Just Kiddin CAS Friendship Card PP677

by Joanne James18. February 2024 08:00

Today it's Sunday and time for this week's new challenge over at The Paper Players! It's the turn of the fabulous Ann to host this week and she has a fun clean and simple challenge for us to work with:
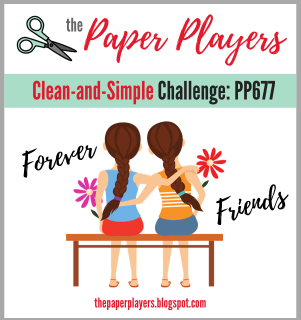
       

I love a good clean and simple challenge and we all have 'forever friends' that we can send this kind of card to, right? I used Linda's layout over at Freshly Made Sketches this week (rotated through 90 degrees) and grabbed my Just Kiddin' designer series paper and my scissors and set to work. This is what I came up with:
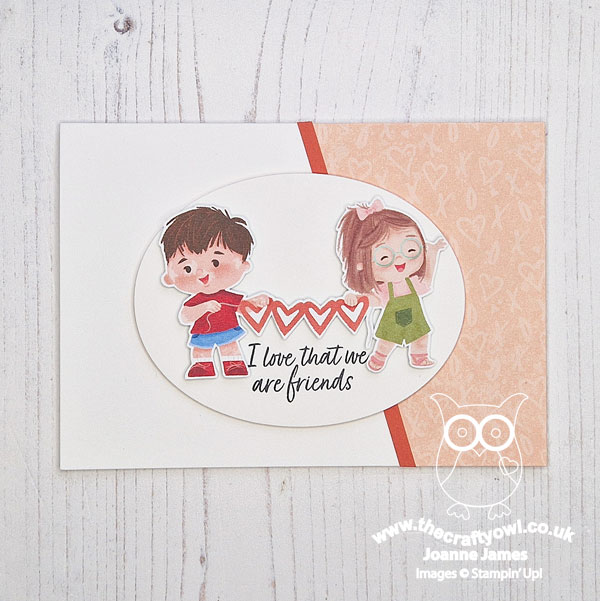
 

Here's the low-down on today's card:

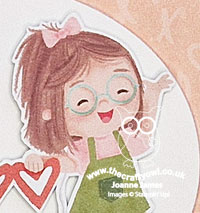
Just Kiddin' - Just Kiddin' is one of my most favourite designer papers - ever! Perfect for cards, children's home decor and scrapbooking, it contains children being children, doing all kinds of things: playing, reading, baking, dressing up, painting and lots more besides. What's more, it is a showcase of diversity: there are children of every colour, wheelchair users, amputees, members of the deaf community and lots more besides - it's so inclusive. I fussy-cut my sweet pair of friends making their heart paper chain directly from one of the pages. This paper appears in the mini catalogue and during February is also available as a free Sale-A-Bration item with a £45 purchase - time to stock up before the end of the month, race you to the shop!!

Country Bouquet - I mounted my fussy cut pair onto an oval that I stamped with a sentiment from the 'Country Bouquet' stamp set that I thought suited these friends perfectly:
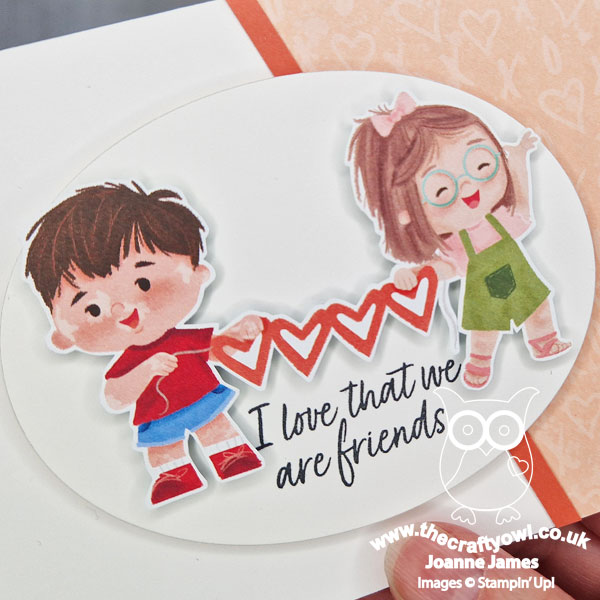
Are they not just sooo cute?!  A diagonal panel of the retired Country Floral Lane designer paper with a heart design to pick up on the detail of the image completed my card. I'm also linking today's card up over at Inkspirational for another play along with their 'hearts' theme. If you like this card, check out yesterday's post too that features another sweet pair from the Just Kiddin' paper.

What Is Clean And Simple (CAS) - I love a good CAS card; as a reminder, when we talk about 'clean and simple' over at The Paper Players we mean:

  • Have minimal layers and embellishments
  • Have plenty of open space
  • Are simple and uncluttered

My card definitely fits the brief this week - designer paper, a little fussy cutting and a well-chosen sentiment - and done! 

Here is the visual summary of the key products used on today's project for you to pin for easy reference:
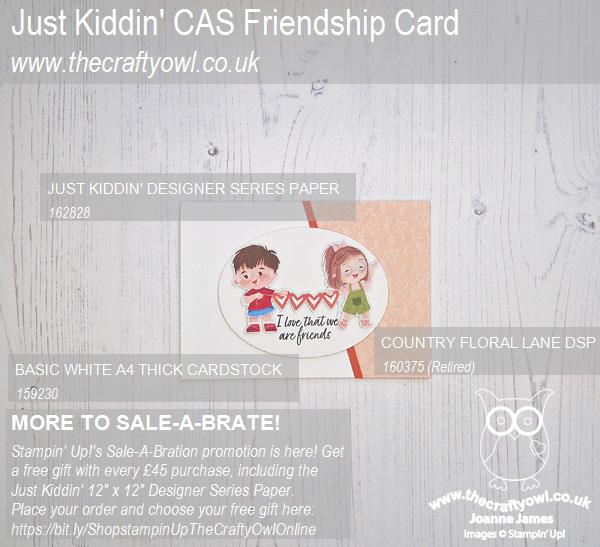
 

You can see all of my Product and 'How To' summaries on my 'How To - Tips and Techniques' Pinterest board in case you've missed any. 

Before you reach for your ink and papers, check out what our amazing team has created to inspire you this week:

Here's a quick recap of our challenge rules:
 
1.  Create a new paper project
2.  Upload your creation to your blog with a link back to us and provide a direct link to the post featuring your challenge submission.
3.  Please link your card to no more than four challenges, TOTAL.
4.  Have FUN!

Enjoy your day; I am looking forward to a Sunday roast and a relaxing day today. I'll be back tomorrow with another project. Until then, happy stampin'!


Stampin' Up! Supplies Used: 
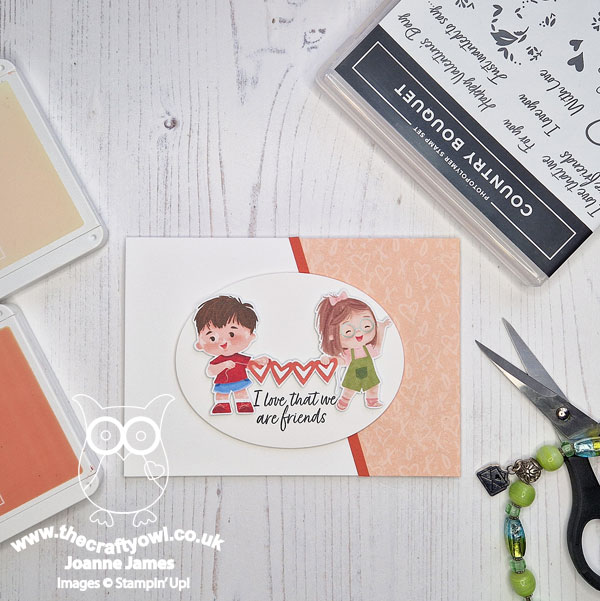
Table built using Product Table Builder by The Crafty Owl - Independent Stampin' Up! Demonstrator.

Bike Ride Apple Basket Thank You Cards PP415

by Joanne James21. October 2018 09:00

Today it's Sunday and time for this week's new challenge over at The Paper Players - yay! It's my turn to host this week and I have a clean and simple challenge for you to work with:


Remember in addition to including an apple on your card, this week is a Clean-and-Simple (CAS) challenge!  What do we mean by CAS?

  • Minimal layers and embellishments
  • Plenty of open space, aka "white" space
  • Simple and uncluttered

I decided that for my card this week I was going to pair a little of something old with something new and create a bunch of thank you cards - take a look:


Here's the low-down on today's card:

A Basket Of Apples - My little basket of apples comes from the Bike Ride set and is cut out with the Build A Bike framelits. This little image works in its own right - not a bike in sight on today's card! It is super quick and easy to stamp as the leaves and apples and basket all have solid images to be stamped to fill in the colour quickly and easily - great for clean and simple cards.

Thanks A Bunch - I layered my basket on a set of layered ovals, with a sentiment from the Beautiful Bouquet stamp set. Ok, so this stamp was designed to work with flowers, but I think it works for apples too!

Buffalo Check Background Made Easy - I know I'm using it again this week, but can you tell I'm loving the new Buffalo Check background stamp? I went with a straightforward single colour stamped image in Granny Apple Green to contrast with the apples - it reminds me of a picnic table cloth!

Here is the visual summary of the key products used on today's project for you to pin for easy reference:


Having completed my full-size card for today, I decided to run off a whole bunch of these using the same design, in both a red and green colourway, to use as my customer thank you cards this month - here are two of my finished cards:


I actually think I prefer the balance of the size/shape of the oval on the lightly smaller card - what do you think? Either way, I like this design so much I think I'll run off a set of co-ordinating bag tags too! 

Here is the visual summary of the key products used on today's project for you to pin for easy reference:


You can see all of my Product and 'How To' summaries on my 'How To - Tips and Techniques' Pinterest board in case you've missed any. 

Before you reach for your ink and papers, check out what our amazing team has created to inspire you this week:

Here's a quick recap of our challenge rules:
 
1.  Create a new paper project
2.  Upload your creation to your blog with a link back to us and provide a direct link to the post featuring your challenge submission.
3.  Please link your card to no more than four challenges, TOTAL.
4.  Have FUN!

You can see all of my 'How To' summaries on my 'How To - Tips and Techniques' Pinterest board in case you've missed any. 

Enjoy your day; I will be spending mine with a lovely group of ladies on the second day of our weekend residential craft retreat - more about that in tomorrow's post! Until then, happy stampin'!


Stampin' Up! Supplies Used: 

Table built using Product Table Builder by The Crafty Owl - Independent Stampin' Up! Demonstrator.

Painted Autumn Suite Collage Card

by Joanne James7. November 2017 06:00


I'm back with another of the cards made at yesterday's technique class featuring the Painted Autumn Suite, which also uses the current sketch over at The Paper Craft Crew:

 Play along with the Paper Craft Crew for Square Sketch Challenge 266. The challenge starts November 1st and ends November 7, 2017 at 1 PM EST. Visit the blog at www.papercraftcrew.com to check out the design team samples and to submit your project. #papercraftcrew #papercrafting #sketchchallenge #color #playalong #imakecards #cardmaker #diy #sendacard #craft #stampinup #cardchallenge #papercraft #bigshot #rainydayfun #designteam #becreative #artsandcrafts #hobby #snailmail #createeveryday #crafttherapy #creativelifehappylife #pcc2017

I love the fact that the sketch had lots of bits and pieces which allowed me to use lots of the items in the Painted Autumn Suite:


Here's the low-down on today's card:

Painted Autumn Patterns - I decided to use the panel to feature a piece of the gorgeous Painted Autumn DSP that I hadn't used previously. I hope you, like me, stocked up on this paper when it was part of the 'buy 3, get 1 free' offer -  the designs really are beautiful. I took my inspiration from the swirly leaves and branches of the paper and using the sketch built my design from there.

All About Texture - This card is full of elements that add texture: ribbon, burlap, enamel dots, punched leaves, touches of nature elements, punched border - all of which add to the loose, collage feel. 

Realistic Planks - The background panel is embossed with the Pinewood Planks Textured Impressions Embossing Folder. This 3D, dynamic folder creates deep and realistic dimensional embossed impressions that look just like the grain of pinewood planks - the perfect way to add interest to my background without detracting from the other elements.

I'm also linking up with the gals over at SUO Challenges today where they currently have a 'thankful' theme going on. 

Here is the visual summary of the key products used on today's project for you to pin for easy reference:


You can see all of my 'How To' summaries on my 'How To - Tips and Techniques' Pinterest board in case you've missed any. 

I am managing an early post today as I have an all-day Christmas stamp-a-stack and then I'm out talking to a local women's group about festive packaging this evening. I hope you have a great day; I'll be back tomorrow with another project. Until then, happy stampin'!


Stampin' Up! Supplies Used:

Table built using Product Table Builder by The Crafty Owl - Independent Stampin' Up! Demonstrator.

Painted Harvest Eclipse Thank You Card

by Joanne James6. November 2017 21:30

It's Monday and the start of another week - only 7 weeks to go until Christmas! I'm not counting down today though; Today I'm sharing a card that I made with the ladies in the second of my technique classes this month that also fits a new(ish) challenge that has appeared in blog land - the TicTacToe Challenge:


I went across the top row for my Painted Harvest thank you card - take a look:


Here's the low-down on today's card:

Large Letter Eclipse - Eclipse cards that use a word raised out of a background are everywhere right now and so on-trend, i thought it was about time I shared one with you. What a great opportunity to use those Large Letter Framelits again - these framelits really are so worth the investment! I went with a wide, thinner card than usual that is just right to fit my 'thanks'.

Painted Harvest - I created my sunflower background using a repeating pattern of bright sunflowers; my chosen colours are Crushed Curry and Peekaboo Peach and I think the latter most certainly adds a vibrancy to this card - the letters really 'pop' against those sunflowers.

A Split Sentiment - I decided to use a split sentiment to really tie my raised letters into the theme of my card: on my small cut oval I partially stamped one of the sentiments from the Painted Harvest set that says 'gather together & give thanks', omitting the 'thanks' and selectively inking the remaining portion, so that my raised letters complete the sentiment. 

Here is the visual summary of the key products used on today's project for you to pin for easy reference:


You can see all of my 'How To' summaries on my 'How To - Tips and Techniques' Pinterest board in case you've missed any. 

I hope your day was a productive one; the ladies in today's class all produced some fabulous creations! My next class in December is using the Delightful Daisy bundle - for more details check out the event on my Facebook page here and get in touch to book your place. I'll be back tomorrow with another project using the Painted Harvest stamp set. Until then, happy stampin'!


Stampin' Up! Supplies Used:

Table built using Product Table Builder by The Crafty Owl - Independent Stampin' Up! Demonstrator.

Blooms and Wishes For The Paper Players

by Joanne James10. July 2016 10:00

It's Sunday and time for a new challenge over at The Paper Players! It's the turn of our fearless leader the awesome Nance to host this week and she has a colour challenge for us to play along with:


For my card this week I decided to use this week's Freshly Made Sketches sketch and took my inspiration from the Blooms and Bliss suite to create my card today:


Here's the low-down on today's card:

Blooms and Bliss Colour Combo - The trio of colours chosen by Nance for today's challenge all appear in the Blooms and Bliss Suite and in particular the designer series paper of the same name, so I was drawn here for the starting point for today's card. Having ooh-ed and ahh-ed at the whimsical floral patterned papers, I eventually settled upon this rather bold, mostly Island Indigo, patterned paper for the base of my card. This pattern is great for a background as it doesn't interfere with the detail of the focal image and the watercolour-like flecking adds a softness to this otherwise strong colour.

Blooms and Wishes - I decided to create a randomly stamped floral panel as the focal point for my card, featuring each of the challenge colours and using the co-ordinating Blooms & Wishes stamp set to create an almost watercoloured effect. I used a combination of both first and second generation stamping for each of the colours to add depth and overlapped the flowers slightly too. This is the only place where there is any Sweet Sugarplum on my card, yet it performs an important role: without it the card would be perfectly co-ordinated, but rather flat. The addition of the warm lilac tones prevents this card from being too 'cold' and clinical I think. I finished with my sentiment stamped in Island Indigo onto Mint Macaron cardstock, for an additional burst of strong colour.

A Simple Oval - I don't use ovals all that often on my cards, but since the sketch asked for one here I thought I would follow it literally and do think it makes a pleasant change from squares or circles and is the perfect shape for my florals. I left it frameless to enable the white to really stand out against the background and added nothing more than a few pearls for a subtle embellishment. 

The Blooms and Bliss suite is such a pretty set of co-ordinating products, with plenty of scope for artistic expression.

Here is the visual summary of the key products used on today's project for you to pin for easy reference:


You can see all of my 'How To' summaries on my 'How To - Tips and Techniques' Pinterest board in case you've missed any. 

Before you reach for your ink and papers, check out what our amazing team has created to inspire you this week:

The Paper Players Design Team
 
 
Here's a quick recap of our challenge rules:
 
1.  Create a new paper project
2.  Upload your creation to your blog with a link back to us and provide a direct link to the post featuring your challenge submission.
3.  Please link your card to no more than four challenges, TOTAL.
4.  Have FUN! 


I look forward to seeing what you create with Nance's colour combination this week.

I am looking forward to a day of rest and relaxation in the sun today and some quality family time. Back in the next day or so with another project; until then, happy stampin'!


Stampin' Up! Supplies Used: 

Table built using Product Table Builder by The Crafty Owl - Independent Stampin' Up! Demonstrator.

Video Tutorial: How To Make Baker's Twine Looped Flowers

by Joanne James25. May 2016 20:03

Wednesday - how did we get to the middle of the week already?! I've had a busy couple of days, with today including my fortnightly coffee and card drop-in session at Bells in Kingsthorpe, Northampton followed by a get-together over lunch with one of my team members. I am busy preparing my new catalogue samples and getting my catalogues ready to go out to both my online and face to face customers. If you've purchased Stampin' Up! products from me in the last six months, a complimentary catalogue will be winging its way out to you within the next week. If you haven't purchased from me recently but would like a copy of the new catalogue, please do get in touch with me either via email [email protected] or by phone and I will arrange to send a catalogue out to you too!

Today I have a video tutorial to share with you! Do you remember this card that I made a while ago?


I used this fun flower embellishment made with the It's My Party Baker's twine to decorate my Botanical Builder Framelits Die colour-blocked card. You can read more about it on the original blog post here if you missed it or would like to refresh your memory.

I promised you a video tutorial on how to make those cute baker's twine looped flower embellishments and finally here it is: 

They really are such fun to make and can be used to dress up cards and packaging and can be made from all kinds of baker's twine and linen thread. 

I hope you enjoyed today's video and it inspires you to have a go and try something new. I'll be back tomorrow with a fun birthday card for this week's new challenge over at Create With Connie and Mary. Until then, happy stampin'!

Bear Hugs - Papa Bear Gone Fishin'

by Joanne James14. April 2016 08:05

Today it's time for a new challenge over at Create With Connie and Mary and this week we have a colour combination for you:


This colour combination left me stumped for a while, until I decided that Soft Suede would be a good colour for a bear - take a look:

The low-down on today's card is as follows:

Papa Bear - I stamped my Daddy Bear from the 'Bear Hugs' stamp set in Early Espresso on Soft Suede card stock and cut him out using my Big Shot and co-ordinating Bear Hugs Framelits, curving his arms in slightly so that he could 'hold' on to his fishing pole. 

Gone' Fishin' - The 'Bear Hugs' set comes with lots of fun embellishments; I decided to go with a fish on this card that I coloured in Mint Macaron and Lost Lagoon with my Aquapainter, then painted liberally with clear Wink of Stella to give him shimmery scales. I attached my fish to a piece of white baker's twine, which I in turn knotted to my cocktail stick fishing pole. How cute?!

Geometrical Forest - I decided I needed to conjure up some forest or at least a feeling of the outdoors behind my lake, but was somewhat at a loss as to how to do this with such a limited colour palette. I perused my designer series papers and bingo - this geometrical design, whilst not including trees of any kind, works as a background. I do think those triangles are evocative of trees (ok, I know it's a stretch, but if you have a better suggestion do leave me a comment below - I'd love to hear it!) And where did I find it? In the 'It's My Party' Designer Series Paper stack of all places!

Here is the visual summary of the key products used on today's project for you to pin for easy reference:


You can see all of my 'How To' summaries on my 'How To - Tips and Techniques' Pinterest board in case you've missed any. 

Do visit the other Design Team members to see what they did with this week's colours; there's lots of inspiration over on their blogs too!

Enjoy your day and I'll be back tomorrow with another project; until then, happy stampin'!


Stampin' Up! Supplies Used:

  • Bear Hugs Clear-Mount Bundle
  • It's My Party Designer Series Paper Stack
  • Soft Suede A4 Cardstock
  • Early Espresso Classic Stampin' Pad
  • Lost Lagoon A4 Cardstock
  • Lost Lagoon Classic Stampin' Pad
  • Mint Macaron Classic Stampin' Pad
  • Ovals Collection Framelits Dies
  • Whisper White A4 Cardstock
  • Rhinestone Basic Jewels
  • Whisper White Baker's Twine
  • Clear Wink of Stella

Work of Art Easter Egg and Honeycomb Happiness Chick

by Joanne James25. March 2016 18:57

Good Friday blessings one and all! I've spent most of today outdoors making the most of the sunny weather; I met my girlfriends for a run this morning and we went on a James family bike ride this afternoon. No time to craft, but since the forecast is dreadful for the rest of the week I'm sure I'll make up for it! Today's card is for the challenge over at The Friday Mashup. I love this challenge and am sad to read that this one is their last one!

This week you can use the sketch above or create a project with an Easter theme and chicks or bunnies, or mashup and create with both. I went with the latter for this card, although I do have a mashup card planned for a few days time! Here's today's card:

I actually made this card with the ladies at my Coffee and Card session at Bell's in Northampton this week. The key elements of my fun Easter card are as follows:

An oval egg - I used my Big Shot and Ovals Framelits to create my fun Easter egg in my layer of Pink Pirouette cardstock. Now I know that technically an egg is more pointed at one end, but without an egg framelit this oval makes a pretty good alternative! Before cutting out my oval, I stamped my chick onto the card. Why? Read on below to find out!

An Easter work of art - To decorate my egg, I cut a second mat of white the same size as my pink layer and stamped the large brushstroke stamp from the 'Work of Art' stamp set in a variety of pastel colours and placed this behind the aperture. The curve of the stamped image adds to the illusion of the egg shape.

A happy chick - The little chick from the 'Honeycomb Happiness' Sale-A-Bration set has been getting lots of use this week as he is perfect for Easter cards. I stamped mine onto So Saffron cardstock, snipped him out with my paper scissors and coloured his beak with my Pumpkin Pie Stampin' Write marker. I didn't fussy cut those fiddly legs though - remember the chick I stamped on the pink layer earlier? Yes, I simply coloured the ones on this layer with my Pumpkin Pie Stampin' Write marker and then lined up my yellow chick with the stamp outline, adhering him with a couple of Stampin' Dimensionals. Clever, right? You have just 6 more days to get your hands on the 'Honeycomb Happiness' stamp set for free with a £45 order; if it's on your wish list, don't leave it too late!

An Easter sentiment courtesy of the 'Easter Lamb' stamp and a trio of Itty Bitty punched flowers completes my card. 

Here's the visual summary of the key supplies used to make today's card for you to save for easy reference:


That's all from me today; if you would like to know more about my drop-in Coffee and Card Sessions, you can read all about it here. We have a short break for Easter then the next one is scheduled for 13th April - I'd love to see you there. I'll be back tomorrow with another project. until then, happy stampin'!


Stampin' Up! Supplies Used:

Table built using Product Table Builder by The Crafty Owl - Independent Stampin' Up! Demonstrator.


Let's Paint The Town...Red!

by Joanne James11. February 2016 10:00

I've an extra card for you today; my spot of crafting yesterday gave me just enough time to squeeze in this fun card for this week's CAS(E) This Sketch:


I also used the colour palette over at Fab Friday, which seemed rather appropriate given the sentiment on today's card - after all, as the saying goes 'Let's paint the town red' right?


I used the hostess set 'Love You Sew' for my card today. The paint brushes and swish of paint stamp made the perfect backdrop for my sentiment; I stamped each paint swish twice on my mat of Very Vanilla and overlapped them beneath my sentiment oval in order to extend their length. I cut out my sentiment using my Big Shot and Oval Framelits and popped it up on a couple of dimensionals. A few punched hearts and an epoxy sticker on the largest heart finished my card. 

This hostess set is a great set for crafters and non-crafters alike - I just love the fun sentiments and creative possibilities. Whilst this sentiment isn't a particular 'love' themed one, I think my card could be used as a fun invitation to a loved one or group of friends perhaps. 'Love You Sew' is exclusively available to customers who host a Stampin' Up! party or place a single order that qualifies for Stampin' Rewards. Sale-A-Bration is a great time to host a party with extra hostess rewards available for qualifying party sales. If you would like to host a party, do get in touch; I have a few slots left before the end of March if you would like to take advantage of these great offers. in addition, for all of my customers who host a party between now and the end of Sale-A-Bration, I will provide them with a free 'to go' tutorial to make a set of fun cards using the 'Love You Sew' hostess stamp set. So what are you waiting for? Make the call!

That's all from me today; back tomorrow with another project. until then, happy stampin'!


Stampin' Up! Supplies Used:

Table built using Product Table Builder by The Crafty Owl - Independent Stampin' Up! Demonstrator.


Just For You Botanical Blooms Card

by Joanne James20. January 2016 09:00

It's Wednesday - hurrah! Today I have a card for this week's challenge over at CAS Colours and Sketches where they have the following sketch to work with:

I turned the sketch through 90 degrees for my card today and used the large sentiment from the 'Botanicals For You' Sale-A-Bration set, paired with some Botanical Gardens Designer Series Paper and yes, another of those flowers made using the Botanical Builder Framelits Dies - I just can't get enough of them! Here's my card:

I just love the different flower combinations you can make with these framelit dies! Whilst I do have something different to share with you tomorrow, rest assured you haven't seen the last of these yet!

That's all from me today; I'll be spending the day in my office - I'm hoping for a productive one! I'll be back tomorrow with a card for this week's new challenge over at Create With Connie and Mary. Until then, happy stampin'!


Stampin' Up! Supplies Used:

Table built using Product Table Builder by The Crafty Owl - Independent Stampin' Up! Demonstrator.


Mini Catalogue

BROWSE THE CATALOGUE

The mini catalogue is now live! Read and download your copy here.

Shop Online

Access my online shop 24 x 7, 365 days of the year:

Current March hostess code:

S9F2XJJW

Shop Online

Join My Team

It's always a great time to join Stampin’ Up! New team members can get £130 worth of products for only £99 + free business supplies + free shipping + all the fun being a part of Stampin’ Up! Stampin' Up! has something for everyone: join my growing team and benefit from my support to enjoy Stampin' Up! however you choose.

If you're interested, call me for a chat to understand how I can help you realise your goals. Alternatively, if you have already decided to sign up and you just can't wait, please click here for the link to the online form where you can sign up and order your starter kit right away! 

Latest Kit!

Stampin Cut and Emboss

The Rock Legend Kit has all you need to make 8 cards with coordinating envelopes. Along with the new Panda Friends Kit, both are available from January 4th for just £14 each - get yours here!

2023-24 Annual Catalogue

BROWSE THE CATALOGUE

Click on the catalogue for a full list of current SU! supplies - if you would like to order any of the items featured, please drop me a line at [email protected] or give me a call on 07773 421446 - I'd be happy to help.

New Online Exclusives

There will be new products available exclusively in the online store from 5 March - check them out here.

About Me

Hi I'm Joanne and live in Northampton and when I'm not looking after my husband and two beautiful children, am an avid crafter with a passion for all things Stampin' Up!

I must confess that I have never been a big rubber stamper - until I discovered Stampin' Up! that is. I love the fact that I can get such great results with co-ordinating stamps, inks, papers and punches - the possibilities are endless! Join me on my stamping journey as I share the things I love and be inspired to create amazing things yourself!

Follow Me

Monthly Newsletter

Box Builder

Click the button above to use Box Buster to create your custom box design using the Envelope Punch Board!

Kits Collection Now Available!

Stampin Cut and Emboss

The new Kits Collection from Stampin' Up! is now available!

Click here to see the current kits available and order yours online today.

I Design For


Stampin' Up Stuff

This is my personal blog and is not endorsed by Stampin’ Up! I hope you find it a plentiful source of ideas and personal inspiration but please don't copy my designs for contest submission or use for classes, publication or sale without express permission.