Curvy Christmas Buffalo Check Christmas Card

by Joanne James24. November 2020 21:57

Today I'm sharing a card using the current sketch over at Paper Craft Crew in a card that was inspired by the fabulous photo over at The Card Concept to create my clean and layered card:

 Vertical Sketch Challenge   

I was inspired by the red and black buffalo check pillow, green ribbon-tied foliage and the white of the rocking chair of the Card Concept photo; this is what I came up with:


Here's the low-down on today's card:

I used the foliage stamps in the 'Curvy Christmas' set to create my tied foliage and stamped this on a stitched scallop square; no curves on the front of the card, but I did use one of the curved stamps to decorate my envelope and the inside of my card:


I paired this with a panel of Real Red cardstock stamped in black with the Buffalo Check background, a banner of green gingham ribbon and some rhinestones and pearls to decorate, along with a sentiment snipped from one of the stamps in the 'Itty Bitty Christmas' stamp set.

Here is the visual summary of the key products used on today's project for you to pin for easy reference:


You can see all of my 'How To' summaries on my 'How To - Tips and Techniques' Pinterest board in case you've missed any. 

I absolutely love that inspiration photo and combined with the sketch am really pleased with how this card turned out.

Enjoy your evening and I'll be back tomorrow with another project. Until then, happy stampin'!

Stampin' Up! Supplies Used:

Table built using Product Table Builder by The Crafty Owl - Independent Stampin' Up! Demonstrator.

Love Never Melts Spirited Snowmen PP418

by Joanne James11. November 2018 09:00

I've had a busy couple of days with some of my team at Stampin' Up!'s Onstage event in Birmingham to celebrate the launch of the upcoming Spring Summer catalogue. More about that in my later post though as for now it's Sunday and time for this week's new challenge over at The Paper Players! It's the turn of the queen of diecuts, the lovely Laurie, to host this week and she has an unusual colour challenge for you to work with:


When I first saw this colour combination I almost ran a mile and it did have me stumped initially, although a sudden flash of inspiration led to me not only creating with but loving this trio that I used to create another Christmas card to share with you this week  - take a look:


Here's the low-down on today's card:

Love Never Melts - What could be sweeter than this pair of snowmen, all wrapped up in their winter woollies and hats? I coloured their accessories using a combination of my Stampin' Write markers and Stampin' Blends and added a Smoky Slate outline to the snowy areas for a touch of extra definition. I'm hoping Laurie will forgive me the liberty of adding a touch of green to my holly leaves, but I'm afraid it just had to be done! The sentiments in this stamp set are so sweet - the one on today's card is perfect to send festives wishes to your bestie and continues onto the inside of the card:


Another Custom Plaid - When considering what paper to pair with my snowmen, I drew a blank. Instead, I decided to create another custom plaid design using my Buffalo Check stamp set in Smoky Slate and using the thick and thin ends of my Stampin' Write markers in Poppy Parade and So Saffron respectively to customise my pattern. I love the Buffalo Check stamp on its own, yet love how you can create such fun and unique patterns with this stamp. What colour combinations and patterns would you try?

Subtle Sparkle and Shine - Although difficult to see on my photos, all of the snowy areas on my image are brushed with clear Wink of Stella and the red heart the snowmen are holding has been painted using a fine tipped glue pen to give a wonderful glossy shine when dry. The shimmer and gloss are subtle, but they are there and add so much to this clean and simple card.

Here is the visual summary of the key products used on today's project for you to pin for easy reference:


You can see all of my Product and 'How To' summaries on my 'How To - Tips and Techniques' Pinterest board in case you've missed any. 

Before you reach for your ink and papers, check out what our amazing team has created to inspire you this week:

Here's a quick recap of our challenge rules:
 
1.  Create a new paper project
2.  Upload your creation to your blog with a link back to us and provide a direct link to the post featuring your challenge submission.
3.  Please link your card to no more than four challenges, TOTAL.
4.  Have FUN!

I can't wait to see what you create with this week's colours and look forward to visiting your blogs this week! Enjoy the rest of your weekend as it will be over all too quickly. I'll be back tomorrow with another project; until then, happy stampin'!


Stampin' Up! Supplies Used: 

Table built using Product Table Builder by The Crafty Owl - Independent Stampin' Up! Demonstrator.

Bike Ride Apple Basket Thank You Cards PP415

by Joanne James21. October 2018 09:00

Today it's Sunday and time for this week's new challenge over at The Paper Players - yay! It's my turn to host this week and I have a clean and simple challenge for you to work with:
 

Remember in addition to including an apple on your card, this week is a Clean-and-Simple (CAS) challenge!  What do we mean by CAS?

  • Minimal layers and embellishments
  • Plenty of open space, aka "white" space
  • Simple and uncluttered

I decided that for my card this week I was going to pair a little of something old with something new and create a bunch of thank you cards - take a look:
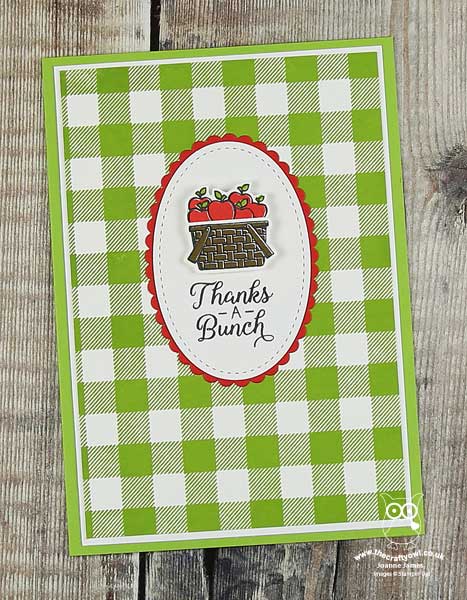
 

Here's the low-down on today's card:

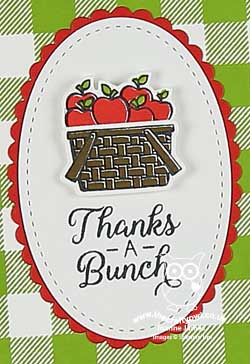
A Basket Of Apples - My little basket of apples comes from the Bike Ride set and is cut out with the Build A Bike framelits. This little image works in its own right - not a bike in sight on today's card! It is super quick and easy to stamp as the leaves and apples and basket all have solid images to be stamped to fill in the colour quickly and easily - great for clean and simple cards.

Thanks A Bunch - I layered my basket on a set of layered ovals, with a sentiment from the Beautiful Bouquet stamp set. Ok, so this stamp was designed to work with flowers, but I think it works for apples too!

Buffalo Check Background Made Easy - I know I'm using it again this week, but can you tell I'm loving the new Buffalo Check background stamp? I went with a straightforward single colour stamped image in Granny Apple Green to contrast with the apples - it reminds me of a picnic table cloth!

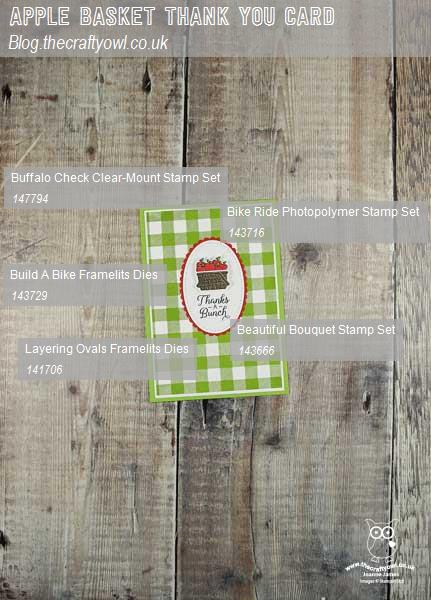
Here is the visual summary of the key products used on today's project for you to pin for easy reference:
 

Having completed my full-size card for today, I decided to run off a whole bunch of these using the same design, in both a red and green colourway, to use as my customer thank you cards this month - here are two of my finished cards:
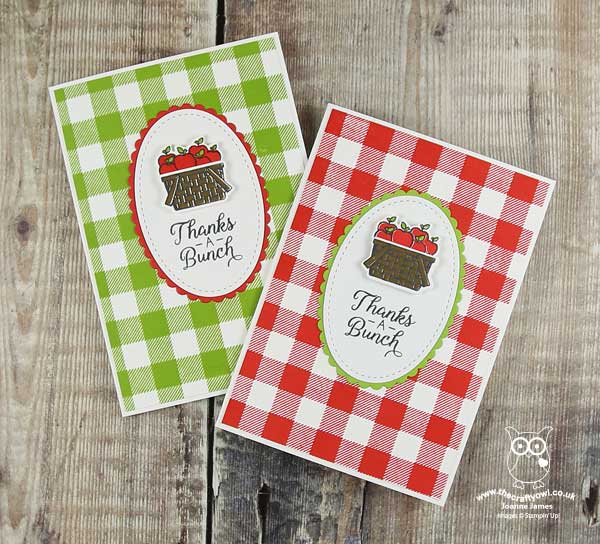
 

I actually think I prefer the balance of the size/shape of the oval on the lightly smaller card - what do you think? Either way, I like this design so much I think I'll run off a set of co-ordinating bag tags too! 

Here is the visual summary of the key products used on today's project for you to pin for easy reference:
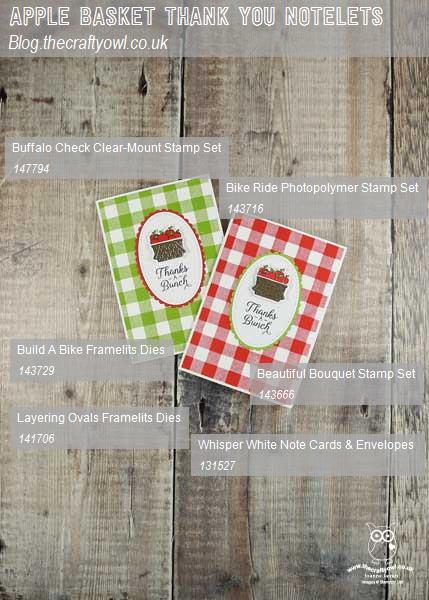
 

You can see all of my Product and 'How To' summaries on my 'How To - Tips and Techniques' Pinterest board in case you've missed any. 

Before you reach for your ink and papers, check out what our amazing team has created to inspire you this week:

Here's a quick recap of our challenge rules:
 
1.  Create a new paper project
2.  Upload your creation to your blog with a link back to us and provide a direct link to the post featuring your challenge submission.
3.  Please link your card to no more than four challenges, TOTAL.
4.  Have FUN!

You can see all of my 'How To' summaries on my 'How To - Tips and Techniques' Pinterest board in case you've missed any. 

Enjoy your day; I will be spending mine with a lovely group of ladies on the second day of our weekend residential craft retreat - more about that in tomorrow's post! Until then, happy stampin'!


Stampin' Up! Supplies Used: 

Table built using Product Table Builder by The Crafty Owl - Independent Stampin' Up! Demonstrator.

Painted Harvest For The Paper Players PP414

by Joanne James14. October 2018 09:00

Did you miss me? A whole week since I last blogged: having been nurse to the men of the James household the week before, they thoughtfully shared their bugs with the girls and for the latter part of this week Rebecca and I have been suffering and feeling decidedly under the weather with streaming colds. Combined with trying to make the final preparations for my residential craft weekend next week, it's left no time for blogging. Luckily for you it's Sunday, so I've put my box of Kleenex to one side and squeezed in a little creative time for this week's new challenge over at The Paper Players! It's the turn of the wonderful Jaydee to host this week and she has an autumnal colour challenge for you to work with:


I immediately thought of sunflowers when I saw Jaydee's colour palette and decided to combine with the challenge over at The Card Concept and use the sketch over at CAS Colours and Sketches and got my paper snips out to do a little fussy cutting - take a look:


Here's the low-down on today's card:

Painted Harvest Sunflower - Painted Harvest has been sat on my shelf and not been used for a long while, so today's card sets out to make amends. I used the mix of Crushed Curry, Cajun Craze and Mossy Meadow to create my layered bloom and double-stamped leaves and then fussy cut my flower to add dimension and interest, whilst using my leaf punch to make easy work of the leaves, adding some braided linen trim to finish. 

Customised Buffalo Check - This is my first outing for the fabulous Buffalo Check background stamp that I used for my features panel on the right, which I decided to customise from the off and having stamped it in Cajun Craze on Very Vanilla, I added a line of Mossy Meadow and a line of Crushed Curry either side of this with my Stampin' Write markers to create a more colourful plaid. I can see that this is a stamp that is going to get a lot of use - so many creative possibilities!

So Subtle Texture - After stamping on my sentiment, I ran my Crushed Curry card base through the Big Shot with my Subtles Dynamic Textured Impressions Embossing Folder for added texture. It is subtle, for sure, but I am loving the additional detail that this embossing folder gives to otherwise plain backgrounds. I also stamped this sentiment from the Painted Harvest set on the inside to complete my card:


Here is the visual summary of the key products used on today's project for you to pin for easy reference:


You can see all of my Product and 'How To' summaries on my 'How To - Tips and Techniques' Pinterest board in case you've missed any. 

Before you reach for your ink and papers, check out what our amazing team has created to inspire you this week:

Here's a quick recap of our challenge rules:
 
1.  Create a new paper project
2.  Upload your creation to your blog with a link back to us and provide a direct link to the post featuring your challenge submission.
3.  Please link your card to no more than four challenges, TOTAL.
4.  Have FUN!

I can't wait to see what you create with this week's colours and look forward to visiting your blogs this week! Enjoy the rest of your weekend as it will be over all too quickly. We will be focusing all our efforts on beating the lurgy that has descended upon us in the hope that next week is a slightly more productive one! I'll be back soon with another project; until then, happy stampin'!


Stampin' Up! Supplies Used: 

Table built using Product Table Builder by The Crafty Owl - Independent Stampin' Up! Demonstrator.

Current Promotions

Stampin Cut and Emboss

Save up to 30% off on all your favourite kits from 1 to 31 October! 

Click here to see the current kits available and order yours online today.

Join My Team

It's always a great time to join Stampin’ Up! During October you can get even more in your starter kit! New team members can get £160 worth of products for only £99 + free business supplies + free shipping + all the fun being a part of Stampin’ Up! Stampin' Up! has something for everyone: join my growing team and benefit from my support to enjoy Stampin' Up! however you choose.

If you're interested, call me for a chat to understand how I can help you realise your goals. Alternatively, if you have already decided to sign up and you just can't wait, please click here for the link to the online form where you can sign up and order your starter kit right away! 

Shop Online

Access my online shop 24 x 7, 365 days of the year:

Current October hostess code:

4XPEYCB9

Shop Online

Scrapbooking

Stampin' Up! has introduced a new range of 12x12" scrapbooking product and kit - the full range is now available to purchase online. To download a copy of the new digital Scrapbooking Catalogue click here.

Mini Catalogue

BROWSE THE CATALOGUE

'Tis The Season - the new Stampin' Up! Mini Catalogue is here! For more details and to download your copy click here

2024-25 Annual Catalogue

BROWSE THE CATALOGUE

Click on the image to download your copy of the 2024-25 annual catalogue. For a full list of current SU! supplies, go to my online store. If you would like any help or advice, please drop me a line at joanne@thecraftyowl.co.uk or give me a call on 07773 421446 - I'd be happy to help.

Latest Kits!

Stampin Cut and Emboss

The Christmas Ornaments Kit and Card Keeper Kit are the latest kits in the online store - get yours here!

New Online Exclusives

There are new products available exclusively in the online store from 5 November - check them out here.

About Me

Hi I'm Joanne and live in Northampton and when I'm not looking after my husband and two beautiful children, am an avid crafter with a passion for all things Stampin' Up!

I must confess that I have never been a big rubber stamper - until I discovered Stampin' Up! that is. I love the fact that I can get such great results with co-ordinating stamps, inks, papers and punches - the possibilities are endless! Join me on my stamping journey as I share the things I love and be inspired to create amazing things yourself!

Follow Me

Monthly Newsletter

Box Builder

Click the button above to use Box Buster to create your custom box design using the Envelope Punch Board!

Kits Collection Now Available!

Stampin Cut and Emboss

The new Kits Collection from Stampin' Up! is now available!

Click here to see the current kits available and order yours online today.

I Design For


Stampin' Up Stuff

This is my personal blog and is not endorsed by Stampin’ Up! I hope you find it a plentiful source of ideas and personal inspiration but please don't copy my designs for contest submission or use for classes, publication or sale without express permission.