A New Thoughtful Wishes Step By Step Class

by Joanne James31. May 2024 08:00

How can it be Friday already?! It's been half term for the youngest of the James Juniors this week so there hasn't been much time for crafting! I'm hoping to get a little time in my craft room tomorrow but until then I do have another card for you featuring the Thoughtful Wishes bundle and Thoughtful Journey papers, along with details of the latest Step By Step Class created with my friend and former Stampin' Up! Artisan Designer Jan Clothier, aka Thinking Stamping.

First up, my card! The Thoughtful Journey papers are so beautiful - even a small amount can go a long way:


When paired with the Thoughtful Wishes bundle, especially those fabulous diecuts, along with some dry embossing and the texture and sparkle of tone-on-tone glimmer, there's so much to love! That's why Jan and I chose this bundle and papers for our step by step class:

Our new step by step class features the Thoughtful Wishes bundle and Thoughtful Journey designer series paper. Simply purchase the Thoughtful Wishes bundle and a pack of Thoughtful Journey designer series paper from us and we’ll email you the step by step instructions to make four beautiful projects featuring them. If you already have the suite or bundle, simply purchase something else of equivalent value and we’ll email the class instructions to you.

You can shop with me if you live in the UK and Europe

You can shop with Jan if you live in New Zealand.

If you would like to receive the details for this step by step class, you can place your online order with me by clicking on the direct product links for the bundle and papers needed below; remember to add the current hostess code 3NR3FB9W to your order. 

Back soon with another project; until then, happy stampin'!


Stampin' Up! Supplies Used:

Table built using Product Table Builder by The Crafty Owl - Independent Stampin' Up! Demonstrator.

Gorgeous Garden Half Panel Card AYSI322

by Joanne James26. April 2024 12:00

Today I'm sharing my design team card for our new challenge over at As you See It where it's time for an interesting 'fill in the blank' challenge from the lovely Heather H:


The colour I use least in my crafting - intriguing! I used the sketch over at Global Design Project #GDP442 for my layout this week and I made a card that features only two colours; can you guess which one I don't use very often?


Here's the low-down on today's card:

Yes - it's Wild Wheat! I must confess I am not a fan of this one of last year's in-colours and actually don't use it very often at all so for today's card I decided that I would try something different and pair it with one of my most-used colours and all-time favourite, Night of Navy, to see if the colour combo would make Wild Wheat more appealing.

I used a Night of Navy card base and covered it with an entire panel of Wild Wheat - brave! I decided to add a diecut panel using the leaf die from the Gorgeous Garden Dies to the centre of my card. I've used these dies many times before and the eagle-eyed amongst you will realise that the whole die covers an entire card front, so you may be wondering how I managed to halve it to create my panel. It actually wasn't that tricky: I cut my Night of Navy Panel to size then aligned my die at the outside edge and partially diecut it towards the other end. I then removed the die and using a craft knife, I used a metal ruler and carefully cut away the edge of the loose pieces to create a narrow border on the other side of the panel. Yet another way to use these fabulous dies!

I added some Night of Navy twine and a simple gold heat-embossed sentiment from the 'Timeless Arrangements' stamp set, accented with a brass metallic dot to finish:


A piece of co-ordinating Wild Wheat in-colour DSP to decorate the flap of the envelope completes my card. Whilst I'm still not a fan of Wild Wheat, I must confess I do rather like this colour combo!

This is a great opportunity to remind you that the Gorgeous Garden bundle is just one of those featured in the monthly tutorials I create with my AYSI teamie, good friend and fellow demonstrator Jan Clothier. This tutorial contains lots more ideas and ways to use the Gorgeous Garden Dies and is yours for FREE when you purchase the Gorgeous Garden Dies from either Jan or myself. These dies are only available until the end of the month before they retire; they are currently almost half price at £24 for the pair - bargain! 

Here is the visual summary of the key products used on today's project for you to pin for easy reference:


You can see all of my 'How To' summaries on my 'How To - Tips and Techniques' Pinterest board in case you've missed any. 

Here's a summary of our challenge rules:

  • Create any card, scrapbooking page, 3D project or packaging project that fits the challenge.
  • Please include the challenge graphic and link back to the challenge in your blog post. Turn off word verification so we can leave you lots of lovely comments. Make sure you link the post not the whole blog to the Linky. Use #AYSIXXX when uploading to a public gallery.
  • If you’re unsure about ‘the rules’, check the details under the Challenge Guidelines tab on the As You See It Challenge homepage.
  • In a colour challenge, black or other neutral can be used in outlines and sentiments but no other colours should be included. Stampin’ Up colours are used for reference but colours that are a close match are welcome.
We look forward to seeing your creations in the AYSI gallery.

Enjoy your day and I'll be back tomorrow with another project. Until then, happy stampin'!


Stampin' Up! Supplies Used:

Table built using Product Table Builder by The Crafty Owl - Independent Stampin' Up! Demonstrator.

Sweet Thoughts Memories & More Interactive Card Using Hooray For Surprises Dies

by Joanne James24. April 2024 11:00

I have another card to share with you today, this time inspired by the challenges over at Festive Friday (I chose green, thread and interactive) and the butterfly inspiration over at TGIF Challenges:


I love Memories & More cards both for scrapbooking and card making and I've used lots of them previously to make quick clean and simple cards. Today I've something a little different though; whilst my card still focuses on the Sweet Thoughts Memories & More card pack and card base and envelopes, I've paired with the Hooray For Surprises bundle to make a fun interactive card - take a look:


Here's the low-down on today's card:

Sweet Thoughts - The Sweet Thoughts Memories & More cards and card and envelope sets are perfect for quick cards. All of the main elements I used to decorate my printed card base came from the card pack - a large butterfly and two sentiments:


All of them are stickers so have self-adhesive backs, but you can easily add with dimensionals too if you'd prefer a little lift as I've done here. The only other thing I added was a twine bow using some coordinating retired thread that I had in my stash.

Hooray For Surprises - I could have stopped there, but I thought another of the cards in the Sweet Thoughts pack would make a fun 'reveal'. I spent a little time marking my card front where I needed to place my Hooray For Surprises long pull tab. The die is longer than I wanted, given the addition of my large butterfly, but this wasn't a problem; I simply used a partial diecutting technique to diecut each one in two stages, which allowed me to shorten it without issue. I stamped the word 'pull' onto the end of each tab, and added a flower sticker from the card pack to embellish each one:


The second M&M card that I used is placed underneath the top layer, being careful to adhere around the edges and leave the tabbed area free.

The Big Reveal - So what's underneath the tabs? I created a 'false top' template using some spare card so that you can see what you'll see when those tabs are pulled:


So not only is the recipient sweet - but beautiful, amazing, fabulous, lovely and wonderful too! The hooray For Surprises Dies are such a great way to add a fun interactive element to card. One last thing - you will notice that I needed to trim the second M&M card down so that the sentiment would appear where I wanted to. Don't discard the spare edge piece though - I added mine as a little extra decoration to the inside of my card. 

So what do you think? A fun way to combine these products, right? I will be sending this card to my lovely daughter who is at university - I'm sure she will love it. This is a great opportunity to remind you that the Hooray For Surprises bundle is just one of those featured in the monthly tutorials I create with my good friend and fellow demonstrator Jan Clothier. This tutorial contains lots more ideas and ways to use this bundle and is yours for FREE when you purchase the Hooray For Surprises bundle from either Jan or myself. So why not add it to your basket now - add some Memories & More cards and you can have a go at today's card too!


Here is the visual summary of the key products used on today's project for you to pin for easy reference:


You can see all of my 'How To' summaries on my 'How To - Tips and Techniques' Pinterest board in case you've missed any. 

Enjoy your day and I'll be back on Friday with another project for our new challenge over at As You See It. Until then, happy stampin'!


Stampin' Up! Supplies Used:

Table built using Product Table Builder by The Crafty Owl - Independent Stampin' Up! Demonstrator.


Hooray For Surprises Gender Reveal Card AYSI316

by Joanne James2. February 2024 13:00

Today I'm sharing my design team card for our new challenge over at As you See It where it's time for a 'fill in the blank' challenge chosen by my dear friend Jan:


Time to confess, crafty shoppers - what was the last thing you purchased? At first glance you might be thinking I'm pulling your leg today, as my card features the 'Sweet Songbirds' stamp set and co-ordinating punch, both of which I've had for ages and shared several times before. Look more closely though and you will see I paired them with my most recent craft purchase: the 'Hooray For Surprises' bundle - take a look:


Here's the low-down on today's card:

Hooray For Surprises - The 'Hooray For Surprises' bundle is so fun! The dies create perforated edges with a tab that allow you to easily create your own interactive cards. Simply pull the tab to reveal the message inside! I've been creating with this bundle a lot in recent weeks as it features in the next 'Join In With Joanne and Jan' craft tutorial bundle that I create with the lovely Jan Clothier. There are so many different ways you can create with the stamp set and dies together in this bundle, but for my card today I wanted to use one of the dies to show that there are tons of possibilities when you combine them with other sets too. I used Jen T's fabulous sketch over at Freshly Made Sketches this week as my starting point (turned through 90 degrees) and paired the largest of the round circle tab dies with my pair of birds and nest for a fun gender reveal card.

Here's the card front with a close up of the tab before opening:


It's A ... - When the tab is removed, there is a message underneath that reveals whether or not the mummy and daddy bird parents are expecting a boy or a girl - check it out below:

Isn't that so fun?! I made two cards, showing both boy and girl inserts. Here's a close up of the baby girl version: 

 And here's the baby boy version:


I stamped the surprise greeting with a combination of sets: the 'It's a' is from a couple of the sets in the Sweet Songbirds set and the 'Baby Boy/Baby Girl' comes from a long-retired set called 'Itty Bitty Baby', but you could just as easily hand write your own message or type one on the computer. So what do you think? I think this would make a lovely card to announce an impending birth to soon-to-be grandparents, for example, but I'd love to hear your thoughts - why not leave me a comment below!

Here is the visual summary of the key products used on today's project for you to pin for easy reference:


You can see all of my 'How To' summaries on my 'How To - Tips and Techniques' Pinterest board in case you've missed any. 

Remember if you purchase the 'Hooray For Surprises' bundle from either myself if you are in the UK or Europe or Jan if you are in New Zealand, then you will receive our tutorial featuring this set for FREE, along with access to our Private Facebook Group for more tips and tricks too. In addition, if you purchase before the end of February you will only be £1 away from a free Sale-A-Bration gift too!

Here's a summary of our challenge rules:

  • Create any card, scrapbooking page, 3D project or packaging project that fits the challenge.
  • Please include the challenge graphic and link back to the challenge in your blog post. Turn off word verification so we can leave you lots of lovely comments. Make sure you link the post not the whole blog to the Linky. Use #AYSIXXX when uploading to a public gallery.
  • If you’re unsure about ‘the rules’, check the details under the Challenge Guidelines tab on the As You See It Challenge homepage.
  • In a Fill in the Blank challenge, complete the sentence in the Challenge Banner with the phrase that is true for you and create your project using the words you used. Tell us what you said in your blog or on your site.
We look forward to seeing your creations in the AYSI gallery.

Enjoy your day and I'll be back tomorrow with another project. Until then, happy stampin'!


Stampin' Up! Supplies Used:

Table built using Product Table Builder by The Crafty Owl - Independent Stampin' Up! Demonstrator.

Joy of Noel Shadow Box Christmas Card PP669

by Joanne James3. December 2023 08:00

Today it's Sunday and time for this week's new challenge over at The Paper Players! It's the turn of the fabulous Jaydee to host this week and she has a timely theme challenge for us to work with:
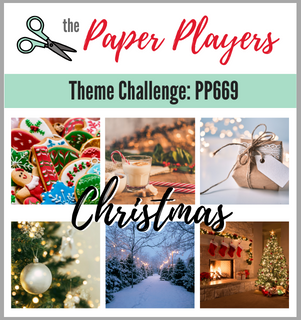
 

It's beginning to look a lot like ... Christmas! It is indeed, so Jaydee has chosen the perfect theme this week! At the start of December I like to make those 'special' cards for friends and family - those over-the-top, fancy ones that you hand deliver. I set aside my usual clean-and-layered self and throw caution to the wind, so I thought I'd share one of those cards with you today - take a look:
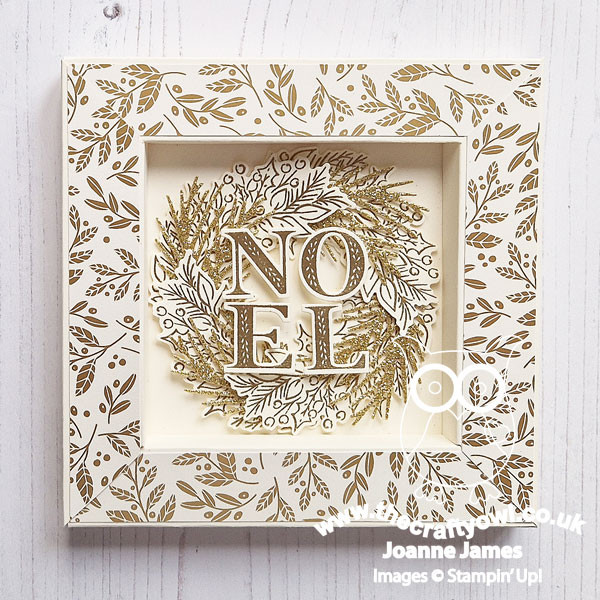
 

Here's the low-down on today's card:

A Fancy Shadow Box - Today's card is part card, part home decor. Measuring 5 3/4" square by 1/2" deep, the front of the card comprises a shadow box frame, with the main design in the centre. I've made non-festive versions of this card in a 6"x6" size that I've shared on my blog previously, but I've never made a Christmas one. This kind of card does take a little longer to make, but I think it's so worth it for a special occasion, don't you? It's also great for those who like to keep their cards and bring out year after year, as it is as much a decoration as it is a card.

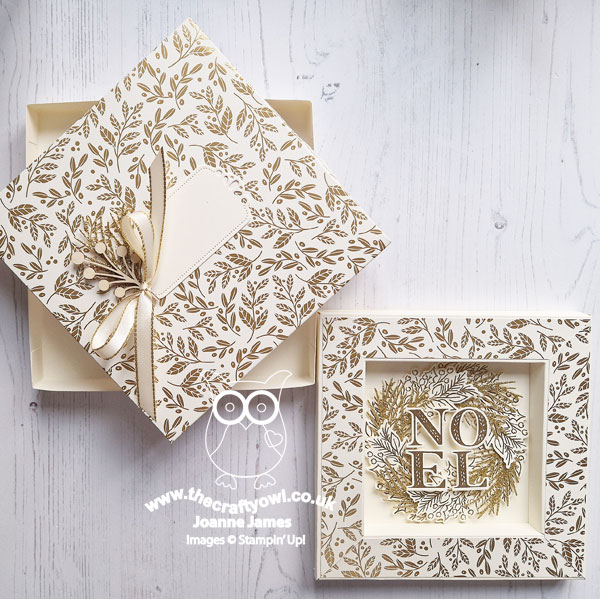
Shining Brightly - I used one of the gold and vanilla patterns from the Shining Brightly specialty designer series paper to decorate the frame of my card. Now, I know this paper is now sold out in Europe, but it's been in and out of stock all season due to its popularity, so I'm hoping that for those of you who stocked up, you appreciate a project that shows it in all its glory. Given that my shadow box card has depth, I need to create a box 'envelope' to send it in and I used more of this paper for the lid. You can see my box in the photo below:
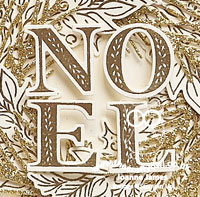
Joy of Noel - The real star of the show is the 'Joy of Noel' bundle that features in the centre of my frame. By far and away my favourite bundle from this year's mini catalogue, it really is fabulous. This bundle is still available and if you purchase it from me, you will receive a free copy of the 'Join in With Joanne & Jan' Joy of Noel tutorial that I created with my talented friend Jan Clothier. I combined gold embossed foliage and gold glitter pine needles with a gold embossed NOEL for the centrepiece - the foiling and glimmer paper add so much beautiful festive sparkle, don't you think?
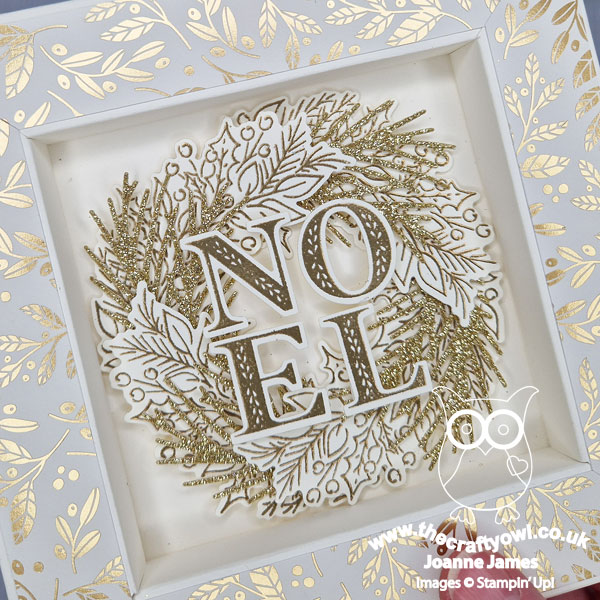
A gold embossed sentiment inside completes my fancy card. What do you think? Do you like to make fancy cards for the special people in your life? Do leave me a comment below - I'd love to hear what you think.  

I'm also playing along with a few challenges: My card follows the sketch at 52 Christmas Card Throwdown (I hope they'll forgive me the sentiment placement), it's a glitter entry over at Inkspirational and finally I've been saving this one for my entry over at SUO Challenges - my favourite holiday catalogue product, actually products with the bundle and paper!!


Here is the visual summary of the key products used on today's project for you to pin for easy reference:
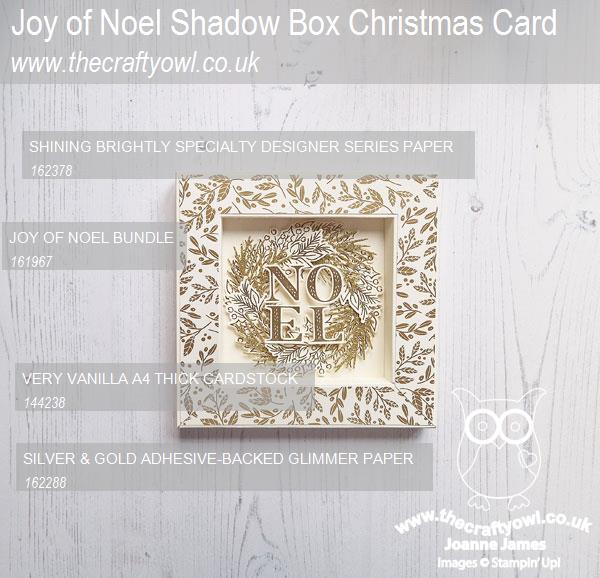
 

You can see all of my Product and 'How To' summaries on my 'How To - Tips and Techniques' Pinterest board in case you've missed any. 

Before you reach for your ink and papers, check out what our amazing team has created to inspire you this week:

Here's a quick recap of our challenge rules:
 
1.  Create a new paper project
2.  Upload your creation to your blog with a link back to us and provide a direct link to the post featuring your challenge submission.
3.  Please link your card to no more than four challenges, TOTAL.
4.  Have FUN!

Enjoy your day; I will be spending mine with more Christmas preparations and getting ready for an upcoming vacation - more about that in a future post! I'll be back tomorrow with another project. Until then, happy stampin'!


Stampin' Up! Supplies Used: 
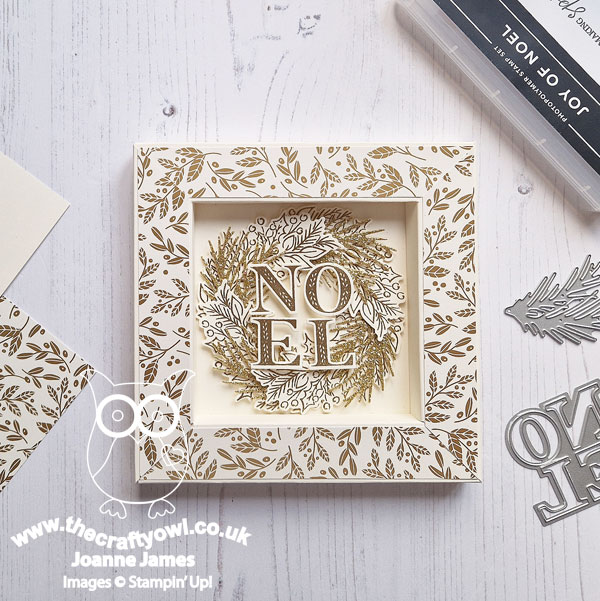
Table built using Product Table Builder by The Crafty Owl - Independent Stampin' Up! Demonstrator.

Gorgeously Made Masked Friendship Card TTT 220

by Joanne James3. August 2023 17:00

It's Thursday and time for a new challenge over at TicTacToe! It's the turn of Team X to host this week and the lovely Vicky is our featured designer this week. This is the fun board that we are playing along with: 


I went down the final column with ink blending/blues and greens/gems and had a go at creating a masked and blended background to highlight the foliage stamps in the Gorgeously Made bundle - take a look:


Here's the low-down on today's card:

I've been working a lot with the Gorgeously Made bundle lately as I've been working through ideas to include in this month's Gorgeously Made Create With Joanne and Jan Tutorial Bundle and this is one the ideas that I was experimenting with that didn't make it into the tutorial itself. I was inspired by the sketch over at Sunday Stamps and whilst ordinarily I would have gone with a large diecut sentiment, I decided to turn the sketch on its head and go for something vertical that used one of the small sentiments in the set, but in a way that highlighted it in an unusual way. When using a bundle for the first time, I like to consider less obvious ways to use it and this card includes one of those. Instead of adding the sentiment to my card by stamping it onto white cardstock, diecutting and adding with dimensionals, I created four label pieces from diecut masking paper and positioned these down the middle of my white panel. I then blended my trio of blue and green inks and stamped my foliage on top of my blended background, going off the edge and over the masked areas - I recommend you use your Stamparatus for this so that you get a good strong black image. When complete, I removed the masking paper labels to leave four white apertures that I could then stamp my sentiment into:

I added a sprinkling of coloured gems that picked up the colours of my blended background, but if you don't have coloured gems that match you chosen background colours, you can custom colour clear rhinestones with Stampin' Blends in corresponding colours. So what do you think of today's card? This is a good way of minimising layers and a neat way to use label dies in a creative way and this style of card would work in other colourways too.


Remember if you would like more ideas of ways to use the Gorgeously Made bundle, if you purchase the bundle from either myself if you're in the UK and Europe (or Jan if you're based in New Zealand) during either August or September, you will receive a copy of our tutorial bundle with instructions for four projects and access to our exclusive customer Facebook Group - for more details read about it in yesterday's post here.

Here is the visual summary of the key products used on today's project for you to pin for easy reference:


You can see all of my Product and 'How To' summaries on my 'How To - Tips and Techniques' Pinterest board in case you've missed any. 

A tictactoe board offers so many creative possibilities - how does this week's board inspire you? Why not have a go? We would love to see you in the gallery and who knows - you might be selected for Designer's Choice and be eligible to be a guest designer on a future challenge. 

Enjoy your day; I'll be back tomorrow with another two projects; in addition to my fortnightly Festive Friday post, I am also the Guest Designer over at CAS On Friday. Until then, happy stampin'!


Stampin' Up! Supplies Used: 

Table built using Product Table Builder by The Crafty Owl - Independent Stampin' Up! Demonstrator.

Create With Joanne and Jan - New Tutorial Bundle

by Joanne James2. August 2023 09:00

News of the August Stampin' Up! Kits Sale yesterday so I saved this post until today! It's August and time for a new Create with Joanne and Jan tutorial bundle!

My friend and former Stampin' Up! Artisan Designer Jan Clothier, aka Thinking Stamping, and I are working together to reward our customers with some extra special perks. Every two months, Jan and I will be putting together a set of four tutorials featuring a bundle or suite. Simply purchase the suite or bundle from us and we’ll email you the tutorials in PDF format for you to make. If you already have the suite or bundle, simply purchase something else of equivalent value and we’ll email the tutorial package to you.

The four tutorials (two from each of us) will really show you different ways to make the most of your purchase because you’ll get the benefit of both our ways of thinking and both our styles. There will be a range of project levels, from casual to avid and you won’t find these projects in any of our other social media platforms. We’ve designed them just for our customers. In addition to the tutorials, you’ll also be offered access to an exclusive private Facebook Group where you’ll be able to share your projects, and ask us questions. You’ll also find little extras there from us like extra projects, tips or even the occasional video or Facebook Live. You just never know!

So there you have it. Two great reasons to shop with us: a package of four exclusive designs AND access to a private Facebook Group so you can pick our brains and share your work with us.

You can shop with me if you live in the UK and Europe

You can shop with Jan if you live in New Zealand.

For August-September, we are featuring the Gorgeously Made bundle from the 2023-2024 Annual Catalogue. The Masterfully Made Suite Collection features the Gorgeously Made stamp set and die bundle and includes beautiful designer series papers featuring mixed media designs with handpainted and hand-torn designs. If you would like to receive this tutorial, you can place your online order with me by clicking on the direct product links for the bundle and any other products in the suite below:

Table built using Product Table Builder by The Crafty Owl - Independent Stampin' Up! Demonstrator.
 

Remember to add the current hostess code 2A6EXGJ4 to your order. 

Watch out for a new tutorial package for October-November at the end of September.

Join In With Joanne and Jan - A New Tutorial Collaboration

by Joanne James30. June 2023 16:00

Hi everyone - as promised I'm here with my second post today and some exciting news! Welcome to Join In with Joanne and Jan!

My friend and former Stampin' Up! Artisan Designer Jan Clothier, aka Thinking Stamping, and I are working together to reward our customers with some extra special perks. Every two months, Jan and I will be putting together a set of four tutorials featuring a bundle or suite. Simply purchase the suite or bundle from us and we’ll email you the tutorials in PDF format for you to make. If you already have the suite or bundle, simply purchase something else of equivalent value and we’ll email the tutorial package to you.

The four tutorials (two from each of us) will really show you different ways to make the most of your purchase because you’ll get the benefit of both our ways of thinking and both our styles. There will be a range of project levels, from casual to avid and you won’t find these projects in any of our other social media platforms. We’ve designed them just for our customers. In addition to the tutorials, you’ll also be offered access to an exclusive private Facebook Group where you’ll be able to share your projects, and ask us questions. You’ll also find little extras there from us like extra projects, tips or even the occasional video or Facebook Live. You just never know!

So there you have it. Two great reasons to shop with us: a package of four exclusive designs AND access to a private Facebook Group so you can pick our brains and share your work with us.

You can shop with me if you live in the UK and Europe

You can shop with Jan if you live in New Zealand.

We’re kicking off with the Cheerful Daisies bundle from the 2023-2024 Annual Catalogue.


The Fresh As A Daisy Suite Collection features the Cheerful Daisies stamp set and die bundle and includes beautiful designer series papers featuring loosely handpainted florals that also feature all of the new 2023-25 in-colours. If you would like to receive this tutorial, you can place your online order with me by clicking on the direct product links for the bundle and any other products in the suite below:

Table built using Product Table Builder by The Crafty Owl - Independent Stampin' Up! Demonstrator.

Remember to add the current hostess code 2A6EXGJ4 to your order. 

Watch out for a new tutorial package for August-September at the end of July.


Sale-A-Bration 2025

It's time for Sale-A-Bration 2025! Shop, host and earn benefits between 7 January - 28 February. Download your copy of the Sale-A-Bration brochure here!

Mini Catalogue

BROWSE THE CATALOGUE

New Year, new products - the new Stampin' Up! Mini Catalogue is here! For more details and to download your copy click here

Shop Online

Access my online shop 24 x 7, 365 days of the year:

Current January hostess code:

M7ZT6XFK

Shop Online

Join My Team

And when you join during Sale-A-Bration, new team members can build your starter kit by choosing £130 worth of products for only £99 + free business supplies + free shipping and either TWO Stampin' Write marker sets and the exclusive Handmade Designs stamp set OR an additional £30 in FREE products. Stampin' Up! has something for everyone: join my growing team and benefit from my support to enjoy Stampin' Up! however you choose.

If you're interested, call me for a chat to understand how I can help you realise your goals. Alternatively, if you have already decided to sign up and you just can't wait, please click here for the link to the online form where you can sign up and order your starter kit right away! 

Scrapbooking

Stampin' Up! has introduced a new range of 12x12" scrapbooking product and kit - the full range is now available to purchase online. To download a copy of the new digital Scrapbooking Catalogue click here.

Latest Kits!

Stampin Cut and Emboss

The Birthday Bash Kit is just one of the latest kits in the online store - get yours here!

2024-25 Annual Catalogue

BROWSE THE CATALOGUE

Click on the image to download your copy of the 2024-25 annual catalogue. For a full list of current SU! supplies, go to my online store. If you would like any help or advice, please drop me a line at joanne@thecraftyowl.co.uk or give me a call on 07773 421446 - I'd be happy to help.

New Online Exclusives

There are new products available exclusively in the online store from 7 January - check them out here.

About Me

Hi I'm Joanne and live in Northampton and when I'm not looking after my husband and two beautiful children, am an avid crafter with a passion for all things Stampin' Up!

I must confess that I have never been a big rubber stamper - until I discovered Stampin' Up! that is. I love the fact that I can get such great results with co-ordinating stamps, inks, papers and punches - the possibilities are endless! Join me on my stamping journey as I share the things I love and be inspired to create amazing things yourself!

Follow Me

Monthly Newsletter

Box Builder

Click the button above to use Box Buster to create your custom box design using the Envelope Punch Board!

Kits Collection Now Available!

Stampin Cut and Emboss

The new Kits Collection from Stampin' Up! is now available!

Click here to see the current kits available and order yours online today.

I Design For


Stampin' Up Stuff

This is my personal blog and is not endorsed by Stampin’ Up! I hope you find it a plentiful source of ideas and personal inspiration but please don't copy my designs for contest submission or use for classes, publication or sale without express permission.

DSP Special Release

Check out 3 popular designer series paper designs in fresh new colourways! Available exclusively in the online store from 3 December - check them out here