by Joanne James25. March 2016 18:57
Good Friday blessings one and all! I've spent most of today outdoors making the most of the sunny weather; I met my girlfriends for a run this morning and we went on a James family bike ride this afternoon. No time to craft, but since the forecast is dreadful for the rest of the week I'm sure I'll make up for it! Today's card is for the challenge over at The Friday Mashup. I love this challenge and am sad to read that this one is their last one!

This week you can use the sketch above or create a project with an Easter theme and chicks or bunnies, or mashup and create with both. I went with the latter for this card, although I do have a mashup card planned for a few days time! Here's today's card:
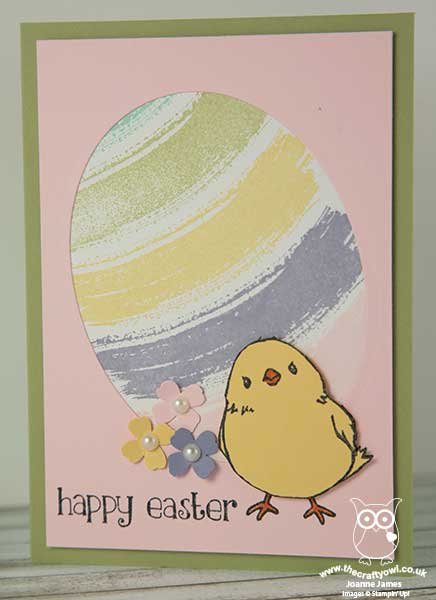
I actually made this card with the ladies at my Coffee and Card session at Bell's in Northampton this week. The key elements of my fun Easter card are as follows:
An oval egg - I used my Big Shot and Ovals Framelits to create my fun Easter egg in my layer of Pink Pirouette cardstock. Now I know that technically an egg is more pointed at one end, but without an egg framelit this oval makes a pretty good alternative! Before cutting out my oval, I stamped my chick onto the card. Why? Read on below to find out!
An Easter work of art - To decorate my egg, I cut a second mat of white the same size as my pink layer and stamped the large brushstroke stamp from the 'Work of Art' stamp set in a variety of pastel colours and placed this behind the aperture. The curve of the stamped image adds to the illusion of the egg shape.
A happy chick - The little chick from the 'Honeycomb Happiness' Sale-A-Bration set has been getting lots of use this week as he is perfect for Easter cards. I stamped mine onto So Saffron cardstock, snipped him out with my paper scissors and coloured his beak with my Pumpkin Pie Stampin' Write marker. I didn't fussy cut those fiddly legs though - remember the chick I stamped on the pink layer earlier? Yes, I simply coloured the ones on this layer with my Pumpkin Pie Stampin' Write marker and then lined up my yellow chick with the stamp outline, adhering him with a couple of Stampin' Dimensionals. Clever, right? You have just 6 more days to get your hands on the 'Honeycomb Happiness' stamp set for free with a £45 order; if it's on your wish list, don't leave it too late!
An Easter sentiment courtesy of the 'Easter Lamb' stamp and a trio of Itty Bitty punched flowers completes my card.
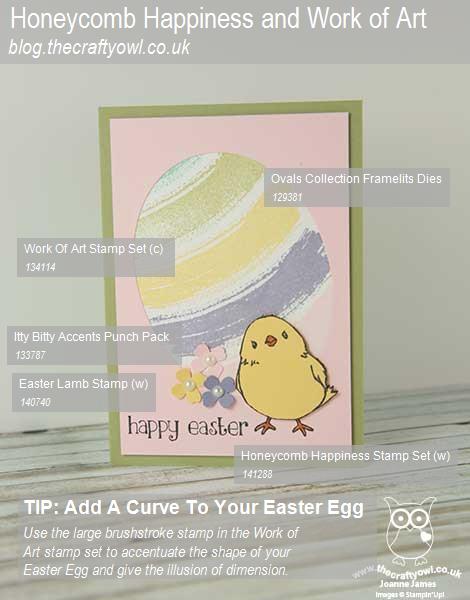
Here's the visual summary of the key supplies used to make today's card for you to save for easy reference:
That's all from me today; if you would like to know more about my drop-in Coffee and Card Sessions, you can read all about it here. We have a short break for Easter then the next one is scheduled for 13th April - I'd love to see you there. I'll be back tomorrow with another project. until then, happy stampin'!
Stampin' Up! Supplies Used:
82b629e8-d2e6-4c0f-8187-1edb4c5b42c8|0|.0|96d5b379-7e1d-4dac-a6ba-1e50db561b04
Tags: Bell of Kingsthorpe, Big Shot, Coffee and Card Drop-in Sessions, Easter, Honeycomb Happiness, Ovals Framelits, Easter Lamb, Work of Art, Sale-A-Bration 2016, Shop Stampin' Up online, Shop online, Stampin' Up, Stampin' Up Card, Stampin' Up Card ideas, Stampin' Up Supplies, Itty Bitty Accents Punch Pack
Cards | Sale-a-bration | Shop Online | Stamping
by Joanne James25. February 2016 08:05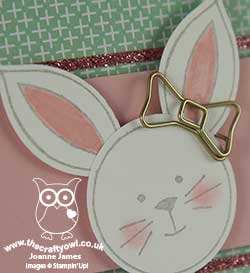
Today it's time for a new challenge over at Create With Connie and Mary and this week we have a great sketch for you:
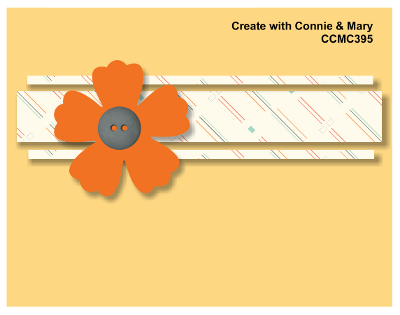
I decided to create a fun Easter card today using the new 'Friends and Flowers' stamp set that co-ordinates with the returning Festive Flower Builder punch - take a look:
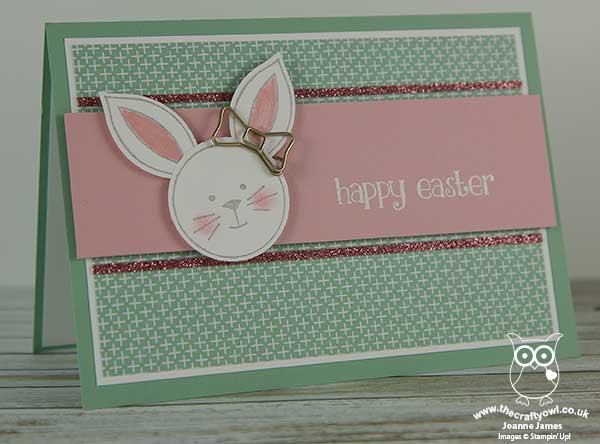
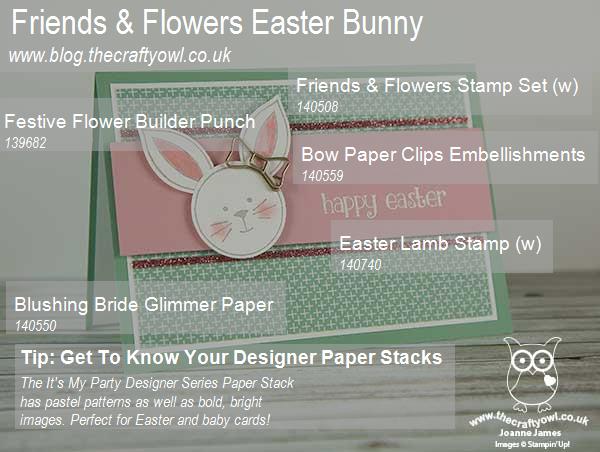
This is a great stamp set with lots of pieces that enable you to make bunnies, fish, flowers and more! It's so easy to punch out the various bits and pieces for easy creation with the co-ordinating punch; my Festive Flower Builder Punch got a real work out before Christmas (do a search on it or the 'Reason For The Season' stamp set here on my blog to see the many projects I've created using it) so I'm glad I get to use it with another co-ordinating stamp set too. I simply stamped the bunny face and ears in Smoky Slate on a piece of Whisper White cardstock, added a little Blushing Bride pink using my Stampin' Write markers and punched out (using the 1 3/8" circle for the face). I added a Bow Paper Clip embellishment to one ear for added 'cute' factor and bordered my sentiment panel with two thin strips of blushing Bride glimmer paper - a little glimmer goes a long way! The sentiment is the one you'll find with the 'Easter Lamb' stamp - I simply masked my stamp so that I would only get the words and not the image - which I stamped in Versamark and heat embossed in white for added gloss.
Lastly, do you recognise the pretty pastel paper I used for my background layer? It's actually from the It's My Party paper stack. Whilst this is a pack with lots of bold patterns and colours, the presence of Mint Macaron and Sahara Sand in the colour combination means there are some hidden pastel gems in there too, so be sure to check it out.
Here's today's visual summary for easy reference:
Do visit the other Design Team members to see how they interpreted this week's sketch; there's lots of inspiration over on their blogs too!
Enjoy your day and I'll be back tomorrow with another project; until then, happy stampin'!
Stampin' Up! Supplies Used:
- Friends & Flowers Wood-Mount Stamp Set
- Festive Flower Builder Punch
- Easter Lamb Wood-Mount Stamp
- Blushing Bride Glimmer Paper
- Bow Paper Clips Embellishments
- Smoky Slate Classic Stampin' Pad
- Blushing Bride Classic Stampin' Pad
- Blushing Bride A4 Cardstock
- Mint Macaron A4 Cardstock
- Whisper White A4 Cardstock
- It's My Party Designer Series Paper Stack
- 1-3/8" Circle Punch
- Embossing Buddy
- Versamark Pad
- White Stampin' Emboss Powder
- Heat Tool (Uk)
a099c02c-a726-48c5-bdaa-95ba30b70f0a|0|.0|96d5b379-7e1d-4dac-a6ba-1e50db561b04
Tags: Create With Connie And Mary, Stampin' Up, Stampin' Up Card, Stampin' Up Card ideas, Stampin' Up Supplies, Easter Lamb, Easter, Friends and Flowers, Festive Flower Builder Punch, It's My Party, Shop online, Shop Stampin' Up online
Cards | Shop Online | Stamping
by Joanne James23. February 2016 09:00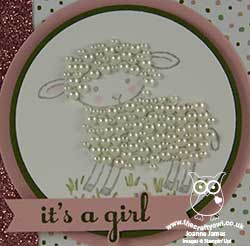
Hello everyone! Today I have a card for this week's challenge over at Pals Paper Arts where they have a sketch to work with:

I love a good sketch and this one allowed me to get my Easter Lamb stamp out for the first time and try something that I've been wanting to do since I bought it - take a look:
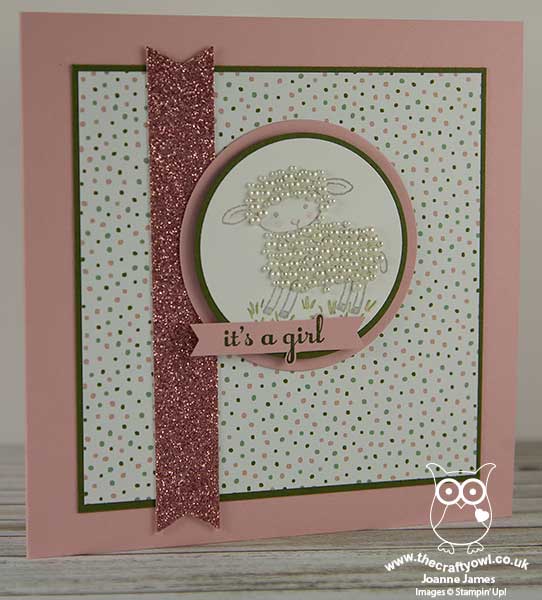
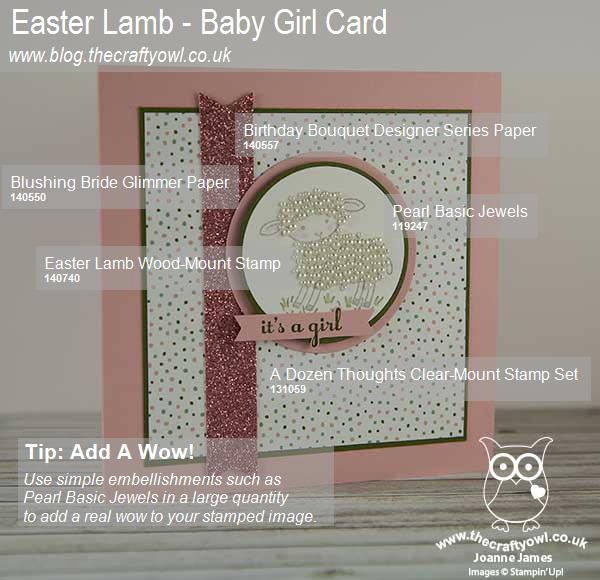
The sketch is perfect for using the circle to create a stunning focal point - and this is where my cute lamb comes in! I decided to stamp it without the 'Happy Easter' sentiment as I wanted to make a card to celebrate the arrival of a baby girl. I stamped the image in Smoky Slate, adding a few touches of Blushing Bride and Mossy Meadow ink with my blender pen, then proceeded to add a pearl to each of the circles of the image to create my pearlescent woolly coat. Two packs of Pearl Basic Jewels and some time later, this was the result! I chose to use Blushing Bride and Mossy Meadow as my feature colours from the delicate spotty Birthday Bouquet designer series paper for my base and mat layers - whilst the green is quite dark for a pastel baby card, I was careful to use it sparingly to frame the paper and image only and to stamp my sentiment from the set 'A Dozen Thoughts'. I love this font but since I wanted a narrow banner, decided to make a feature of the loops and cut around them, which fits quite neatly to my circle too - bonus! Lastly, I decided that a strip of Blushing Bride Glimmer Paper was necessary for the vertical banner - just in case anyone was in any doubt that this is most definitely a card for a little lady! I may well be responsible for a run on packs of pearl jewels from the Stampin' Up! store with this card and I know that this is not the sort of card you would make every day, but for a special one-off to commemorate the addition of one more to the female race, I think it's totally worth it!
Here is today's visual summary for easy reference:
That's all from me today. I have lots to be getting on with, including last minute preparations for my new 'Coffee and Card' drop in class at Bells in Northampton tomorrow. Back tomorrow with another project and this week's new Weekly Deals; until then, happy stampin'!
Stampin' Up! Supplies Used:
168b32d2-ddcf-4c5a-b048-eec0c99508d5|0|.0|96d5b379-7e1d-4dac-a6ba-1e50db561b04
Tags: Baby cards, Big Shot, circle punch, Circles Framelits, Easter Lamb, A Dozen Thoughts, Shop online, Shop Stampin' Up online, Stampin' Up Supplies, Stampin' Up Card ideas, Stampin' Up Card, Stampin' Up
Cards | Shop Online | Stamping