Circle Sayings Beachy Peek A Boo Fancy Fold For AYSI 306

by Joanne James25. August 2023 12:00

Today I'm sharing my design team card for our new challenge over at As you See It where it's time for a seasonal theme challenge chosen by Deborah:


At the beach - wouldn't I like to be there right now? I most definitely would, but instead a card will have to do! I decided to feature sun, sea and sand on today's card which is also a fancy fold - take a look:


 Here's the low-down on today's card:

Circle Sayings - Today's card is a Peek-A-Boo fancy fold: when closed you see one thing in the window, then as you open the card the panel slips aside to reveal a second image or message. The Circles Sayings stamp set is perfect for this style of fancy fold card - it has lots of co-ordinating stamp images and sentiments that can be mixed and matched to create fun combinations. I used the sea and sun image for my first image, along with a fussy-cut partial sentiment attached to the frame and I paired it with the 'warm hello' sentiment, along with shells and sand for the peek-a-boo reveal:


Rays of Light - I wanted to add some additional colour to the front of my card, but without distracting from my seaside image. I decided on some ton-on-tone stamped detail using the Rays of Light stamp set, radiating out from the stamped image and fading into the base. Because I wanted my rays to radiate from the image, they wouldn't reach to the opposite edge of my card, so I added an Azure Afternoon ribbon and bow to balance my design. You can see the detail on the stamped image below, including some snowflake puff paint that I added to the wave foam for some extra dimension:


Peek-A-Boo Fancy Fold - This fold is really not tricky to execute - you just need to ensure the circle aperture is positioned correctly on each layer to ensure they align and that each of the mechanism panels are cut to the correct size. Here's a video that shows the peek-a-boo action:

Isn't that fun?! You can see another example of a card I made with this design here. I'm linking this one up over at The Paper Craft Crew where 'fun folds' is their theme this week.

Here is the visual summary of the key products used on today's project for you to pin for easy reference:


You can see all of my 'How To' summaries on my 'How To - Tips and Techniques' Pinterest board in case you've missed any. 

Here's a summary of our challenge rules:

  • Create any card, scrapbooking page, 3D project or packaging project that fits the challenge.
  • Please include the challenge graphic and link back to the challenge in your blog post. Turn off word verification so we can leave you lots of lovely comments. Make sure you link the post not the whole blog to the Linky. Use #AYSIXXX when uploading to a public gallery.
  • If you’re unsure about ‘the rules’, check the details under the Challenge Guidelines tab on the As You See It Challenge homepage.
We look forward to seeing your creations in the AYSI gallery.

Enjoy your day and I'll be back tomorrow with another project. Until then, happy stampin'!


Stampin' Up! Supplies Used:

Table built using Product Table Builder by The Crafty Owl - Independent Stampin' Up! Demonstrator.

Loveliest Layers Double Stencilled Card TTT200

by Joanne James16. March 2023 16:00

It's Thursday and time for a new challenge over at TicTacToe! It's the turn of Team X to host this week and the lovely Vicky is our featured designer this week. This is the fun board that we are playing along with for our 200th (yes, 200th!) challenge: 


I went on the diagonal from bottom left to top right with stencil, flower, sentiment and took the opportunity to have another play with my Loveliest Layers Decorative Masks, this time using both the flower and background stencil and a little fussy cutting - take a look:


Here's the low-down on today's card:

Double Decorative Masks - I wanted to play along with this month's challenge over at The Flower Challenge where they are using floral diecuts or stencils, so stencilled a flower and leaves using the floral stencil, but instead of stencilling directly onto my card base as I have previously, I fussy cut it and set it to one side whilst I created a background using the other stencil in the set. I created an ombre background using the same shade of pink and purple that I used for my flower using my blending brushes, then used my background stencil to apply shimmery white embossing paste over the top. This adds both a touch of sparkle and some textural interest; be sure to clean your stencil quickly though once you've used is with paste, to avoid it drying onto it and proving difficult to remove. You can see the detail of both stencils more clearly below:

Best Family Ever - The sentiment on my card comes from a stamp set called 'Best Family Ever' - so useful for customisable greetings and great value too. I stamped it in Highland Heather onto a white circle punched with my 1 3/4" circle punch.

Online Exclusives - Before you wonder where the word 'retired' was in front of the reference above to my 1 3/4" circle punch, fear not - it's not there because circle punches are back! Well a 1 3/4" and a 2" version at least, as part of the Online Exclusives range that launched at the start of the month. As you would expect, these items can be found under the 'Online Exclusives' section of my online store - they can be ordered online directly or by placing your order with me, but the important thing to note is that just like our range of craft and card kits, they will not appear in any catalogue publications. Purchase your circle punch and see the rest of the current Online Exclusives range in my online store here

I finished my card with some sparkly ribbon, twine and a collection of pearls, gems and enamel dots to compliment my colour scheme.

Here is the visual summary of the key products used on today's project for you to pin for easy reference:


You can see all of my Product and 'How To' summaries on my 'How To - Tips and Techniques' Pinterest board in case you've missed any. 

A tictactoe board offers so many creative possibilities - how does this week's board inspire you? Why not have a go? We would love to see you in the gallery and who knows - you might be selected for Designer's Choice and be eligible to be a guest designer on a future challenge. 

Enjoy your day; my day has been a busy one, but since I have a Parents' School Exchange Meeting at school this evening, I am being rewarded with dinner out with the youngest of the James Juniors in order that we can fit everything in - what a treat! I'll be back tomorrow with another project. Until then, happy stampin'!


Stampin' Up! Supplies Used: 

Table built using Product Table Builder by The Crafty Owl - Independent Stampin' Up! Demonstrator.

Flowering Cactus Product Medley #mojosketch554

by Joanne James7. March 2021 21:00

Today I'm sharing an extra card with you! I made it earlier in the week using the current Mojo Monday sketch for the challenge over at Hand Stamped Sentiments and had hoped to share yesterday, but simply ran out of time!


So I thought I'd grab a quick few minutes to share my make with you - take a look:


 Here's the low-down on today's card:

This card was my first outing with the Flowering Cactus Product Medley and it was perfect for that inspiration photo over at Hand Stamped Sentiments - cactus galore and pops of colour. I've not showcased a Product Medley on my blog before, so if it's a concept that's unfamiliar to you, let me explain! A Product Medley contains stamps, dies, papers and accessories that co-ordinating with each other perfectly and no instructions - leaving you free to create whatever you want. I'm not usually attracted to cactus stamps, but I particularly liked the dies and sentiments in this stamp set so thought I'd get one and have a play. I went big with the layers on this card, with lots of dimension:


I mostly used diecuts, paper and elements from the kit on this card, with the only stamping for my sentiment and on the inside of my card:


I really like the effect though and am pleased with my first attempt. Can't wait to make more with this box of prickly loveliness!

Here is the visual summary of the key products used on today's project for you to pin for easy reference:


You can see all of my 'How To' summaries on my 'How To - Tips and Techniques' Pinterest board in case you've missed any. 

Enjoy your evening and I'll be back soon with another project. Until then, happy stampin'!


Stampin' Up! Supplies Used:

Table built using Product Table Builder by The Crafty Owl - Independent Stampin' Up! Demonstrator.

Circle Punch Snowman for CASology 380 Guest Designer

by Joanne James15. December 2020 14:00

Today I'm sharing a card for the new challenge over at CASology where I have been invited by the lovely Melissa to be the guest designer, following my 'stag' card being chosen as a winner for challenge 378 - if you missed it, you can see that card here

Today's cue card is a festive one and perfect for some last-minute card making for the Christmas season:


 I decided to create a cute snowman using negative space for my card today - take a look:


 Here's the low-down on today's card:

Do You Wanna Build A Snowman - Apologies if you now have THAT song stuck in your head, but that was exactly what I decided to do today, on my card at least! Whilst I used my Snowman Builder Punch for the hat and arms, it wouldn't work for the body but this was easily remedied by using some (retired) circle punches (3/4", 1" and 1 1/4"). I added a felt scarf left over from one of last year's accessory kits for a little added texture, a simple sentiment from the 'Snowman Season' stamp set and my falling snow was courtesy of my much-loved retired Softly Falling embossing folder - it's still a favourite of mine:


This was the stamping on the inside of my card:


Design Defined - One of the things I love about the CASology challenge is that they encourage us to consider what makes our card 'clean and simple'. In addition to the basic guidelines, the design team offer some great tips in terms of their cards. Often when I play along I do the same, and if you check out my previous CASology-related blog posts, you will see lots of similar tips in relation to the cards that I created. For today's card, I defined my card design as 'Use negative space to create a focal point' which is a great way to add interest to a CAS design. 

An Unconventional Take - I actually made a second card using the same design, that was as a result of seeing this week's Inspired By inspiration photo:

I loved the holly against the bright pink for an unconventional take on Christmas colour, so decided I would use this idea to create a second version of the above card. My holly is small and I swapped out my scarf colour for more green, but this card is very much about the pink:


So what do you think? I actually still prefer the original one myself, however it was fun to change out the colour for an alternative effect. Here are both cards together for comparison:


Which one do you prefer? Do leave me a comment below - I would love to hear your thoughts.

Here is the visual summary of the key products used on today's project for you to pin for easy reference:


You can see all of my 'How To' summaries on my 'How To - Tips and Techniques' Pinterest board in case you've missed any. Thank you to the team at CASology for having me as their Guest Designer this week - do check out the team designs and I'm sure they would love you to play along with this challenge too.

Enjoy your day and I'll be back tomorrow with another project. Until then, happy stampin'!


Stampin' Up! Supplies Used:

Table built using Product Table Builder by The Crafty Owl - Independent Stampin' Up! Demonstrator.

Cute Fruit with Oranges, Lemons and Limes

by Joanne James24. July 2020 20:56

I had some new goodies arrive yesterday and finally got some time to play this afternoon so I'm just popping by to share a quick card that I made for this week's Freshly Made Sketches challenge with the current colour palette over at Color Throwdown:


I was intrigued by those circles on Jen's sketch and I had an idea that I thought might work with one of my new stamp sets - take a look:


Here's the low-down on today's card:

Cute Fruit - The 'Cute Fruit' stamp set is so fun! The set includes lots of different fruit and in addition to the fruit and some great punny sentiments, there are also a selection of cute faces - I mean, what's better than a banana? Well, a banana with a face of course!! I haven't used the faces on today's card, but rest assured they will make an appearance at some point.  

Let's Talk Sketch - I was musing over how to represent those little circles when it occurred to me they could be slices of oranges, lemons and limes. I decided to try out my idea, but this necessitated me altering my card base to a horizontal rather than vertical one, to allow me to scale my fruit accordingly and still keep the elements of the sketch in proportion. You can still see the sketch layout though and how it inspired my card. I would never have thought about using this set in this way so the sketch was a great way to stretch my creative thinking. 

Citrus Sparkle - I stamped each of my small citrus slices in Granny Apple Green and retired Pineapple Punch and Grapefruit Grove and punched them out with my retired 1" punch. I decided to create a large orange slice for the larger circle in the sketch and did this by layering some circles of cardstock and adding some segments cut from retired glimmer paper that I coloured orange with some ink and a sponge dauber for some extra sparkle which you can see better on the photo below:

I added some clear Wink of Stella to my stamped citrus slices too for some added lustre and my card was complete. So what do you think of today's citrus-y card? Does it work for you? Do leave me a comment - I'd love to hear your thoughts.

Here is the visual summary of the key products used on today's project for you to pin for easy reference:


You can see all of my 'How To' summaries on my 'How To - Tips and Techniques' Pinterest board in case you've missed any. 

Enjoy your evening and I'll be back tomorrow with another project. Until then, happy stampin'!


Stampin' Up! Supplies Used:

Table built using Product Table Builder by The Crafty Owl - Independent Stampin' Up! Demonstrator.

#ShareSunshine With We'll Walrus Be Friends For PP489

by Joanne James3. May 2020 09:00

Today it's Sunday and time for this week's new challenge over at The Paper Players! It's my turn to host this week and I have a fun theme challenge for you to work with:


I have been looking at the sentiments in the new #ShareSunshine product giveback download and decided to use one of the funny ones on my card today - take a look:


Here's the low-down on today's card:

#ShareSunshine - The #ShareSunshine PDF download is the Covid-19 Product Giveback that I shared with you here last week. It includes lots of fun sentiments related to the current social distancing and unique times we find ourselves in that are great for sharing with friends and family to let them know we are thinking of them. I chose to feature the fun 'I've Just Been Working On My Homebody' sentiment and hunted through my stamp sets to find a suitably fit individual ...

We'll Walrus Be Friends - ... and the rotund walrus in 'We'll Walrus Be Friends' was just the thing! I created a repeating background with my stamp. Is it only me that feels like this chap of late? Too much cake and not enough exercise!!

Starburst Punch - The PDF download comes with a list of the ink colours used and co-ordinating products for each of the images and the one I chose fits the Starburst Punch perfectly. I cropped mine first with a 2" circle punch and mounted it onto my Mango Melody starburst; the former is carrying over but the Starburst Punch is retiring so if this is on your wishlist, now is the time to add it to your shopping basket.

Here is the visual summary of the key products used on today's project for you to pin for easy reference:


You can see all of my Product and 'How To' summaries on my 'How To - Tips and Techniques' Pinterest board in case you've missed any. 

Before you reach for your ink and papers, check out what our amazing team has created to inspire you this week:

Here's a quick recap of our challenge rules:
 
1.  Create a new paper project
2.  Upload your creation to your blog with a link back to us and provide a direct link to the post featuring your challenge submission.
3.  Please link your card to no more than four challenges, TOTAL.
4.  Have FUN!

You can see all of my 'How To' summaries on my 'How To - Tips and Techniques' Pinterest board in case you've missed any. 

I can't wait to see what happy projects you have to share with us in the Paper Players gallery this week!

Enjoy your day; I will be spending time in the garden and trying to make Sunday feel less like any other day of the week since they all seem to roll into one at the moment! I might make up more Covid cards with my download printouts too to send out to friends and family as I have a few ideas. I'll be back tomorrow with another project. Until then, happy stampin'!


Stampin' Up! Supplies Used: 

Table built using Product Table Builder by The Crafty Owl - Independent Stampin' Up! Demonstrator.

Bonanza Buddies Lion CAS Birthday Card

by Joanne James22. April 2020 08:00

Today I'm sharing a card that was inspired by quite a few challenges - I started with a couple in mind but my card just kind of snowballed:


Believe it or not my starting pint was the Just Add Ink challenge and that lovely yellow and pink colour combo, along with the tassels. I had already decided to make a lion birthday card inspired by the Hand Stamped Sentiments photo and I wondered whether I could make a bushy mane from tassels. I used the sketch layout courtesy of AAA cards (no optional twist - this lion doesn't fly!) but given that he is a lion, I am linking up Leo over at CASology where the keyword is 'zodiac' and entering over at Addicted to CAS too! So that's how I got to my card - now to tell you the story of the bushy mane! Firstly, here's my finished card:


 Here's the low-down on today's card:

Bonanza Buddies - I used my Bonanza Buddies stamp set for the lion with his balloons, and stamped them and my sentiment directly onto my card base. Then, instead of diecutting the head and mane using the stamp provided and popping it up, I stamped it but fussy cut the face and put my bushy mane behind - here's a close up of that detail:


The Mane Event - So how did I create my mane? I knew I had some tassels in my stash, but the closest I had to yellow was gold and it looked a little too 'bling', so I grabbed some retired Crushed Curry baker's twine and created my own by punching a small 1/2" circle of cardstock with a smaller hole in the centre to create a ring, then looped a bunch of 2" pieces of twine around it then trimmed it to fit. Here's a close-up photo so you can see what it looked like before I added it to my card:


I think glued this to my card and glued my lion's face, complete with party hat, to the middle.

Clean And Simple? - Having completed my card, I did have some doubts as to whether my card would pass the 'CAS' test; it does have a single focal point, lots of white space and minimal layers but whilst it only has one embellishment, it is rather a fancy one! I hope I haven't offended anyone in the AAA Cards, Addicted to CAS or CASology camps as I try and hone my CAS skills, but do leave me a comment if you think I've still more to learn on this front - I'm sure my sweet PP teamie and queen of CAS, the lovely Jaydee who is hosting at Addicted to CAS this week will put me right!

Here is the visual summary of the key products used on today's project for you to pin for easy reference:


You can see all of my 'How To' summaries on my 'How To - Tips and Techniques' Pinterest board in case you've missed any. 

As I trimmed my lion's mane, it reminded me of cutting both Mr James and the James Juniors' hair last week. We are all missing our regular trims during lockdown, and the boys in particular decided we should take matters into our own hands. Having purchased some clippers, I set to work and surprised myself at what a good job I did. So much so I bought a pair of hairdressing scissors and cut Rebecca's hair too! It appears I have found a new skill - it's just a shame I can't practise it on myself and I certainly don't trust anyone else if the James household to cut my hair, so the ladies that see me on my online classes at the moment will have to witness my increasingly unruly mop for a while longer yet!! So have you discovered any new skills you didn't know you had whilst you've been in lockdown? Do share - I would love to hear about them! 

I have lots to share with you today so will be back later with a couple more posts, so be sure to stay tuned or depending on when you are reading this scroll forwards to catch up on everything that 's happening! Enjoy your day and I'll be back later. Until then, happy stampin'!


Stampin' Up! Supplies Used:

Table built using Product Table Builder by The Crafty Owl - Independent Stampin' Up! Demonstrator.

Tags: , , , , , ,

Rooted in Nature Winter Wonderland CAS Christmas Card

by Joanne James30. January 2020 12:30


The week is running away with me again - I can't believe it's Thursday already and I'm finally managing a blog post! Today I'm sharing a card that I made for a few challenges in an attempt to keep my 2020 Christmas cardmaking on track:


Armed with the codeword of 'Frosty' from the current challenge over at Addicted to CAS, along with the snowflakes, trees and pink sky in the inspiration photo at Hand Stamped Sentiments, I set to work and this is what I came up with:


Here's the low-down on today's card:

This was another relatively quick and easy card to make: I used a 2 1/4" circle punch to make a mask and then sponged a combination of Melon Mambo and Blueberry Bushel inks on a Whisper White base to create my sky. I stamped a collection of trees from Rooted in Nature in Memento Black onto Whisper White and cut them out with my co-ordinating Nature's Roots Dies and popped them up on dimensionals in front of the sky. I added snow to the branches of my trees with a chalk marker then added a liberal application of glitter to the snowy branches and a few sequins to complete my frosty look:


How pretty is this? Given the crystalline appearance of all that glittery and frosty snow, I am also linking up with CASology for my take on the word 'Crystal'. I then stamped my sentiment (from the retired SU! stamp set 'Wonderland') in black onto vellum and wrapped this around the front of my card to finish. I do find it difficult to think about Christmas amongst all of the hearts and flowers that are prevalent at this time of year, so was grateful to the above challenges for some festive inspiration!

Here is the visual summary of the key products used on today's project for you to pin for easy reference:


You can see all of my 'How To' summaries on my 'How To - Tips and Techniques' Pinterest board in case you've missed any. 

Enjoy your day; I am without electricity today, which since it was planned is no bad thing; I've enough laptop battery to write this post and access to a wifi hotspot, and no means to do any washing, ironing, cooking or vacuuming  - an afternoon of crafting it is then!! I'll be back tomorrow with another project. Until then, happy stampin'!


Stampin' Up! Supplies Used:

Table built using Product Table Builder by The Crafty Owl - Independent Stampin' Up! Demonstrator.

Pumpkin Thankful Seasonal Wreath for AYSI 213

by Joanne James8. November 2019 12:00

Today I'm sharing my design team card for our new challenge over at As You See It where it's time for my favourite, a sketch challenge:

       RRCB 123

 I considered a number of options before settling on using this week's muted palette over at Color Throwdown to create an autumnal thank you card - take a look:


The sketch gave me the opportunity to do something that I've been wanting to try for a while with my Seasonal Wreath embossing folder. I'm also linking up with the Retro Rubber Challenge since they currently have an 'anything goes' theme. I am making a concerted effort to use up more of my retired papers and give some old favourite stamp sets some love so their theme this week is perfect: my card uses a piece of left over retired DSP and a bunch of products that are all more than a year old - read on to see just how old! Here's the low-down on today's card:

A Blended Embossed Wreath - The Seasonal Wreath is in my 'top 5' of favourite embossing folders, especially for Christmas cards. I've had mine since it was launched in 2018 and I do feel it's one of those annual catalogue 'unsung heroes' - lost in the pages at the back of the book, buried amongst the other patterns, but it's great for quick cards and works for all seasons depending on how you decorate/embellish it. I usually use it as a straight forward emboss, but I wondered what it would look like if I coloured it. I decided to try Blends in the first instance and I actually quite like the effect. It isn't as easy to see the dimension from a distance, but even in just three colours I think it gives it a new look.  

Thanks and Appreciation - The sentiment on my card comes from probably my most favourite fall stamp set ever: Painted Harvest. I've had this stamp set since it's launch in 2017 and I can't ever imagine parting with it. Such wonderful thankful sentiments and sunflower stamps that are pretty much foolproof to use and look fabulous in a wide variety of colour combinations. The best thing about it is this set features in the current Stampin' Up! annual catalogue and is still available to purchase :-) The other stamp I've used on my card today is my orange pumpkin embellishment; this stamp is from one of my old sets, 'Pick A Pumpkin', also from 2017 but now retired. I held onto this set and the co-ordinating Patterned Pumpkin Thinlits as they contain some nice pumpkin shapes that work for both fall and Halloween-themed cards alike.

Other 'Oldie but Goodies' - Other items that I've used on today's card that I've had for longer than I can remember are the circle punches I used to layer my sentiment and that piece of Paisley and Posies DSP, which is from Autumn-Winter 2016 - not that I'm a hoarder of patterned paper or anything ...!

I debated whether to add anything else to this card, but decided to leave it 'as is' and allow the wreath to take centre stage. I am enjoying experimenting a little this week and with this card it certainly felt good to use up some bits and pieces, albeit just a few - not sure I made enough of a dent to justify a shopping spree!

Here is the visual summary of the key products used on today's project for you to pin for easy reference:


You can see all of my 'How To' summaries on my 'How To - Tips and Techniques' Pinterest board in case you've missed any. 

Do check out the cards by the other members of the As you See It design team - we have all interpreted the sketch differently so there is a ton of creative inspiration!

Enjoy your day; I have a date with the ironing basket before heading out on the swim run this evening. What are your plans for the weekend? We are having a split one in the James household: the girls are at home looking forward to a weekend full of hockey, GCSE coursework and crafting, whilst the boys are on the school rugby tour to York via Nottingham. Hopefully the pitches won't be too waterlogged to play - I am looking forward to unpacking the kit bags on Sunday already!!

I'll be back tomorrow with another project. Until then, happy stampin'!


Stampin' Up! Supplies Used:

Table built using Product Table Builder by The Crafty Owl - Independent Stampin' Up! Demonstrator.

Wedding Invites Made Easy - All It Takes Is A Little Planning!

by Joanne James19. May 2018 18:00


Good evening everyone! Well, today has been a special day here in the UK - we celebrated the royal wedding of HRH Prince Harry and Meghan Markle. Whilst I'm not a devoted Royal watcher, I do think the Monarchy has an important role to play and one thing's for sure: I love a wedding, royal or otherwise! I enjoyed watching the wedding from my office as I was crafting this morning and ooh'ed and ahh'ed at the flowers, the dresses and those adorable and so well-behaved bridesmaids and page boys. Such a glorious day for it too and the bride was truly stunning.

Since weddings are the order of the day, I thought it would make a great topic for today's blog post too so I'm sharing with you the invites I designed recently for a bride who was keen to create her own stationery for the big day.

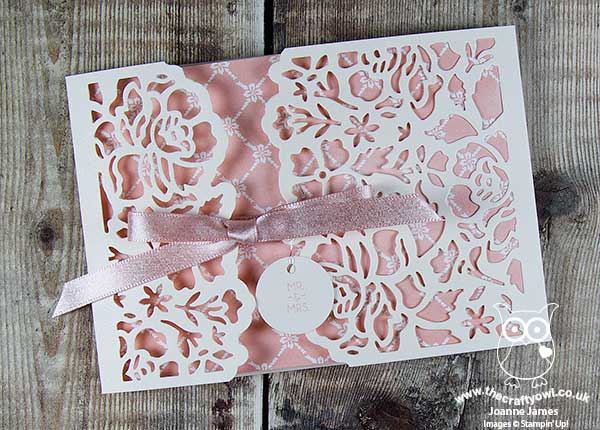
Making your own wedding stationery is a great way to create something individual and personal to you - take a look at the design we agreed upon:
 

The key things to remember when designing your own wedding stationery are as follows:

Make It Your Own - When you make your own wedding stationery, you are able to create something unique and personal to you in a way that off-the-shelf invitations will never be able to deliver. You can choose colours that co-ordinate with your scheme for the day and flowers or emblems that tie in with your chosen theme. For this wedding, the bride was keen to incorporate pale pink, but otherwise had no fixed views on design. This is one of the things I love about being a Stampin' Up! demonstrator - I love to design cards and projects, so working to a bride-to-be's brief is always an exciting prospect. It's great for the bride too - often they are keen to make their own stationery but have never done this (or sometimes any papercrafting) before, so they are keen to work with someone who can take their ideas and make them into a workable, reproductable, design. 

Keep It Simple - The key to good wedding stationery design is to keep it simple. Sometimes you may only have to make 20 invitations, but sometimes it is 120! For any kind of mass production, it's important to have a design that can be easily reproduced many times, each time as good as the last, so keeping it simple is key. For this invitation, we used the Detailed Floral Thinlits to create a gatefold-style card, with a Powder Pink Fresh Florals Designer Series Paper insert that was adhered on one side. When opened, the invitation wording was then on the inside.

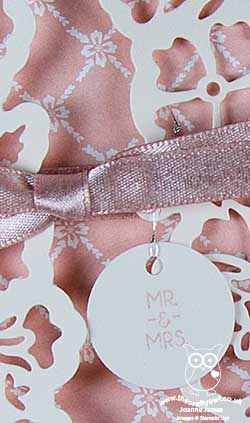
Finishing Touches - Whilst the design is simple and easy to reproduce, the finishing touches are all-important to add that of luxury: the outer gatefold was cut from Shimmery White cardstock, with the addition of Powder Pink Shimmer Ribbon to create the tied closure that co-ordinates with the DSP lining. We also added a small round punched tag, with the words 'Mr & Mrs' from the 'Beautiful Bouquet' set stamped on it in pink, using a length of silver thread.  

These invitations were really not too tricky at all to make, armed with the right tools and a few pairs of hands. The most important thing to consider when making your own wedding stationery is to plan ahead - don't underestimate the time it takes to mass produce invitations and other stationery items and be sure to allow enough time to actually put it all together. This is the perfect activity to involve friends and bridesmaids in - after all, many hands make light work!

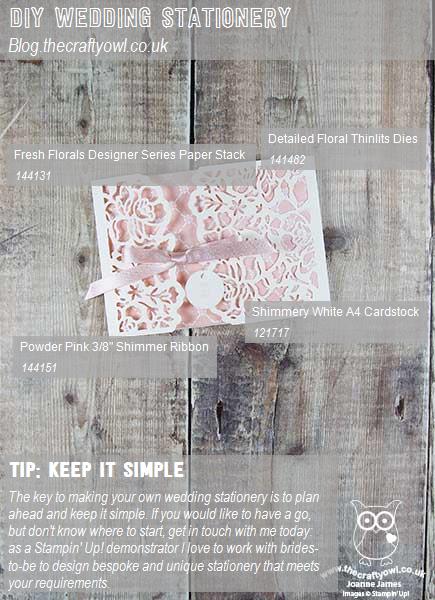
Here is the visual summary of the key products used on today's project for you to pin for easy reference:
 

You can see all of my 'How To' summaries on my 'How To - Tips and Techniques' Pinterest board in case you've missed any. 

If you are reading this and thinking you would like some help in designing your own wedding invitations, please don't hesitate to get in touch - I'd love to discuss your requirements and help you create the unique, bespoke stationery of your dreams.

Enjoy your day and I'll be back tomorrow with another project. Until then, happy stampin'!


Stampin' Up! Supplies Used:


Table built using Product Table Builder by The Crafty Owl - Independent Stampin' Up! Demonstrator.

Scrapbooking

Stampin' Up! has introduced a new range of 12x12" scrapbooking product and kit - the full range is now available to purchase online. To download a copy of the new digital Scrapbooking Catalogue click here.

Mini Catalogue

BROWSE THE CATALOGUE

'Tis The Season - the new Stampin' Up! Mini Catalogue is here! For more details and to download your copy click here

Shop Online

Access my online shop 24 x 7, 365 days of the year:

Current September hostess code:

JQEHTZGK

Shop Online

2024-25 Annual Catalogue

BROWSE THE CATALOGUE

Click on the image to download your copy of the 2024-25 annual catalogue. For a full list of current SU! supplies, go to my online store. If you would like any help or advice, please drop me a line at joanne@thecraftyowl.co.uk or give me a call on 07773 421446 - I'd be happy to help.

Join My Team

It's always a great time to join Stampin’ Up! New team members can get £130 worth of products for only £99 + free business supplies + free shipping + all the fun being a part of Stampin’ Up! Stampin' Up! has something for everyone: join my growing team and benefit from my support to enjoy Stampin' Up! however you choose.

If you're interested, call me for a chat to understand how I can help you realise your goals. Alternatively, if you have already decided to sign up and you just can't wait, please click here for the link to the online form where you can sign up and order your starter kit right away! 

Latest Kits!

Stampin Cut and Emboss

The Christmas Ornaments Kit and Card Keeper Kit are the latest kits that will be arriving in the online store later this month - get yours here!

New Online Exclusives

There are new products available exclusively in the online store from 3 July - check them out here.

About Me

Hi I'm Joanne and live in Northampton and when I'm not looking after my husband and two beautiful children, am an avid crafter with a passion for all things Stampin' Up!

I must confess that I have never been a big rubber stamper - until I discovered Stampin' Up! that is. I love the fact that I can get such great results with co-ordinating stamps, inks, papers and punches - the possibilities are endless! Join me on my stamping journey as I share the things I love and be inspired to create amazing things yourself!

Follow Me

Monthly Newsletter

Box Builder

Click the button above to use Box Buster to create your custom box design using the Envelope Punch Board!

Kits Collection Now Available!

Stampin Cut and Emboss

The new Kits Collection from Stampin' Up! is now available!

Click here to see the current kits available and order yours online today.

I Design For


Stampin' Up Stuff

This is my personal blog and is not endorsed by Stampin’ Up! I hope you find it a plentiful source of ideas and personal inspiration but please don't copy my designs for contest submission or use for classes, publication or sale without express permission.