Foamy Waves of Inspiration AYSI 273

by Joanne James22. April 2022 12:00

Today I'm sharing my design team card for our new challenge over at As you See It where it's time for a shades of blue colour challenge chosen by the lovely LeAnne:


I have been busy preparing for my upcoming 'Waves of The Ocean' card class and this trio of blues is just perfect for waves, so I thought I'd share a variation of a card that I'll be making with my ladies next week, including a fun technique - take a look at my card:


Here's the low-down on today's card:

Waves of Inspiration - This fabulous tidal wave is the real scene-stealer in the 'Waves of Inspiration' stamp set and can make a card all by itself (more on that later!) For this card, I used my Stamparatus to ink the whole wave in Balmy Blue, then I inked a second time, adding Pacific Point and Night of Navy to select areas of the stamp using a sponge dauber, to give me the variegated colour. The Stamparatus is most definitely your friend when using this stamp - it allows you to align the image and add layers of colour with ease. 

Foamy Waves - I decided I wanted to add some dimension and texture to my wave to give it a truly foamy feel; you can see it on the card above but I thought you would appreciate a closer look below:


In real life this texture looks so good! 

Want To Know More? - Creating the textured foam really is easier than it perhaps looks: all you need is some liquid glue, white embossing powder and a heat gun to make the magic happen. Here's a link to a short video I made some years ago where I used the same technique to create puffy clouds and snow that demonstrates it better than I can explain it:

In addition to the basic technique, to add a little extra sparkle to today's card I went back over some of the raised areas with my liquid glue and added some fine loose glitter, but you could forgo this step if glitter isn't your thing. 

In designing my classes I always try to use all of the stamps in a set, but also to introduce new ideas or ways of using stamps that my ladies perhaps haven't thought of or that I haven't seen used elsewhere in the creative blogosphere. I hope my ladies like this one!

Here is the visual summary of the key products used on today's project for you to pin for easy reference:


You can see all of my 'How To' summaries on my 'How To - Tips and Techniques' Pinterest board in case you've missed any. 

Here's a summary of our challenge rules:

  • Create any card, scrapbooking page, 3D project or packaging project that fits the challenge.
  • Please include the challenge graphic and link back to the challenge in your blog post. Turn off word verification so we can leave you lots of lovely comments. Make sure you link the post not the whole blog to the Linky. Use #AYSIXXX when uploading to a public gallery.
  • If you’re unsure about ‘the rules’, check the details under the Challenge Guidelines tab on the As You See It Challenge homepage.
  • In a colour challenge, black or other neutral can be used in outlines and sentiments but no other colours should be included. Stampin’ Up colours are used for reference but colours that are a close match are welcome.
We look forward to seeing your creations in the AYSI gallery.

Enjoy your day; we are taking it easy following a very late night in London yesterday. It was so worth it though - the ALW production of 'Cinderella' was AMAZING!  I'll be back tomorrow with another project and I have several more 'Waves of Inspiration' cards to share too, so stay tuned. Until then, happy stampin'!


Stampin' Up! Supplies Used:

Table built using Product Table Builder by The Crafty Owl - Independent Stampin' Up! Demonstrator.

Relax In The Moment

by Joanne James16. March 2022 11:30

Today I'm sharing a card that I made using the current sketch over at TGIF Challenges:

Today's card features the 'In The Moment' stamp set and is also a sneak peek of things to come for the ladies attending my class next week that centres around this set. So many creative possibilities with this one in addition to straightforward colouring and this card showcases just one of them - take a look:


Here's the low-down on today's card:

I stretched the sketch as I needed my panel to be horizontal rather than vertical, to accommodate my stamped image and tag element and stamped my image onto a scalloped rectangle. I added a strip of Hand-Penned designer series paper to the left hand side, and having stamped and coloured my image using Stampin' Blends, I stamped the image a second time onto a piece of Hand-Penned paper and fussy cut both the blanket and pillows and paper-pieced them onto my coloured image to bring in some extra pattern. You can see the detail more closely on the image below:


I think this is quite a fun way to add extra interest to a coloured image. Some co-ordinating twine and a sentiment on a coloured tag completes my card.

I used one of the 2020-22 In Colors, Misty Moonlight, for the base of my card today and this is a good time to remind you that Misty Moonlight, along with the other 2020-22 In Colors Cinnamon Cider, Just Jade, Bumblebee and Magenta Madness, will all be retiring soon when the current annual catalogue retires. The retiring lists for the Annual Catalogue will be announced next week on Wednesday 23rd March and that is usually the point at which in-color products sell out, so if you need to stock up on ink, cardstock, reinkers or accessories, now is the time to get your order in!

Here is the visual summary of the key products used on today's project for you to pin for easy reference:


You can see all of my 'How To' summaries on my 'How To - Tips and Techniques' Pinterest board in case you've missed any. 

I'm looking forward to making a version of this card along with a couple of others at my card class next week. As a reminder, all of my classes are delivered online via Zoomm these days so if you're reading this and think you would like to join us do get in touch - you would be most welcome!

Enjoy your day; following yesterday's sunshine today it's pouring with rain, grey and freezing cold - clearly spring has not quite yet sprung!! I'll be keeping warm in my craft room and will be back tomorrow with another project. Until then, happy stampin'!


Stampin' Up! Supplies Used:

Table built using Product Table Builder by The Crafty Owl - Independent Stampin' Up! Demonstrator.

Daffodil Daydream Meets Daffodil Afternoon For Sunday Stamps

by Joanne James20. January 2022 13:28

Today I'm sharing a card that is a 'sneak peek' of one of the cards that I am making with the lovely ladies signed up form my 'Daffodil Daydream' online card class that is taking place next week; I used the great sketch over at Sunday Stamps for my layout, so am linking up with their current challenge. Here's their sketch:

And here's the card that I made using it as my starting point:


Here's the low-down on today's card:

Daffodil Afternoon - I knew I wanted to use this particular design of Daffodil Afternoon designer series paper as my background. Bold designs on dark backgrounds can be intimidating, so I chose it as I wanted to give my class attendees ideas how to use them. Taking advantage of the split panel and choosing the lighter colours for both the card base and mat layer both serve to lighten this pattern. Lots to love about this paper pack, but most of all - it's FREE with a £45 purchase during the current Sale-A-Bration promotion! If you buy the Daffodil Daydream stamp set and die bundle, this makes a great free product choice to accompany it as it co-ordinates beautifully.  

Daffodil Dies - And so onto those Daffodil Dies! There are lots of die pieces in this set but they go together really easily when you know how. We will be going through that in class, so it was only right that I make up a couple of flower heads and use them to decorate my sentiment label. I cut them from colours that matched the daffodils on the paper, then added some ink with a blender brush to each piece to bring a little more depth to the colours. 

And A Beautiful Shape - Finally, I did start out with a circle shape as per the sketch, albeit I then layered it with my sentiment label and daffodil heads almost covering it up! You can see that circle. courtesy of a new die in the Beautiful Shapes set, a little closer on the photo below, where the debossed detail can just about be seen:


I know this die is one I'll be using lots; the added detail makes it a nice centrepiece. It's no stitched circle, granted, but it is a nice alternative!

I'm looking forward to making a version of this card in my 'Daffodil Daydream' online card class next week. I have lots of other classes and events planned in the coming months - if you would like more information, then do get in touch - I'd love you to join me!

Here is the visual summary of the key products used on today's project for you to pin for easy reference:


You can see all of my 'How To' summaries on my 'How To - Tips and Techniques' Pinterest board in case you've missed any. 

Enjoy your day; I have been granted a free pass on the school run this afternoon, so am fortunate to be getting a little extra crafting time (I might even make a head start on tomorrow's chores too!). I'll be back tomorrow with another project. Until then, happy stampin'!


Stampin' Up! Supplies Used:

Table built using Product Table Builder by The Crafty Owl - Independent Stampin' Up! Demonstrator.

Festive Foliage Red and White Split Panel Christmas Card Times Two

by Joanne James28. July 2021 17:00

Today I have a couple of festive Christmas cards that I made using my favourite 'Festive Foliage' background stamp from the annual catalogue - here's the first one:


I stamped one background stamp in Real Red on Basic White and another in Versamark onto Real Red cardstock and heat embossed it in white, then split the panels and swapped them so that there is one of each on each card for contrast. Here's the second one:


I added a sentiment from 'Poinsettia Petals' on a label cut with my Tasteful Labels Dies and backed each with some white glittered organdy ribbon from the upcoming mini catalogue:  


Here is the visual summary of the key products used on today's project for you to pin for easy reference:


You can see all of my 'How To' summaries on my 'How To - Tips and Techniques' Pinterest board in case you've missed any. 

I've been looking at creative ways to use background stamps for my upcoming online class in September that features both the 'Festive Foliage' and 'Daisy Garden' background stamps and will look at ways to use them for all-year round cards. A split panel card is a great way to create two cards quickly using the same background stamp, so today's post is a nice taster for my class ladies who are already signed up for this class. If you would like to join them, you can find full details for this and all my online classes on my Facebook Page here or just message me for more information.

I used the sketch over at Inspire.Create and the monochromatic red colour scheme from over at The Rainbow Challenge as further inspiration for my cards today and since I'm still doing Christmas I'm also linking up with Christmas Craft Creations and their 'anything goes' theme.


The weather here has alternated today between brilliant sunshine and torrential downpours and apart from giving up on using the washing line completely, I have successfully managed to get a whole bunch of errands run whilst dodging the rain (mostly!) Since we are on the summer holidays, the children are taking turns to help out with cooking the evening meal. One is more enthusiastic than the other (I wonder if you can guess which one!) Needless to say, if I survive the flour tornado that is currently my kitchen, I will be eating Turkish-style flatbread pizzas for dinner this evening! Enjoy the rest of your day and I'll be back tomorrow with another project. Until then, happy stampin'!


Stampin' Up! Supplies Used:

Table built using Product Table Builder by The Crafty Owl - Independent Stampin' Up! Demonstrator.

Tidings And Trimmings Tidings of Christmas Card Duo

by Joanne James20. July 2021 13:00

This is my second post today! Technically it is in lieu of yesterday's post, but having held this month's online class yesterday morning and spent some time with the James Juniors in the afternoon now that they are on summer vacation, I haven't got around to typing up until today. I am here now though and I'm sharing a couple of cards using the current sketch over at Just Add Ink:

I haven't found the time to play along with these ladies for a while (waves enthusiastically at the JAI team!) and this week's sketch was too good to pass up! It is a perfect sketch to showcase designer series paper so I grabbed one of the packs that are currently 15% off in the DSP Sale this month and with thoughts of Christmas in mind I made a couple of cards. Here's the first one:


Both of today's cards feature the Tidings of Christmas papers, and two different sentiments from the co-ordinating tidings and Trimmings stamp set. This is a great sketch that would work for simple, flat cards, but I decided to step mine up a little by adding in some of the gorgeous co-ordinating Evening Evergreen 3/8" Chevron Weave Ribbon and creating some statement bows. On my first card I went for an over-the-top triple looped bow:


Whilst I do think is rather fabulous, it isn't ever so post-friendly. As such, I went a little more conservative on my second card with a flat bow. Here's my card, showcasing the gorgeous deep green patterned paper:


And here's a close-up of that flatter bow, which is a little more mail friendly:


Excuse the light lines on the photograph - it has been so hot and sunny here this past week that it is playing havoc with photo-taking in my south-facing office. I'm not complaining about the weather, but am definitely having to be a little more organised about when I photograph to avoid these harsh lines! Here's a picture of both cards together:


Which one do you prefer? I love the patterns in these papers so much - I will definitely be snagging another pack whilst they are discounted before the end of this month. 

The Tidings of Christmas Suite features in the annual catalogue, so if you want to get started in earnest on your Christmas crafting, these products are available now - no need to wait for the launch of the new autumn-winter catalogue on 3rd August! Furthermore, I will be featuring the Tidings and Trimmings Bundle and the Tidings of Christmas DSP in my August Online Card Class, scheduled for Monday 16th August. If you would like more information or to join me for this class, please do get in touch - I would love you to join me! 

Here is the visual summary of the key products used on today's project for you to pin for easy reference:


You can see all of my 'How To' summaries on my 'How To - Tips and Techniques' Pinterest board in case you've missed any. 

Enjoy your day and I'll be back tomorrow with another project. Until then, happy stampin'!


Stampin' Up! Supplies Used:

Table built using Product Table Builder by The Crafty Owl - Independent Stampin' Up! Demonstrator.

Peaceful Poppies in Red, White and Grey CTD578

by Joanne James3. February 2020 19:00

I'm here with my second card of the day - and on a class day too, go me! And it's only Monday - let's hope that this is a sign of a productive week! This card is one of the ones that we made in my technique class this morning featuring the Painted Poppies bundle and I used this week's colours over The Color Throwdown as my inspiration:

This is the card I came up with: 


Here's the low-down on today's card:

Painted Poppies and Peaceful Moments - All of our class cards featured the Peaceful Poppies stamps and co-ordinating Painted Labels Dies. Here the poppies were simply coloured using Real Red ink and the watercolour 'splodge' stamp in the set, with a little detailing added with a marker and then diecut. The leaves were stamped in black and some tiny splodges added in Smoky Slate before fussy cutting by hand. We paired it with a sentiment of our choice from the 'Peaceful Moments' set - I chose this one, but everyone in my class used the 'With Deepest Sympathy as they thought this card wold work well as a sympathy card.  

Sweetly Stitched - I used the largest of the Stitched So Sweetly rectangular dies as the mat on my card; these are on page 20 of the Spring-Summer mini catalogue and worth a look if you've passed over them as they are easy to miss, especially if the co-ordinating stamp set is one that doesn't appeal. You're welcome ;-) 

A Pattern Party - I sponged some darker Basic Grey onto my scalloped rectangle piece using one of the Pattern Party masks, graduating the colour outwards from the corner, to add interest and tie in with my flowers. I added some clear sequins and some black pearls (regular ones coloured with a black marker) to the centre of my flowers to finish.

Here is the visual summary of the key products used on today's project for you to pin for easy reference:


You can see all of my 'How To' summaries on my 'How To - Tips and Techniques' Pinterest board in case you've missed any. 

This was the middle card from my class today and it's fair to say the ladies loved it. I'll share the others another time; in the meantime, if you live in or around Northampton and would like to attend a class, do get in touch - we would love you to join us! The next one features the 'Peaceful Moments' bundle and will be held on Monday 9th March - the day after my residential weekend craft retreat!

Enjoy your evening; I have to go and start on my ironing pile now - I can't put it off any longer! I'll be back tomorrow with another project. Until then, happy stampin'!


Stampin' Up! Supplies Used:

Table built using Product Table Builder by The Crafty Owl - Independent Stampin' Up! Demonstrator.

Come Sail Away Bermuda Bay and Copper Brusho Lighthouse Card TGIFC226

by Joanne James28. August 2019 09:00

Today I'm sharing a card for the current challenge over at TGIF Challenges where they challenging us to use a technique that I don't often feature on my cards:

I did experiment with splatters for my recent technique class featuring the Come Sail Away suite so having been using splatters a little more of late with this set in particular. You can see one of my previous cards here; this is another of the samples I prepared to demonstrate how splattering can be used to create unigue backgrounds: 


On this card I used some Bermuda Bay reinker and blue Brusho on Shimmery White cardstock, covered with scrunched up cling film before leaving to dry and then removed the cling film. I then covered with some splatters of copper shimmer and I added a collage of stamped and diecut bits and pieces from the Come Sail Away suite and some unravelled copper trim to complete my card. I'm not sure this type of card will ever feel natural to me - watercoloured backgrounds and collage-style cards are not my forte, but it's fun to step outside of your comfort zone every once in a while to try something different.

Don't forget to set your alarms for 6pm UK time this evening for your last chance opportunity to order trimmer blades for the discontinued Stampin' Up! trimmer - full details in my previous post here.

We have been busy harvesting fruit and veg from our garden and spent yesterday baking more goodies to eat and for the freezer I hope you enjoy your day and I'll be back tomorrow with another project. Until then, happy stampin'!


Stampin' Up! Supplies Used:

Table built using Product Table Builder by The Crafty Owl - Independent Stampin' Up! Demonstrator.

Join Me For A Creative Escape With The Crafty Owl Luxury Weekend Crafting Retreat - Last Spots Remaining!

by Joanne James17. August 2019 09:00

It's school summer vacation here so my crafting time has been limited as I spend time with the James Juniors and I haven't managed to get into my craft room all week, despite receiving my Autumn-Winter preorder. This first glimpse of the new Autumn-Winter catalogue from Stampin' Up! (a demonstrator perk!) has me starting to think about the projects for my forthcoming luxury weekend craft retreat in October - it's never too early to start creating for Christmas!

I have lots of lovely ladies enrolled to attend and have just the last couple of spots remaining, so thought I would do a quick reminder in case any of you would like to join us for a weekend of crafting bliss:
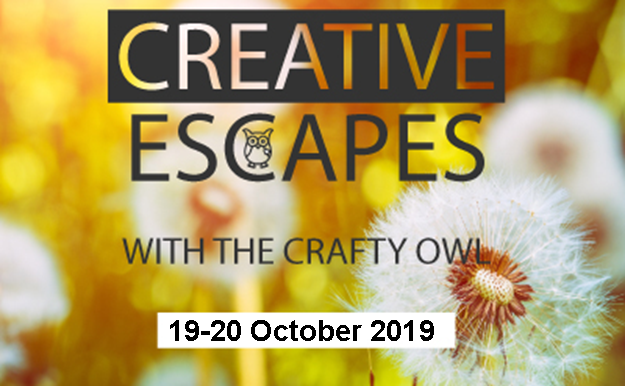
 

If getting away from everyone and everything and having some ME time appeals, then a luxury weekend of crafting and a Creative Escape with The Crafty Owl sounds just the thing for you.

Where is the retreat held?

The venue for the Craft Retreat is the award-winning Highgate House Hotel, conveniently located just off junction 1 of the A14 in Northamptonshire.

Set in beautiful grounds it is the perfect destination for a getaway; gorgeous surroundings, good food and your own stylish bedroom for the night.

Its central location in Creaton, Northamptonshire can be easily accessed via the M1 (junction 16/19) and the M6 – making it a perfect destination break for you and your friends from afar.

What is included?

The Creative Escape package includes an overnight stay and all food for the weekend, lunches, snacks, evening meal and breakfast together with unlimited tea and coffee. You have 2 full days of crafting with your own table for the whole weekend – no need to tidy away! Bliss!A goody bag of Stampin’ Up! crafting supplies is also part of the package and will be more than £100 in value. The supplies will enable you to complete the projects for the classes run throughout the weekend and you'll have lots left over to take home too!

The Classes

The classes offered during the weekend are optional. The weekend is yours, so you can choose to keep with class pace or do your own thing. There is no requirement to complete everything, you can do exactly what you want – chat, craft, chill … the choice is yours. Choose to craft at every possible moment, or take a break for a walk or a drink in the lounge – it’s all up to you.

How do I book?

Sounds like your kind of fun? Email to [email protected] and I will contact you to confirm your place and payment details. Your hotel room will need to be paid for to the hotel in full at the time of booking and this will secure your retreat place. The remaining balance will be paid to me directly thereafter. Rates for the weekend are as follows: Single occupancy (single room) is £330 per person or double occupancy (twin room) is £310 per person. Full terms and conditions are available on the Creative Escape Crafting Retreats page on my website.

The October Creative Escape will have a distinctly Christmas theme so why not come along and give yourself a head start on your creative makes for the festive season? 

If you have any further questions or queries, please do get in touch - I would love you to join me!


I'll be back tomorrow with my next creative project fr this week's challenge over at The Paper Players; until then, happy stampin'!


Come Sail Away Brusho Lighthouse Anchor Card

by Joanne James5. August 2019 21:00

I've just got time to squeeze in my entry for the current challenge over at Festive Friday where the challenge is to feature a lighthouse and/or rays on your card:

 #festivefridaychallenge, #FF0039, Lighthouse Day, Light Rays/Starburst

I did a technique card last week featuring the Come Sail Away suite so have been making lots of lighthouse cards in readiness for this - here's one of them:


I had been doing some experimenting with inked backgrounds and on this card used some blue Brusho on Shimmery White cardstock, covered with scrunched up cling film before leaving to dry and then removed the cling film. I then covered with a liberal spritz of champagne shimmer and I added a collage of stamped and diecut bits and pieces from the Come Sail Away suite to complete my card. No rays of light - I was trying to capture stormy seas behind my lighthouse. This is quite a different card for me - watercoloured backgrounds and collage-style cards are not my forte, but it was fun to create and this is the first time I've used Brusho and really liked the finished effect.

Here is the visual summary of the key products used on today's project for you to pin for easy reference:


You can see all of my 'How To' summaries on my 'How To - Tips and Techniques' Pinterest board in case you've missed any. 

I have another card similar to this one which I will hopefully share later this week in an alternative colourway.

This is my card for Tuesday so I hope you enjoy your day and I'll be back tomorrow with another project. Until then, happy stampin'!


Stampin' Up! Supplies Used:

Table built using Product Table Builder by The Crafty Owl - Independent Stampin' Up! Demonstrator.

Textured Beautiful Blizzard Christmas Card

by Joanne James6. December 2018 22:00

Well it's taken me a few days as I've had a couple of classes and am knee-deep in all that comes with the preparations for the festive season, but today I'm here and sharing the last of the three cards that I designed for a recent technique class using the Beautiful Blizzard bundle - take a look:


Here's the low-down on today's card:

A Swirly Snowflake Blizzard - This card has the simplest of stamped backgrounds. I used a variety of the swirls and snowflake stamps in the set in both blues to create a stamped swirly snowflake blizzard. This is one of those very forgiving, easy stamped projects, perfect for a beginner and would work on a single layer card too.

Shimmery White Textured Snowflakes - The real 'wow' on this card is very difficult to see on the above photo: I made a mask using the Blizzard Thinlits and added a layer of textured snowflakes using shimmery white embossing paste. This looks so sparkly in real life and adds real texture and interest to the card design. I finished with some diecut snowflakes and a simple heat embossed sentiment.

A Sweet Sentiment - The sentiment on the inside of my card is one that just makes me go all warm and fuzzy inside:

Isn't that just so sweet?!

Here is the visual summary of the key products used on today's project for you to pin for easy reference:


You can see all of my 'How To' summaries on my 'How To - Tips and Techniques' Pinterest board in case you've missed any. 

Enjoy your evening and I'll be back soon with another project. Until then, happy stampin'!


Stampin' Up! Supplies Used: 

Table built using Product Table Builder by The Crafty Owl - Independent Stampin' Up! Demonstrator.

Mini Catalogue

BROWSE THE CATALOGUE

The mini catalogue is now live! Read and download your copy here.

Shop Online

Access my online shop 24 x 7, 365 days of the year:

Current March hostess code:

S9F2XJJW

Shop Online

Join My Team

It's always a great time to join Stampin’ Up! New team members can get £130 worth of products for only £99 + free business supplies + free shipping + all the fun being a part of Stampin’ Up! Stampin' Up! has something for everyone: join my growing team and benefit from my support to enjoy Stampin' Up! however you choose.

If you're interested, call me for a chat to understand how I can help you realise your goals. Alternatively, if you have already decided to sign up and you just can't wait, please click here for the link to the online form where you can sign up and order your starter kit right away! 

Latest Kit!

Stampin Cut and Emboss

The Rock Legend Kit has all you need to make 8 cards with coordinating envelopes. Along with the new Panda Friends Kit, both are available from January 4th for just £14 each - get yours here!

2023-24 Annual Catalogue

BROWSE THE CATALOGUE

Click on the catalogue for a full list of current SU! supplies - if you would like to order any of the items featured, please drop me a line at [email protected] or give me a call on 07773 421446 - I'd be happy to help.

New Online Exclusives

There will be new products available exclusively in the online store from 5 March - check them out here.

About Me

Hi I'm Joanne and live in Northampton and when I'm not looking after my husband and two beautiful children, am an avid crafter with a passion for all things Stampin' Up!

I must confess that I have never been a big rubber stamper - until I discovered Stampin' Up! that is. I love the fact that I can get such great results with co-ordinating stamps, inks, papers and punches - the possibilities are endless! Join me on my stamping journey as I share the things I love and be inspired to create amazing things yourself!

Follow Me

Monthly Newsletter

Box Builder

Click the button above to use Box Buster to create your custom box design using the Envelope Punch Board!

Kits Collection Now Available!

Stampin Cut and Emboss

The new Kits Collection from Stampin' Up! is now available!

Click here to see the current kits available and order yours online today.

I Design For


Stampin' Up Stuff

This is my personal blog and is not endorsed by Stampin’ Up! I hope you find it a plentiful source of ideas and personal inspiration but please don't copy my designs for contest submission or use for classes, publication or sale without express permission.