It's Saturday and today I have a special post for you since I, along with the talented Kayla Macaulay, am a guest with the lovely ladies over on the Stampin' Creative Design Team Blog Hop:
.png)
You may have just arrived from the colourful Pip Todman over at Queen Pip Cards or alternatively this may be your first stop. Either way, welcome and be sure to continue to the next stop along the hop by clicking on the next name in the list below for more creative ideas. This month the theme is 'party central' and there are lots of ideas and inspiration for parties for many different occasions throughout the hop.
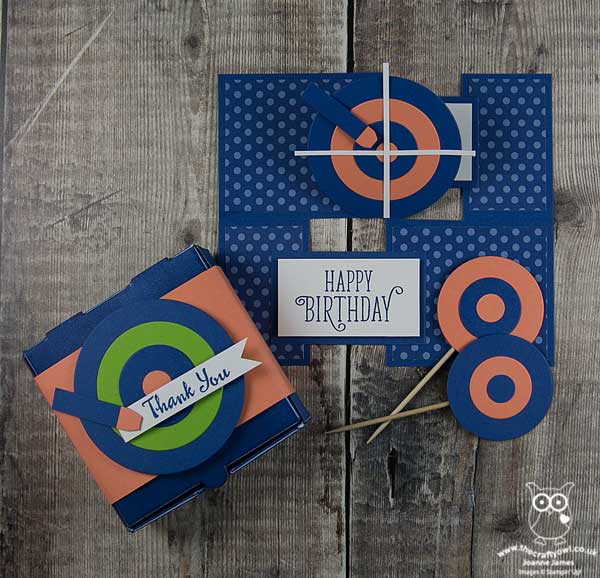
When I started thinking about what I was going to create today, I immediately jumped to my collection of new catalogue products wondering which new set to use. But in actual fact, I ended up using one of the most long-standing staple items in my crafting arsenal for the majority of my makes today: my Layering Circles Framelits. The next party that I need to plan will be that of the youngest of the James Juniors and whilst we've had lots of debate about what form it will take, one thing is for sure - no party that centres around 11 year old boys is complete without some form of Nerf battle these days, so I decided to get ahead and take the opportunity to start making with this in mind.
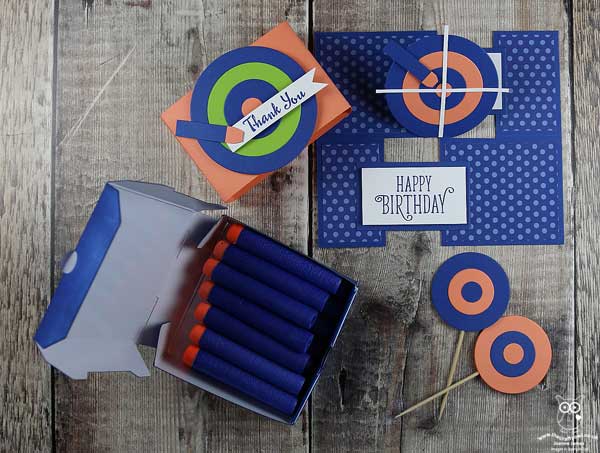
First up is a birthday card that I actually made for a friend of his who is celebrating his birthday today: I used the currently popular 'impossible card' fancy fold and along with some partial diecutting to create a Nerf target for the popped-up section. These cards are really not at all tricky to make, despite their name! You simply score across the horizontal and then make a single cut at the centre of one panel at right angles to this (I made mine at 3"), followed by two cuts wherever you like on the facing panel (mine are at (1 5/8" in from each edge) and then fold each half in opposite directions, leaving a gap front and back and creating the central pop-up. I kept the colour scheme really simple, using the new in-colours Blueberry Bushel and Grapefruit Grove, both of which are a perfect match for Nerf guns and foam bullets, and having layered my diecut target circles added a sight and a bullet popped up on dimensionals for a fun touch. Some in-colour Blueberry Bushel patterned paper and a sentiment courtesy of the Perennial Birthday stamp set finish my card.
This 'impossible card' fold is a fun way to add dimension and interest to a card whilst still enabling it to be folded flat for mailing. My card is an irregular size, since the size of the base was determined by the diameter of the outer target circle. The card measures 5 1/4" x 6" when flat, so requires a bespoke envelope which I created using my trusty Envelope Punch Board with the help of my Envelope Expert tool.

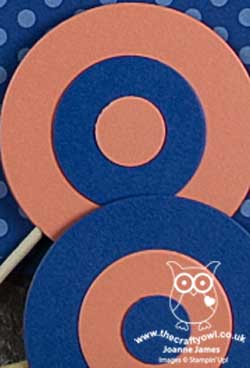
The other targets you can see in the forefront of my card are some cake toppers I made. I am currently in the middle of a kitchen renovation and have only a microwave and the BBQ for cooking, so there was no opportunity to bake any cakes to put them in but I'm sure you get the idea!
I also created a fun party favour using Stampin' Up!'s Mini Pizza Boxes. I'm so glad these made it into the annual catalogue, they really are so useful for dressing up for all kinds of things. I brayed my box with Bluberry Bushel ink then created a belly band with another target on top and a thank you tag. Can you guess what is inside?
Yes, more foam Nerf bullets! The Mini Pizza Boxes are the perfect size to house 14 bullets and since the children seem to use hundreds of these when they are playing in their Nerf battles, I figured a few more each wouldn't go amiss!
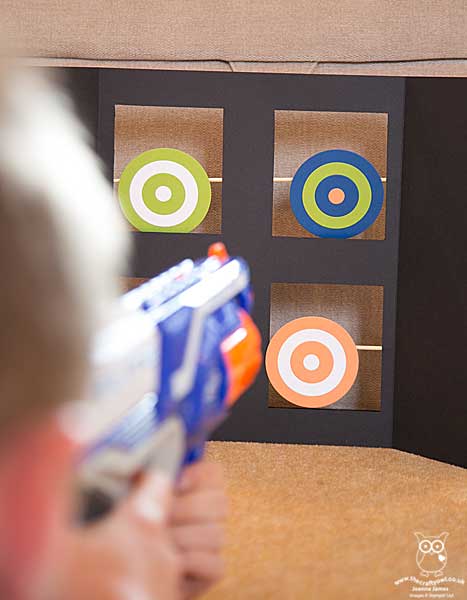
Lastly for today I also created a set of freestanding spinning Nerf targets, based on this one I saw over at Frugal Fun 4 Boys. If you click on the link you can follow the instructions to make your own - I simply used a collection of layered circles, adding in some Whisper White and Granny Apple Green for more colour variety. This is great for indoor or outdoor use, so I'm sure will be added to the toybox supplies. This is my tester in action, declaring it to be too easy - I think he needs to move further away so that it's more of a challenge!
I hope you liked my collection of fun party ideas, that in fact require very little in the way of supplies to make. I have another Nerf-themed birthday card to share, which is the one I have made for Ben's birthday, but will save that for another time!
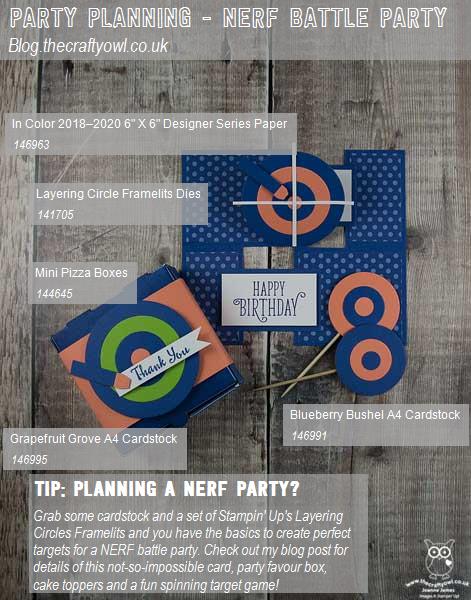
Here is the visual summary of the key products used on today's project for you to pin for easy reference:
You can see all of my Product and 'How To' summaries on my 'How To - Tips and Techniques' Pinterest board in case you've missed any.
For now, why not continue the blog hop for more creative party ideas? Do check out them rest of the Stampin’ Creative team to see what celebrations they have been preparing for. To carry on with the hop click on the names in the list below:
Enjoy the rest of your day. Mine will be a busy one, with a Family Fun Day, birthday party and sleepover (thankfully not at my house!) and the final performance of The Sound of Music for my eldest singing superstar - can't wait. I'll be back tomorrow with this week's post over at The Paper Players where the celebrations continue as we are celebrating our 400th birthday! We have a very special challenge for you as a result with lots of prizes to give away too so do pop back then - you are not going to want to miss it. Until then, happy stampin'!
Stampin' Up! Supplies Used: