Lovely You Stitched Heart Triangle Panel Card

by Joanne James10. July 2020 20:47

Today I'm sharing a card that started out with the colour palette over at CAS Colours and Sketches and Lee Ann's sketch this week over at Freshly Made Sketches:


I ended up creating a sheet of my own DSP too so will also be linking up over at the new-to-me challenge The Spot too. Here's my card: 

Here's the low-down on today's card:

Lovely You DSP - I was immediately drawn to the CAS Colours and Sketches colour palette this week as I'm a big fan of Brights and whilst Pacific Point was one of the three ink pads that I first purchased when I was new to Stampin' Up! so many years ago, it's a colour I don't often use these days. I would never have chosen this trio of colours to work with, but I absolutely love the vibrant, bright combination and will definitely use it again. I held an online class featuring the 'Lovely you' stamp set earlier this week and as is my 'new normal' since my move to online classes, I always host a number of additional demonstration sessions in between classes for anyone to attend that use the same set and highlight other ways it can be used. In our class we created a DSP using one colour per stamp then created a one sheet wonder set of cards, by cutting our DSP in a certain way to give various panels. I wanted to show that these stamps would also be great as multi-coloured images using Stampin' Write markers to colour each of the parts of the flowers on each stamp with a different colour. I shared a sample I made earlier in the week using this technique for a single flower (if you missed it you can see that card that I posted earlier this week here) and knew that these more intense colours would work to great effect and work for the same idea of creating your own piece of patterned paper. Here's my finished paper before I cut it into sections:


Stampin' Write Markers Two Ways - In addition to inking the individual flower elements, I also used my Stampin' Write markers to ink my sentiment easily using two different colours, highlighting the word 'heart' in Gorgeous Grape - this is so much easier to do with a marker than with ink pads.  

A Stitched Heart - I decided this sentiment would work perfectly in a heart shape, so created an outlined heart using my Stitched Be Mine dies. I need to shorten my sentiment to fit it into my heart, so inked it twice in stages and stamped it in such a way that it would both fit into the heart shape and accommodate a fussy cut flower for decoration - you can see the detail below:


Finally I added a couple of blue sequins and a white twine bow to complete the decoration on my card. 

I actually made two cards, since once that rectangle was cut into triangles I had another 2 opposing triangles and didn't want to let them go to waste so made a second card too with an identical centrepiece:


Here are both cards together:


I finished these cards and love them - they are so me!! Here is the visual summary of the key products used on today's project for you to pin for easy reference:


You can see all of my 'How To' summaries on my 'How To - Tips and Techniques' Pinterest board in case you've missed any. 

Lastly, I've been experimenting with some video lately and I did make a little time lapse video (no audio - that proved a little too challenging for my technical skills!) that shows how I put my card together:

Do you find this kind of thing useful? I'd be really interested to know whether this is the kind of thing you would like to see more of. 

Enjoy your day - the sun is shining here - finally! - so I may do some gardening, combined with a little cooking later on. I'll be back tomorrow with another project. Until then, happy stampin'!


Stampin' Up! Supplies Used:

Table built using Product Table Builder by The Crafty Owl - Independent Stampin' Up! Demonstrator.

#SimpleStamping In-Colour Accented Blooms Cards

by Joanne James12. April 2019 08:00

Today I'm sharing a collection of cards that have been designed for this month's timely #SimpleStamping challenge which is to feature the 2017-19 soon-to-be-retiring in-colours, on a project using nothing more than stamps, ink and paper. I decided to use the Accented Blooms stamp set that I used on this card yesterday, with a clean and simple card that really lets these in-colours shine. 

So first of all, let's take a look at the five in-colours that we've all loved for the last two years and will soon be leaving us:


Clockwise from the left: Fresh Fig, Powder Pink, Berry Burst, Lemon-Lime Twist and Tranquil Tide in the centre. 

Do you have a favourite? Whilst I find these colours a challenge to use together on a project, you will find some great examples of projects that feature these colours in a variety of combinations elsewhere on my blog. I think if pushed I would rate Berry Burst as my favourite, but it's a close call. Each of these colours has something to offer. Here's a close-up of my favourite one:


For today's #SimpleStamping project I simply stamped the main floral image from the 'Accented Blooms' stamp set in my chosen in-colour onto a square of Whisper White cardstock measuring 9cm x 9cm and adhered it to a card base in the same in-colour, then stamped the sentiment in the same colour on a separate piece of Whisper White and cut it out by hand; you could use the Tailored Tag Punch for this for speed, but the shape is great for #SimpleStamping projects as it can be easily fussy-cut by hand too. I then popped this onto a couple of foam dimensionals and added to my project. Voila! It's that easy - I created on in each of the in-colours. Here's a peek:


I haven't yet had time to put the a quick and easy #SimpleStamping videos that demonstrate how easy this card is to put together - when I do you will see all five of these cards. Onstage has got in the way of video production this week so I'll update this post at some point early next week with the necessary demonstration!

The Accented Blooms stamp set is another one that is great for colouring but also works well with a monochromatic design too. For these cards all you need is the stamp set, one or more of the in-colours and the corresponding colour of cardstock, along with a pair of scissors and adhesive, and you are good to go! The Stamparatus will enable you to get a good solid image of the sentiment in particular, but this is by no means an essential tool to create this card.

Here is the visual summary of the key products used on today's project for you to pin for easy reference:


You can see all of my 'How To' summaries on my 'How To - Tips and Techniques' Pinterest board in case you've missed any. 

If you're new to these colours you only have a few more days to guarantee their availability; when the retiring list goes live on Monday 15th April (at 8pm) these will undoubtedly be one of the first things to sell-out - and once they're gone, they're gone! 

If you are a crafter who has been enjoying these colours and can't bare to see them go, make sure you stock up on re-inkers, cardstocks and accessories now to keep you going in the months to come! You can purchase everything you need from my online store via the links below:

Table built using Product Table Builder by The Crafty Owl - Independent Stampin' Up! Demonstrator.

Enjoy your day. I'm travelling to Onstage today with my teamies and looking forward to a CentreStage leadership reception this evening so if you want to see all things new be sure to follow my Facebook page where I will do my best to share the fun and excitement 'real time'. I am organised for once and I will be back here tomorrow with another project, so do pop back for more creative inspirationfacebook. Until then, happy stampin'!


Stampin' Up! Supplies Used:

Table built using Product Table Builder by The Crafty Owl - Independent Stampin' Up! Demonstrator.

Party Panda Spinner Card For Fab Friday

by Joanne James17. January 2018 23:00


Another late one I'm afraid as I've been tied (figuratively, not literally!) to my desk all day pushing paperwork. Just time to share a card for the current challenge over at Fab Friday where they have a super-bright colour combo to work with:

I love brights so was really keen to play along with one of my favourite challenges. I figured the best way to use this trio of bold colours was to ensure that I also incorporated plenty of white. I decided to get out my Party Pandas Sale-A-Bration stamp set again and do something I haven't done in a while - take a look:


Yes, it's a fun spinner card - isn't that party panda just the cutest?! I made this card over a week ago but delayed sharing it with you as I made a video tutorial to go with it. I still need to finish editing so will post it here once complete but in the meantime I couldn't not share this cutie! Here's the low-down on today's card:

Get Spinning - Everyone loves the fun element created by adding a spinner - young and old alike! I've made my Sale-A-Bration Party Panda the spinning star of today's card, but this technique works with lots of other stamps too. The panda looks like he was meant to cartwheel though I think! To make the panda spin, you simply attach him to two penny coins (or a dime, or a washer - you get the idea) separated by a dimensional, with the pennies sitting either side of the track. If I've lost you already, come back when I upload the video - all will become clear! 

Creating The Track - I used the Classic Label Punch to create the track for my spinning panda, by repeatedly punching along my cardfront in order to get an extended gap. This is one of the easiest ways to create a spinner track. The key to getting a freely-spinning panda though is to use Stampin' Up!'s foam strips to adhere your front panel to your card base. This ensures the gap is deep enough for the panda to spin freely.

Let's Celebrate - I pulled my sentiment from another of my free Sale-A-Bration sets, Amazing You, and inked up the words in contrasting colours. Such a great sentiment that allows this card to work for all kinds of celebrations, not just birthdays. In fact, I am going to dedicate this one to one of the Fab Friday design team members, the awesome Brian King, who at the time of posting this challenge had announced the day before that he is also joining the design team over at CAS(E) this Sketch, another great challenge blog favourite of mine - way to go Brian! 

I love these bright colours, so perfect for this fun card. Do check out the design team cards over at Fab Friday and the gallery, where there are some amazing and varied entries that will provide great inspiration.

Here is the visual summary of the key products used on today's project for you to pin for easy reference:


You can see all of my 'How To' summaries on my 'How To - Tips and Techniques' Pinterest board in case you've missed any. 

I'll be back tomorrow with another project. Until then, happy stampin'!


Stampin' Up! Supplies Used:

Table built using Product Table Builder by The Crafty Owl - Independent Stampin' Up! Demonstrator.

Introducing The Stamparatus - The Best Stamp Positioning Tool EVER And How To Get Yours!

by Joanne James14. November 2017 15:20

Hello lovely readers! Apologies for an even longer blogging absence than usual - as many of you will know if you follow me on Facebook, I was at Stampin' Up!'s #Onstage2017 UK event at Solihull at the weekend, in readiness for the launch of the new Spring-Summer catalogue. Not only did I attend the event, I was one of the Onstage presenters and had the privilege of presenting one of the new product collections to the 480 demonstrators present. This was a great gig for me, as I love presenting and was so excited to share the things I had been working on secretly in the weeks leading up to the event. I will of course be sharing them with you too in due course, however today I have some news that is SO exciting it just can't wait!

It’s big news when something breaks the mould and changes everything. The Stamparatus will change the way you stamp, and before long, you’ll wonder how you ever crafted without it! Why do YOU need one? You’ll fall in love with stamping all over again when you learn everything you can do with it!

  • Make multiples with ease
  • Consistently stamp crisp, clean images
  • If you want a darker impression, apply more ink and restamp—no need to start over
  • Make fewer mistakes, saving time and money
  • Easily create 2-step, 3-step, and 4-step stamped images using reversible plates
  • Develop new and specialised stamping techniques with adjustable stamping plates and precision placement

I am very excited about this product: the idea of a stamping positioning tool was conceptualised, designed and produced in collaboration with a select group of Stampin' Up! demonstrators, of whom I was one. Demonstrator input has been critical to the final design. This is a product that has been designed by demonstrators, for stampers - and it shows.  Here are the crucial details you need to know:

  • Compatible with Stampin’ Up!’s red rubber and photopolymer stamps
  • Includs a foam mat to use with photopolymer stamps
  • Rulers and gridlines for quick measuring
  • 2 open sides so you can stamp on larger paper
  • 2 reversible plates: a total of 4 surfaces to work with
  • 2 magnets to hold the paper in place
  • Magnet storage areas on the reverse
  • Retail Price: £44.00/59,00 €

 Here are some images of the tool that show these features in more detail:


And this animation shows just how easy it is to use:


Want the scoop on this life-changing tool? check out the 5 things you need to know in this informative video by Carrie at the Stampin' Up! Home Office:


With the launch of this tool, Stampin' Up!  are trying something different too: we are testing a new reservation system. And it acts like a true pre-order. You reserve your spot and we guarantee shipment as soon as the product arrives in our warehouse. Everyone will place reservations and receive their product at the same time. This system will allow us to get the product to market as soon as possible while avoiding backorders and efficiently managing inventory.

The global launch will feature three reservation windows. For each window, please note the following:

  • Reservation quantities are while supplies last only.
  • Limit is 1 tool per customer per reservation window, however you may participate in multiple reservation windows.
  • The 3 reservation windows and approximate delivery dates are as below:

16–30 November 2017

   -   Approx. 1 February 2018

5–30 December 2017

   -  Approx. 19 March 2018

15–30 January 2018

   -  Approx. 15 April 2018

So how can you get your hands on one?

You can PRE-ORDER your Stamparatus in any of the reservation windows over the next few months. The first window will open on Thursday 16th November at 9PM GMT - that's two days from now. To reserve yours then, simply visit my Online Store and log in. If you don't already have an account, set yourself one up. Make sure you see my name as your demonstrator in the top right corner of the screen.


Once you are logged in, visit the STAMPARATUS page and click on RESERVE. You can see more instructions below if you decide to cancel or try to order outside of a reservation window. All the details regarding when you'll receive your Stamparatus and more detail on the points above can be found in the Customer Q&A document that you can read by clicking here

What Happens When Your Stamparatus Arrives?

Your Stamparatus will be added to a shopping basket for you, and you will sent an email asking you to complete the transaction and pay. You can add other Stampin' Up! goodies to your basket at that time, so you only pay one lot of P&P. If this is during either of the first two delivery windows, you will be checking out during Sale-A-Bration, so it's worth adding a little something to your basket to take your order over £45 so that you will qualify for a free Sale-A-Bration item too! Also, be sure to add my current HOST CODE for that month if your order is less than £150 - you can always find this in the 'Shop Online' box on the right hand side of my blog. You'll then earn fabulous rewards direct from me - including a free 'Stampin' With The Stamparatus' class to ensure you get the most out of this amazing new tool.

A long post today but there's a lot of information to communicate. If you've any questions or queries, do get in touch with me prior to Thursday.

Back tomorrow hopefully with a creative post! Until then, happy stampin'!


The Very Hungry Caterpillar Birthday Card

by Joanne James26. May 2017 06:00

Happy Friday everyone! Today I'm sharing a fun card that I cased from one I saw on Pinterest by Belinda Neil a while ago but haven't got around to sharing - take a look:


You can see Belinda's original card here. I thought this was such a fun card, especially for those of you out there with children who have read Eric Carle's classic 'The Very Hungry Caterpillar' story book - probably, like me, many, many times!

This fun card is made using nothing more than inks, stamps and paper - specifically, the Balloon Builder stamp set. I made you a super simple, speedy video to show you how I created this card from start to finish:


Isn't that easy? Who would have thought that the Balloon Builder stamp set could be used to create something so fun? This is another one of those stamp sets that is retiring next week, so if you want to recreate this card, you'll need to click on the link below and hop over to the online store and put it into your basket!

Here is the visual summary of the key products used on today's project for you to pin for easy reference:


You can see all of my 'How To' summaries on my 'How To - Tips and Techniques' Pinterest board in case you've missed any. 

Enjoy your day; I'm spending mine at Rebecca's Sports Day watching javelin-throwing and the 200m sprint amongst other things and hopefully enjoying a picnic lunch and the glorious weather we have been blessed with here in the UK this week. I'll be back tomorrow with another project. Until then, happy stampin'!


Stampin' Up! Supplies Used:

Table built using Product Table Builder by The Crafty Owl - Independent Stampin' Up! Demonstrator.

Hearth & Home Thinlits Roman Blind Card

by Joanne James27. May 2016 08:00

Happy Friday everyone! Today I'm sharing a card that I made in my shaker card technique class that featured the Hearth & Home Thinlits at the back end of last year:


So long ago I know, and whilst some of the products on this card are retiring (namely the flower and bird punches, the Alphabet Rotary Stamp and the ribbon), the Hearth & Home Thinlits are staying so it's still worth a share! Not only that, but the new Foam Adhesive Strips that are coming in the new catalogue will make this kind of card a breeze. 

This one isn't a shaker card; I made a little video tutorial to show how I created my colourful roman blind window treatment and have finally got around to editing it, so here it is:


I'm so glad the Hearth & Home Thinlits are staying, they really are so useful. I'm looking forward to seeing what new ribbons are coming our way to see how I can give my next window a makeover!

Here is the visual summary of the key products used on today's project for you to pin for easy reference:


You can see all of my 'How To' summaries on my 'How To - Tips and Techniques' Pinterest board in case you've missed any. 

That's all from me today; back tomorrow with another project. Until then, happy stampin'!


Stampin' Up! Supplies Used: 

Table built using Product Table Builder by The Crafty Owl - Independent Stampin' Up! Demonstrator.

Video Tutorial: How To Make Baker's Twine Looped Flowers

by Joanne James25. May 2016 20:03

Wednesday - how did we get to the middle of the week already?! I've had a busy couple of days, with today including my fortnightly coffee and card drop-in session at Bells in Kingsthorpe, Northampton followed by a get-together over lunch with one of my team members. I am busy preparing my new catalogue samples and getting my catalogues ready to go out to both my online and face to face customers. If you've purchased Stampin' Up! products from me in the last six months, a complimentary catalogue will be winging its way out to you within the next week. If you haven't purchased from me recently but would like a copy of the new catalogue, please do get in touch with me either via email joanne@thecraftyowl.co.uk or by phone and I will arrange to send a catalogue out to you too!

Today I have a video tutorial to share with you! Do you remember this card that I made a while ago?


I used this fun flower embellishment made with the It's My Party Baker's twine to decorate my Botanical Builder Framelits Die colour-blocked card. You can read more about it on the original blog post here if you missed it or would like to refresh your memory.

I promised you a video tutorial on how to make those cute baker's twine looped flower embellishments and finally here it is: 

They really are such fun to make and can be used to dress up cards and packaging and can be made from all kinds of baker's twine and linen thread. 

I hope you enjoyed today's video and it inspires you to have a go and try something new. I'll be back tomorrow with a fun birthday card for this week's new challenge over at Create With Connie and Mary. Until then, happy stampin'!

Enjoy The Little Things

by Joanne James19. January 2016 07:00

Good morning lovely readers! Today I am sharing a card for this week's challenge over at Pals Paper Arts:

PPA-283-Jan14

I'm not usually one to gravitate towards colour challenges (I'm more of a sketch gal as you well know!) but I thought this was a great colour combo chosen by the equally great Brian King and so that, combined with the fact that he finds my English spelling of the word 'colour' in and of itself rather quirky, I just had to play along! Here's my card:

I decided to make a bold statement using blocks of colour, with Basic Black as my base and each of the other colours cut with both the positive and negative pieces of the intricate leaf framelit from the Botanical Builder Framelits Dies and pieced together for my base. I stamped my sentiment in Versamark and heat embossed it in white on an oval of Basic Black, which I then popped up on dimensionals in the centre of my card. What to use to tie the whole thing together though? I decide to have a go at making a loopy flower out of the new thick baker's twine that comes in the challenge colours; I made a few but decided one was enough to ground my sentiment and bring the whole thing together. If you've never made one of these before, they are really not that tricky when you know how. With that in mind, I made another short technique tutorial to show you how it's done - I haven't yet had time to edit it though, so will share with you later in the week. 

That's all from me today; I have a private class this morning with a wonderful group of seniors at a local residential care home and then a few jobs this afternoon before taking the James Juniors for their music lessons. Another busy day!

Back tomorrow with another project; until then, happy stampin'!


Stampin' Up! Supplies Used:

Table built using Product Table Builder by The Crafty Owl - Independent Stampin' Up! Demonstrator.


Behind The Scenes at Stampin' Up! - Shooting a Stampissimo Video

by Joanne James30. October 2014 07:00

Today I have something very special that I've had to keep under wraps for a little while: the latest Stampin' Up! UK Stampissimo video has just been published and guess what? I am the starring demonstrator! I was so excited to be asked by Paula Gorry, Stampin' Up! UK Business Development Manager, to create a project for the latest video with the theme of 'Winter Treats' that once I had a copy of the Autumn-Winter seasonal catalogue in my hands, it didn't take me long to decide what I was going to use - the fabulous new Curvy Keepsake Box Thinlits Die. You can make all kinds of customised boxes with this die, but for the theme of 'Winter Treats' I knew I wanted to create a range of Christmas characters, with Rudolf the Red-nose Reindeer being the star of the show. It meant I could combine the box die with another of my favourite catalogue products that you've seen me use so many times on different projects - the Autumn Wooden Embellishments (LOVE these and one pot lasts an age!)

Here is the reindeer box that I demonstrate in the video - how cute is this?!
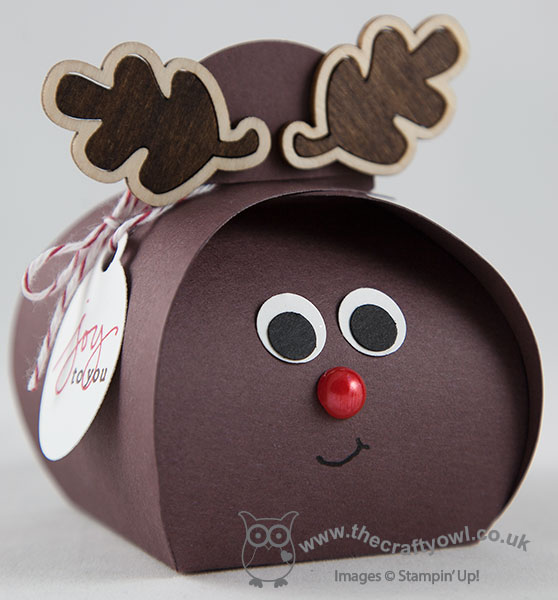
The project itself needed to be simple enough to demonstrate whilst chatting at the same time - the purpose of Stampin' Up!'s range of Stampissimo videos is to spread the word about Stampin' Up! to both crafters and non-crafters who may not have heard of Stampin' Up! and give them some insight into the products and the demonstrators who sell them. Whilst they are based around demonstrating and sharing a particular product or project, the informational nature of these videos mean they last longer than your average tutorial so you need to get comfy!

You can get the details for how I made the box above and see lots of other boxes featured in the video itself, but I wanted to share with you some of the 'behind the scenes' photos from my day and give you a little insight into the fun that I had spending the day with Paula and Kelly in the studio, along with the now infamous 'Ben and Jerry' film crew of Ben and James, who do all of the filming for Stampin' Up!'s UK events and did such a fabulous job of recording the day and producing the final video.

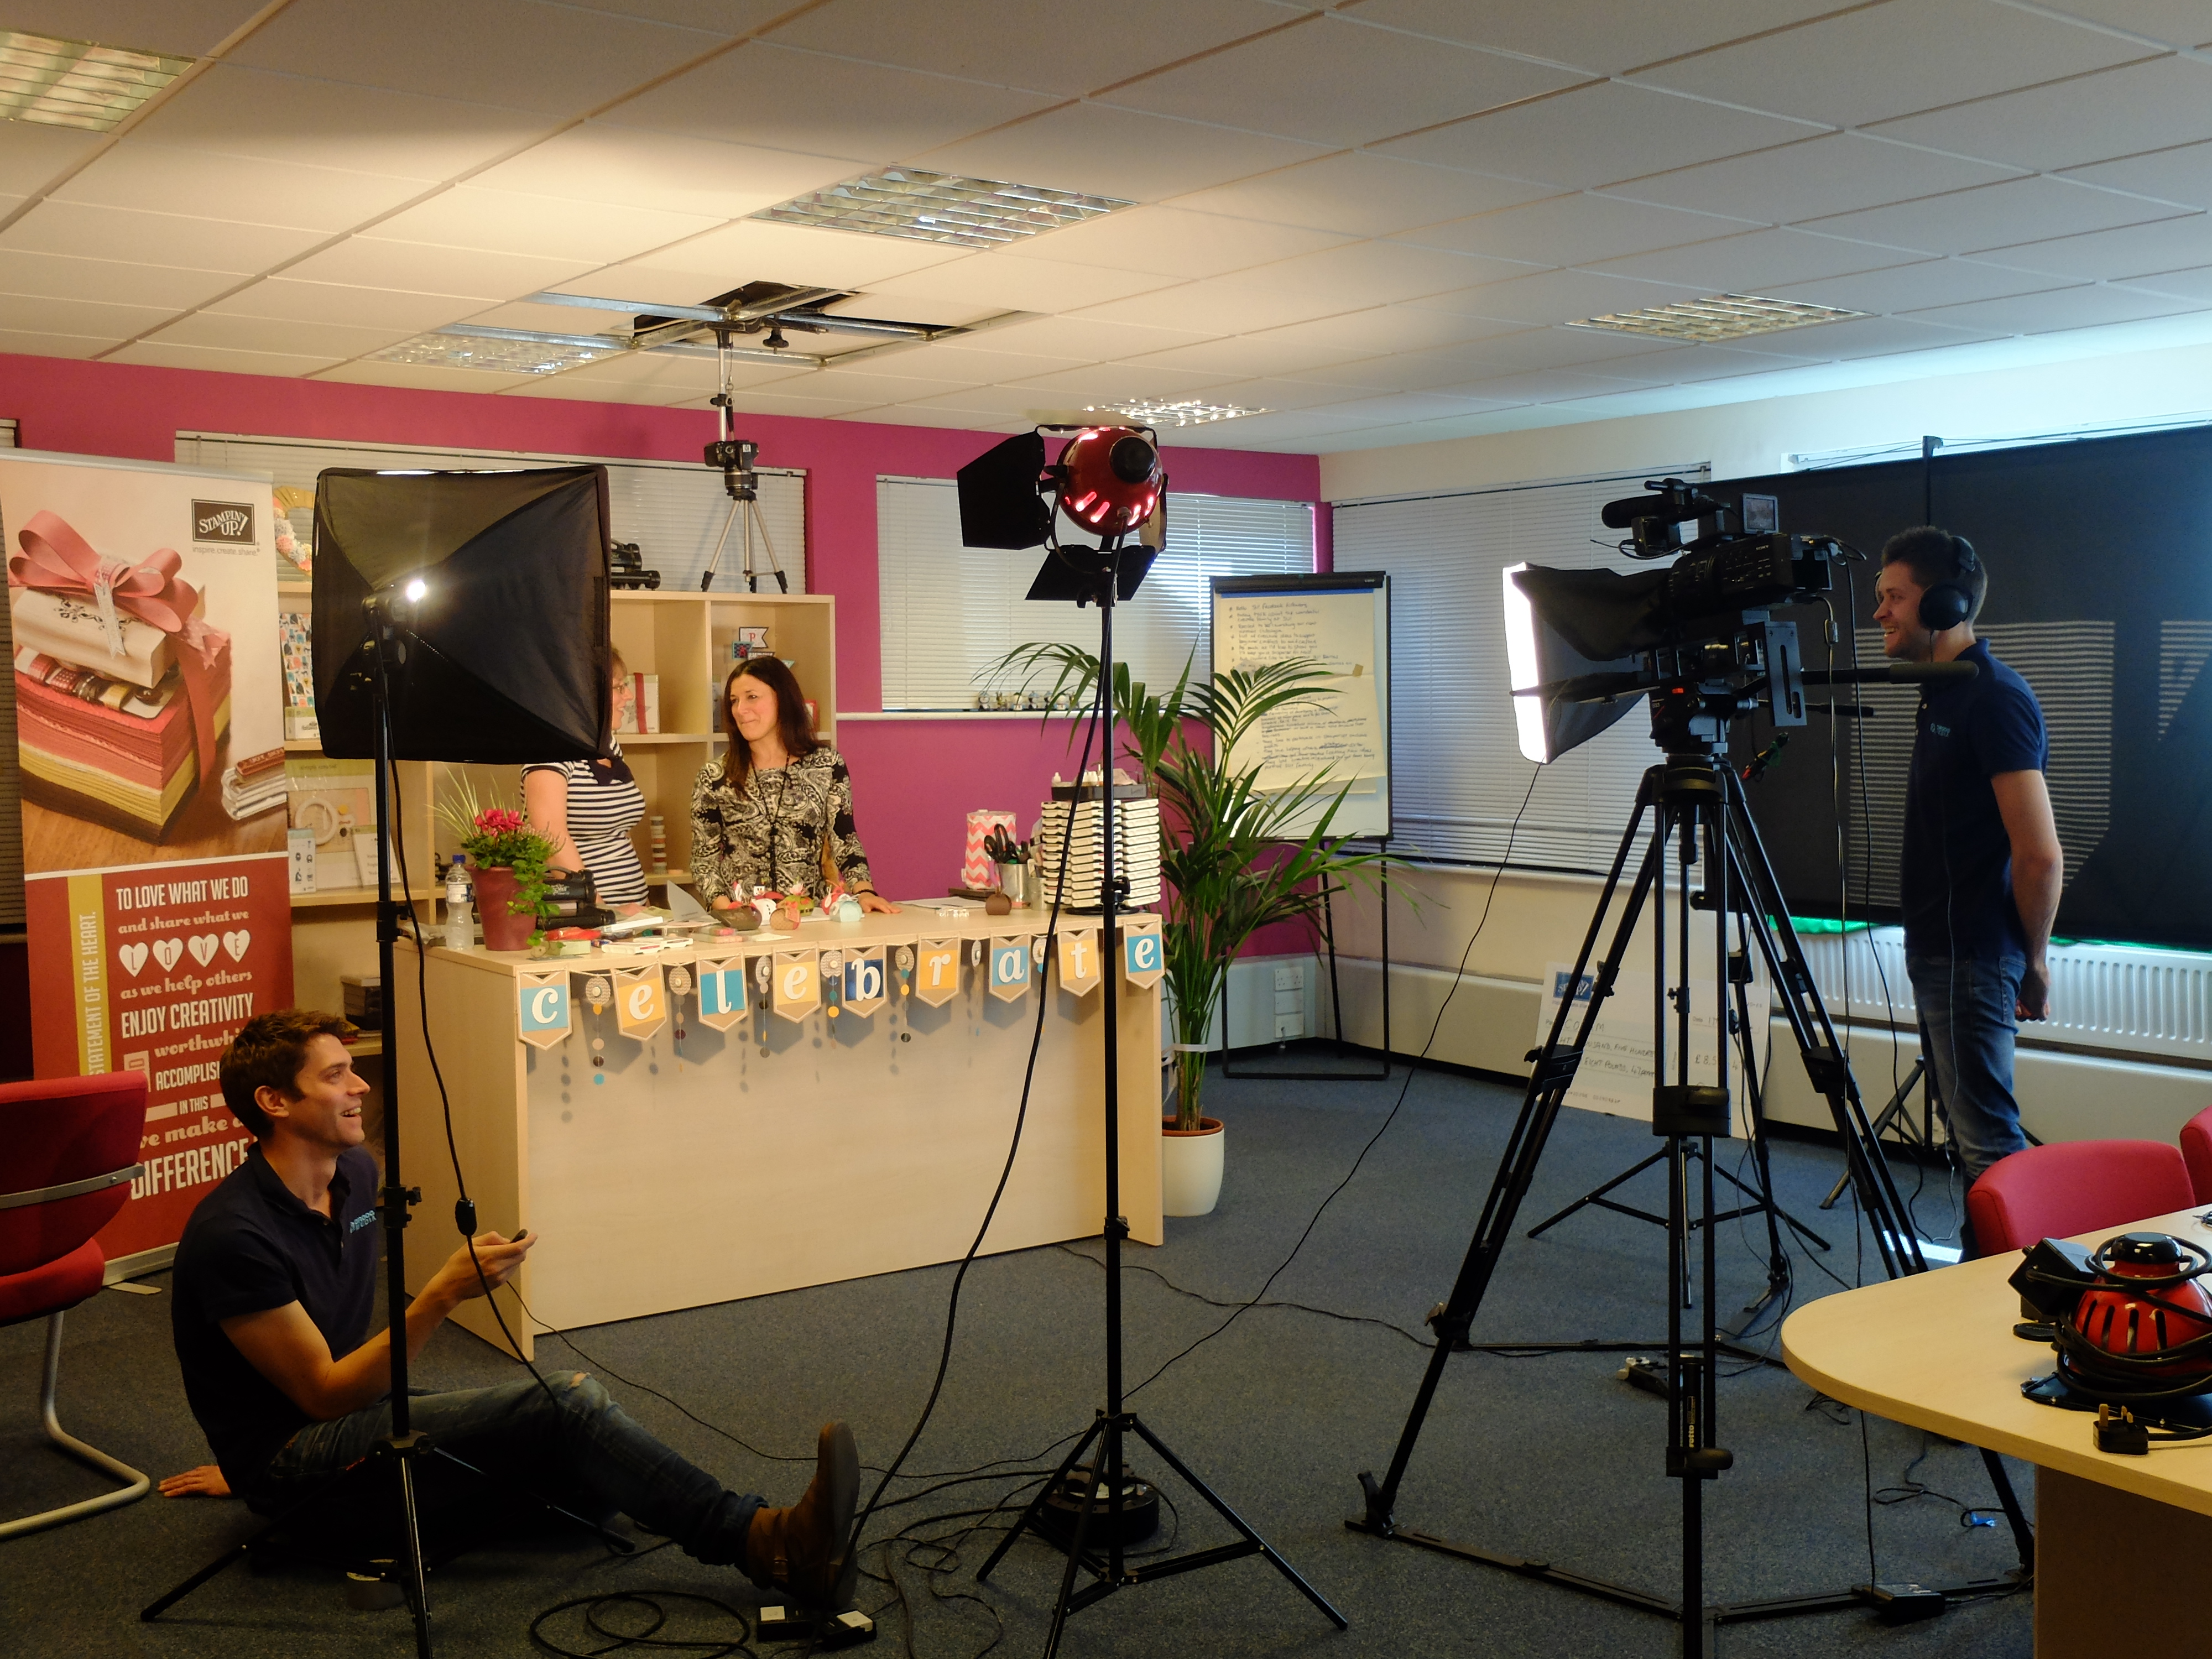
This is what filming looks like from behind the scenes -  a real case of lights, camera, action! There are cameras that shoot from the front and from above in order to get a full range of shots and the necessary close-ups. When I shoot video tutorials at home I use an overhead camera, but I'm sitting at my desk. When you're standing up it is quite tricky because you have to be careful not to lean over your workspace, otherwise all the viewer sees is the top of your head! Sounds obvious, but I found out there is a real art to working with your arms outstretched and not leaning too far into your workspace.
Here are a couple of shots of Ben and James, the guys that produce the video - I struggle to tell them apart - they're twins! - but as you can see, one is slightly more camera-shy than the other:


They really are the nicest chaps you could wish to meet and I think they did a great job with the final edit, although I'll admit I'm biased!

This is my favourite photo of Paula and I on the day, taken mid-take once we were properly relaxed and into the swing of things - we really were having fun:

Lastly, here's one of us all post filming each displaying our favourite boxes, the chaps included. They decided the boxes were so easy to make, they might even have a go themselves at making some to grace their family festive table. At the UK training day at Telford earlier this year, the Stampin' Up! demonstrators were treated to a video of Ben and 'Jerry' making their first foray into crafting Stampin' Up! style, so this may well be their second!!
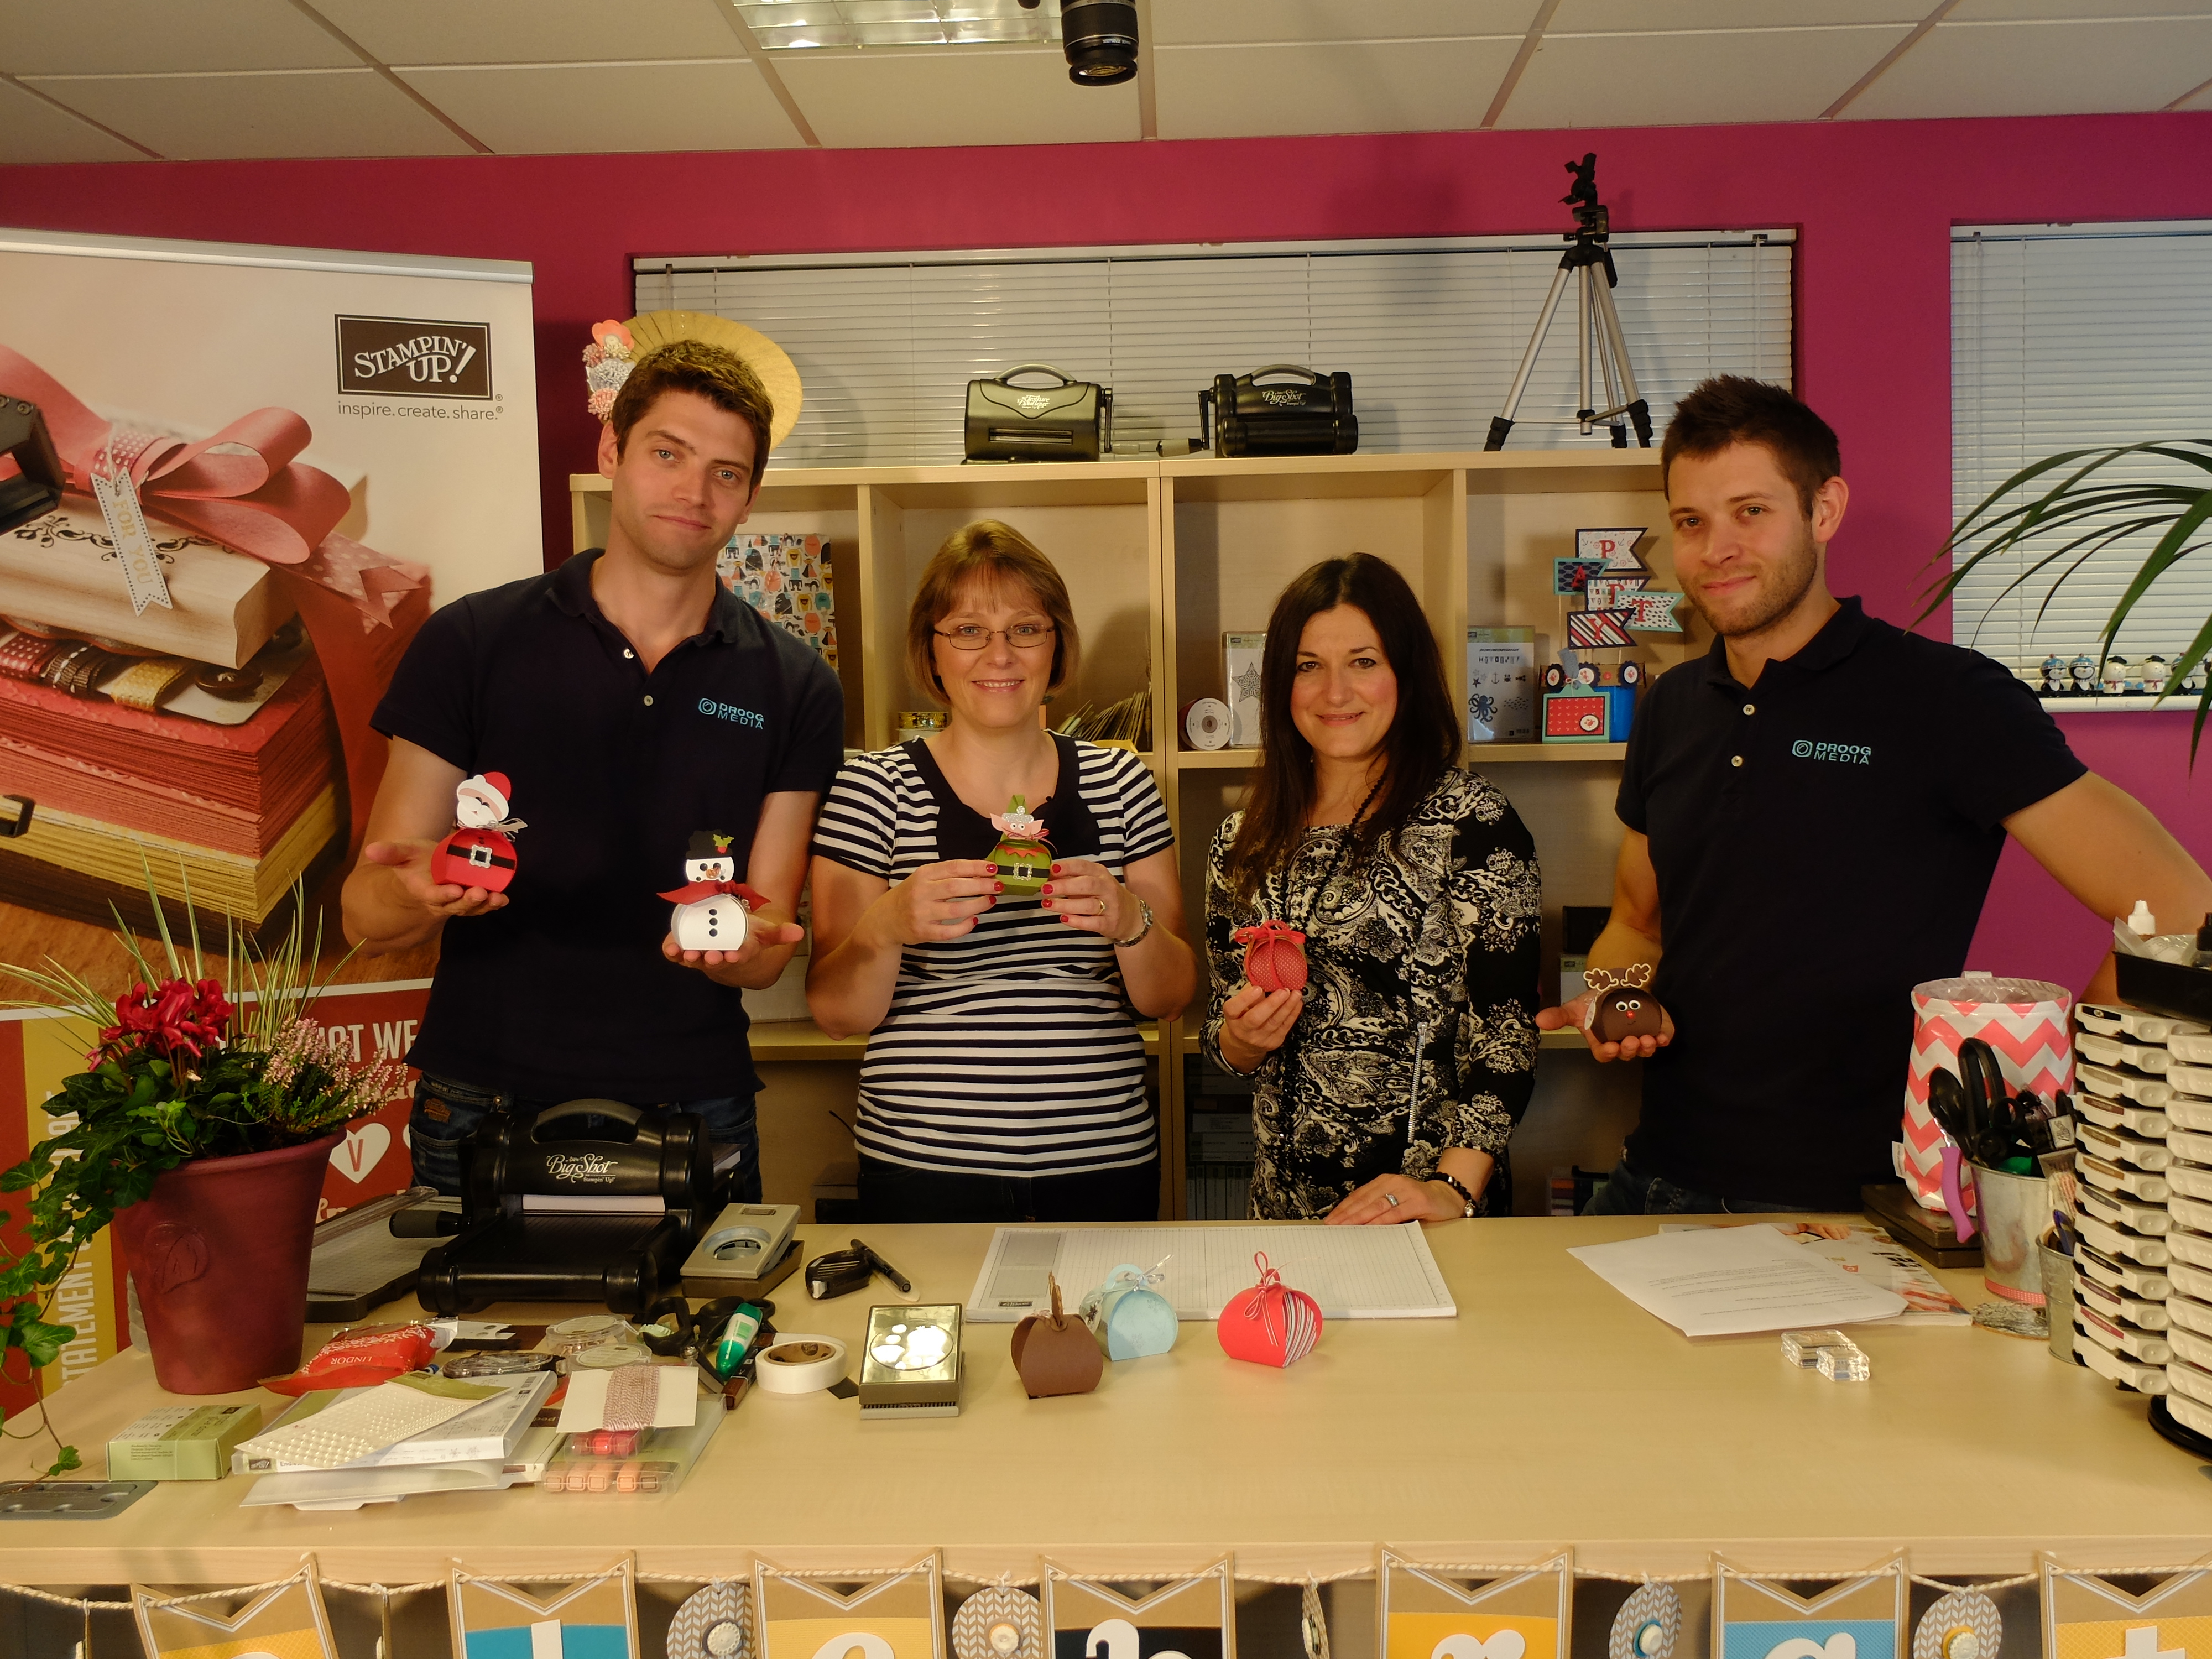
Also, note the festive pot plant on the edge of the desk and the Christmas tree in the video - Kelly and Paula did their best to make the studio look festive, which was quite tricky given that this was filmed some time ago when the sun was shining gloriously outside and it was not even remotely autumnal, let alone wintery! A big thank you the lovely Kelly Francis, who took all of the above pictures - she is an absolute star!

Here are some additional pictures of some of the finished boxes that feature in the video - this is Santa's helper, the mischievous elf: 
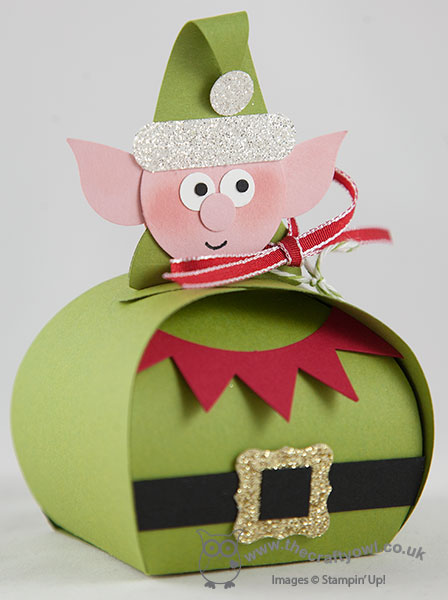
This is the man himself, Santa Claus - with his head!:
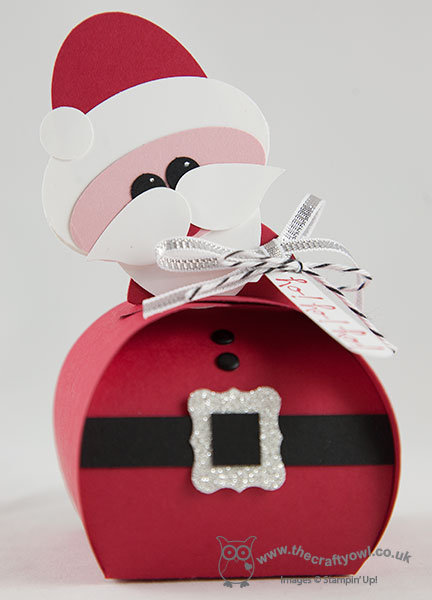
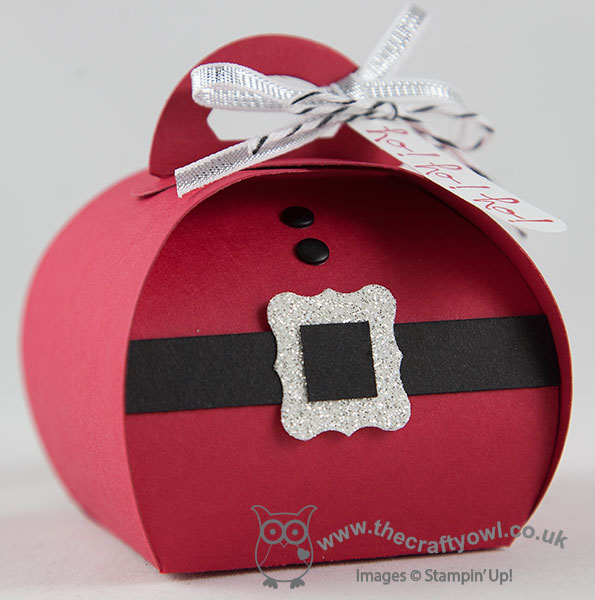
This one is Santa - without his head! Perfect if you are short on time or want something that's a little more adult-oriented:
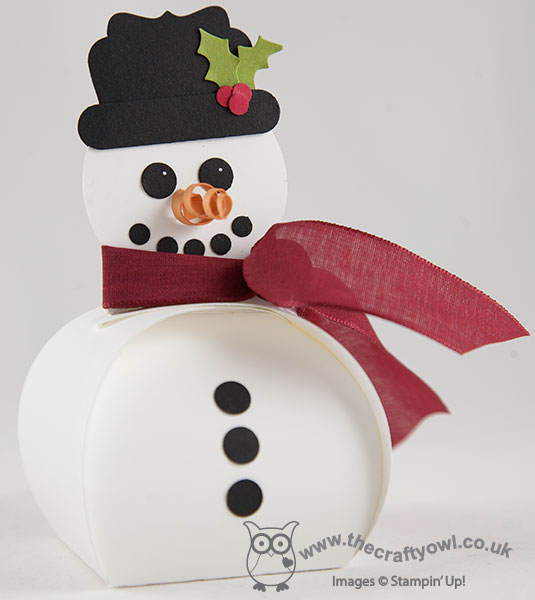
Then we have the cutest snowman - check out his twirly carrot nose! 
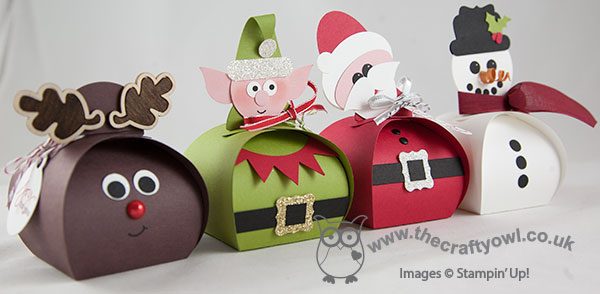
Here they are altogether - one big happy Curvy Keepsake Box festive family:
I hope you found the 'behind the scenes' tour interesting - now here's the video that you've all been waiting for:

In summary, a truly great experience and yet another of the fantastic opportunities available to me as a Stampin' Up! demonstrator working with this amazing company that allows me to share what I love, be endlessly creative, manage and motivate a great team and have a job that totally fits around my family commitments and enables me to achieve the best work-life balance I've ever had.

If you're reading this and thinking that you would like to know more about the benefits of becoming a Stampin' Up! demonstrator, then do get in touch with me on 07773 421446  - I would love to have a no-obligation chat with you and tell you more.

If you would like to make Rudolf, the supplies list that links to my online store is below.

Back tomorrow with another project; until then, happy stampin'!


Stampin' Up! Supplies Used:

Table built using Product Table Builder by The Crafty Owl - Independent Stampin' Up! Demonstrator.


Video Tutorial: Scalloped Tag Topper Punch Concertina Card

by Joanne James8. May 2014 14:54

Hello everyone - my second video in a week! I'm cheating slightly, as I actually shot this video weeks ago but haven't got around to editing it until now. I made a lovely concertina fold Mother's Day card a while ago using the Scalloped Tag Topper Punch - you can see my original card here - which was based on a similar card made by Julie Kettlewell (you can see Julie's original card here). Having just gone to update my original post with the link to today's video, I realise I didn't mention her in my original post, which was very remiss of me and a complete oversight on my part, as I even mentioned her in today's video. Needless to say, I have now updated the original post!

I love this concertina fold card style - it's great if you need a card that's just a little different. I made another card based on my original one, this time adapting it to a birthday card for a friend of mine who always puts so much thought into cards for others, I thought she deserved something special for her birthday too; here's my latest scalloped tag topper punch concertina fold card:

The dimensions are exactly the same as my original card - there is still enough space to stamp 'happy' on one panel, with 'birthday' spelled out on the subsequent panels leaving the last panel blank for your message (I also stamped a little 'to you!' on this panel, just to complete my message). I also decorated one of the Stampin' Up! Kraft gift boxes with some co-ordinating Gingham Garden DSP to make some pretty packaging for my accompanying gift - finished with a tag made with the Scalloped Tag Topper Punch - well, what else?! Here's a picture of both pieces together:

So, if you would like to make a Scalloped Tag Topper Concertina Fold Card - either for the forthcoming international Mother's Day or a birthday card, here's my video tutorial showing you everything you need to know:


If you would like to purchase any of the Stampin' Up! supplies featured in today's project, just contact me or click on the links in the table below to go straight to my online store.

Back tomorrow with another project; until then, happy stampin'!


Stampin' Up! Supplies Used:

Table built using Product Table Builder by The Crafty Owl - Independent Stampin' Up! Demonstrator.


Current Promotions

Stampin Cut and Emboss

Save up to 30% off on all your favourite kits from 1 to 31 October! 

Click here to see the current kits available and order yours online today.

Join My Team

It's always a great time to join Stampin’ Up! During October you can get even more in your starter kit! New team members can get £160 worth of products for only £99 + free business supplies + free shipping + all the fun being a part of Stampin’ Up! Stampin' Up! has something for everyone: join my growing team and benefit from my support to enjoy Stampin' Up! however you choose.

If you're interested, call me for a chat to understand how I can help you realise your goals. Alternatively, if you have already decided to sign up and you just can't wait, please click here for the link to the online form where you can sign up and order your starter kit right away! 

Shop Online

Access my online shop 24 x 7, 365 days of the year:

Current October hostess code:

4XPEYCB9

Shop Online

Scrapbooking

Stampin' Up! has introduced a new range of 12x12" scrapbooking product and kit - the full range is now available to purchase online. To download a copy of the new digital Scrapbooking Catalogue click here.

Mini Catalogue

BROWSE THE CATALOGUE

'Tis The Season - the new Stampin' Up! Mini Catalogue is here! For more details and to download your copy click here

2024-25 Annual Catalogue

BROWSE THE CATALOGUE

Click on the image to download your copy of the 2024-25 annual catalogue. For a full list of current SU! supplies, go to my online store. If you would like any help or advice, please drop me a line at joanne@thecraftyowl.co.uk or give me a call on 07773 421446 - I'd be happy to help.

Latest Kits!

Stampin Cut and Emboss

The Christmas Ornaments Kit and Card Keeper Kit are the latest kits in the online store - get yours here!

New Online Exclusives

There are new products available exclusively in the online store from 5 November - check them out here.

About Me

Hi I'm Joanne and live in Northampton and when I'm not looking after my husband and two beautiful children, am an avid crafter with a passion for all things Stampin' Up!

I must confess that I have never been a big rubber stamper - until I discovered Stampin' Up! that is. I love the fact that I can get such great results with co-ordinating stamps, inks, papers and punches - the possibilities are endless! Join me on my stamping journey as I share the things I love and be inspired to create amazing things yourself!

Follow Me

Monthly Newsletter

Box Builder

Click the button above to use Box Buster to create your custom box design using the Envelope Punch Board!

Kits Collection Now Available!

Stampin Cut and Emboss

The new Kits Collection from Stampin' Up! is now available!

Click here to see the current kits available and order yours online today.

I Design For


Stampin' Up Stuff

This is my personal blog and is not endorsed by Stampin’ Up! I hope you find it a plentiful source of ideas and personal inspiration but please don't copy my designs for contest submission or use for classes, publication or sale without express permission.