Party Panda Spinner Card For Fab Friday

by Joanne James17. January 2018 23:00


Another late one I'm afraid as I've been tied (figuratively, not literally!) to my desk all day pushing paperwork. Just time to share a card for the current challenge over at Fab Friday where they have a super-bright colour combo to work with:

I love brights so was really keen to play along with one of my favourite challenges. I figured the best way to use this trio of bold colours was to ensure that I also incorporated plenty of white. I decided to get out my Party Pandas Sale-A-Bration stamp set again and do something I haven't done in a while - take a look:


Yes, it's a fun spinner card - isn't that party panda just the cutest?! I made this card over a week ago but delayed sharing it with you as I made a video tutorial to go with it. I still need to finish editing so will post it here once complete but in the meantime I couldn't not share this cutie! Here's the low-down on today's card:

Get Spinning - Everyone loves the fun element created by adding a spinner - young and old alike! I've made my Sale-A-Bration Party Panda the spinning star of today's card, but this technique works with lots of other stamps too. The panda looks like he was meant to cartwheel though I think! To make the panda spin, you simply attach him to two penny coins (or a dime, or a washer - you get the idea) separated by a dimensional, with the pennies sitting either side of the track. If I've lost you already, come back when I upload the video - all will become clear! 

Creating The Track - I used the Classic Label Punch to create the track for my spinning panda, by repeatedly punching along my cardfront in order to get an extended gap. This is one of the easiest ways to create a spinner track. The key to getting a freely-spinning panda though is to use Stampin' Up!'s foam strips to adhere your front panel to your card base. This ensures the gap is deep enough for the panda to spin freely.

Let's Celebrate - I pulled my sentiment from another of my free Sale-A-Bration sets, Amazing You, and inked up the words in contrasting colours. Such a great sentiment that allows this card to work for all kinds of celebrations, not just birthdays. In fact, I am going to dedicate this one to one of the Fab Friday design team members, the awesome Brian King, who at the time of posting this challenge had announced the day before that he is also joining the design team over at CAS(E) this Sketch, another great challenge blog favourite of mine - way to go Brian! 

I love these bright colours, so perfect for this fun card. Do check out the design team cards over at Fab Friday and the gallery, where there are some amazing and varied entries that will provide great inspiration.

Here is the visual summary of the key products used on today's project for you to pin for easy reference:


You can see all of my 'How To' summaries on my 'How To - Tips and Techniques' Pinterest board in case you've missed any. 

I'll be back tomorrow with another project. Until then, happy stampin'!


Stampin' Up! Supplies Used:

Table built using Product Table Builder by The Crafty Owl - Independent Stampin' Up! Demonstrator.

Video Tutorial: How To Make Baker's Twine Looped Flowers

by Joanne James25. May 2016 20:03

Wednesday - how did we get to the middle of the week already?! I've had a busy couple of days, with today including my fortnightly coffee and card drop-in session at Bells in Kingsthorpe, Northampton followed by a get-together over lunch with one of my team members. I am busy preparing my new catalogue samples and getting my catalogues ready to go out to both my online and face to face customers. If you've purchased Stampin' Up! products from me in the last six months, a complimentary catalogue will be winging its way out to you within the next week. If you haven't purchased from me recently but would like a copy of the new catalogue, please do get in touch with me either via email [email protected] or by phone and I will arrange to send a catalogue out to you too!

Today I have a video tutorial to share with you! Do you remember this card that I made a while ago?


I used this fun flower embellishment made with the It's My Party Baker's twine to decorate my Botanical Builder Framelits Die colour-blocked card. You can read more about it on the original blog post here if you missed it or would like to refresh your memory.

I promised you a video tutorial on how to make those cute baker's twine looped flower embellishments and finally here it is: 

They really are such fun to make and can be used to dress up cards and packaging and can be made from all kinds of baker's twine and linen thread. 

I hope you enjoyed today's video and it inspires you to have a go and try something new. I'll be back tomorrow with a fun birthday card for this week's new challenge over at Create With Connie and Mary. Until then, happy stampin'!

Enjoy The Little Things

by Joanne James19. January 2016 07:00

Good morning lovely readers! Today I am sharing a card for this week's challenge over at Pals Paper Arts:

PPA-283-Jan14

I'm not usually one to gravitate towards colour challenges (I'm more of a sketch gal as you well know!) but I thought this was a great colour combo chosen by the equally great Brian King and so that, combined with the fact that he finds my English spelling of the word 'colour' in and of itself rather quirky, I just had to play along! Here's my card:

I decided to make a bold statement using blocks of colour, with Basic Black as my base and each of the other colours cut with both the positive and negative pieces of the intricate leaf framelit from the Botanical Builder Framelits Dies and pieced together for my base. I stamped my sentiment in Versamark and heat embossed it in white on an oval of Basic Black, which I then popped up on dimensionals in the centre of my card. What to use to tie the whole thing together though? I decide to have a go at making a loopy flower out of the new thick baker's twine that comes in the challenge colours; I made a few but decided one was enough to ground my sentiment and bring the whole thing together. If you've never made one of these before, they are really not that tricky when you know how. With that in mind, I made another short technique tutorial to show you how it's done - I haven't yet had time to edit it though, so will share with you later in the week. 

That's all from me today; I have a private class this morning with a wonderful group of seniors at a local residential care home and then a few jobs this afternoon before taking the James Juniors for their music lessons. Another busy day!

Back tomorrow with another project; until then, happy stampin'!


Stampin' Up! Supplies Used:

Table built using Product Table Builder by The Crafty Owl - Independent Stampin' Up! Demonstrator.


Behind The Scenes at Stampin' Up! - Shooting a Stampissimo Video

by Joanne James30. October 2014 07:00

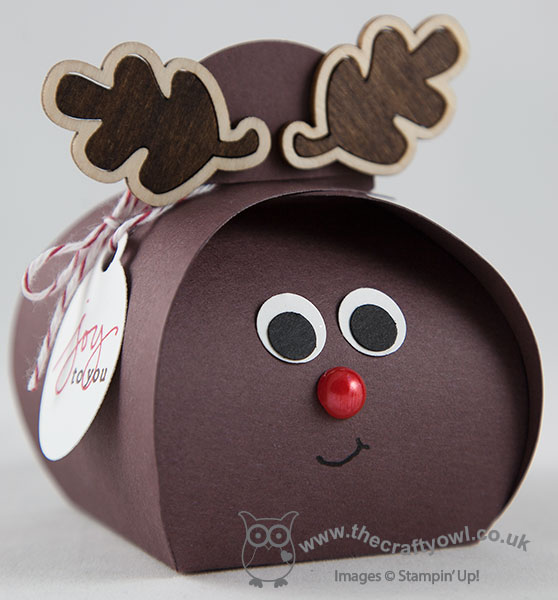
Today I have something very special that I've had to keep under wraps for a little while: the latest Stampin' Up! UK Stampissimo video has just been published and guess what? I am the starring demonstrator! I was so excited to be asked by Paula Gorry, Stampin' Up! UK Business Development Manager, to create a project for the latest video with the theme of 'Winter Treats' that once I had a copy of the Autumn-Winter seasonal catalogue in my hands, it didn't take me long to decide what I was going to use - the fabulous new Curvy Keepsake Box Thinlits Die. You can make all kinds of customised boxes with this die, but for the theme of 'Winter Treats' I knew I wanted to create a range of Christmas characters, with Rudolf the Red-nose Reindeer being the star of the show. It meant I could combine the box die with another of my favourite catalogue products that you've seen me use so many times on different projects - the Autumn Wooden Embellishments (LOVE these and one pot lasts an age!)

Here is the reindeer box that I demonstrate in the video - how cute is this?!
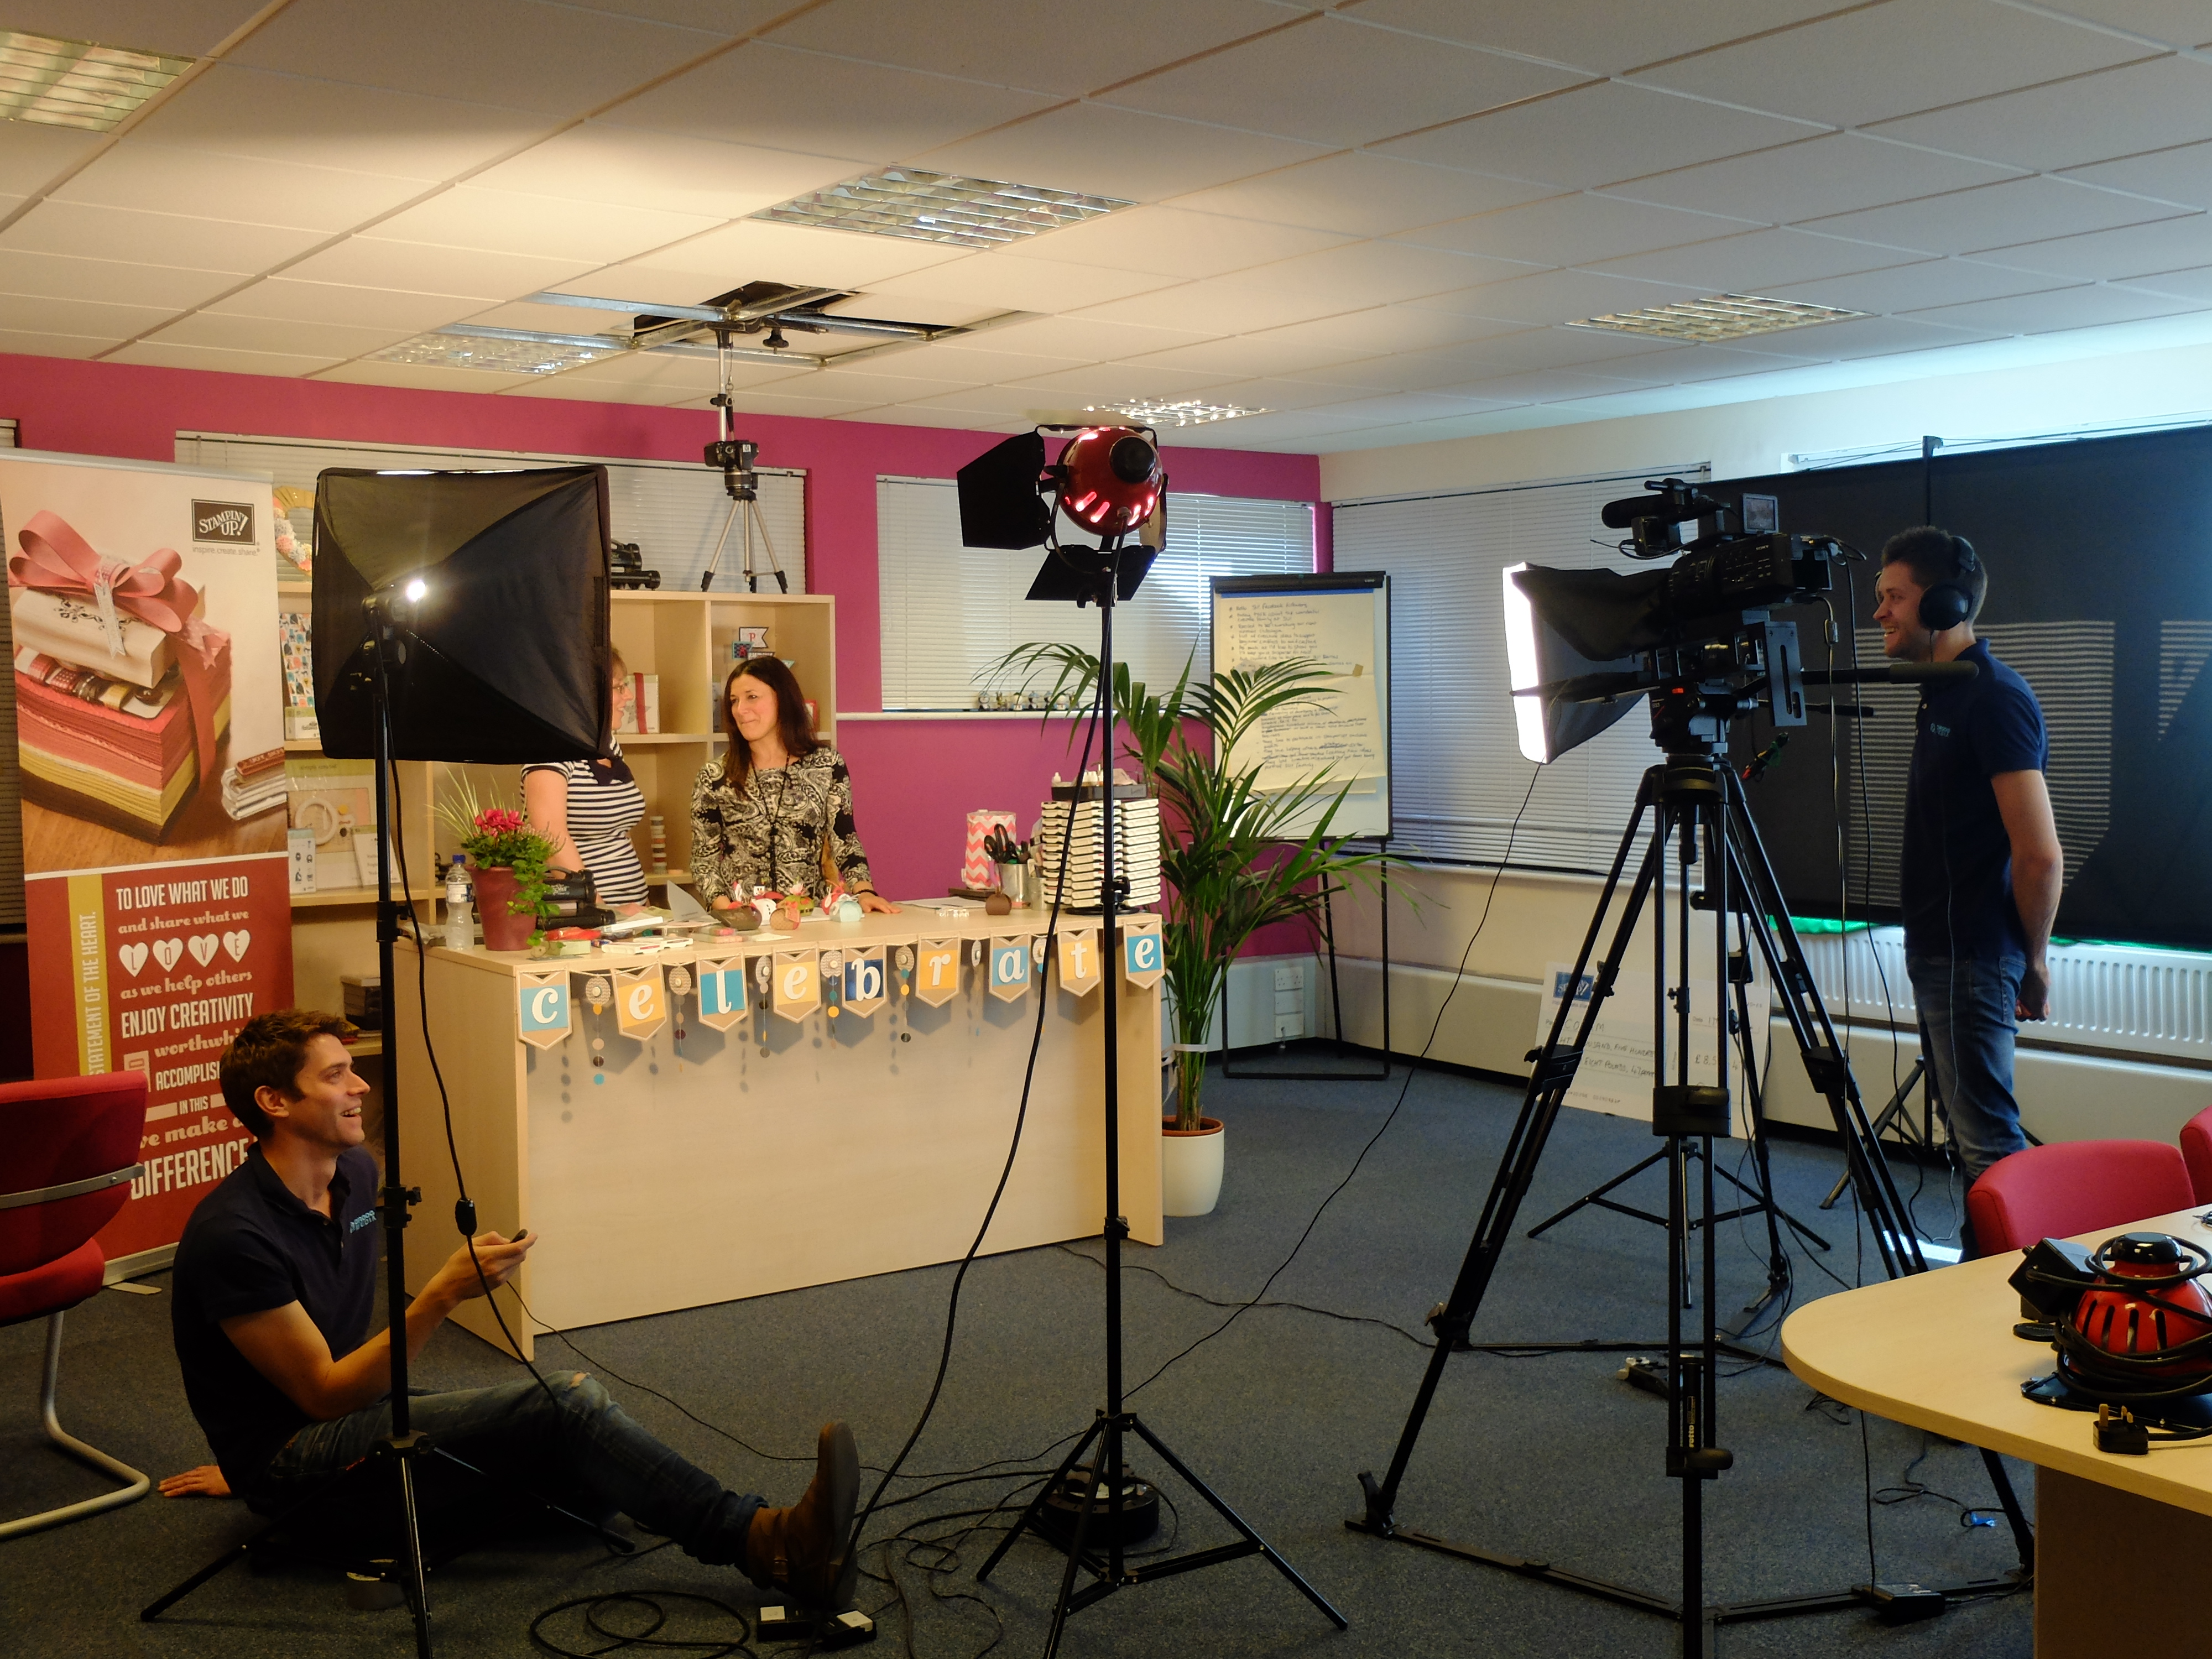
The project itself needed to be simple enough to demonstrate whilst chatting at the same time - the purpose of Stampin' Up!'s range of Stampissimo videos is to spread the word about Stampin' Up! to both crafters and non-crafters who may not have heard of Stampin' Up! and give them some insight into the products and the demonstrators who sell them. Whilst they are based around demonstrating and sharing a particular product or project, the informational nature of these videos mean they last longer than your average tutorial so you need to get comfy!

You can get the details for how I made the box above and see lots of other boxes featured in the video itself, but I wanted to share with you some of the 'behind the scenes' photos from my day and give you a little insight into the fun that I had spending the day with Paula and Kelly in the studio, along with the now infamous 'Ben and Jerry' film crew of Ben and James, who do all of the filming for Stampin' Up!'s UK events and did such a fabulous job of recording the day and producing the final video.

This is what filming looks like from behind the scenes -  a real case of lights, camera, action! There are cameras that shoot from the front and from above in order to get a full range of shots and the necessary close-ups. When I shoot video tutorials at home I use an overhead camera, but I'm sitting at my desk. When you're standing up it is quite tricky because you have to be careful not to lean over your workspace, otherwise all the viewer sees is the top of your head! Sounds obvious, but I found out there is a real art to working with your arms outstretched and not leaning too far into your workspace.
Here are a couple of shots of Ben and James, the guys that produce the video - I struggle to tell them apart - they're twins! - but as you can see, one is slightly more camera-shy than the other:
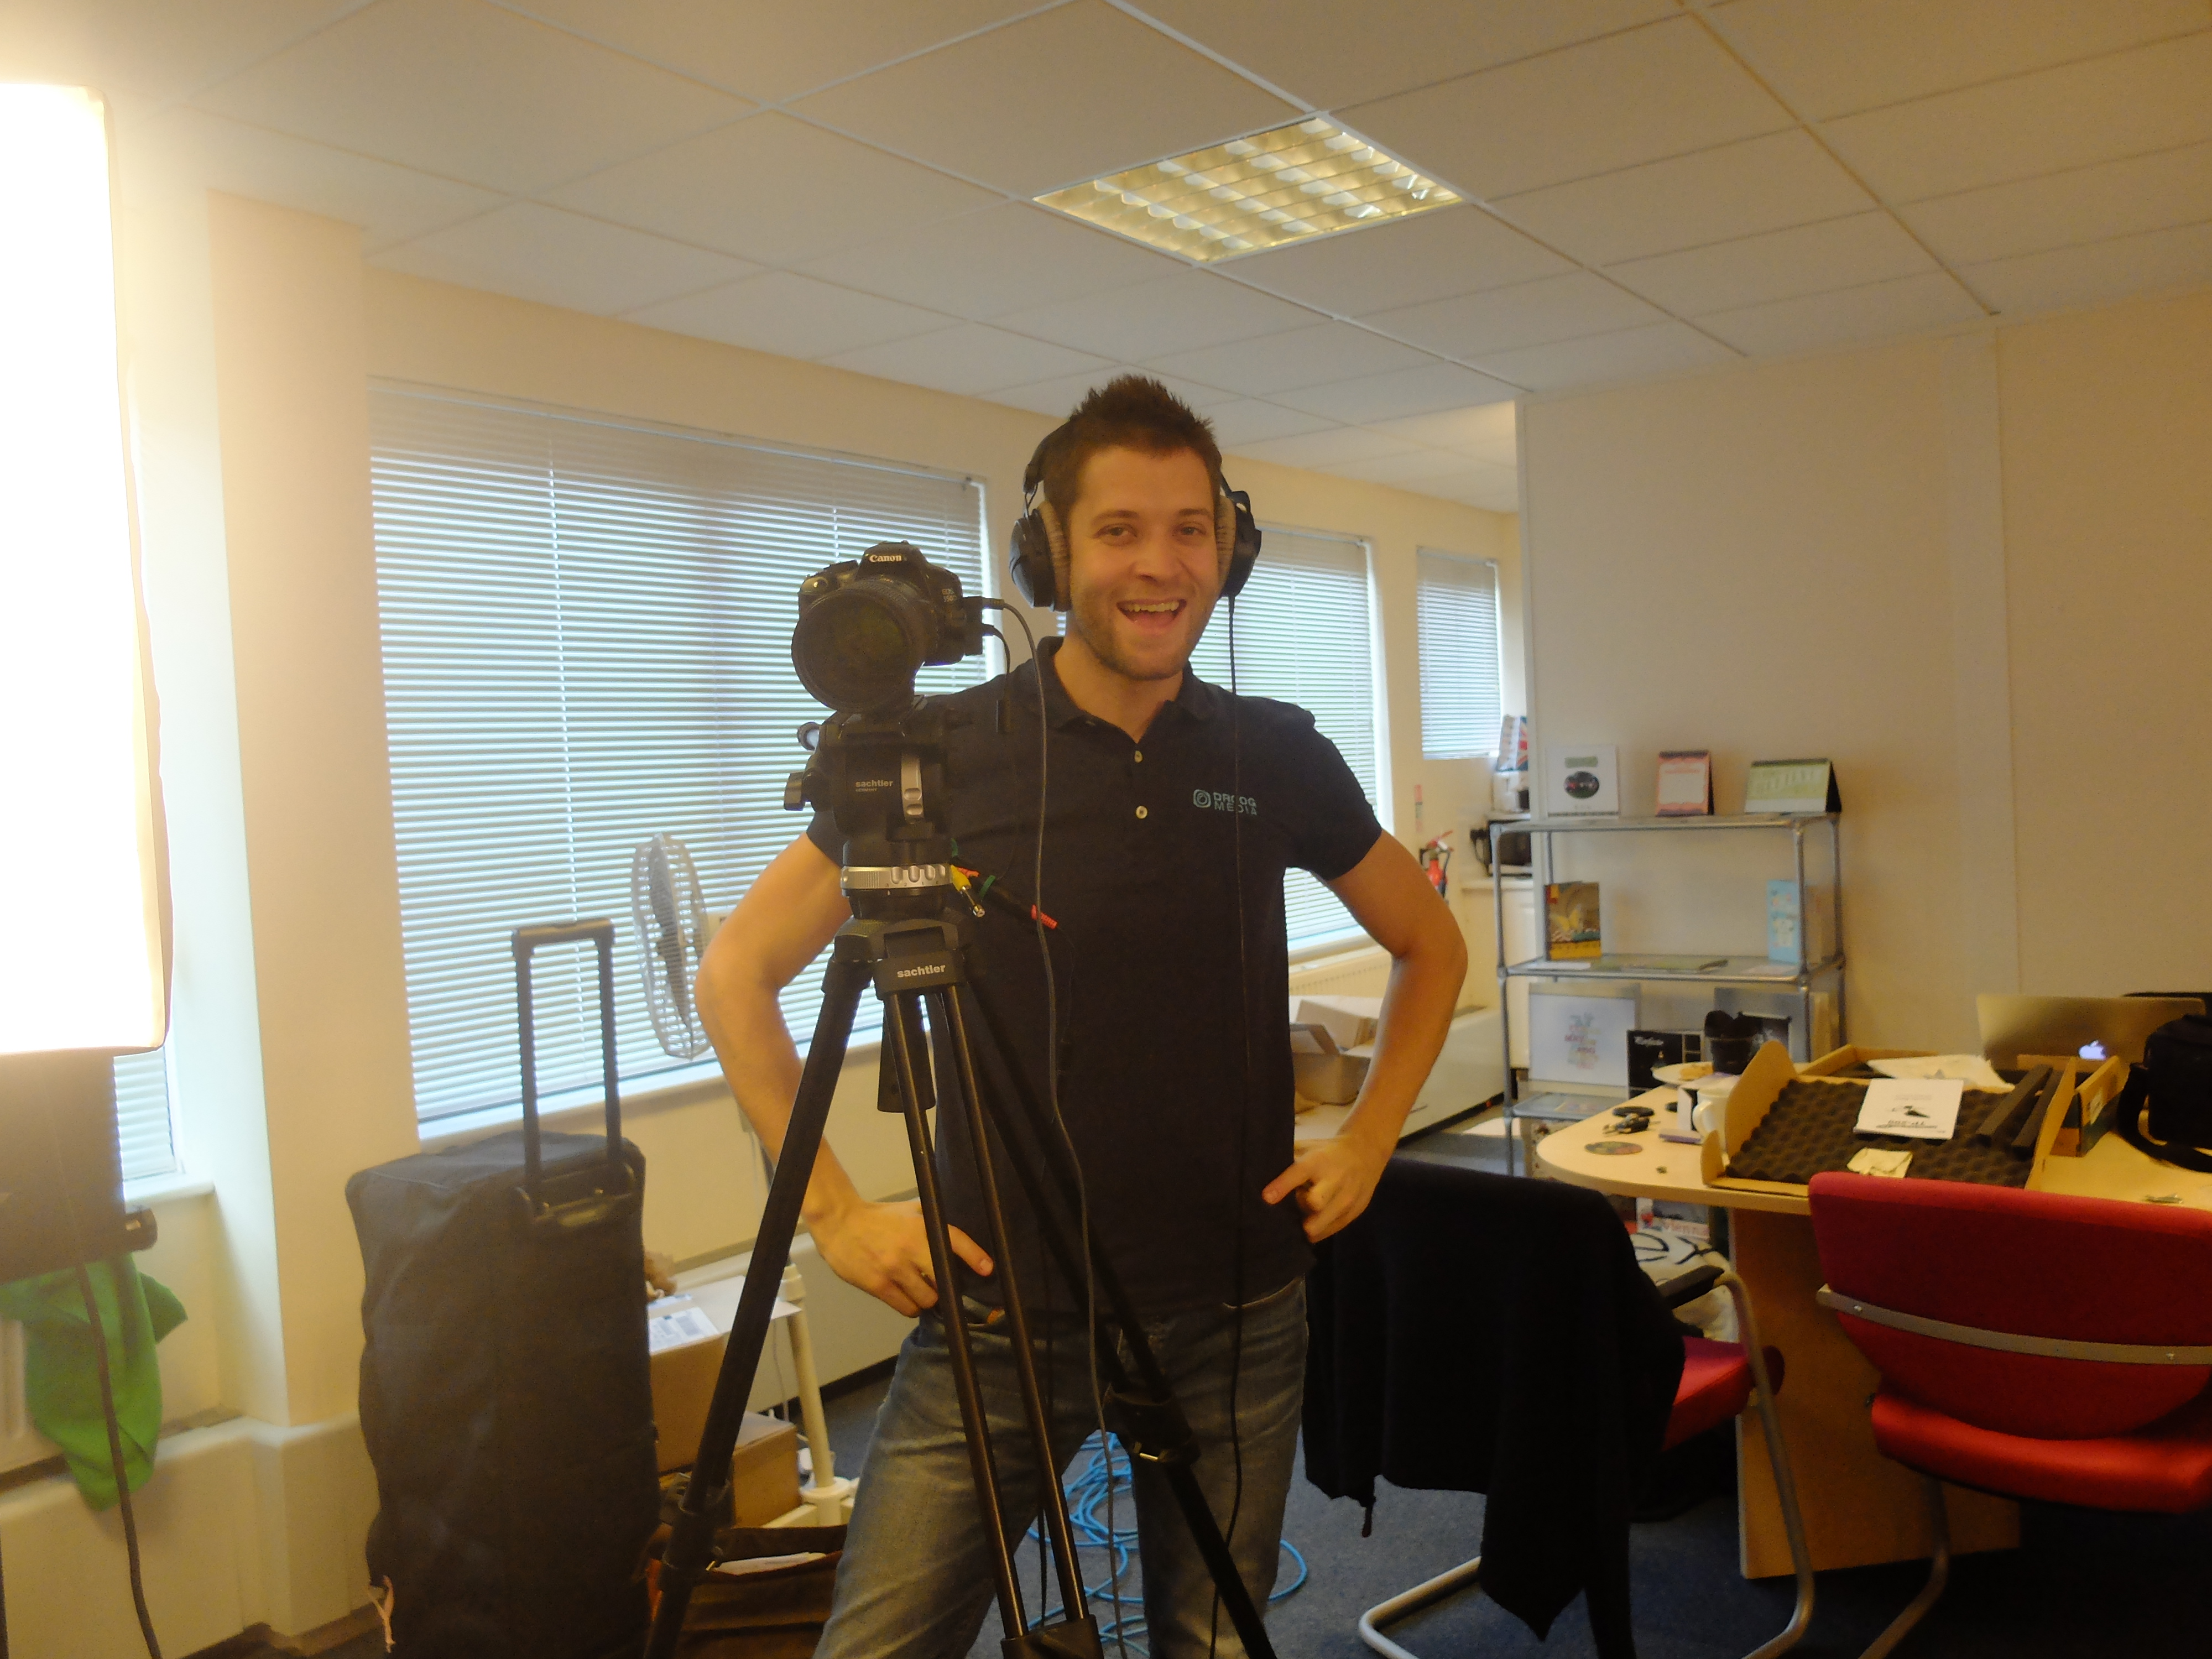
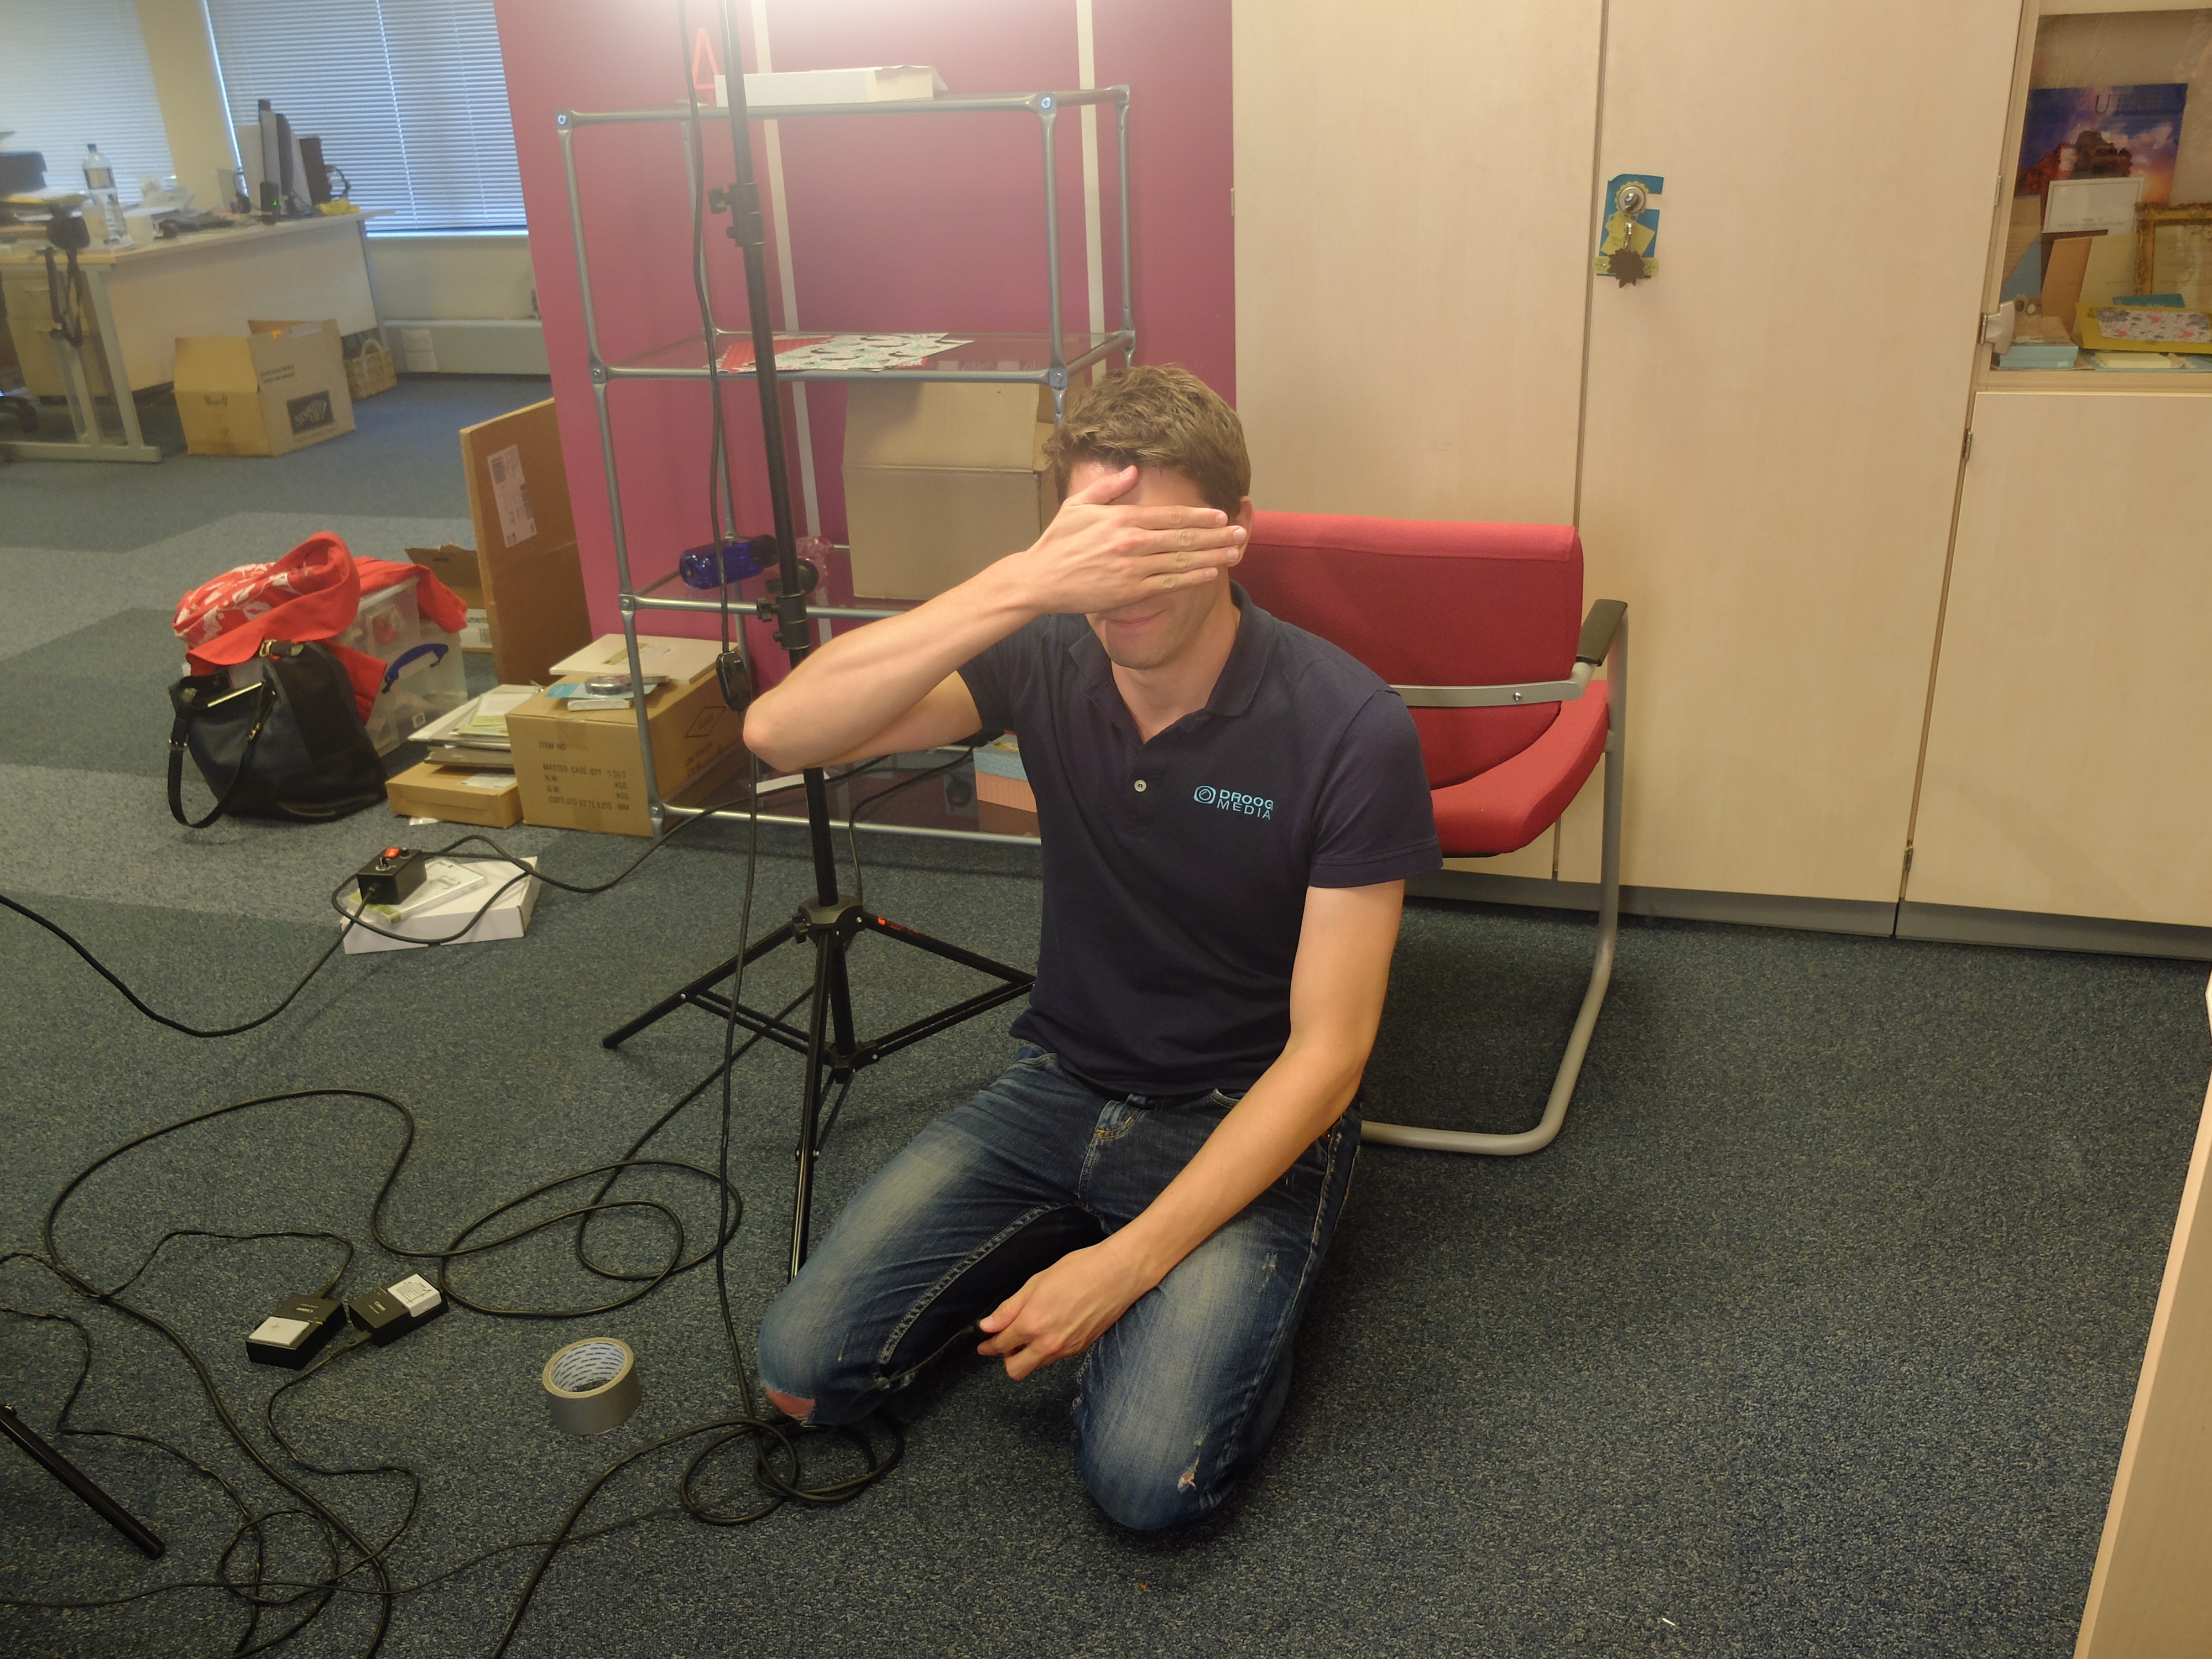
 

They really are the nicest chaps you could wish to meet and I think they did a great job with the final edit, although I'll admit I'm biased!

This is my favourite photo of Paula and I on the day, taken mid-take once we were properly relaxed and into the swing of things - we really were having fun:

Lastly, here's one of us all post filming each displaying our favourite boxes, the chaps included. They decided the boxes were so easy to make, they might even have a go themselves at making some to grace their family festive table. At the UK training day at Telford earlier this year, the Stampin' Up! demonstrators were treated to a video of Ben and 'Jerry' making their first foray into crafting Stampin' Up! style, so this may well be their second!!
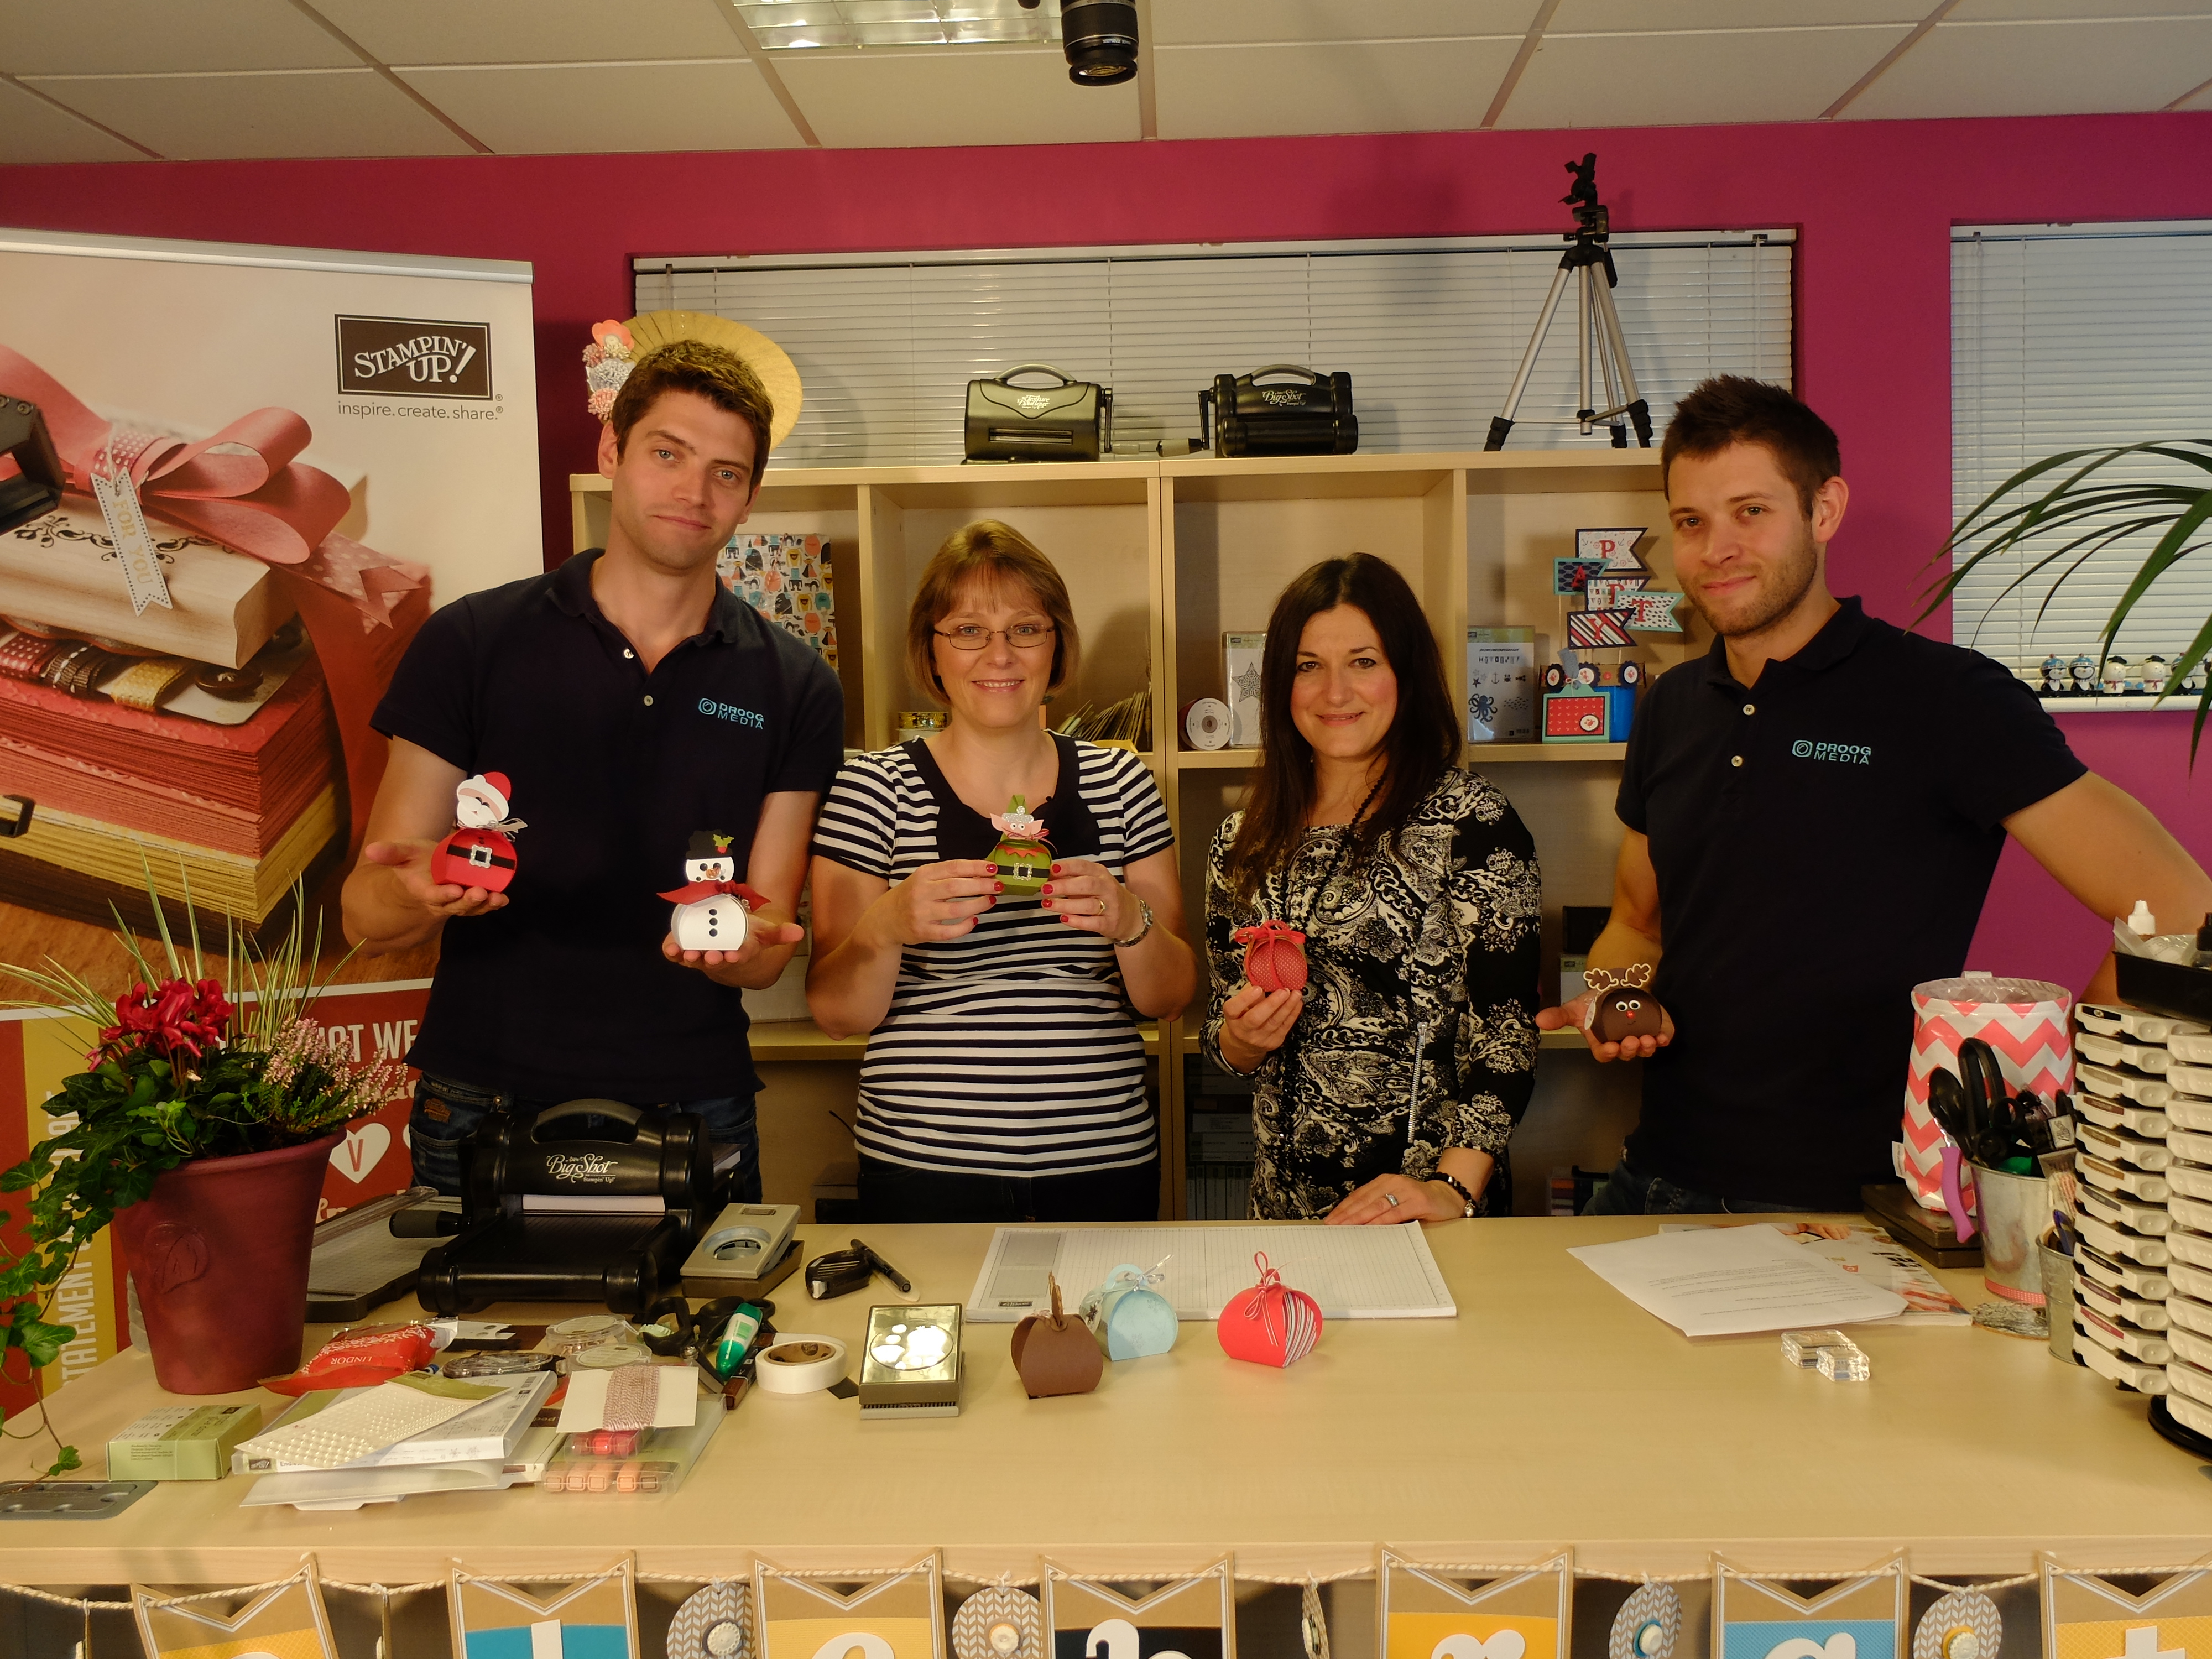
Also, note the festive pot plant on the edge of the desk and the Christmas tree in the video - Kelly and Paula did their best to make the studio look festive, which was quite tricky given that this was filmed some time ago when the sun was shining gloriously outside and it was not even remotely autumnal, let alone wintery! A big thank you the lovely Kelly Francis, who took all of the above pictures - she is an absolute star!

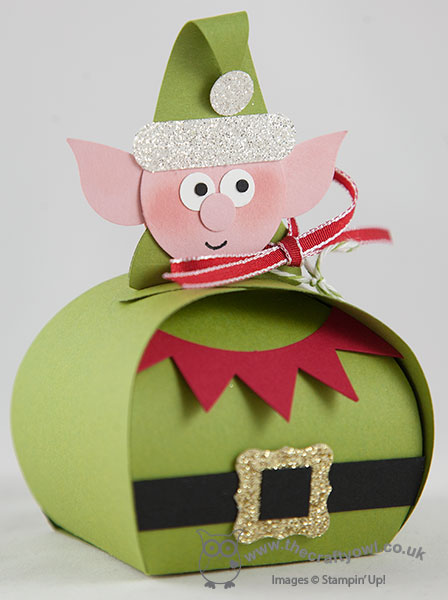
Here are some additional pictures of some of the finished boxes that feature in the video - this is Santa's helper, the mischievous elf: 
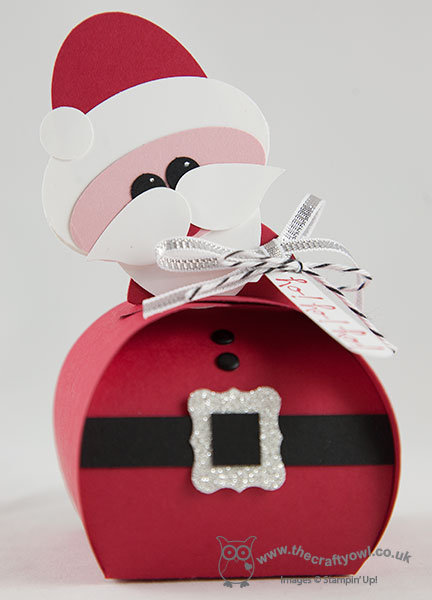
This is the man himself, Santa Claus - with his head!:
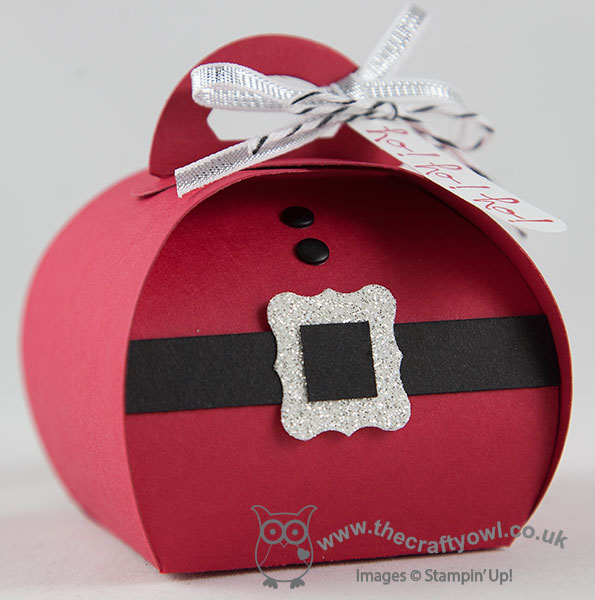
This one is Santa - without his head! Perfect if you are short on time or want something that's a little more adult-oriented:
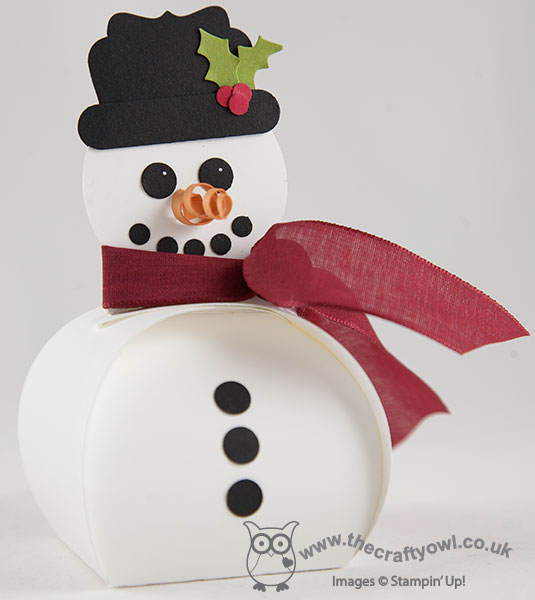
Then we have the cutest snowman - check out his twirly carrot nose! 
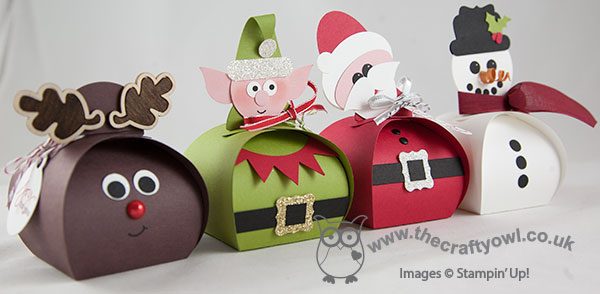
Here they are altogether - one big happy Curvy Keepsake Box festive family:
I hope you found the 'behind the scenes' tour interesting - now here's the video that you've all been waiting for:

In summary, a truly great experience and yet another of the fantastic opportunities available to me as a Stampin' Up! demonstrator working with this amazing company that allows me to share what I love, be endlessly creative, manage and motivate a great team and have a job that totally fits around my family commitments and enables me to achieve the best work-life balance I've ever had.

If you're reading this and thinking that you would like to know more about the benefits of becoming a Stampin' Up! demonstrator, then do get in touch with me on 07773 421446  - I would love to have a no-obligation chat with you and tell you more.

If you would like to make Rudolf, the supplies list that links to my online store is below.

Back tomorrow with another project; until then, happy stampin'!


Stampin' Up! Supplies Used:

Table built using Product Table Builder by The Crafty Owl - Independent Stampin' Up! Demonstrator.


Video Tutorial: Scalloped Tag Topper Punch Concertina Card

by Joanne James8. May 2014 14:54

Hello everyone - my second video in a week! I'm cheating slightly, as I actually shot this video weeks ago but haven't got around to editing it until now. I made a lovely concertina fold Mother's Day card a while ago using the Scalloped Tag Topper Punch - you can see my original card here - which was based on a similar card made by Julie Kettlewell (you can see Julie's original card here). Having just gone to update my original post with the link to today's video, I realise I didn't mention her in my original post, which was very remiss of me and a complete oversight on my part, as I even mentioned her in today's video. Needless to say, I have now updated the original post!

I love this concertina fold card style - it's great if you need a card that's just a little different. I made another card based on my original one, this time adapting it to a birthday card for a friend of mine who always puts so much thought into cards for others, I thought she deserved something special for her birthday too; here's my latest scalloped tag topper punch concertina fold card:

The dimensions are exactly the same as my original card - there is still enough space to stamp 'happy' on one panel, with 'birthday' spelled out on the subsequent panels leaving the last panel blank for your message (I also stamped a little 'to you!' on this panel, just to complete my message). I also decorated one of the Stampin' Up! Kraft gift boxes with some co-ordinating Gingham Garden DSP to make some pretty packaging for my accompanying gift - finished with a tag made with the Scalloped Tag Topper Punch - well, what else?! Here's a picture of both pieces together:

So, if you would like to make a Scalloped Tag Topper Concertina Fold Card - either for the forthcoming international Mother's Day or a birthday card, here's my video tutorial showing you everything you need to know:


If you would like to purchase any of the Stampin' Up! supplies featured in today's project, just contact me or click on the links in the table below to go straight to my online store.

Back tomorrow with another project; until then, happy stampin'!


Stampin' Up! Supplies Used:

Table built using Product Table Builder by The Crafty Owl - Independent Stampin' Up! Demonstrator.


Video Tutorial: Stampin' Up! Hip Hip Hooray Card Kit in under 6 minutes!

by Joanne James6. May 2014 16:11

Today I'm sharing one of the latest additions to the Stampin' Up! range: the Hip Hip Hooray Card Kit. It costs just £17.95 and contains literally EVERYTHING you need to make 20 cards - tags, embellishments, cards, envelopes,  stamps, ink, block - yes, everything! This kit is great for seasoned crafters who want to stock up on cards in a hurry and those who are new to crafting - if you've never stamped before, this is the kit for you!

To see just how easy it is, check out my lighthearted video below where I make all 20 cards in under 6 minutes:


Ok, so there was some fast-forwarding in there!! In reality it took me just over an hour to make all 20 cards, which is still a great output for a short time investment. If you would like to purchase a Hip Hip Hooray Card Kit, get in touch or pop on over to my online store and place an order today. This kit would also make a great gift, maybe for a teenager or someone who likes crafting or to try new things - at less than £1 per card, it represents great value.

Better still, why not get together a group of friends and host your very own Hip Hip Hooray Card Party? I'll provide the kits, all you need to provide is the refreshments. I'll be on hand to help and answer any questions and I guarantee that by the end of the session you will have 20 cards to be proud of! Contact me to book your Hip Hip Hooray Card Party today!

And here's one more look at the finished cards:


Back tomorrow with another project; until then, happy stampin'!


Stampin' Up! Supplies Used:

Table built using Product Table Builder by The Crafty Owl - Independent Stampin' Up! Demonstrator.


Scalloped Tag Topper Punch Easter Egg Box

by Joanne James3. April 2014 21:03

Evening everyone! I promised you a special project today and here it is! Several months ago Stampin' Up! asked me if I would create an Easter box for a magazine commission and that magazine hits the shelves of the newsagents today! The box I created for Stampin' Up! is featured in the April 2014 issue of Prima Baby and Parenting and is part of an extended feature on Easter Family Fun - great things to make and do with your family this Easter. There are cute cakes and biscuits to bake and this fabulous Easter egg box to make:

 Here's another shot from a different angle showing a close up of the tag, stamped with the egg from the 'Eggstra Spectacular' stamp set:

Lastly the trio of boxes that the magazine used for the title page of the two-page spread:

Here is my photograph of the title page in the magazine itself - the facing page contains a step-by-step 'how to' tutorial showing how to make it:

The sides of the body of the finished box measures 2" x 2 1/2" which is perfect for a small Easter egg (I used the ones you can buy in packs for Easter egg hunts) but this box could be used for anything small and attractive where you want to give a glimpse of the contents.  If you would like a copy of the tutorial you can see it in this month's Prima Baby magazine - if you live in Northampton, you'd better get to the shops quick though before I buy all the copies :-) I also made a short video tutorial showing you how I made this box - click the link below to watch it:

 That's all from me today; back tomorrow with another project; happy stampin'!


Stampin' Up! Supplies Used:

Table built using Product Table Builder by The Crafty Owl - Independent Stampin' Up! Demonstrator.


Video Tutorial 4: Make Any Size Box Using Your Envelope Punch Board and Box Buster from The Crafty Owl

by Joanne James11. March 2014 15:13

Firstly, thank you to everyone who has left comments on my blog, Facebook page, youTube channel or emailed me in person with comments and praise for my new Box Buster tool - I am genuinely touched that you have gone out of your way to share with me what a great tool you think this is and I'm delighted to be able to share it with you. Today I'm back with another video tutorial showing you a different box that you can make using your Envelope Punch Board - an open topped Easter bunny treat box - made using paper from the lovely Fresh Prints Designer Series Paper stack:

Sometimes you want to be able to see the contents of your box and today's box is just perfect for that. It also means that when you're making your box out of such lovely double-sided designer paper, you get a lovely glimpse of the reverse side too:

I love the Fresh Prints DSP stack - these paper stacks are great for small boxes and perfect if you're a card maker; I always get through several of these each season! Today's boxes were made to fit the Malteser Easter bunnies that are currently on sale in store right now, but as always with the aid of my Box Buster tool you could adapt the same style box to fit any size contents, just by measuring them; Box Buster from The Crafty Owl will do all the hard work for you and tell you what size paper you need and where you should make your punch marks. So, without further ado, here's what you've all been waiting for - the link to today's video:

)

I hope you found the tutorial useful - there's lots more still to come! Don't forget - you can access the Box Buster tool via the button on the right hand side of my blog home page or simply by clicking here.

Back tomorrow with another project; until then, happy box making!


Stampin' Up! Supplies Used:

Table built using Product Table Builder by The Crafty Owl - Independent Stampin' Up! Demonstrator.


Video Tutorial 2: Make Any Size Box Using Your Envelope Punch Board and Box Buster from The Crafty Owl

by Joanne James5. March 2014 09:52

Good morning blog readers and crafters! Back nice and early this morning with the second of my video tutorial posts showing you how to make any size box using your Envelope Punch Board and my new Box Buster tool. I've started early on my Easter treat boxes, so today's box shows you how to make this cute box:

The finished dimensions of today's box are 100mm x 75mm x 15mm. It was designed to fit a specific Easter treat - but you'll have to watch the video below to find out what it was! My new Box Buster from The Crafty Owl tool is just great for that - you can easily create a box to fit your chosen contents, without any hassle or wasted paper - you just measure the thing you want to put in the box, input the dimensions into the Box Buster tool and it does all the hard work for you: it will tell you exactly what size paper you need and where to make your first and second punch markings.

Today's project was worked out in millimetres, but the Box Buster tool will let you construct your box in either millimetres or inches - you choose! Here's the link to today's video tutorial:


Wasn't that SOOO easy?! Keep following this week as there are more box tutorials to come, showcasing a variety of box types with handy hints and tips for making the most of your Envelope Punch Board and my new Box Buster tool.

Back soon with another project; until then, happy stampin' (and box making!)


Stampin' Up! Supplies Used:

Table built using Product Table Builder by The Crafty Owl - Independent Stampin' Up! Demonstrator.


Video Tutorial: Make Any Size Box Using Your Envelope Punch Board and Box Buster from The Crafty Owl

by Joanne James3. March 2014 22:26

Good evening readers! Another busy day today with my first class of the month. The ladies in today's class made some great cards using their Happenings Simply Created Card Kits - pop by my Facebook page tomorrow if you would like to see what they created as I will be uploading some photos of their work.

Meanwhile, I promised you a special second blog post today that showed you how to make a box that can be used to hold four of the notelets created from part of the Happenings Simply Created Card Kit - so here it is! I've shot a few videos previously using the Envelope Punch Board, however this is the first box video. The reason I'm excited to share this particular video with you though is that I used a new tool of mine - Box Buster from The Crafty Owl - to work out the dimensions for my box and it was SO easy!!

For any of you that have made boxes using your Envelope Punch Board previously, you will know that the trickiest thing is working out where to make your first and second punches in order to create a box of the correct dimensions. It's easy for a square-based box, as the dimensions simply need to be divisible by 3, but what about when you want to create rectangular boxes of different heights, widths and depths? Following many templates and a considerable amount of test paper, I have developed a tool that means you can input your three chosen dimensions, in either millimetres or inches, and the Box Buster will calculate the size of the paper that you require and where you need to make both your first and second punches.

Watch the video to see just how easy it is to use (you will need to make a volume adjustment for sound during the middle section of the video; the section that shows the Box Buster in action uses different recording software to my usual video recordings and the sound volume settings are not only different but I've been unable to edit post-production - I do now know for next time though!):


You can find Box Buster from The Crafty Owl on my website here or via the permanent link on the right hand side of my blog page. Box Buster is a free tool and will be permanently available for anyone to use - why not visit the page now and add it to your 'favourites' so that you can access it quickly and easily the next time you need to make a box using your Stampin' Up! Envelope Punch Board? Whilst you're there, why not also check out the Product Table Builder from The Crafty Owl - a great tool if you are a Stampin' Up! demonstrator with an online store. And if you haven't already got an Envelope Punch Board, what are you waiting for? Click on the link at the bottom of today's post and purchase one from my online store today!

I'll be making more video tutorials this week showing you how easy it is to make boxes in a variety of different shapes and sizes, in both metric and imperial measurements, using Box Buster from The Crafty Owl and The Stampin' Up! Envelope Punch Board; do come back and check them out or subscribe to my YouTube channel.

Back tomorrow with another project; until then, happy stampin'!


Stampin' Up! Supplies Used:

Table built using Product Table Builder by The Crafty Owl - Independent Stampin' Up! Demonstrator.


Mini Catalogue

BROWSE THE CATALOGUE

The mini catalogue is now live! Read and download your copy here.

Shop Online

Access my online shop 24 x 7, 365 days of the year:

Current April hostess code:

VDKNV7BH

Shop Online

Join My Team

It's always a great time to join Stampin’ Up! New team members can get £130 worth of products for only £99 + free business supplies + free shipping + all the fun being a part of Stampin’ Up! Stampin' Up! has something for everyone: join my growing team and benefit from my support to enjoy Stampin' Up! however you choose.

If you're interested, call me for a chat to understand how I can help you realise your goals. Alternatively, if you have already decided to sign up and you just can't wait, please click here for the link to the online form where you can sign up and order your starter kit right away! 

Latest Kit!

Stampin Cut and Emboss

The Rock Legend Kit has all you need to make 8 cards with coordinating envelopes. Along with the new Panda Friends Kit, both are available from January 4th for just £14 each - get yours here!

2023-24 Annual Catalogue

BROWSE THE CATALOGUE

Click on the catalogue for a full list of current SU! supplies - if you would like to order any of the items featured, please drop me a line at [email protected] or give me a call on 07773 421446 - I'd be happy to help.

New Online Exclusives

There are new products available exclusively in the online store from 5 March - check them out here.

About Me

Hi I'm Joanne and live in Northampton and when I'm not looking after my husband and two beautiful children, am an avid crafter with a passion for all things Stampin' Up!

I must confess that I have never been a big rubber stamper - until I discovered Stampin' Up! that is. I love the fact that I can get such great results with co-ordinating stamps, inks, papers and punches - the possibilities are endless! Join me on my stamping journey as I share the things I love and be inspired to create amazing things yourself!

Follow Me

Monthly Newsletter

Box Builder

Click the button above to use Box Buster to create your custom box design using the Envelope Punch Board!

Kits Collection Now Available!

Stampin Cut and Emboss

The new Kits Collection from Stampin' Up! is now available!

Click here to see the current kits available and order yours online today.

I Design For


Stampin' Up Stuff

This is my personal blog and is not endorsed by Stampin’ Up! I hope you find it a plentiful source of ideas and personal inspiration but please don't copy my designs for contest submission or use for classes, publication or sale without express permission.