by Joanne James4. March 2014 22:24Good evening lovely readers! I have finished editing my next video tutorial but have bumped it to tomorrow so that I can fit in a quick card that I made for this week's Paper Craft Crew challenge. here is this week's sketch layout:
Here is the card I made using this layout:
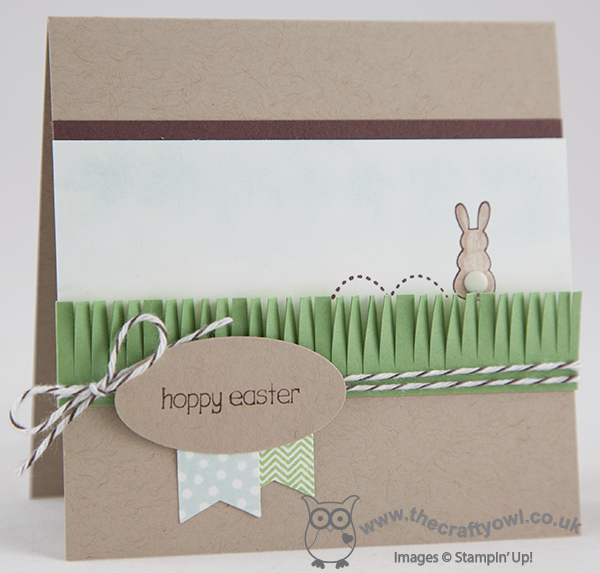
I went with a 4" square card for a change and a Crumb Cake base, then took a strip of Whisper White that I lightly sponged in Soft Sky across the top with Wild Wasabi across the bottom, then stamped the bunny minus the sentiment in Chocolate Chip and coloured him with Crumb Cake ink and a blender pen, before adding a candy dot for his tail. I matted this section on a strip of Chocolate Chip and then added a fringe of Wild Wasabi to the front of the card to make it look like the bunny was hiding in the grass. The new fringe scissors are great for creating grass in an instant and add a lovely texture. I then finished by wrapping some Early Espresso baker's twine around my card and tying in a bow. I stamped the sentiment onto an oval of Crumb Cake cardstock and finished with two co-ordinating banners, stamped using the Banner Blast stamp set and punched out with the matching punch. Both of these items are available free with a spend of £45 or more during Sale-A-Bration - contact me or visit my online store if you would like to place a £45 order and receive these gifts for free.
I've had a busy day today so am off to bed for a well-earned rest; back tomorrow with the second in my 'Any Size' box tutorial series. Until then, happy stampin'!
Stampin' Up! Supplies Used:
857a10ab-e2de-414a-a7f9-f2ec4120ed25|0|.0|96d5b379-7e1d-4dac-a6ba-1e50db561b04
Tags: Candy Dots, Easter, Earn Free Products, Sale-a-bration 2014, Sale-a-bration, Shop online, Stampin' Up, Stamp-a-ma-jig, Stampin' Up Card, Stampin' Up Supplies, Eggstra Spectacular, Fringe Scissors
Cards | Sale-a-bration | Stamping
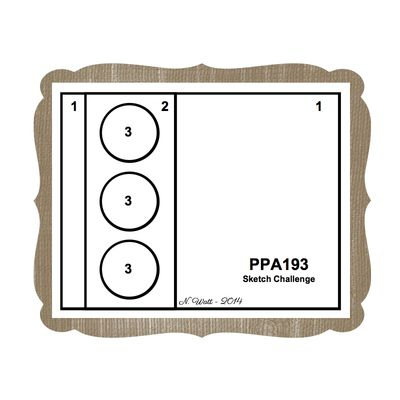
by Joanne James4. March 2014 16:28I'll be back later with another video tutorial showing you how to make another 'any size' box using your Stampin' Up! Envelope Punch Board and Box Buster from The Crafty Owl, but meanwhile I managed to grab a quick few minutes this morning to make a card for this week's Pals Paper Arts challenge. There is a great sketch from Nicole Watt this week that offers so many possibilities:
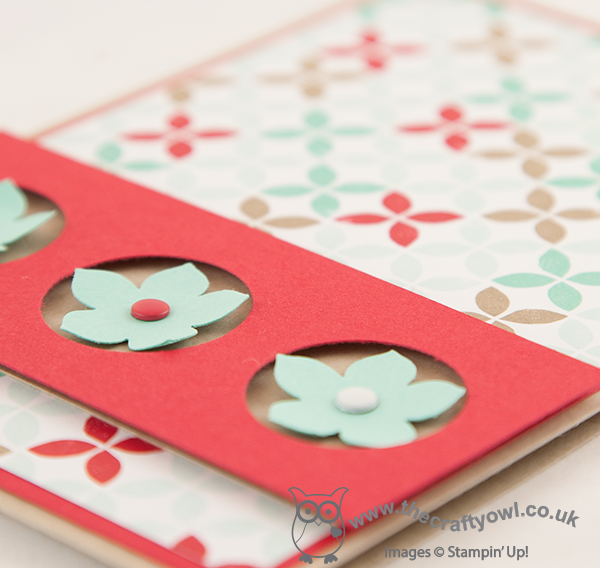
I've had my card in my head since I first saw the sketch, but only managed to get it translated into an actual card today. So here is my take on the sketch:
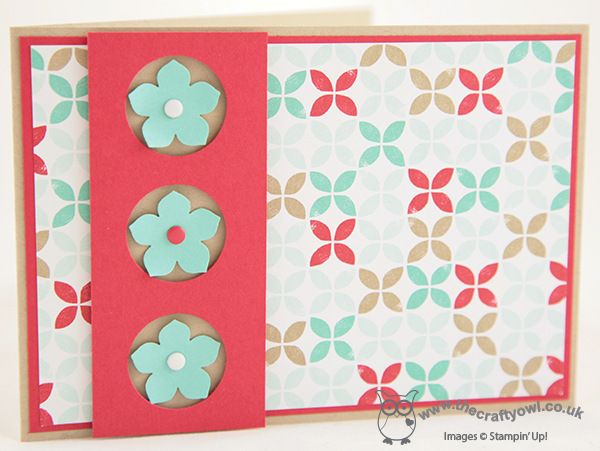
I went for a modern graphic card, using a sheet of the Fresh Prints Designer Series Paper Stack for my colour scheme. I punched the flowers using my Petite Petals punch without stamping them with the co-ordinating stamp set first, as I wanted to limit the pattern to the paper. I set the flowers in a section that has three holes punched with the 1" circle punch and raised this up on dimensionals to add some depth and give the flowers more of a 3D effect. I finished each of the flowers with a candy dot in either Real Red or Whisper White. having finished the card, I realised that it was one of life's rarities - no stamping! I really like this sketch layout and I'm sure will be using it again.
Back later with another video tutorial for you; until then, happy stampin'!
Stampin' Up! Supplies Used:
by Joanne James3. March 2014 22:26Good evening readers! Another busy day today with my first class of the month. The ladies in today's class made some great cards using their Happenings Simply Created Card Kits - pop by my Facebook page tomorrow if you would like to see what they created as I will be uploading some photos of their work.
Meanwhile, I promised you a special second blog post today that showed you how to make a box that can be used to hold four of the notelets created from part of the Happenings Simply Created Card Kit - so here it is! I've shot a few videos previously using the Envelope Punch Board, however this is the first box video. The reason I'm excited to share this particular video with you though is that I used a new tool of mine - Box Buster from The Crafty Owl - to work out the dimensions for my box and it was SO easy!!
For any of you that have made boxes using your Envelope Punch Board previously, you will know that the trickiest thing is working out where to make your first and second punches in order to create a box of the correct dimensions. It's easy for a square-based box, as the dimensions simply need to be divisible by 3, but what about when you want to create rectangular boxes of different heights, widths and depths? Following many templates and a considerable amount of test paper, I have developed a tool that means you can input your three chosen dimensions, in either millimetres or inches, and the Box Buster will calculate the size of the paper that you require and where you need to make both your first and second punches.
Watch the video to see just how easy it is to use (you will need to make a volume adjustment for sound during the middle section of the video; the section that shows the Box Buster in action uses different recording software to my usual video recordings and the sound volume settings are not only different but I've been unable to edit post-production - I do now know for next time though!):
You can find Box Buster from The Crafty Owl on my website here or via the permanent link on the right hand side of my blog page. Box Buster is a free tool and will be permanently available for anyone to use - why not visit the page now and add it to your 'favourites' so that you can access it quickly and easily the next time you need to make a box using your Stampin' Up! Envelope Punch Board? Whilst you're there, why not also check out the Product Table Builder from The Crafty Owl - a great tool if you are a Stampin' Up! demonstrator with an online store. And if you haven't already got an Envelope Punch Board, what are you waiting for? Click on the link at the bottom of today's post and purchase one from my online store today!
I'll be making more video tutorials this week showing you how easy it is to make boxes in a variety of different shapes and sizes, in both metric and imperial measurements, using Box Buster from The Crafty Owl and The Stampin' Up! Envelope Punch Board; do come back and check them out or subscribe to my YouTube channel.
Back tomorrow with another project; until then, happy stampin'!
Stampin' Up! Supplies Used:
by Joanne James2. March 2014 23:23Today it's the first Monday of the month, which means one thing - card class! I'm looking forward to a fun afternoon with the ladies in the first of my classes this week, but before I go I have the first of today's blog posts for you - my card for this week's challenge over at Freshly Made Sketches. This week Narelle has designed the following sketch layout:
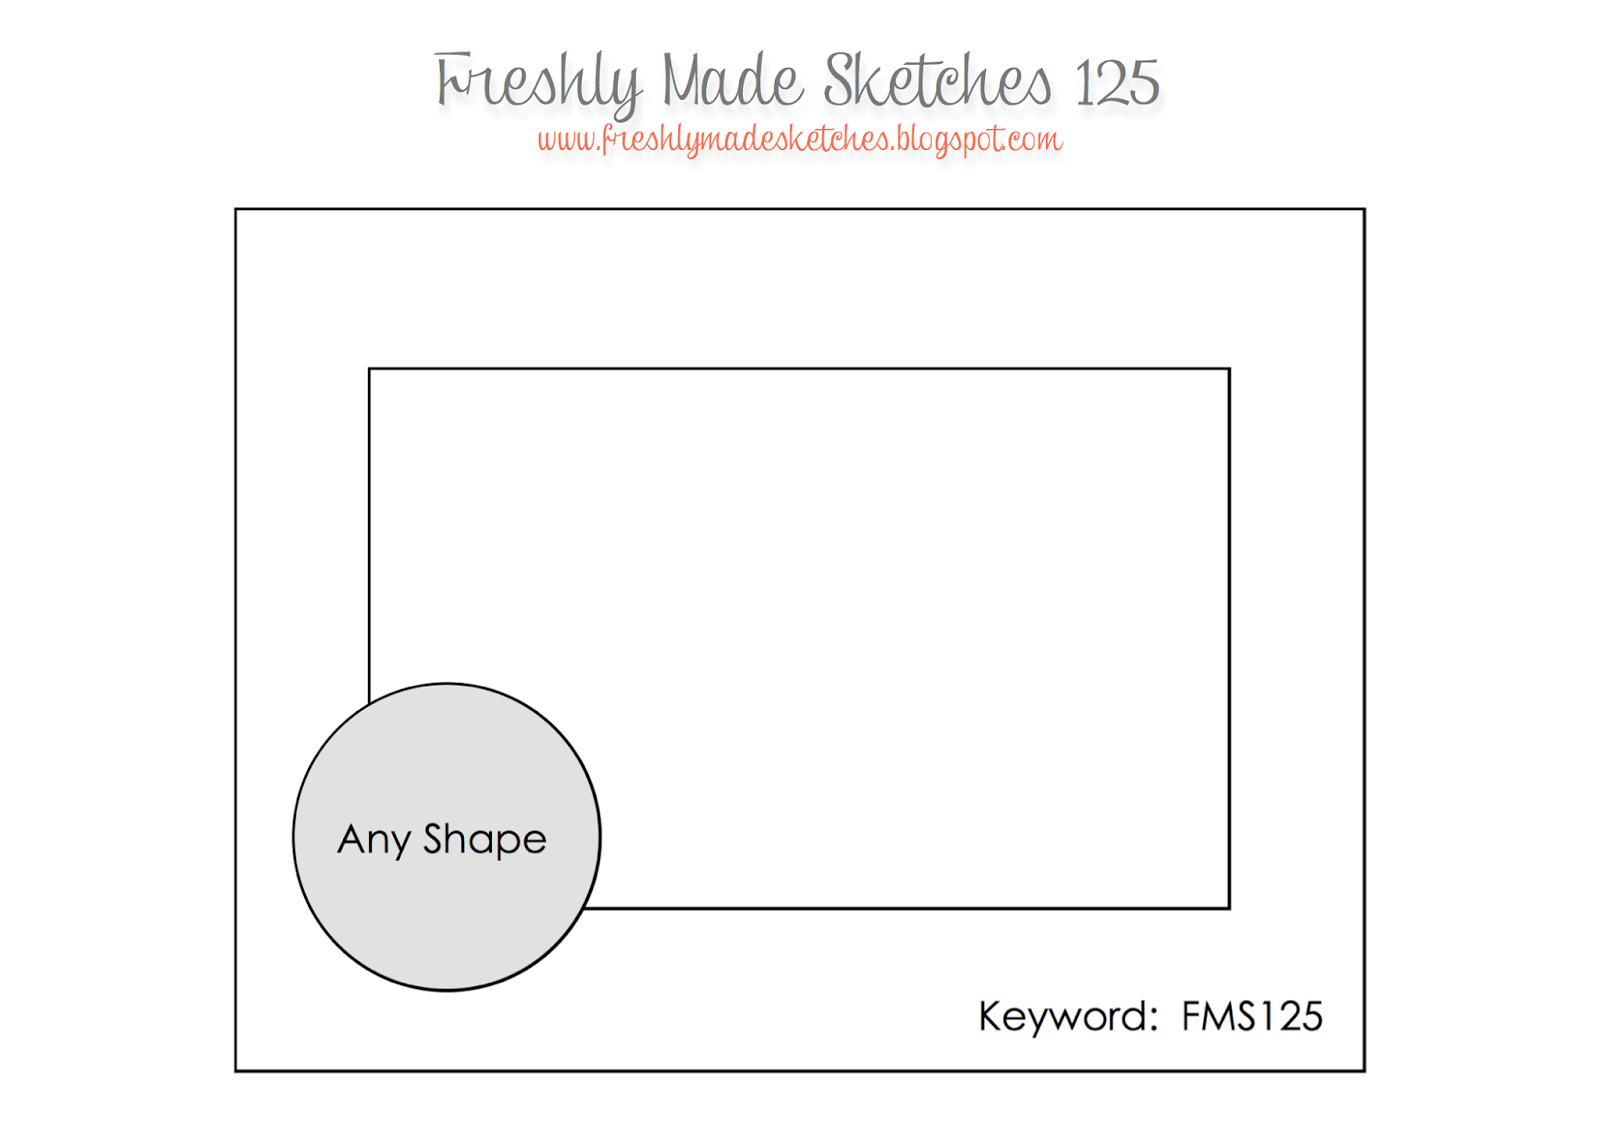
Since Mothering Sunday falls at the end of March here in the UK (earlier than my readers from across the pond) I decided it's time to start card making with Mothers in mind, so here's what I did with today's sketch:
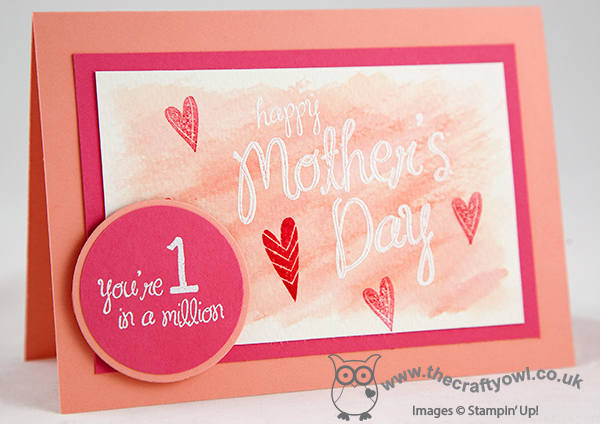
Using watercolour paper, I heat embossed my Happy Mother's Day sentiment in white and then using my Aquapainter and some Crisp Cantaloupe ink, I created a watercolour background. When the paper was dry, I stamped the hearts from the same set in Strawberry Slush ink over the top, stamping off some of them to create a variation in colour intensity. I stuck with the circle shape to highlight 'You're 1 in a Million' and also heat embossed this in white directly onto Strawberry Slush cardstock matted onto Crisp Cantaloupe, to echo the matting on the main section of my card. It almost looks like a badge doesn't it?
Back later with a very exciting video tutorial for you - how to make a box of any size using your envelope punch board - you're not going to want to miss it!
Until then, happy stampin'!
Stampin' Up! Supplies Used:
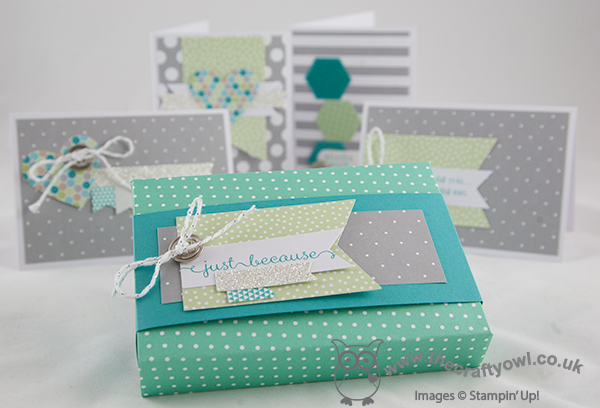
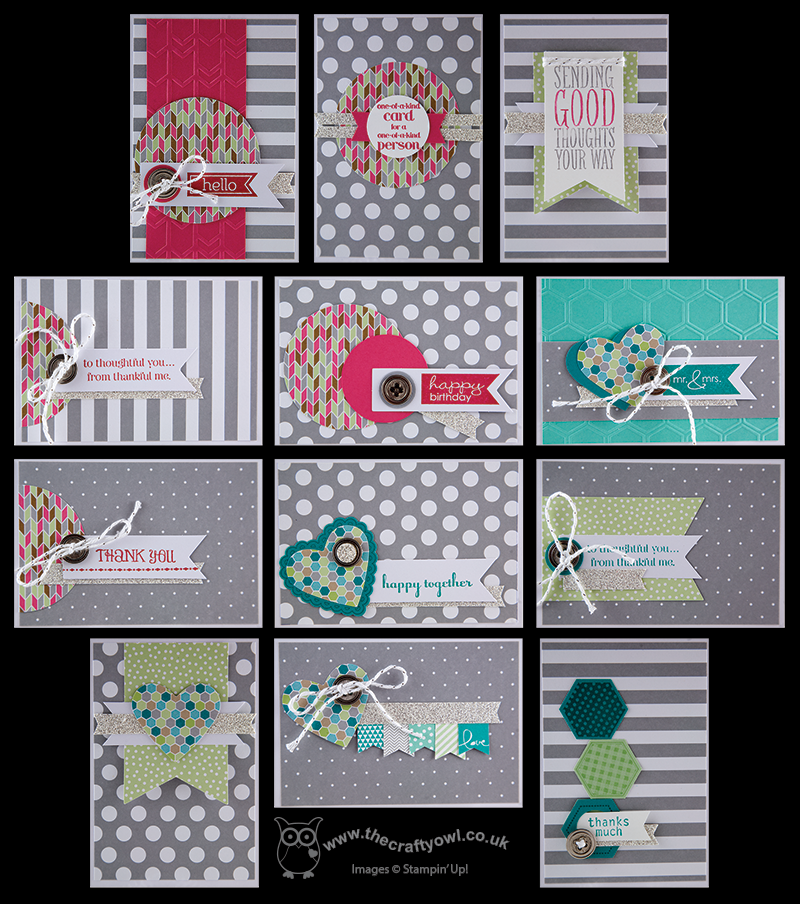
by Joanne James2. March 2014 20:59Today I'm sharing some of the cards I made using the Happenings Simply Created Card Kit that features in the Spring-Summer catalogue. The kit contains everything you need to make 15 cards, including envelopes and costs just £13.50 - that equates to 90p per card, which is great value for a hand-finished card. It doesn't include inks or stamps - you can use the 'Says it All' set suggested in the catalogue, or you can use whatever sentiment sets you already own. I used a selection of stamps on my cards, and added in a few additional items on a few of them too. So here's my first card, which is made up following the basic design that is included with the kit:
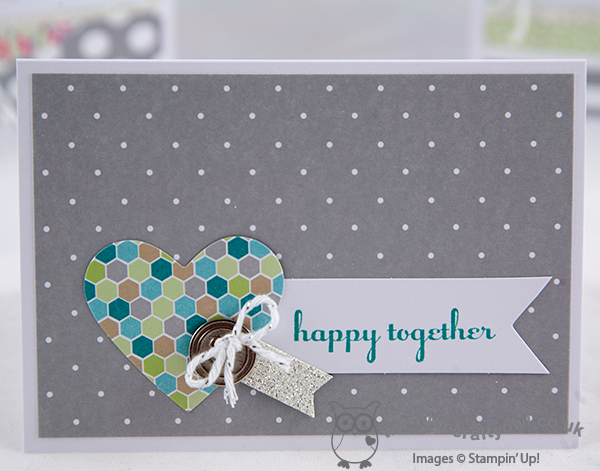
I then added in some co-ordinating accessories just to change things up a little on some of my cards - I created some embossed sections using the new Arrows embossing folder and the Hexagon embossing folder:
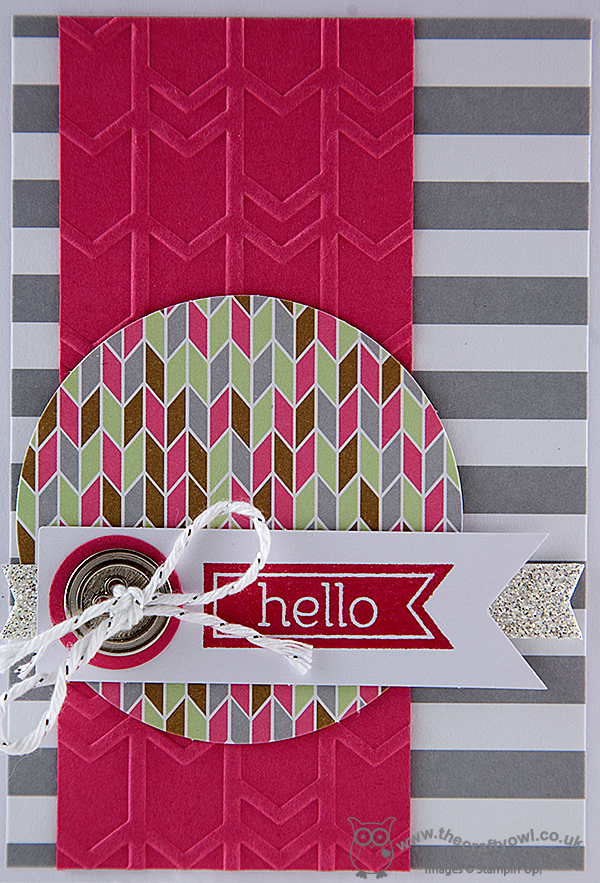
I also used some punches to create shapes that mirrored the patterns of the die-cut accents to add some interest:
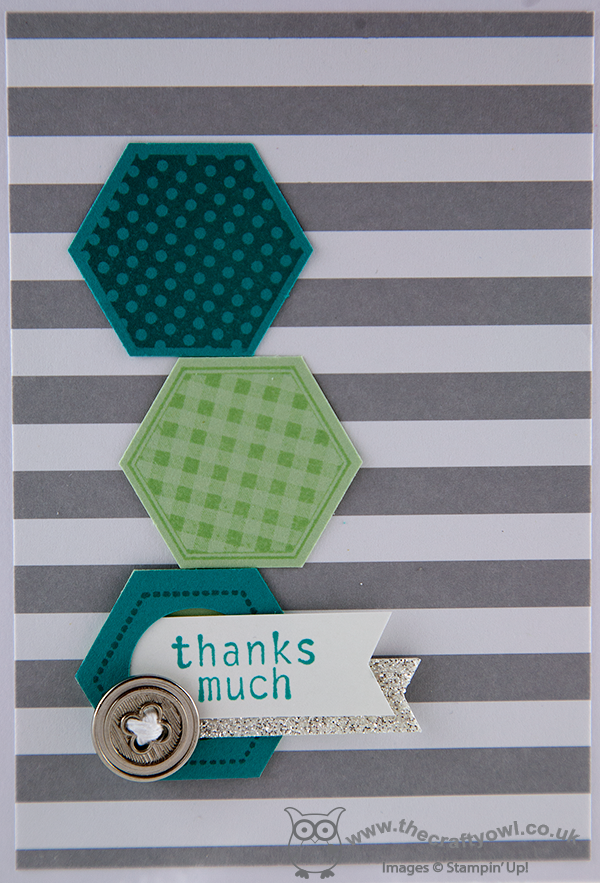
These kits would be great for a beginner or someone who hasn't stamped before, as a gift for someone or even just when time is short and you want to create a whole bunch of cards in one go, but that can be varied such that each is unique. If you would like to buy the Happenings Simply Created Kit or any of the other items I've used on my cards, just click on the links in the table below to go straight to my online store or give me a call if you're local to me and I can place the order for you. We are using these kits in my classes this week and I can't wait to see what my ladies will come up with. I managed to decorate all of cards and still have some embellishments left over to decorate a gift box to hold some of the cards I made - come back tomorrow to see a video tutorial showing how I made it using a new tool that I'm sure you will find useful!
Until then, happy stampin'!
Stampin' Up! Supplies Used:
55c42721-365a-4b1a-9ef6-8b270ecab48e|0|.0|96d5b379-7e1d-4dac-a6ba-1e50db561b04
Tags: Arrows TIEF, circle punch, Classes, Hexagon Embossing Folder, Hexagon Punch, Shop online, Stampin' Up, Stampin' Up Card, Stampin' Up Card ideas, Stampin' Up Supplies, Happenings Simply Created Card Kit, Honeycomb Embossing Folder
Cards | Classes | Stamping
by Joanne James1. March 2014 20:16Today I've had the kind of day where I feel like a true working mother - my 'to do' list is reaching epic proportions and I seem to be rushing from one thing to the next and am welcome for the break that sitting down to write my blog today has given me: and breathe ...!
Well being Welsh, there's only one thing I could share with you today: March 1st is St David's Day, the day that celebrates the patron saint of Wales, so it had to be a card featuring the national flower - daffodils. The first time I saw the Petite Petals punch I knew it would make great daffodil petals - it was the perfect shape. I've seen a few examples in blogland - the first one of which I think was by Jackie Topa - but today I'm going to share my version with you. So for working mothers everywhere and Welsh people at home and abroad, Here's today's card:
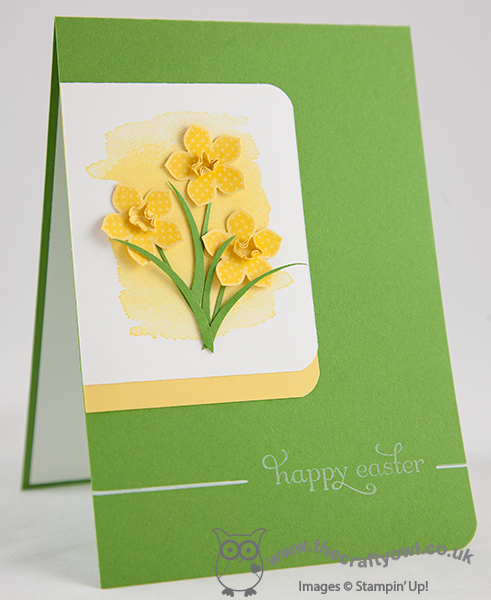
I stamped the petals in Daffodil Delight onto the same colour cardstock using the spotted flower stamp just to give some pattern, and made the trumpets by using a flower shape from the Itty Bitty Punches which I formed by scrunching around the rounded end of my paper piercing tool. here's a close up of the flowers so that you can see what I mean:
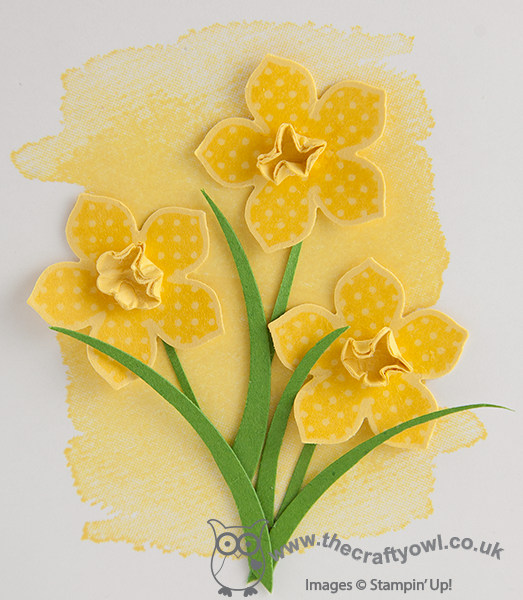
I cut some stems and leaves using the edges of my large oval punch and my paper snips, and mounted these onto a piece of Whisper White cardstock that I background stamped with the large colourwash stamp from the Happy Watercolour set to add some interest. I edged this piece with yellow for definition and mounted my decorated piece onto a Gumball Green card base. I decided to make my card into an Easter card and stamped my sentiment in Whisper White kraft ink and set it within a horizontal line that I drew in with my chalk marker.
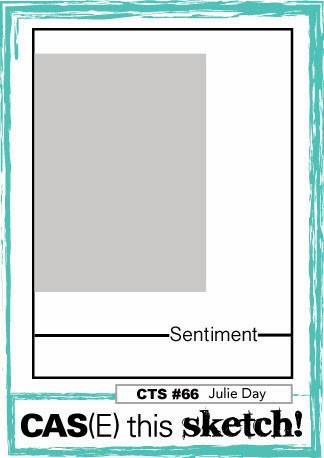
I used this week's sketch layout at CAS(E) this Sketch for my card this week and was delighted to see that the challenge over at Less is More this week is to use yellow and green on your card - perfect!
Back tomorrow with another project; until then, happy stampin'!
Stampin' Up! Supplies Used:
aca38dd3-4a82-4fa0-96b6-1224bf6f20ec|0|.0|96d5b379-7e1d-4dac-a6ba-1e50db561b04
Tags: Punch Art, Petite Petals, large oval punch, Delightful Dozen, Easter, Happy Watercolour, Envelope Punch Board, Shop online, Stampin' Up, Stampin' Up Card, Stampin' Up Card ideas, Stampin' Up Supplies
Cards | Punch Art | Stamping
by Joanne James28. February 2014 21:01Today I have a quick card for you which was inspired by both the sketch over at The Paper Players this week and last week's trio of colours over at Dynamic Duos. Here is Jaydee's sketch over at the Paper Players:
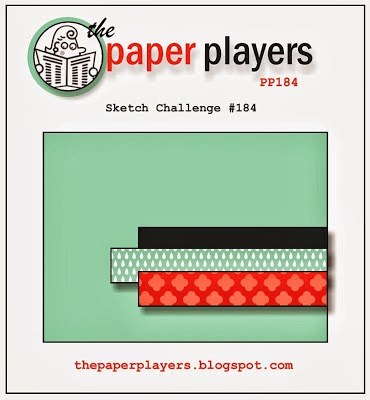
And here is my card:
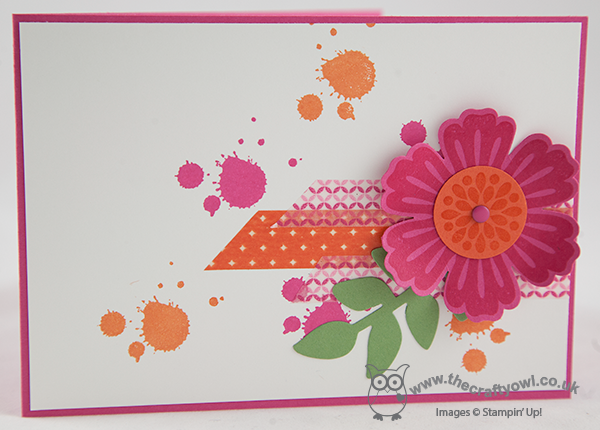
I toyed with going with a literal interpretation of the sketch using nothing more than various papers for the design, but instead I decided to go down a different route and use a combination of washi tape to create my 'stripes', with a tone-on-tone Mixed Blossom flower as my focal point. I then used one of my Gorgeous Grunge stamps to add some interest to the background. This card was something of an experiment but I love the bright, bold colours and the addition of a green stem is just enough to lift the other key colours. I'm also just in time to link up with 'Less is More' where the challenge this week is to add metal to your card - whilst there is only one candy dot brad on my card, I think it serves an important purpose in bringing the whole design together.
That's all from me today; back tomorrow with another project. until then, happy stampin'!
Stampin' Up! Supplies Used:
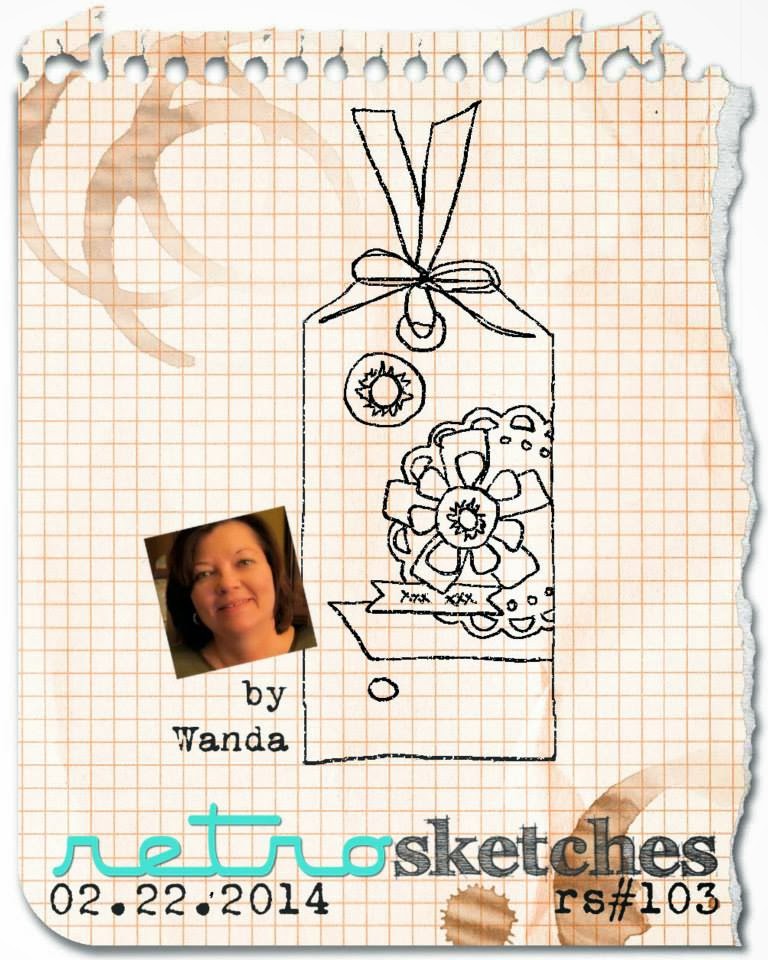
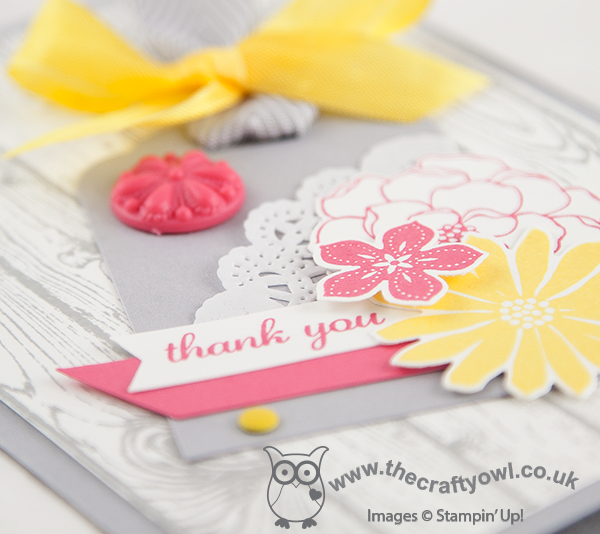
by Joanne James26. February 2014 14:09Today I've a card quite different to yesterday's - I finally caved and purchased the Hardwood background stamp, having seen so many beautiful samples of it on other people's cards and projects. I almost didn't, as I already own Woodgrain and the Wood embossing folder; but I loved the panelled effect so in my basket it went and I have inked it up for the very first time for this project. I am taking my colour inspiration from CAS Colours and Sketches this week and the tag focal point of my card was inspired by the sketch over at Retrosketches, where tags are the order of the day:
So without further ado, let me share my card with you:
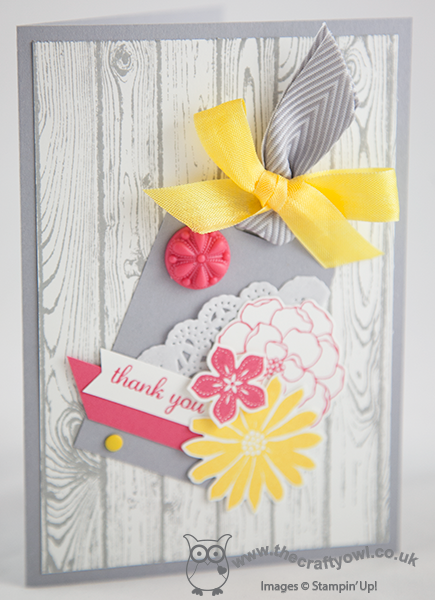
With the Hardwood stamp as my neutral whitewashed background, I used a combination of Secret Garden flowers along with a little pink one from Petite Petals to decorate my tag, the tag itself being punched with the Scalloped tag Topper Punch (such a versatile punch!). I then decorated my tag with a doily, an in-colour embellishment in Strawberry Slush, a Daffodil Delight candy dot and some lovely Smoky Slate Chevron Ribbon tied with some yellow seam binding ribbon along with a double-layered sentiment tag. I'm hoping I didn't get too carried away to qualify for CAS Colours and Sketches this week - I ended up with more layering and detail than I originally intended when I started out with this card, but I must say I really like the effect and love the colour combination.
That's all from me today - back tomorrow with another project. until then, happy stampin'!
Stampin' Up! Supplies Used:
904fba74-59d8-4a25-8f39-75510e042374|0|.0|96d5b379-7e1d-4dac-a6ba-1e50db561b04
Tags: Big Shot, Petite Petals Punch, Petite Petals, Secret Garden, Secret Garden Framelits, Shop online, Stampin' Up, Stampin' Up Card, Stampin' Up Card ideas, Stampin' Up Supplies, Hardwood
Cards | Stamping
by Joanne James24. February 2014 20:29Good evening blog readers! I managed to grab a few hours this afternoon to catch up on some crafting (a reward to myself for getting some of my admin out of the way this morning!) and I made a card using both this week's 'tall and skinny' Mojo Monday sketch and the colours over at Colour Q:
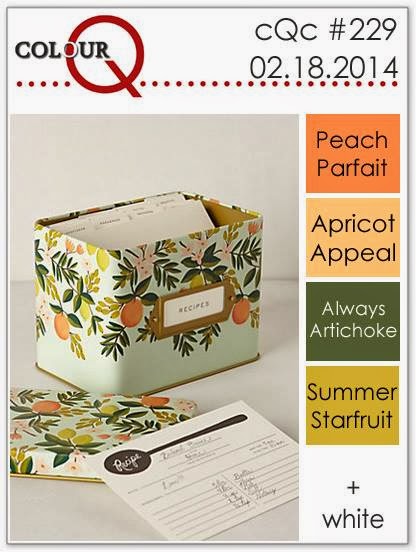
I don't often make 'tall and skinny' cards and historically was always put off by not having the correct sized envelope, but now I have my Envelope Punch Board, irregular envelope sizes don't phase me at all! As for the Colour Q challenge, well you may remember when I made this card a few weeks ago that I confessed I had two ink pads in my stash that I had owned for more than 12 months and never broke the cellophane wrapper on; one of them was Garden Green, that I used on the previous card; the other - Always Artichoke. So when I saw this colour challenge, I just had to have a go! Now Peach Parfait and Apricot Appeal are retired SU colours; I did have an old inkpad and some Peach Parfait cardstock, which I've used, but no Apricot Appeal, so I substituted with Pumpkin Pie instead. Here is my card:
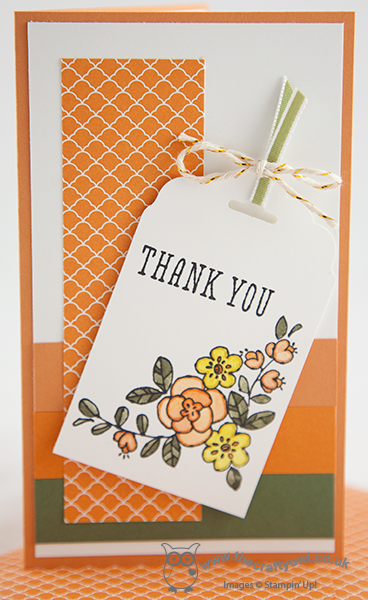
I followed the background layering of the sketch with solid colour cardstock and overlaid with a slim panel of Pumpkin Pie Brights DSP. Instead of a circle as my focal point, I decided to use a tag punched with my Scalloped Tag Topper Punch. I cut my cardstock slightly wider than the 2" groove in order that it could accommodate my corner flower stamp from the 'You're So Grateful' stamp set. I stamped the image in black Stazon and used my Aquapainter to colour in the design. When the image had dried, I went around the inside edge of the image with the co-ordinating colour marker pen to give it added definition. I have one small confession, which is that I used a small piece of Old Olive ribbon to finish off my tag as it was the closest match I had to Always Artichoke. And finally - I made a co-ordinating envelope!
Hope you like today's card; I'll be back tomorrow with a very special punch art creation, so do check back to see what I've made. Until then, happy stampin'!
Stampin' Up! Supplies Used:
by Joanne James21. February 2014 22:37One last quick post from me today - call it an early post for tomorrow! I saw the current sketch over at Retrosketches and was really keen to have a go as I managed to squeeze in a little extra crafting time this afternoon, so thought I would combine it with the challenge over at Addicted to CAS this week:
Now I don't have a current coffee stamp, but I do have a cute little stamp that was part of one of last year's Sale-A-Bration sets that I knew would fit the bill. Here is my card:
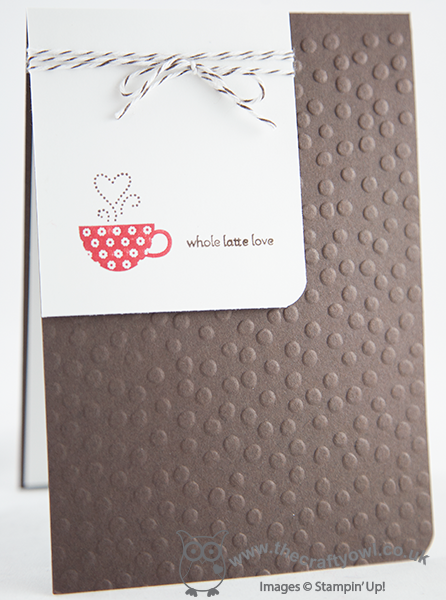
I used coffee as the inspiration for my colour scheme too, with my base card of Early Espresso picked up in the co-ordinating baker's twine. I coloured my coffee cup in red to give a pop of colour and embossed my card base with the Decorative Dots Textured Impressions Embossing Folder to add texture and interest.
That's all from me; I'm off to catch up on a little late night TV. Back tomorrow with another project; until then, happy stampin'!
Stampin' Up! Supplies Used: