Adorable Owls You're So Cute Valentines Card TTT194

by Joanne James26. January 2023 16:00

It's Thursday and time for a new challenge over at TicTacToe! It's the turn of Team X to host this week and I am the featured designer this week. This is the fun board that we are playing along with: 


I went down the first column with diecut, heart and patterned paper and had another play with those Adorable Owls, taking my inspiration too from the scattering of red hearts in the inspiration photo over at Hand Stamped Sentiments - take a look:


Here's the low-down on today's card:

I went with a similar layout to the card I shared with you previously, as I wanted to create another sentiment using my Alphabet A La Mode Dies. This time I added my 'Hoot!' having stamped a shower of hearts behind the 'O', and finished my sentiment with a heat-embossed one from the Adorable Owls stamp set. I used the other two owls in the set, again coloured with my Stampin' Blends and popped up on dimensionals on wither side of the central panel: 

I used a piece of the Country Lane Floral DSP for my base this time as I wanted even more hearts - it is a Valentine's Day card, after all!

Here is the visual summary of the key products used on today's project for you to pin for easy reference:


You can see all of my Product and 'How To' summaries on my 'How To - Tips and Techniques' Pinterest board in case you've missed any. 

A tictactoe board offers so many creative possibilities - how does this week's board inspire you? Why not have a go? We would love to see you in the gallery and who knows - you might be selected for Designer's Choice and be eligible to be a guest designer on a future challenge. 

Enjoy your day; I'll be back tomorrow with another project. Until then, happy stampin'!


Stampin' Up! Supplies Used: 

Table built using Product Table Builder by The Crafty Owl - Independent Stampin' Up! Demonstrator.

Your Last Chance To Sale-A-Brate With Awesome Otters!

by Joanne James26. February 2022 20:00

I've spent a lovely day outside in the fresh air today watching back-to-back hockey matches, still chilly but with glorious sunshine - at last! So I've a super quick post today to share a clean and simple card that uses the colours over at Sunday Stamps and the sketch challenge over at AAA Cards:


I went for the middle rectangle of the nine grid split and chose a cute party-going otter as my favourite animal (of the moment!) as he won't be around for much longer - take a look:


Here's the low-down on today's card:

The Sunday Stamps challenge is entitled 'Winter Blues' but there's nothing sad about today's card! This cute little otter is from the 'Awesome Otters' stamp set: I stamped him and added a party hat from the same set and coloured him with a selection of Stampin' Blends markers (added below, plus a retired Coastal Cobana set) before finishing with a simple sentiment:


The 'Awesome Otters' stamp set is one of a number of items that can be yours FREE with a £45 purchase during Stampin' Up!'s current Sale-A-Bration promotion. If it's still on your wish list, you have until next Monday when the promotion ends to order yours before it's gone forever. Just click on the links below to go to my online store to get yours - remember to add the current host code for a special thank you from me.

Here is the visual summary of the key products used on today's project for you to pin for easy reference:


You can see all of my 'How To' summaries on my 'How To - Tips and Techniques' Pinterest board in case you've missed any. 

Enjoy your evening and I'll be back tomorrow with another project. Until then, happy stampin'!


Stampin' Up! Supplies Used:

Table built using Product Table Builder by The Crafty Owl - Independent Stampin' Up! Demonstrator.

Friendly Hello Birthday Card TTT150

by Joanne James24. February 2022 16:00

It's Thursday and time for a new challenge over at TicTacToe! It's the turn of Team X to host this week and the lovely Vicky is our featured designer this week. This is the fun board that we are playing along with: 


Vicky chose some great options this week and I could have gone in any direction! In the end I went across the top of the board with pastel colours/designer paper/diecut and grabbed some of my designer paper and paper snips and set to work:


Here's the low-down on today's card:

Friendly Hello Times Two - I decided to use both the 'Friendly hello' stamp set and the co-ordinating papers on today's card. I set to work fussy cutting one of the multi-coloured sheets and created a layered image of the bird surrounded by leaves and flowers. The stamping on my card is limited to my sentiment on the front, that I stampsed twice, once onto the base and then again onto some Pool Party cardstock and fussy-cut the word 'friend' for a contrasting look. I also stamped a birthday sentiment inside and used some left over flowers to decorate my insert:


These papers are gorgeous - I even used a piece to decorate the envelope flap for a card that is pretty both inside and out!

Dots and Circles - I layered my bird, flowers and foliage onto a circle of Granny Apple Green with a black scalloped mat - you can just see it peeking through below all of that fussy-cut goodness below:


I grounded the decorative circle with a strip of dotty paper which is another design in the same Friendly Hello pack.

Still Time To Sale-A-Brate - The 'Friendly Hello' bundle is available FREE with a £90 purchase during Stampin' Up!'s current Sale-A-Bration promotion. If it's still on your wish list, you have until next Monday when the promotion ends to order yours before it's gone forever. Just click on the links below to go to my online store to get yours - remember to add the current host code for a special thank you from me.

Here is the visual summary of the key products used on today's project for you to pin for easy reference:


You can see all of my Product and 'How To' summaries on my 'How To - Tips and Techniques' Pinterest board in case you've missed any. 


Today's card uses the sketch over at Atlantic Hearts for the layout (I did move the sentiment though - and it's my first time of playing too!). There are also lots of dots and circles so I'm linking up over at Global Design Project as that's their theme this week and I'm linking up over at TGIF Challenges where they, like me, are all about Sale-A-Bration (thanks too for chooing me as your winner last week ladies!)

A tictactoe board offers so many creative possibilities - how does this week's board inspire you? Why not have a go? We would love to see you in the gallery and who knows - you might be selected for Designer's Choice and be eligible to be a guest designer on a future challenge. 

Enjoy your day; I'll be back tomorrow with another project. Until then, happy stampin'!


Stampin' Up! Supplies Used: 

Table built using Product Table Builder by The Crafty Owl - Independent Stampin' Up! Demonstrator.

Driving By To Say Hi In A Pink Camper Van

by Joanne James17. February 2022 17:00

Today I'm sharing a card that I made for fun using the sketch over at TGIF Challenges and the pink and blue inspiration board over at Hand Stamped Sentiments , where the same colours feature at Colour Hues too:


I love the pink and blue colours of the HSS board and was particularly drawn to the florals and the pink camper van with the palm trees. It was the perfect opportunity to ink up the cute camper in the Sale-A-Bration 'Driving By' stamp set - take a look:


Here's the low-down on today's card:

I used hexagons cut using my Beautiful Shapes Dies, as opposed to a heart as the basis for design, having cut one in the gold-splattered navy paper from the Abstract Beauty pack, and layered it with gold vellum and a double-edged gold hexagon from the Expressions In Ink Ephemera pack, although you could be forgiven for not being able to tell; I didn't have any palm trees, so I used the retired 'Tropical Chic' stamp set and Tropical Thinlits Dies to create some bi-coloured florals and tropical leaves as a back drop for my fun camper van, that I coloured with Blends. Once I'd started layering, I just couldn't stop! I also added in some gold foliage and gold faceted gems alongside my sentiment to finish:


This is one of those cards that I wanted to create 'just for fun' - the sketch and inspo board were too good to pass up!

Here is the visual summary of the key products used on today's project for you to pin for easy reference:


You can see all of my 'How To' summaries on my 'How To - Tips and Techniques' Pinterest board in case you've missed any. 

Enjoy your day and I'll be back tomorrow with another project. Until then, happy stampin'!


Stampin' Up! Supplies Used:

Table built using Product Table Builder by The Crafty Owl - Independent Stampin' Up! Demonstrator.


Awesome Otters Otterly Awesome Card

by Joanne James14. February 2022 14:00

Happy Valentine's Day everyone! Today I'm sharing a card for the current challenge over at Fusion where I used both the sketch and the pink and red hearts in the photo for my inspiration:

No cupcakes on today's card, although I did try and incorporate a little chocolate brown colour! I I have a card that would work for Valentine's, or any other time that you'd like to let someone know how awesome they are - take a look:


Here's the low-down on today's card:

Today's card features one of the cute otters from the 'Awesome Otters' stamp set - one of the many items that can be yours free with a £45 purchase during the current Sale-A-Bration promotion. I coloured him with my new skin tone Blends markers - so great to now have so many neutral tone Blends to choose from! - and then heat embossed a sentiment from the same set onto a red diecut heart for him to hold. I love that the heart is so big it looks like the otter can barely hold it up!


I backed the whole thing with more of my favourite Sweet Talk heart patterned paper, and for the horizontal banner added a red glimmer diecut; what to use for the horizontal caused me most of the thinking time on today's card and I tried a whole range of things before settling on this!

Did you know that otters hold hands so that they don't drift away from each other as they sleep? I think that's so sweet! My other half definitely does not display any otter-like tendencies, preferring plenty of space down the middle of the bed to ensure a good night's sleep! He's thoughtful in other ways though - and will be cooking Valentine's dinner for four this evening, so no complaints from me!

Here is the visual summary of the key products used on today's project for you to pin for easy reference:


You can see all of my 'How To' summaries on my 'How To - Tips and Techniques' Pinterest board in case you've missed any. 

Enjoy your day and I'll be back tomorrow with another project. Until then, happy stampin'!


Stampin' Up! Supplies Used:

Table built using Product Table Builder by The Crafty Owl - Independent Stampin' Up! Demonstrator.

Sale-A-Brate with a Pool Party Friendly Hello AYSI 266

by Joanne James14. January 2022 12:00

Today I'm sharing my design team card for our first challenge this year over at As you See It where it's time for a sketch challenge designed by the lovely LeAnne:


A short and sweet post from me today as I've a lot on so need to make it brief. I decided to use one of my Sale-A-Bration freebies for my card today - take a look:


 Here's the low-down on today's card:

Today's card features the pretty 'Friendly Hello' stamp set and co-ordinating papers - one of the co-ordinating bundles that can be yours free as part of the current Sale-A-Bration promotion with a £90 purchase. The line images of the stamp set co-ordinate with the florals and spring colours of the papers perfectly. I left my stamped bird image black and white and coloured the circle behind with my Pool Party Blends to give the same effect as the background papers and added a fussy cut heat-embossed sentiment, with some sparkly ribbon and black enamel dots to finish. The shimmer from the ribbon seems to almost reflect the blue, don't you think?


I usually struggle with a diagonal, but my card for today came together quite easily. The black, white and Pool Party colour combination is also perfect for the Color Dare challenge of neutrals plus one colour of your choice so I'm linking up today's card there too.

If you would like to snap up this bundle of products for FREE, just place an order for £90 or more in my online store before the end of February. Gotta love free craft products!

Here is the visual summary of the key products used on today's project for you to pin for easy reference:


You can see all of my 'How To' summaries on my 'How To - Tips and Techniques' Pinterest board in case you've missed any. 


Here's a summary of our challenge rules:

  • Create any card, scrapbooking page, 3D project or packaging project that fits the challenge.
  • Please include the challenge graphic and link back to the challenge in your blog post. Turn off word verification so we can leave you lots of lovely comments. Make sure you link the post not the whole blog to the Linky. Use #AYSIXXX when uploading to a public gallery.
  • If you’re unsure about ‘the rules’, check the details under the Challenge Guidelines tab on the As You See It Challenge homepage.
  • In a sketch challenge, you are welcome to rotate or flip a sketch. You can replace shapes used such as substituting a circle panel for a square panel. However, we must be able to still see the basis of the original sketch in your finished product.
We look forward to seeing your creations in the AYSI gallery.

Enjoy your day and I'll be back soon with another project. Until then, happy stampin'!


Stampin' Up! Supplies Used:

Table built using Product Table Builder by The Crafty Owl - Independent Stampin' Up! Demonstrator.

By The Bay Clean and Simple Inlaid Frame Card

by Joanne James18. January 2019 09:00

Yay - it's Friday, bring on the weekend! Today I'm sharing a card for the current challenge over at Less is More where I haven't played for a while:

I had a short window for a spot of crafting yesterday and thought I'd whip up another clean and simple card using a couple of new products that fits perfectly with their theme this week - take a look:


Here's the low-down on today's card:

By The Bay - The seagulls paddling on the shoreline that feature on today's card are reminiscent of the ones that featured in the much loved and now retired Wetlands set (anyone else remember that set?) albeit with a little more definition, and they are one of three line-drawn images that feature with three sentiments in 'By The Bay', one of the stamp sets that can be yours free with a purchase of £45 or more during Sale-A-Bration. Perfect for colouring the images are large enough to stand alone but also not so big that they take a long time to colour. I really like this set and you can be sure I will be using it more before the promotion is over. 

Another Way To Frame - To frame my image, I used a new favourite of mine, the Rectangle Stitched Framelits Dies, but this time to cute an aperture frame into my cardfront. I then adhered my watercoloured image behind this. I like the subtle added detail that this gives to a clean and simple card, without adding overt layers. 

Ways With Watercolour - I feel like I've been watercolouring a lot on my cards lately; I don't consider myself to be by any means an expert at watercolouring, but I think that's why I'm enjoying it so much; on watercolour paper, it's easy to build up colour without needing to be too precise in terms of the overall effect. It would take ages if I was to attempt to properly draw and paint the image to achieve omething like this, so I'm grateful that stamps, ink and an aquapainter enable me to produce something this good in a fraction of the time! I used a combination of blues, greys and sandy neutrals to colour my image.

If you like today's clean and simple card, by purchasing the key items used below, you can earn the By The Bay stamp set for free - perfect for creating your own watercoloured masterpieces.

Here is the visual summary of the key products used on today's project for you to pin for easy reference:

You can see all of my 'How To' summaries on my 'How To - Tips and Techniques' Pinterest board in case you've missed any. 

Enjoy your day - I have a monster basket of ironing to wade through but I'm hoping if I focus I might squeeze in a little stamping time before my afternoon school run, so I'm on a mission! I'll be back tomorrow with another project. Until then, happy stampin'!


Stampin' Up! Supplies Used:

Table built using Product Table Builder by The Crafty Owl - Independent Stampin' Up! Demonstrator.

Epic Celebration - You Rock for The Paper Players PP387

by Joanne James1. April 2018 09:00

Happy Easter Sunday wishes everyone! It's time for this week's new challenge over at The Paper Players! It's the turn of the amazingly talented Laurie to host this week and she has a fun theme challenge for you to work with:
    

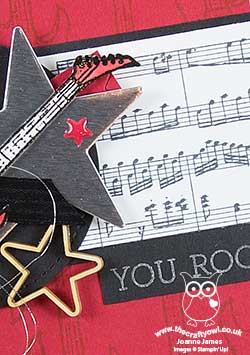
I don't have much in the way of music-themed supplies in my collection and usually end up resorting to my e-cutter to create music-themed cards and gifts (you can see some of my previous examples here and here), so I was thrilled to see the Epic Celebrations set in this year's Sale-A-Bration promotion. As the wife of a guitarist and the other mother of two almost-teens, one of whom is in a band and both of whom are into either listening to or playing music in a big way, this set was a must-have for me. So whilst Sale-A-Bration has now ended, this set is a keeper and I just had to use it on today's card. I also used this week's sketch at Freshly Made Sketches for my layout - take a look:
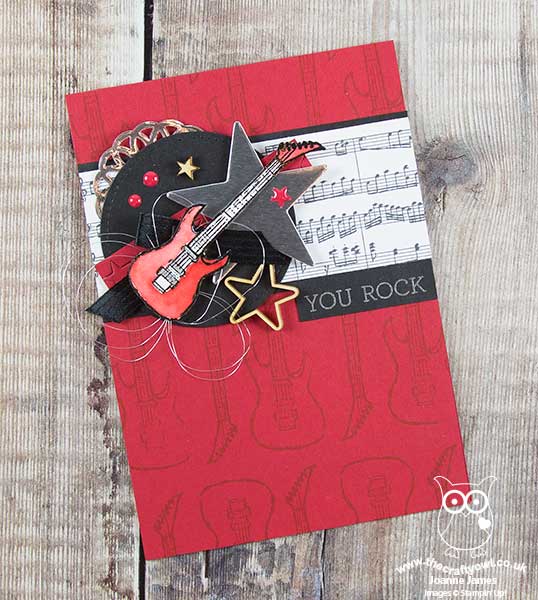
 

Here's the low-down on today's card:

Epic Tone on Tone - I decided to use a simple tone-on-tone stamped background in Real Red using the guitar stamp to create some detail and to highlight my main focal image, which I stamped and heat embossed in black on watercolour paper, then coloured with my aqua painter. I added this to a collection of stars and bits and pieces to add a touch of 'glam rock' to my card. 

A LittleSheet Music - The border panel is a section of the background stamp 'Sheet Music', which I simply stamped onto Whisper White and cut out a section for added interest in keeping with the theme.

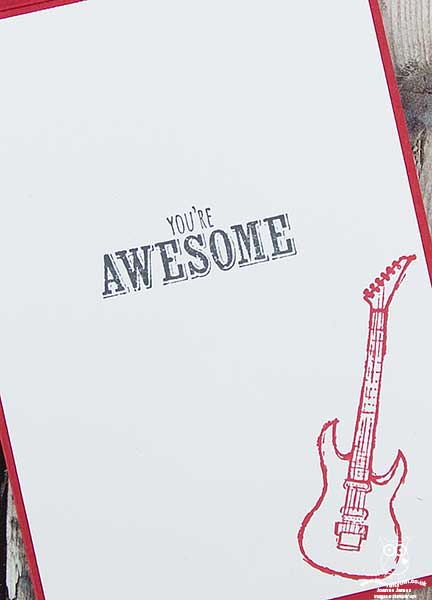
A Punny Sentiment - My punny sentiment is courtesy of the now-retired 'Crazy About You' set, which was perfect for this card. I also used the 'You're Awesome' sentiment from the Epic Celebrations set on the inside of my card:
 

Here is the visual summary of the key products used on today's project for you to pin for easy reference:
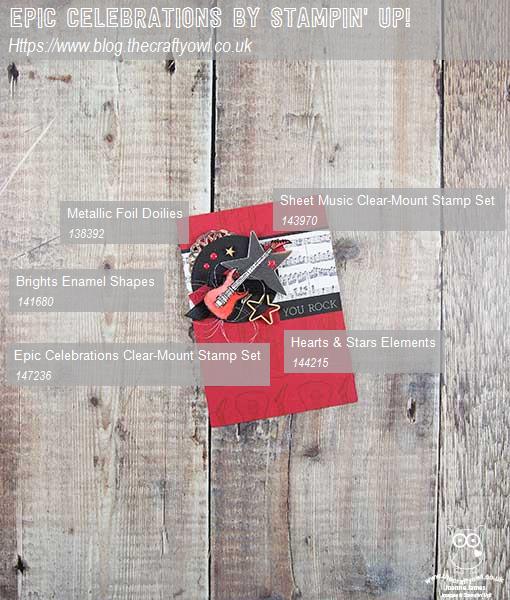
 

You can see all of my Product and 'How To' summaries on my 'How To - Tips and Techniques' Pinterest board in case you've missed any. 

This card is headed to my pile as a thank you for one of Rebecca's teachers; she will be performing the role of Brigitte in her whole school production of Rogers & Hammerstein's 'The Sound of Music' next term and there are an army of staff involved in making this happen, including her Maths teacher, who also plays electric guitar. The girls at school think he is super cool, so this card will be perfect for him!

Before you reach for your ink and papers, check out what our amazing team has created to inspire you this week:

Here's a quick recap of our challenge rules:
 
1.  Create a new paper project
2.  Upload your creation to your blog with a link back to us and provide a direct link to the post featuring your challenge submission.
3.  Please link your card to no more than four challenges, TOTAL.
4.  Have FUN!

I can't wait to see how you interpret this week's theme and look forward to visiting your blogs this week! Enjoy the rest of your weekend - enjoy your Easter egg hunts and eat as much chocolate as you can safely consume! I'll be back tomorrow with another project; until then, happy stampin'!


Stampin' Up! Supplies Used: 

Table built using Product Table Builder by The Crafty Owl - Independent Stampin' Up! Demonstrator.

Bubbles And Fizz Clock - No Stamping Required #GDP127

by Joanne James2. March 2018 22:00

Today I'm sharing a 3D project with you that is the ultimate showcase of the Sale-A-Bration Bubbles & Fizz papers, so is perfect for this week's Global Design Project challenge:

Why is it the ultimate DSP showcase? Well there's not a single bit of stamping on today's project - take a look:


A multi-coloured and fully functional working clock - how fun is that?! Here's the low-down on today's project:

No Stamping Required - This is another of the projects that I showcased at Onstage back in November and is a real favourite of mine. You know how much I love those Bubbles and Fizz papers and this project showcases 3 of the designs (4 if you count the decorated pizza box I used to gift wrap it!): the multi-coloured bubble background, the bottle tops indicating where the numbers are and the bottles that form the clock hands. All three papers work really well together and leave no need for any stamping on this project.  

Bottles and Tops - Well, Bottles and Bubbles actually - well framelits that is, that fit the Bottles and Fizz paper perfectly. On each of these sheet designs every bottle and top can be cut out perfectly with the co-ordinating framelits, so there is no wastage. 

A Touch of Gloss - I added a layer of fine tip glue to my bottles and tops before attaching the to my clock face, to give a layer of shine and protection. That's all there is to it!

This project uses a simple clock kit that you can buy at any craft store and is great if you have customers who like home decor projects but are not big stampers (I have a group of those!) The clock is also fun - great for decorating the bedroom of a discerning teenager or maybe a student away from home. It really doesn't use much in the way of supplies and whilst you only need the framelits for this project, you are definitely going to want to buy the bundle to benefit from the stampset too and explore further creative opportunities.

Here is the visual summary of the key products used on today's project for you to pin for easy reference:


You can see all of my 'How To' summaries on my 'How To - Tips and Techniques' Pinterest board in case you've missed any. 

Enjoy your weekend; I will be hosting my first two day residential Stampin' Sanctuary luxury craft retreat so will not be blogging tomorrow. I'll be back on Sunday with another project for this week's new challenge over at The Paper Players though so be sure to tune in then. Until then, happy stampin'!


Stampin' Up! Supplies Used:

Table built using Product Table Builder by The Crafty Owl - Independent Stampin' Up! Demonstrator.

Happy Birthday Wishes Ombre Card

by Joanne James27. February 2018 22:00

Having a busy few days putting the final touches to my craft retreat this weekend, so a quick post from me to share a card that is perfect for the challenge over at Just Add Ink this week:

For my 'h' I had to go with 'h for happy' as in the 'Happy Wishes' Sale-A-Bration set - take a look:


Here's the low-down on today's card:

Happy Birthday Wishes - The 'Happy Wishes' stamp set is one of three items available with a £90 purchase during the current Sale-A-Bration promotion - a great sentiment set with so many possibilities. Two large floral words and 14 additional stamps with words and phrases that can be combined to create a wide variety of sentiments. Useful and pretty too!

Easy Ombre - I made a version of this card in my recent Sale-A-Bration class and wanted to teach those present how to create an easy ombre effect by inking a stamp in a single, light colour (here I inked my 'happy' in Powder Pink) and then add ink in a complimentary darker colour, such as Berry Burst, with my sponger dauber to the lower portion of the stamp. A fun technique that is easy to achieve - always a winner. Once stamped, I added a little more Powder Pink to the florals on the stamped image with my blender pen for a little added detail. 

Love The In-Colours - My card features a little Powder Pink but is otherwise all about the Berry Burst - ink, some in-colour patterned designer series paper and a bow in that lovely, soft Berry Burst crinkle ribbon. In case you couldn't tell, I just love this in-colour - I think it might be my current favourite! 

Here is the visual summary of the key products used on today's project for you to pin for easy reference:


You can see all of my 'How To' summaries on my 'How To - Tips and Techniques' Pinterest board in case you've missed any. 

That's all from me today; I'll be back tomorrow with another project. Until then, happy stampin'!


Stampin' Up! Supplies Used:

Table built using Product Table Builder by The Crafty Owl - Independent Stampin' Up! Demonstrator.

New Online Exclusives

There are new products available exclusively in the online store from 5 November - check them out here.

Latest Kits!

Stampin Cut and Emboss

The Perpetual Beauty Calendar Kit and Cherry Blossoms Treat Boxes Kit are the latest kits in the online store - get yours here!

Shop Online

Access my online shop 24 x 7, 365 days of the year:

Current December hostess code:

9NKXDTTR

Shop Online

Mini Catalogue

BROWSE THE CATALOGUE

'Tis The Season - the new Stampin' Up! Mini Catalogue is here! For more details and to download your copy click here

Scrapbooking

Stampin' Up! has introduced a new range of 12x12" scrapbooking product and kit - the full range is now available to purchase online. To download a copy of the new digital Scrapbooking Catalogue click here.

2024-25 Annual Catalogue

BROWSE THE CATALOGUE

Click on the image to download your copy of the 2024-25 annual catalogue. For a full list of current SU! supplies, go to my online store. If you would like any help or advice, please drop me a line at joanne@thecraftyowl.co.uk or give me a call on 07773 421446 - I'd be happy to help.

Join My Team

It's always a great time to join Stampin’ Up! New team members can get £130 worth of products for only £99 + free business supplies + free shipping + all the fun being a part of Stampin’ Up! Stampin' Up! has something for everyone: join my growing team and benefit from my support to enjoy Stampin' Up! however you choose.

If you're interested, call me for a chat to understand how I can help you realise your goals. Alternatively, if you have already decided to sign up and you just can't wait, please click here for the link to the online form where you can sign up and order your starter kit right away! 

About Me

Hi I'm Joanne and live in Northampton and when I'm not looking after my husband and two beautiful children, am an avid crafter with a passion for all things Stampin' Up!

I must confess that I have never been a big rubber stamper - until I discovered Stampin' Up! that is. I love the fact that I can get such great results with co-ordinating stamps, inks, papers and punches - the possibilities are endless! Join me on my stamping journey as I share the things I love and be inspired to create amazing things yourself!

Follow Me

Monthly Newsletter

Box Builder

Click the button above to use Box Buster to create your custom box design using the Envelope Punch Board!

Kits Collection Now Available!

Stampin Cut and Emboss

The new Kits Collection from Stampin' Up! is now available!

Click here to see the current kits available and order yours online today.

I Design For


Stampin' Up Stuff

This is my personal blog and is not endorsed by Stampin’ Up! I hope you find it a plentiful source of ideas and personal inspiration but please don't copy my designs for contest submission or use for classes, publication or sale without express permission.

DSP Special Release

Check out 3 popular designer series paper designs in fresh new colourways! Available exclusively in the online store from 3 December - check them out here

Last Chance Products

Last Chance Products will now be updated every other month - check them out here.