Snowflake Wishes Hexagonal Shaker Box and Matching Christmas Card PP520

by Joanne James6. December 2020 09:00

Today it's Sunday and time for this week's new challenge over at The Paper Players! It's my turn to host this week and I have a timely theme challenge for you to work with:


19 days to go and yes - it's beginning to feel a lot like Christmas, so that is my theme this week! You can share your gifts, cards, packaging - we would love to see your festive makes! I love to make co-ordinating cards and gift packaging at this time of year so I have one such set to share with you today. My post is photo-heavy as I'm going to share both a Christmas card and a rather fancy matching gift box using products from the Snowflake Splendor Suite. I even have a video tutorial for you!

First up - here's my Christmas card, with the hexagonal aperture cut using the So Many Snowflake dies:


I added some diecut snowflakes painted with Frosted White shimmer paint and finished with those pretty Balmy Blue adhesive-backed gems and a pretty Pool Party sheer ribbon bow, with a simple sentiment and snowflake decoration on the inside of my card:


 Check out the effect of those faceted gems - so sparkly!

This card was a variation on one I made in my monthly card class featuring the Snowflake Wishes bundle a few months ago. I liked the card so much, I decided to make a matching box, using the same hexagonal aperture and the Stitched Nested Label Dies from the annual catalogue. I made a simple birthday gift box using these dies previously (you can see that box here if you missed it) and have been wanting to make a video tutorial to show how it was done, so this seemed like the perfect opportunity. Here is my finished box closed:


And this is what it looks like open - the lid and base extend beyond the sides of the box and the top slides off to reveal the inside:


I wanted to step up my box so instead of simply creating an open aperture on the lid, I added some acetate and created a shaker, filled with snowflake sequins and glitter - check out  this out - it's not only the sentiment that's full of sparkle:


I added some Snowflake Splendor designer paper to the sides of my box lid and wrapped and tied it with more of the Pool Party sheer ribbon, to tie it in with the detail on my card - you can see that better below:


Rather than detail exactly how I made this project in words, I thought I would make a video tutorial should you wish to have a go at making one yourself - so here it is:

I am just in love with this set; the box isn't huge, but will hold small gifts such as chocolates, jewellery, a scented candle - lots of options! Here's a final photo of my projects together:


I would love to know what you thought of my video tutorial too; was it useful? Would you like to see more of this type of content. Do let me know - I would love to hear your thoughts!

Here is the visual summary of the key products used on today's project for you to pin for easy reference:


You can see all of my Product and 'How To' summaries on my 'How To - Tips and Techniques' Pinterest board in case you've missed any. 

Before you reach for your ink and papers, check out what our amazing team has created to inspire you this week:

Here's a quick recap of our challenge rules:
 
1.  Create a new paper project
2.  Upload your creation to your blog with a link back to us and provide a direct link to the post featuring your challenge submission.
3.  Please link your card to no more than four challenges, TOTAL.
4.  Have FUN!

You can see all of my 'How To' summaries on my 'How To - Tips and Techniques' Pinterest board in case you've missed any. 

Enjoy your day; I started writing Christmas cards whilst at hockey yesterday and am hoping to crack on with those this afternoon to get them in the post tomorrow, which will be a huge achievement! I'll be back tomorrow with another project. Until then, happy stampin'!

Stampin' Up! Supplies Used: 

Table built using Product Table Builder by The Crafty Owl - Independent Stampin' Up! Demonstrator.

Lovely Lipstick Layered Hearts Valentine's Day Card and Diamond-Faceted Gift Box

by Joanne James8. February 2019 21:15

Yay it's Friday and the weekend is just around the corner! Today has been a day of rest for the girls of the James household - both of us are suffering with colds, courtesy of the youngest James Junior who thoughtfully shared his cold with us and today it has knocked us for six. Today I'm sharing a card I made earlier this week using the lovely Julee Tilman's sketch; I was thrilled to learn recently that she had revived her Mojo Monday sketch challenge which she is now hosting on her blog Poetic Artistry - always worth a read, so do go take a look. So here is the current Mojo Monday sketch:

With only a week to go until Valentine's Day, I decided to take Julee's layout quite literally and used the heart focal point to influence the remainder of my design - take a look:


 Here's the low-down on today's card:

All Heart - My card today is all heart: I cropped my main heart with the Be Mine Stitched Framelit Dies and used the bold heart-patterned paper from the All My Love DSP pack for my main panel - there's nothing that says 'I Love You' for Valentine's Day more than hearts, hearts and more hearts! 

Layers of Lovely Lipstick - Julee's sketch has lots of layers and since I didn't want to detract from the heart patterned paper, I used a plain banner of Lovely Lipstick cardstock in conjunction with a couple of co-ordinating papers for the additional panel layers and used the monochromatic shade of Lovely Lipstick to unify my card. 

And a Matching Treat Box Too - I had a couple of lidless diamond-faceted gift boxes in Lovely Lipstick and made with the Gift Bag Punch Board on my desk, left over from another project, so quickly whipped up a lid in the heart-patterned paper to make a small gift box to co-ordinate with my card: 

Perfect for a small item of jewellery or some chocolates - I might have to drop a few hints to Mr James and see if he can put one of these to good use!

Here's one last photo of both of my projects together:

Here is the visual summary of the key products used on today's project for you to pin for easy reference:

You can see all of my 'How To' summaries on my 'How To - Tips and Techniques' Pinterest board in case you've missed any. 

Enjoy your evening and I'll be back tomorrow with another project. Until then, happy stampin'!


Stampin' Up! Supplies Used:

Table built using Product Table Builder by The Crafty Owl - Independent Stampin' Up! Demonstrator.

Forever Lovely Double Diecut Anniversary Card PP427

by Joanne James3. February 2019 09:00

Today it's Sunday and time for this week's new challenge over at The Paper Players! It's my turn to host this week and I have a timely theme challenge for you to work with:

     Paper Craft Crew Tic Tac Toe Challenge 324! Play along with the latest challenge by visiting www.papercraftcrew.com #stampinup #papercraftcrew #papercrafts #stamping #sunnygirlscraps #crafting #crafts #craft #creative #creativity #create #tictactoechallenge   

It's February and in the James Household love is definitely in the air: Valentine's Day is around the corner and this is also the month when Mr James and I celebrate our wedding anniversary and this year it's a milestone one too, so it seemed appropriate to choose this as my theme this week. I decided to make a pretty anniversary card and matching gift box  - take a look:


Here's the low-down on today's card:

All My Love - I went all hearts and flowers for my card today with the Forever Lovely stamp set and Lovely Flowers Edgelits Dies. I have been itching to get this beautiful set out and use it so I couldn't resist creating not one but two border edges spraying out either side of my heart centrepiece. I was a little nervous as to how easy the stamped florals and greenery were going to be to line up with my diecut borders, but needn't have worried - the Stamparatus made light work of it and I was very pleased with the result. My layout was inspired by the sketch over at Just Add Ink this week - and my card also works for TicTacToe over at The Paper Craft Crew (I went diagonally: something new-Valentines-floral).

Meant To Be - I combined Forever Lovely with another of the Valentine's themed sets in the seasonal catalogue, 'Meant To Be', a set of decorative hearts that co-ordinate with some beautiful stitched dies. I heat-embossed my sentiment in gold onto a vellum-bordered Soft Sea Foam heart - I know it's not pink, but having tried both the pink heart seemed a little too much; the soft sea green, with a few pink flowers and delicate pink ribbon, worked much better. Plus that's the beauty of creating your own cards right? You can make things any colour you want them to be! And I finished my sentiment inside my card with this one:


Perfect words for the one you love!

Self-Closing Lovely Flowers Edgelits Treat Box - I decided to make a small treat box to co-ordinate with my card, that would also show off that lovely diecut edge. My box is self-closing and measures 4" x 1" x 1 1/2" and is just large enough to hold 6 heart truffles:


Here's one last photo of both my projects together:

Here is the visual summary of the key products used on today's project for you to pin for easy reference:


You can see all of my Product and 'How To' summaries on my 'How To - Tips and Techniques' Pinterest board in case you've missed any. 

Before you reach for your ink and papers, check out what our amazing team has created to inspire you this week:

Here's a quick recap of our challenge rules:
 
1.  Create a new paper project
2.  Upload your creation to your blog with a link back to us and provide a direct link to the post featuring your challenge submission.
3.  Please link your card to no more than four challenges, TOTAL.
4.  Have FUN!

You can see all of my 'How To' summaries on my 'How To - Tips and Techniques' Pinterest board in case you've missed any. 

I'm looking forward to seeing what you create for our challenge over at The Paper Players this week.

Enjoy your day; we have guests for dinner but otherwise will be enjoying a cosy day indoors, with our hockey match today being cancelled due to a frozen pitch. I for one am pleased to not be standing out on the touchline in these freezing temperatures we have been experiencing here in the UK this week! I'll be back tomorrow with another project. Until then, happy stampin'!


Stampin' Up! Supplies Used: 

Table built using Product Table Builder by The Crafty Owl - Independent Stampin' Up! Demonstrator.

Copper and Merry Merlot Swirly Snowflakes Christmas Card and Triangular Gift Box

by Joanne James23. September 2018 09:00


Today it's Sunday and time for this week's new challenge over at The Paper Players! It's the turn of the fabulously creative Jaydee to host this week and she has my favourite, a sketch challenge, for you to work with:


I decided to continue getting a headstart on my Christmas card making preparations (so my projects are perfect for the challenge over at TGIF Challenges too this week) and spent a few hours making a more involved boxed Christmas card with a matching gift box too. First things first - here's my card:


Here's the low-down on today's card:

Diagonal Swirly Snowflake Border - Whilst I love a good sketch, I often struggle with the concept of a diagonal. I decided to alter the dimensions of Jaydee's sketch and create a horizontal fold out card as I wanted to use my Swirly Snowflakes Thinlits Dies to create a layered diagonal edge and I needed the extra width to balance my card and fit the entire border in (I'm sure she will allow me this liberty ;-) ). I snipped away the straight edge of my copper foil snowflakes and added a sentiment embossed in white, before adding my embellishment (more on that below). My card opens from the right to reveal a complete panel of my favourite copper-embossed Joyous Noel Specialty Designer Series Paper, then the left hand side lifts to reveal the sentiment inside, embellished with a narrow strip of copper washi tape:

Christmas Copper Snowflakes - I created a layered embellishment on the front of my card, using one of the copper snowflake wire elements as the centrepiece. I layered this with a Shimmery White diecut from the Eastern Medallions Thinlits set, with a centre of a clear epoxy droplet on a copper sequin, all layered up on a fancy double bow in the gorgeous Merry Merlot and Copper Reversible Ribbon. This showy embellishment adds a lot of dimension to the front of my card, so much so that it wouldn't fit in a standard envelope. Instead, I made a box with a co-ordinating belly band closure:

A Gift Box To Match - This kind of card takes a little while to make and is destined for someone who I know will appreciate the effort and time taken to create it. Whilst I was fully 'in the zone', I decided to create a co-ordinating gift box with a magnetic closure. The box measures approx. 15cm x 6cm x 5cm, so not huge but large enough for a small gift to accompany my card. I created a triangular box with a decorative flap created using the Swirly Snowflakes Thinlits for the border detail, based on this one I'd seen on Pinterest. I decorated the front panel of my box with more of that gorgeous Joyous Noel DSP too: 

And here's one last photo of all three of my project elements together - I hope you will agree, a lovely Christmas set in rich, festive colours:


Here is the visual summary of the key products used on today's project for you to pin for easy reference:


You can see all of my Product and 'How To' summaries on my 'How To - Tips and Techniques' Pinterest board in case you've missed any. 

Before you reach for your ink and papers, check out what our amazing team has created to inspire you this week:

Here's a quick recap of our challenge rules:
 
1.  Create a new paper project
2.  Upload your creation to your blog with a link back to us and provide a direct link to the post featuring your challenge submission.
3.  Please link your card to no more than four challenges, TOTAL.
4.  Have FUN!

You can see all of my 'How To' summaries on my 'How To - Tips and Techniques' Pinterest board in case you've missed any. 

Thank you Jaydee for a great sketch - who would have thought that it would have resulted in 3 projects in one go!

Enjoy your day; the weather has been dreadful here the past couple of days so I'm hoping I get the longer straw and get to stay home and craft whilst hubby takes the James Juniors to hockey trials this afternoon. I'll be back tomorrow with another project. Until then, happy stampin'!


Stampin' Up! Supplies Used: 

Table built using Product Table Builder by The Crafty Owl - Independent Stampin' Up! Demonstrator.

Sweet Soiree Silver Mini Gable Gift Box

by Joanne James12. March 2018 21:00

Another Monday, another week! Today I'm sharing a cute packaging option that is perfect as a wedding favour or thank you gift and takes minutes to put together - take a look:


Here's the low-down on today's project:

Gifts And Goodies - Have you spotted these lovely silver mini gable boxes on page 13 of the current seasonal catalogue? I'm all for making my own boxes, but sometimes you just need the speed and convenience of something off-the-shelf - and the silver gable box is the answer. Whether used as they are, or dry embossed (perhaps with the new Petal Pair embossing folders) or decorated with some designer series paper to dress them up a little, these sturdy little boxes are easy to turn from their flat-packed state into something robust enough to carry a small gift: perhaps some truffles, nail polish, or a few reinkers or embellishment sets ... and lots more besides! You can even turn them inside out so that you have a white outer that can then also be coloured as you choose.

Sweet Soiree - I've added a wrap with a piece of Sweet Soiree Specialty Designer Series Paper to my container. These gorgeous silver foiled designs give the hand-painted appearance of these papers a textured look all of their own and co-ordinate perfectly with the silver box - minimum effort, maximum impact!

Finishing Touches - I've added some Berry Burst metallic-edge ribbon and a small circle-punched tag, stamped with the Cake Soiree stamp set, to my box as a finishing touch. So pretty, I almost don't want to give it away!

Here is the visual summary of the key products used on today's project for you to pin for easy reference:


You can see all of my 'How To' summaries on my 'How To - Tips and Techniques' Pinterest board in case you've missed any. 

I'll be back tomorrow with another project. Until then, happy stampin'!


Stampin' Up! Supplies Used:

Table built using Product Table Builder by The Crafty Owl - Independent Stampin' Up! Demonstrator.

Tags & Trimmings Festive Christmas Stocking Gift Box For The Paper Players PP374

by Joanne James10. December 2017 09:00

It's Sunday and time for this week's new challenge over at The Paper Players- what's more, it's the last one of 2017! It's the turn of my good friend, the lovely and talented Claire, to host this week and she has a bright colour challenge for us to end the year with:


This is a palette with lots of options - you could still craft for Christmas, or use these colours for a non-festive project, it's up to you. Our design team this week has done a little of both, so there's lots of inspiration for you. I took the opportunity to squeeze in another Christmas project, but went with a 3D gift box rather than a card today. In fact, a Christmas stocking - take a look:


Here's the low-down on today's project:

Trim Your Stocking - These colours were perfect for a pink and girly Christmas stocking, complete with spotty heel, toe and cuff trim then finished off with a sprig of festive greenery. I've used the Trim Your Stocking Thinlits on this card previously but whatever your project, this set has an abundance of useful dies that are perfect for all kinds of embellishments. 

It's What's Inside That Counts - I love this sentiment! Whether it's a little chocolate - the content of choice of Rebecca - or money (most definitely the content of choice for my teenage niece!), the pillow box on the reverse of this stocking is just big enough for either. I haven't yet decided who this stocking will be heading for and for me how it looks on the outside is the most important thing, but one thing is for sure, for the recipient it's definitely what's inside that counts!

A Little Added Sparkle - I couldn't resist adding in a little sparkle to my festive stocking, with a silver foil bell, some mini sequin trim and a liberal dose of clear Wink of Stella on the lime green pieces - I'm hoping Claire considers silver (almost) a neutral such that I can get away with it - I just couldn't resist, those jingle bell dies are my favourite! 

Here is the visual summary of the key products used on today's project for you to pin for easy reference:


You can see all of my Product and 'How To' summaries on my 'How To - Tips and Techniques' Pinterest board in case you've missed any. 

Before you reach for your ink and papers, check out what our amazing team has created to inspire you this week:

The Paper Players Design Team
 
 
Here's a quick recap of our challenge rules:
 
1.  Create a new paper project
2.  Upload your creation to your blog with a link back to us and provide a direct link to the post featuring your challenge submission.
3.  Please link your card to no more than four challenges, TOTAL.
4.  Have FUN! 


I look forward to seeing what you create with this week's colour palette. As I mentioned above, this is our last challenge for 2017; we will be taking a two week break before returning with a fresh new set of challenges for 2018 starting on Sunday 7th January 2018. Thanks to everyone who plays along each week, to this year's guest designers, Crystal and Valentyna, Deanne, Jan and Annie, and everyone of you who visits our blogs and leaves us encouraging comments each week - it's great to know that you enjoy our creations! We will be announcing our new guest designers for the first half of 2018 this coming Wednesday, in my mid-week reminder post, so be sure to check back then to see who will be joining us to kick off the Paper Players fun at the start of 2018!

Enjoy the rest of your weekend as it will be over all too quickly; we are hoping to put our Christmas tree up and decorate the house tomorrow - then it really will feel like Christmas! I'll be back soon with another project; until then, happy stampin'!


Stampin' Up! Supplies Used: 

Table built using Product Table Builder by The Crafty Owl - Independent Stampin' Up! Demonstrator.

It's The Little Things Sweet Treat Card and Treat Box

by Joanne James27. September 2017 05:00

Today I'm sharing a card that uses the sketch over at Fab Friday Challenge as my starting point:

I decided to go with sweet treats and created both a card and a co-ordinating mini pizza treat box, Here's my card:


Here's the low-down on today's card:

Sweet Treats - My card today features another of those busy DSPs in the Christmas Around The World pack - perfect for the large expanse of card front today and just right with my sentiment. These papers are really growing on me - they work really well for clean cards as the pattern does much of the work. This one is covered in yummy treats - gingerbread, sweets and puddings - enough to make your mouth water!

It's The Little Things - The stamps in the 'It's The Little Things' set are designed to fit the lids of the Mini Pizza boxes; this one also works perfectly for this sketch. I stamped it in Early Espresso and then stamped again on scrap paper in Real Red and cut out the banner separately and popped it on a couple of dimensionals. I also added a little Real Red enamel heart to the sentiment - it fitted perfectly in place of the stamped one.

A Foodie Treat - I couldn't make a card with this sentiment and not pair it with a matching treat! I covered my box in co-ordinating paper and punched a window in the lid that I backed with clear acetate to allow the recipient to peek at the treats inside and added a Real Red scalloped circle to mimic the design of my card. Here are both items together:


These boxes are the perfect size for some homemade gingerbread or a baked brownie - I will be gifting so many treats in these boxes this year!

Here is the visual summary of the key products used on today's project for you to pin for easy reference:


You can see all of my 'How To' summaries on my 'How To - Tips and Techniques' Pinterest board in case you've missed any. 

Enjoy your day and I'll be back tomorrow with another project. Until then, happy stampin'!


Stampin' Up! Supplies Used:

Table built using Product Table Builder by The Crafty Owl - Independent Stampin' Up! Demonstrator.

Window Box Thinlits Pencil Gift Box and Back To School Card For The Paper Players PP360

by Joanne James3. September 2017 09:00

It's Sunday and time for this week's new challenge over at The Paper Players! My dear friend Claire is the hostess this week and she has a fun and timely theme for us to work with:


I know some of my readers in other countries have already seen a return to school, but for us this week Wednesday is the day, so this week's challenge is a timely one. Is it me or do all Mums especially get just a little excited at the prospect of the start of a new academic year and a return to school after the long summer break? Don't get me wrong, I love having my two Juniors at home and am thankful for the break from the sometimes relentless activities that comprise the school routine, however all good things must come to an end and so it is that we are getting ready to begin a new school year, with the excitement, opportunities and challenges that this will undoubtedly bring.

I've double projects for you today as I needed some gift packaging for a teacher gift this week, so took the opportunity to create a fun gift box and co-ordinating card - take a look:


The gift box is rather large (approx. 18 inches long) so was something of a challenge to photograph but hopefully the detail below will enable you to see how I made it. Here's the low-down on today's projects:

A Window Turned Pencil Box - Having made an elongated box with my Window Box previously with the ladies in one of my technique classes earlier this year, I knew that I could use the same idea to create my pencil-shaped box. I cut one piece of the window box without cutting straight through and elongated this for the length of my sheet of A4 Crushed Curry cardstock. I then cut another piece that was the same length and the width of three sides, for the opposite 3 sides of my pencil, but without a bottom/lid. Instead I used some Maths to create a template for my pencil point in Crumb Cake, and adhered this inside the end of the tube to create my pencil point:


Here's a shot showing you how the main body of the pencil box opens to accommodate the main gift:


In addition to the main box, I also made a complete box using my Window Box Thinlits in Blushing Bride for my eraser and adhered this to the top of my pencil, which also opens separately - just big enough to add a little treat or two inside to accompany my main gift:


Finally I added a sleeve created from silver foil, to hold the pencil box closed securely - it just slides off to create access to the main box. A banner tag decorated with an apple - every teacher project has to have one, right? - finished my box. 

Pieces And Patterns For A Co-ordinating Card - I wanted a card to co-ordinate with my gift box, so decided to replicate the pencil design on a simple card using the pencil stamp from the Pieces and Patterns set. I masked a square and created my own repeating pattern - thank heavens for a stamp-a-ma-jig! - and then added a banner sentiment from the same set, again anchored with an apple (made using an old die I have in my stash):

Back To School Colours - My back-to-school pencil and apple colours fit perfectly with the colour palette and photo inspiration over at The Color Throwdown this week (I hope I'll be allowed my pink eraser and a few neutrals (the pencil really wouldn't be complete without it). I'm also linking my card up with the challenge over at Addicted to CAS where the code word is 'apples' and both of my projects fit the bill over at Paper Craft Crew where they have extended their 'back to school' challenge for another week:

      Play along with the Paper Craft Crew Theme Challenge 257! Visit www.papercraftcrew.com #theme #themechallenge #stampinup #sunnygirlscraps #playalong #cardmaking #papercrafting #papercraft #scrapbooking #handmade #rubberstamping #cards

Here is the visual summary of the key products used on today's project for you to pin for easy reference:


You can see all of my Product and 'How To' summaries on my 'How To - Tips and Techniques' Pinterest board in case you've missed any. 

Before you reach for your ink and papers, check out what our amazing team has created to inspire you this week:

The Paper Players Design Team
 
 
Here's a quick recap of our challenge rules:
 
1.  Create a new paper project
2.  Upload your creation to your blog with a link back to us and provide a direct link to the post featuring your challenge submission.
3.  Please link your card to no more than four challenges, TOTAL.
4.  Have FUN! 


I look forward to seeing what you create with this week's theme. Enjoy the rest of your weekend as it will be over all too quickly; I'll be back tomorrow with another project; until then, happy stampin'!


Stampin' Up! Supplies Used: 

Table built using Product Table Builder by The Crafty Owl - Independent Stampin' Up! Demonstrator.

Sealed With Love Lidded Notelet Box Using The Envelope Punch Board

by Joanne James6. February 2017 20:00

Happy Monday everyone! I've had a busy day today with the first of this month's classes. I'll share some of those projects later in the week, but for today I wanted to share a simple little lidded box that I made with my Envelope Punch Board to hold some cute little Valentine's love notes. Now I didn't do the best job of photographing this one - the lid edges get a little lost against the background:


Here's the box with one of the little notelets inside:


Here's the low-down on today's project:

Sending Love Notes - Way back at Onstage last November we made three little notelets using the Sealed with Love Bundle. I modified mine slightly, cutting down the panels of Sending Love patterned paper and adding each one to a 3 1/2" Whisper White card base. I designed a few more using the other stamps in the set and made a bunch of co-ordinating envelopes and decided to make a little box to keep them all in. 

Love My Envelope Punch Board - Not only did I use my Envelope Punch Board to make my designer series paper envelopes (each made to fit a card of 3 1/2" square and requiring a 6" square piece of paper) but I also used my Box Buster tool to help me design a 4" square lidded box to hold them in. I love making lidded boxes usign the EPB rather than a scoreboard, as it makes them much more sturdy and rigid. It's really easy to do - you just need to make your lid 1/8" larger than your base for a snug fit.

Ribbon and Hearts - I continued the red and white theme of my project by adding a triple loop of Sending Love Ribbon with a double bow to adorn my sassy red Valentine-embossed heart to complete my box embellishment.

Here is the visual summary of the key products used on today's project for you to pin for easy reference:


You can see all of my 'How To' summaries on my 'How To - Tips and Techniques' Pinterest board in case you've missed any. 

I will be using these little notes to hide in my children's school bags and pencil cases this month; they love to find a surprise note when they least expect it; I might even slip in a little chocolate treat too. I'm also linking up with the team over at SUO Challenges again where they are also celebrating Valentine's this week.

I'll be back tomorrow with another project. Until then, happy stampin'!


Stampin' Up! Supplies Used:

Table built using Product Table Builder by The Crafty Owl - Independent Stampin' Up! Demonstrator.

Behind The Scenes at Stampin' Up! - Shooting a Stampissimo Video

by Joanne James30. October 2014 07:00

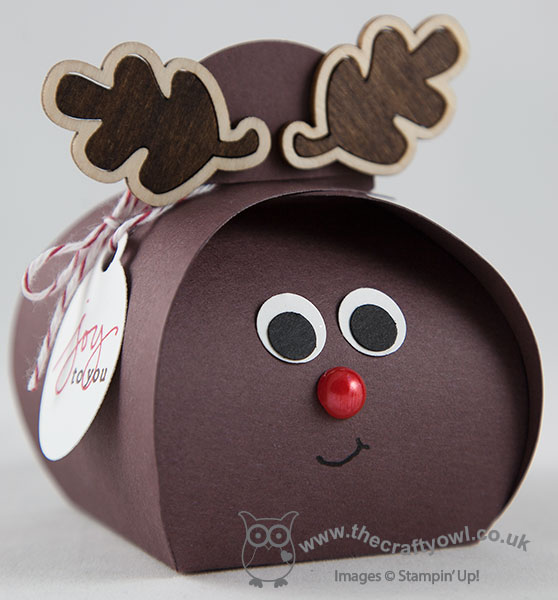
Today I have something very special that I've had to keep under wraps for a little while: the latest Stampin' Up! UK Stampissimo video has just been published and guess what? I am the starring demonstrator! I was so excited to be asked by Paula Gorry, Stampin' Up! UK Business Development Manager, to create a project for the latest video with the theme of 'Winter Treats' that once I had a copy of the Autumn-Winter seasonal catalogue in my hands, it didn't take me long to decide what I was going to use - the fabulous new Curvy Keepsake Box Thinlits Die. You can make all kinds of customised boxes with this die, but for the theme of 'Winter Treats' I knew I wanted to create a range of Christmas characters, with Rudolf the Red-nose Reindeer being the star of the show. It meant I could combine the box die with another of my favourite catalogue products that you've seen me use so many times on different projects - the Autumn Wooden Embellishments (LOVE these and one pot lasts an age!)

Here is the reindeer box that I demonstrate in the video - how cute is this?!

The project itself needed to be simple enough to demonstrate whilst chatting at the same time - the purpose of Stampin' Up!'s range of Stampissimo videos is to spread the word about Stampin' Up! to both crafters and non-crafters who may not have heard of Stampin' Up! and give them some insight into the products and the demonstrators who sell them. Whilst they are based around demonstrating and sharing a particular product or project, the informational nature of these videos mean they last longer than your average tutorial so you need to get comfy!

You can get the details for how I made the box above and see lots of other boxes featured in the video itself, but I wanted to share with you some of the 'behind the scenes' photos from my day and give you a little insight into the fun that I had spending the day with Paula and Kelly in the studio, along with the now infamous 'Ben and Jerry' film crew of Ben and James, who do all of the filming for Stampin' Up!'s UK events and did such a fabulous job of recording the day and producing the final video.

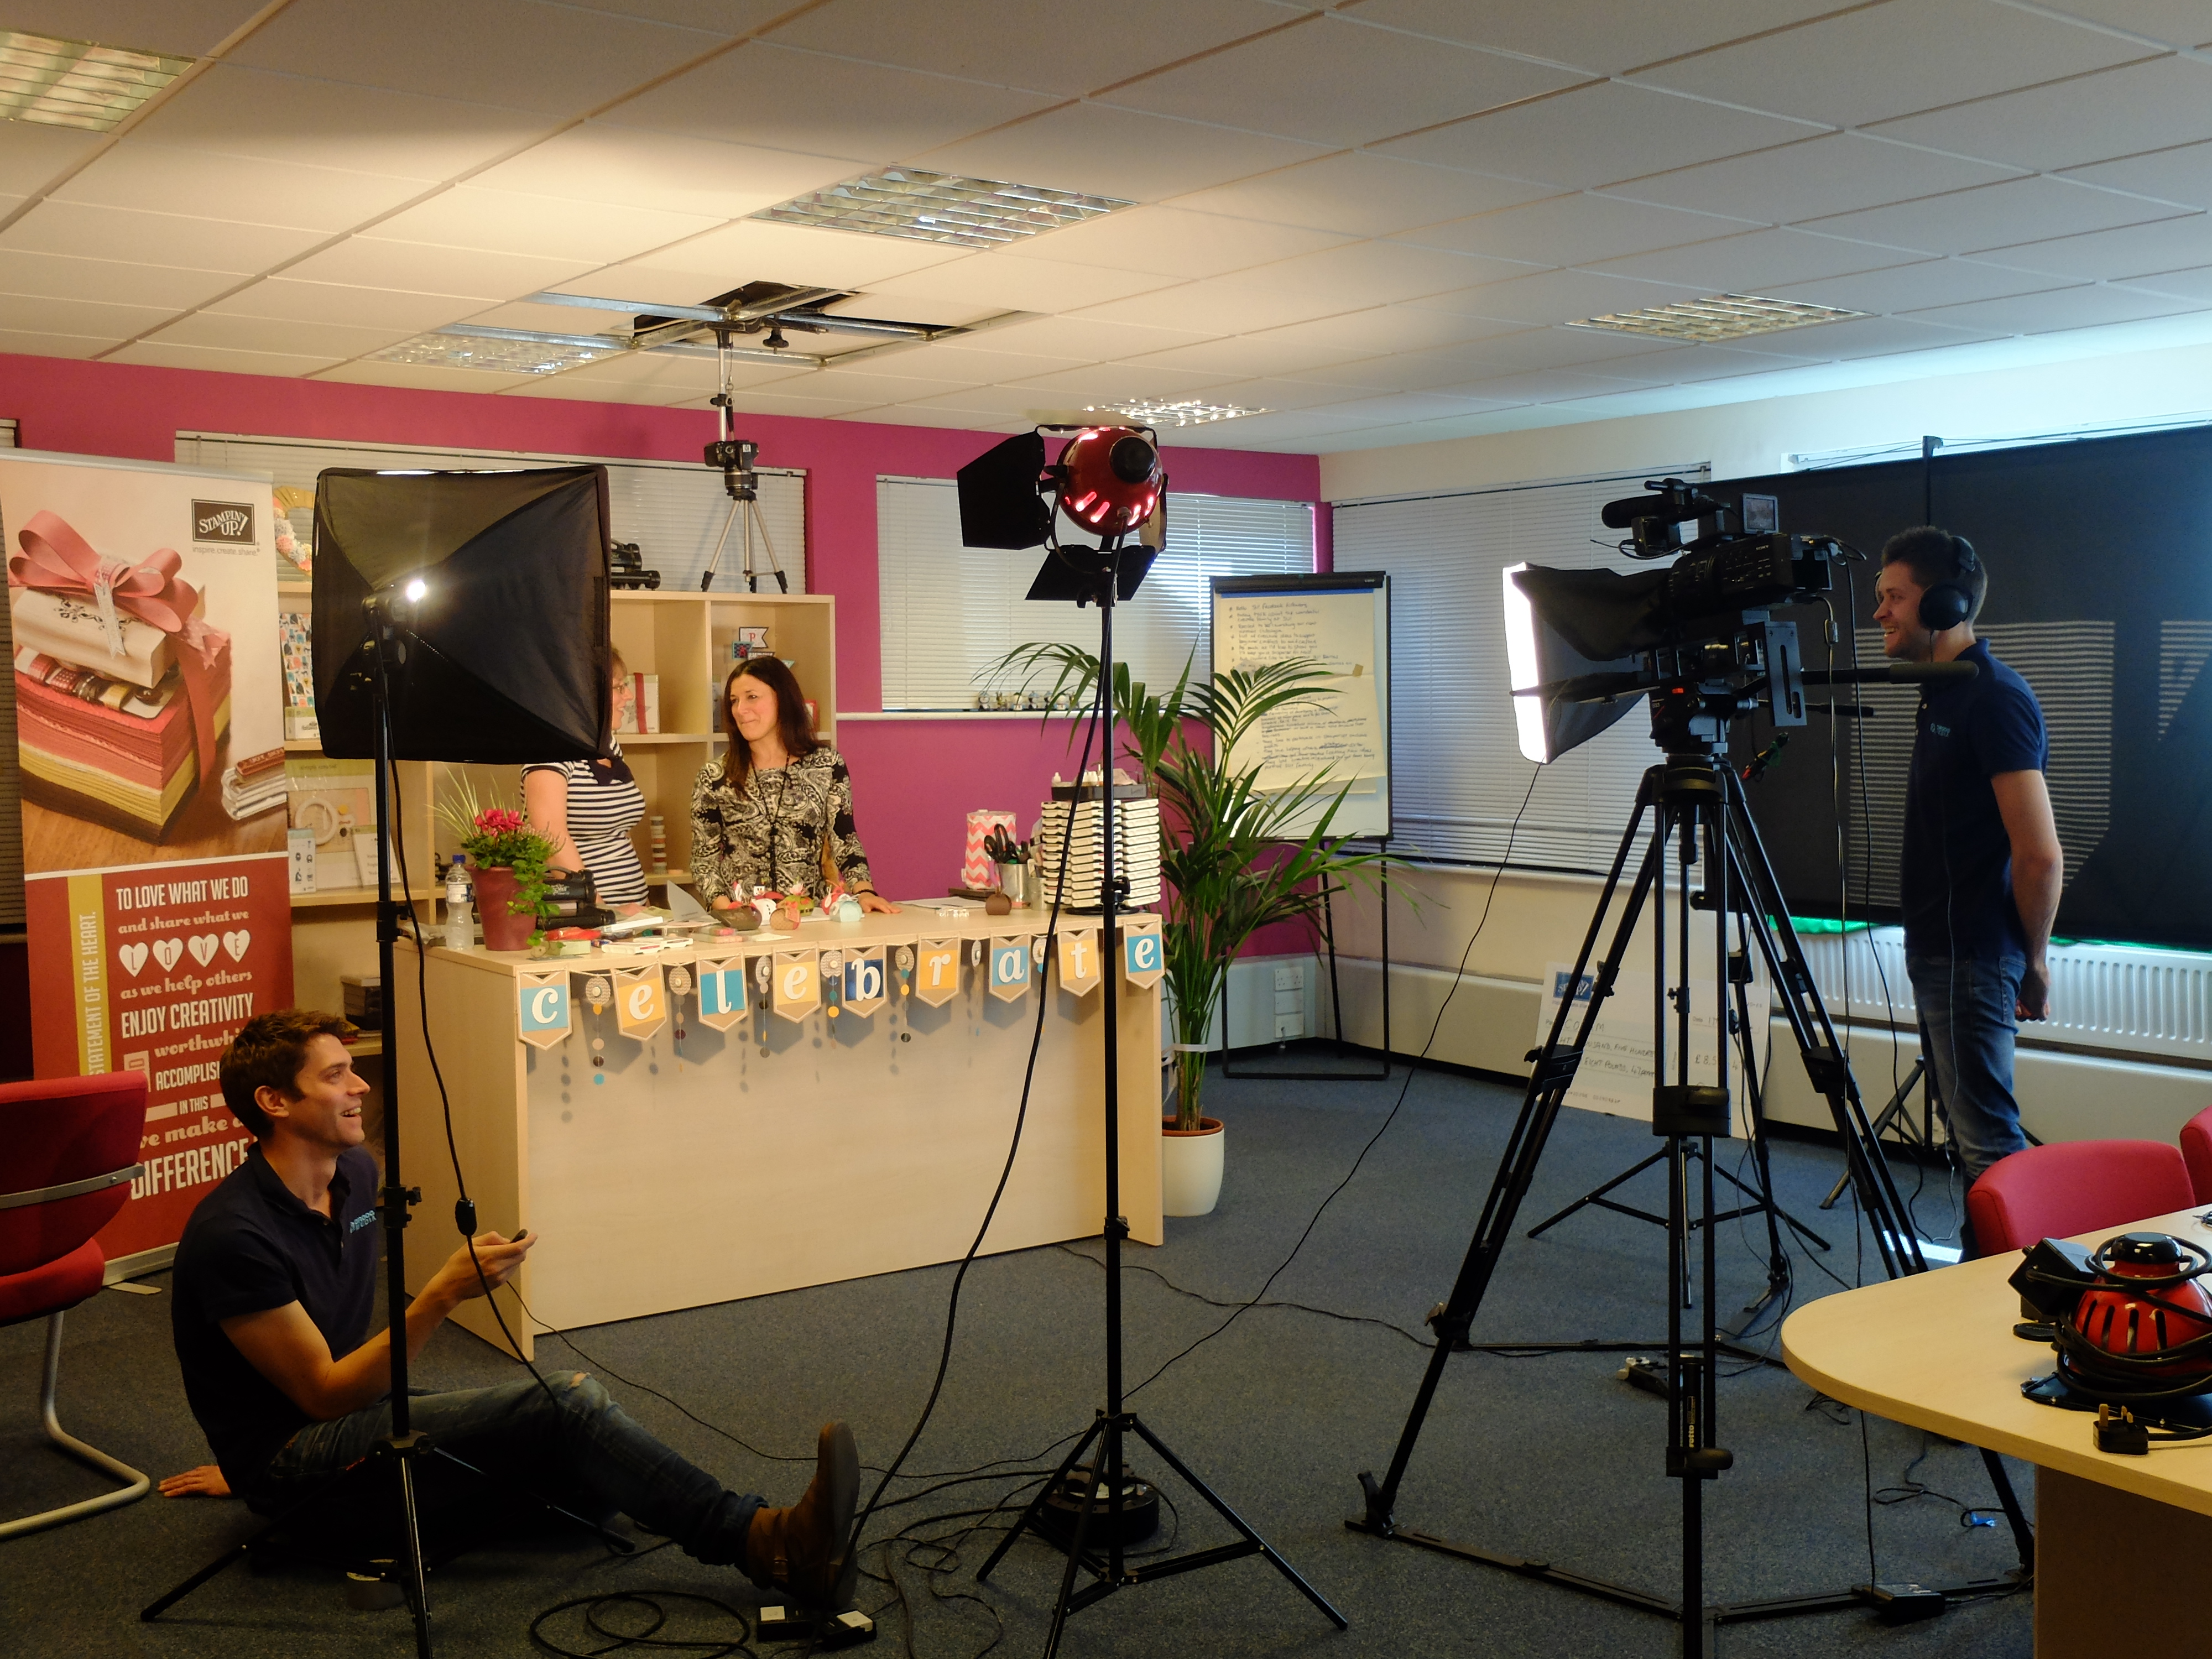
This is what filming looks like from behind the scenes -  a real case of lights, camera, action! There are cameras that shoot from the front and from above in order to get a full range of shots and the necessary close-ups. When I shoot video tutorials at home I use an overhead camera, but I'm sitting at my desk. When you're standing up it is quite tricky because you have to be careful not to lean over your workspace, otherwise all the viewer sees is the top of your head! Sounds obvious, but I found out there is a real art to working with your arms outstretched and not leaning too far into your workspace.

Here are a couple of shots of Ben and James, the guys that produce the video - I struggle to tell them apart - they're twins! - but as you can see, one is slightly more camera-shy than the other:


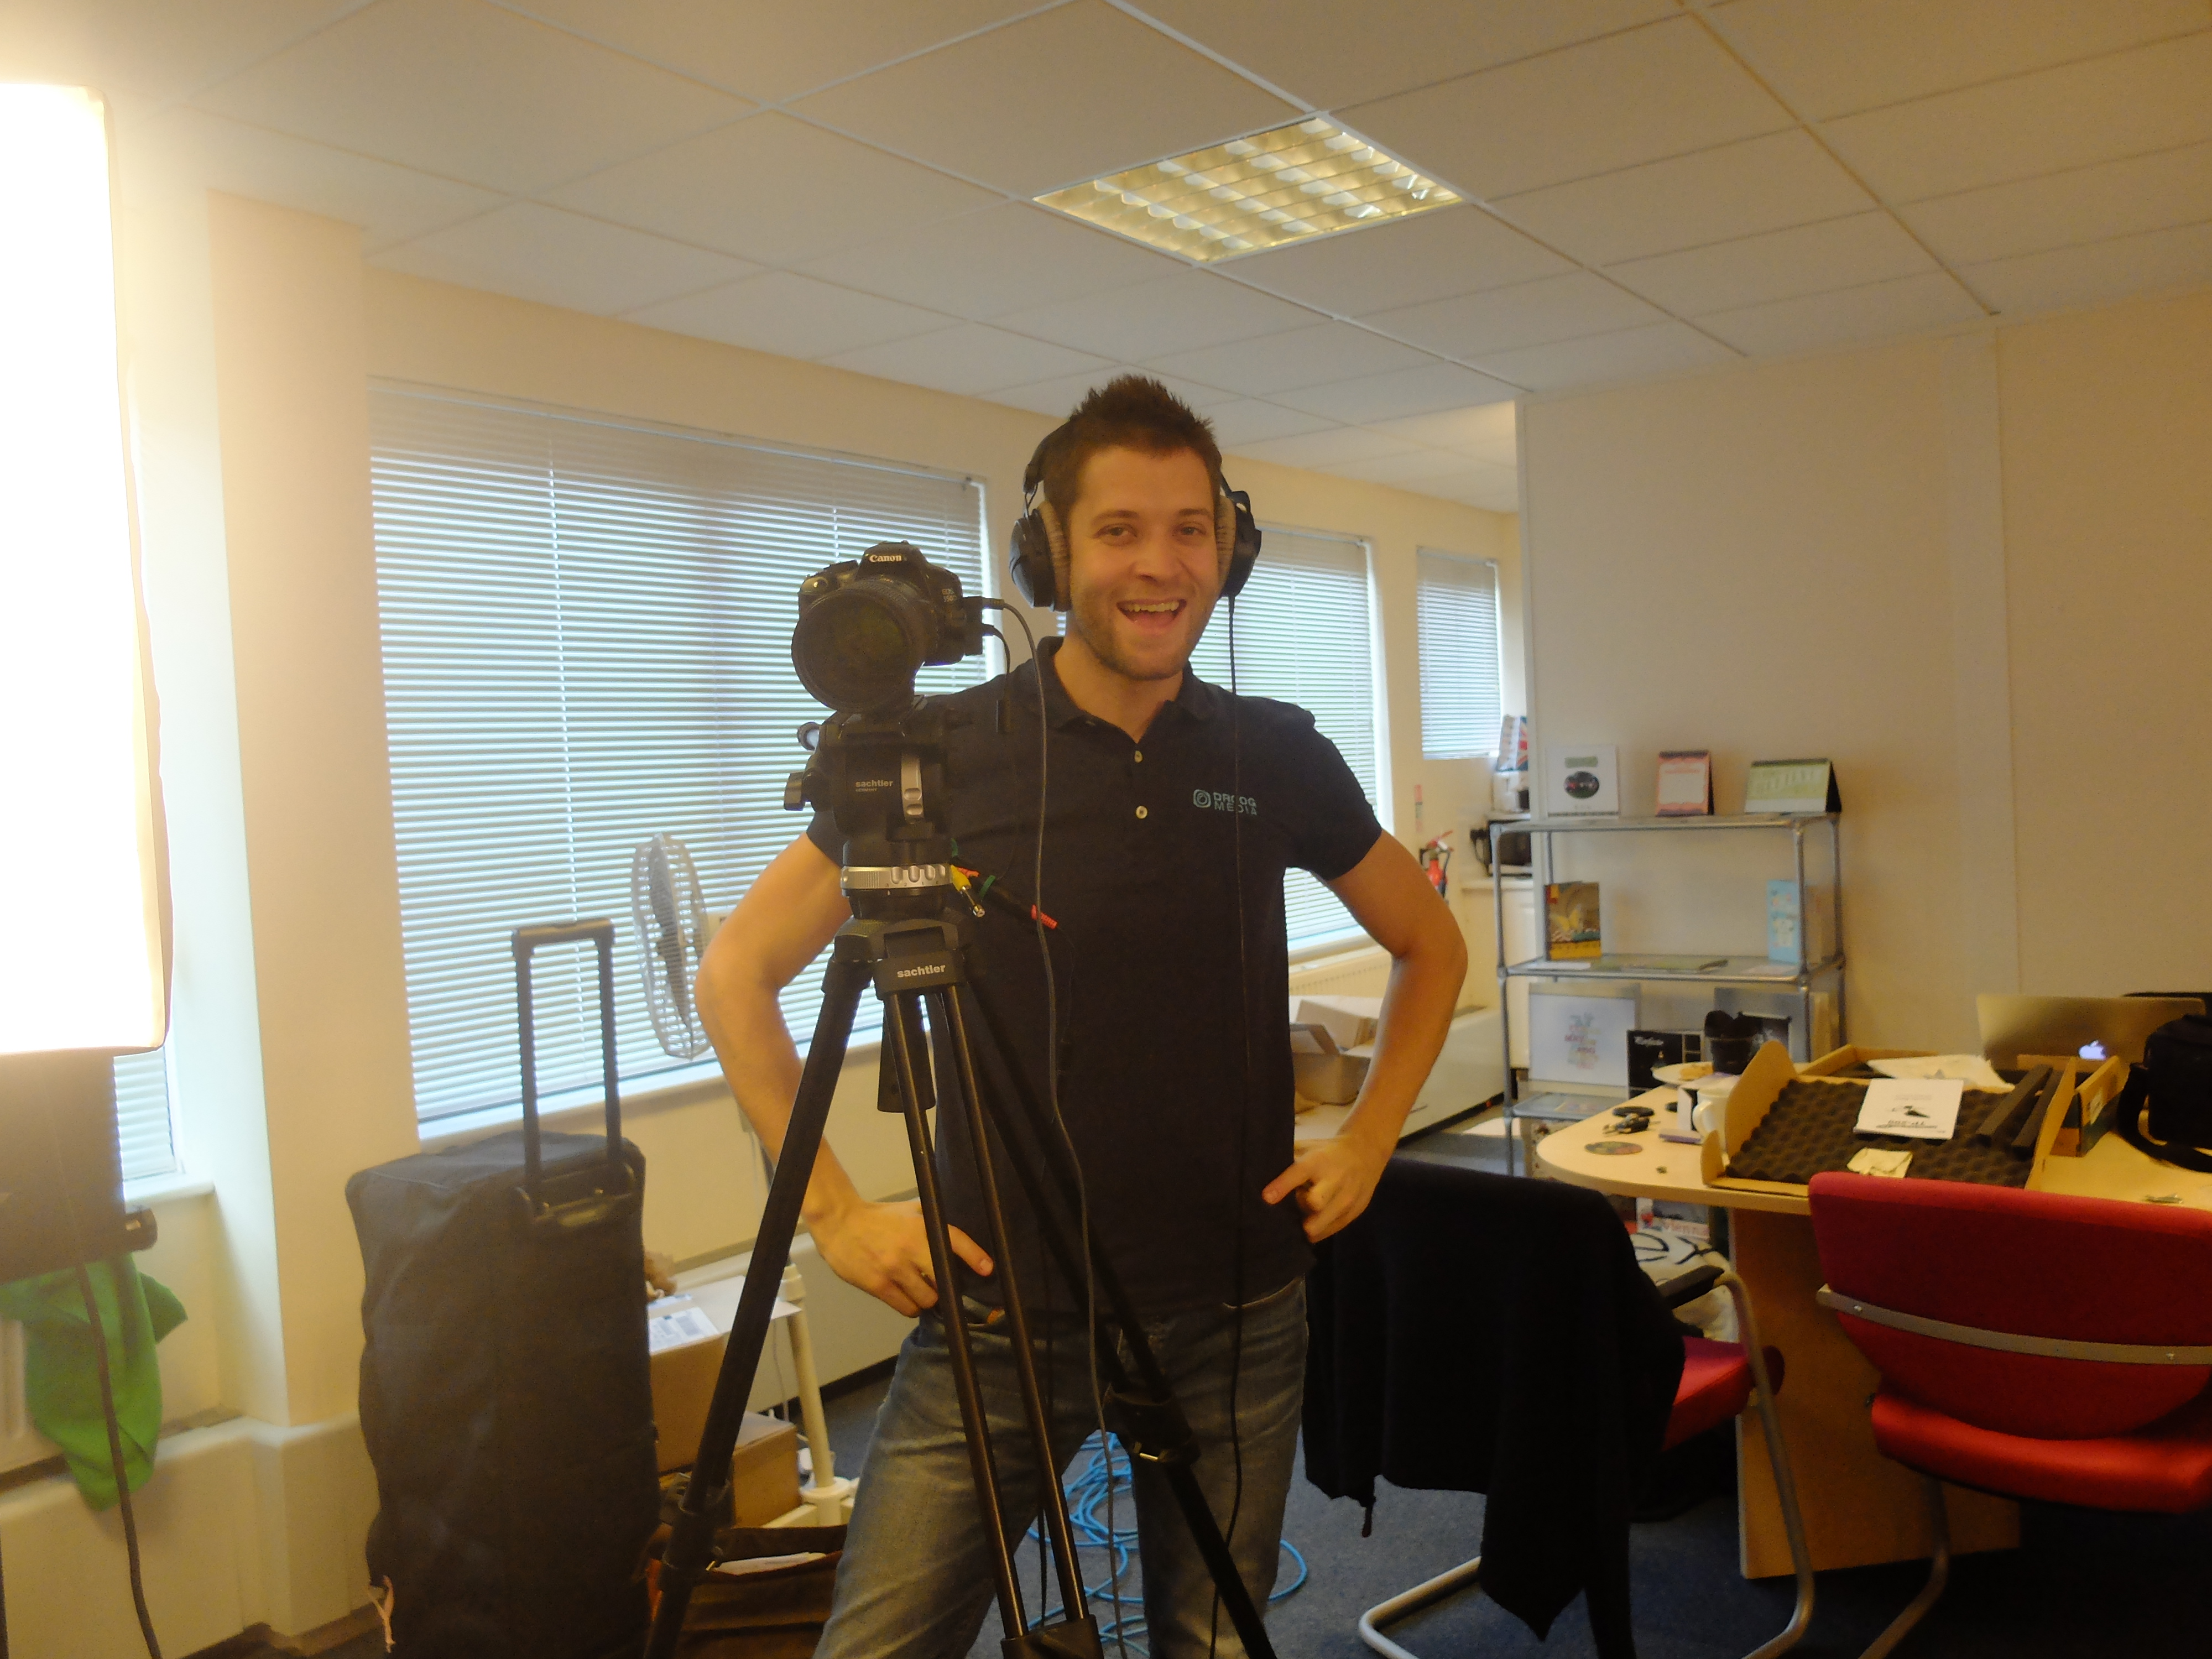
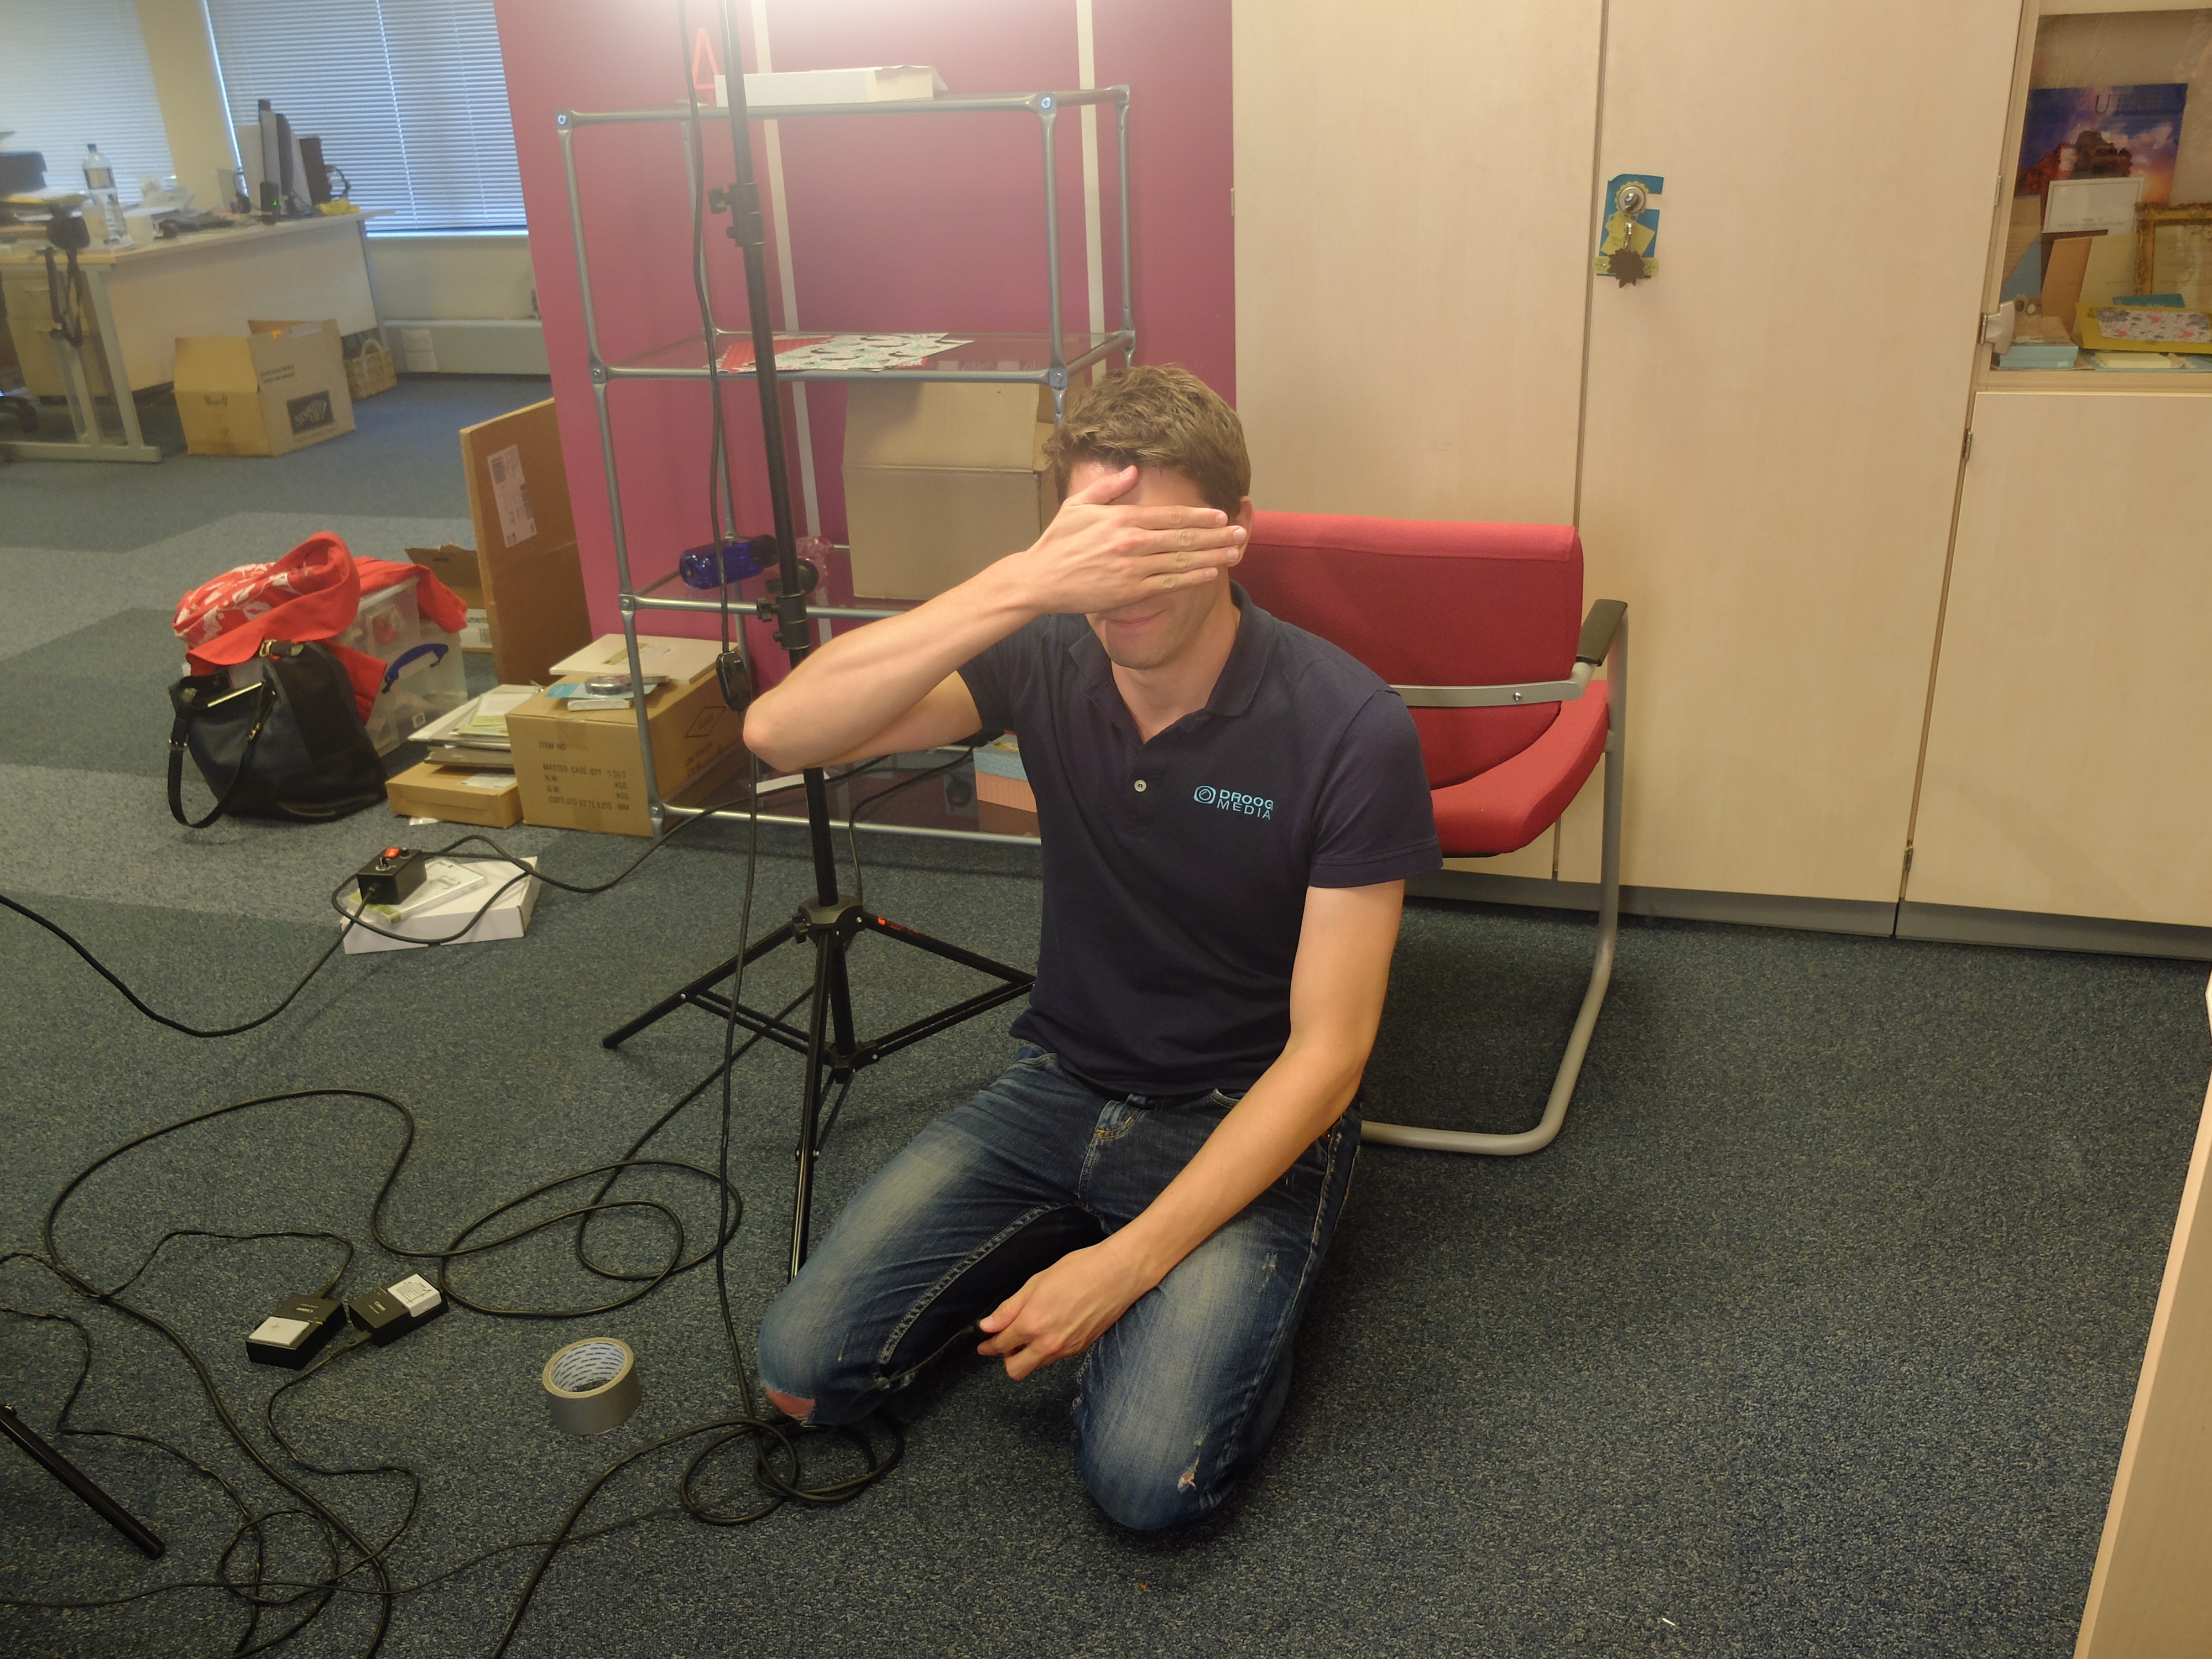
They really are the nicest chaps you could wish to meet and I think they did a great job with the final edit, although I'll admit I'm biased!

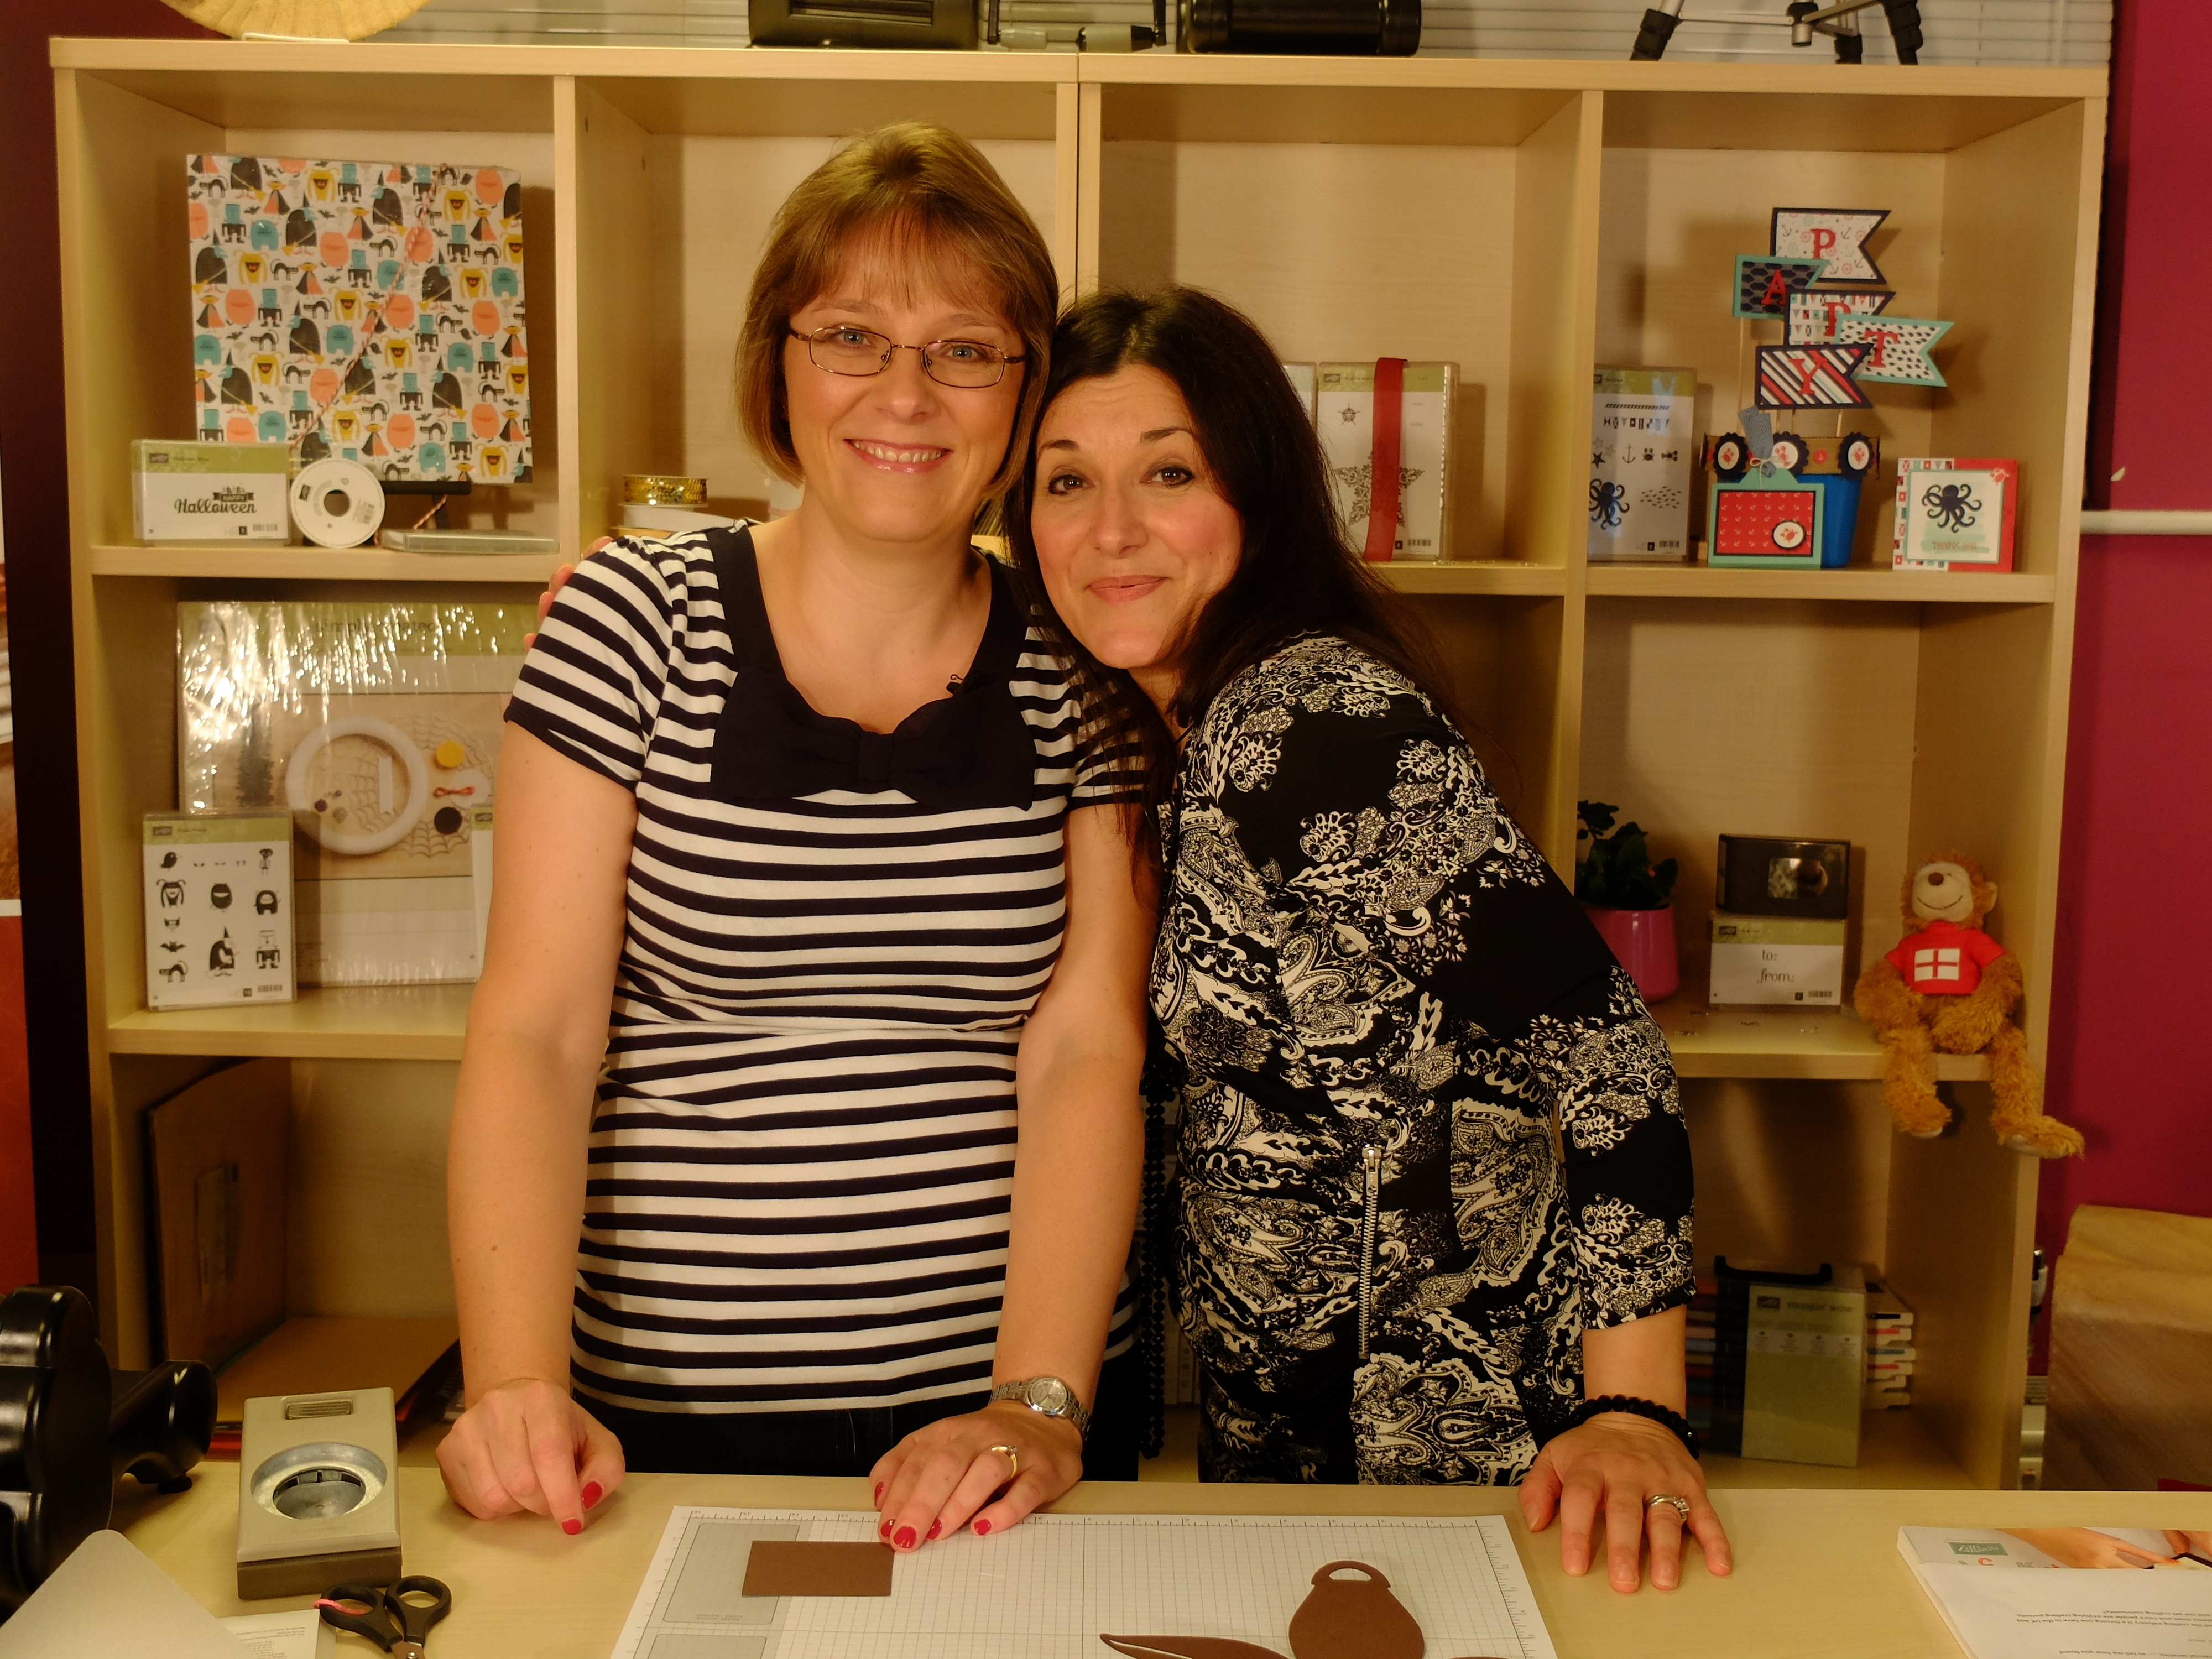
This is my favourite photo of Paula and I on the day, taken mid-take once we were properly relaxed and into the swing of things - we really were having fun:

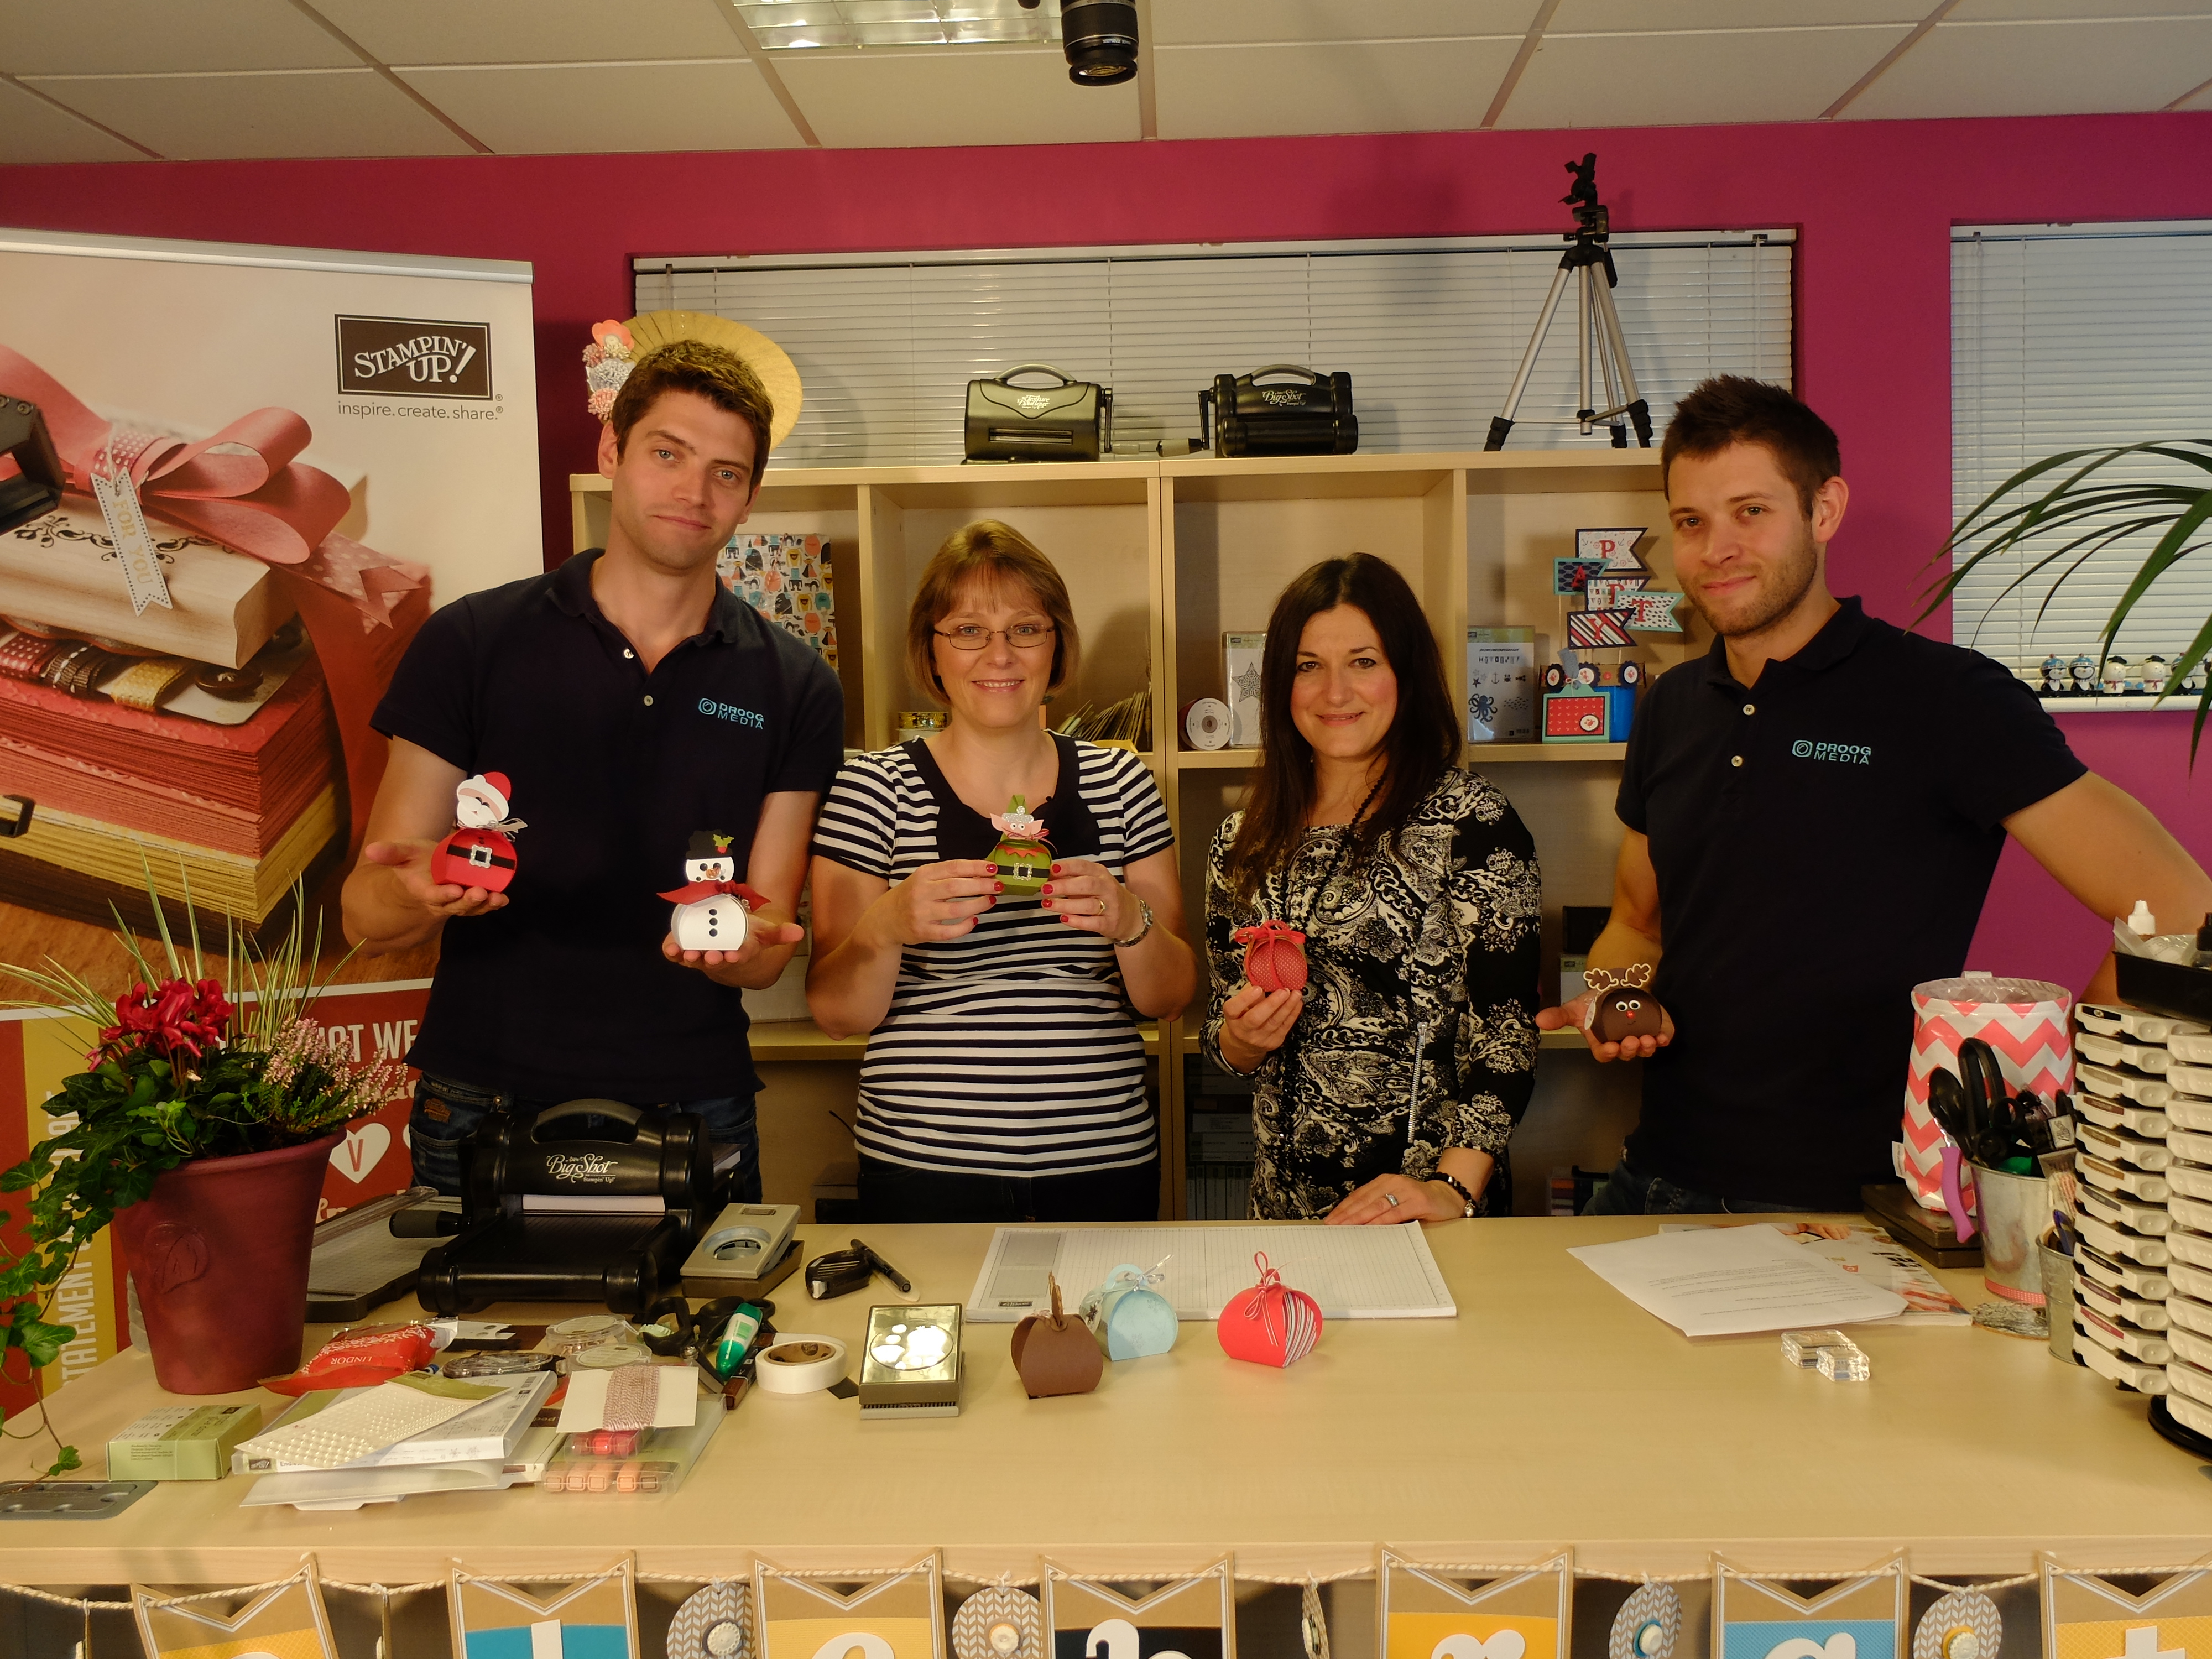
Lastly, here's one of us all post filming each displaying our favourite boxes, the chaps included. They decided the boxes were so easy to make, they might even have a go themselves at making some to grace their family festive table. At the UK training day at Telford earlier this year, the Stampin' Up! demonstrators were treated to a video of Ben and 'Jerry' making their first foray into crafting Stampin' Up! style, so this may well be their second!!

Also, note the festive pot plant on the edge of the desk and the Christmas tree in the video - Kelly and Paula did their best to make the studio look festive, which was quite tricky given that this was filmed some time ago when the sun was shining gloriously outside and it was not even remotely autumnal, let alone wintery! A big thank you the lovely Kelly Francis, who took all of the above pictures - she is an absolute star!

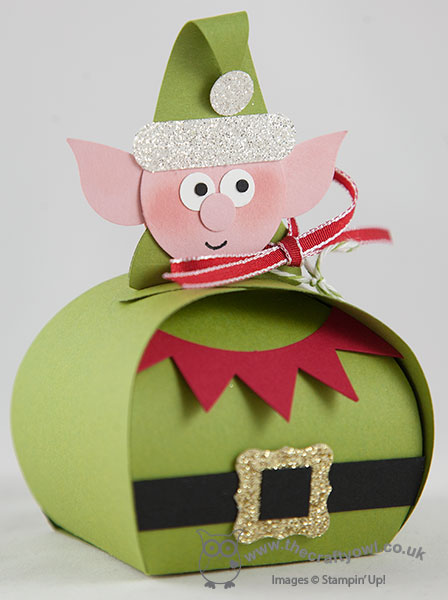
Here are some additional pictures of some of the finished boxes that feature in the video - this is Santa's helper, the mischievous elf: 

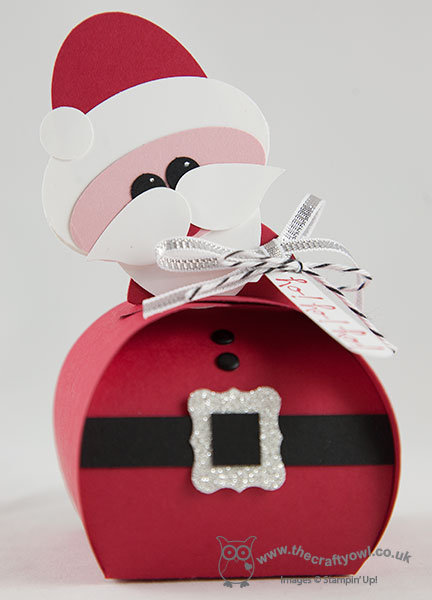
This is the man himself, Santa Claus - with his head!:

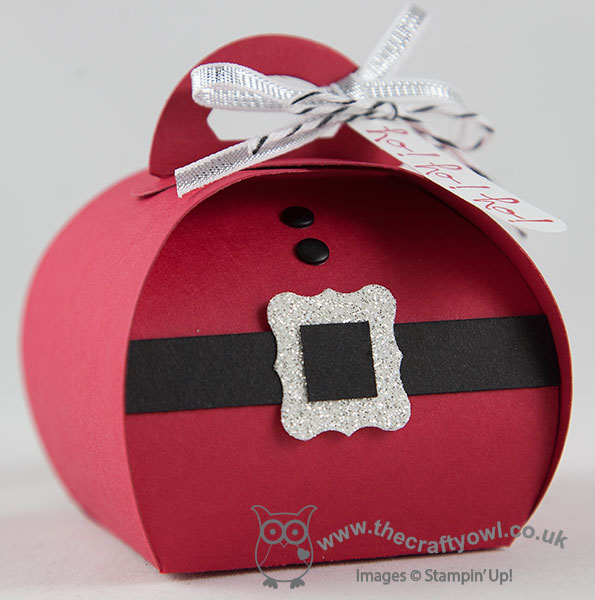
This one is Santa - without his head! Perfect if you are short on time or want something that's a little more adult-oriented:

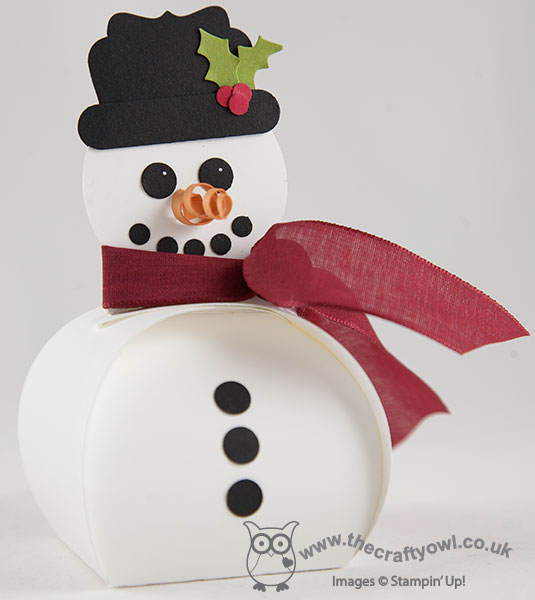
Then we have the cutest snowman - check out his twirly carrot nose! 

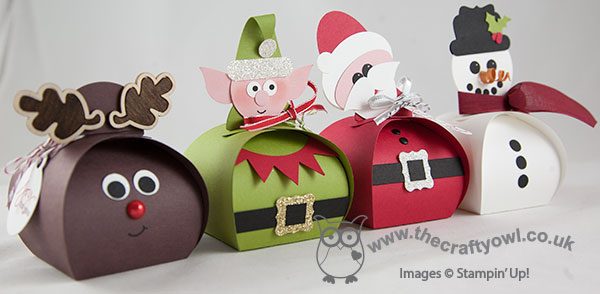
Here they are altogether - one big happy Curvy Keepsake Box festive family:

I hope you found the 'behind the scenes' tour interesting - now here's the video that you've all been waiting for:

In summary, a truly great experience and yet another of the fantastic opportunities available to me as a Stampin' Up! demonstrator working with this amazing company that allows me to share what I love, be endlessly creative, manage and motivate a great team and have a job that totally fits around my family commitments and enables me to achieve the best work-life balance I've ever had.

If you're reading this and thinking that you would like to know more about the benefits of becoming a Stampin' Up! demonstrator, then do get in touch with me on 07773 421446  - I would love to have a no-obligation chat with you and tell you more.

If you would like to make Rudolf, the supplies list that links to my online store is below.

Back tomorrow with another project; until then, happy stampin'!


Stampin' Up! Supplies Used:

Table built using Product Table Builder by The Crafty Owl - Independent Stampin' Up! Demonstrator.


Mini Catalogue

BROWSE THE CATALOGUE

The mini catalogue is now live! Read and download your copy here.

Shop Online

Access my online shop 24 x 7, 365 days of the year:

Current April hostess code:

VDKNV7BH

Shop Online

Join My Team

It's always a great time to join Stampin’ Up! New team members can get £130 worth of products for only £99 + free business supplies + free shipping + all the fun being a part of Stampin’ Up! Stampin' Up! has something for everyone: join my growing team and benefit from my support to enjoy Stampin' Up! however you choose.

If you're interested, call me for a chat to understand how I can help you realise your goals. Alternatively, if you have already decided to sign up and you just can't wait, please click here for the link to the online form where you can sign up and order your starter kit right away! 

Latest Kit!

Stampin Cut and Emboss

The Rock Legend Kit has all you need to make 8 cards with coordinating envelopes. Along with the new Panda Friends Kit, both are available from January 4th for just £14 each - get yours here!

2023-24 Annual Catalogue

BROWSE THE CATALOGUE

Click on the catalogue for a full list of current SU! supplies - if you would like to order any of the items featured, please drop me a line at [email protected] or give me a call on 07773 421446 - I'd be happy to help.

New Online Exclusives

There are new products available exclusively in the online store from 5 March - check them out here.

About Me

Hi I'm Joanne and live in Northampton and when I'm not looking after my husband and two beautiful children, am an avid crafter with a passion for all things Stampin' Up!

I must confess that I have never been a big rubber stamper - until I discovered Stampin' Up! that is. I love the fact that I can get such great results with co-ordinating stamps, inks, papers and punches - the possibilities are endless! Join me on my stamping journey as I share the things I love and be inspired to create amazing things yourself!

Follow Me

Monthly Newsletter

Box Builder

Click the button above to use Box Buster to create your custom box design using the Envelope Punch Board!

Kits Collection Now Available!

Stampin Cut and Emboss

The new Kits Collection from Stampin' Up! is now available!

Click here to see the current kits available and order yours online today.

I Design For


Stampin' Up Stuff

This is my personal blog and is not endorsed by Stampin’ Up! I hope you find it a plentiful source of ideas and personal inspiration but please don't copy my designs for contest submission or use for classes, publication or sale without express permission.