by Joanne James6. February 2017 20:00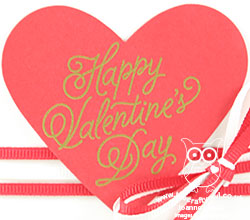
Happy Monday everyone! I've had a busy day today with the first of this month's classes. I'll share some of those projects later in the week, but for today I wanted to share a simple little lidded box that I made with my Envelope Punch Board to hold some cute little Valentine's love notes. Now I didn't do the best job of photographing this one - the lid edges get a little lost against the background:

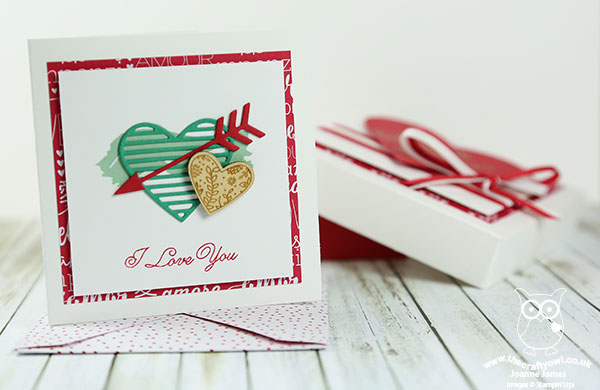
Here's the box with one of the little notelets inside:
Here's the low-down on today's project:
Sending Love Notes - Way back at Onstage last November we made three little notelets using the Sealed with Love Bundle. I modified mine slightly, cutting down the panels of Sending Love patterned paper and adding each one to a 3 1/2" Whisper White card base. I designed a few more using the other stamps in the set and made a bunch of co-ordinating envelopes and decided to make a little box to keep them all in.
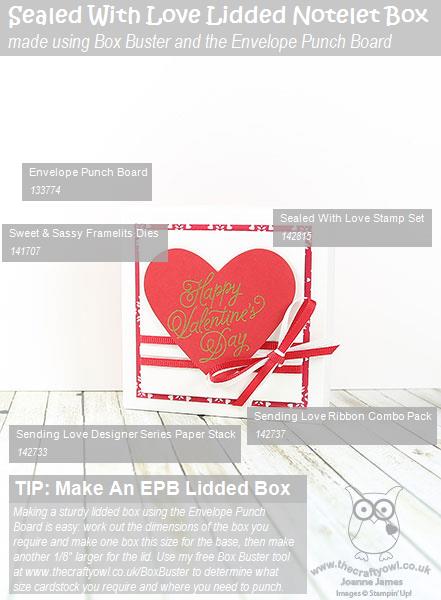
Love My Envelope Punch Board - Not only did I use my Envelope Punch Board to make my designer series paper envelopes (each made to fit a card of 3 1/2" square and requiring a 6" square piece of paper) but I also used my Box Buster tool to help me design a 4" square lidded box to hold them in. I love making lidded boxes usign the EPB rather than a scoreboard, as it makes them much more sturdy and rigid. It's really easy to do - you just need to make your lid 1/8" larger than your base for a snug fit.
Ribbon and Hearts - I continued the red and white theme of my project by adding a triple loop of Sending Love Ribbon with a double bow to adorn my sassy red Valentine-embossed heart to complete my box embellishment.
Here is the visual summary of the key products used on today's project for you to pin for easy reference:
You can see all of my 'How To' summaries on my 'How To - Tips and Techniques' Pinterest board in case you've missed any.
I will be using these little notes to hide in my children's school bags and pencil cases this month; they love to find a surprise note when they least expect it; I might even slip in a little chocolate treat too. I'm also linking up with the team over at SUO Challenges again where they are also celebrating Valentine's this week.
I'll be back tomorrow with another project. Until then, happy stampin'!
Stampin' Up! Supplies Used:
5dd18891-d64b-4d34-9e7c-1f4ef851e4ac|0|.0|96d5b379-7e1d-4dac-a6ba-1e50db561b04
Tags: Shop Stampin' Up! Online, Stamping Shop Stampin' Up online, Shop online, Stampin' Up, Stampin' Up Card ideas, Stampin' Up Supplies, Stampin' Up Card, The Paper Players, Sending Love, Sealed With Love, Sweet and Sassy Framelits, Valentines, Valentine's, Box Buster, Envelope Punch Board, 3D Projects, boxes
3D Projects | Box Buster | Boxes | Envelope Punch Board | Shop Online | Shop Stampin' Up! Online | Stamping
by Joanne James18. February 2016 10:00A day late as I was out all day and evening yesterday - here are this week's new Wednesday Weekly Deals! These offers are valid for one week only. As always, a new collection of deals will be announced next Wednesday.
If you want to take advantage of any of the deals on offer, you can support my business by placing your order online by clicking here or using the link to my store on the right hand side of my blog page where it says 'Shop Online' or with me in person. Don't forget to add the new Hostess Code for February UYGWGF4W if your order is under £150 and be sure to make sure that you don't check the 'no contact' box if you'd like to be kept updated with the progress of you order and receive a little thank you in the post from me.
Here's a summary of this week's one-week only Wednesday deals - click on each item to go to the online store to purchase:
Some great offers on this week - the cute Bear Hugs framelits, as used by my good self to create the little Valentine's table favours at the weekend that I shared over on my Facebook page (you can see them here if you missed them - do give my page a 'like' if you'd like to keep up to date with all the fun over there too!) Very useful Tags and Labels framelits dies, along with the Petite Petals stamp set, as voted for by one of my customers last week as 'the best stamp set EVER!' (hello Jane!) and the product that always gets my vote for the top spot: The Envelope Punch Board. When used in conjunction with my Envelope Expert and Box Buster tools, a tool that offers limitless possibilities. Always a bargain in my view even at its full price of £18, but at £13.50 it's an absolute steal!!! If you haven't got one, what on earth are you waiting for???!!!
Don't forget that for every £45 you spend you are entitled to a free Sale-A-Bration item too - and this week there are three new ones added to the range too. In case you missed it, you can find full details here.
Back later with today's creative project; until then, happy shopping!
063402aa-bafd-4b05-ab70-5c00a58f1271|0|.0|96d5b379-7e1d-4dac-a6ba-1e50db561b04
Tags: Promotions, Shop online, Shop Stampin' Up online, Stampin' Up, Stampin' Up Card, Stampin' Up Card ideas, Stampin' Up Supplies, Wednesday Weekly Deals, Box Buster, Envelope Expert, Envelope Punch Board, Bear Hugs, Petite Petals, Confetti Stars Punch, Tags and Labels Framelits
Promotions | Shop Online | Stamping
by Joanne James7. January 2015 07:00It's Wednesday so that means a new collection of Wednesday Weekly Deals! This week's deals are included below - they will be available for one week only, before a new collection of deals is announced.
As always, if you want to take advantage of any of the deals on offer, you can support my business by placing your order online by clicking here or using the link to my store on the right hand side of my blog page where it says 'Shop Online' or with me in person. Don't forget to add the Hostess Code for January (you can find this under the 'Shop Online' section on the right) and be sure to make sure that you don't check the 'no contact' box if you'd like to be kept updated with the progress of you order and receive a little thank you in the post from me.
Here's a summary of this week's one-week only Wednesday deals - click on each item to go to the online store to purchase:
There are some great offers on cardstock and designer series paper this week, but why do I think these Wednesday Weekly Deals are the best ever? Well, because my beloved Envelope Punch Board is on offer - I think it's a steal at its full price of £17.95, but at this week's offer price of £13.46 there really is no excuse for everyone not to own one!!
This really is such a versatile piece of kit and when you combine it with my Envelope Expert and Box Buster tools, the sky really is the limit! Nothing more to say other than get yours today!!
Back shortly with today's creative post - happy shopping!
b00c71fd-a5dd-40aa-beb7-ed27b98c2527|0|.0|96d5b379-7e1d-4dac-a6ba-1e50db561b04
Tags: Box Buster, Envelope Punch Board, Envelope, Envelope Expert, Promotions, Shop online, Stampin' Up, Stampin' Up Card, Stampin' Up Card ideas, Stampin' Up Supplies, Wednesday Weekly Deals, Typeset, Gold Soiree
Box Buster | Envelope Punch Board | Promotions | Shop Online | Stamping
by Joanne James27. December 2014 16:40Merry Christmas to you all, my lovely blog readers! After a welcome few days break hosting Christmas for my family, today I'm back to the blog! I have a couple of pre-Christmas makes to share still; do you ever find yourself so busy crafting in the run up to the big day that you spend more time 'in the moment' rather than recording it and sharing? Well, this year that was definitely me! Today I am being treated to a day of rest - my seven year old has declared that he is doing the cooking today, from his new boy's cookbook (doing well so far - fresh fruit and pancakes for breakfast, followed by shepherd's pie for lunch) - so whilst he prepares a feast of chicken dippers for tea, I thought I would take the opportunity to get back into my blog.
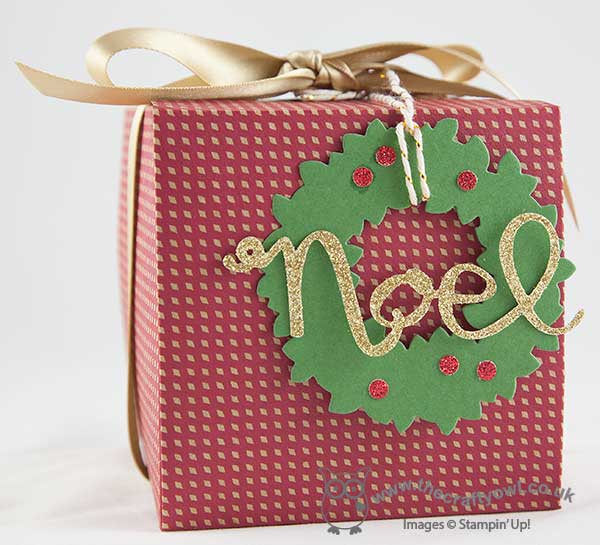
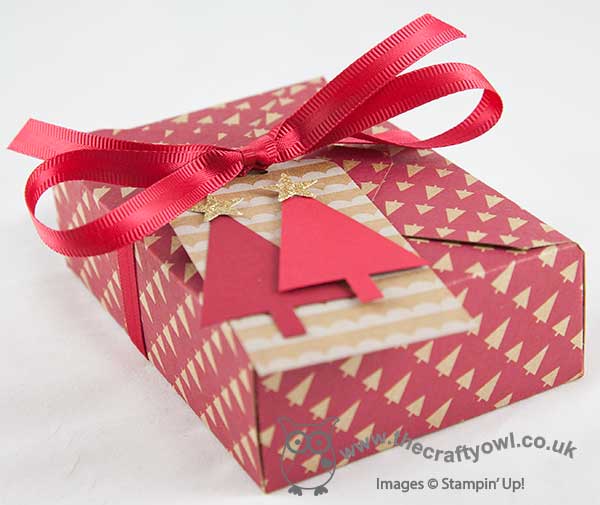
Today's share is some lovely gift packaging made with the Gift Box Punch Board, Envelope Punch Board and the Big Shot and Banner Framelits. I decorated some gifts using boxes made with the gorgeous Under the Tree speciality DSP and the Gift Box Punch board and some easy die cut tags to co-ordinate:
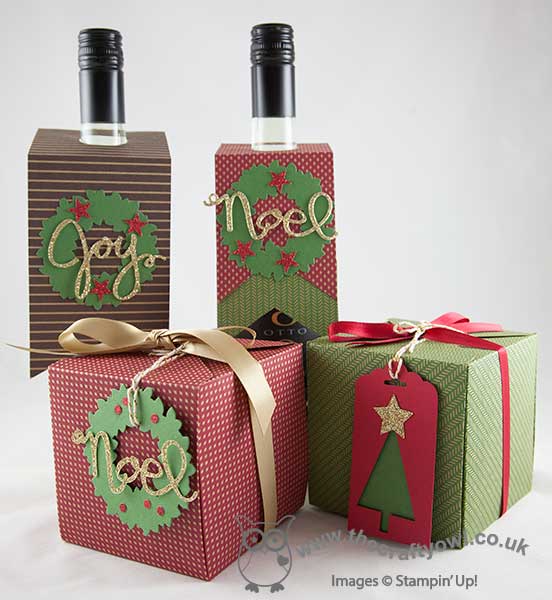
If your gift fits the standard boxes that the Gift Box Punch Board makes, it is a quick and easy 'no glue' packaging solution. With some ribbon and a fancy tag they really look the part:
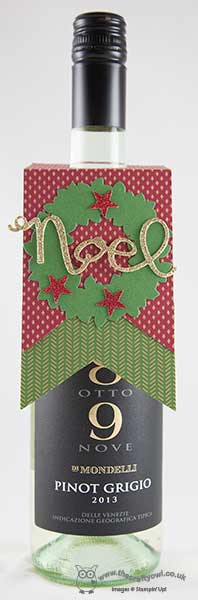
I also made some bottle tags using the Banner framelits and a circle punch, again decorating with some simple wreaths cut with the Wonderful Wreath framelits - here's a close up:
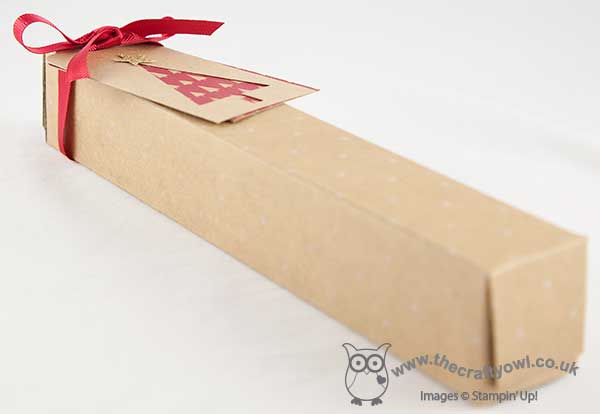
As my regular readers will know, I am a big fan of the Envelope Punch Board and it is still my tool of choice for creating custom boxes - this is so easy to do with my BoxBuster tool - it enables you to create the perfect box size first time with no paper wastage. Here's one I made for my niece's Christmas gift that is the perfect case in point, this time finished with a tag made with the tree punch to co-ordinate with the Under The Tree paper:
If you are a fan of creating easy, attractive gift packaging, you will be pleased to know that the Gift Box Punch Board is carrying over and will still be available when the current Autumn-Winter seasonal catalogue ends. The Envelope Punch Board is always available as a standard annual catalogue item - phew, I don't know what I'd do if this tool was ever discontinued!
Back tomorrow with another of my pre-Christmas makes and a special announcement, so check back then for more crafting lovliness!
Until then, happy stampin'!
Stampin' Up! Supplies Used:
c33dec21-a135-4757-83fa-cdd13c7c3db0|0|.0|96d5b379-7e1d-4dac-a6ba-1e50db561b04
Tags: Wonderful Wreath Framelits, Under The Tree, Tree Punch, Stampin' Up, Stampin' Up Card, Stampin' Up Card ideas, Stampin' Up Supplies, Shop online, Gift Box Punch Board, Envelope Punch Board, Box Buster, Big Shot, Scalloped Tag Topper Punch
3D Projects | Box Buster | Boxes | Envelope Punch Board
by Joanne James29. March 2014 22:13A quick (and late!) post from me today - I have one of the busiest weekends ever today and tomorrow. I've been putting the final touches to my class preparation for next week today and have spent the evening at the swimming pool with Rebecca as she was participating in a swimming gala. We are having a real 'girls versus boys' weekend; we each went to our separate swimming pools today (and Granny came along to watch Rebecca for the first time today too) and tomorrow Rebecca and I are travelling to London so that she can take part in an inter-school music festival with the rest of her school choir, whilst the boys have a fun day doing their own thing at home.
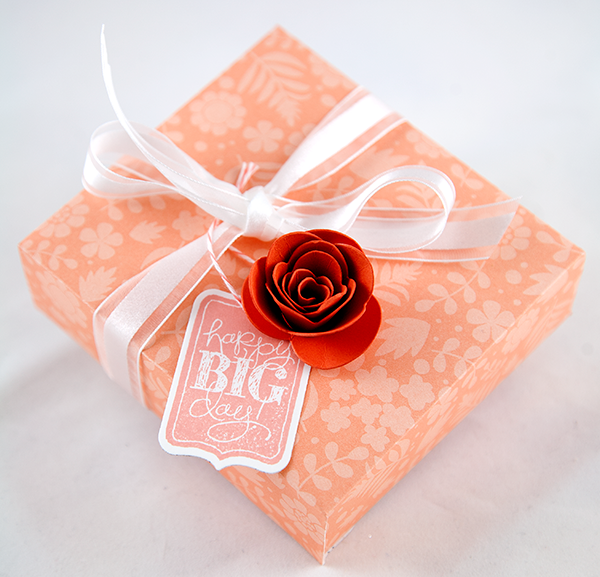
Anyway, with all that in mind there will be a couple of quick posts from me over the next couple of days. Today I'm sharing a gift I made for one of my customers who celebrated her birthday recently. If you follow me on Facebook, you will have see this photograph I posted yesterday of a lovely box I made using the Sweet Sorbet papers (yours free with a £45 spend during Sale-A-Bration - only 2 more days to go to plae a Sale-A-Bration order!)and my Box Buster tool and Envelope Punch Board:
Today I thought I would share what was inside - a sweet little box frame:
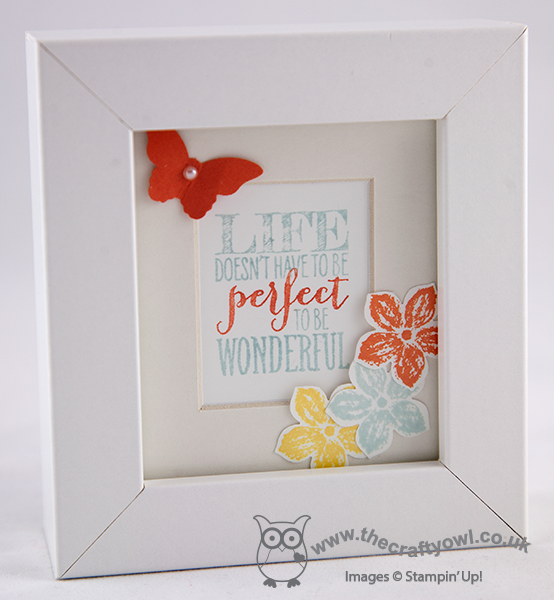
Just a simple stamped sentiment, decorated with a punched butterfly and a few flowers stamped and punched using the Petite Petals stamp set and co-ordinating punch. A decorated frame makes a lovely gift.
Back tomorrow with a card (or two!); until then, happy stampin'!
Stampin' Up! Supplies Used:
65600cd8-bb9b-4ae6-86f9-55f983360d71|0|.0|96d5b379-7e1d-4dac-a6ba-1e50db561b04
Tags: 3D Projects, Box Buster, boxes, Envelope Punch Board, Bitty Butterfly Punch, Petite Petals, Petite Petals Punch, Perfect Pennants, Shop online, Sale-a-bration 2014, Sweet Sorbet, Stamp-a-ma-jig, Stampin' Up, Stampin' Up Card, Stampin' Up Card ideas, Stampin' Up Supplies
3D Projects | Envelope Punch Board | Sale-a-bration | Stamping
by Joanne James11. March 2014 15:13Firstly, thank you to everyone who has left comments on my blog, Facebook page, youTube channel or emailed me in person with comments and praise for my new Box Buster tool - I am genuinely touched that you have gone out of your way to share with me what a great tool you think this is and I'm delighted to be able to share it with you. Today I'm back with another video tutorial showing you a different box that you can make using your Envelope Punch Board - an open topped Easter bunny treat box - made using paper from the lovely Fresh Prints Designer Series Paper stack:
Sometimes you want to be able to see the contents of your box and today's box is just perfect for that. It also means that when you're making your box out of such lovely double-sided designer paper, you get a lovely glimpse of the reverse side too:
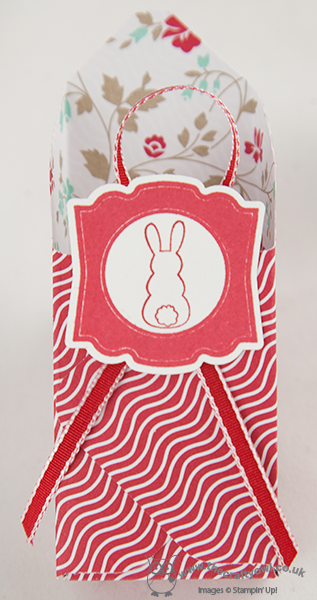
I love the Fresh Prints DSP stack - these paper stacks are great for small boxes and perfect if you're a card maker; I always get through several of these each season! Today's boxes were made to fit the Malteser Easter bunnies that are currently on sale in store right now, but as always with the aid of my Box Buster tool you could adapt the same style box to fit any size contents, just by measuring them; Box Buster from The Crafty Owl will do all the hard work for you and tell you what size paper you need and where you should make your punch marks. So, without further ado, here's what you've all been waiting for - the link to today's video:
)
I hope you found the tutorial useful - there's lots more still to come! Don't forget - you can access the Box Buster tool via the button on the right hand side of my blog home page or simply by clicking here.
Back tomorrow with another project; until then, happy box making!
Stampin' Up! Supplies Used:
c5d11fe0-3556-4a4f-8586-67c08127827c|0|.0|96d5b379-7e1d-4dac-a6ba-1e50db561b04
Tags: Box Buster, boxes, Artisan Label Punch, Eggstra Spectacular, Easter, Envelope Punch Board, Fresh Prints DSP Stack, Label Love, Shop online, Stamp-a-ma-jig, Stampin' Up, Stampin' Up Card ideas, Stampin' Up Supplies, video tutorial
Box Buster | Boxes | Envelope Punch Board | Video Tutorials
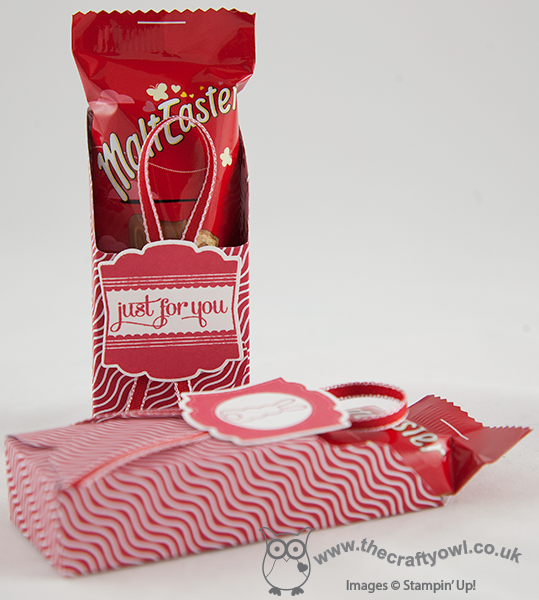
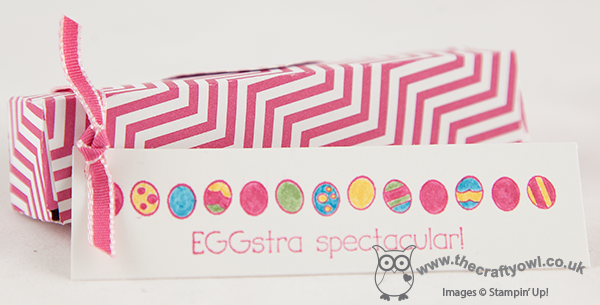
by Joanne James7. March 2014 19:25Hello everyone! From the home of 'cool time-saving tools' (if you're reading this and you're an SU! demonstrator you should also check out my Product Table Builder application) today I have the third of this week's video tutorials showing you how to make a super cute Easter mini-egg treat box using your Envelope Punch Board and my new Box Buster tool. You can use your Envelope Punch Board to make boxes of all shapes and sizes - including some rather dinky small ones. Check out this box that I made to hold 5 foil-wrapped mini eggs ready for Easter:
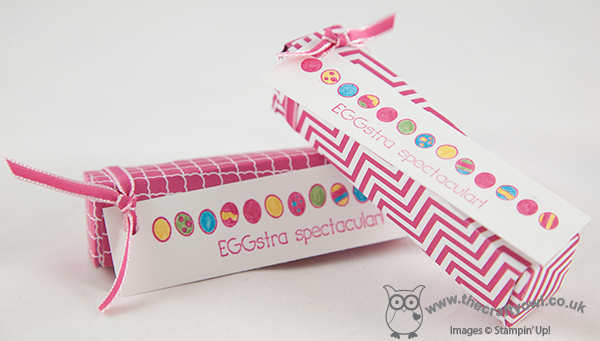
It measures just 20mm x 20mm x 85mm and it was so easy to work out the paper dimensions and punch points with the help of the Box Buster tool. Here's the video that shows you how I did it, along with a 'top tip' when creating narrow boxes like this:
This size box would also make a great wedding favour - it's the perfect size for sugared almonds if you're looking for something traditional. I hope you found today's video useful; why not use the Box Buster tool to create your own small or narrow boxes? You can use either millimetres or inches (to 1/8 of an inch) and create the box size of your choice?
Back tomorrow with another project; until then, happy stampin'!
Stampin' Up! Supplies Used:
by Joanne James3. March 2014 22:26Good evening readers! Another busy day today with my first class of the month. The ladies in today's class made some great cards using their Happenings Simply Created Card Kits - pop by my Facebook page tomorrow if you would like to see what they created as I will be uploading some photos of their work.
Meanwhile, I promised you a special second blog post today that showed you how to make a box that can be used to hold four of the notelets created from part of the Happenings Simply Created Card Kit - so here it is! I've shot a few videos previously using the Envelope Punch Board, however this is the first box video. The reason I'm excited to share this particular video with you though is that I used a new tool of mine - Box Buster from The Crafty Owl - to work out the dimensions for my box and it was SO easy!!
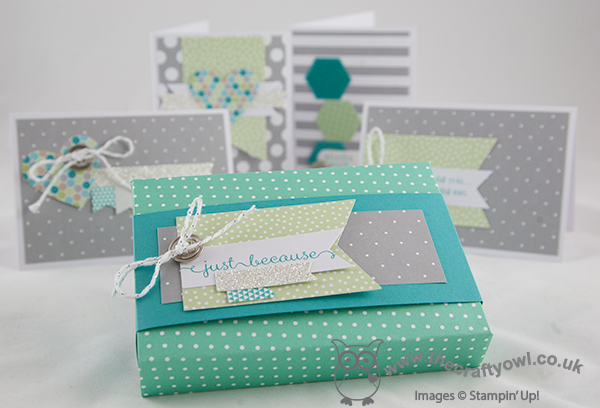
For any of you that have made boxes using your Envelope Punch Board previously, you will know that the trickiest thing is working out where to make your first and second punches in order to create a box of the correct dimensions. It's easy for a square-based box, as the dimensions simply need to be divisible by 3, but what about when you want to create rectangular boxes of different heights, widths and depths? Following many templates and a considerable amount of test paper, I have developed a tool that means you can input your three chosen dimensions, in either millimetres or inches, and the Box Buster will calculate the size of the paper that you require and where you need to make both your first and second punches.
Watch the video to see just how easy it is to use (you will need to make a volume adjustment for sound during the middle section of the video; the section that shows the Box Buster in action uses different recording software to my usual video recordings and the sound volume settings are not only different but I've been unable to edit post-production - I do now know for next time though!):
You can find Box Buster from The Crafty Owl on my website here or via the permanent link on the right hand side of my blog page. Box Buster is a free tool and will be permanently available for anyone to use - why not visit the page now and add it to your 'favourites' so that you can access it quickly and easily the next time you need to make a box using your Stampin' Up! Envelope Punch Board? Whilst you're there, why not also check out the Product Table Builder from The Crafty Owl - a great tool if you are a Stampin' Up! demonstrator with an online store. And if you haven't already got an Envelope Punch Board, what are you waiting for? Click on the link at the bottom of today's post and purchase one from my online store today!
I'll be making more video tutorials this week showing you how easy it is to make boxes in a variety of different shapes and sizes, in both metric and imperial measurements, using Box Buster from The Crafty Owl and The Stampin' Up! Envelope Punch Board; do come back and check them out or subscribe to my YouTube channel.
Back tomorrow with another project; until then, happy stampin'!
Stampin' Up! Supplies Used: