by Joanne James5. July 2016 17:31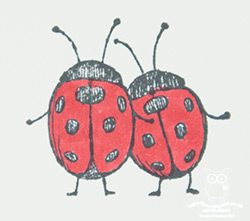
I've had a busy day today with my 'Jar of Love' technique class this morning and a wonderful afternoon of Project Life memory keeping. I made a quick card yesterday for a couple of challenges that I wanted to share with you today:


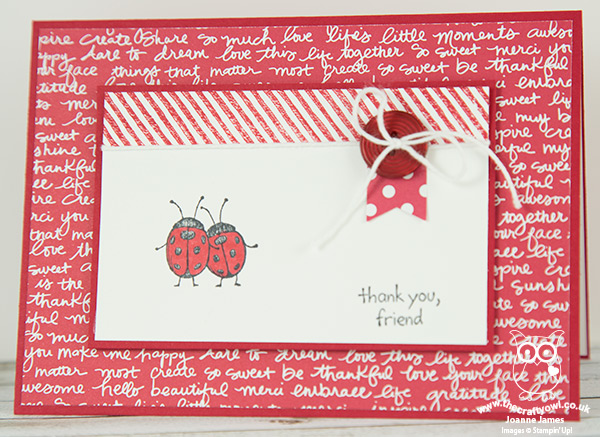
I loved this sketch over at Paper Craft Crew and was attracted to the red and white theme over at As You See It, although I don't have a Canadian card I'm afraid! I've been keen to ink up the cute ladybird pair from the hostess set 'Love You Lots' so that was straight where I headed for today's card:
Here's the low-down on the detail:
Thank You, Friend - This adorable ladybird pair comes in one of the new hostess sets in the annual catalogue called 'Love You Lots'. This is such a fun set with a fun frog, cute pair of hedgehogs, and an adorable elephant and mouse in addition to this spotted pair and is exclusively available to anyone who hosts a Stampin' Up! party or places a single order of £150 or more. I stamped my ladybirds in black and coloured them with my Real Red Stampin' Write marker and added my simple sentiment.
Faux Washi Tape Border - I used the striped stamp from Gorgeous Grunge that I used on my Jar of Blooms card yesterday (you can see that card here if you missed it) to create a border along the top of the central panel; I think it looks like washi tape, which would of course be a good alternative if you don't have this set. I added some white baker's twine, a red button and a tiny banner to finish this edge.
Paper With Meaning - For my background frame, I decided to use the scripted paper from the Brights designer series paper stack. I love this paper but as it's so busy I tend to use it with caution. The clean and simple central panel and the overall sentiment of my card made this paper a good choice here.
This card and a couple more just like it are headed to Rebecca's friends this week; I haven't made a monochromatic card in a while and this one is really fun.
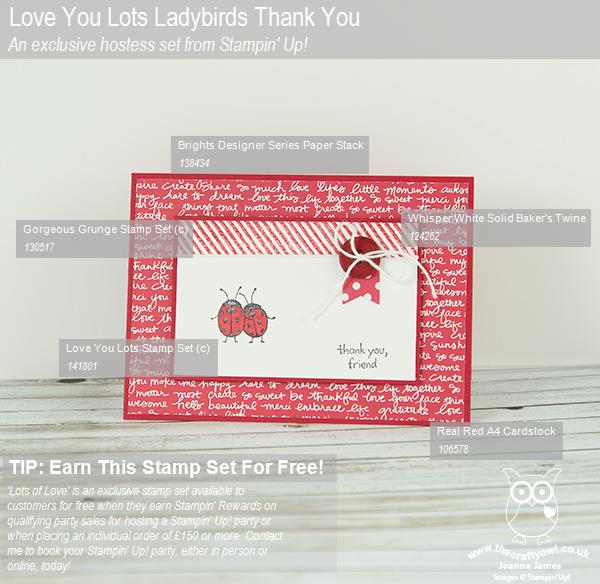
Here is the visual summary of the key products used on today's project for you to pin for easy reference:
You can see all of my 'How To' summaries on my 'How To - Tips and Techniques' Pinterest board in case you've missed any.
I'll be back tomorrow with another project; until then, happy stampin'!
Stampin' Up! Supplies Used:
by Joanne James4. July 2016 22:04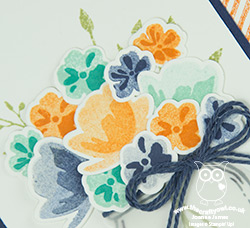
Happy Monday everyone! I hope yours was a good one; I had a very early class today, followed by school sports day for the James Juniors, the bad weather having caused it to be postponed from last week. Today was beautifully sunny though and there was some great sporting action out on the field. Back to a late blog post though as a result!
Whilst finishing up the preparations for my classes this week on Saturday I managed to sneak in an extra card too, using this week's Colour Q colours (or their closest current equivalents):

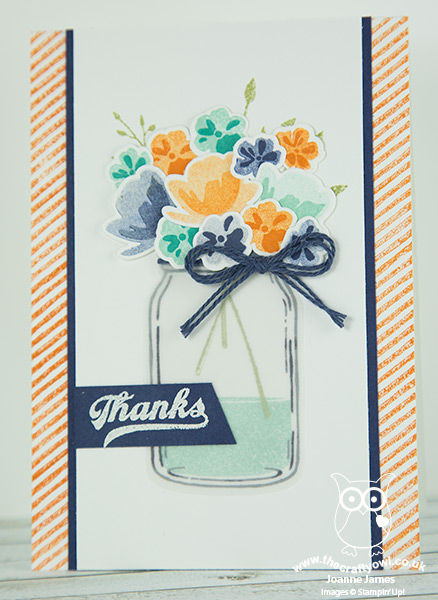
One of my classes this week features the Jar of Love stamp set, and I've been having so much fun stamping and cutting out the flowers that I decided to make another card with it - take a look:
Here's the low-down on today's card:
Jar of Blooms - The 'Jar of Love' set has a trio of jars, each a different size, with so many content options. My jar today is a vase filled with a mix of blue and orange blooms, stamped off first for the base layer of colour to allow for contrast - and cut out easily using my Big Shot and co-ordinating Everyday Jars Framelits Dies. There are also a host of co-ordinating sentiments. I've used the retro-styled 'thanks' on my card today, heat embossed in white onto Night of Navy cardstock.
Gorgeous Grunge Border - I used the striped stamp in the Gorgeous Grunge set for my border, stamped in Pumpkin Pie for a bright pop of orange.
Soften With Vellum - I stamped my jar, water and leaf stems directly onto my Whisper White cardstock. To soften the appearance of my glass jar, I used my framelits to cut a jar out of vellum and adhered it over the top, adding some Night of Navy twine around the neck of the jar and finishing with a bow.
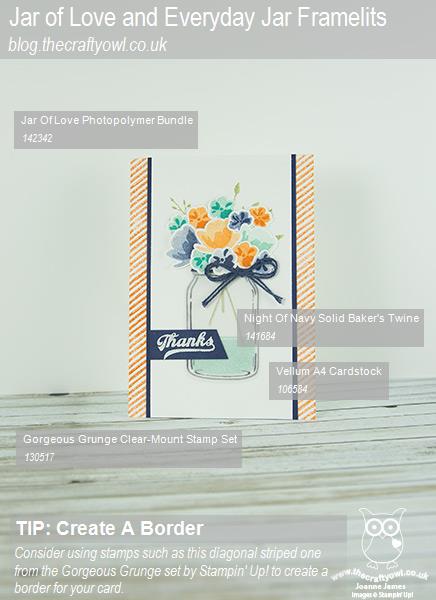
Here is the visual summary of the key products used on today's project for you to pin for easy reference:
You can see all of my 'How To' summaries on my 'How To - Tips and Techniques' Pinterest board in case you've missed any.
I'll be back tomorrow with another project; until then, happy stampin'!
Stampin' Up! Supplies Used:
by Joanne James29. October 2015 08:05
Today it's time for a new challenge over at Create With Connie and Mary and this week we have a great sketch challenge for you:
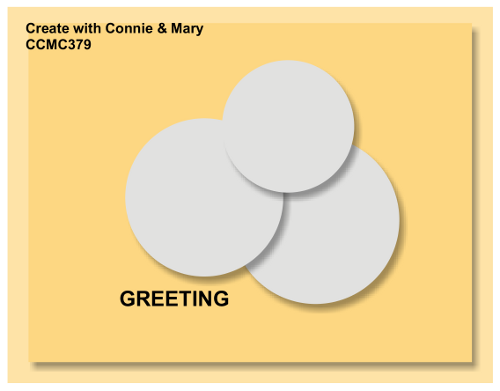
I saw this sketch layout and immediately thought 'snowflakes' so dug out my 'Festive Flurry' stamp set and some Lost Lagoon cardstock, a colour that I haven't used much this season. Here's my card:
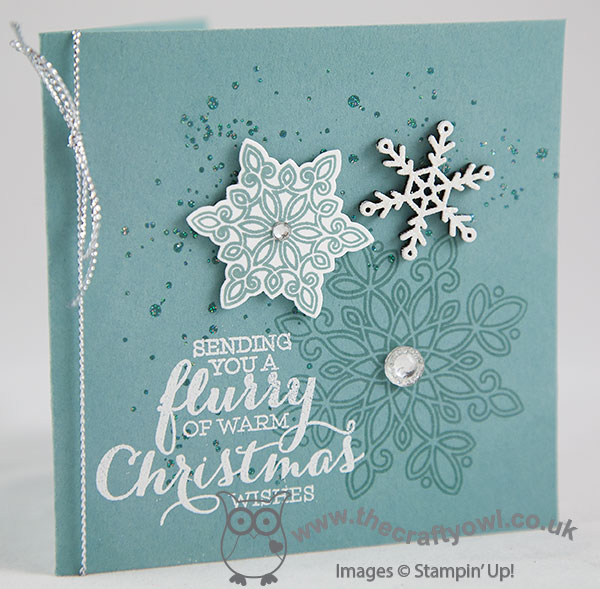
I decided to go with a square card today and worked directly onto my card base, as I wanted my snowflakes to add the layers. I stamped my first snowflake in Lost Lagoon directly onto my card base and centred it with an iced rhinestone , then stamped my sentiment in Versamark overlapping this and heat embossed it in white. Before adding my punched snowflakes, I also stamped the splatter stamp from Gorgeous Grunge in Versamark onto the background and heat embossed this in Iridescent Ice; it looks quite dark in the photo but is actually really sparkly. For the remaining circular elements of the sketch, I stamped one of the smaller snowflakes in Lost Lagoon on Whisper White, added a rhinestone to the centre and punched it out using the co-ordinating punch, then for the remaining circle I used one of the natural snowflake elements that I stamped in versamark and heat embossed in white, then stamped it again in versamark and heat embossed it in Iridescent Ice so that it is super-sparkly. lastly, I added some silver cord trim to the folded edge.
I just love this card - so very sparkly and Christmassy, all rolled into one! I love the combination of snowflakes to add a little flavour of collage to my card today.
Do visit the other Design Team members to see how they used this week's challenge sketch; there's lots of inspiration over on their blogs too!
Enjoy your day and I'll be back tomorrow with another project; until then, happy stampin'!
Stampin' Up! Supplies Used:
- Flurry Of Wishes Photopolymer Bundle
- Gorgeous Grunge Clear-Mount Stamp Set
- Snowflake Elements
- Iced Rhinestone Embellishments
- Silver Cording Trim
- Embossing Buddy
- Versamark Pad
- White Stampin' Emboss Powder
- Heat Tool (Uk)
- Iridescent Ice Stampin' Emboss Powder
- Whisper White A4 Cardstock
- Lost Lagoon Classic Stampin' Pad
- Lost Lagoon A4 Cardstock
by Joanne James13. May 2015 20:44I have a super quick post for you today to share a super-quick card that I've been trying to find the opportunity to blog for a while now that fits in perfectly with the current challenge over at Fab Friday, where the designers want us to use any or all of the retiring 2013-15 in-colours:
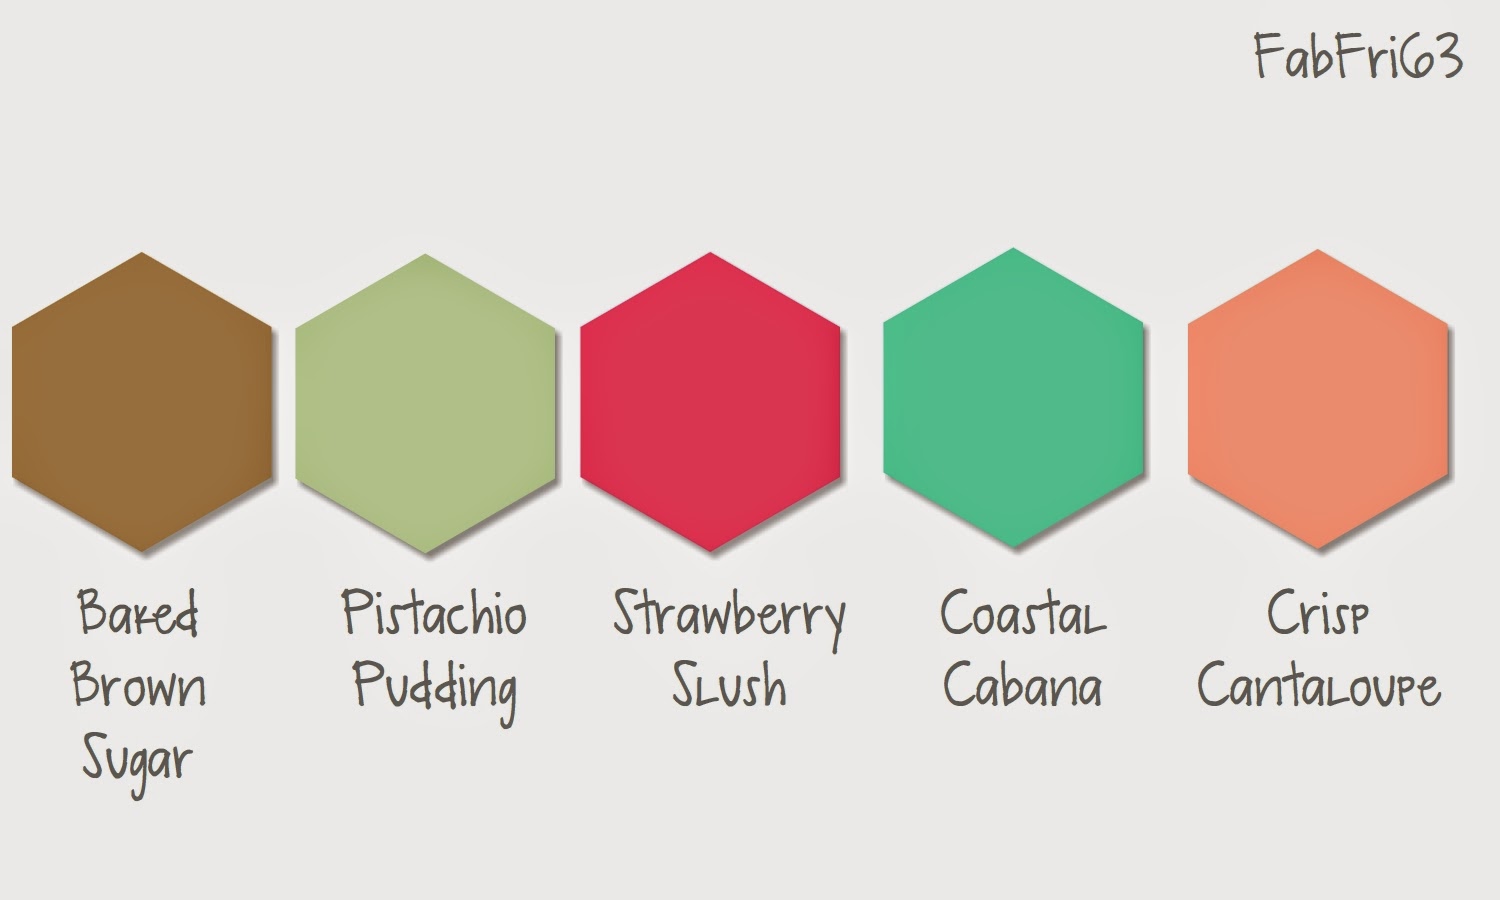
I like to make a little thank you card and co-ordinating bag tag for my local customers to hand out with their orders and in March I decided to feature the in-colours to remind them of their forthcoming retirement and to stock up on re-inkers, cardstock and so on before the retiring list launched. Here is my card:
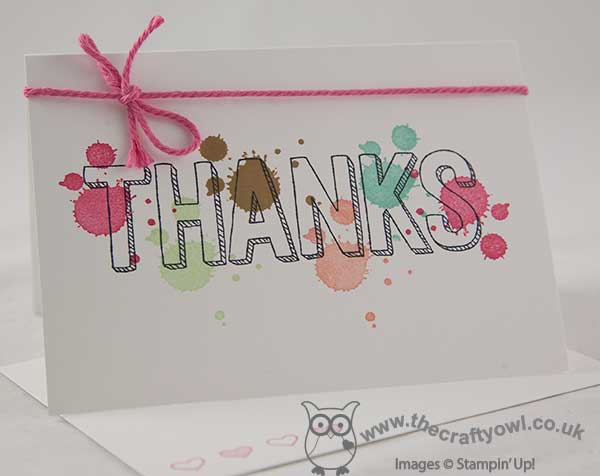
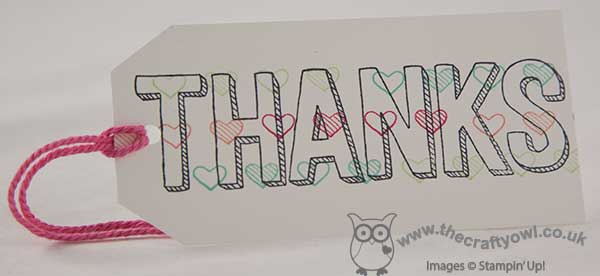
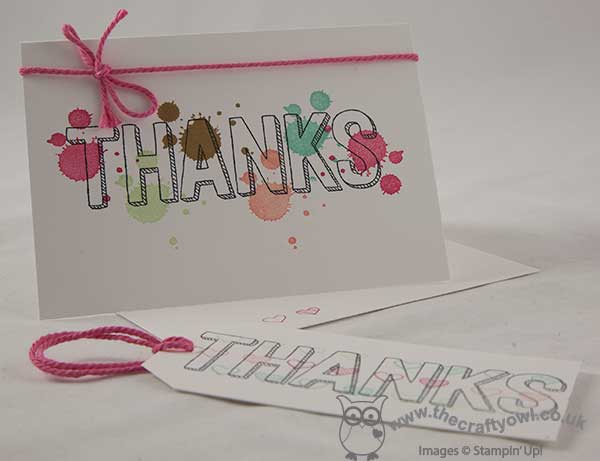
Quite self-explanatory - I used a bunch of the Stampin' Up! notelets and envelopes and used one of the 2015 Sale-A-Bration promotional stamps 'For Being You' across the centre of my card stamped in Momento Black, then went across the letters and highlighted each one with a fun splodge of Gorgeous Grunge in each of the in-colours and starting and finishing with the same one on each card. I then added a piece of co-ordinating thick baker's twine and tied in a bow - job done! A little extra stamping on the envelopes, and then a bag tag to match, this time stamped with the heart stamp from the thank you set 'For Being You' as the background:
A super - quick and easy card and tag to reproduce, just what you need for mass stamping and a perfect reminder to my customers to order their retiring in-colour supplies before it was too late. It also illustrates another way to combine stamps to great effect; one of my customers in particular loved the 'For Being You' stamp set, yet she isn't into colouring with marker pens at all and so had been asking me for other suggestions as to how she could use her stamp. Along with paper-piecing, watercolouring or embossing, combining stamps is another great way to introduce colour without resorting to colouring in with pens.
That's all from me today; back tomorrow with this week's card for the new challenge over at Create With Connie and Mary. Until then, happy stampin'!
Stampin' Up! Supplies Used:
All now retired, except for the notelets and envelopes!
by Joanne James3. March 2015 15:00Today I have something a little different for you! The current challenge over at SUO Challenges is 'Cards For Teens', sometimes a tricky group to create for. Most of the children's cards I create are for the under-10s so I wouldn't consider my self experienced in this field at all although having purchased an e-cutter recently and looking through My Digital Studio for inspiration, I discovered a stamp that is perfect for a birthday card for male teens that ultimately led me to make a few cards. Here's the first one:
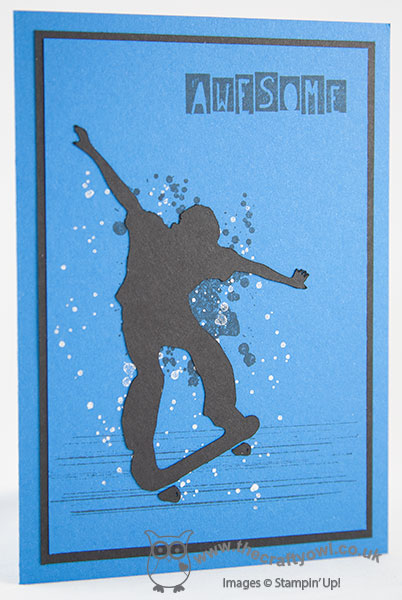
Using Pacific Point as my base colour, I used the 'Extreme Skateboard' stamp image and converted it to a cut file which I then cut out of Basic Black cardstock using my e-cutter. Before adhering to my cardbase, I added some spatter and stripes in Memento Black ink and Encore Silver Metallic to create a grungy background. I also added a retired 'Awesome' stamp from the 'Cool Kid' set to this card.
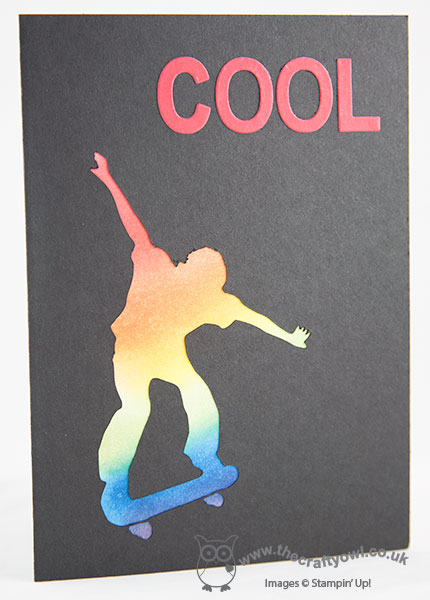
For my second card, I used the negative space of the skateboarder to create a black card with a graduated rainbow sponged skateboarder behind and added some letters cut with my Little Letters thinlits to spell 'Cool' - something all teens think applies to them I think:
Finally, I used the cut skateboarder and adhered him to a sponged rainbow starburst background - I also stamped some black stars on top of this to add to the effect:
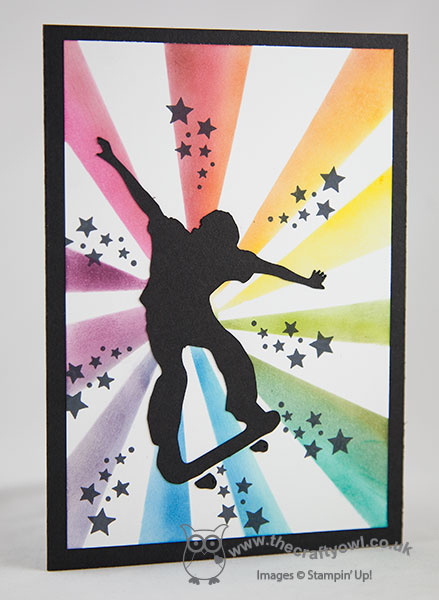
I love all of these cards, bit I think the bottom one is my favourite. It has an almost psychodelic feel. This is one of the projects that I submitted for the Convention Design Challenge in Brussels last November, although haven't shared until now. I gave the first card to my skateboard-mad 13 year old neighbour for his birthday and he pronounced it 'sick' - as I looked puzzled and slightly disappointed, he rushed to explain this was a good thing - apparently in teen-speak this is high praise! Clearly, what do I know!!!
If you struggle with teenage cards too, do check out the DT samples and the SUO gallery, where there's lots of teen inspiration.
Back tomorrow with a new set of Wednesday Weekly Deals and another project. Until then, happy stampin!
Stampin' Up! Supplies Used:
1b3c52a5-d688-4d75-a60a-c808e9f202c4|0|.0|96d5b379-7e1d-4dac-a6ba-1e50db561b04
Tags: MDS, masculine cards, My Digital Studio, Shop online, Stampin' Up, Stampin' Up Card, Stampin' Up Card ideas, Stampin' Up Supplies, Extreme Skateboard, Gorgeous Grunge, Cool Kid
Cards | E-Cutter | My Digital Studio
by Joanne James2. November 2014 07:00It's Sunday and time for a new challenge over at The Paper Players, where this week LeAnne has an interesting challenge for us:
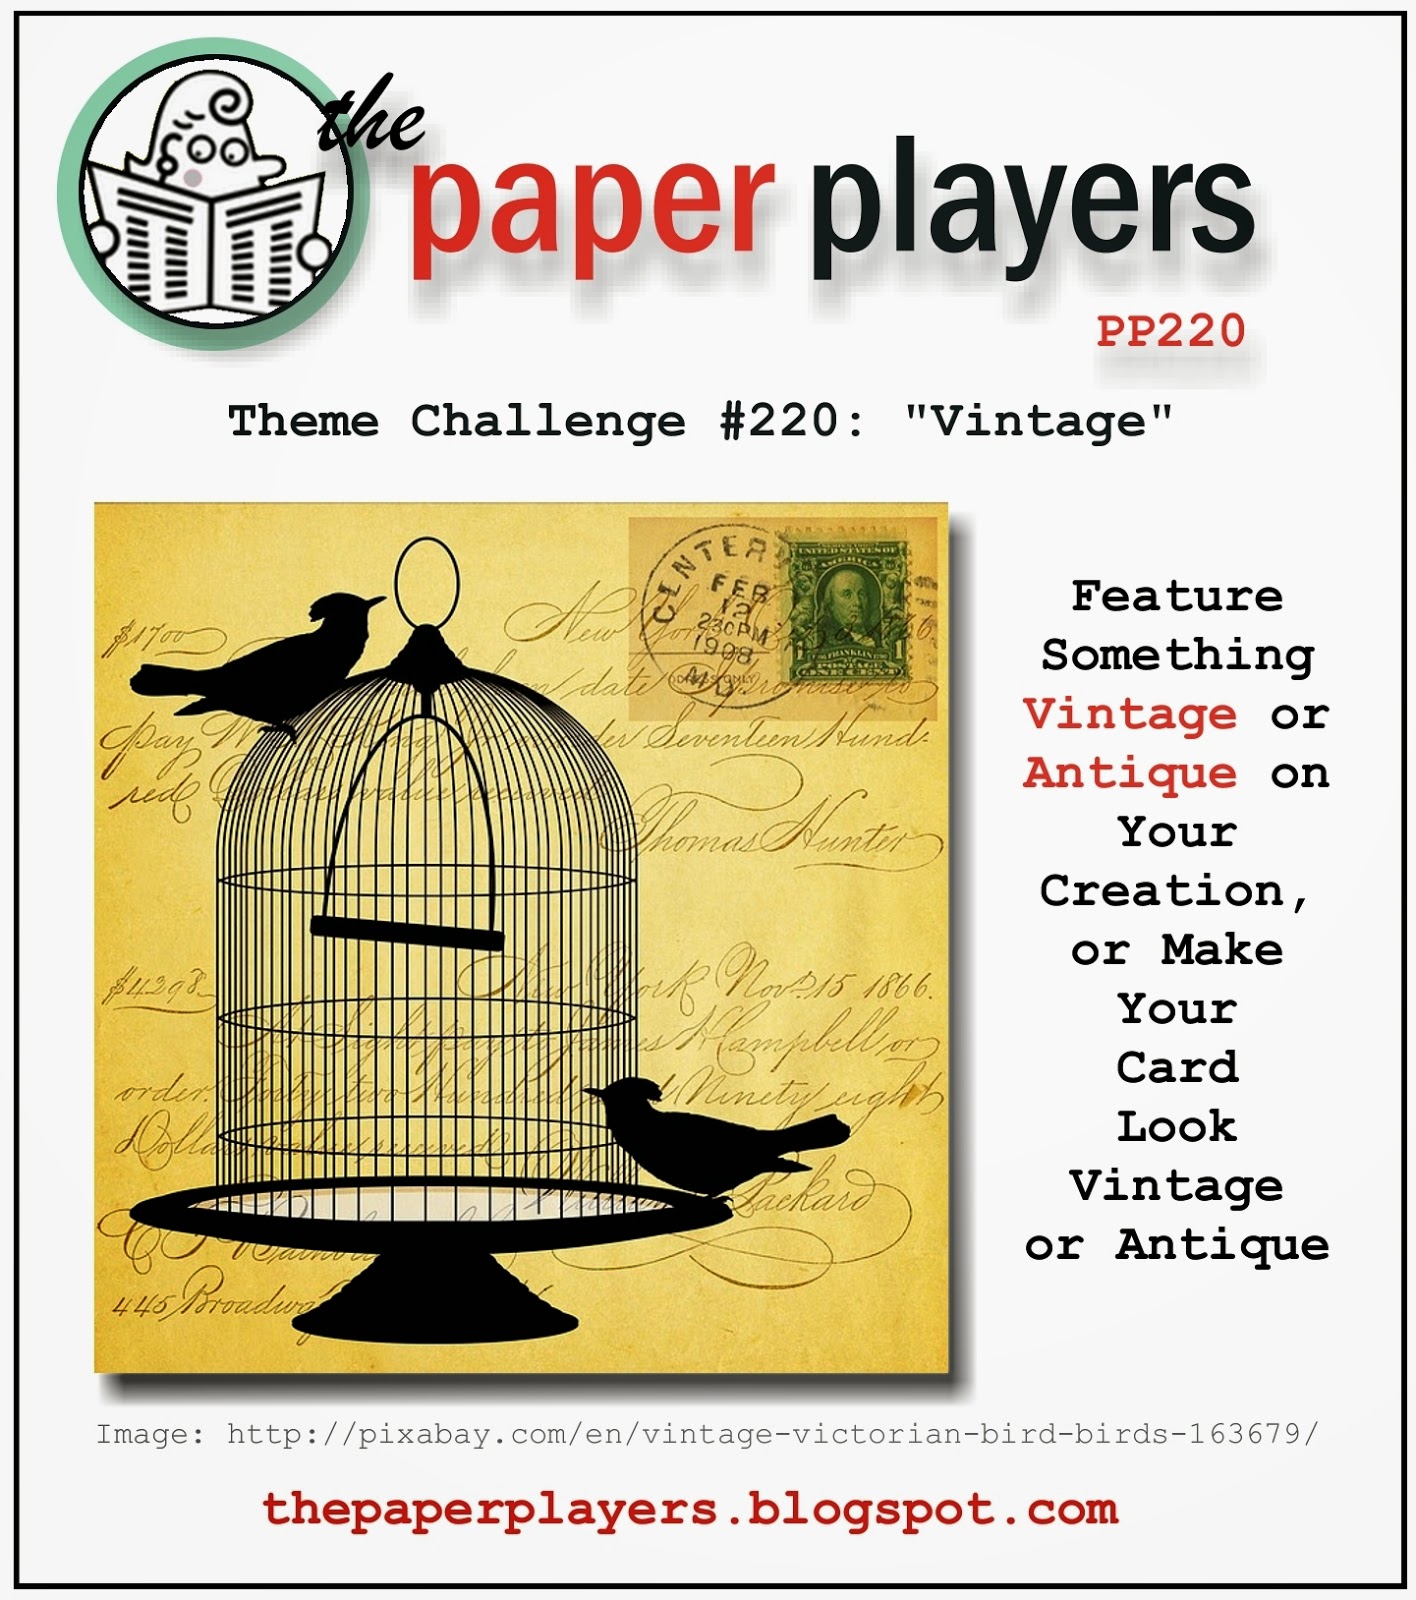
I had a minor panic when I saw this week's challenge, for two reasons: firstly, vintage as a style is not my forte, and secondly, when I looked through my (extensive!) stamp collection, it was obvious I didn't have much in the way of vintage stamps either!! In fact, I only have one set that looks even remotely 'vintage' and that's my Traveler set - at that moment though, I relaxed. I love this set and suddenly remembered an idea I'd had way back when it first came out in July. I wondered what the vintage steam train would look like converted into the Polar Express, the famous train in the Christmas movie starring Tom Hanks - well wonder no more, here's my card:
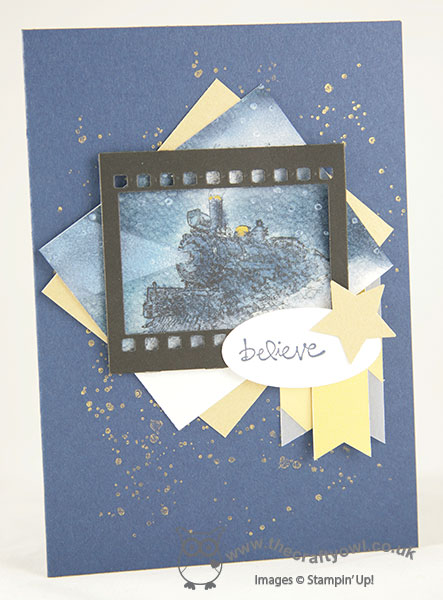
I used Night of Navy for my card base, stamped with some grunge spatters from Gorgeous Grunge in Gold Encore ink, and matted my focal image with an offset piece of Brushed Gold cardstock. I stamped my image in black Stazon on watercolour paper, then sponged in my sky using Night of Navy and a little Pacific Point. I added more colour to the train using my Aquapainter and a touch of gold, then I used Whisper White kraft ink for the snow on the ground, the smoke from the train's funnel and I masked off an area and sponged white for the beam of light coming from the front of the train. I also stamped some falling snow using the snow stamp in the 'White Christmas' set. I wanted to frame my image with the 'On Film' framelit as per the sketch from The Paper Craft Crew because I wanted the connection to the movie, but in truth it does crop the image a little small and you lose some of the detail. I will probably make another version of this without such a tight crop, but as I was racing towards my deadline I didn't have time to make another for today so had to go with this one. I do love the overall effect though. The flags are made from striped gold vellum and gold foil, and the sentiment from 'Good Greetings', in keeping with one of the famous straplines from the movie, 'The bell still rings for all who truly believe', which I punched out with a small oval punch and finished with a small brushed gold star.
I hope you like my vintage festive train today; do check out the other design team cards over at The Paper Players - there is, as always, some fantastic inspiration to be found there.
Back tomorrow with another project; until then, happy stampin'!
Stampin' Up! Supplies Used:
b76a2ac7-4489-4a34-a688-887463a380af|0|.0|96d5b379-7e1d-4dac-a6ba-1e50db561b04
Tags: Big Shot, Christmas, On Film Framelits, Good Greetings, Shop online, Stampin' Up Supplies, Stampin' Up Card ideas, Stampin' Up Card, Stampin' Up, Star Framelits, Watercolouring, Traveler, Gorgeous Grunge, The Paper Players
Cards | Stamping
by Joanne James23. September 2014 13:30Hello everyone! Today I'm sharing my card for this week's challenge over at The Paper Craft Crew, for which I also used the current colour palette over at The Card Concept:

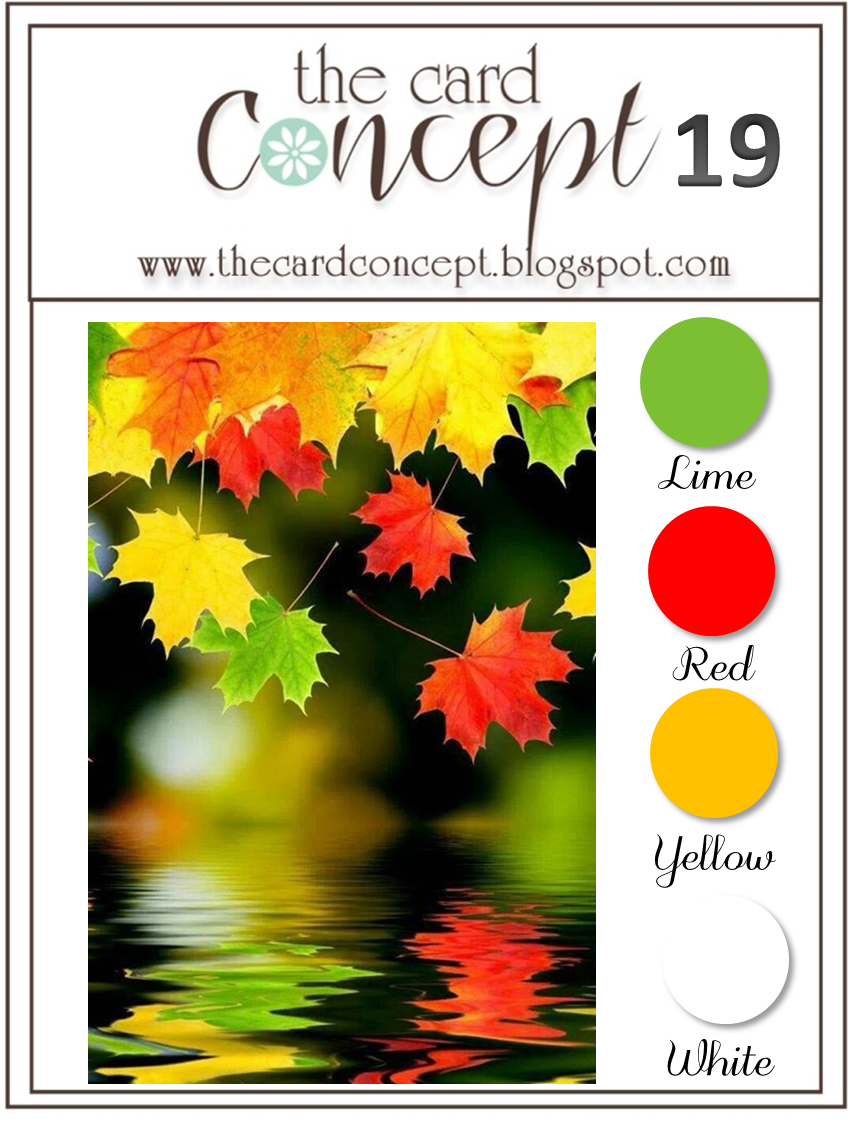
I thought the sketch layout with the word bubbles and the leafy inspiration photo would combine to create the perfect opportunity to showcase the sentiments in the 'Gratitude For Days' stamp set - a rather unsung hero from the current seasonal catalogue I think, but a set that I have used lots and lots. Here is my card:
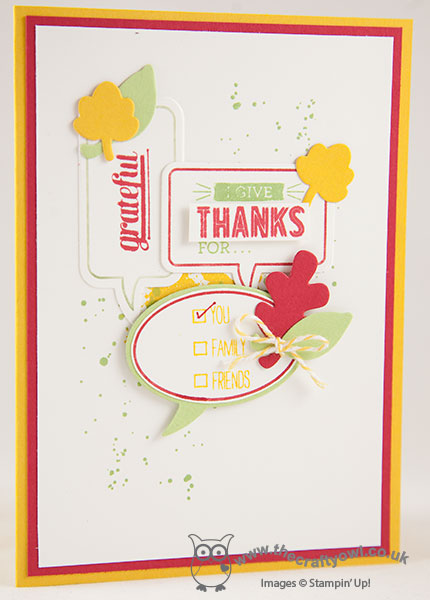
I used a combination of Real Red, Crushed Curry and Wild Wasabi for my card and inked the outlines of the Just Sayin' stamped word bubbles using my markers then stamped the insides with various 'gratitude' stamps in contrasting colours. I used some little leaves cut with my Fall Fest framelits as the embellishment for the word bubbles, and gradually layered them over a Gorgeous Grunge background to achieve my finished design. I think this still qualifies as 'clean and layered' as far as The Card Concept is concerned (if you've ever wondered about the definitions of the various cardmaking styles, you should check out their site - it gives some great guidelines), maybe bordering on 'freestyle collage', although probably not random enough to truly be a collage!
Hope you like my card; I'll pop back later with another quick make today for this week's challenge over at Create With Connie and Mary, so stay posted. until then, happy stampin'!
Stampin' Up! Supplies Used:
1e9c525a-9bc1-419e-9fbd-a468668813b6|0|.0|96d5b379-7e1d-4dac-a6ba-1e50db561b04
Tags: Thankyou cards, Just Sayin', Word Bubbles Framelits, Gratitude For Days, Fall, Fun Fall Framelits, Gorgeous Grunge, Big Shot, Stampin' Up, Stampin' Up Card, Stampin' Up Card ideas, Stampin' Up Supplies, Shop online
Cards | Stamping
by Joanne James7. April 2014 21:18When I saw the colour combo over at Dynamic Duos this week, I just knew I was going to have to make a card for this challenge! Of all the colour collections, Brights is my most favourite and this pink and blue combination just rocks!

Here is my card:
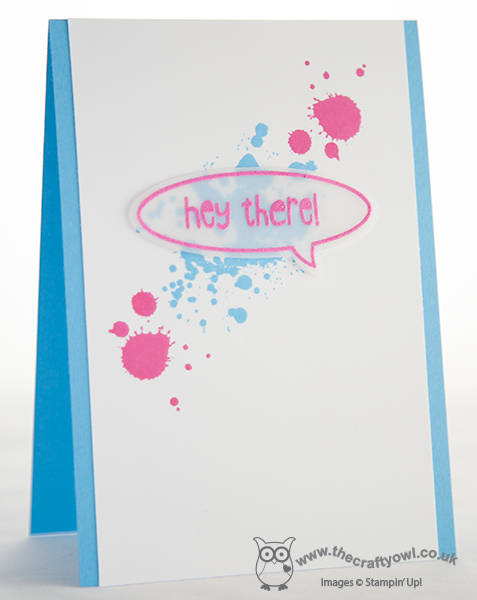
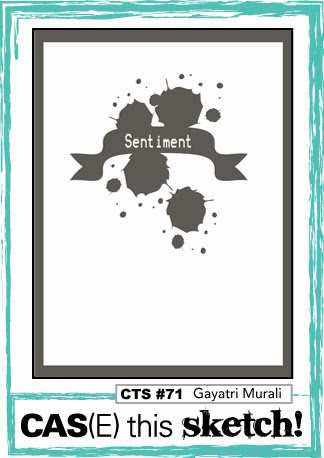
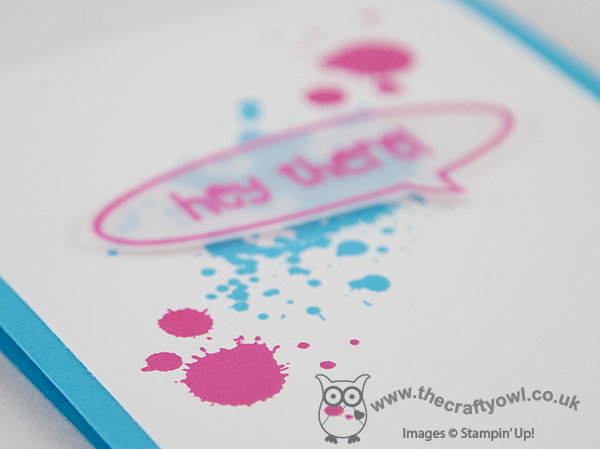
I decided to combine it with the sketch over at CAS(E) This Sketch this week too, where I decided to use the pattern literally and stamp my background with Gorgeous Grunge. For my sentiment I wanted something contemporary and in keeping with the grunge look, so I decided to go with a word bubble, stamped in Versamark onto vellum then heat embossed with Melon Mambo embossing powder - the photograph really doesn't do this justice, in real life it has a lovely raised sheen. The word bubble was adhered using rolled glue dots, hidden along the stamped outline; this gives just enough height but doesn't allow them to show through the vellum.
I think this would make a great card for a teenager, or just a general card to cheer someone up. I like this minimalist card so much, I might have to make a few more in alternative colour combinations!
Back tomorrow with another project and some important Stampin' Up! news that you won't want to miss; until then, happy stampin'!
Stampin' Up! Supplies Used:
a8d33050-087e-4244-b437-fc6f055ff41d|0|.0|96d5b379-7e1d-4dac-a6ba-1e50db561b04
Tags: Gorgeous Grunge, Embossing, Just Sayin', Word Bubbles Framelits, Big Shot, Magnetic Platform, Shop online, Stampin' Up, Stampin' Up Card, Stampin' Up Card ideas, Stampin' Up Supplies
Cards | Stamping
by Joanne James12. March 2014 10:11I'm hoping for a super-efficient day today: the dinner is already prepared and in the slow cooker, I've managed a few admin tasks and I'm getting my blog post in nice and early before I crack on with more creating and ticking a few more things off my ever-growing 'to do' list - I love days like this! Today I'm sharing two versions of essentially the same card - you'll see why shortly!
I loved the colours over at CAS Colours and Sketches this week and had a specific card in mind that I thought would also work for the challenge over at Less is More, where the challenge is One Layer cards featuring Spring flowers. So here are the CAS colours this week:
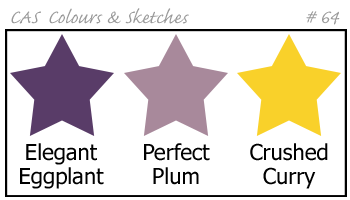
These colours reminded my of iris, a spring flower that we are starting to see in bloom now; I decided to use the orchid stamp from the Happy Watercolour set for my card (an iris is a type of orchid, right?!) because I needed to be able to create something abstract without any green and the stamps in this set are perfect for this. So here is my one layer card:
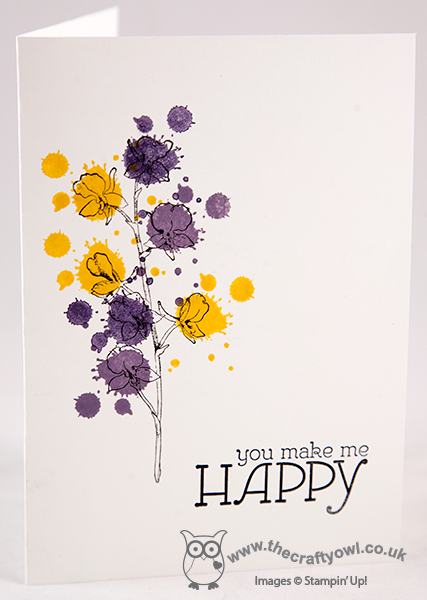
Instead of using one of the watercolour pieces to colour the flowers, I decided the bold colours needed something different so used one of the Gorgeous Grunge 'splodge' stamps instead; I saw something similar at a recent training event by Laura Mackie and decided this stamp would work nicely with the bold colour scheme. The splodges look random, but are perfectly placed: with the aid of my Stamp-a-ma-jig, it was easy to get the correct placement that I wanted. I then finished off with the 'happy' sentiment from the Happy Watercolour set - I love the font on this stamp. Having made this one layer card, I then decided to 'step it up' a little - here is my second card:
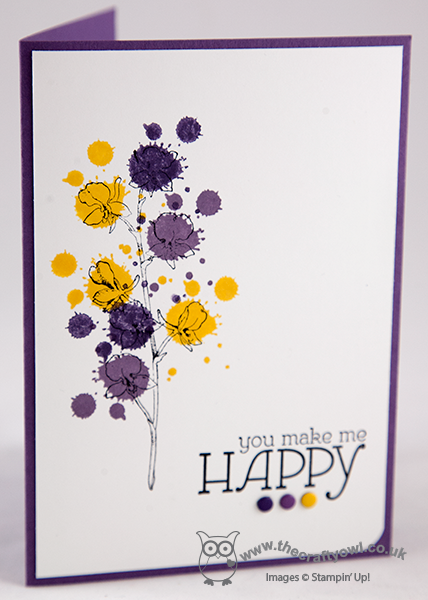
This time I layered on a base of Perfect Plum and finished the sentiment with some co-ordinating Candy Dots, rounding one corner of the white layer with my Envelope Punch Board. Some subtle additions, but they give the card quite a different look I think. I like both of these cards - which one do you prefer?
The 'Happy Watercolour' stamp set will feature in my classes on 28th and 30th April - if you live in Northampton and would like to join me to make some beautiful cards using this set, please get in touch for more information and to book your place. You can find my full class schedule here.
Right, I'm off to get inky! Back tomorrow with another project; until then, happy stampin'!
Stampin' Up! Supplies Used:
2dc518d3-fd24-4030-9b4f-d714327c5af4|0|.0|96d5b379-7e1d-4dac-a6ba-1e50db561b04
Tags: Candy Dots, Envelope Punch Board, Happy Watercolour, one layer cards, Gorgeous Grunge, Shop online, Stamp-a-ma-jig, Stampin' Up, Stampin' Up Card, Stampin' Up Card ideas, Stampin' Up Supplies
Cards | Classes | Stamping
by Joanne James28. February 2014 21:01Today I have a quick card for you which was inspired by both the sketch over at The Paper Players this week and last week's trio of colours over at Dynamic Duos. Here is Jaydee's sketch over at the Paper Players:
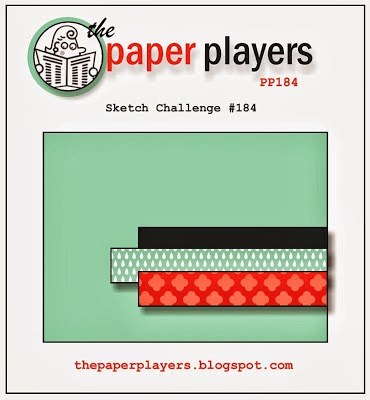
And here is my card:
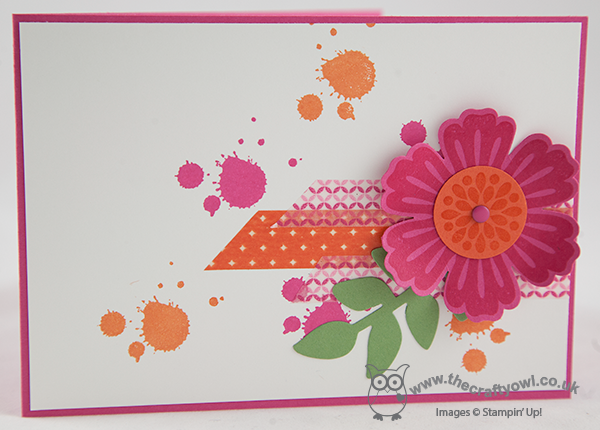
I toyed with going with a literal interpretation of the sketch using nothing more than various papers for the design, but instead I decided to go down a different route and use a combination of washi tape to create my 'stripes', with a tone-on-tone Mixed Blossom flower as my focal point. I then used one of my Gorgeous Grunge stamps to add some interest to the background. This card was something of an experiment but I love the bright, bold colours and the addition of a green stem is just enough to lift the other key colours. I'm also just in time to link up with 'Less is More' where the challenge this week is to add metal to your card - whilst there is only one candy dot brad on my card, I think it serves an important purpose in bringing the whole design together.
That's all from me today; back tomorrow with another project. until then, happy stampin'!
Stampin' Up! Supplies Used: