Heartfelt Hellos Mothers Day Card FMS620

by Joanne James29. January 2024 14:50

Today I'm sharing a card that I made using Jacquie's layout over at Freshly Made Sketches that also showcases the colour palette over at Hand Stamped Sentiments:


I couldn't resist a quick FMS entry this week since Jacquie's sketch is something of a 'go to' layout for me; the large circle works to showcase either a sentiment or an image with the smaller elements also offering lots of options. Today I decided to go with a sentiment from one of my Sale-A-Bration stamp sets, called 'Heartfelt Hellos' - take a look:


Here's the low-down on today's card:

Heartfelt Hellos - I previously showcased the 'hello' from this set (if you missed that card, you can see it here) so today I thought I'd go with the larger Mother's Day sentiment (ages away, I know but it pays to be organised!) The 'heartfelt hellos' set has 6 different sentiments that work for lots of occasions: Easter, Mother's Day, Father's Day, Dad's Birthday, Valentine's Day, Anniversary, Birthdays and general wishes too. What's more it's FREE with a product purchase of £45 or more - bonus!

Paper Florist Bold Blooms - I used my Paper Florist Dies to create two bold blooms to accent my sentiment circle. I love the bold colour palette from Hand Stamped Sentiments, but needed to add in some white to balance these strong colours. I love how quickly these diecut flowers come together and here they pack a colourful punch:

Basics Embossing - Finally, I decided to emboss the base of my card with one of the 3D Basics Embossing Folders. I haven't used this EF on anything before, but decided that these deep colours and my otherwise clean and uncluttered card could take the addition of the embossed finish. What do you think - do you like the added texture? Do leave me a comment below - I'd love to hear your thoughts.

Here is the visual summary of the key products used on today's project for you to pin for easy reference:


You can see all of my 'How To' summaries on my 'How To - Tips and Techniques' Pinterest board in case you've missed any. 

I'm having a crafty start to my week so I'm off to get back to it! Enjoy the rest of your day and I'll be back tomorrow with another project. Until then, happy stampin'!


Stampin' Up! Supplies Used:

Table built using Product Table Builder by The Crafty Owl - Independent Stampin' Up! Demonstrator.

Beautifully Happy Mother's Day Fancy Fold Card AYSI293

by Joanne James24. February 2023 12:00

Today I'm sharing my design team card for our new challenge over at As you See It where our leader and chief organiser, the lovely Heather C, has a recipe challenge for us with a distinctly feminine feel:


Recipe challenges usually send me into a bit of a spin, but this one actually worked out surprisingly well for me! I was inspired to have a go at a fancy fold card layout that was recently shared by Stampin' Up's CEO, Sara Douglas and decided to take the opportunity to make my Mother's Day card and use a new floral stamp set that will be available for just a few more days - take a look:


This is a photo-heavy post, so time to get comfy! Here's the low-down on today's card:

Beautifully Happy - The flower at the centrepiece of today's card is from the 'Beautifully Happy' stamp set - one of the items that can be yours FREE with a £90 purchase during the current Sale-A-Bration promotion. Can you believe I've had this set for almost 2 months and this is the first time I've used it?! So many stamp sets, so little time! Anyway, I digress - this is a two-step stamp set, with an outline that can be used along and coloured freehand, or alternatively used with the infill stamps. I wanted to heat-emboss my flower, so my Stamparatus was key here: I stamped the flower outline in Sahara Sand, then added the infills without removing from my Stamparatus, then stamped the outline again in Versamark and heat-embossed in gold. I fussy cut the main stem and added a gold pearl for the stamen and used this flower  as the centrepiece of my card:


I also added a stemless version inside and a single bloom to my envelope label, and I used the outline for some tone-on-tone stamping on the first inside layer of my card - you can see below how the card opens:


The sentiment in the heart on the front of my card is also from this stamp set. If 'Beautifully Happy' is on your Sale-A-Bration wishlist, you have just 4 days to place your £90 order and receive this stamp set for free. Time to get shopping!

Texture Chic - The recipe ingredient of 'distressed paper' sent me immediately reaching for my Distressed Gold Specialty Paper and Texture Chic Specialty Designer Series Papers - both add a distressed look without any tearing or self-made grunge, neither of which are my style! The Texture Chic papers also include various shades of pink to compliment my Petal Pink stamped flower and lots of faux-texture. I also added actual texture with my Painted Texture Embossing Folder on the panel behind my fussy cut flower stem. 

The Distressed Gold paper is just beautiful; I used it to add some hatched diecut details on both the front and left inside panels:


Here's a close-up of that detail on the left (the diecut sentiment uses the now retired Word Wishes Dies):


I also used the Distressed Gold Paper to create a pocket using the Split Textures Dies:


I handwrote my Mother's Day message, along with a poem, on a separate card that I tucked in here after photographing.

Fancy Inside and Out - A fancy card with a little bulk requires a fancy envelope too, so I created a simple file folder style, adding some retired ribbon and a scalloped address label. You can see in properly below:


Here is the visual summary of the key products used on today's project for you to pin for easy reference:


You can see all of my 'How To' summaries on my 'How To - Tips and Techniques' Pinterest board in case you've missed any. 

It's not Mother's Day here in the UK until next month (March 19th) but it pays to be organised! Equally, if you don't make or send Mother's Day cards, this could be easily adapted and used as a fancy birthday card for someone special. These kinds of card do take a long time to make, however for someone special it's totally worth it. I'm linking up today's card over at The Flower Challenge where they are asking us to use our newest flower stamps and dies - it looks like I'm getting there just in time!

Here's a summary of our challenge rules:

  • Create any card, scrapbooking page, 3D project or packaging project that fits the challenge.
  • Please include the challenge graphic and link back to the challenge in your blog post. Turn off word verification so we can leave you lots of lovely comments. Make sure you link the post not the whole blog to the Linky. Use #AYSIXXX when uploading to a public gallery.
  • If you’re unsure about ‘the rules’, check the details under the Challenge Guidelines tab on the As You See It Challenge homepage.
We look forward to seeing your creations in the AYSI gallery.

Enjoy your day. I'm off to the hairdressers first thing then am collecting the eldest of the James Juniors and a friend for a trip up north to Newcastle for a university offer day tomorrow, so that should be fun. I'll be back Sunday with my project for this week's Paper Players challenge so do join me then. Until then, happy stampin'!


Stampin' Up! Supplies Used:

Table built using Product Table Builder by The Crafty Owl - Independent Stampin' Up! Demonstrator.

You Are Amazing Daffodil and Tulip Spring Bouquet PP581

by Joanne James6. March 2022 08:00

Today it's Sunday and time for this week's new challenge over at The Paper Players! It's the turn of the fabulous Jaydee to host this week and she has a timely seasonal theme challenge for you to work with:


Nothing says spring to me more than daffodils and tulips, so I decided to go all out and diecut a spring bouquet for the front of my card that have these as the centrepiece - take a look:


Here's the low-down on today's card:

I added a panel of (retired) Sale-A_Bration Friendly Hello DSP to the centre of my card and overlaid this with a slimline die coverpiece, leaving the long inset pieces intact, then built up my bouquet from Daffodil Delight and So Saffron daffodils and Fresh Freesia tulips:


I finished with an over-the-top ribbon bow and a layered 'you are amazing' diecut sentiment cut with my Amazing Thanks Dies. This card is larger than usual (15cm x 21cm) to accommodate my spring blooms. I'm afraid I succumbed to the most dreadful cold this week, so I haven't finished decorating the inside of this card. Hence no inside photos - a job for another day.

Here is the visual summary of the key products used on today's project for you to pin for easy reference:


You can see all of my Product and 'How To' summaries on my 'How To - Tips and Techniques' Pinterest board in case you've missed any. 

Before you reach for your ink and papers, check out what our amazing team has created to inspire you this week:

Here's a quick recap of our challenge rules:
 
1.  Create a new paper project
2.  Upload your creation to your blog with a link back to us and provide a direct link to the post featuring your challenge submission.
3.  Please link your card to no more than four challenges, TOTAL.
4.  Have FUN!

Enjoy your day; I will be hiding under my blanket with a box of tissues feeling sorry for myself! Hope normal service will resume soon! Until then, happy stampin'!


Stampin' Up! Supplies Used: 

Table built using Product Table Builder by The Crafty Owl - Independent Stampin' Up! Demonstrator.

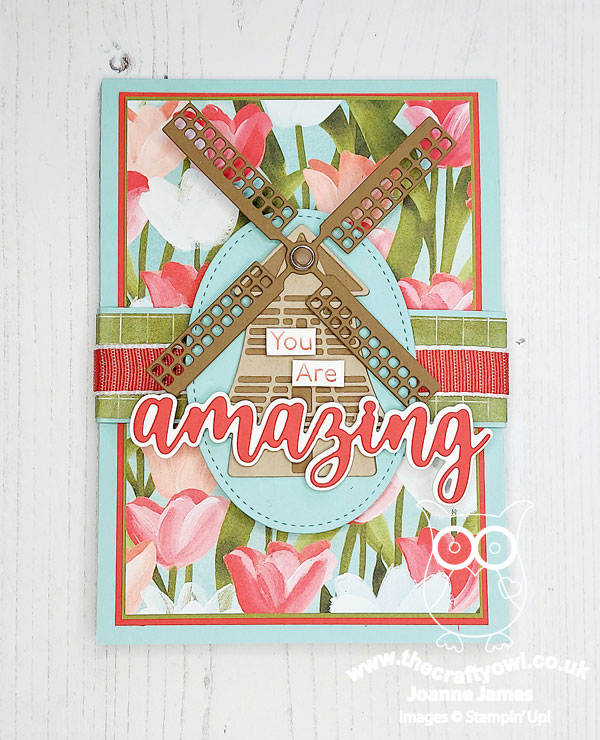
Windmill Flowering Tulip Fields Mother's Day Card With Belly Band PP580

by Joanne James27. February 2022 09:00

Today it's Sunday and time for this week's new challenge over at The Paper Players! It's the turn of the fabulous Anne Marie to host this week and she has my favourite, a sketch challenge, for you to work with:
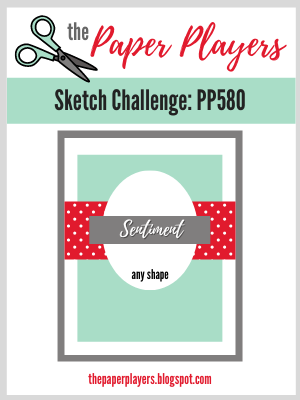
    

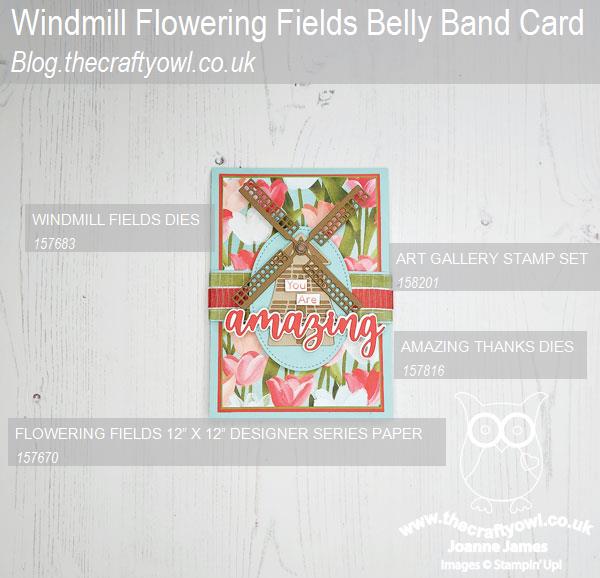
I do love a good sketch and this week I really went to town! I have been making lots of cards with the 'Tulip Fields' bundle as it was the feature bundle for my online class last week and I decided that the layout of Anne Marie's sketch was perfect for a diecut windmill for the central focal point and the beginnings of what turned out to be a rather special card - take a look:


Here's the low-down on today's card:

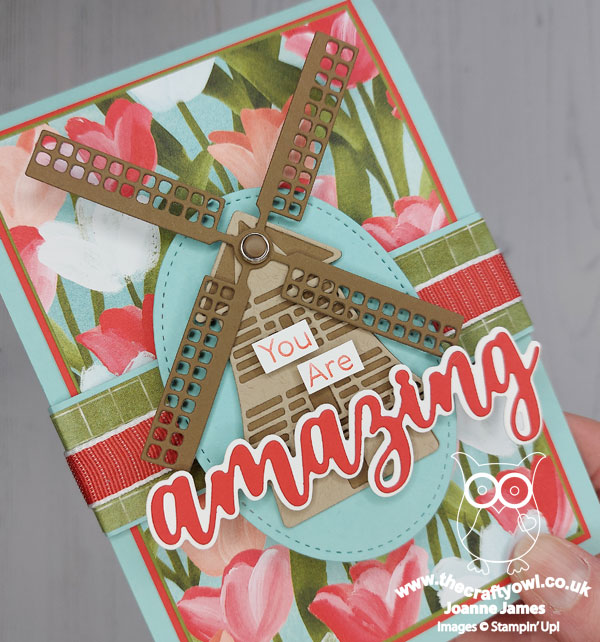
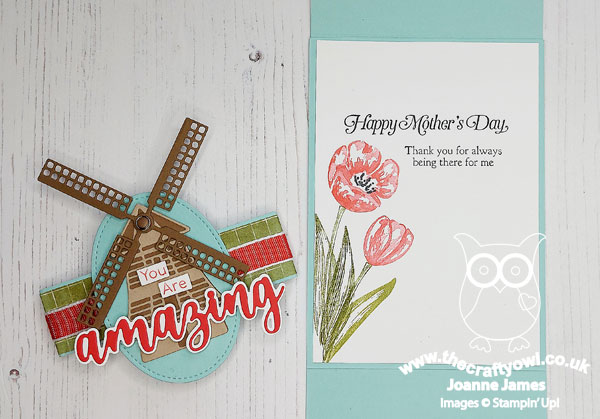
Many Layers - This is a card of many layers - which means I'm also playing along with the ladies at Just Add Ink this week where I chose 'layers' and patterned paper as my two things. More on patterned paper in a moment, but firstly those layers! I can count 13 on the front of my card alone (not including the band of ribbon!) - and there are even more inside! I used a (retired) stitched oval diecut as a base for my windmill cut using the Windmill dies and added a sentiment combining stamped words taken from 'Art Gallery' and a layered 'amazing' cut using the Amazing Thanks Dies. I attached these to a horizontal band as the focal point for the front of my card.You can see the layered loveliness in more detail below:

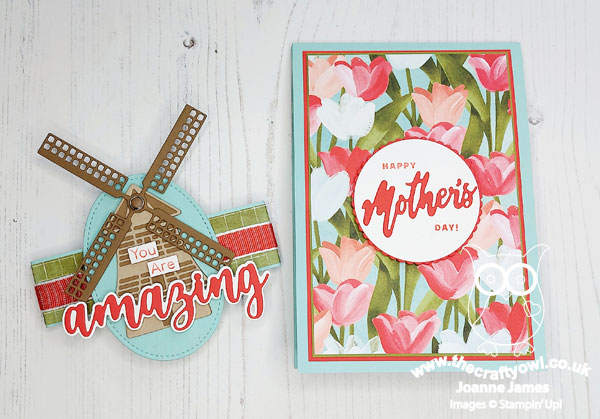
A Belly Band Surprise - The layered windmill is in fact attached to a belly band decorated with a strip of DSP, which when removed reveals the beautiful red, pink and white tulips of the Flowering Fields DSP in all it's glory, along with a sentiment made from a combination of some partial stamping from a stamp in the 'Flowering Tulips' stamp set and the word 'Mother's' cut using the Word Wishes Dies:


With Mother's Day here in the UK only a few weeks away, this was a great opportunity to get ahead and make my Mother's Day card. I love that the layered circle greeting sits below the windmill oval of the belly band and is only revealed when the belly band is removed. 

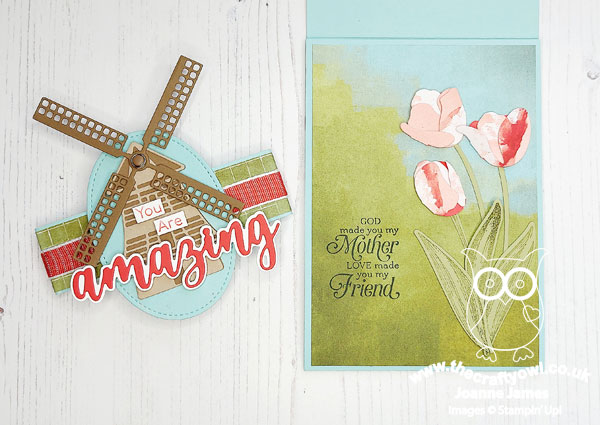
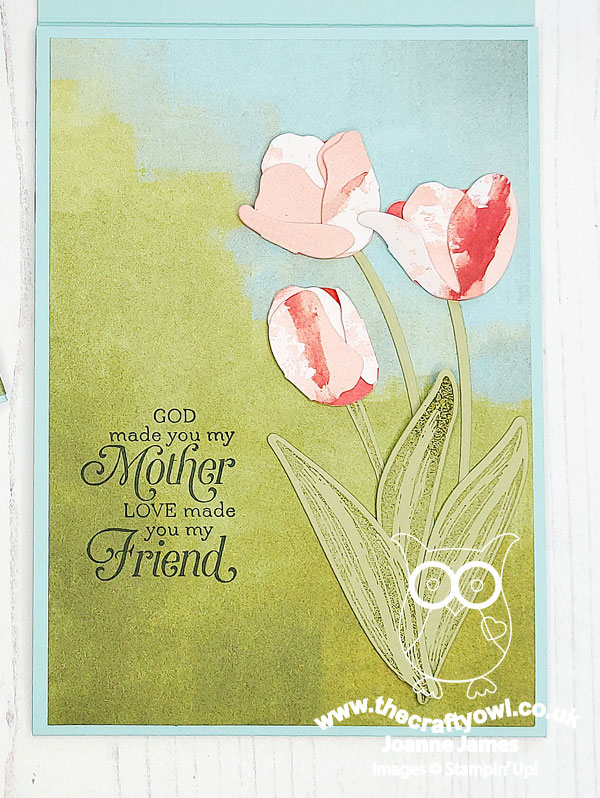
Mother's Day Details - The surprises don't end there though. My card has an additional flap, so when it's opened you see this panel, also decorated with another piece of Flowering Fields DSP and a trio of tulips cut with the Tulips Dies:


 These Tulips Dies are amazing - they create the most amazing dimensional tulips! I cut mine from another pattern in the Flowering Fields DSP pack; it is actually a Petal Pink sky with white and red clouds, but I like the mottled effect that it gives the tulips and they compliment the pattern on the front of the card:


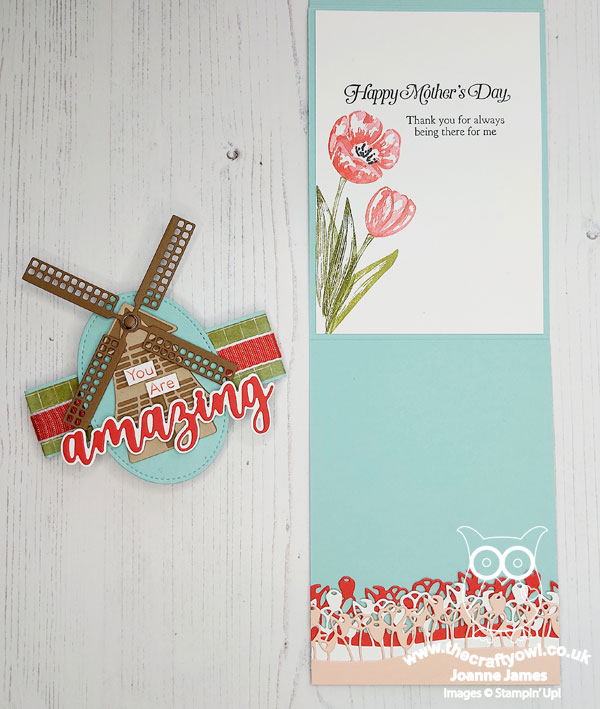
The sentiment, along with the one on the inside of the card is from the retired stamp set 'Strong and Beautiful'. This set is a keeper - the words in this set are so perfect for special female cards. when you open the next flap, the inside panel is revealed. I bordered the edge of the bottom panel with a trio of tulip border dies (I might add another diecut windmill behind these tulips - now that I am looking at it again this panel is a little light on decoration compared to the others):


 And here's a close-up of the innermost panel, decorated with some layered tulips stamped with the 'flowering Tulips' stamp set:


As you can imagine, all those layers make for a bulkier than usual card, so I will be making a custom box-envelope to enclose it in. That's a job for another day though! This kind of card does take a long time to make, but it is worth it - I love the end result and know my Mum will appreciate it too.

Here is the visual summary of the key products used on today's project for you to pin for easy reference:


You can see all of my Product and 'How To' summaries on my 'How To - Tips and Techniques' Pinterest board in case you've missed any. 

Before you reach for your ink and papers, check out what our amazing team has created to inspire you this week:

Here's a quick recap of our challenge rules:
 
1.  Create a new paper project
2.  Upload your creation to your blog with a link back to us and provide a direct link to the post featuring your challenge submission.
3.  Please link your card to no more than four challenges, TOTAL.
4.  Have FUN!

Enjoy your day; we are hoping for another restful Sunday, mainly centred around cooking and eating - we are cooking a Turkish recipe for dinner today for the first time, so that should be fun! I'm also hoping to squeeze in another movie this afternoon - last week's 'Encanto' proved a big hit so this week we might go for 'Sing 2' - hope it's as good as the first one!

I'll be back tomorrow with another project. Until then, happy stampin'!


Stampin' Up! Supplies Used: 

Table built using Product Table Builder by The Crafty Owl - Independent Stampin' Up! Demonstrator.

Kangaroo and Company Card For Mum AYSI 249

by Joanne James30. April 2021 12:00


Today I'm sharing my design team card for our new challenge over at As You See It where it's time for a sweet colour challenge:


Don't those macarons look delicious? I love those sugary colours and thought they would look perfect combined with the photo inspiration over at Fusion this week! I don't have a mum & baby giraffe pair in my stash, but I do have...kangaroos! So I set to work and this is what I came up with:


 Here's the low-down on today's card:

Kangaroo and Company - You've seen me use this set before for Valentine's, but it is perfect for cute cards for a range of occasions. There is a baby joey that fits in the mummy's pouch, but today I went in favour of the younger freestanding kangaroo who has just delivered his mum a beautiful big bunch of flowers, coloured in our challenge colours. 

Strong and Beautiful - Mother's Day has been and gone here in the UK, but I decided to choose a sentiment from the retiring 'Strong and Beautiful' stamp set (now available for the bargain price of £9.20!) that works for mums, or any special person, that you want to give a special thank you to. I love the sentiments in this set - they really are wonderful for celebrating special women in the broadest sense. I sat my young kangaroo on my sentiment strip so that he didn't look like he was floating in mid air, and I like that this makes him more central to the design than he would otherwise have been at floor level. 

A Hidden Message - Whilst my main sentiment is the one I talked about above, I couldn't resist adding another to the fun 'reveal' when you pull out the flowers from the pouch:

I know this feature has more appeal on cards for youngsters, but I think my Mum will find it fun too! It's so easy to do, as the Kangaroo Dies cut the slit in the pouch perfectly - no added effort required. I'm also linking today's card up with the ladies over at SUO Challenges where the theme is 'Animal Kingdom' and they are asking us to feature animals big and small on our cards.

Here is the visual summary of the key products used on today's project for you to pin for easy reference:


You can see all of my 'How To' summaries on my 'How To - Tips and Techniques' Pinterest board in case you've missed any. 

Here's a summary of our challenge rules:

  • Create any card, scrapbooking page, 3D project or packaging project that fits the challenge.
  • Please include the challenge graphic and link back to the challenge in your blog post. Turn off word verification so we can leave you lots of lovely comments. Make sure you link the post not the whole blog to the Linky. Use #AYSIXXX when uploading to a public gallery.
  • If you’re unsure about ‘the rules’, check the details under the Challenge Guidelines tab on the As You See It Challenge homepage.
  • In a colour challenge, black or other neutral can be used in outlines and sentiments but no other colours should be included. Stampin’ Up colours are used for reference but colours that are a close match are welcome.

Enjoy your day; my Fridays are always busy, so I'll keep this short and see you again tomorrow with another project. Until then, happy stampin'!

Stampin' Up! Supplies Used:

Table built using Product Table Builder by The Crafty Owl - Independent Stampin' Up! Demonstrator.

Tea Together Mother's Day Card for PP426

by Joanne James27. January 2019 09:00

Today it's Sunday and time for this week's new challenge over at The Paper Players! It's the turn of the talented Jaydee to host this week and she has my favourite, a sketch challenge, for you to work with:


Today's card is something of a departure from my usual 'clean' style and is choc-full of detail, so I hope you like it! I've gone pastel with this week's Global Design Project colours and whilst not for Valentine's my card is definitely all about love so is perfect for the Stamp Ink Paper challenge too - take a look:


Here's the low-down on today's card:

Time For Tea - The moment I laid eyes on the 'Tea Together' stamp set in the Spring-Summer catalogue, I knew it would have to find it's way into my shopping basket: as a self-confessed 'teapot' who often drinks between 6 and 8 cups of tea a day, it was bound to appeal, but the clincher was that it was paired with some wonderful Mother's Day sentiments too and the only person I know who drinks more tea each day than me is my Mum, so it seemed a perfect choice. Add to this the fact that the co-ordinating Tea Together Framelits Dies that cut out each of the elements, including the flowers, are available free during Sale-A-Bration with a £90 purchase and that was it - decision made! I decided to continue with my watercolouring phase and for today's teacup and flowers, as it suited the subtle, pastel colours and coloured, cut and layered until I was happy with the result.

Flourishes and Lace - I added additional detail to my background with a combination of an embossed panel - check out that fabulous lace effect detail - and some Petal Pink flourishes, carefully snipped from the new Beautifully Detailed Laser-Cut Paper, which is helpfully already coloured Petal Pink on one side (and white on the other side). Along with a few punched flowers and pearls, I'm really going for the vintage look and feel today. 

A Mother's Love - I've been liberal with my interpretation of Jaydee's sketch, but you can still see the basic circular shape represented by my tea cup full of flowers and my horizontal overlaid sentiment, accentuated by stamping only part of the sentiment on the teacup and substituting the masked word 'love' with a stacked diecut, courtesy of the Well Written Framelits. Whilst I would definitely agree with the sentiment on the front of this card, the sentiment from the 'Tea Together' set really is one of the most wonderful we have had in a stamp set for a long time:


The perfect finishing touch for my Mother's Day card. Here is the visual summary of the key products used on today's project for you to pin for easy reference:
 

You can see all of my Product and 'How To' summaries on my 'How To - Tips and Techniques' Pinterest board in case you've missed any. 

Before you reach for your ink and papers, check out what our amazing team has created to inspire you this week:

Here's a quick recap of our challenge rules:
 
1.  Create a new paper project
2.  Upload your creation to your blog with a link back to us and provide a direct link to the post featuring your challenge submission.
3.  Please link your card to no more than four challenges, TOTAL.
4.  Have FUN!

You can see all of my 'How To' summaries on my 'How To - Tips and Techniques' Pinterest board in case you've missed any. 

Enjoy your day; we are finishing up on our homework today along with the dreaded tax returns (each year I tell myself I will make time to process them well in advance of the deadline, yet it never happens!) Hopefully I will finish in time to sneak into my craft room for a quick make or two. Either way, I'll be back tomorrow with another project. Until then, happy stampin'!


Stampin' Up! Supplies Used: 
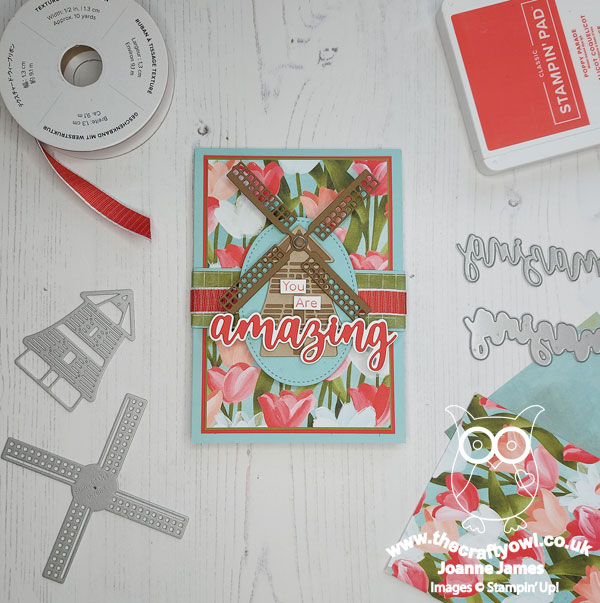
Table built using Product Table Builder by The Crafty Owl - Independent Stampin' Up! Demonstrator.

So Detailed Thinlit Die Mother's Day Card

by Joanne James17. March 2017 17:00

Now I know since it's St Patrick's Day I should probably be sharing something green, however my plans today took a different turn so instead with Mother's Day only just over a week away here in the UK I'm sharing a Mother's Day card with you instead - take a look:


 Here's the low-down on today's card:

So In Love - The inspiration for my card today came from the patterned paper that forms the base of my card. A busy, detailed outline pattern that features the same floral that can be found in the 'So In Love' stamp set (featured behind my sentiment) and the largest image in the So Detailed Thinlits Dies. I used this die to create a feature detail on the left of my card, backing it with vellum so that the detail continues to stand out from the paper behind it. My card measures a slightly larger than usual 6" x 6".

Love At First Sight - The sentiment that I featured on my card is from the 'First Sight' stamp set in the annual catalogue; beautiful words that seem so appropriate to show appreciation on Mothering Sunday. It's easy to overlook the annual catalogue when we have a seasonal with so many new and exciting sets, yet it contains many hidden gems, including ones that work for seasonal occasions such as Mother's Day so don't forget to take a look when your deciding on products for your projects.

A Little Flower - I added some vanilla ribbon and one of those gorgeous vanilla Falling in Love floral embellishments to finish off my card today. I kept to neutral colours to avoid any clash with the other more detailed elements of my design.

Here is the visual summary of the key products used on today's project for you to pin for easy reference:


You can see all of my 'How To' summaries on my 'How To - Tips and Techniques' Pinterest board in case you've missed any. 

This is the card that I've made for my Mum for Mother's Day (I'm safe to post it early as she doesn't read my blog) and I've already made another identical one for a friend's Mum too. 

I'll be back tomorrow with another project. Until then, happy stampin'!


Stampin' Up! Supplies Used:

Table built using Product Table Builder by The Crafty Owl - Independent Stampin' Up! Demonstrator.
 

First Sight Mother's Day Card

by Joanne James24. April 2016 09:00

No blog posts for the last couple of days as I've just been too tired and unable to fit it all in. However today it's Sunday and time for a new challenge over at The Paper Players! It's my good friend Claire's turn to host our challenge this week and she has a great sketch challenge for you to play along with:


Claire's sketch has some lovely layers that were crying out for some designer series paper and I've seen a few challenges out there with 'Mother' as their theme, including this week's TGIF Challenge, so for my card this week I decided to use some Love Blossoms DSP and my favourite sentiment stamp from the 'First Sight' stamp set:


Here's the low-down on today's card:

The Mother of all Sentiments - The 'First Sight' stamp set has some lovely sentiments, all with love at their heart. The one I've used on my card today is my favourite though; what Mother wouldn't be touched to receive a card featuring these words? I also stamped the flourish from the same set onto the base of my card in Versamark and heat embossed it clear, to add additional interest without competing with the other elements of my card.

Love Blossoms - The vertical panels on the sketch needed either pattern or texture; I chose to go with pattern and chose three complimentary patterns from the Love Blossoms DSP stack. I kept the colours similar, and used these for the main blocks of colour on my card.

All that Glitters - ...is not gold, or at least not on today's card! I chose to mount my sentiment on a circle of white Dazzling Diamonds glimmer paper to add a little sparkle and create focus, but maintain the balance of white on my card. Some split jute ribbon, a pink button and a sprinkle of pink and clear sequins complete my card.

Here is the visual summary of the key products used on today's project for you to pin for easy reference:


You can see all of my 'How To' summaries on my 'How To - Tips and Techniques' Pinterest board in case you've missed any. 

Before you reach for your ink and papers, check out what our amazing team has created to inspire you this week:

The Paper Players Design Team
 
 
Here's a quick recap of our challenge rules:
 
1.  Create a new paper project
2.  Upload your creation to your blog with a link back to us and provide a direct link to the post featuring your challenge submission.
3.  Please link your card to no more than four challenges, TOTAL.
4.  Have FUN! 


I look forward to seeing what you make of our sketch this week. We are off to basketball today and then Rebecca and I have a little Mother and Daughter crafting time planned tomorrow afternoon; should be fun!

Back tomorrow with another project; until then, happy stampin'!


Stampin' Up! Supplies Used:

Table built using Product Table Builder by The Crafty Owl - Independent Stampin' Up! Demonstrator.

Love Blossoms With The Bloomin' Heart Thinlit Die

by Joanne James2. January 2016 08:00

Today I have another 'sneak peek' card for you, featuring some beautiful new designer series paper and a most beautiful die. I used the sketch over at Freshly Made Sketches for the layout for today's card:

   SIP Challenge 28 - No Christmas 800

I'm also linking up with the team over at Stamps Ink Paper who are asking for anything so long as it's not Christmas! The 'Love Blossoms' suite on the new Spring-Summer catalogue includes a stamp set, papers, thinlit die, pink glimmer paper and an accessory kit and my card today uses each of the first three:

The thinlit die looks great in a single colour with or without the flowers highlighted, but for my card today I chose to cut out my heart in Garden Green, adding additional flowers in Rose Red and Blushing Bride that I cut with the other thinlits in the set and also paper-piecing some flowers into the negative spaces of the die. I highlighted the hearts in pink and added some tiny pearls to break up the green further. 

You can see the detail of the subtle layering and finish on the close-ups below: 

The die itself is so intricate, yet with another new tool available with the new catalogue, the Big Shot Die Brush, it is really easy to separate into its various parts - just look at the detail on the flowers themselves:

The sentiment is from the 'Bloomin' Love' set and the banner cut out with the co-ordinating framelit from the 'Large Numbers' framelits dies, also available in the new catalogue.

Whilst the Love Blossoms set and in particular the Bloomin' Heart thinlit die makes for beautiful Valentine's Day cards, it is versatile enough to be used for anniversaries, weddings, birthdays or even Mother's Day too. I paired my outer sentiment with one from another set, 'First Sight', on the inside of my card to make a very fitting tribute to a Mum - take a look:

A beautiful sentiment for the prettiest of cards!

That's all from me today; I'll be back tomorrow with my card for this week's challenge over at The Paper Players. I am the hostess for our first challenge of the new year, so do pop back to see what I've chosen as the challenge this week. Until then, I have a few jobs to do today and we are back to the pool for our first swimming following the Christmas break. I'm almost envious that it's only the James Juniors getting in the water; I could do with losing a few post-Christmas pounds and this seems like it could be a good place to start! Happy stampin'!


Stampin' Up! Supplies Used:

Available 5th January:

140818 Bloom' Love Stamp Set and Bloomin' Hearts Thinlits Dies Bundle

140548 Love Blossoms Designer Series Paper Stack

140685 First Sight (clear mount) 

140603 Big Shot Die Brush

Table built using Product Table Builder by The Crafty Owl - Independent Stampin' Up! Demonstrator.


Tone on Tone Mother's Love Tag Card

by Joanne James1. May 2015 19:57

Yay - it's Friday! I've been a busy bee out and about today so am only just getting around to my blog post. I'm squeezing in a card to join the lovely ladies over at Less Is More this week where we need to have a tag on our card and I'm using this week's Color Throwdown colours, which I love:


I decided to 'go bold' with colour today and use the aqua in Coastal Cabana as my background for both my card and tag, to give a tone-on-tone look - take a look:

I order that my sentiment and flower would have an impact, I stamped both in Versamark and heat embossed in white which gives a lovely sheen. I then used my aquapainter to paint the detail of the flower petals and leaves with white craft ink and when it was dry, I painted them again with Strawberry Slush and Pear Pizzazz ink respectively. I punched my tag with the angle tag topper punch and added some white seam binding ribbon tied with some Strawberry Slush thick baker's twine to finish, before popping up with some dimensionals for a little extra lift. A super clean and simple card and I love the white on the aqua background, with the delicately watercoloured flower. Not to mention that lovely sentiment pairing from 'Mum's Love' - a favourite of mine. I'm also going to link today's card up with SUO Challenges, where the current challenge is to make a Mother's Day card, although this card would also work for a Mum's birthday card too.

I hope you like today's card; back tomorrow with another project. Until then, happy stampin'!


Stampin' Up! Supplies Used:

Table built using Product Table Builder by The Crafty Owl - Independent Stampin' Up! Demonstrator.


Tags: , , , , , , ,

Cards | Stamping

Current Promotions

Stampin Cut and Emboss

Save up to 30% off on all your favourite kits from 1 to 31 October! 

Click here to see the current kits available and order yours online today.

Join My Team

It's always a great time to join Stampin’ Up! During October you can get even more in your starter kit! New team members can get £160 worth of products for only £99 + free business supplies + free shipping + all the fun being a part of Stampin’ Up! Stampin' Up! has something for everyone: join my growing team and benefit from my support to enjoy Stampin' Up! however you choose.

If you're interested, call me for a chat to understand how I can help you realise your goals. Alternatively, if you have already decided to sign up and you just can't wait, please click here for the link to the online form where you can sign up and order your starter kit right away! 

Shop Online

Access my online shop 24 x 7, 365 days of the year:

Current October hostess code:

4XPEYCB9

Shop Online

Scrapbooking

Stampin' Up! has introduced a new range of 12x12" scrapbooking product and kit - the full range is now available to purchase online. To download a copy of the new digital Scrapbooking Catalogue click here.

Mini Catalogue

BROWSE THE CATALOGUE

'Tis The Season - the new Stampin' Up! Mini Catalogue is here! For more details and to download your copy click here

2024-25 Annual Catalogue

BROWSE THE CATALOGUE

Click on the image to download your copy of the 2024-25 annual catalogue. For a full list of current SU! supplies, go to my online store. If you would like any help or advice, please drop me a line at joanne@thecraftyowl.co.uk or give me a call on 07773 421446 - I'd be happy to help.

Latest Kits!

Stampin Cut and Emboss

The Christmas Ornaments Kit and Card Keeper Kit are the latest kits in the online store - get yours here!

New Online Exclusives

There are new products available exclusively in the online store from 5 November - check them out here.

About Me

Hi I'm Joanne and live in Northampton and when I'm not looking after my husband and two beautiful children, am an avid crafter with a passion for all things Stampin' Up!

I must confess that I have never been a big rubber stamper - until I discovered Stampin' Up! that is. I love the fact that I can get such great results with co-ordinating stamps, inks, papers and punches - the possibilities are endless! Join me on my stamping journey as I share the things I love and be inspired to create amazing things yourself!

Follow Me

Monthly Newsletter

Box Builder

Click the button above to use Box Buster to create your custom box design using the Envelope Punch Board!

Kits Collection Now Available!

Stampin Cut and Emboss

The new Kits Collection from Stampin' Up! is now available!

Click here to see the current kits available and order yours online today.

I Design For


Stampin' Up Stuff

This is my personal blog and is not endorsed by Stampin’ Up! I hope you find it a plentiful source of ideas and personal inspiration but please don't copy my designs for contest submission or use for classes, publication or sale without express permission.