All About Trees Christmas Card - I'm a Color Throwdown Guest Designer Today!

by Joanne James3. December 2014 07:00


Welcome to my first creative post of the day! Following my selection as Featured Stamper for this card using the above challenge colours over at Color Throwdown a couple of weeks ago, the lovely ladies over there have invited me to be a guest designer for this week's challenge - yay! As if that wasn't enough, just look at the lovely colours and inspiration photo we had to work with:

I had to go with something Christmassy and I found the mix of textures in the inspiration photo provided me with the starting point for my card. So this is what I came up with:

I used Whisper White for my base and layered this with a mat of Early Espresso, then another piece of Whisper White, having first embossed this piece with my On Point embossing folder. I then created a little 'corner collage', comprising some gold striped vellum, a piece of tree-patterned DSP from the 'Trim The Tree' stack, a gold and snaller silver foil starburst circle, and then two Christmas trees - one stamped in Versamark and heat embossed in gold on Early Espresso cardstock and the other stamped in Early Espresso on Whisper White, with the baubles heat embossed in gold and a few silver rhinestones added for extra sparkle. A couple of silver glimmer paper stars top the trees and I looped some silver thread removed from some silver baker's twine behind them. To finish, I stamped my sentiment in between the embossed area in Early Espresso and Versamark heat embossed in gold. Collage-style cards are not my usual thing, but I must confess I enjoyed getting slightly carried away with this card and am really pleased with the result.

Do pop over to the Color Throwdown blog to see what the other designers have created using this colour palette; these ladies do a great job each week and would I'm sure appreciate your visit. I for one will be stalking the gallery with interest!

Back shortly with today's third post! Until the, happy stampin'!


Stampin' Up! Supplies Used:

Table built using Product Table Builder by The Crafty Owl - Independent Stampin' Up! Demonstrator.


Christmas wouldn't be Christmas without Dasher!

by Joanne James27. November 2014 11:21

Yesterday evening I was at a Stampin' Up! event where demonstrators got a 'sneak peek' of what's in store for Sale-A-Bration; all I'm going to say at this point is boy do you all have something to look forward to, and I highly recommend you consider asking for a Stampin' Up! gift voucher from your nearest and dearest for Christmas (contact me for details!) and hold back some of your January Sales budget to take advantage, as you are not going to miss it!!

Today though I am back onto Christmas cards with another to share with you, having had a few days break. Well, it is now officially 'the season' I think! I used this week's sketch over at Addicted to CAS for my card today where the team are celebrating their second birthday - congratulations! - and which was designed with the theme over at Less is More in mind.

Now the theme this week is 'Jingle All the Way' and you would think that this card from earlier in the week might be a more appropriate fit, but the lovely ladies over at Less is More went on to say "we would like to see some reference to any of these things.... bells, reindeer, Santa, elves, stockings, presents, decorations, Christmas songs/music/instruments... in fact anything Christmassy!" and I immediately took this as the opportunity to bring my Dasher stamp out of retirement to create a card with a reindeer on it. Well, Christmas wouldn't be Christmas unless he made at least one appearance on a card this season, after all it's almost tradition! So here is my card:

I used Cherry Cobbler for my base and stamped my reindeer in Versamark on a piece of Baked Brown Sugar and heat embossed it in Early Espresso embossing powder to give it a lovely rich sheen. I matted this piece on a base of last year's Season of Style DSP stack, which I cut into pieces and mounted with mitred corners as the pattern was actually a chevron, but I wanted it to be diagonals going around the frame (I hope that makes sense when you look at the photograph, it just seems difficult to explain!)I then popped this piece onto my base using dimensionals, so that I could run a couple of loops of Baked Brown Sugar thick baker's twine around the base beneath it. I used my tiny hole punch to put a couple of semi-circle grooves in each side so that the twine would rest in them and stay in position - a useful tip if you're creating this type of card. To finish, I added my sentiment stamped from 'Endless Wishes' and a trio of candy dots to balance the main image.

I hope you like today's card and before I go would like to give a big shout out to Chrissie, Sarah and Anne over at Less is More, both for recognising this card in their top 3 of the recent one layer challenge but also for their tireless dedication to commenting on the cards in the LIM gallery and for their general helpfulness and constructiveness; I think my CAS style has improved a lot with their input, so I for one am grateful!

That's all from me today; I'm off out for lunch with a friend (a rare treat!) and then back to finish some work before the school run! Back tomorrow with another project; until then, happy stampin'!


Stampin' Up! Supplies Used:

Table built using Product Table Builder by The Crafty Owl - Independent Stampin' Up! Demonstrator.


Winter Wonderland Snowflakes Christmas Card

by Joanne James21. November 2014 07:00

Today's Christmas card uses the somewhat unconventional festive colour scheme over at The Challenge paired with the current Retrosketches layout for inspiration:


I decided to create another snowflake card using the Endless Wishes set, along with a few of the stamps in the Project Life December Wonder set that I happened to have out on my desk. This is such a great set, and not just for memory-keeping. Take a look:


A Pink Pirouette base with a mat of Rich Razzleberry for a pop of colour, then a selection of snowflakes stamped in pink and grey and interspersed with some Razzleberry stars. I added a few rhinestones for a little sparkle and decided to use my sentiment from the Project Life set, stamped and framed and cut out with the co-ordinating framelits and popped up on a couple of dimensionals. Very simple, but quite pretty and super quick to put together.

Back tomorrow with another Christmas card with some fun punch art; until then, happy stampin'!


Stampin' Up! Supplies Used:

Table built using Product Table Builder by The Crafty Owl - Independent Stampin' Up! Demonstrator.


Tags: , , , , , , ,

Cards | Stamping

Nordic Noel Joy To You Christmas Card

by Joanne James6. November 2014 09:36

Good morning everyone! I'm back with another Christmas card today - well, it truly is the season for it now! Today's card uses the sketch over at CAS(E) This Sketch which was the perfect layout for me to showcase some lovely Nordic Noel DSP and incorporate a layered die cut. Here's this week's sketch:

And this is my card: 

A simple layering of Garden Green on Soft Sky, followed by the Nordic Noel DSP. This paper has such a busy pattern I find it only really works on cards like this where there isn't anything to clutter it; I cut my 'Joy' die cut in Real Red, then stacked it on a couple of identical die cuts in Garden Green to give it real dimension (I used adhesive transfer sheets to hold the layers together, which made for very easy layering). I decided to mount it onto a rectangular piece of Garden Green cardstock, because the die cut didn't stand out enough against the patterned paper without, then I added the 'to you' from the Endless Wishes stamp set in Garden Green on Calypso Coral beneath it - the only stamping on today's card! Lastly, I added a sprinkling of candy dots in something of a nod to the sketch, albeit that I restricted use of them to the solid colour panels.

Hope you like today's card - if you like this layout you should check out the other cards on the CAS(E) This Sketch page - there are some great examples there.

Right, I'm off to get some work done - back tomorrow with another Christmas card; until then, happy stampin'!


Stampin' Up! Supplies Used:

Table built using Product Table Builder by The Crafty Owl - Independent Stampin' Up! Demonstrator.


Tags: , , , , , , , , ,

Cards | Stamping

Behind The Scenes at Stampin' Up! - Shooting a Stampissimo Video

by Joanne James30. October 2014 07:00

Today I have something very special that I've had to keep under wraps for a little while: the latest Stampin' Up! UK Stampissimo video has just been published and guess what? I am the starring demonstrator! I was so excited to be asked by Paula Gorry, Stampin' Up! UK Business Development Manager, to create a project for the latest video with the theme of 'Winter Treats' that once I had a copy of the Autumn-Winter seasonal catalogue in my hands, it didn't take me long to decide what I was going to use - the fabulous new Curvy Keepsake Box Thinlits Die. You can make all kinds of customised boxes with this die, but for the theme of 'Winter Treats' I knew I wanted to create a range of Christmas characters, with Rudolf the Red-nose Reindeer being the star of the show. It meant I could combine the box die with another of my favourite catalogue products that you've seen me use so many times on different projects - the Autumn Wooden Embellishments (LOVE these and one pot lasts an age!)

Here is the reindeer box that I demonstrate in the video - how cute is this?!
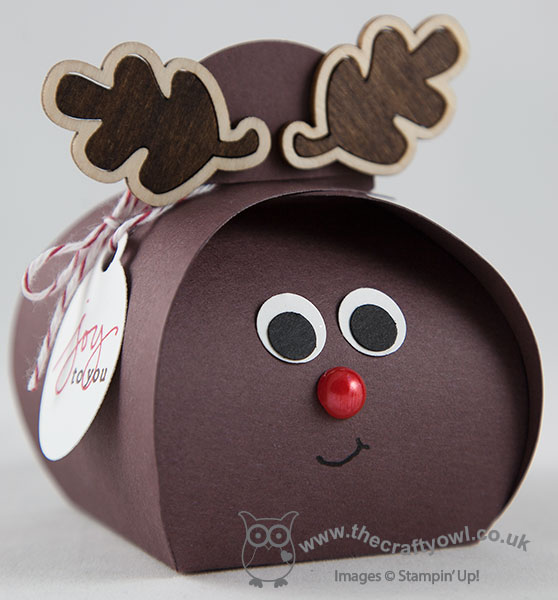
The project itself needed to be simple enough to demonstrate whilst chatting at the same time - the purpose of Stampin' Up!'s range of Stampissimo videos is to spread the word about Stampin' Up! to both crafters and non-crafters who may not have heard of Stampin' Up! and give them some insight into the products and the demonstrators who sell them. Whilst they are based around demonstrating and sharing a particular product or project, the informational nature of these videos mean they last longer than your average tutorial so you need to get comfy!

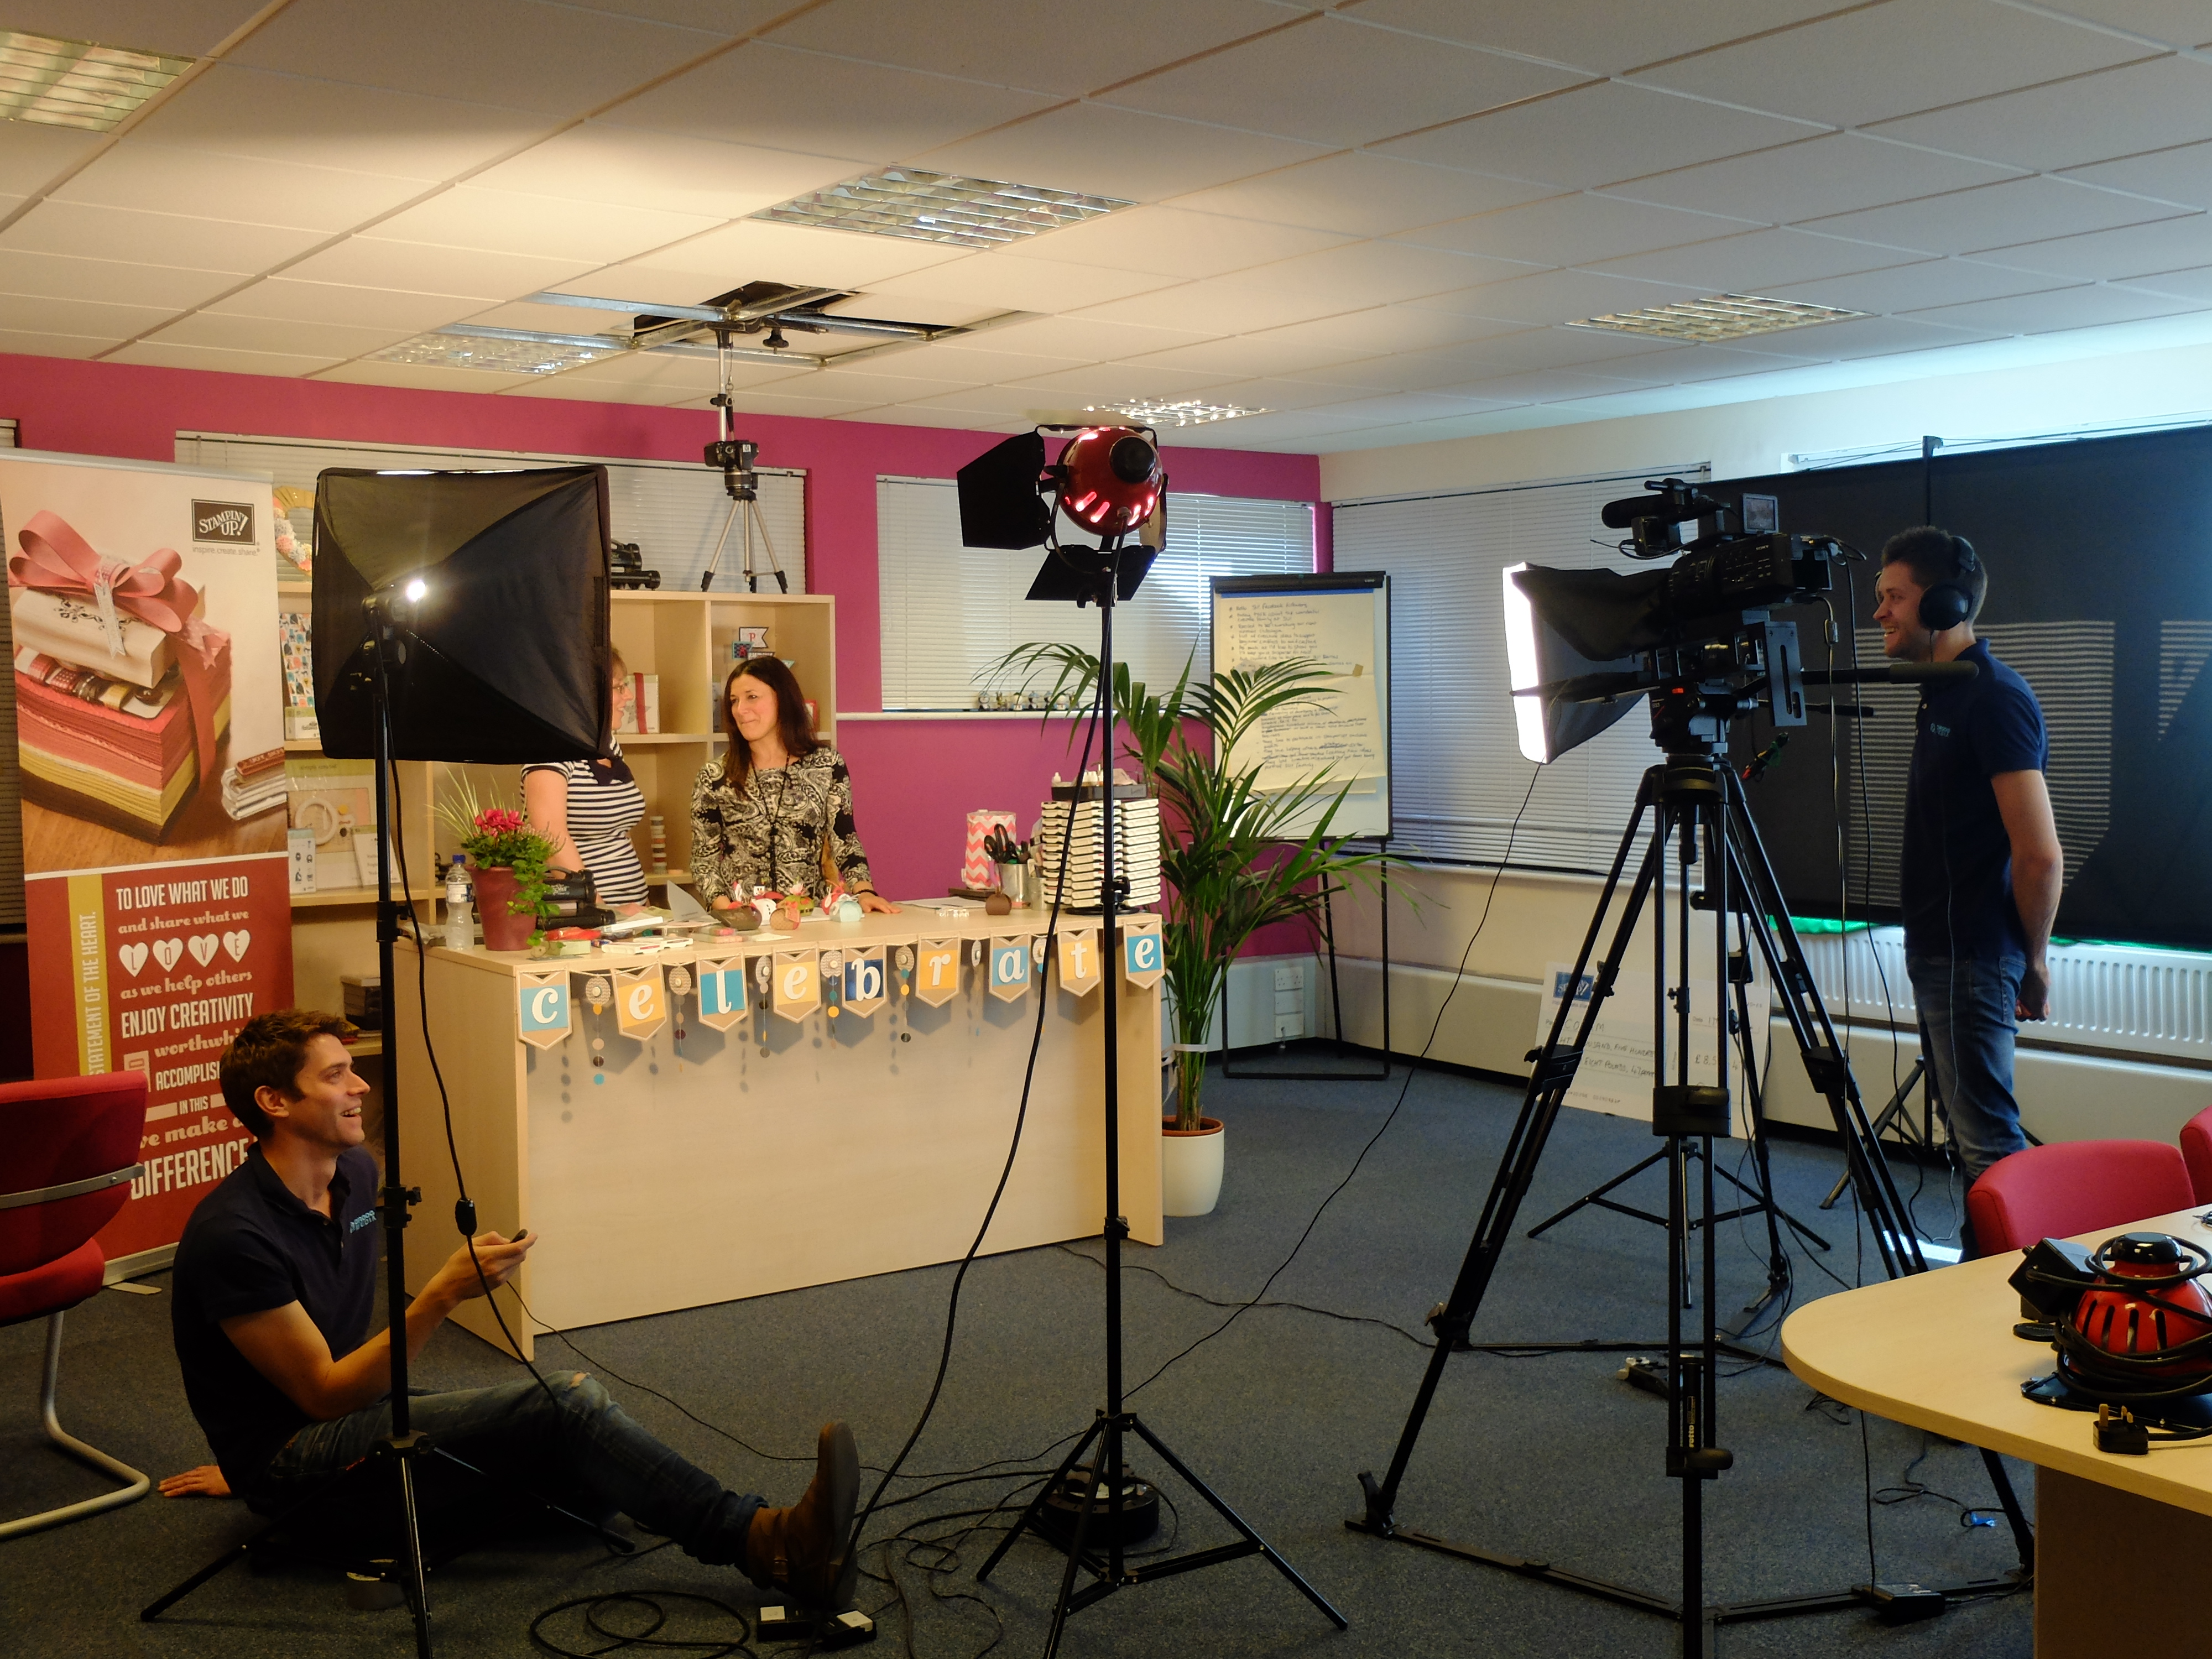
You can get the details for how I made the box above and see lots of other boxes featured in the video itself, but I wanted to share with you some of the 'behind the scenes' photos from my day and give you a little insight into the fun that I had spending the day with Paula and Kelly in the studio, along with the now infamous 'Ben and Jerry' film crew of Ben and James, who do all of the filming for Stampin' Up!'s UK events and did such a fabulous job of recording the day and producing the final video.

This is what filming looks like from behind the scenes -  a real case of lights, camera, action! There are cameras that shoot from the front and from above in order to get a full range of shots and the necessary close-ups. When I shoot video tutorials at home I use an overhead camera, but I'm sitting at my desk. When you're standing up it is quite tricky because you have to be careful not to lean over your workspace, otherwise all the viewer sees is the top of your head! Sounds obvious, but I found out there is a real art to working with your arms outstretched and not leaning too far into your workspace.
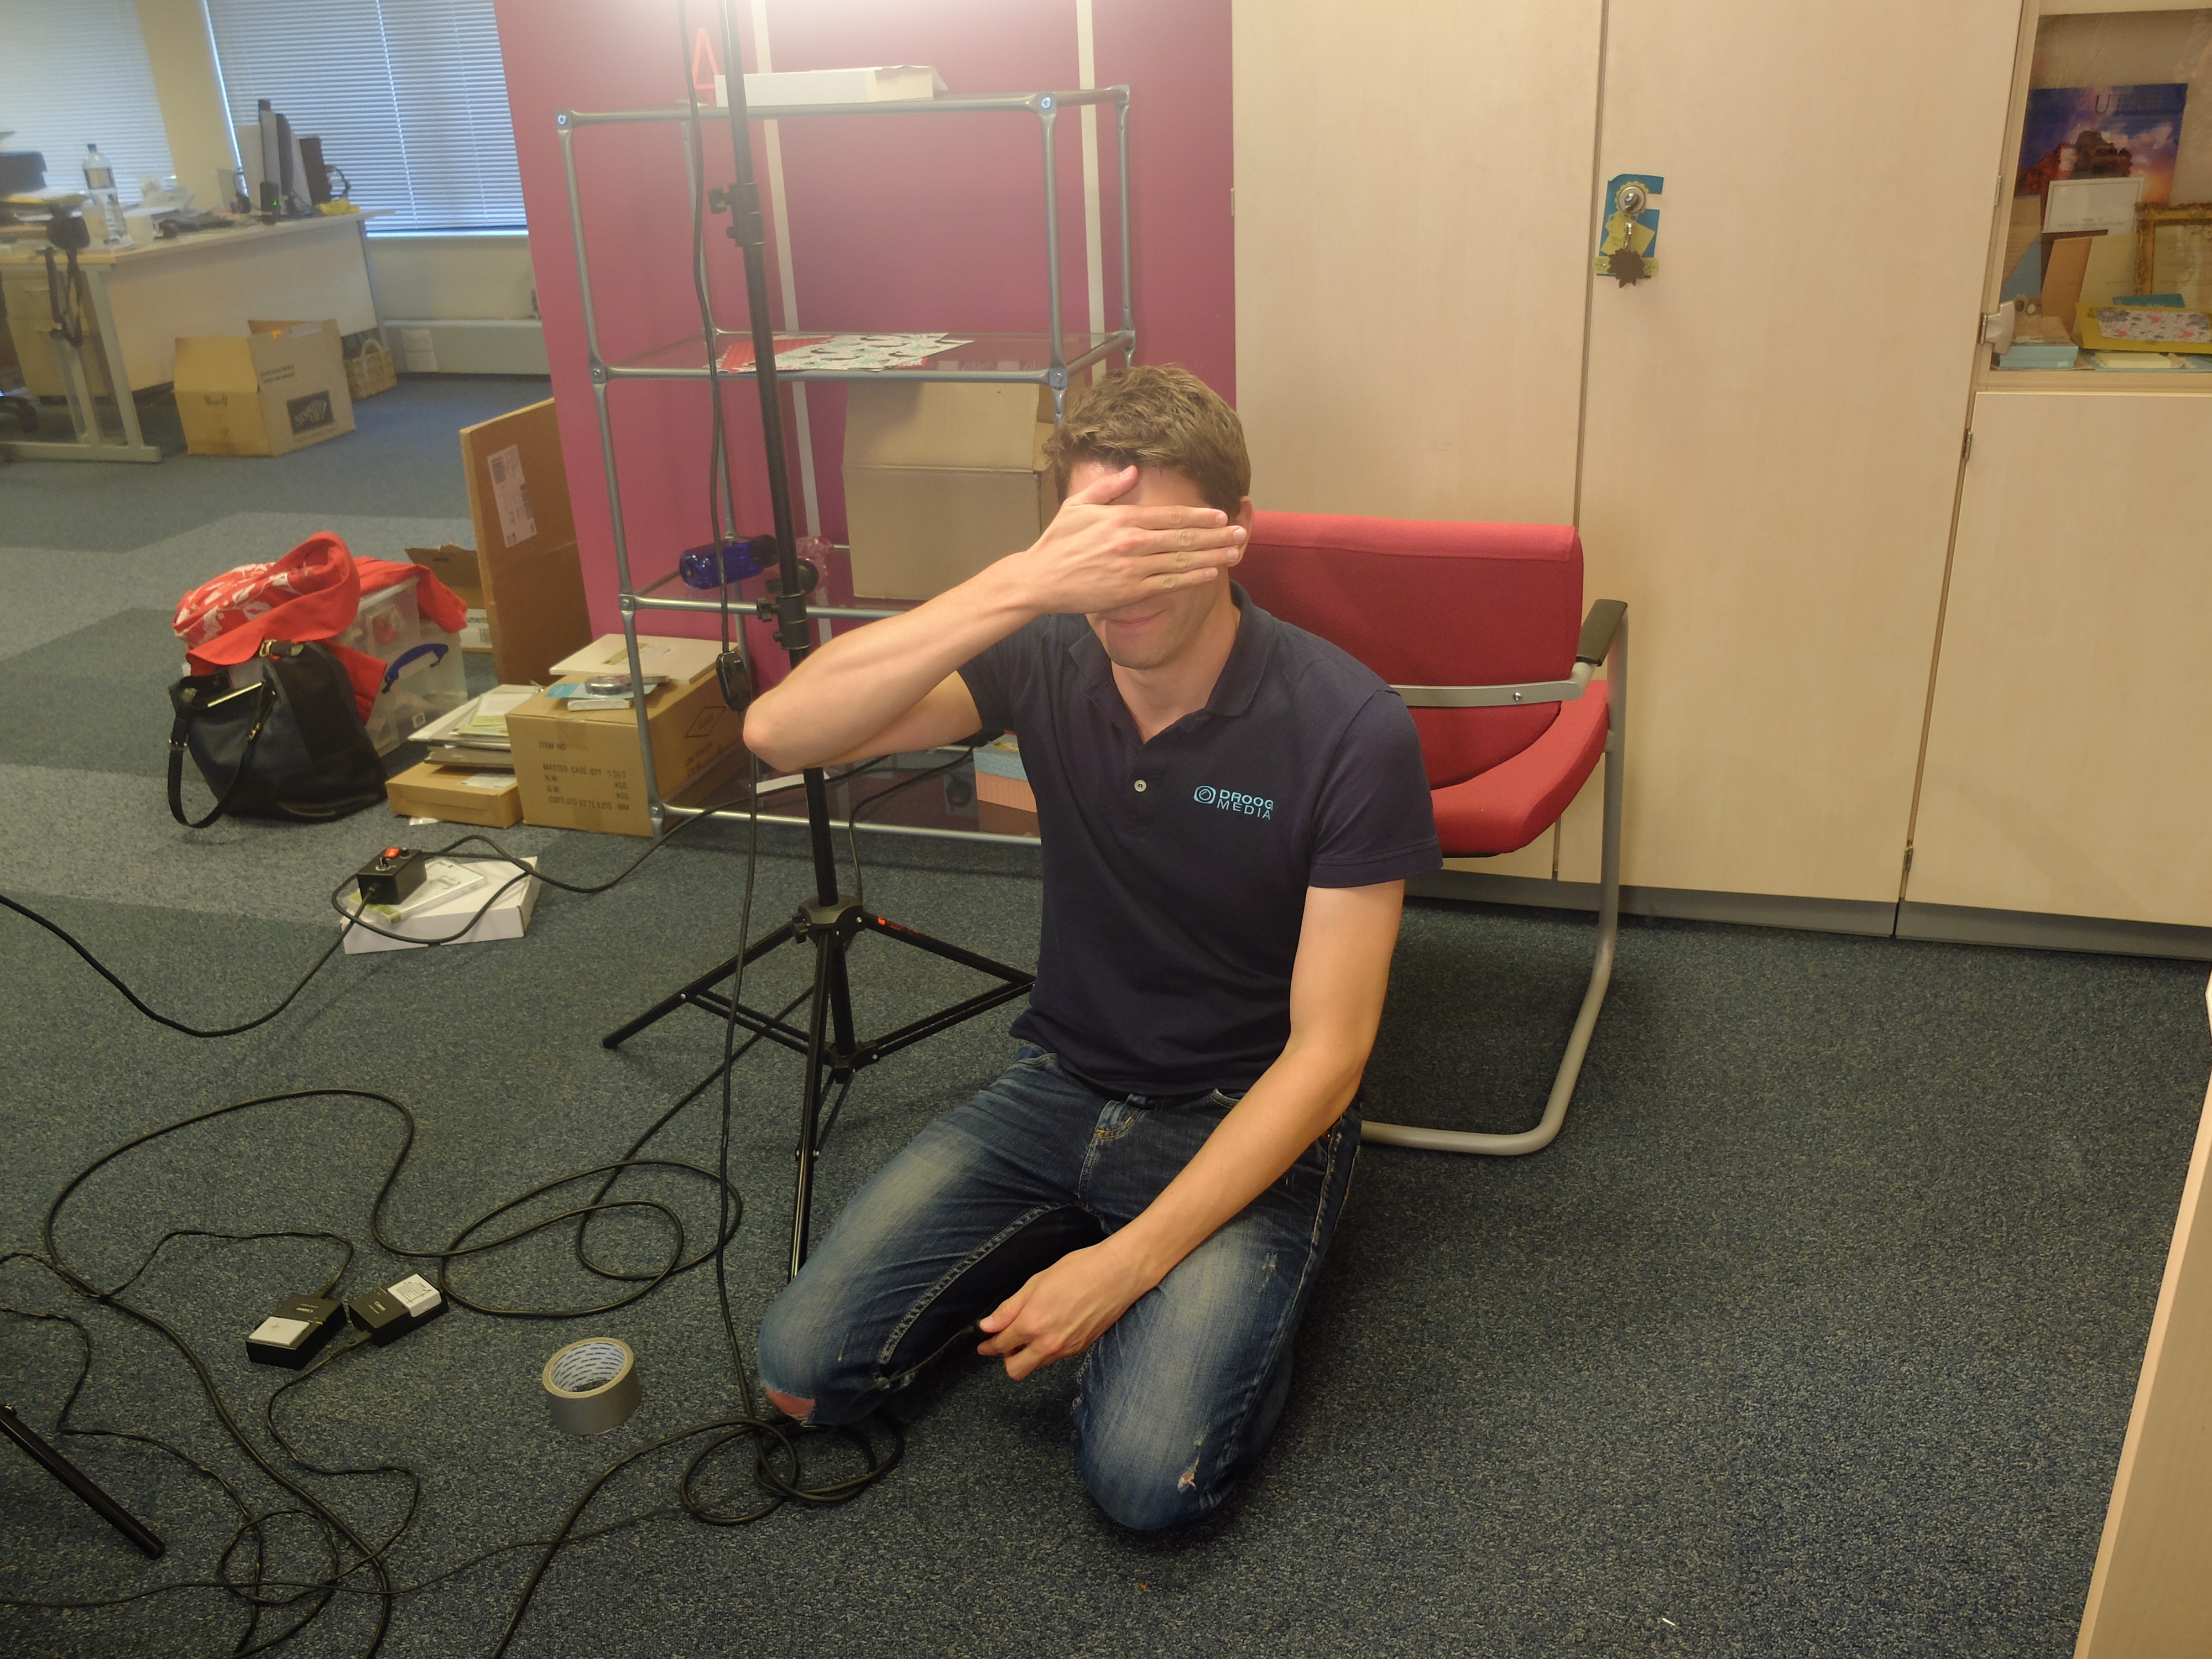
Here are a couple of shots of Ben and James, the guys that produce the video - I struggle to tell them apart - they're twins! - but as you can see, one is slightly more camera-shy than the other:

 

They really are the nicest chaps you could wish to meet and I think they did a great job with the final edit, although I'll admit I'm biased!

This is my favourite photo of Paula and I on the day, taken mid-take once we were properly relaxed and into the swing of things - we really were having fun:

Lastly, here's one of us all post filming each displaying our favourite boxes, the chaps included. They decided the boxes were so easy to make, they might even have a go themselves at making some to grace their family festive table. At the UK training day at Telford earlier this year, the Stampin' Up! demonstrators were treated to a video of Ben and 'Jerry' making their first foray into crafting Stampin' Up! style, so this may well be their second!!
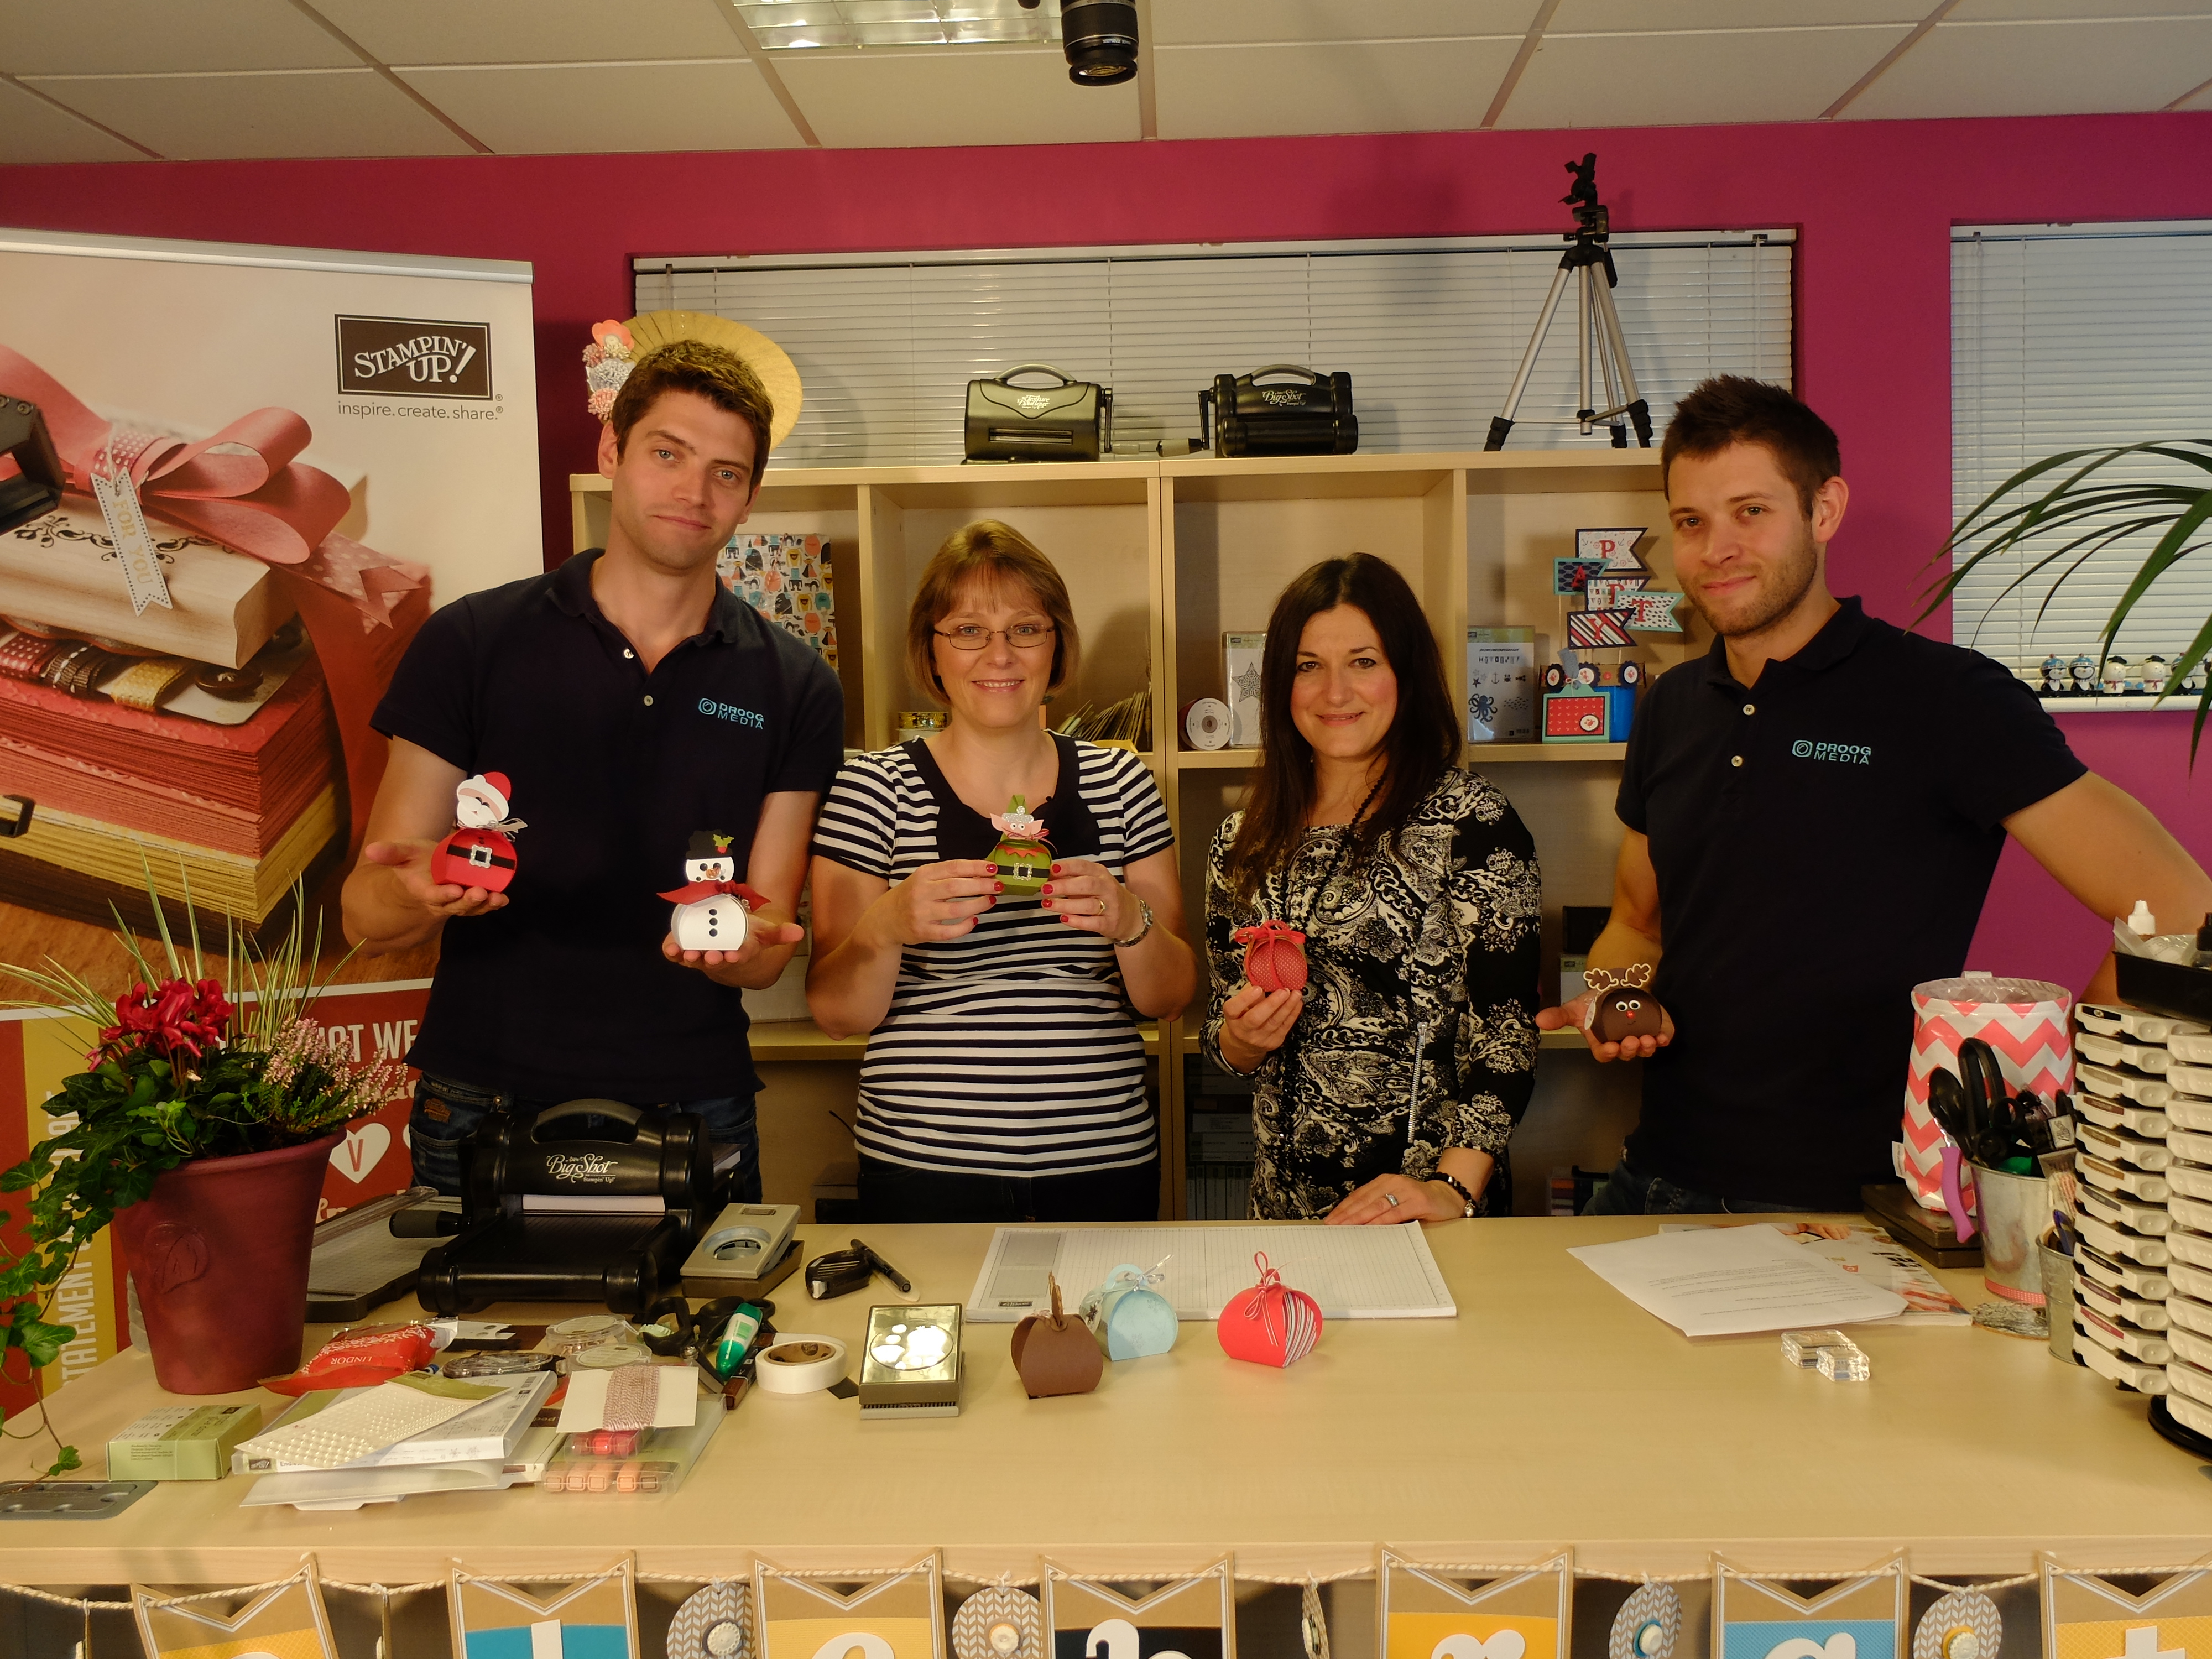
Also, note the festive pot plant on the edge of the desk and the Christmas tree in the video - Kelly and Paula did their best to make the studio look festive, which was quite tricky given that this was filmed some time ago when the sun was shining gloriously outside and it was not even remotely autumnal, let alone wintery! A big thank you the lovely Kelly Francis, who took all of the above pictures - she is an absolute star!

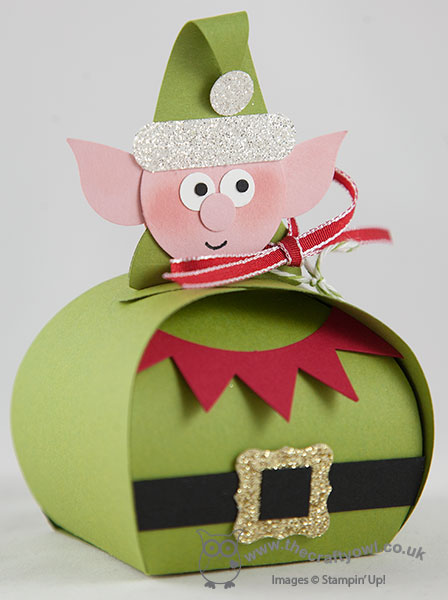
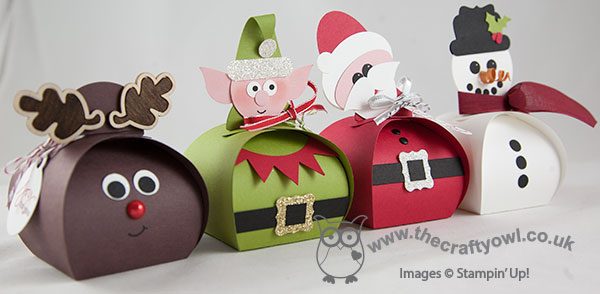
Here are some additional pictures of some of the finished boxes that feature in the video - this is Santa's helper, the mischievous elf: 
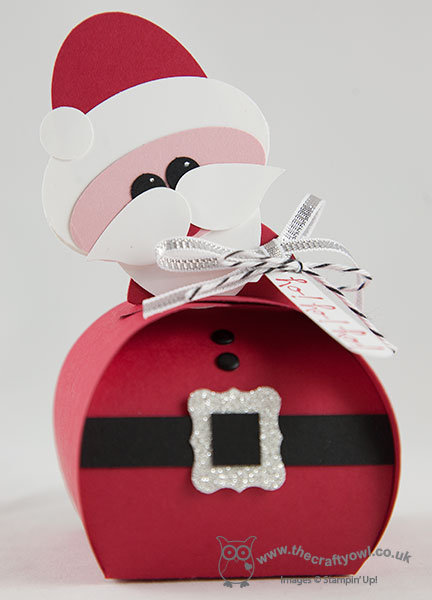
This is the man himself, Santa Claus - with his head!:
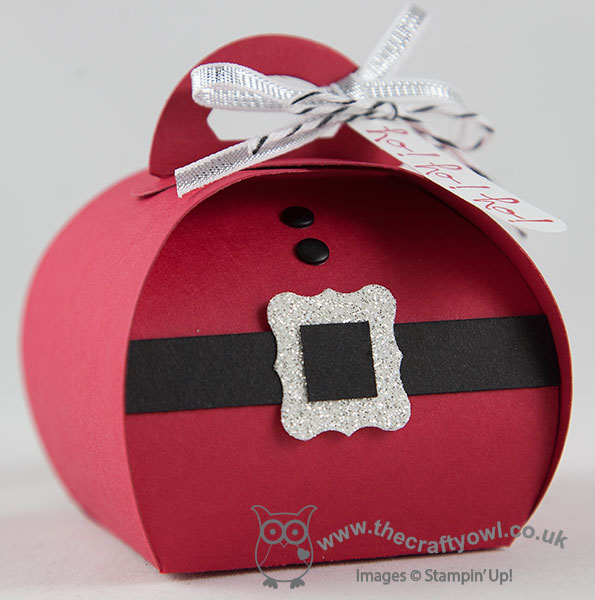
This one is Santa - without his head! Perfect if you are short on time or want something that's a little more adult-oriented:
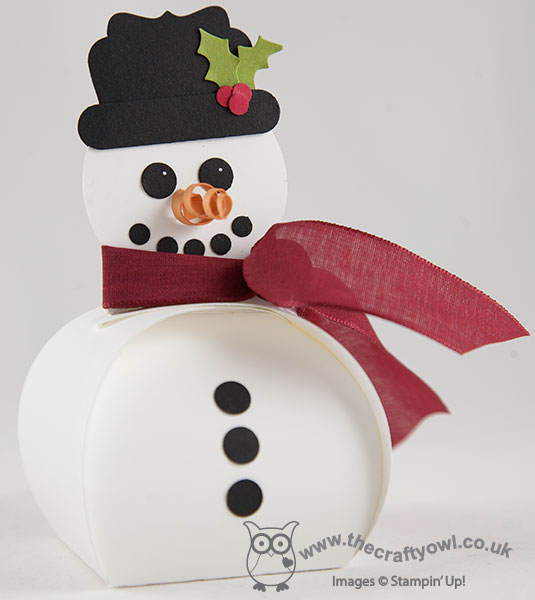
Then we have the cutest snowman - check out his twirly carrot nose! 
Here they are altogether - one big happy Curvy Keepsake Box festive family:
I hope you found the 'behind the scenes' tour interesting - now here's the video that you've all been waiting for:

In summary, a truly great experience and yet another of the fantastic opportunities available to me as a Stampin' Up! demonstrator working with this amazing company that allows me to share what I love, be endlessly creative, manage and motivate a great team and have a job that totally fits around my family commitments and enables me to achieve the best work-life balance I've ever had.

If you're reading this and thinking that you would like to know more about the benefits of becoming a Stampin' Up! demonstrator, then do get in touch with me on 07773 421446  - I would love to have a no-obligation chat with you and tell you more.

If you would like to make Rudolf, the supplies list that links to my online store is below.

Back tomorrow with another project; until then, happy stampin'!


Stampin' Up! Supplies Used:

Table built using Product Table Builder by The Crafty Owl - Independent Stampin' Up! Demonstrator.


Mingle All the Way Monochromatic Snowflake Card

by Joanne James7. October 2014 08:00

Today I'm back with a Christmas card (haven't had one of those for a few days!!) I saw this week's sketch over at Create With Connie and Mary this week and immediately had an idea - always great when that happens! Here is the sketch that inspired my card:

This is a great sketch with many possibilities; I wanted to use the 'Mingle All The Way' stamp from the stamp set of the same name and this is the card I came up with:

I used Soft Sky for my card base and a piece of the swirly snowflake paper from the 'All is Calm' speciality DSP pack for my offset layer. I then used a plain piece of Soft Sky for my bottom banner flag and overlaid this with a vellum banner that I stamped in Versamark with snowflakes from the Endless Wishes stamp set and then heat embossed in White. For the circle, I stamped the sentiment again in Versamark and heat embossed in white, then punched it out using my 2 1/2" circle punch. To finish, I added a few snowflake sequins and a bow in white seam binding ribbon.

Without trying, I made a monochromatic card, something I usually find quite tricky. I love the calm, serene feeling of this card.

Back tomorrow with this week's Design Team card for Colour Me...! and a new set of Wednesday Weekly Deals. Until then, happy stampin'!


Stampin' Up! Supplies Used:

Table built using Product Table Builder by The Crafty Owl - Independent Stampin' Up! Demonstrator.


Tags: , , , , , , , , ,

Cards | Stamping

Winter Hot Chocolate for Less Is More

by Joanne James18. September 2014 10:37

Well we're on the back end of the week already - yay! Thank you to all the new visitors to my blog yesterday who came to see my guest stamper card for The Color Throwdown and to those of you who left lovely comments on my blog - it's always nice to hear from my readers! I look forward to you becoming regular visitors.

Today's card is for this week's challenge over at 'Less is More' where the theme this week is 'beverages' and it's a one layer challenge. I pulled out one of my favourite Christmas retired sets, Scentsational Season, to make today's card; I thought a winter-warming hot chocolate should be the order of the day for my card, even if not outdoors as we are still enjoying a mild September (and long may it continue!). Here's my card:

I used a Crumb Cake base and stamped my mug in Real Red, colouring the hot chocolate section of the mug separately with my Chocolate Chip Stampin' Write marker. I added my two-tone sentiment from the 'Endless Wishes' set, then using my Chalk Marker, I carefully coloured in the snowflake on the mug and randomly doodled a flurry of snowflakes around the edge of my card. I'm a tea drinker myself (in large quantities, usually about 10 cups a day!) but there's something really appealing about hot chocolate in the Winter time - I think it's the smell of cocoa and sugar which just cuts through cold air like nothing else!

Check out the gallery for more beverage inspiration - there are lots of fun cards there this week, and a whole range of beverages are featured including some altogether more alcoholic tipples too!

Back tomorrow with another project; until then, happy stampin'!


Stampin' Up! Supplies Used:

Table built using Product Table Builder by The Crafty Owl - Independent Stampin' Up! Demonstrator.


Tags: , , , , , , , ,

Cards | Stamping

Celebrate The Season Endless Wishes CAS Christmas Card

by Joanne James16. September 2014 08:45

Apologies firstly for anyone who saw a partial post within the last 10 hours - my blog appears to have published one version of tomorrow's post whilst also saving a draft; not sure what's happened there, but as it wasn't complete anyway it won't have made much sense. Come back tomorrow to see the completed post, with card! I think the moral of the story is don't spend too much time late at night preparing blog posts.

Anyway - today I'm sharing a Christmas card that I made for this week's challenge over at Create with Connie and Mary, where we have been challenged to use the following colour palette:

Whilst today's card took less than 10 minutes to make, I could have made six in the time it took me to decide upon my final design! I started out with my 'All Is Calm' Christmas Designer Series Paper as I knew it featured these colours, but then was overwhelmed by all of the possibilities and options and couldn't decide where to start. Here's my finished card:

I eventually decided to use the paper you can see on the edge of this card; I had been unsure how I was going to use this pattern as I don't have any of the stamp sets that obviously co-ordinate with it and it's quite a bold pattern. Eventually I thought it would make the perfect background for my Endless Wishes stamp set - SOOO glad SU! put this in the catalogue this year for us Europeans to enjoy too! - so I bordered my Lost Lagoon base card with it, then adhered my stamped top panel using dimensionals after tying a loop of Old Olive baker's twine around it. I know this is a bit of a cheat to the colour palette, but there's so little of it in the twine it could be mistaken for Pear Pizzazz at a distance (or at least that's my story and I'm sticking to it!)

I love the simplicity of this card and think I will actually make a few more of these to add to my stock of Christmas cards. Back tomorrow with a double post for you: my usual Design Team card for Colour Me...! and a special post as the Guest Star Stamper over at The Color Throwdown as I was their Featured Stamper with this card last week! Oh, and not forgetting the new Wednesday Weekly Deals! Until then, happy stampin'!


Stampin' Up! Supplies Used:

Table built using Product Table Builder by The Crafty Owl - Independent Stampin' Up! Demonstrator.


Tags: , , , , , , ,

Cards | Stamping

Mini Catalogue

BROWSE THE CATALOGUE

The mini catalogue is now live! Read and download your copy here.

Shop Online

Access my online shop 24 x 7, 365 days of the year:

Current April hostess code:

VDKNV7BH

Shop Online

Join My Team

It's always a great time to join Stampin’ Up! New team members can get £130 worth of products for only £99 + free business supplies + free shipping + all the fun being a part of Stampin’ Up! Stampin' Up! has something for everyone: join my growing team and benefit from my support to enjoy Stampin' Up! however you choose.

If you're interested, call me for a chat to understand how I can help you realise your goals. Alternatively, if you have already decided to sign up and you just can't wait, please click here for the link to the online form where you can sign up and order your starter kit right away! 

Latest Kit!

Stampin Cut and Emboss

The Rock Legend Kit has all you need to make 8 cards with coordinating envelopes. Along with the new Panda Friends Kit, both are available from January 4th for just £14 each - get yours here!

2023-24 Annual Catalogue

BROWSE THE CATALOGUE

Click on the catalogue for a full list of current SU! supplies - if you would like to order any of the items featured, please drop me a line at [email protected] or give me a call on 07773 421446 - I'd be happy to help.

New Online Exclusives

There are new products available exclusively in the online store from 5 March - check them out here.

About Me

Hi I'm Joanne and live in Northampton and when I'm not looking after my husband and two beautiful children, am an avid crafter with a passion for all things Stampin' Up!

I must confess that I have never been a big rubber stamper - until I discovered Stampin' Up! that is. I love the fact that I can get such great results with co-ordinating stamps, inks, papers and punches - the possibilities are endless! Join me on my stamping journey as I share the things I love and be inspired to create amazing things yourself!

Follow Me

Monthly Newsletter

Box Builder

Click the button above to use Box Buster to create your custom box design using the Envelope Punch Board!

Kits Collection Now Available!

Stampin Cut and Emboss

The new Kits Collection from Stampin' Up! is now available!

Click here to see the current kits available and order yours online today.

I Design For


Stampin' Up Stuff

This is my personal blog and is not endorsed by Stampin’ Up! I hope you find it a plentiful source of ideas and personal inspiration but please don't copy my designs for contest submission or use for classes, publication or sale without express permission.