by Joanne James4. March 2015 20:05Finally time for today's creative post! I was fortunate enough to be selected as the 'Top Pick' over at the As You See It Challenge last week - thank you ladies! - for this card here. Today I'm entering a card for this week's challenge which is another sketch-based one - you know how I love a good sketch:

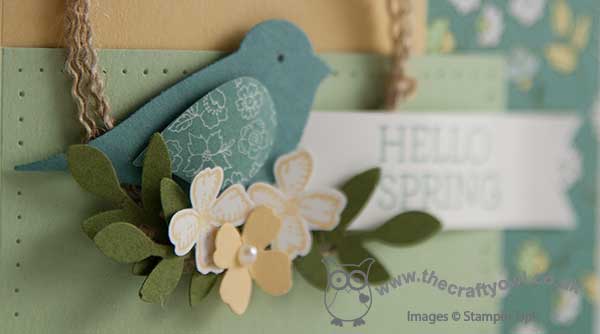
I was keen to interpret the ring in the sketch as a wreath in some way and since I had some leftover burlap on my desk from another project that I am currently working on, I knew which direction I wanted to go. My thoughts are definitely on Spring this week - here is my interpretation of the sketch:
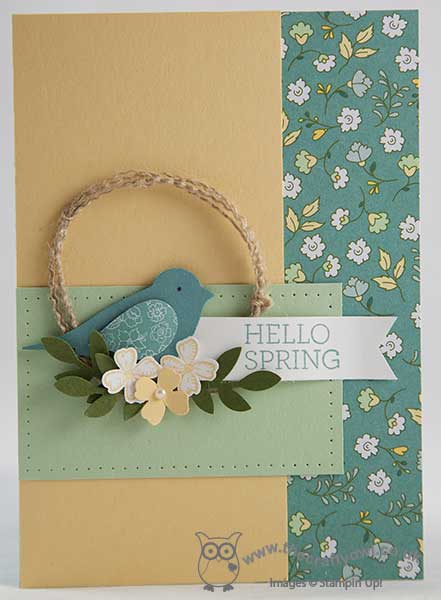
I started with a base of Lost Lagoon then added a piece of All Abloom DSP down the side. I overlapped this with a piece of So Saffron and added a Pistachio Pudding panel across the horizontal, that I pierced around the edge to add interest. To create my spring wreath, I used a few strands of burlap that I stripped from a length and tied it together at three points around the edge to hold everything together. To decorate, I added a few springs of leaves in Mossy Meadow punched from my bird punch, then punched my bird itself in Lost Lagoon. I added an eye with a Basic Grey marker and I punched his wing out of a snippet of All Abloom paper in a different stack design. I added a sentiment banner that I stamped using the Crazy About You' stamp set and to finish a trio of flowers, one in So Saffron with a pearl centre, and two that I stamped in So Saffron on Whisper White with the flower stamp from the 'Something to Say' stamp set and punched out with the co-ordinating Itty Bitty Accents punch.
I love the look and feel of this card - it's so fresh and says that Spring is on the way. I haven't used my bird punch in ages but this little fella looks quite at home sat on his burlap wreath. This would also make a nice Easter or Birthday card, with a change of sentiment.
Back tomorrow with another double-post day and some exciting news too! Until then, happy stampin'!
Stampin' Up! Supplies Used:
d85e6154-0322-4e9a-80ce-64ebefb6d975|1|5.0|96d5b379-7e1d-4dac-a6ba-1e50db561b04
Tags: 2-step bird punch, All Abloom, Itty Bitty Accents Punch Pack, Crazy About You, Shop online, Something To Say, Stampin' Up, Stampin' Up Card, Stampin' Up Card ideas, Stampin' Up Supplies, Paper Piercing
Cards | Punch Art | Stamping
by Joanne James28. February 2015 22:26Good evening blog readers! A busy couple of days so a later blog post today. Just time to share with you another card using the Butterfly Thinlits, this time including the largest of the trio:
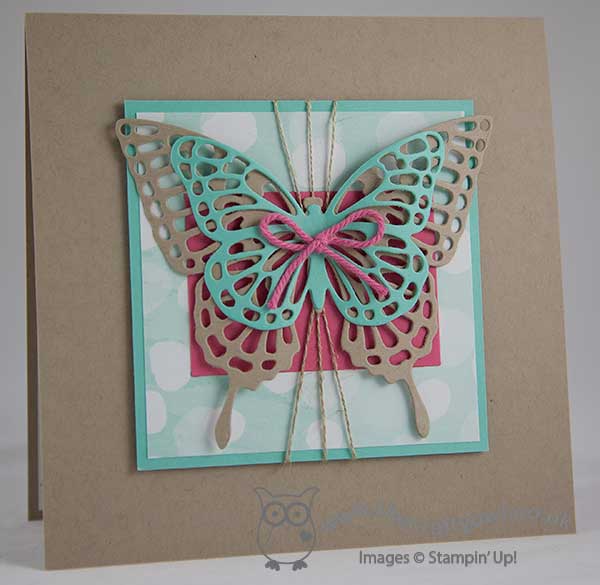
This is a larger than usual card at 6" x 6", as I wanted to allow enough cardstock to frame this rather large butterfly and set if off to true effect. The base of my card is Crumb Cake cardstock, onto which I added a raised mat panel consisting of a piece of the current Sale-A-Bration 'Best Year Ever' Designer Series Paper onto a piece of Coastal Cabana cardstock. I love this bokeh-inspired patterned paper - it saves the time of creating your own and makes for a lovely background effect. |Even better still, it can be yours free with an order of £45! I then added a piece of Strawberry Slush cardstock, and wrapped some linen thread around the panel before adhering to my card. I then added my layered butterfly - the largest butterfly cut from Crumb Cake and the smallest butterfly cut from Coastal Cabana - and finished with a bow of Strawberry Slush thick baker's twine. A no-stamping card, that really shows these delicate butterflies off to great effect.
I'm linking today's card with the sketch challenge over at Fab Friday (I turned the sketch through 90 degrees and used my linen thread in place of the flagged banner in the sketch).
Back tomorrow with my card for this week's new challenge over at The Paper Players and news of some new Sale-A-Bration goodies that you can earn during the month of March. Until then, happy stampin'!
Stampin' Up! Supplies Used:
7d0c4645-663d-45e6-9247-f22b986a2f7a|0|.0|96d5b379-7e1d-4dac-a6ba-1e50db561b04
Tags: Best year Ever, Butterfly Thinlits Dies, Big Shot, Sale-A-Bration 2015, Promotions, Shop online, Stampin' Up, Stampin' Up Card, Stampin' Up Card ideas, Stampin' Up Supplies, Bokeh
Cards | Punch Art
by Joanne James12. February 2015 07:00Another quick, clean and simple Valentine's card for you today - a second crack at the 'hugs and kisses' challenge over at Addicted to CAS and Can You Case It:
My card was inspired by Kylie's in the ATCAS Design Team - it reminded me of the little 'xoxo' framelit in the circle thinlits set, which was perfect for the fun little game I had in mind - here's my card:
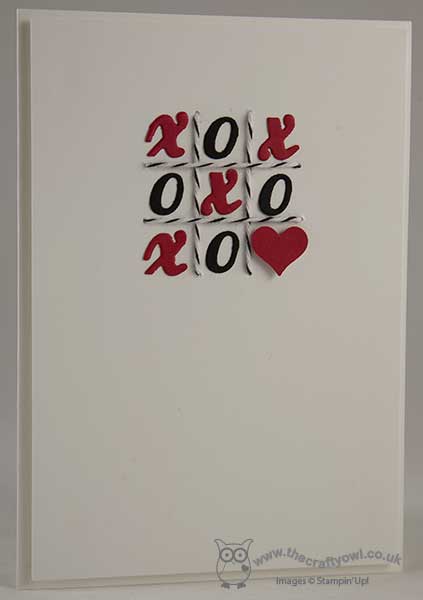
I cut out a few of the 'xoxo' in both Real Red and Basic Black, then snipped them apart so that I could use them for my game of tic-tac-toe. I created my 'board' by piercing some holes in my Whisper White layer and threading them with black baker's twine - here's a close up so that you can see it in more detail:
I substituted my final 'x' with a little red heart, popped up on a dimensional - sweet! Another no stamping card too - that doesn't happen often!!
Today's post is short and sweet too - I have a very busy day ahead so I'm off to get started. Back with another project tomorrow - until then, happy stampin'!
Stampin' Up! Supplies Used:
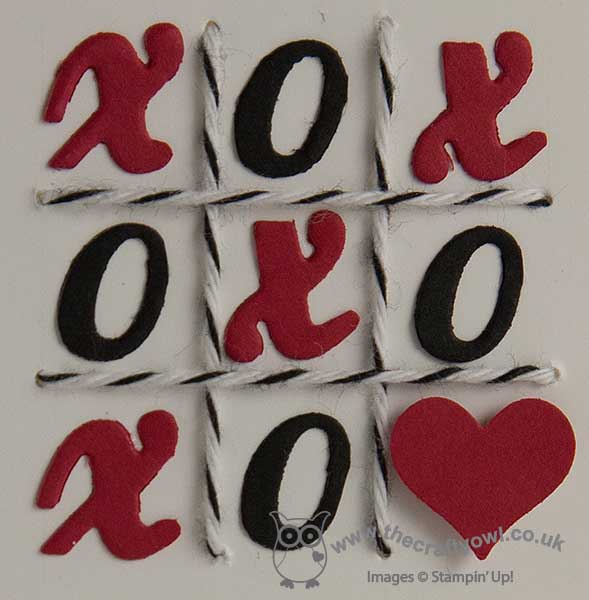
by Joanne James11. February 2015 09:15I still have a couple more Valentine's cards to share with you this week, all of them quick and easy to execute though if you are making a last-minute card for your loved one! Today's card has been made using this week's sketch over at CAS(E) This Sketch and I am also entering it into the 'Hugs and Kisses' challenge over at Addicted to CAS and the colour challenge at Can You CASE IT:

This is one of those 'go to' sketch layouts for clean and simple cards and is also great for showcasing designer series paper, as I've done here with the hugs & kisses pattern from the 'Stacked With Love' DSP stack. Take a look:
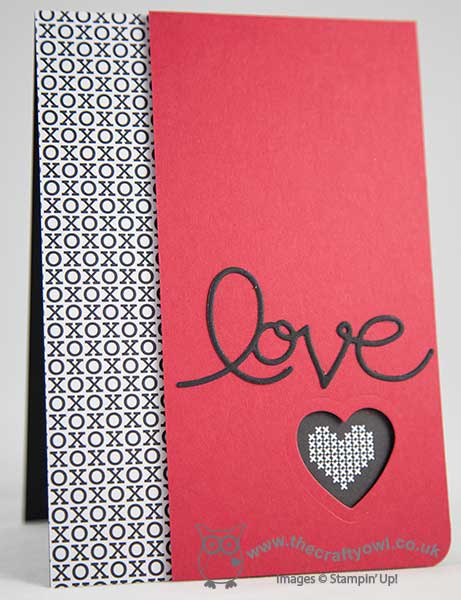
For the other half of my base layer, I used another of the black and white patterns in the stack, and used a heart framelit to create a die cut in my top red layer that allowed an element of the paper design to show through. I finished my card with a 'vintage' love die cut with my now retired Expressions thinlits - these are still available on the clearance rack and can be picked up for a bargain £13.79 and lastly rounded the bottom right corner of my card. Not a stamp in sight either - no risk of inky fingers with this one!
Simple but effective I hope you will agree! Back tomorrow with another Valentine's card to share with you; until then, happy stampin'!
Stampin' Up! Supplies Used:
c6b90e9c-8f55-489c-af26-b8a0ba4afda3|0|.0|96d5b379-7e1d-4dac-a6ba-1e50db561b04
Tags: Anniversary, Valentines, Valentine's, Stampin' Up Supplies, Stampin' Up Card ideas, Stampin' Up Card, Stampin' Up, Stacked With Love, Shop online, Hearts Framelits, Expressions Thinlits Dies, Big Shot
Cards | Punch Art
by Joanne James9. February 2015 09:00Today is a busy day for me: I have my monthly technique class this morning and this afternoon I'm heading to Ikea to stock up on picture frames for a party at the weekend. This month's technique class features the 'Butterfly Basics' stamp set and co-ordinating Butterfly Thinlit Dies, so I have been using them to make lots of samples recently. Today's card is one of the ones I made to show the ladies that are attending my class and works wonderfully with the palette over at Colour Q this week:
The butterflies can be used in a number of ways to incorporate colour into them - having seen some interesting samples using vellum and also colouring with Blendabilites, I decided to have a go at paper-piecing a solid butterfly image. Here is my card:
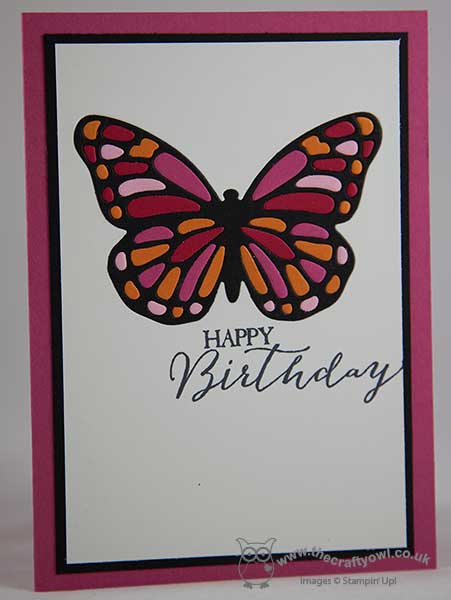
Whilst this card looks deceptively simple, with its inlaid black butterfly outline and coloured wings, I can assure you it isn't altogether quick to put together! Keeping track of all the tiny pieces from the insides of the four coloured butterflies I cut was something of a challenge, but was well worth it - I love the effect of the solid, brightly coloured paper-pieced butterfly. Here's a close up of the detail:
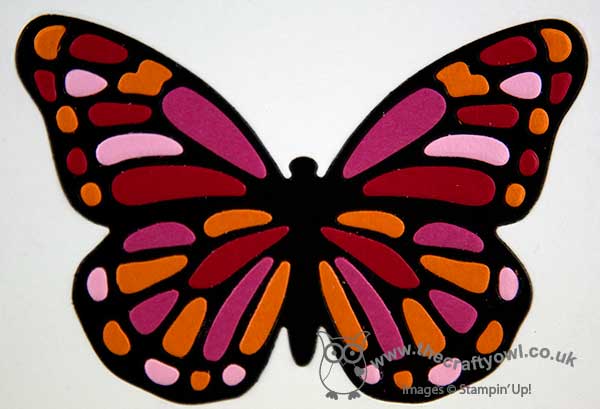
In addition, I also have the four coloured butterflies to use for other projects - bonus!
That's all from me today. check out my Facebook page if you would like to see the fun that the ladies are getting up to in my class and what this week's cakes look like! Better still, get in touch with me and join me for next month's technique class on 9th March, when we will be using Blendabilities and the lovely Easter stamp set, 'Indescribable Gift'. You can find more details on my class schedule here. Back tomorrow with another project; until then happy stampin'!
Stampin' Up! Supplies Used:
* Pretty In Pink cardstock - retired
by Joanne James28. December 2014 10:00Today I wanted to share with you a fun punch art card that I made for a special little girl for Christmas featuring the adorable snowman Olaf from the Disney movie 'Frozen'. I've made a few of these but never blogged one - so here's the most recent one that I made:
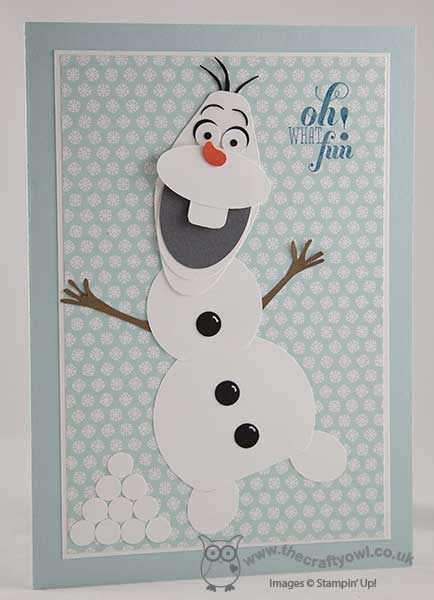
I most certainly can't take the credit for the Olaf punch art itself; to create mine, I always follow the excellent instructions by Michelle Suit - you can watch her video tutorial on how to create your own Olaf here. He is actually rather straight forward - the real key is using the Gift Bow Bigz die to get the right shape for his head. If you are a fan of Disney and like to create punch art every once in a while, I recommend you check out Michelle's blog Suitably Stamped - she really is a whizz!
On this occasion, I kept the design of my card really simple and used a piece of Nordic Noel DSP for the snowflake background and just added a pile of snowballs and a retired sentiment, which I stamped in Island Indigo directly onto the DSP. I have more of these to make this month, as I am the official party planner for a special birthday girl later this month who is having a Frozen-themed celebration; there is clearly no sign of the Frozen phenomena dying down any time soon!
And now to my special announcement! As my regular readers will know, I was asked to join the lovely ladies over at The Paper Players challenge blog back last July for a 3 month guest designer stint. This was then extended to a 6 month stay, which I completed with the last challenge of the year earlier this month. This has always been one of my favourite challenges to play along with and I was delighted to be asked to guest with this talented and creative bunch and equally sad to leave them. So imagine my delight when I got a call asking if I would like to return - as a permanent member of their design team!! Woohoo! I am thrilled that these ladies think so much of me that they would want me to join them on a permanent basis and I am so looking forward to creating with them through 2015 and beyond. Our first post of 2015 will be next Sunday, so do pop back then to join us for some fresh design inspiration!
As for me, I am hoping to be back with you tomorrow with another project; until then, happy stampin'!
Stampin' Up! Supplies Used:
5109cb95-113b-4260-bda9-a61674524f9b|0|.0|96d5b379-7e1d-4dac-a6ba-1e50db561b04
Tags: Christmas, Disney, Frozen, Punch Art, Gift Bow Bigz L Die, circle punch, Nordic Noel, Shop online, Stampin' Up, Stampin' Up Card, Stampin' Up Card ideas, Stampin' Up Supplies
Cards | Punch Art | Stamping
by Joanne James25. November 2014 09:36Today's card is for another couple of challenges: I'm having a second entry over at The Challenge, this time using the sketch, and also this week's colour challenge over at Create With Connie and Mary, where this palette of rich autumnal colours was just too good to pass up:
This weekend my American friends will be celebrating Thanksgiving; whilst it's not something we celebrate in the UK, we all have something to be thankful for and today's sketch and colours gave me the perfect opportunity to have a little go at something I've been wanting to do for a while and since I know I have lots of American and overseas blog readers, this one is for you! Here is today's card:
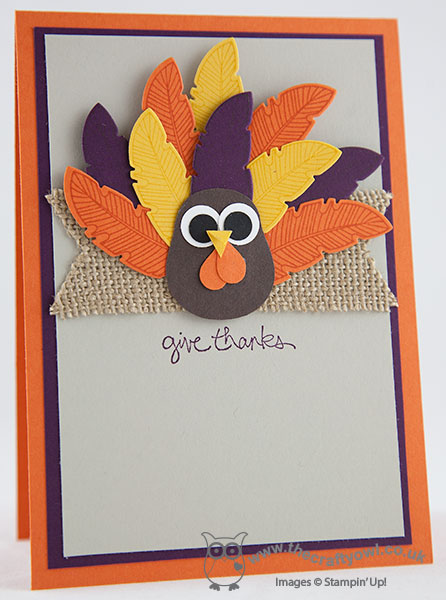
A punch art turkey - how cute is he?! I've seen lots of different punch art turkeys on Pinterest and wanted to have a go at creating one using the Four Feathers stamp set and co-ordinating framelits for the tail. The sketch layout is perfect for my card, as with such a detailed turkey there really isn't room for a lot else! I used Tangelo Twist for my card base with a mat of Blackberry Bliss, then followed this with a layer of Sahara Sand as my neutral, to really allow my turkey centre stage. I stamped a number of the small feathers in each of the challenge colours onto the same colour cardstock for a tone-on-tone look, and fanned them out in two layers for the turkey's tail. The turkey's body is the body of the owl punch, in Early Espresso with the ears and feet removed, and his jowls are a punched heart, cut in half and overlaid on top of each other. I placed a piece of burlap behind my turkey to add a little rustic texture then stamped my sentiment directly onto the card base. I'm hoping Lesley will forgive me the centralised sentiment; I spent so long fussing over my turkey, i didn't revisit the sketch before I stamped and centralised my sentiment rather than set it off to the side, as suggested. Note to self - make a final check before you stamp!
I hope you like today's card - please do visit both challenge sites for more design inspiration from some very talented designers.
Back tomorrow with a triple bill: two creative posts and a new set of Wednesday Weekly Deals!
Until then, happy stampin'!
Stampin' Up! Supplies Used:
6ac2bbea-df92-40d7-a009-aa26c2799b56|0|.0|96d5b379-7e1d-4dac-a6ba-1e50db561b04
Tags: Autumn, Fall, Four Feathers, Feathers Framelits, Owl Punch, Good Greetings, Punch Art, Thanksgiving, Shop online, Stampin' Up, Stampin' Up Card, Stampin' Up Card ideas, Stampin' Up Supplies
Cards | Punch Art | Stamping
by Joanne James22. November 2014 07:00It's the weekend - yay! Today I'm sharing my card for this week's challenge over at the Merry Monday Card Challenge, where Sue has the following challenge for us this week:
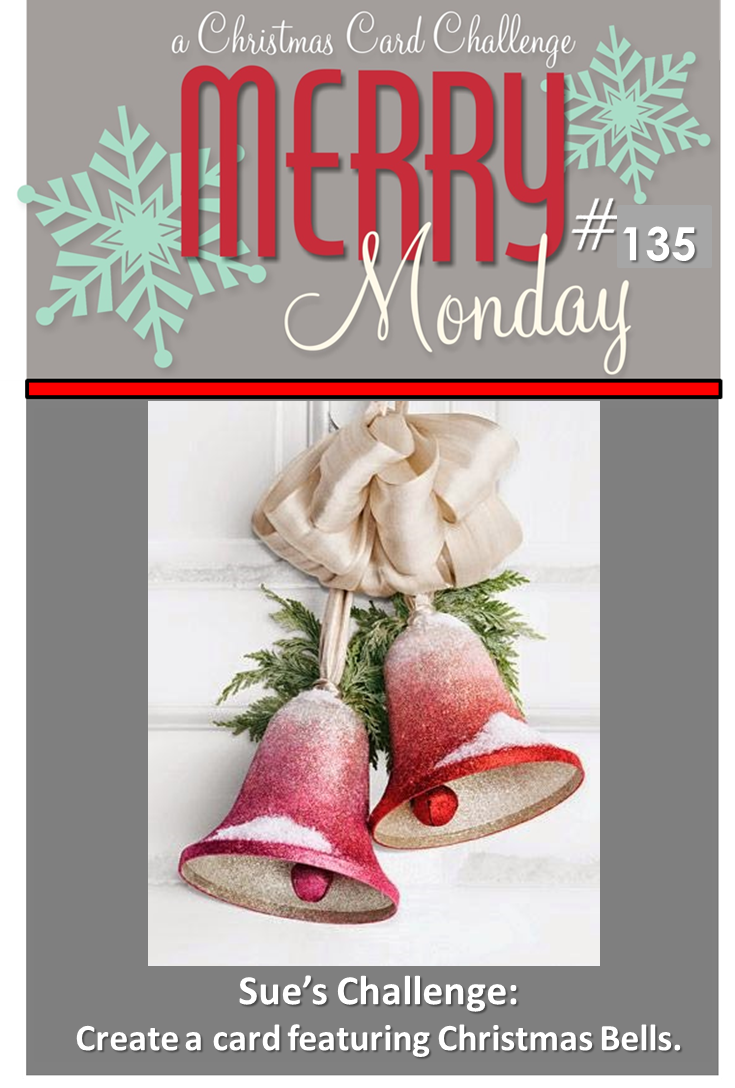
Hmmm - bells! These designers are really keeping me on my toes this week, as this is another one of those where investigation of my extensive supplies led me to conclude not a single bell image, die cut or embellishment of any kind! Not to be beaten, I decided it was time to think laterally; the obvious choice was to run to my e-cutter, but instead I thought I would try and create some jingle bells using punches. Here is my finished card:
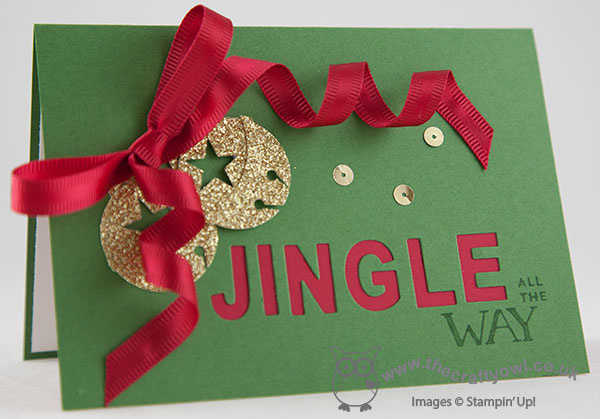
I had the urge to create something really glitzy today, so chose a plain background of Garden Green and decided on gold glimmer paper for my bells. They were surprisingly easy to make: I punched a 1" circle, then punched a star out of the top half. I punched two small circles with my crop-a-dile on the bottom half and used my paper snips to create the openings. Lastly, I punched a round edge using my 1 3/4" circle punch, adhered it to the centre of my bell and trimmed the ends. I also created a couple of gold bell hooks, but you can't really see these beneath the ribbon. I layered these onto my card base, popping one on a dimensional for a little lift, then finished with a rather extravagant bow. This red satin ribbon curls so beautifully I couldn't resist - even though this card is SOOO impractical for mailing!
My sentiment is a combination of the die cut using my Little Letters thinlits to spell 'jingle' and backed with Real Red cardstock, and the 'all the way' from the Mingle All The Way stamp set, which I selectively coloured with my Garden Green marker.
I'm also entering this card for the challenge over at Less is More where the theme this week is aptly 'Jingle All The Way', although I have another card planned with a slightly different slant for later in the week and it didn't occur to me that this one probably fits the theme slightly better!
I'm really pleased with my shiny jingle bells - what do you think? I'm off for my usual Saturday of sport today; back tomorrow with my Design Team card for this week's new challenge over at The Paper Players. Until then, happy stampin'!
Stampin' Up! Supplies Used:
by Joanne James25. September 2014 14:17A quick post from me today as I am having the busiest of weeks! Today I'm sharing my entry for this week's challenge over at 'Less is More' where this week the challenge them is 'Let's face the music and dance' and the ladies are looking for cards with a music or dance theme. Now today's card is not overly original, in that I've seen many of them on Pinterest and the internet in general for a long time, but I needed a thank you card for someone who plays piano and as I've never made one of these cards before, I thought I'd create my version which just so happens to fit the bill for this week's LIM challenge. So here's my card:
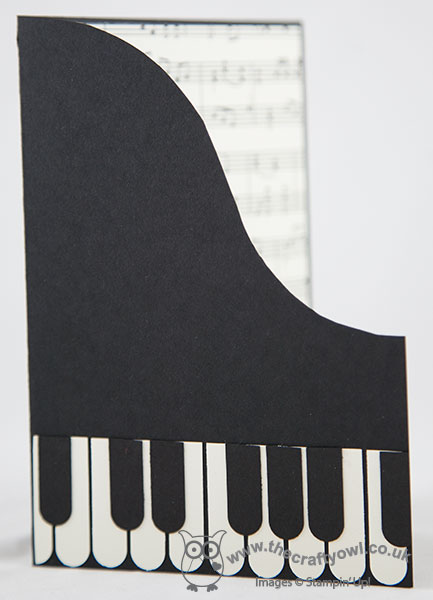
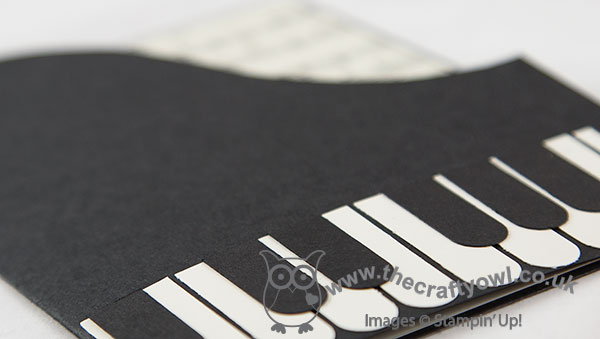
Quite difficult to photograph, so bear with me! This the front, in Basic Black, with the edge cut shaped like the lid of a grand piano, and then piano keys punched from a Word Window punch in Very Vanilla and Basic Black. Behind the cutaway section you can see the sheet music that is adhered to the inside of the card, which you can see more clearly below:
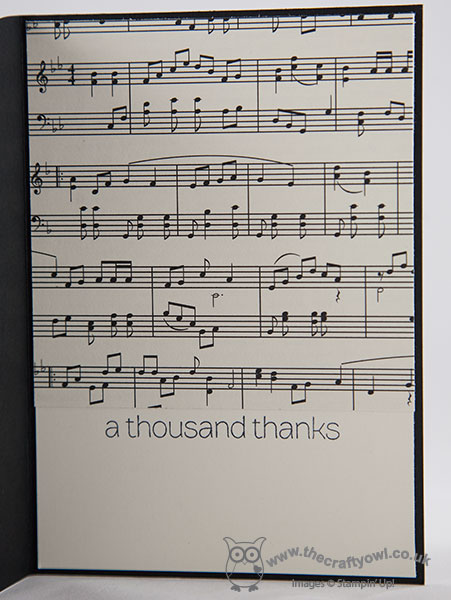
The sheet music is a piece of retired 'Modern Medley' DSP (I must confess to having hoarded the sheet music pages, I love them!), with space below for the sentiment and your message.
So a fun and simple piano card, where the 'white space' today is entirely black! Check out the other LIM entries this week for plenty of music and dance inspiration - I personally am loving the ballerinas on display!
One other thing - the Stampin' Up! UK Clearance rack updated last night - lots of new bargains at up to 80%, including 12 x 12" papers, washi tape and last season's Halloween papers and kits. You can check out all the bargains at my online store by clicking here - go and grab yourself a bargain!
Lastly, on the subject of THE Piano Man, Mr Billy Joel himself, if you're a fan and have never seen him play live, I can highly recommend it; I saw him in concert for the first time last year and can honestly say it was the best concert performance I have ever attended.
Back tomorrow with another project; until then happy stampin'!
Stampin' Up! Supplies Used:
dc3c3223-2cc3-4845-b514-ad0ce98f1fdd|0|.0|96d5b379-7e1d-4dac-a6ba-1e50db561b04
Tags: Word Window Punch, Punch Art, Modern Medley, Lots of Thanks, Clearance Rack, Product Shares, Promotions, Shop online, Stampin' Up, Stampin' Up Card, Stampin' Up Card ideas, Stampin' Up Supplies
Cards | Punch Art
by Joanne James23. September 2014 20:00As promised, here's my second post today as I wanted to share with you the card I made for this week's sketch challenge over at Create With Connie and Mary:

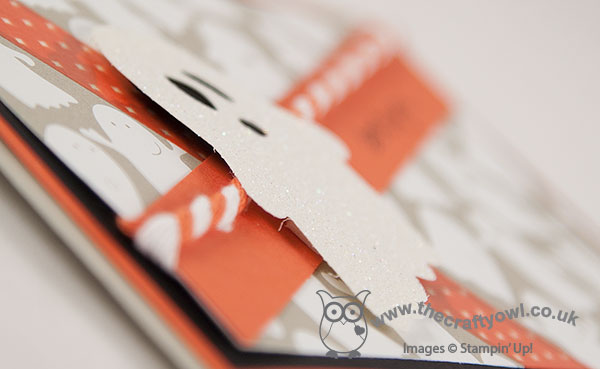
I love a sketch challenge and was intrigued by this unusual layout, which was crying out for the use of some washi tape with those bold stripes, something that is quite under-utilised within my craft stash at times. Anyways this was one of those cards that the minute I saw the sketch I knew what I wanted to do with it, so it took me next to no time to pull this card together. Here's my card:
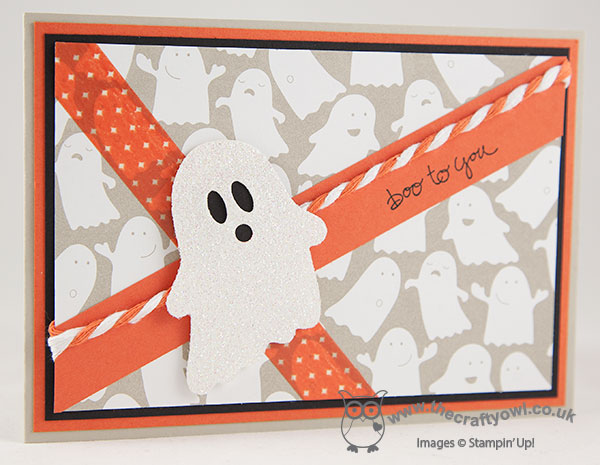
I used a base of Sahara Sand for my card as this is the colour of the ghost DSP from the Motley Monster set, but as it's quite neutral used lots of splashes of Tangerine Tango to really bring this card together and prevent it from looking washed out. By the way, check out the faces on the ghosts on the paper - how cute are they?! In addition to the mat, I added a strip of Tangerine Tango Retro Fresh washi tape for the vertical band (I love how you can see the ghosts through it - adds to the spooky I think!) and then used a piece of Tangerine Tango cardstock for the horizontal band, onto which I stamped my 'boo to you!' greeting. I bordered this with a piece of thick orange and white two-tone trim (I frayed the ends before adhering to the back of my panel so that it wouldn't have too much bulk). Lastly, I finished with a lovely Dazzling Diamonds sparkly ghost (thank you Mary Brown for the inspiration on a previous card of yours - love it!) I wanted my ghost to look towards the sentiment so cut the paper on the reverse using my framelit so that I could turn him over (hope that makes sense). I used one of the eyelits from the 'Chalk Talk' framelits to create the eyes and punched his mouth using my Crop-a-dile and adhered a piece of Basic Black cardstock to the reverse for definition, before adhering with dimensionsals.
The greeting I used on this card is from the 'Good Greetings' set that is currently available free with qualifying party sales of £200 or more for parties held between now and 31st October. This is such a versatile set - whilst this card has a definite Halloween feel to it, I think the 'boo to you' greeting means it would work as a nice 'Hello' card for this time of year. If you would like to earn this greetings set for free, I do still have a couple of slots available for parties in October so if you'd like one, do get in touch as soon as possible!
If you like this sketch, you should check out the other cards over at Create with Connie and Mary - there are some great interpretations and ideas of how to use it.
Back tomorrow with this week's Design Team sketch for the new challenge over at Colour Me...! and this week's Weekly Wednesday Deals!
Until then, happy stampin'!
Stampin' Up! Supplies Used: