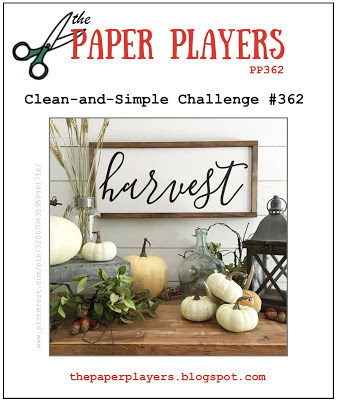
It's Sunday and time for this week's new challenge over at The Paper Players! It's the turn of my good friend, the awesome LeAnne, to host this week and she has a timely clean and simple challenge for us to work with:

I'm also playing along with the team over at Stamp Ink Paper today as I'm just in time to link up with their CAS Fall challenge and the lovely ladies over at SUO Challenges where the theme is Autumn colours.
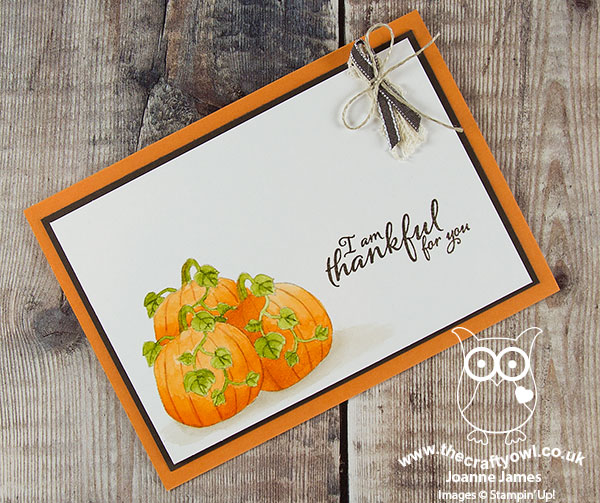
When I think about harvest, I think about harvest loaves, vegetables from the garden ... and pumpkins! I love the photo inspiration that Nance found for this week's challenge and I decided I just had to have pumpkins on my card. I decided to go with something a little different - take a look:
Here's the low-down on today's card:
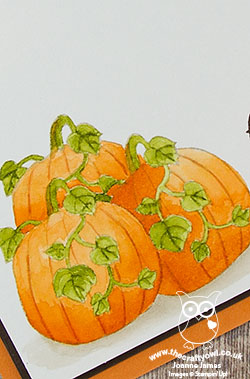
Pumpkins Are For Harvest, Not Just For Halloween - Most of the pumpkin stamps I have in my set are ones with carved faces, all ready for Halloween. This stamp from the new seasonal catalogue is one of the few that I own that isn't - do you recognise which set it comes from? It's actually from the 'Seasonal Chums' set on page 47, but it's not the front of the face on the Halloween tag - it's the back piece of the same tag. I've circled it below so that you can see which one I mean:
.png)
This part of the stamp makes for a perfect pre-carved pumpkin - all I needed to do was mask off the front portion of the stamp and stamp just the back image. I also created a mask out of a post-it note to enable me to stamp my trio of pumpkins overlapping each other, to create depth and dimension.
No Line Watercolouring - I decided to use a little no-line watercolouring to give my pumpkins a natural look. I love this effect and it's so easy to achieve: simply stamp your chosen image in a pale colour such as Sahara Sand onto watercolour paper, then use your chosen inks and an aquapainter to colour your stamped images normally, making the lines 'disappear'.
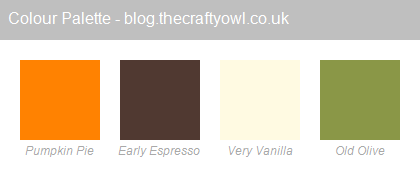
Colours of Fall - Warm yellows, oranges, reds, browns and olive greens are the colours I associate with autumn and I chose to focus on orange and brown on my card today. Here's my colour palette should you wish to save it as inspiration for your fall projects:
To finish my card I added a little lace and ribbon embellishment (retired bits and pieces); not something I usually do with a CAS card, but I felt my card needed a little something just to balance it visually. I love this card!
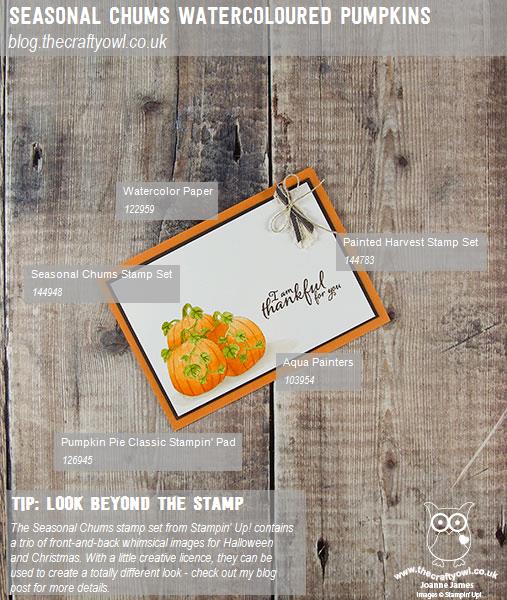
Here is the visual summary of the key products used on today's project for you to pin for easy reference:
You can see all of my Product and 'How To' summaries on my 'How To - Tips and Techniques' Pinterest board in case you've missed any.
Before you reach for your ink and papers, check out what our amazing team has created to inspire you this week:
The Paper Players Design Team
Here's a quick recap of our challenge rules:
1. Create a new paper project
2. Upload your creation to your blog with a link back to us and provide a direct link to the post featuring your challenge submission.
3. Please link your card to no more than four challenges, TOTAL.
4. Have FUN!
I look forward to seeing your clean and simple creations in the gallery this week. Enjoy the rest of your weekend as it will be over all too quickly; mine is sports-filled, with hockey, swimming and ice hockey yesterday and basketball and more hockey today! I'll be back tomorrow with another project; until then, happy stampin'!
Stampin' Up! Supplies Used: