by Joanne James16. November 2014 07:00It's Sunday and time for another challenge over at The Paper Players, where this week Ann has a clean and simple challenge with a 'thankful' theme for us:

Inspired by the leaves in our challenge badge this week, I decided to use up a few more of my much-loved Autumn Wooden Elements and create a colour-block card using the colours over at Colour Q (substituting for the closest match in my collection) - I'm also linking up with Catherine & Cathy Creates where the theme is 'thankful for fall'. Here is my card:
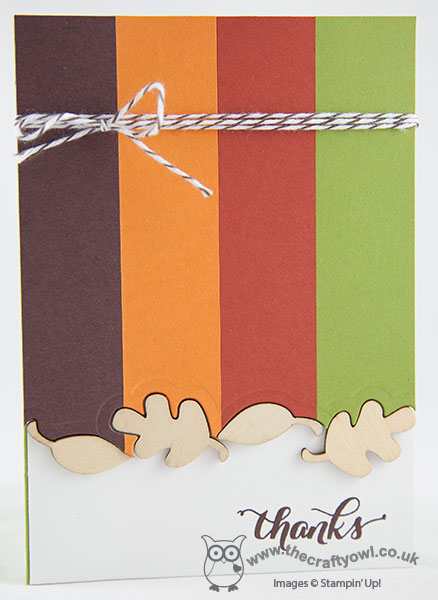
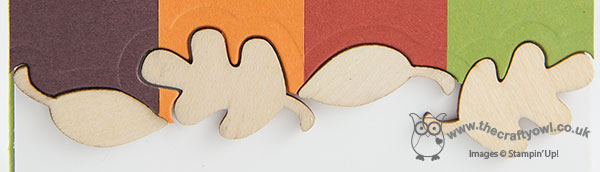
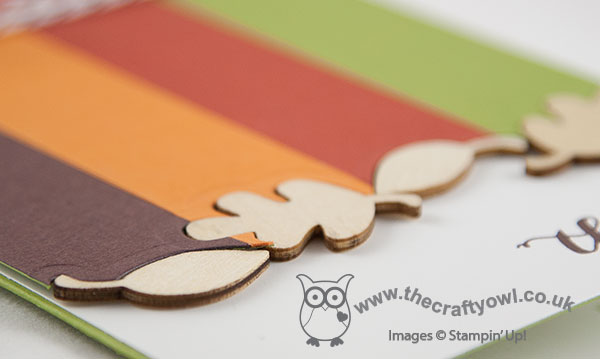
I used a base of Old Olive, then matted the front with a piece of Whisper White that I had stamped in the corner with my 'thanks' sentiment from Another Thank You in Chocolate Chip. I then took a piece of Old Olive and I added 4 panels to it, one each in Chocolate Chip, Pumpkin Pie, Cajun Craze and Old Olive. I then lined up my Fall Fest Framelits and cut a shaped edge, that mirrors the shape of the wooden leaves. This panel was adhered to the base using dimensionals - this allows the wooden leaves to fit right into the shaped edge - here's a closer look:
To finish, I added some Early Espresso baker's twine across the top and tied it in a bow. A super-CAS card using some fun techniques. Do pop by The Paper Players challenge blog to check out what the other designers have come up with this week - there is great inspiration there, as always.
We are having a quiet sport-free weekend this week; both James Juniors have been poorly this week and we are keen that they recover themselves enough to survive the rest of what is a busy half-term for them. We do have a little treat in store this afternoon though; I'll let you know well it's received tomorrow!
Back tomorrow with another project; until then, happy stampin'!
Stampin' Up! Supplies Used:
b4d682a5-3606-4dbe-97fc-b44d7c19c986|0|.0|96d5b379-7e1d-4dac-a6ba-1e50db561b04
Tags: Autumn Wooden Elements, Colour Blocking, Another Thank You, Big Shot, Shop online, Stampin' Up, Stampin' Up Card, Stampin' Up Card ideas, Stampin' Up Supplies, Thankyou cards, The Paper Players, Fun Fall Framelits
Cards | Stamping
by Joanne James28. October 2014 22:51I'm very late posting today - eek! - having had a fun day with the James juniors, amongst other things shopping for the contents for our annual Samaritan's Purse Shoeboxes. This is something we really enjoy and is a great way to encourage the children to think of others less fortunate than themselves as we are about to embark on one of the most commercial seasons of the year and to be grateful for all they have.
With gratefulness in mind, I thought I would share a little pumpkin that I made using the Curvy Keepsake Thinlit Die - this would make a perfect Thanksgiving table favour for my American readers and equally with an alternative tag would be suitable for Halloween too. There are tons of variations on pumpkins made with the thinlit die out there in blogland, but this is my version:
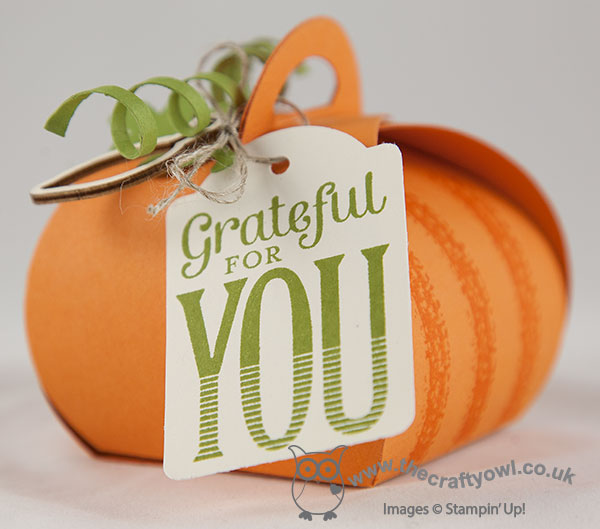
So simple to make: just cut two pieces of Pumpkin Pie cardstock with the thinlit, stamp the inner sections of the box with one of the stamps from the Work of Art set, then finish with some Old Olive leaves cut using the Fun Fall Framelits, some twisted tendrils, a couple of my favourite Autumn Wooden Embellishments and a tag from the Merry Everything set, all tied on with linen thread. I love this die and have made so many gorgeous boxes with it; I am hoping to be able to share some of them with you later this week.
Meanwhile, today I'm going to leave you with a fun photo that is destined for this year's Halloween Project Life page for sure - whilst out shopping today, we treated ourselves to some Halloween 'trick or treat' donuts at Krispy Kreme; sure enough, we had one of each filling:
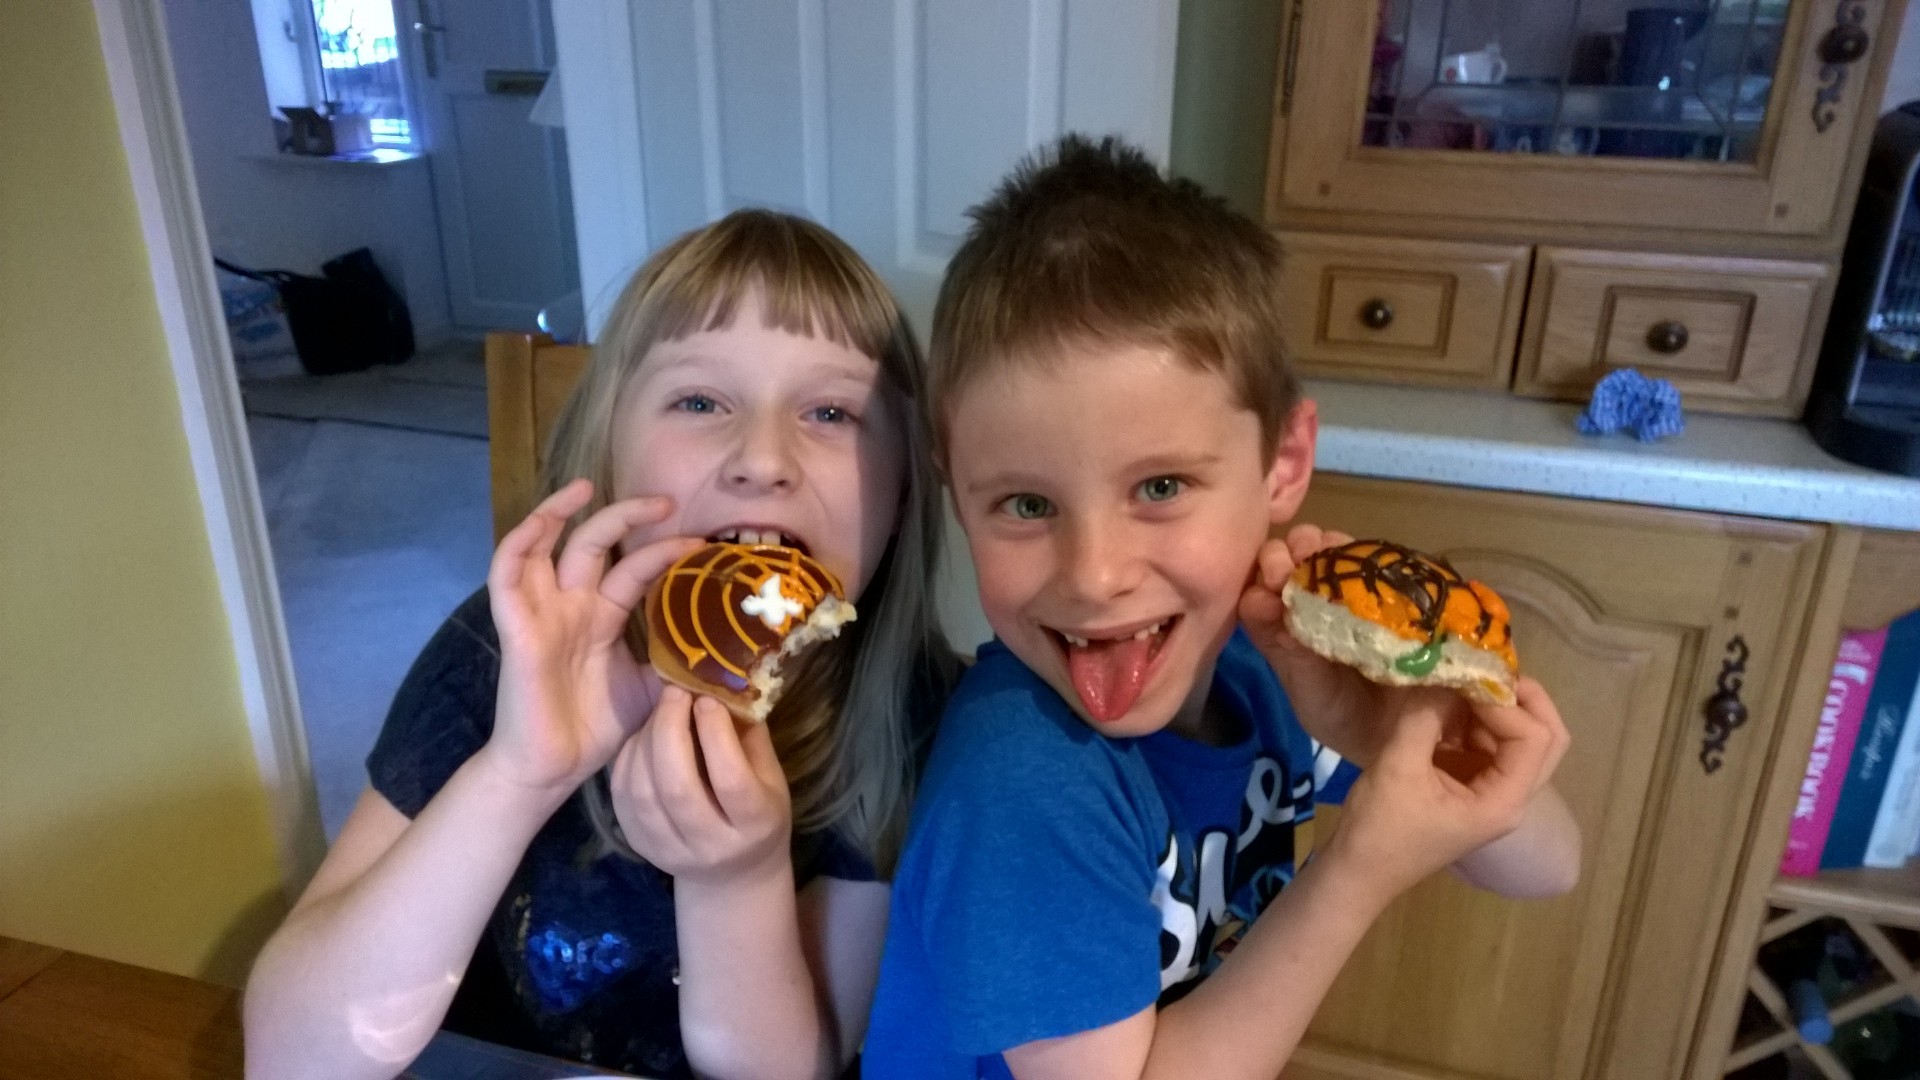
The oozing green filling was actually quite nice, but the appearance was definitely a surprise!
Back tomorrow with this week's Wednesday Deals and my Design Team post for Colour Me...! Until then, happy stampin'!
Stampin' Up! Supplies Used:
05eacde4-7ef0-4381-a983-557c58f6acab|0|.0|96d5b379-7e1d-4dac-a6ba-1e50db561b04
Tags: Merry Everything, Note Tag Punch, Curvy Keepsake Box Thinlits Die, Autumn, Autumn Wooden Elements, Big Shot, Fall, Fun Fall Framelits, Halloween, Shop online, Stampin' Up, Stampin' Up Card ideas, Stampin' Up Supplies, 3D Projects, boxes
3D Projects | Stamping
by Joanne James27. October 2014 20:19Happy Monday everyone! I've had a fun day today: made today's blog card first thing, caught up with a friend who's been away for a while, then spent the afternoon with the lovely ladies that attend my monthly card class - there can't be a better way to start my week! I tell you, those ladies are an absolute hoot and there are some real artists amongst them for sure (yes Chris, the reindeer was inspired!!) Pictures to follow on my Facebook page!
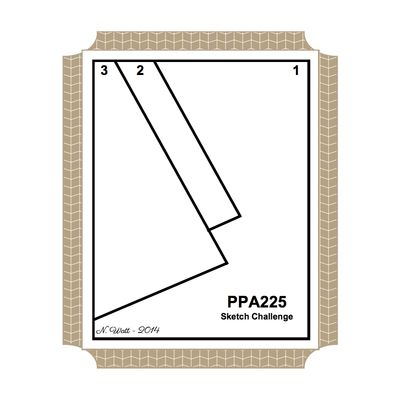
We used the Endless Wishes stamp set in my class today, but today's blog card is back on the theme of Halloween - I need to get the use out of my Halloween sets before they get retired for another year! I took my inspiration from the photo over at Fusion, but didn't double up and use their sketch too (I might have another go at this later in the week) - instead I used the rather interesting layout over at Pals Paper Arts:
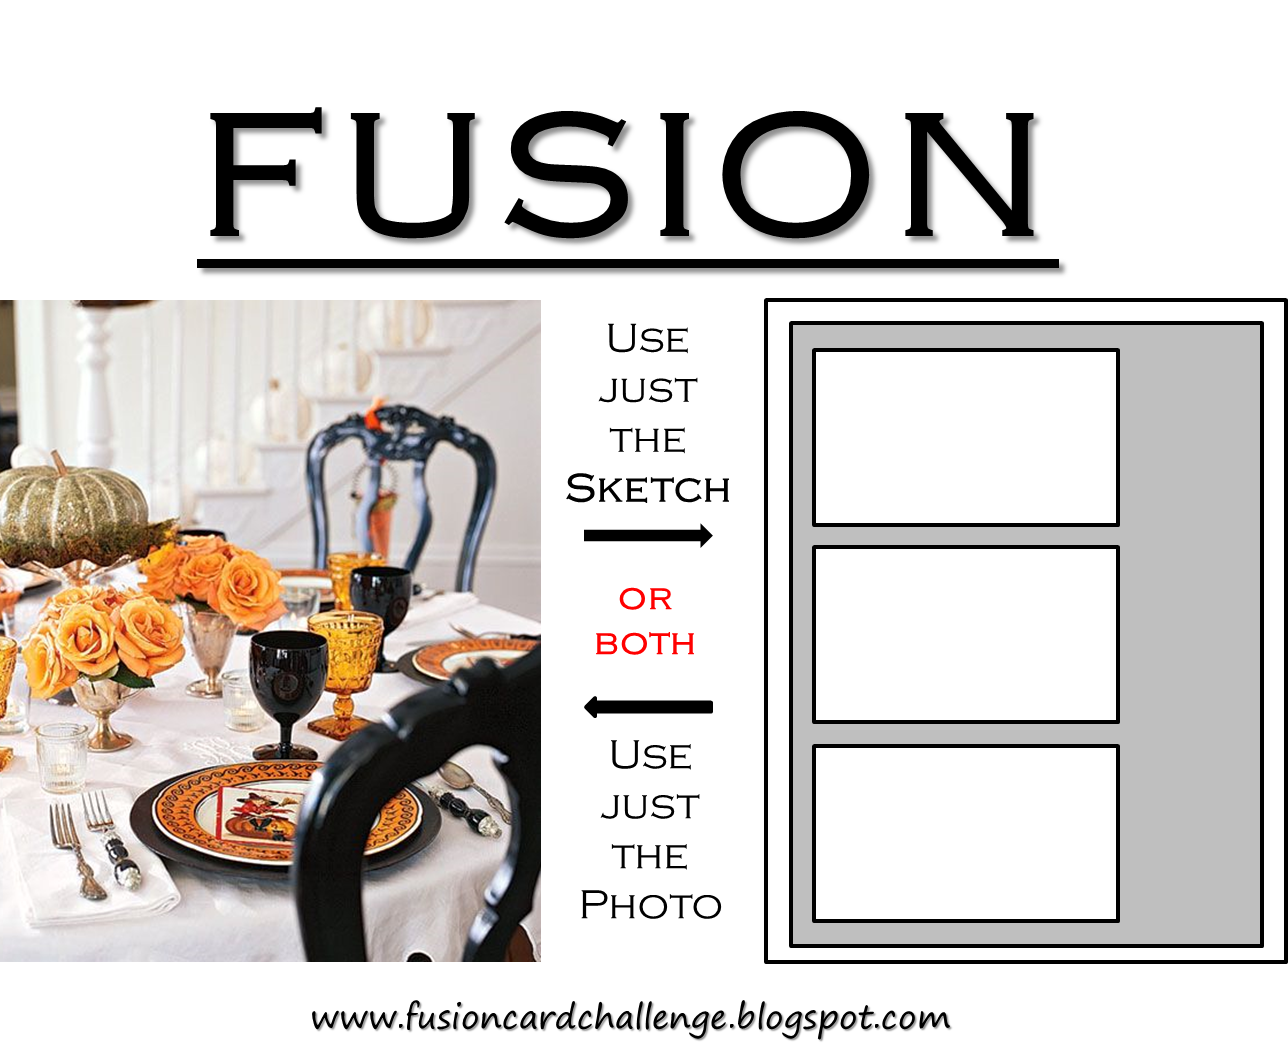
I knew I wanted to use orange with a touch of black and definitely needed to incorporate the pumpkin in the photo - this is what I came up with:
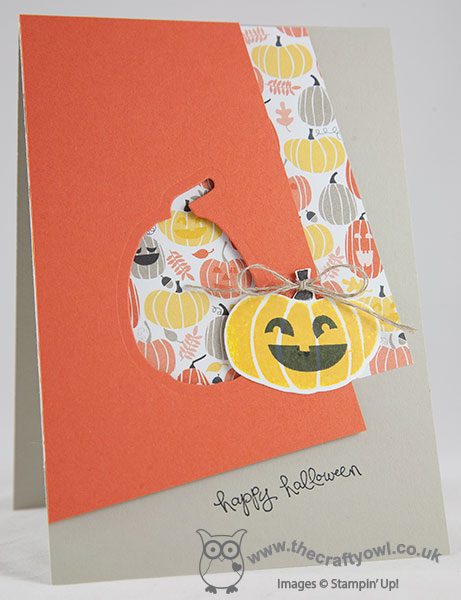
I used Sahara Sand for my card base, and used a piece of the Motely Monsters DSP that is covered with happy smiling pumpkins as my first angular layer. For my top piece, I used a piece of Tangerine Tango cardstock and cut out a pumpkin shape using my Fall Fest framelits, so that the DSP beneath would show through. I then stamped another smaller pumpkin is Crushed Curry onto Whisper White, stamped a face in Memento Black, cut this out with a framelit, tied it with a piece of linen thread and adhered to the edge of the open aperture. I popped this whole section onto dimensionals to give a little extra lift and depth. To finish, I stamped my sentiment from 'Good Greetings' in Memento Black onto the base of my card.
I hope you like today's card; back tomorrow with another project. Until then, happy stampin'!
Stampin' Up! Supplies Used:
c0351d83-e8e2-49f3-9dce-33cb991fade2|0|.0|96d5b379-7e1d-4dac-a6ba-1e50db561b04
Tags: Halloween, Fall Fest, Fun Fall Framelits, Magnetic Platform, Motley Monsters, Shop online, Stampin' Up, Stampin' Up Card, Stampin' Up Card ideas, Stampin' Up Supplies, Big Shot, Good Greetings
Cards | Stamping
by Joanne James13. October 2014 10:19Monday already - where does the time go?! This week promises to be full of fun and excitement, but for today there is lots to be done! I have a Stampin' Up! party to prepare for this evening and I need to put the finishing touches to tomorrow's project class, so a nice early blog post is most definitely the order of the day! As Halloween approaches, lots of the current colour challenges have colour palettes to match - today's card uses this week's colours over at Pals Paper Arts and this week's CAS(E) This Sketch:
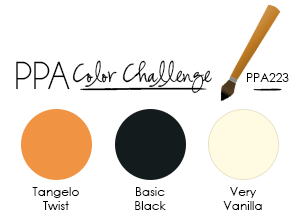
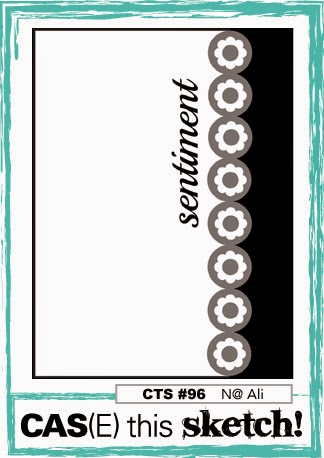
There are some great examples on the challenge page where these colours have been used in a non-traditional way, but I decided to stick with the spooky theme and create another Halloween card - take a look:
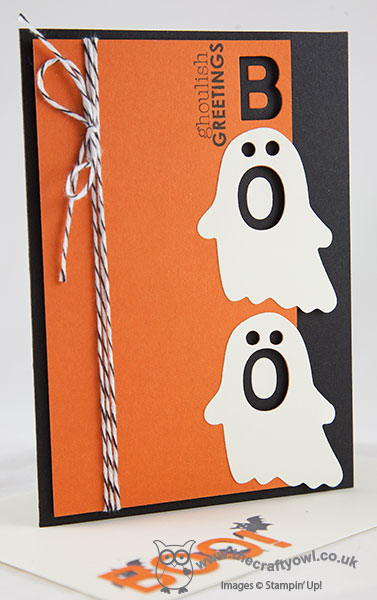
I used a base of Basic Black cardstock, then used a panel of Tangelo Twist that is narrower than the base and popped up on dimensionals. I used my little letter thinlits to cut the word 'BOO' out of the length of the orange cardstock, then I used my Fun Fall framelits to cut two ghosts out of Very Vanilla and adhered these to the edge of the Tangelo Twist piece, aligning the 'O's to look like the ghost's mouth - they really look like they're floating off the edge of the card. I finished with a stamped sentiment and tied some black and white baker's twine around the Tangelo Twist layer and tied in a bow.
Whilst I used the negative space of the die cut letters for my card, the letters themselves didn't go to waste - I stamped some bats from 'Freaky Friends' onto a Very Vanilla envelope then adhered my 'Boo!' on top to add interest. Waste not, want not, as the saying goes!
I hope you like today's fun spooky card; back tomorrow with something altogether more Christmassy! Until then, happy stampin'!
Stampin' Up! Supplies Used:
by Joanne James29. September 2014 08:00Happy Monday everyone! Today I'm sharing another autumn-inspired card using this week's sketch over at Pals Paper Arts and this week's colours at Colour Q as my inspiration:
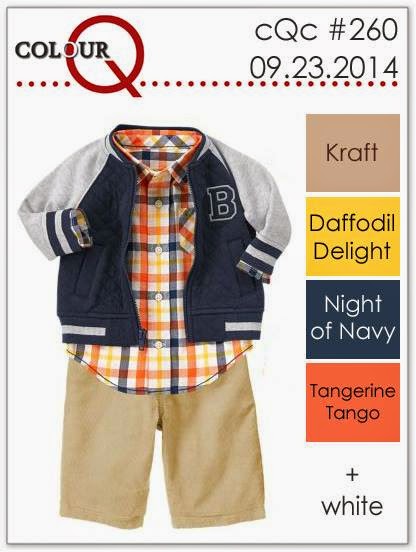
I love this colour palette and resisted the urge to recreate that check shirt, which is adorable! Instead I decided to use my Fall Fest framelits to recereate the layout of the sketch and make a bright Autumnal card - here it is:
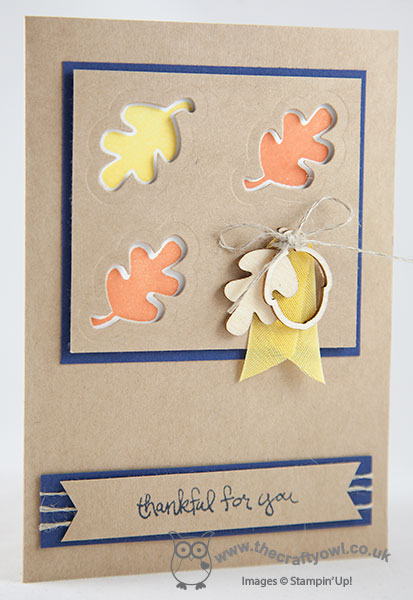
I used Kraft cardstock for the body of my card, which has a lovely texture and thickness to it. I matted a square panel of Night of Navy onto the base, then stamped some leaves in orange and yellow onto Whisper White cardstock and overlaid this with another piece of kraft attached with dimensionals with the same leaf shapes cut out so that you can see the stamped leaves beneath. The leaves are edged in white, which just helps add to their definition. In space of the fourth square, I didn't cut out - instead I tied an acorn and leaf wooden embellishment together with a piece of Daffodil Delight seam binding ribbon and some linen thread and attached them to my card. A little bulky for mailing, but a nice statement for a hand delivered card.
I added the sentiment to a banner on the bottom, using another of the stamps from the Good Greetings set (available as a hostess exclusive until the end of October) and mounted this on a piece of Night of navy wrapped with linen thread.
That's all for today; I have a Christmas card class to look forward to later using Festival of Trees, which should be fun! Back tomorrow with another project; until then, happy stampin'!
Stampin' Up! Supplies Used:
0a3ab614-cd07-42ea-a212-96cd52c4fc44|1|3.0|96d5b379-7e1d-4dac-a6ba-1e50db561b04
Tags: Fall, Fun Fall Framelits, Fall Fest, Autumn, Autumn Wooden Elements, Good Greetings, Shop online, Stampin' Up, Stampin' Up Card, Stampin' Up Card ideas, Stampin' Up Supplies
Cards | Stamping
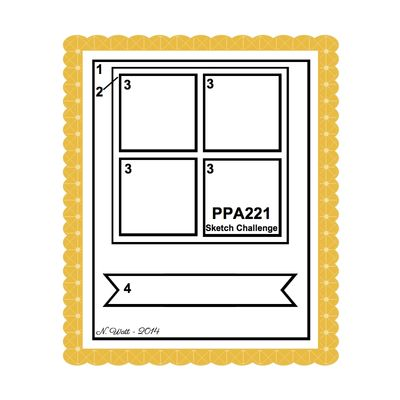
by Joanne James28. September 2014 07:00It's Sunday which means one thing - it's time for our weekly challenge over at The Paper Players! This week Sandy has a great sketch for us:

Sketches are my absolute favourite challenges - so many possibilities, and this sketch is no exception! So much so, I actually made two cards using this sketch already which I thought I would share with you today. If you've come from The Paper Players blog, this is the card that you will have seen there:
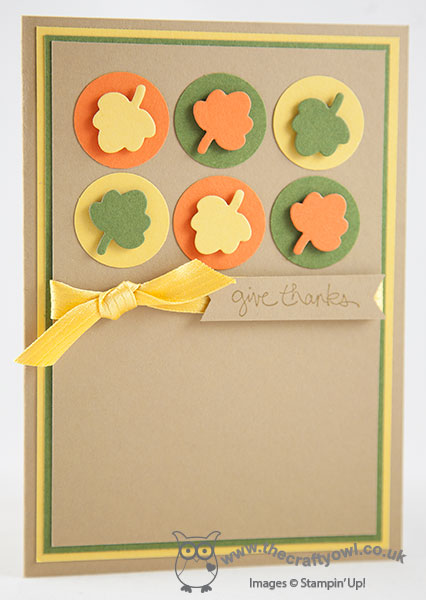
My first take on the sketch was this fall-inspired card, where I layered a combination of 1" punched circles and little leaves cut out using the Big Shot and the Fall Fest framelits, in Hello Honey, Mossy Meadow and Tangelo Twist on a base of Baked Brown Sugar, and finished with a simple knotted bow of Hello Honey satin ribbon and a sentiment from the 'Good Greetings' hostess set. I haven't used this colour combination before but thought it would make a nice fall colour scheme; I prefer these colours in cardstock rather than stamped on Whisper White, as I find the inks too intense somehow. I am linking this card up with the challenge over at SUO Challenges this week as they are looking for cards using autumnal colours, so this totally fits the bill.
I liked this sketch so much, I couldn't stop at one card though; the card below is the very first thing that came to me when I looked at the sketch and it was so simple I just had to make it and share it with you:
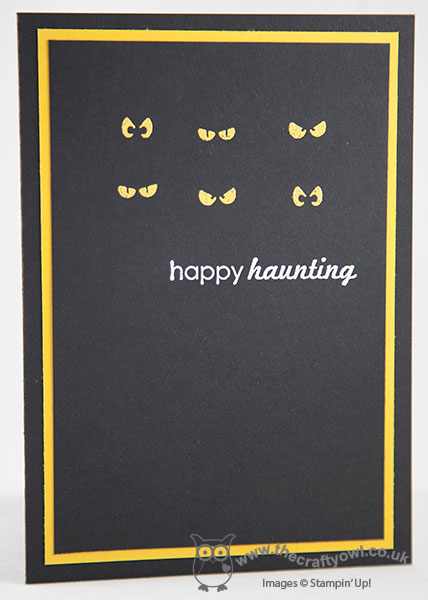
I stamped the 3 pairs of eyes from 'Freaky Friends' twice each in Versamark onto Basic Black cardstock and heat embossed in Crushed Curry, then did the same with the sentiment and heat embossed that in white. I then matted this panel onto a panel of Crushed Curry and a Basic Black card base. Simple, but so effective in real life - the eyes have a real shine as if they are looking out of the card at you!
I had to stop there for today, but I know I will use this sketch again - it is a keeper! Do pop by The Paper Players site and check out the blogs of the rest of the design team - there are some awesome cards this week, as always!
Right, we have a morning of sport in the James household today - Rebecca and I are going to explore a new hockey club and the boys are off to check out a rugby club, before reconvening for lunch and hopefully a restful afternoon.
Back tomorrow with another project; until then, happy stampin'!
Stampin' Up! Supplies Used:
904c5d09-e82d-4928-b779-6567e293d40c|0|.0|96d5b379-7e1d-4dac-a6ba-1e50db561b04
Tags: Big Shot, Fall, Fun Fall Framelits, Good Greetings, Freaky Friends, Ghoulish Greetings, Halloween, The Paper Players, Shop online, Stampin' Up, Stampin' Up Card, Stampin' Up Card ideas, Stampin' Up Supplies
Cards | Stamping
by Joanne James23. September 2014 20:00As promised, here's my second post today as I wanted to share with you the card I made for this week's sketch challenge over at Create With Connie and Mary:

I love a sketch challenge and was intrigued by this unusual layout, which was crying out for the use of some washi tape with those bold stripes, something that is quite under-utilised within my craft stash at times. Anyways this was one of those cards that the minute I saw the sketch I knew what I wanted to do with it, so it took me next to no time to pull this card together. Here's my card:
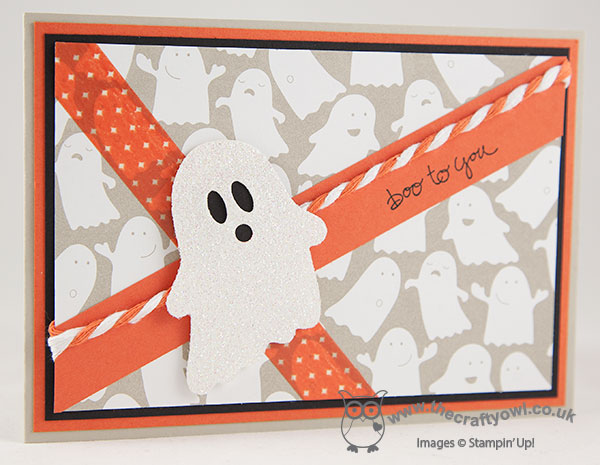
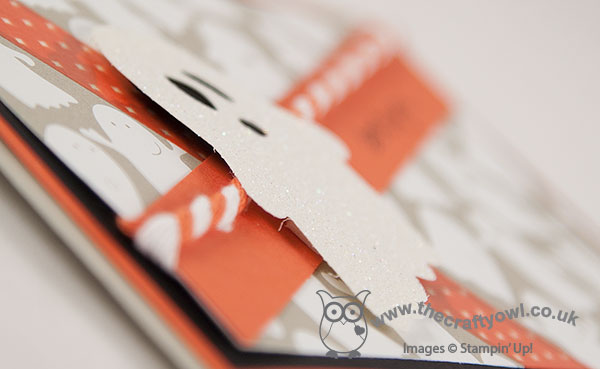
I used a base of Sahara Sand for my card as this is the colour of the ghost DSP from the Motley Monster set, but as it's quite neutral used lots of splashes of Tangerine Tango to really bring this card together and prevent it from looking washed out. By the way, check out the faces on the ghosts on the paper - how cute are they?! In addition to the mat, I added a strip of Tangerine Tango Retro Fresh washi tape for the vertical band (I love how you can see the ghosts through it - adds to the spooky I think!) and then used a piece of Tangerine Tango cardstock for the horizontal band, onto which I stamped my 'boo to you!' greeting. I bordered this with a piece of thick orange and white two-tone trim (I frayed the ends before adhering to the back of my panel so that it wouldn't have too much bulk). Lastly, I finished with a lovely Dazzling Diamonds sparkly ghost (thank you Mary Brown for the inspiration on a previous card of yours - love it!) I wanted my ghost to look towards the sentiment so cut the paper on the reverse using my framelit so that I could turn him over (hope that makes sense). I used one of the eyelits from the 'Chalk Talk' framelits to create the eyes and punched his mouth using my Crop-a-dile and adhered a piece of Basic Black cardstock to the reverse for definition, before adhering with dimensionsals.
The greeting I used on this card is from the 'Good Greetings' set that is currently available free with qualifying party sales of £200 or more for parties held between now and 31st October. This is such a versatile set - whilst this card has a definite Halloween feel to it, I think the 'boo to you' greeting means it would work as a nice 'Hello' card for this time of year. If you would like to earn this greetings set for free, I do still have a couple of slots available for parties in October so if you'd like one, do get in touch as soon as possible!
If you like this sketch, you should check out the other cards over at Create with Connie and Mary - there are some great interpretations and ideas of how to use it.
Back tomorrow with this week's Design Team sketch for the new challenge over at Colour Me...! and this week's Weekly Wednesday Deals!
Until then, happy stampin'!
Stampin' Up! Supplies Used:
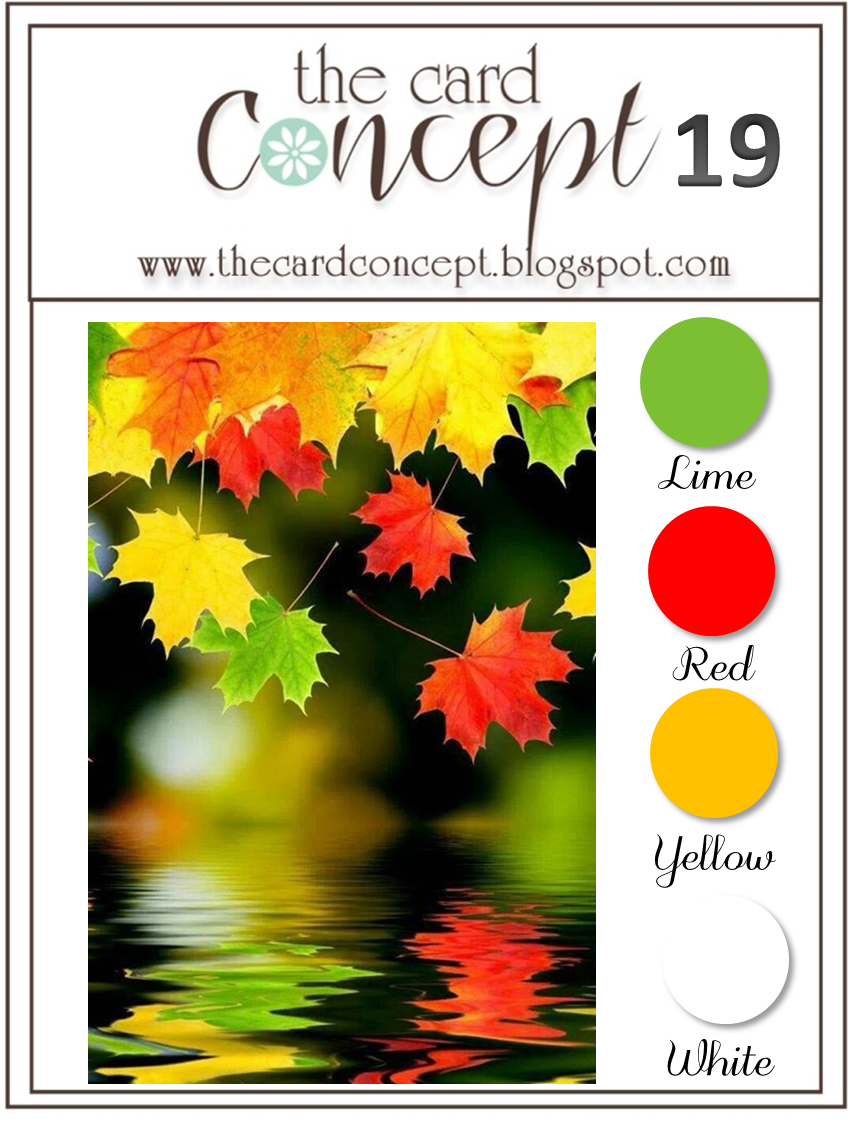
by Joanne James23. September 2014 13:30Hello everyone! Today I'm sharing my card for this week's challenge over at The Paper Craft Crew, for which I also used the current colour palette over at The Card Concept:

I thought the sketch layout with the word bubbles and the leafy inspiration photo would combine to create the perfect opportunity to showcase the sentiments in the 'Gratitude For Days' stamp set - a rather unsung hero from the current seasonal catalogue I think, but a set that I have used lots and lots. Here is my card:
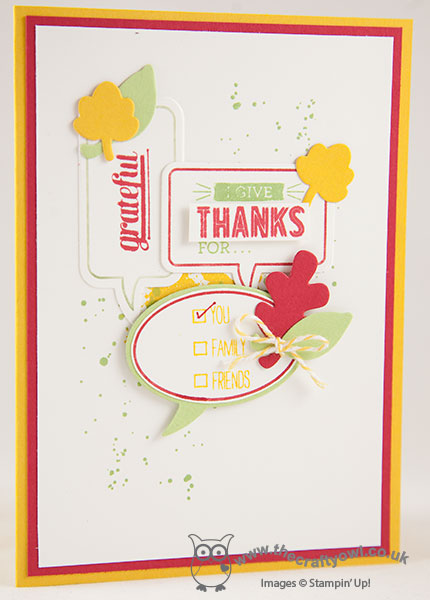
I used a combination of Real Red, Crushed Curry and Wild Wasabi for my card and inked the outlines of the Just Sayin' stamped word bubbles using my markers then stamped the insides with various 'gratitude' stamps in contrasting colours. I used some little leaves cut with my Fall Fest framelits as the embellishment for the word bubbles, and gradually layered them over a Gorgeous Grunge background to achieve my finished design. I think this still qualifies as 'clean and layered' as far as The Card Concept is concerned (if you've ever wondered about the definitions of the various cardmaking styles, you should check out their site - it gives some great guidelines), maybe bordering on 'freestyle collage', although probably not random enough to truly be a collage!
Hope you like my card; I'll pop back later with another quick make today for this week's challenge over at Create With Connie and Mary, so stay posted. until then, happy stampin'!
Stampin' Up! Supplies Used:
1e9c525a-9bc1-419e-9fbd-a468668813b6|0|.0|96d5b379-7e1d-4dac-a6ba-1e50db561b04
Tags: Thankyou cards, Just Sayin', Word Bubbles Framelits, Gratitude For Days, Fall, Fun Fall Framelits, Gorgeous Grunge, Big Shot, Stampin' Up, Stampin' Up Card, Stampin' Up Card ideas, Stampin' Up Supplies, Shop online
Cards | Stamping