Creative Escapes From The Crafty Owl - October Luxury Crafting Weekend Retreat Booking Offer!

by Joanne James25. August 2018 10:50

Happy Bank Holiday weekend to my UK readers and I hope the rest of you are finding fun (and maybe even crafty!) things to do this weekend. I have managed to squeeze in a little craft time this week so do have lots of new projects to share with you (especially using the items in my Autumn-Winter preorder box, I can't stop creating with them!) but firstly today I want to talk about creative escapes of a different kind!
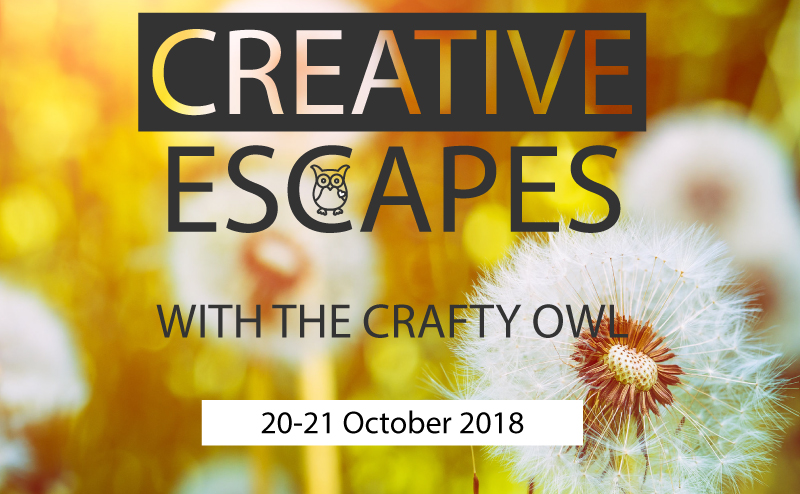
 

Further to the successful weekend retreat I held earlier this year with my friend and fellow demonstrator Louise Sims, I have another two sole ventures planned. The same venue, more great projects and most importantly a weekend away, full of crafting and good company. If getting away from everyone and everything and having some ME time appeals, then a luxury weekend of crafting and a Creative Escape with The Crafty Owl sounds just the thing for you.

Where is the retreat held?

The venue for the Craft Retreat is the gorgeous 4 star Macdonald Ansty Hall Hotel, conveniently located just off the M6/M69, near Coventry, Warwickshire.

Set in beautiful grounds it is the perfect destination for a getaway; gorgeous surroundings, good food and your own stylish bedroom for the night.

Its central Midlands location just off junction 2 of the M6 motorway means it has easy access from all parts of the country – making it a perfect destination break for you and your friends from afar.

What is included?

The Creative Escape package includes an overnight stay and all food for the weekend, lunches, snacks, evening meal and breakfast together with unlimited tea and coffee. You have 2 full days of crafting with your own table for the whole weekend – no need to tidy away! Bliss!

A goody bag of Stampin’ Up! crafting supplies is also part of the package and will be more than £100 in value. The supplies will enable you to complete the projects for the classes run throughout the weekend and you'll have lots left over to take home too!

The Classes

The classes offered during the weekend are optional. The weekend is yours, so you can choose to keep with class pace or do your own thing. There is no requirement to complete everything, you can do exactly what you want – chat, craft, chill … the choice is yours. Choose to craft at every possible moment, or take a break for a walk or a drink in the lounge – it’s all up to you. Classes are suitable for both beginner and experienced crafters alike - there really is something for everyone.

2018-19 Craft Retreat Dates

Booking is currently open for the following dates:

Saturday 20th October - Sunday 21st October 2018​   **LIMITED AVAILABILITY** LAST FEW SPACES REMAINING
Saturday 2nd March – Sunday 3rd March 2019

Fully inclusive price for 1 nights accommodation,  with lunch and a 3 course dinner on Saturday, followed by breakfast and buffet lunch on Sunday. It also includes unlimited tea, coffee or hot chocolate & snacks, 4 crafting classes and a goody bag worth more than £100 full of Stampin’ Up! products.

The price of a Creative Escape With The Crafty Owl is as follows:

Single occupancy is £325 per person or
Double occupancy is £305 per person

Early booking discounts for all Creative Escapes apply (£292 pp and £272 pp respectively).

Spaces are limited with booking brisk for next March and only a few spots remaining for this October. I am keen to fill the last few spaces for the October weekend so with this in mind I have a Bank Holiday weekend booking incentive for you: 

Bank Holiday Creative Escapes Booking Offer:


** Book and pay in full for your October Creative Escape before 31st August 2018 and you will receive both a free ink pad and early booking rates for next March too. **


Once you've done one, you won't want to miss the next one!

The October Creative Escape will have a distinctly Christmas theme so why not come along and give yourself a head start on your creative makes for the festive season? 


How do I book?

Sounds like your kind of fun? Email to joanne@thecraftyowl.co.uk and I will contact you to confirm payment details. If you would like to book a place on the March Creative Escape, you are still able to join my payment plan so you can split the cost into monthly payments. Full terms and conditions are available on the Creative Escape Crafting Retreats page on my website.

If you have any further questions or queries, please do get in touch - I would love you to join me!


I'll be back soon with my next creative project; until then, happy stampin'!


Garden Impressions Floral Pocket Card

by Joanne James21. August 2018 10:00

It's Tuesday and I have my third post of the week! Today I'm sharing another of the cards that I made in one of my recent technique classes featuring the Garden Impressions Product Suite that is perfect for the current floral challenge over at Inspire.Create:


I made a pocket card featuring one of my favourite Garden Impressions paper designs with an over-the-top diecut embellishment - take a look: 


Here's the low-down on today's card:

Impressionist Inspiration - You now what a fan of designer series paper I am and the Garden Impressions paper is no exception; I just love these bold bright colours and the Impressionistic style of the patterns and florals in this pack. I like each and every pattern in this pack and this is already my most-used papers. Here I used it to decorate the flaps of my pocket card, which I made from co-ordinating Pacific Point cardstock using my trusty Envelope Punch Board and Envelope Expert tool (my finished card measures 10.5cm x 15cm).

Paper-Pieced Springtime Impressions - Not content with the florals on my basic pocket card sleeve, I decided to add the fabulous corner diecut from the Springtime impressions Thinlits set. I diecut a base in Shaded Spruce, then cut the whole thing again in Melon Mambo and Calypso Coral and snipped out some of the flowers and paper-pieced them onto my base piece. This may seem extravagant, but if you keep the offcuts you can use them to create another one in an alternative colourway, so there is very little waste really. I finished the whole thing with a Mango Melody butterfly. Bold? yes. Bright? Absolutely. Yet I love it! 

Abstract Florals - I added my sentiment to a banner tag on the front of my pocket, so that the whole of my inside card is blank for my message. I couldn't leave this piece 'naked' though, so I added a row of bright pink flowers courtesy of the Abstract Impressions stamp set across the bottom. I love this stamp set - so easy to use as it really is easy to line up the images for the two-step stamping required.

Here is the visual summary of the key products used on today's project for you to pin for easy reference:


You can see all of my 'How To' summaries on my 'How To - Tips and Techniques' Pinterest board in case you've missed any. 

Enjoy your day and I'll be back tomorrow with another project. Until then, happy stampin'!


Stampin' Up! Supplies Used:

Table built using Product Table Builder by The Crafty Owl - Independent Stampin' Up! Demonstrator.

Never-Ending Garden Impressions and A Designer Paper Obsession!

by Joanne James8. August 2018 07:00

A midweek post for you before I head out on today's activities with the James Juniors! Today I'm sharing a card that is perfect (and just in time!) for the current challenge over at As You See It:

This was an easy one for me! There are lots of things that fall in and out of love with as I craft, but there is one thing that I will always be obsessed with - and that's designer series paper! I have boxes and boxes of the stuff, old and new (about 25 12"x12" storage boxes at the last count!!). I use it - but I hoard it too! One of my team jokingly shared the attached image on our team page recently saying 'I wonder if you know anyone like this?'

Image may contain: text

Of course, she knew it was perfect for me :-) I know that some of you reading this will also share my passion for patterned paper, so if you would like to see a fun project that showcases all those lovely patterns, read on! 

In my recent technique class featuring the Garden Impressions Suite, we made a never-ending card featuring the gorgeous Garden Impressions papers. This is a photo-heavy post, so that you can see each of the sides of these fun-fold cards. So first up, here is the version we made in class:

This is the front:


The card then opens from the centre to reveal the next 'side':


Followed by a third fold:


And then the final 'side', with space above the sentiment to write a personal message:


The next fold then takes you back to the beginning. Whilst the still photos show you each of the sides, they don't really highlight the mechanism; I shot a  short video of one of the ladies at my class demonstrating how hers worked which will give you a much better idea of why it's called a never-ending card -you can see this over on my Facebook page below:.


After the class I also made another one using the same papers in an alternative colourway, and decorated it with some of the diecut pieces from the Springtime Impressions thinlits dies set - take a look:


The basic mechanism for these cards, which measure 6" x 6" finished size, is fairly straightforward; it's choosing how to decorate them and which papers to use that takes the thought - especially when your collection is as vast as mine!

Here is the visual summary of the key products used on today's project for you to pin for easy reference:


You can see all of my 'How To' summaries on my 'How To - Tips and Techniques' Pinterest board in case you've missed any. 

Enjoy your day and I'll be back tomorrow with another project. Until then, happy stampin'!


Stampin' Up! Supplies Used:

Table built using Product Table Builder by The Crafty Owl - Independent Stampin' Up! Demonstrator.

Amazing Congratulations On Your New Little One

by Joanne James16. July 2018 08:00

I finally managed to get a little time in my craft room this weekend and made a card that was originally for this week's sketch challenge over at Freshly Made Sketches but also works for the challenge over at Color Throwdown and Addicted to CAS this week:


I changed the orientation of my card but kept the layout and decided to create a gender-neutral baby card - take a look:


 Here's the low-down on today's card:

Amazing Congratulations - The sentiment combinations from the Amazing Congratulations stamp set are perfect for this week's FMS sketch and even helped me get over my paranoia of a wonky sentiment (thanks for the challenge, girls!) I used my stamparatus to line up all three of the images that make up the main word - I love how this enables you to re-ink the same image too until you get the intensity you want; I would not be able to get such a great outline in Smoky Slate without it for sure.

A Pineapple Punch - I decided to go 'gender neutral' for my baby card - I love to have a few of these in my stash - and chose the new zingy and bright Pineapple Punch as my feature colour - it's so fresh! I used a strip of co-ordinating in-colour designer series paper along the edge and paired it with Daffodil Delight across the sentiment to get the contrast on the lettering.  

Hello Swirly Bird - I wanted something more than just the sentiment for my baby card, so decided to add a pair of proud parents in their nest courtesy of the Swirly Bird stamp set, which I haven't used in a while yet gave me just what I needed whilst keeping the clean and simple feel of my card.

I have one of my monthly technique classes this morning so will come back and edit this post with the visual summary of the key products used on today's project for you to pin for easy reference later. The organised me would have written this post yesterday, but alas a jug of Pimms and the Wimbledon Men's Tennis Finals took my attention instead! 

You can see all of my 'How To' summaries on my 'How To - Tips and Techniques' Pinterest board in case you've missed any. 

Enjoy your day and I'll be back tomorrow with another project. Until then, happy stampin'!


Stampin' Up! Supplies Used:

Table built using Product Table Builder by The Crafty Owl - Independent Stampin' Up! Demonstrator.

Serene Garden PP401 & GDP146

by Joanne James15. July 2018 09:00

It's Sunday and time for this week's new challenge over at The Paper Players! Firstly, I would like to say a big thank you to everyone who joined in with our 400th anniversary celebration theme challenge these past two weeks - what an amazing gallery! You made it very difficult for us to choose our 'cut aboves' and the headliner this week for sure. We will be announcing the results of our random.org draw and the winners of all those amazing prizes donated by our generous sponsors on Wednesday; meanwhile, it's my turn to host this week and I have a bold and vibrant colour challenge for you to work with:


I've had the Serene Garden stamp set and Garden Scene Framelits out on my desk preparing for my next technique class, so decided to use them for my card today, which also uses this week's Global Design Project sketch for my layout:


Here's the low-down on today's card:

A Peek of Granny Apple Green - I've been getting to grips with the new inks in my collection following the recent colour revamp by Stampin' Up! and I chose three of my new favourite bold and bright colours for my challenge this week. That said, my card today features a lot of white in order to balance these colours and keep my card feeling light and bright and not too garish. I've stamped each of the elements of my design - leaves, flowers and butterfly - in one of the challenge colours. The colour that features most is the fresh Granny Apple Green, since I stamped the leafy corner on a mat in the same shade and then used the Garden Scene Framelits to cut out the leaf sections, to reveal the tone-on-tone image below. I toyed with stamping the flowers and butterfly tone-on-tone too, but when I put it together I decided I preferred the colours on white with a little more added with a blender pen - an altogether more subtle affair.

Words of Courage - The Serene Garden stamp set is sentiment-free, so I rooted through my stamp collection and decided these words from the Ribbon of Courage stamp set fit perfectly with my layout and immediately gave me an intended recipient too, which is always nice. The swirly font fits nicely with this stamp set, although I'm sure there will be many others that work well with it too.

Polka Dots and an Embellishment Cheat - When it came to embellishing my card, I added a strip of Lovely Lipstick cardstock with a couple of notches punched out with my 1/2" circle punch to hold my pretty white polka dot tuille. I also added a trio of one of my favourite new embellishments, the glitter enamel dots, around my sentiment and yes, here's the cheat: they are actually Gorgeous Grape and Melon Mambo in colour. They tone in beautifully with the colour scheme though,so I went with it (I know my secret is safe with you!)

Here is the visual summary of the key products used on today's project for you to pin for easy reference:


You can see all of my Product and 'How To' summaries on my 'How To - Tips and Techniques' Pinterest board in case you've missed any. 

I love this colour combo and know it's one I will use again; the tuille bow is a little fussy for my generally clean style, but I do love how easy it is to work with and adds a real touch of pretty to the finished card.

Before you reach for your ink and papers, check out what our amazing team has created to inspire you this week:

Here's a quick recap of our challenge rules:
 
1.  Create a new paper project
2.  Upload your creation to your blog with a link back to us and provide a direct link to the post featuring your challenge submission.
3.  Please link your card to no more than four challenges, TOTAL.
4.  Have FUN!

I can't wait to see what you create with this week's colours and look forward to visiting your blogs this week! Enjoy the rest of your weekend as it will be over all too quickly. Today I will be waving off the eldest of my James Juniors for a 2 week sports tour of South Africa to play hockey and netball and experience all of the tourist delights this fascinating country has to offer. As for me, I will be at home braving week 2 of the summer vacation with the youngest of the James Juniors and continuing to monitor progress on the kitchen renovation project - I know where I would rather be, for sure! I have at least managed to get a little making done over the last few days so I'll be back tomorrow with another project; until then, happy stampin'!


Stampin' Up! Supplies Used: 

Table built using Product Table Builder by The Crafty Owl - Independent Stampin' Up! Demonstrator.

Wild About You Animal Expedition PP399

by Joanne James24. June 2018 09:00

Another busy week in the James household with little time for crafting - boohoo! I did have a great technique class earlier this week where we made cards using the 'Share What You Love' Suite and have had the opportunity to chat with lots of my lovely customers this week as they have been collecting their new catalogue orders, so it's not all bad. And today it's Sunday and time for this week's new challenge over at The Paper Players - yay! It's the turn of our very own queen of diecuts, the lovely Laurie, to host this week and she has my favourite, a sketch challenge, for you to work with:


I decided that the sketch layers lent themselves to featuring some new designer series paper and having just taken delivery of the Animal Expedition papers I had to start cutting them up for my card this week - take a look:


Here's the low-down on today's card:

Animal Antics - My card today contains very little stamping - it really is all about the paper. Oh and how I love designer series paper! I used two different designs from the Animal Expedition DSP on my card: a background panel featuring a selection of cute animals, including the animals to be found in the co-ordinating 'Animal Outing' stamp set along with a few extras too, including crocodiles and a sloth. For my circle element, I used one of the other paper designs featuring larger versions of the same animals and cut out a sloth with a circle framelit, allowing the fussy cut edges to overhang the border of my mount - isn't he just the cutest?

Wild About ... My Everyday Label - The only stamped element on my card is the sentiment. I punched this out using my Everyday label punch by feeding the cardstock into the punch from the back in order to create the longer rectangle, then snipped off the circular elements top and bottom in order to create a uniform shape that was easier to mount. 

A Bright Colour Combo - I chose to use Lemon Lime Twist for my card base and label, to provide a bright contrast to my busy patterned paper. I mounted all of my panels on Rich Razzleberry, pulling the colour from the little purple bird that is chatting to the sloth. I also added a thin border of Old Olive to frame my sloth. Feel free to save this colour combination for your future projects:

Here is the visual summary of the key products used on today's project for you to pin for easy reference:


You can see all of my Product and 'How To' summaries on my 'How To - Tips and Techniques' Pinterest board in case you've missed any. 

Before you reach for your ink and papers, check out what our amazing team has created to inspire you this week:

Here's a quick recap of our challenge rules:
 
1.  Create a new paper project
2.  Upload your creation to your blog with a link back to us and provide a direct link to the post featuring your challenge submission.
3.  Please link your card to no more than four challenges, TOTAL.
4.  Have FUN!

I can't wait to see what you create with this week's sketch and look forward to visiting your blogs this week! Enjoy the rest of your weekend as it will be over all too quickly. We have the last bits of the kitchen to pack away before major building work starts tomorrow on the new one, along with another school project - last week it was Eid cards, this time a map of the Tour de France route - to assist in the completion of. Thank heavens for Stampin' Up! and a ready stash of onhand craft supplies! I'm hoping to get some crafting done this week in between making copious cups of builders tea so will be back soon with more projects sharing some new makes.

Either way, you are definitely going to want to pop by next Sunday for the next Paper Players challenge; we will be celebrating our 400th anniversary and have a ton of fun in store for you! Until next time, happy stampin'!


Stampin' Up! Supplies Used: 

Table built using Product Table Builder by The Crafty Owl - Independent Stampin' Up! Demonstrator.

The Wait Is Over - The New 2018 Stampin' Up! Catalogue Is Here!

by Joanne James1. June 2018 07:00


The wait is over - it's June 1st and the new 2018-19 Stampin' Up! Annual Catalogue is here! I have updated my links on the right hand side of my blog and you will find a permanent link to the new catalogue there, but for today you need look no further than the picture below which will take you straight to the new catalogue:


The catalogue is fantastic, with so many great new products to choose from. The new catalogue is posted above and will be permanently linked via my blog on the right hand side if you don’t have a paper copy and wish to browse. If you have your paper copy and just want to go straight to the shop to place your order, click here - ordering systems have now fully transitioned from the old stock items to the new so you are good to go! Also, remember to add the current hostess code for June QCW2Y7SW if your order is less than £150 and ensure your preferences are set to 'contactable' to receive a thank you in the post from me.

There are a few items that due to unexpected shipping delays will not be immediately available - they are as follows:


  • BIG PLANS PLANNER KIT (146859)
  • BIG PLANS PLANNER KIT REFILL (146861)
  • METALLIC PEARLS (146282)
  • LEAF RIBBON (146905)
  • PETAL PINK RHINESTONE GEMS (146914)
  • METALLIC BRADS (146929)
  • BASIC BRADS (146930)
  • 2018-2020 IN COLOR MINI BINDER CLIPS (146932)

New Stampin' Up! Blends colours are also unavailable at this time, but rest assured I will post more information on this as they come online. There is plenty that is available though, so you can always add these items to your 'next time' list!

I'll be sharing my favourite items from the new catalogue in a blog post soon, but in the meantime if you would like to get hands on with new products then save the following dates: 

I will be holding two Annual Catalogue Open House Drop-in Sessions next week on Wednesday 6th June from 10am-12 noon and then again on Thursday 7th June from 6-8pm. If you live in or around Northampton this is a great opportunity for you to see some of the products up close, take advantage of my BOGOF sale of retired stamp sets, do a make and take and more! If you would like to put your name down for these exclusive events then do get in touch!

I also have a number of classes lined up in coming months featuring products from the new catalogue - here's a quick summary for you below:

  • 18th June - Share What You Love Suite
  • 5th July -Lilypad Lake Bundle
  • 16th July - Serene Garden Bundle
  • 2nd August - Abstract Impressions
  • 13th August - Darling Label Punch Box
  • 10th September - Pop of Petals Home Decor Frame

Full details for these classes can be found on my Facebook Events Page  or alternatively under the 'Events/classes' tab on my website.

That's a lot of information for one post; if I were you I would put the kettle on, put your feet up and get comfy and settle down with your new catalogue for a browse and start creating that all-important wish list!

Back tomorrow with a new project; until then, happy shopping!

Share What You Love Lovely Floral Embossed Card

by Joanne James30. May 2018 20:00

It's half term here so I'm feeling stretched again this week, hence no blog post yesterday. I was also sending out my new annual catalogues to everyone who has ordered from me in the last 6 months so that they will be with you in time for when the catalogue goes live on Friday - can't wait! If you haven't ordered from me in the last 6 months and don't already have a Stampin' Up! demonstrator but would like to receive a catalogue, then send me your details to joanne@thecraftyowl.co.uk and I will arrange to post one out to you.

Today I'm sharing one of my favourite cards made with some of the products in the fabulous Share What You Love Suite that has been on early release this month - take a look:


Here's the low-down on today's card:

Lovely Floral - Dynamic Indeed - You all know how much I love designer series paper and the papers in this suite are no exception, however for today's card I wanted to showcase the fabulous Lovely Floral Textured Impressions Embossing Folder and needed it to take centre stage, without a paper pattern to distract from it. The embossed detail is just gorgeous - I think this folder may move into my top 3! Whether on its own or tucked behind some additional layers as on my card today, it makes a card all on its own. I think it would make a fabulous design for wedding stationery too and so easy to mass produce.

Embellish With Love - I also used a number of the accessories from the Share What You Love Embellishment Kit: the label, twine and metallic rose brought my card together really quickly. Add some of the velvet ribbon, some coloured pearls and a sliver of pearl doily and it steps up the embossing folder to make for a quick card with lots of interest and detail.

A Beautiful Day - The only stamping is the simple layered floral and sentiment on my diecut piece - I stamped my petals in two different strengths by stamping off the outer petals first for added interest.

You have just one more day to take advantage of the Share What You Love Bundles, including free products and the exclusive 'Statement of My Heart' stamp set, before these items can be purchased individually in the new annual catalogue. This suite will also feature in one of my Monthly Product Technique Clasess in June - check out the details on my Facebook page or contact me if you would like to know more.

Here is the visual summary of the key products used on today's project for you to pin for easy reference:


You can see all of my 'How To' summaries on my 'How To - Tips and Techniques' Pinterest board in case you've missed any. 

Enjoy your day and I'll be back tomorrow with another project. Until then, happy stampin'!


Stampin' Up! Supplies Used:

Table built using Product Table Builder by The Crafty Owl - Independent Stampin' Up! Demonstrator.

Memories And More Sweet Soiree Mini Album

by Joanne James30. March 2018 19:00

I hope you are all enjoying the start of a long bank holiday weekend. We have already enjoyed a morning of fresh air, followed by an afternoon of chocolate and a movie to avoid the return of the rain here in the UK. I am so done with winter now!

Today I thought I would share with you the first of the projects that I made with the ladies that attended my recent luxury craft weekend earlier this month. I won't be sharing any instructions on how they were made - these are reserved for those that attended - however I am sharing lots of photos of the projects that I designed as it is a great way for my readers to get a flavour of what a residential crafting retreat with me is like and the kinds of projects included. With 4 classes spread over 2 days, it's a great opportunity to tackle a variety of projects and also some that are a little more time-consuming than can be completed in a class that is of a shorter duration.

Today I'm sharing one of my favourite projects: a mini album I made featuring the Sweet Soiree Memories and More cards that are one of the current Sale-A-Bration gifts that can be yours free with a purchase of £45 or more, for just over another 24 hours:


Berry Burst cardstock forms the base of this expandable album and in addition to the Sweet Soiree Memories and More card pack, the Sweet Soiree Embellishment Kit has been used to decorate the cover and inside. 

This is what album looks when you first open it:


Fully extended, the album is four panels wide:


Each side then expands further to include additional flaps and pockets on both sides:


The album includes lots of areas to add photographs and capture memories, including this neat waterfall feature:


This album was certainly the most challenging of the projects we tackled during the retreat and was not for the fainthearted! The feedback was really positive though and everyone was so pleased with their creations; some ladies reported feeling truly amazed and thrilled to have tackled something like this, which they would not have ever contemplated on their own. I was personally thrilled with how positively this was received, as I've never led a class quite like this before. I'm already taking the learns from this project to create another version that is equally 'wow' yet a little easier to recreate.

If you would like to make projects like this one at a future retreat, please sign up to my newsletter by clicking on the icon in the right-hand column to ensure you receive the information for future retreats as soon as it is released or click here for more information - details for my next retreat will be announced in the coming weeks!

Here is the visual summary of the key products used on today's project for you to pin for easy reference:


You can see all of my 'How To' summaries on my 'How To - Tips and Techniques' Pinterest board in case you've missed any. 

Enjoy your evening and I'll be back tomorrow with one last project featuring Sale-A-Bration item. Until then, happy stampin'!


Stampin' Up! Supplies Used:

Table built using Product Table Builder by The Crafty Owl - Independent Stampin' Up! Demonstrator.

Coloured Heartfelt Blooms Card

by Joanne James29. March 2018 20:00


I've a quick post for you this evening to share a card I made a couple of months ago in my Sale-A-Bration class using one of the Sale-A-Bration sets that has been hugely popular with my customers - take a look:


Here's the low-down on today's card:

Heartfelt Blooms - Heartfelt Blooms is one of Stampin' Up!'s new Distinktive stamps: they lay down ink at different opacities, giving the finished image more depth. When you look at the stamp itself, you almost wonder if it will stamp anything, yet lightly inking the stamp results in a perfect photographic finish. The set also has three useful, beautifully scripted sentiments too - I particularly like the wording of the one I used on this card.

A Touch Of Colour -  The Heartfelt Blooms image can either be stamped in a single colour to create a simple monochromatic card, or stamped in a neutral base that allows colour to be added. Today's card is based on one that appeared in our quarterly demonstrator magazine where the image is stamped in Archival Black on Shimmery White cardstock, then colour is subtly added over the image using inks and an aquapainter. 

Petal Passion Stripes - I paired the image with an angled panel of Petal Passion striped designer series paper; the brushstroke-style stripes compliment the image perfectly.

If you would like to add this set to your stamp collection, you only have another couple of days to do so before the end of this year's Sale-A-Bration promotion, after which it will be gone forever!

Here is the visual summary of the key products used on today's project for you to pin for easy reference:


You can see all of my 'How To' summaries on my 'How To - Tips and Techniques' Pinterest board in case you've missed any. 

I'll be back tomorrow with another project. Until then, happy stampin'!


Stampin' Up! Supplies Used:

Table built using Product Table Builder by The Crafty Owl - Independent Stampin' Up! Demonstrator.

New Online Exclusives

There are new products available exclusively in the online store from 5 November - check them out here.

Latest Kits!

Stampin Cut and Emboss

The Perpetual Beauty Calendar Kit and Cherry Blossoms Treat Boxes Kit are the latest kits in the online store - get yours here!

Shop Online

Access my online shop 24 x 7, 365 days of the year:

Current December hostess code:

9NKXDTTR

Shop Online

Mini Catalogue

BROWSE THE CATALOGUE

'Tis The Season - the new Stampin' Up! Mini Catalogue is here! For more details and to download your copy click here

Scrapbooking

Stampin' Up! has introduced a new range of 12x12" scrapbooking product and kit - the full range is now available to purchase online. To download a copy of the new digital Scrapbooking Catalogue click here.

2024-25 Annual Catalogue

BROWSE THE CATALOGUE

Click on the image to download your copy of the 2024-25 annual catalogue. For a full list of current SU! supplies, go to my online store. If you would like any help or advice, please drop me a line at joanne@thecraftyowl.co.uk or give me a call on 07773 421446 - I'd be happy to help.

Join My Team

It's always a great time to join Stampin’ Up! New team members can get £130 worth of products for only £99 + free business supplies + free shipping + all the fun being a part of Stampin’ Up! Stampin' Up! has something for everyone: join my growing team and benefit from my support to enjoy Stampin' Up! however you choose.

If you're interested, call me for a chat to understand how I can help you realise your goals. Alternatively, if you have already decided to sign up and you just can't wait, please click here for the link to the online form where you can sign up and order your starter kit right away! 

About Me

Hi I'm Joanne and live in Northampton and when I'm not looking after my husband and two beautiful children, am an avid crafter with a passion for all things Stampin' Up!

I must confess that I have never been a big rubber stamper - until I discovered Stampin' Up! that is. I love the fact that I can get such great results with co-ordinating stamps, inks, papers and punches - the possibilities are endless! Join me on my stamping journey as I share the things I love and be inspired to create amazing things yourself!

Follow Me

Monthly Newsletter

Box Builder

Click the button above to use Box Buster to create your custom box design using the Envelope Punch Board!

Kits Collection Now Available!

Stampin Cut and Emboss

The new Kits Collection from Stampin' Up! is now available!

Click here to see the current kits available and order yours online today.

I Design For


Stampin' Up Stuff

This is my personal blog and is not endorsed by Stampin’ Up! I hope you find it a plentiful source of ideas and personal inspiration but please don't copy my designs for contest submission or use for classes, publication or sale without express permission.

DSP Special Release

Check out 3 popular designer series paper designs in fresh new colourways! Available exclusively in the online store from 3 December - check them out here

Last Chance Products

Last Chance Products will now be updated every other month - check them out here.