
Country Floral Colours of Spring Birthday Card

by Joanne James2. March 2019 06:00

Today I'm sharing a card for this week's challenge over at Inspire.Create Challenges where they have a beautiful Spring colour palette this week:


With the unseasonably warm weather we have been having here in the UK this past week or so, I am definitely feeling like Spring is around the corner. The flowers in the garden are waiting to burst into bloom so I just had to use these fresh colours for another dry embossed card using one of my current favourites from the second Sale-A-Bration release that went live on 15th February, the new Country Floral Dynamic Textured Impressions Embossing Folder: 


Here's the low-down on today's card:

Country Floral - I couldn't resist the opportunity to create another card using the new Country Floral dynamic embossing folder. This time I tried something else new that is the reverse of this card that I shared with you the other day - I embossed a piece of Whisper White cardstock and then used my Blends markers in the challenge colours to colour the individual flowers. A little quicker than my previous card and a great way to include all of these lovely spring colours. 

A Perennial Birthday - I used a sentiment from the Perennial Birthday set in the annual catalogue on my card - the script compliments the embossing folder I think. I stamped mine using Pool Party ink on Whisper White and punched it out using the Everyday Label Punch and trimmed it slightly so that it could be matted with a Daffodil Delight base. 

Sale-A-Bration New Releases - My card today does use some of the Sale-A-Bration organdy ribbon that sold out some weeks ago. I don't like to tempt you with something you can no longer get your hands on, but it was the perfect finishing touch for my card. There is good news though - as of March 1st there are even more FREE product choices for the remainder of Sale-A-Bration (you can read all about them in my earlier post here if you missed it) so there is lots more to choose from!

Here is the visual summary of the key products used on today's project for you to pin for easy reference:


You can see all of my 'How To' summaries on my 'How To - Tips and Techniques' Pinterest board in case you've missed any. 

I am busy hosting my first residential crafting retreat of the year this weekend so I have a whole day of crafting fun ahead with some fabulous ladies. I will have more to share with you about it later this week, but in the meantime, if this is the kind of thing that appeals to you, why not check out the details for my next one in October here. It's open for booking and I would love to welcome you!

Enjoy your day and I'll be back tomorrow with this week's project for our new challenge over at The Paper Players. Until then, happy stampin'!


Stampin' Up! Supplies Used:

Table built using Product Table Builder by The Crafty Owl - Independent Stampin' Up! Demonstrator.

Sale-A-Bration 2019 Starts Today And The New Spring-Summer Catalogue Is Here!

by Joanne James3. January 2019 08:00


Hello everyone - I'm back! Following a longer than anticipated Christmas break (sometimes, family simply has to come first) the new year brings with it lots of Stampin' Up! goodness: it's time to shake off the January blues, today is THE day - yes, the highlight of the Stampin' Up! calendar, Sale-A-Bration is here! No more sneak peeks - the catalogue is available, the shop is live and from now until 31st March the benefits are yours for the taking. You can click on the catalogue on the right hand side of my blog page or below to access the Sale-A-Bration leaflet to download a copy or click on the icon above or on the right to go directly to my online shop to place an order - we are LIVE!


So what is Sale-A-Bration? For anyone who hasn't come across it before, it's Stampin' Up!'s annual promotion that is loaded with offers whether you shop, join or host:


Earn a free Sale-A-Bration product for every £45 you spend between 3 January and 31 March. There is also the opportunity to earn even bigger rewards with a £90 purchase. It's the perfect time to purchase those products you've had on your wish list and earn more products for free! 


It’s the best time of year to join Stampin’ Up! There are 2 fabulous joining options during this year's Sale-A-Bration promotion: Option 1, you can become a demonstrator for just £99 and choose £71 more of FREE products for your Starter Kit. That's an extra £40 worth of product in your starter kit when compared to the usual £130. Alternatively there is option 2: for £125, you can receive £170 worth of craft items and this exclusive Craft & Carry Tote to carry it all around in too! The tote bag is absolutely fabulous and a must have for all crafters - check it out in this video:


Isn't it just great?! Plus, the whole kit ships for free! There is plenty of choice and flexibility, whether you want to be a hobby demonstrator and just use your discount to enable you to purchase craft supplies more cheaply, or alternatively would like to build a flourishing direct sales business and sell supplies to others - it's entirely up to you. 


Earn an additional £20 in hostess credits when you host a party and have party sales of £200 or more (this also applies to individual orders). So for party sales of £200, that makes a whopping £40 of Stampin' Rewards - more freebies! What's more, you can even apply your Stampin' Rewards to a Starter Kit and become a demonstrator yourself - I would love to welcome you to my team!

If you would like to host a party, real or virtual, please do get in touch; my diary is filling up but there are still lots of slots available and I would love to share these great benefits with you. If you've ever thought about becoming an SU! demonstrator, now is a great time to do so - I would love to have a no-obligation chat with you about joining my team and the benefits.

As if that wasn't enough, today also sees the launch of the new Spring-Summer catalogue - full of gorgeous new products:
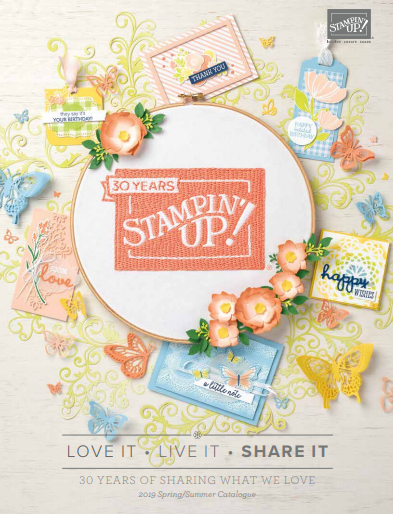
Just click on the image above or in the sidebar on the right to browse the catalogue online, or contact me on 07773 421446 if you would like a paper copy posted out to you and you don't already have a demonstrator. If you are as excited as me and just can't wait, here's the link to my online store - everything is available to purchase from today!

If you would like more information on any of the above, please don't hesitate to get in touch! 

Thanks so much for popping by - it's always nice to share good news! Back soon with lots of projects showcasing products from the new catalogue. Until then, happy shopping!

Textured Beautiful Blizzard Christmas Card

by Joanne James6. December 2018 22:00

Well it's taken me a few days as I've had a couple of classes and am knee-deep in all that comes with the preparations for the festive season, but today I'm here and sharing the last of the three cards that I designed for a recent technique class using the Beautiful Blizzard bundle - take a look:


Here's the low-down on today's card:

A Swirly Snowflake Blizzard - This card has the simplest of stamped backgrounds. I used a variety of the swirls and snowflake stamps in the set in both blues to create a stamped swirly snowflake blizzard. This is one of those very forgiving, easy stamped projects, perfect for a beginner and would work on a single layer card too.

Shimmery White Textured Snowflakes - The real 'wow' on this card is very difficult to see on the above photo: I made a mask using the Blizzard Thinlits and added a layer of textured snowflakes using shimmery white embossing paste. This looks so sparkly in real life and adds real texture and interest to the card design. I finished with some diecut snowflakes and a simple heat embossed sentiment.

A Sweet Sentiment - The sentiment on the inside of my card is one that just makes me go all warm and fuzzy inside:

Isn't that just so sweet?!

Here is the visual summary of the key products used on today's project for you to pin for easy reference:


You can see all of my 'How To' summaries on my 'How To - Tips and Techniques' Pinterest board in case you've missed any. 

Enjoy your evening and I'll be back soon with another project. Until then, happy stampin'!


Stampin' Up! Supplies Used: 

Table built using Product Table Builder by The Crafty Owl - Independent Stampin' Up! Demonstrator.

A Z-Fold Blizzard of Snowflakes for PP421

by Joanne James2. December 2018 09:00

Today it's Sunday and time for this week's new challenge over at The Paper Players - yay! It's the turn of the queen of florals, the lovely Jaydee,  to host this week and she has a festive theme challenge for you to work with:


Jaydee has been kind to us with a broad theme this week - pretty much anything festive goes! I decided that I would take my inspiration from the snow in our badge picture this week and share a card that I made at a recent technique class using the Beautiful Blizzard bundle - take a look:


Here's the low-down on today's card:

An Embossed Blizzard - On this card I used the Blizzard Thinlits Die to create an embossed (as opposed to a diecut) panel to add interest to the fold behind my sentiment panel. I then sponged this liberally with Frost White Shimmer Paint for a subtle snowy sparkle. I love that the Big Shot Embossing Mats make this really easy and make our dies go further, opening up a whole new range of creative possibilities.

A Fancy Fold - This card uses a fancy fold that is quite simple to recreate - a z-fold - it's a great way to allow for overhanging diecuts without having to increase the overall size of the card and shows just a hint of the decoration inside too. Here's a picture of my card opened out so that you can see the inside fully:


A Drop of Frost - The stamping on my card is a random combination of the stamps in this set, with a few of the snowflakes left over from this card added for dimension. I finished one of these with a frosted droplet - these make perfect centres for a wintery snowflake.

I'm a little pressed for time with all that is going on in the James household during the holiday season, so no the visual summary of the key products used on today's project today although the table at the bottom of this post will of course take you directly to my online store if you would like to purchase any of the items featured on today's card. 

Before you reach for your ink and papers, check out what our amazing team has created to inspire you this week:

Here's a quick recap of our challenge rules:
 
1.  Create a new paper project
2.  Upload your creation to your blog with a link back to us and provide a direct link to the post featuring your challenge submission.
3.  Please link your card to no more than four challenges, TOTAL.
4.  Have FUN!

You can see all of my 'How To' summaries on my 'How To - Tips and Techniques' Pinterest board in case you've missed any. 

Enjoy your day - I shall be recovering from my first Christmas party yesterday and tacking a mountain of ironing today but I'll be back tomorrow with another project. Until then, happy stampin'!


Stampin' Up! Supplies Used: 

Table built using Product Table Builder by The Crafty Owl - Independent Stampin' Up! Demonstrator.

Beautiful Blizzard Panel Card

by Joanne James1. December 2018 16:00

Today I'm sharing the first of three cards that I designed for a recent technique class using the Beautiful Blizzard bundle - take a look:


Here's the low-down on today's card:

A Snowflake Blizzard - On this card I used the Blizzard Thinlits Die to cut a full panel of snowflakes. I used a piece of Whisper White cardstock that I first covered with an adhesive sheet on the reverse, then sponged the whole of the front liberally with Frost White Shimmer Paint for a subtle snowy sparkle. The use of a multi-purpose adhesive sheet is key for making this an easy project, as it means that the snowflakes and the surround can be used by simply peeling them off the backing paper. No fiddling around trying to add liquid adhesives to the narrow snowflake stems! This card features the 'negative' of the diecut; I'll be sharing the other two cards that use the rest of the snowflakes tomorrow and later in the week.

A Stitched Label - The label that features the sentiment on the front of my card is from the Stitched Labels Framelits; so pretty and perfect for the first part of my sentiment, along with a few stamped snowflakes too. 

A Sweet Sentiment - I love the sentiment on this card, which carries over from the front of the card to complete on the inside:

Without the 'season's greetings', this sentiment would be lovely for someone celebrating a winter birthday too. 

I'm a little pressed for time with all that is going on in the James household during the holiday season, so no the visual summary of the key products used on today's project today although the table at the bottom of this post will of course take you directly to my online store if you would like to purchase any of the items featured on today's card. 

Enjoy your evening - I am out at my first Christmas party this evening but I'll be back tomorrow with my card for this week's Paper Players challenge which will also feature snowflakes! Until then, happy stampin'!


Stampin' Up! Supplies Used: 

Table built using Product Table Builder by The Crafty Owl - Independent Stampin' Up! Demonstrator.

Beautiful Blizzard Christmas Card

by Joanne James7. November 2018 07:00

Today I'm sharing a card using last week's sketch over at the Paper Craft Crew:

I have a technique class featuring the Beautiful Blizzard Bundle next week and having designed the cards for my class I wanted to create another card in a similar colourway to demonstrate the versatility of this set and this sketch was perfect - take a look:


 Here's the low-down on today's card:

Beautiful Blizzard - This is such a pretty stamp set; the splodges, spots and wisps make it easy to create lots of texture in detail with minimal layering. I stamped the background behind my sentiment oval in a combination of Balmy Blue and Night of Navy, stamping some of the images full strength and stamping some off first to create depth. I also added a little touch of snow to the inside too:


Frosted Shimmer Snowflakes - I used a couple of the snowflakes cut with my Blizzard Thinlits Die to embellish my sentiment oval, liberally sponging each with Frosted White Shimmer Paint for a wonderful soft shimmery finish.

A Snowflake Trinket - To finish my card, I added one of the new snowflake trinkets too - because you can never have too many snowflakes!

Here is the visual summary of the key products used on today's project for you to pin for easy reference:


You can see all of my 'How To' summaries on my 'How To - Tips and Techniques' Pinterest board in case you've missed any. 

Enjoy your day; I've a busy day in my craft room today catching up following a busy day yesterday. One big thing achieved though - finally got the last bits in the kitchen finished so I'm all set to decorate the week after next then I'll be able to share some pictures! I'll be back tomorrow with another project. Until then, happy stampin'!


Stampin' Up! Supplies Used:

Table built using Product Table Builder by The Crafty Owl - Independent Stampin' Up! Demonstrator.

Autumn-Winter Catalogue Items Now Available Only While Stocks Last and Dashing Along DSP To Buy!

by Joanne James5. November 2018 05:00

I'm just popping by with a quick post following an update by Stampin' Up! with regard to stock levels on certain products. Sales for a number of products have exceeded forecast and are continuing strong and due to their popularity might not be available for the entire catalogue sales period. The products in question are:

147816: Joyous Noel Specialty Designer Series Paper 
147890: Festive Farmhouse Elements 
147811: Santa’s Workshop Enamel Elements

I am definitely responsible in part for the first two items above; I used both at my recent Creative Escapes Craft Retreat and the ladies present got to both create with them and take some of each home in their goody bags. I just adore this paper - it is so beautiful!

In order to provide another holiday-themed option,the lovely people at Stampin' Up! have decided to make the recent promotional Dashing Along Designer Series Paper (item 149903) available for sale for £10.25 a pack. This beautiful, 12" x 12" (30.5 x 30.5 cm) traditional Christmas paper has a festive, eclectic feel and is perfect for layering. Coordinating colours are Cherry Cobbler, Garden Green, and Whisper White.

Here is a card I made at my recent Dashing Deer Technique Class that features one of the papers as a border of the central panel:

Here is the visual summary of the key products used on today's project for you to pin for easy reference:


You can see all of my 'How To' summaries on my 'How To - Tips and Techniques' Pinterest board in case you've missed any. 

You can see other samples showcasing these gorgeous papers here.

Enjoy your day and I'll be back later with another project. Until then, happy shopping!


Stampin' Up! Supplies Used:

Table built using Product Table Builder by The Crafty Owl - Independent Stampin' Up! Demonstrator.

Snowflake Showcase Pillow Box Creative Retreat Gifts

by Joanne James2. November 2018 19:00

As promised in my earlier post today (you can read that here if you missed it), today I'm sharing something a little different that I gave a sneak peek of on my Facebook page the week before last - a 3D project! Today is the perfect day to share it since it coincides with the launch of the Snowflake Showcase product suite yesterday - you can read all about that here.

The weekend before last I held my second residential craft retreat this year. I love these weekends: they are a great opportunity for me to spend quality time with my customers, some of whom I see at my regular classes but for many who follow my blog and shop with me online and for whom this is an opportunity to get away from it all for some quality crafting time amongst friends. I am grateful that they choose to spend a weekend with me crafting and as such in addition to their goody bags, they receive lots of little pillow gifts and table favours throughout their stay as a token of my appreciation. When they leave at the end of the weekend, I like to gift them a key ring that is unique to that retreat as a reminder of the fun time that they've had. It has to showcase some fabulous Stampin' Up! product too, both on the keyring and the packaging so for this one I just had to feature the limited edition, exclusive Snowflake Showcase products that went live on sale yesterday. So first up here is the packaging for my gift:


I dressed up one of the kraft pillow boxes available in the annual catalogue with some silver-trimmed ribbon and added a sentiment banner stamped tone-on-tone with the border stamp and then heat-embossed my sentiment in silver over the top. I then added the fabulous string of snowflakes diecut to the front of the box for a real 'wow'.

It didn't end there; I continued the snowflake theme inside with a keyring, that had a snowflake tree, a teeny-tiny sentiment and one of my craft retreat logos all stamped onto shrink plastic and reduced in size, along with one of the gorgeous snowflake trinkets that are also part of this suite. I made them in two colourways, Pool Party and Balmy Blue:


Here's a picture of them both together - gift and packaging. What do you think - cute enough to hang your keys from? 

I received such lovely comments from the ladies who attended my retreat, who all said they felt truly spoiled all weekend. Here's one of the pictures I shared over on my Facebook page of us at dinner on the Saturday evening, with some of them sharing another of their table gifts:


Christmas crackers, what else?! I will have more projects using the fabulous Snowflake Showcase in the coming weeks so look out for those and meanwhile do get in touch with me directly or via my online store to order yours whilst supplies last.

Equally, if you would like to be similarly spoiled and enjoy a fabulous crafty weekend away from it all, there are still spaces available on my March 2019 retreat which will be held in the West Midlands on 2-3 March - you can read more about it here and I would love it if you could join me! The dates for next October will be released soon and I already have a waiting list for this event, so if you would like to be one of the first to receive the details as they are published then do get in touch with me via joanne@thecraftyowl.co.uk to register your interest as spaces are likely to be snapped up quickly!

Enjoy your evening and I'll be back tomorrow with another project. Until then, happy stampin'!


Stampin' Up! Supplies Used:

Table built using Product Table Builder by The Crafty Owl - Independent Stampin' Up! Demonstrator.

Feathers And Frost Festive Leaf Triptych For The Paper Players PP413

by Joanne James7. October 2018 09:00

Today it's Sunday and time for this week's new challenge over at The Paper Players- yay! It's the turn of the super-talented Sandy to host this week and she has a timely theme challenge for you to work with:


Trees and leaves - perfect for autumn and fall, with so many colours at this time of year. I'm on a festive roll though, so decided to go for a Christmas card - still with leaves though as opposed to a tree or trees, as you might expect. I have another Feathers and Frost card for you, but this time using the leaves only - take a look:


Here's the low-down on today's card:

No Feathers ... - The Feathers and Frost stamp set features a pair of robins and poinsettia flower as centre pieces for this leaf pattern, but I decided on this card that I wanted the leaves themselves to take centre stage. Don't get me wrong, I love the pair of robins (and have another project that features them lined up for another day) and have featured the flower on this card previously, but for today it's all about the leaves!

A Leaf Triptych - I decided to create a repeating pattern with a triptych of leaves, creating a longer than usual card (my card measures 21cm in length and is 11cm wide) and joining 3 of the leafy squares into a seamless row. I stamped them in my favourite festive green, Shaded Spruce, onto watercolour paper and used an aquapainter to pull some of the outline colour in and give a light wash over each leaf. When this had dried, I them went back in with some extra ink and my aquapainter and added an additional swipe of colour on each leaf. This is a rather labour-intensive way of colouring, but I think it really adds to the loose brushstroke effect of the stamp set.

... But Plenty of Frost - Whilst there's an absence of feathers, my card has plenty of frost - of the sparkly gold kind at least! I used my retired gold Wink of Stella pen to colour the berries in between my green leaves (you could use the new Vegas Gold Shimmer Paint to achieve the same effect) and flicked some across the surface of my card, along with a sprinkling of gold sequins, some loops of gold thread, gold glimmer paper border and finally my sentiment, which I stamped in Versamark and heat embossed in gold on a vellum strip and wrapped it around the centre of my card. Vellum is a great base to add a sentiment to a card where you don't want it to overly obscure the pattern or stamping beneath. It also enables me to link up with the lovely ladies over at Just Add Ink who are challenging us to use vellum on our cards this week - do check them out, they've some great ideas and suggestions on other ways you can use it in your cardmaking too.

 I also did a little co-ordinated stamping on the inside of my card (and remembered to photograph it!):


Here is the visual summary of the key products used on today's project for you to pin for easy reference:


You can see all of my Product and 'How To' summaries on my 'How To - Tips and Techniques' Pinterest board in case you've missed any. 

Before you reach for your ink and papers, check out what our amazing team has created to inspire you this week:

Here's a quick recap of our challenge rules:
 
1.  Create a new paper project
2.  Upload your creation to your blog with a link back to us and provide a direct link to the post featuring your challenge submission.
3.  Please link your card to no more than four challenges, TOTAL.
4.  Have FUN!

You can see all of my 'How To' summaries on my 'How To - Tips and Techniques' Pinterest board in case you've missed any. 

So what do you think? Can you use leaves as the main focus and decoration on a Christmas card to good effect? I'd be interested to here your thoughts - do leave me a comment below. 

Enjoy your day and I'll be back tomorrow with another project. Until then, happy stampin'!


Stampin' Up! Supplies Used: 

Table built using Product Table Builder by The Crafty Owl - Independent Stampin' Up! Demonstrator.

Dandelion Wishes Blue Bokeh Dots Card

by Joanne James13. September 2018 21:00

I'm sorry this week has been a little less blog-filled than anticipated; I am getting back into a routine now that the James Juniors are back at school, however I'm still playing catch-up. I've had two classes this week and lots more going on besides, and can't quite believe it's Thursday before I've managed a post - eek!

Anyway, today I'm sharing a card that I made with the ladies in my stamp class earlier this week that was inspired by the challenges over at As You See It  and Less Is More


My class featured the Dandelion Wishes stamp set and we looked at different techniques to create interesting backgrounds. The Dandelion Wishes set is perfect for clean and simple cards - take a look:


Here's the low-down on today's card:

Back To Basics - The theme over at As you See It this week is 'Back To Basics', creating cards using little more than stamps. ink and paper. I love clean creations, although they aren't always basic in this sense. There is something liberating though about creating with just stamps, ink and paper and it is fun to be able to share creations from time to time like this. They can be quick(er!) to create and show that it's still possible to create something pretty without needing a ton of supplies. My card uses only two ink colours and two colours of cardstock - basic supplies indeed!

Layer Images for Interest - One of the ways to create interest on a basic card is to layer images to create interest. In addition the basic card layers, with a little tone-on-tone stamping on the base, I used the bokeh dots stamp as a 'background' for my dandelion seed heads and positioned both them and my sentiment across the edges in order to create the illusion of an extra layer.

A Drop of Frost - I could have just left my card there as it looked pretty enough to be fair. I often add a little something to a CAS card for extra interest and in this instance decided to add a trio of the new frosted epoxy droplets from the seasonal catalogue. I love the frosted finish they have and am a sucker for something shiny! I'm hoping the ladies at AYSI approve - my justification is that it's less fussy than ribbon ;-)

Here is the visual summary of the key products used on today's project for you to pin for easy reference:


You can see all of my 'How To' summaries on my 'How To - Tips and Techniques' Pinterest board in case you've missed any. 

I'll be back tomorrow with another project for you. Until then, happy stampin'!


Stampin' Up! Supplies Used:

Table built using Product Table Builder by The Crafty Owl - Independent Stampin' Up! Demonstrator.

New Online Exclusives

There are new products available exclusively in the online store from 5 November - check them out here.

Latest Kits!

Stampin Cut and Emboss

The Perpetual Beauty Calendar Kit and Cherry Blossoms Treat Boxes Kit are the latest kits in the online store - get yours here!

Shop Online

Access my online shop 24 x 7, 365 days of the year:

Current December hostess code:

9NKXDTTR

Shop Online

Mini Catalogue

BROWSE THE CATALOGUE

'Tis The Season - the new Stampin' Up! Mini Catalogue is here! For more details and to download your copy click here

Scrapbooking

Stampin' Up! has introduced a new range of 12x12" scrapbooking product and kit - the full range is now available to purchase online. To download a copy of the new digital Scrapbooking Catalogue click here.

2024-25 Annual Catalogue

BROWSE THE CATALOGUE

Click on the image to download your copy of the 2024-25 annual catalogue. For a full list of current SU! supplies, go to my online store. If you would like any help or advice, please drop me a line at joanne@thecraftyowl.co.uk or give me a call on 07773 421446 - I'd be happy to help.

Join My Team

It's always a great time to join Stampin’ Up! New team members can get £130 worth of products for only £99 + free business supplies + free shipping + all the fun being a part of Stampin’ Up! Stampin' Up! has something for everyone: join my growing team and benefit from my support to enjoy Stampin' Up! however you choose.

If you're interested, call me for a chat to understand how I can help you realise your goals. Alternatively, if you have already decided to sign up and you just can't wait, please click here for the link to the online form where you can sign up and order your starter kit right away! 

About Me

Hi I'm Joanne and live in Northampton and when I'm not looking after my husband and two beautiful children, am an avid crafter with a passion for all things Stampin' Up!

I must confess that I have never been a big rubber stamper - until I discovered Stampin' Up! that is. I love the fact that I can get such great results with co-ordinating stamps, inks, papers and punches - the possibilities are endless! Join me on my stamping journey as I share the things I love and be inspired to create amazing things yourself!

Follow Me

Monthly Newsletter

Box Builder

Click the button above to use Box Buster to create your custom box design using the Envelope Punch Board!

Kits Collection Now Available!

Stampin Cut and Emboss

The new Kits Collection from Stampin' Up! is now available!

Click here to see the current kits available and order yours online today.

I Design For


Stampin' Up Stuff

This is my personal blog and is not endorsed by Stampin’ Up! I hope you find it a plentiful source of ideas and personal inspiration but please don't copy my designs for contest submission or use for classes, publication or sale without express permission.

DSP Special Release

Check out 3 popular designer series paper designs in fresh new colourways! Available exclusively in the online store from 3 December - check them out here

Last Chance Products

Last Chance Products will now be updated every other month - check them out here.