by Joanne James21. July 2013 20:07So I have a confession: I don't like all the stamps that Stampin' Up! has to offer! I like modern, clean and unfussy design and don't really go in much for the vintage, distressed look. So whilst I loved three of the four stamps in June's 'Best of Flowers' set, I struggled with the fourth one. The bouquet of roses had a real 'old fashioned' look I thought and I would probably have left it in the box uninked. I could happily spend endless hours creating things with the other three stamps in the set, each of which I love, but for the fact that I had decided to use this set for this month's card class and therefore felt I should use each of the stamps equally. After much huffing and puffing, I came up with a couple of cards and this is one, of them:
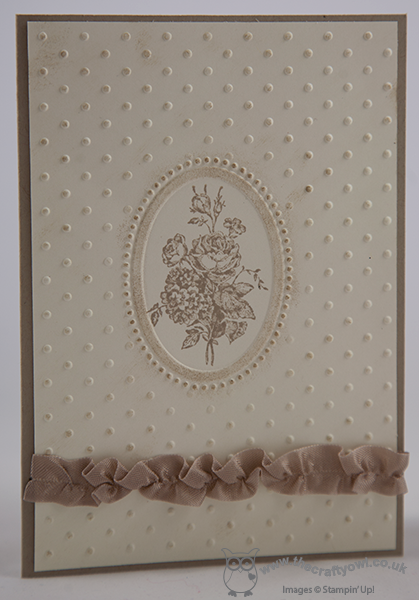
This is something of a departure from my usual style, but I quite like the way it turned out. It was also a great opportunity to teach the ladies in my class the double embossing technique, which enabled me to make the stamp the focal point, without creating an overly fussy design. Some sponging of Crumb Cake ink over the surface and some ruched seam binding ribbon were all that I needed to finish it off.
I think maybe it's the kind of card that grows on you; the more you look at it, the more appeal it has - some 'olde worlde' charm, perhaps! if you would like to own the 'Best of Flowers' set, it is still available to purchase for £13.95 until 31st March 2014. Equally, if you would like to join one of my card classes, do get in touch for more details - our September class will feature the new 'Mosaic Madness' stamp set, along with the coordinating punch and embossing folder.
Back tomorrow with another card I made using this stamp; until then, happy stampin'!
Stampin' Up Supplies:
Stamps: Best of Flowers
Cardstock: Crumb Cake, Very Vanilla
Ink/Stampin' Write Markers: Crumb Cake
Tools: Stamp-a-ma-jig, Perfect Polka Dots Embossing Folder, Designer Frames Embossing Folder, Sponge Dauber
Finishing Touches: Crumb Cake `1/2" Seam Binding Ribbon
21c625fb-1294-4558-8815-2a51bf4af8ec|0|.0|96d5b379-7e1d-4dac-a6ba-1e50db561b04
Tags: Best of Flowers, Big Shot, Embossing, Designer Frames Embossing Folder, Perfect Polka Dots Embossing Folder, Promotions, Stamp-a-ma-jig, Stampin' Up, Stampin' Up Card, Stampin' Up Card ideas, Stampin' Up Supplies, Classes
Cards | Classes | Promotions | Stamping
by Joanne James18. July 2013 21:09I'm back after another busy card class last night, which was great fun but I was home too late to post so am back on track this evening. We were using the 'Best of Flowers' set at yesterday's class and everyone made some great cards - I 'll share these another time. Today I have another Mosaic Madness card for you; something a little different:
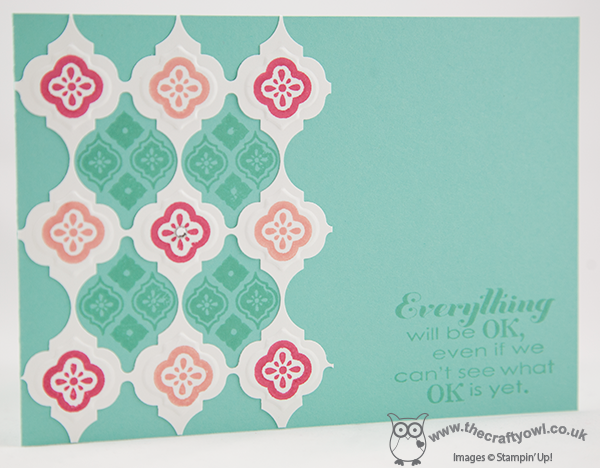
To create this card, I used the mosaic stamp set along with the co-ordinating embossing folder and punch, but this time created a 'trellis' from the embossed sheet using the punch, and then stamping a two-tone pattern on the trellis so that it would really 'pop' against the Coastal Cabana ink and cardstock duo. I've been playing around with this idea in my head for a few days and having finally committed it to paper I'm really pleased with how it's turned out.
This set really is so versatile; I hope you're not tired of it yet, as there's lots more where this came from! I'll be featuring this stamp set in September's card class, so if you live in Northampton and would like to experience a little Mosaic Madness for yourself, then do get in touch for further details - whether an experienced crafter or first-time card maker, you will be more than welcome. We are not having a monthly card class in August due to the summer holidays, although on Saturday 3rd August I am holding an-all day Christmas Crafts Workshop, where we will be getting a headstart on our Christmas preparations - it pays to be organised, especially if you're a crafter!
Back tomorrow with another project; until then, happy stampin'!
Stampin' Up Supplies:
Stamps: Mosaic Madness, Really Good Greetings
Cardstock: Coastal Cabana, Whisper White
Ink/Stampin' Write Markers: Coastal Cabana, Strawberry Slush, Crisp Cantaloupe
Tools: Mosaic Punch, Mosaic Embossing Folder, Stamp-a-ma-jig
Finishing Touches: Basics Rhinestones
by Joanne James1. July 2013 19:26Two posts from me today - the first to announce the new 'Best of' set for July - Best of Butterflies. Following last month's launch, to celebrate its 25th anniversary, Stampin' Up! is releasing a new 'Best of' stamp set featuring 3-4 past favourites and one brand new design, each month until October. Each set costs £13.95 and will be available to purchase until 31 March 2014 (clear mount only). The box to the right of my blog page will show the current stamp set - the set for July is called 'Best of Butterflies' and features the following delicate butterfly designs:
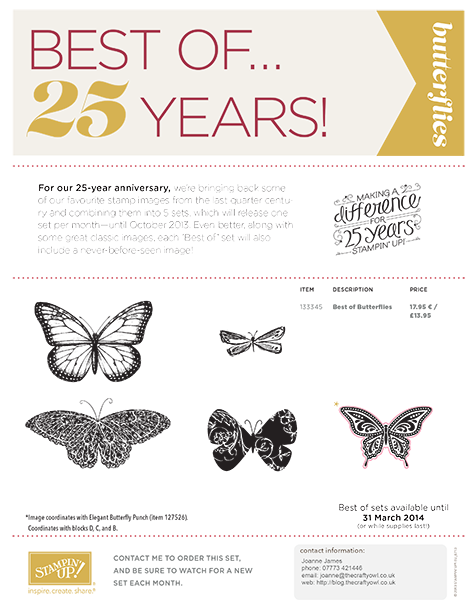
I will have some samples using these stamps to share with you in due course, but if you can't wait to get your hands on them, then drop me a line at joanne@thecraftyowl.co.uk and I will happily place an order for you.
Also, this month's card class will feature last month's 'Best of Flowers' stamp set. This month's classes are scheduled for Monday 15th and Wednesday 17th July; we will be making one card using each of the stamps and the cost of the 2 hour class is £10. If you would like to attend, do drop me a line or give me a call for more information.
Back shortly with another post; until then, happy stampin'!
by Joanne James20. June 2013 22:00Today I'm sharing another of the cards from last week's Secret Garden One Sheet Wonder class with you. This card also uses single stamped images of three of the flowers in the set which are then cut out using the co-ordinating framelits and layered onto a smaller piece of patterned cardstock as a background:
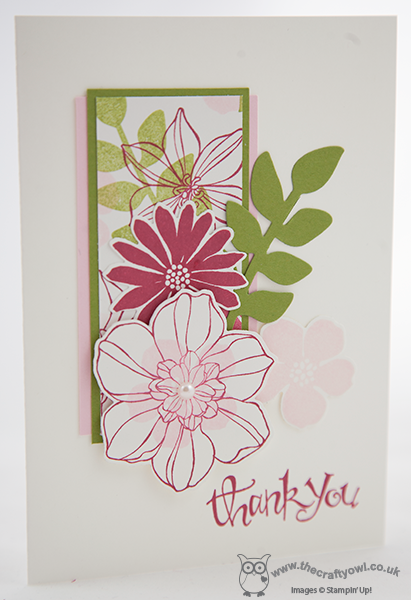
This card has more detailed to it with lots of layering and looks very crisp on a white background. We had a lot of fun creating our cards using the One Sheet Wonder and the nice thing is that even though we all followed the same basic layout, everyone's cards looked different.
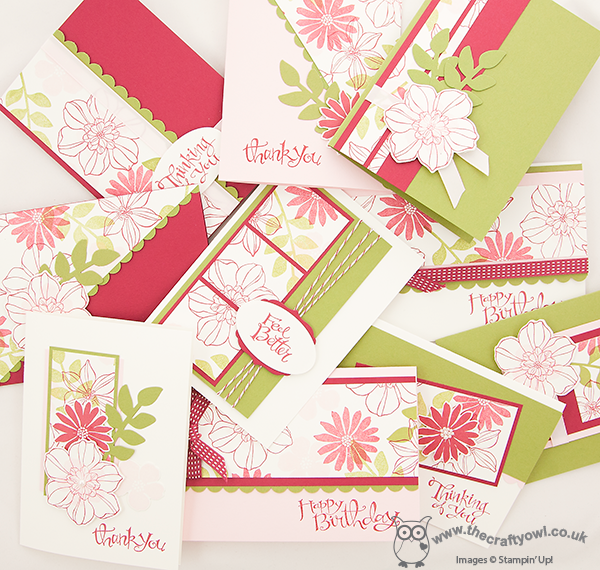
I really enjoyed the One Sheet Wonder - look at how many cards you can make with just one sheet of patterned stamped paper:
Come back tomorrow to see another project. Until then, happy stampin'!
Stampin' Up Supplies:
Stamps: Secret Garden, Sassy Salutations
Cardstock: Whisper White, Pink Pirouette, Old Olive
Ink/Stampin' Write Markers: Raspberry Ripple, Pink Pirouette, Old Olive
Tools: Secret Garden Framelits
Finishing Touches: Basics Pearls
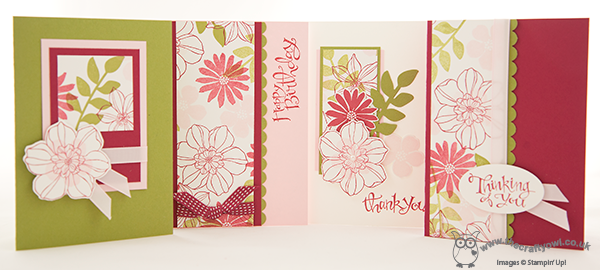
by Joanne James19. June 2013 21:00Today I'm going to share a couple of the cards that I made with the ladies in my card classes last week. This month we decided to make a One Sheet Wonder using the Secret Garden stamp set and co-ordinating framelits. For those of you reading this who've never tried it, a One Sheet Wonder is where you create your own sheet of patterned paper using a variety of stamps and colours, then cut this into sections and use these as the basis to decorate your cards. You can cut your patterned sheet into lots of different shapes and sizes and depending on the dimensions you choose, you can make between 2 and 10 cards. I used a template based on a layout by LeAnn Greff, although modified slightly to suit my purposes. Our template made 10 cards in total. Here are the 4 cards we made in class:
And here's a close up of one of the cards in our set:
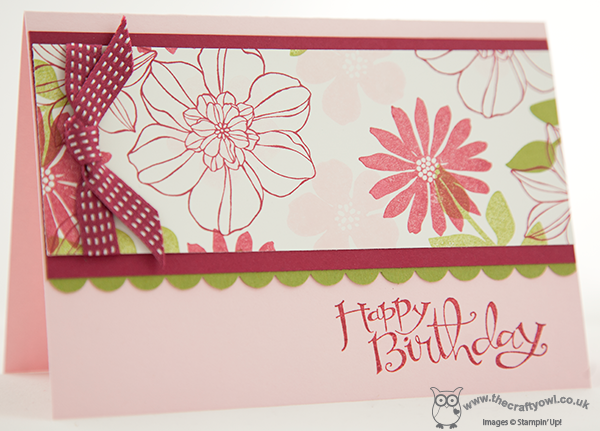
This is quite a simple card and quick to pull together - by carefully choosing the colours and adding some luxurious ribbon it turns it from something ordinary into something classic.
Come back tomorrow to see the other cards in the set. Until then, happy stampin'!
Stampin' Up Supplies:
Stamps: Secret Garden, Sassy Salutations
Cardstock: Whisper White, Raspberry Ripple, Pink Pirouette, Old Olive
Ink/Stampin' Write Markers: Raspberry Ripple, Pink Pirouette, Old Olive
Tools: Secret Garden Framelits, Scallop Edge Border Punch
Finishing Touches: Raspberry Ripple 3/8" Stitched Satin Ribbon
by Joanne James24. May 2013 21:19As promised, I'm back today with the last of the owl punch cards from this month's class. Our last card was another alternative use for this versatile punch; this time, to make a cute giraffe punch art card:
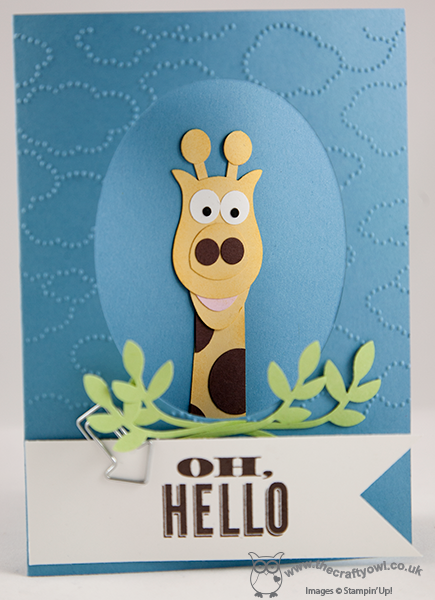
To make this card, the owl's body (minus his feet!) becomes the giraffe's head - clever, right?! We then used a variety of circle punches and the large oval punch to create the rest of him. The edges of the finished giraffe were sponged in So Saffron ink to add dimension and I placed him inside the card looking out, for added interest. The oval aperture was easy to make using an oval framelit and a few branches from the Bird Builder punch were added to give the giraffe something to munch on. I finished this card with embossed clouds and an 'Oh Hello' sentiment highlighted with a Cute Clip (love these!), but you could just as easily use a happy birthday greeting - I think this would make a lovely card for a little person.
I hope you like the finished card - there were a few interesting adaptations to this card by the ladies at my class: everything from hearts added to the sentiment banner to eyelashes on the giraffe. That's one of the things I love about teaching classes - whilst I scope out the original design, it can still be adapted or customised to make it individual to you. If you would like to attend my stamping classes, please do get in touch via joanne@thecraftyowl.co.uk for more details. Next month's class is a One Sheet Wonder class using the Secret Garden stamp set and framelits.
Back tomorrow with another project - until then, happy stampin'!
Stampin' Up Supplies:
Stamps: Oh Hello
Cardstock: Whisper White, Marina Mist, Pink Pirouette, So Saffron, Chocolate Chip, Basic Black, Certainly Celery
Ink/Stampin' Write Markers: Early Espresso
Tools: Owl Punch, Cloudy Day Textured Impressions Embossing Folder, 1" Circle Punch, 3/4" Circle Punch, Bird Builder Punch, Oval Framelits, Itty Bitty Shapes Punch (circle), Large Oval Punch
Finishing Touches: Cute Clip
978903eb-96a2-4560-8b79-e81e3b888ce1|0|.0|96d5b379-7e1d-4dac-a6ba-1e50db561b04
Tags: bird builder punch, circle punch, Cloudy Day Textured Impressions Embossing Folder, Classes, Cute Clips, Itty Bitty Punches, Oh Hello, Owl Punch, Ovals Framelits, Punch Art, Stampin' Up, Stampin' Up Card, Stampin' Up Card ideas, Stampin' Up Supplies, large oval punch
Cards | Classes | Punch Art
by Joanne James23. May 2013 21:26Busy day revolving around my little ones today with music recitals, class assemblies, ballet lessons and visiting friends for tea - I swear my two have a better social life than me! Anyway, finally sitting down to share another card from this month's class with you - today, a cute baby card, complete with washing line:
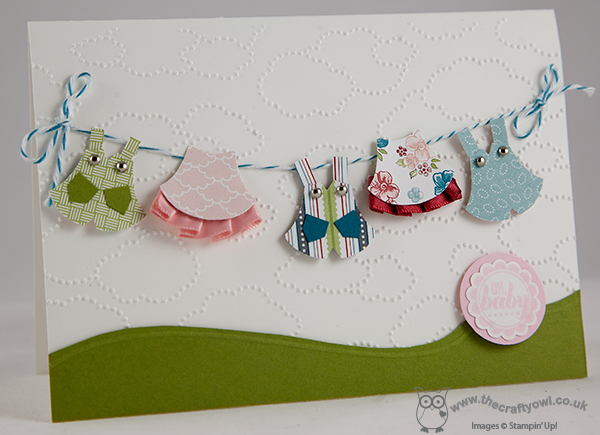
I used the lovely Twitterpated designer paper for the dresses and dungarees, as the largely pastel colours suit a new baby card. I must confess to using some now retired ribbon that was lurking at the back of my drawer to edge the dresses because the pleated edge was perfect for the dress edge. The dresses and dungarees are all made from the 'waistcoat' section of the owl punch, with a few nips and tucks here and there. My most favourite thing about this card is the mini-brad dungaree buttons - I love them!
I've added a pink 'oh baby' sentiment circle to this card, but in class we made two: one pink and one blue, so that they could be added at a later stage when the recipient was known; now that's what you call organised! Back tomorrow with my last class card - until then, happy stampin'!
Stampin' Up Supplies:
Stamps: Ciao Baby!
Cardstock: Whisper White, Old Olive, Island Indigo, Baja Breeze, Pink Pirouette, Twitterpated DSP
Ink/Stampin' Write Markers: Baja Breeze, Pink Pirouette
Tools: Owl Punch, Cloudy Day Textured Impressions Embossing Folder, Simply Scored Borders Scoring Plate, 7/8" Scallop Circle Punch, 1" Circle Punch
Finishing Touches: 1/8" Mini Brads, Island Indigo Baker's Twine, Ruffled Ribbon (retired)
5be96ef1-5752-47e1-ae68-2bd64995cc39|0|.0|96d5b379-7e1d-4dac-a6ba-1e50db561b04
Tags: Ciao Baby!, circle punch, Classes, Cloudy Day Textured Impressions Embossing Folder, Owl Punch, scallop circle punch, Simply Scored, Stampin' Up, Stampin' Up Card, Stampin' Up Card ideas, Stampin' Up Supplies, Twitterpated
Cards | Classes | Punch Art | Stamping
by Joanne James22. May 2013 20:36As promised, here's the second card from last week's Owl Punch card class - this time Nurse Owl coming to wish the recipient 'Get Well Soon':
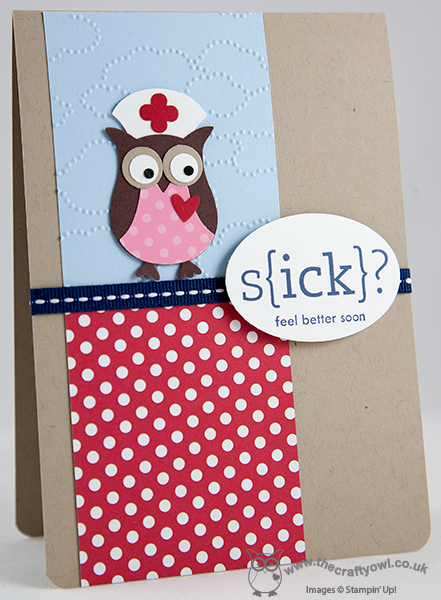
I've seen these little nurse owls lots of times and think they make a great focal point for a 'get well soon' card. The nurses hat is made from an upside-down 'waistcoat' piece of the owl, whilst the cross is punched with one of the punches from the the Itty Bitty Punches set. This is the only card from our class that we made that wasn't an original design of mine. Jo Dumbleton shared this card on her Facebook page recently and as I was planning my class, with my owl punch, cloudy day embossing folder and 'sick' stamp at the ready, I knew her card would be perfect to showcase all three - and I didn't feel I could improve upon it. I hope you like it too.
Back tomorrow with another of our class cards - and it will be an owl, but not as you know it; you'll have to pop back tomorrow to see what I mean ... until then, happy stampin'!
Stampin' Up Supplies:
Stamps: Word Play
Cardstock: Whisper White, Basic Black, Crumb Cake, Chocolate Chip, Real Red, Brights DSP, Polka Dot Parade DSP
Ink/Stampin' Write Markers: Night of Navy
Tools: Owl Punch, Large Oval Punch, Itty Bitty Shapes Punch, Cloudy Day Textured Impressions Embossing Folder, 3/16" Corner Punch
Finishing Touches: 1/4" Night of Navy Stitched Grosgrain Ribbon
by Joanne James21. May 2013 20:54I've been busy card making today, but I thought it was about time I shared some of the cards that we made in this month's card class, featuring the owl punch. The class centred around the versatility of this punch and with the exception of the card I'm sharing today, the other cards we made were about using the punch to make things other than a straight forward owl. So on to today's card! This is the somewhat unassuming front of the card:
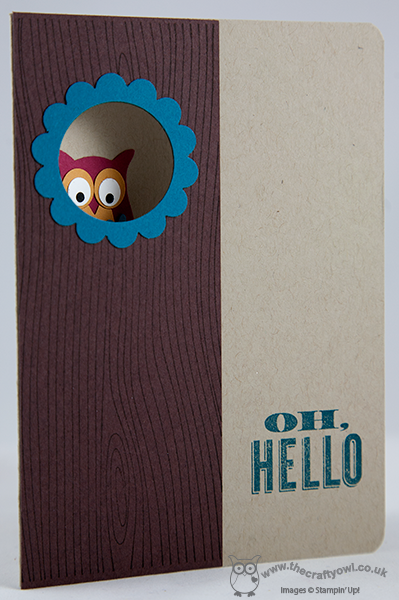
A nice woodgrained stamped tree trunk with a someone peeping out to say 'Oh Hello'. Open up the card and this is what you find:
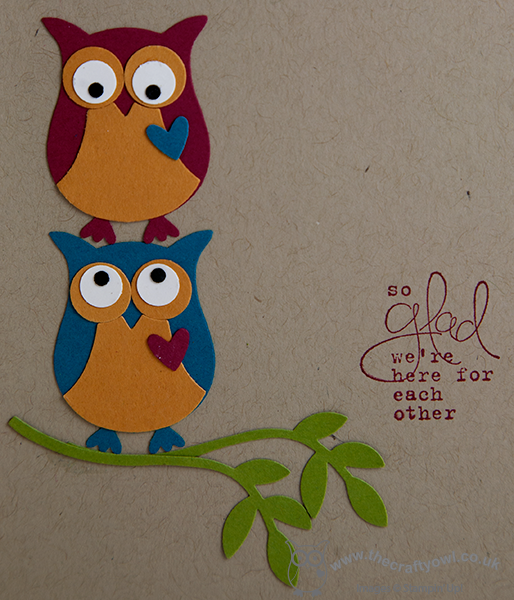
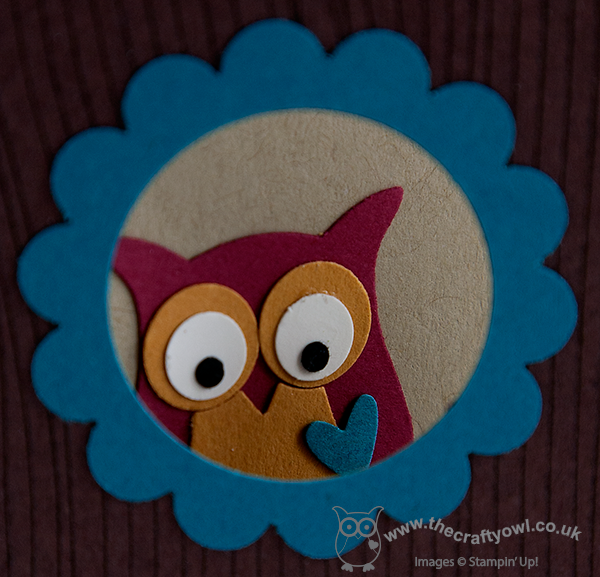
A cute pair of owls keeping each other company, balancing on a branch. I chose to use bright colours for the owls so that they would stand out against the neutral Crumb Cake background. This would make a great card for a good friend, or even an anniversary card for your 's'owl' mate' (apologies - couldn't resist the pun!)
Back tomorrow with another owl card - until then, happy stampin'!
Stampin' Up Supplies:
Stamps: Oh Hello, Bloomin' Marvelous (Sale-A-Bration - retired), Woodgrain
Cardstock: Whisper White, Basic Black, Crumb Cake, Chocolate Chip, Island Indigo, Raspberry Ripple, More Mustard, Old Olive
Ink/Stampin' Write Markers: Island Indigo, Raspberry Ripple
Tools: Owl Punch, 1 3/4" Scallop Circle Punch, 1 1/4" Circle Punch, Bird Builder Punch
f490a71c-c4a5-4c2c-972b-6bb7a0d72f68|0|.0|96d5b379-7e1d-4dac-a6ba-1e50db561b04
Tags: bird builder punch, Bloomin' Marvelous, circle punch, Classes, Oh Hello, Owl Punch, scallop circle punch, Stamp-a-ma-jig, Stampin' Up, Stampin' Up Card, Stampin' Up Card ideas, Stampin' Up Supplies, Woodgrain
Cards | Classes | Punch Art | Stamping
by Joanne James10. May 2013 21:16Good evening, blog followers! Apologies for the lack of blog post yesterday; things have been very busy in the world of the Crafty Owl this past few days and yesterday just ran away with me. Anyway, back today with a card I wanted to share in advance of next week's card class featuring my favourite punch of all time - the owl punch. This punch really is so versatile; there are many examples of alternative uses for this punch. Today I'm sharing an alien pop-up card, inspired by the many examples found on Pinterest - this is the outside:
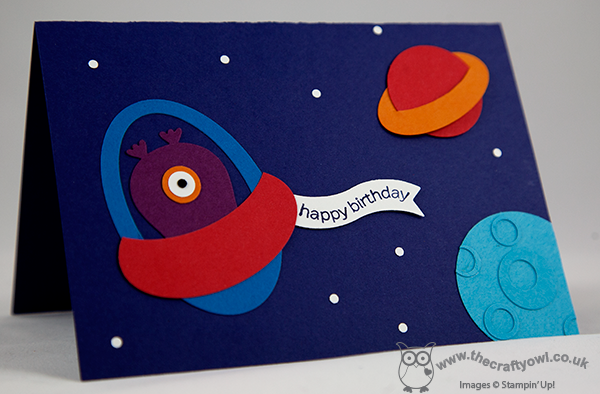
Recognise the alien in the spaceship? An upside-down owl with one eye, along with some punch art planets and stars. When you open it up, the inside looks like this:
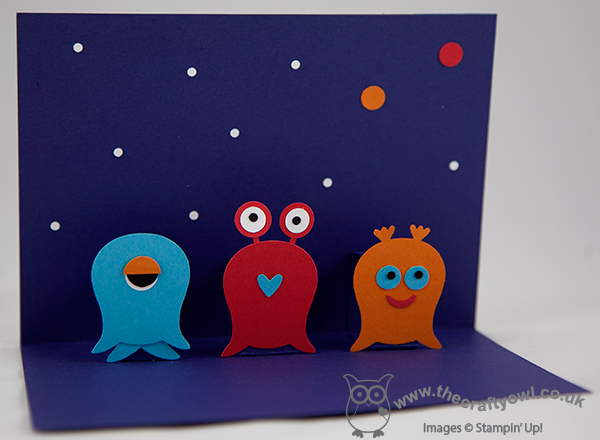
A trio of aliens pop up to wish you a happy birthday! This kind of card is such fun - you can customise your aliens and make them different every time. perfect for a birthday that's 'out of this world'! The owl punch is the feature punch for this month's card class - if you live in Northampton and the surrounding areas and would be interested in attending one of my classes, do get in touch for more details. Right - I'm done with the alien puns; I'm off to try and schedule tomorrow's blog post as I'll be on a Stampin' Up! regional training day in Telford all day - should be fun! Until tomorrow, happy stampin'!
Stampin' Up Supplies:
Stamps: Happiest Birthday Wishes (retired)
Cardstock: Whisper White, Rich Razzleberry, Tempting Turquoise, Pacific Point, Pumpkin Pie, Basic Black, Concord Crush (retired), Poppy Parade (retired)
Ink/Stampin' Write Markers: Concord Crush (retired)
Tools: Owl Punch, Large Oval Punch, Small Oval Punch, 1" Circle Punch, 1 1/4" Circle Punch, Oval Framelits, Bitty Banners
f79f64f2-a211-44b2-946e-f5843d8e7492|0|.0|96d5b379-7e1d-4dac-a6ba-1e50db561b04
Tags: Big Shot, Bitty Banners, circle punch, Happiest Birthday Wishes, large oval punch, Ovals Framelits, Owl Punch, Punch Art, small oval punch, Stampin' Up, Stampin' Up Card, Stampin' Up Card ideas, Stampin' Up Supplies
Cards | Classes | Punch Art