Beautiful Friendship Stamparatus Wreath Builder Card PP493

by Joanne James31. May 2020 09:00

Today it's Sunday and time for this week's new challenge over at The Paper Players! It's the turn of the fabulous Jaydee to host this week and she has a fun tic-tac-toe challenge for you to work with:


I decided to go across the top row with Flowers/Girly/Birthday and wanted to share with you a card I made using one of my most favourite stamp sets of all time, Beautiful Friendship - take a look:


Here's the low-down on today's card:

I ADORE the 'Beautiful Friendship' stamp set and have made a ton of cards with it recently, having held an online class using this set. In between  my online classes, I have been running a whole host of online demonstration sessions either sharing different ideas using the class stamp set, revisiting previously learned techniques, or sometimes a combination of both. This card was a result of one of those sessions, where I held I refresher session showing how to use your Stamparatus to create wreaths. The single rose in the 'Beautiful Friendship' set is perfect to create a simple wreath, so armed with my favourite of the retiring in-colors, Lovely Lipstick, and ringing the changes with a 6" x 6" square card, this was what I came up with. 

Have you ever used your Stamparatus to create a floral wreath? Here's a short speeded-up clip of my demonstration (without sound) that shows how easy it is to do:

https://youtu.be/1LgZ-ttfvIE

I then added a heat-embossed fussy cut sentiment from the soon-to-be-retired 'Seriously The Best' stamp set and a simple twine bow to the front of my card and added a little decoration to the inside too:


Did you find the above speeded up video clip useful? If you would like to take part in one of my online classes or attend my online demonstration sessions, do check out my class schedule on the events section of my Facebook page or on the 'Classes' tab on my website, or just drop me a line for more information.

I'm linking today's card up over at SUO Challenges where the current theme is Designer's Choice - this one is definitely one of mine!

Here is the visual summary of the key products used on today's project for you to pin for easy reference:


You can see all of my Product and 'How To' summaries on my 'How To - Tips and Techniques' Pinterest board in case you've missed any. 

Before you reach for your ink and papers, check out what our amazing team has created to inspire you this week:

Here's a quick recap of our challenge rules:
 
1.  Create a new paper project
2.  Upload your creation to your blog with a link back to us and provide a direct link to the post featuring your challenge submission.
3.  Please link your card to no more than four challenges, TOTAL.
4.  Have FUN!

You can see all of my 'How To' summaries on my 'How To - Tips and Techniques' Pinterest board in case you've missed any. 

Enjoy your day; I'll be spending mine in and out of my 'By One Get One Free' party over on my Facebook page as I clear out my retiring stamps to make way for the new, whilst sitting in the garden enjoying the warm sunshine!nI'll be back tomorrow with another project. Until then, happy stampin'!


Stampin' Up! Supplies Used: 

Table built using Product Table Builder by The Crafty Owl - Independent Stampin' Up! Demonstrator.


Daisy Lane Fern Starburst Stamparatus Card

by Joanne James10. July 2019 20:00

Today I'm sharing another of the cards I designed for my Daisy Lane class earlier this week that is perfect for the current colour challenge over at Hand Stamped Sentiments where they have a pretty subtles colour palette for inspiration:

I wanted to remind my ladies of a technique that I demonstrated to them previously using a template to create a wreath or uniform pattern using their Stamparatus and the Daisy Lane set was perfect for this - take a look at my card:


Here's the low-down on today's card:

A Layered Daisy - Today's card features more stamped and punched daisies - this time layered to create a full flower: two large stamped and punched daisies in Petal Pink, with two smaller stamped and punched daisies in Calypso Coral layered on top. Lots of petal curling with a bone folder adds dimension and the appearance of fullness.

A Starburst Fern And A Fun Stamparatus Technique - I wanted to use the fern on this card and it was the perfect size and shape to revise a fun technique using the Stamparatus. We had previously looked at how you can use a template to help you create a symmetrical wreath using leaves and small flowers; this time we used the same template, but instead used it to create an almost flower-shaped starburst of ferns to back our punched daisy. This was perfect for my daisy focal point and a neat way to ring the changes with a square card too.

A Touch of Sparkle - On this card, I finished my daisy with a clear faceted dot for a neutral touch of sparkle. 

Here is the visual summary of the key products used on today's project for you to pin for easy reference:

You can see all of my 'How To' summaries on my 'How To - Tips and Techniques' Pinterest board in case you've missed any. 

Enjoy your evening and I'll be back tomorrow with another project. Until then, happy stampin'!


Stampin' Up! Supplies Used:

Table built using Product Table Builder by The Crafty Owl - Independent Stampin' Up! Demonstrator.

Bike Ride Apple Basket Thank You Cards PP415

by Joanne James21. October 2018 09:00

Today it's Sunday and time for this week's new challenge over at The Paper Players - yay! It's my turn to host this week and I have a clean and simple challenge for you to work with:


Remember in addition to including an apple on your card, this week is a Clean-and-Simple (CAS) challenge!  What do we mean by CAS?

  • Minimal layers and embellishments
  • Plenty of open space, aka "white" space
  • Simple and uncluttered

I decided that for my card this week I was going to pair a little of something old with something new and create a bunch of thank you cards - take a look:


Here's the low-down on today's card:

A Basket Of Apples - My little basket of apples comes from the Bike Ride set and is cut out with the Build A Bike framelits. This little image works in its own right - not a bike in sight on today's card! It is super quick and easy to stamp as the leaves and apples and basket all have solid images to be stamped to fill in the colour quickly and easily - great for clean and simple cards.

Thanks A Bunch - I layered my basket on a set of layered ovals, with a sentiment from the Beautiful Bouquet stamp set. Ok, so this stamp was designed to work with flowers, but I think it works for apples too!

Buffalo Check Background Made Easy - I know I'm using it again this week, but can you tell I'm loving the new Buffalo Check background stamp? I went with a straightforward single colour stamped image in Granny Apple Green to contrast with the apples - it reminds me of a picnic table cloth!

Here is the visual summary of the key products used on today's project for you to pin for easy reference:


Having completed my full-size card for today, I decided to run off a whole bunch of these using the same design, in both a red and green colourway, to use as my customer thank you cards this month - here are two of my finished cards:


I actually think I prefer the balance of the size/shape of the oval on the lightly smaller card - what do you think? Either way, I like this design so much I think I'll run off a set of co-ordinating bag tags too! 

Here is the visual summary of the key products used on today's project for you to pin for easy reference:


You can see all of my Product and 'How To' summaries on my 'How To - Tips and Techniques' Pinterest board in case you've missed any. 

Before you reach for your ink and papers, check out what our amazing team has created to inspire you this week:

Here's a quick recap of our challenge rules:
 
1.  Create a new paper project
2.  Upload your creation to your blog with a link back to us and provide a direct link to the post featuring your challenge submission.
3.  Please link your card to no more than four challenges, TOTAL.
4.  Have FUN!

You can see all of my 'How To' summaries on my 'How To - Tips and Techniques' Pinterest board in case you've missed any. 

Enjoy your day; I will be spending mine with a lovely group of ladies on the second day of our weekend residential craft retreat - more about that in tomorrow's post! Until then, happy stampin'!


Stampin' Up! Supplies Used: 

Table built using Product Table Builder by The Crafty Owl - Independent Stampin' Up! Demonstrator.

World Card Making Day Promotion and New Stamparatus Accessories

by Joanne James1. October 2018 13:00

Hello everyone! I'm starting the week with a couple of news items for you.

Firstly, for papercrafters everywhere, to celebrate World Card Making Day on 6th October Stampin' Up! has a number of products that are available on offer from 1st-7th October with 10% off:

With discounts on cardstock and adhesives, it's a great opportunity to stock up on your cardmaking essentials. There are also some great offers on kits and stamp sets too - why not treat yourself and save a few pennies into the bargain? These offers last for just one week until Sunday 7th October, so get your order in today!


The second piece of news to start off October is that the first wave of Stamparatus accessories is here! The case/bag won't be available until later in the year, but for now you can purchase additional plates, magnets and foam pads, along with new custom-sized grid paper. Here's the complete list:


If you would like to know more about any of the above or would like to place an order, then please do get in touch.  I'll be back tomorrow with a creative post; until then, happy shopping!

Wishing You Well Festive Wreath Made Easy With The Stamparatus

by Joanne James19. September 2018 10:00


I had a busy day yesterday, having been treated to a rare breakfast catch up with my sister-in-law, and lots of work and prep in between chasing various items around the garden in the face of the terrific winds we've been having here in the UK at the moment. I finished my day by hosting a Stampin' Up! party for the lovely Jane and her crafty friends yesterday evening to share all things Christmas.

Today I'm squeezing in another entry for the current challenge over at at As You See It where the team are all about getting back to basics with stamps, ink and paper:


I always send a card out to my customers when I mail them a new catalogue with a 'sneak peek' of what's inside. This is one of my big mass production exercises of the year though, so it needs to be something simple to enable me to get a large volume churned out within a reasonable time frame - yet I still want it to be pretty and have impact. Here's this year's Autumn-Winter catalogue card:


Here's the low-down on today's card:

Back To Basics - The theme over at As you See It this week is 'Back To Basics', creating cards using little more than stamps. ink and paper. There is something liberating though about creating with just stamps, ink and paper and it is fun to be able to share creations from time to time like this. They can be quick(er!) to create and show that it's still possible to create something pretty without needing a ton of supplies. My card uses only 5 items: a blank card base, two ink colours, one stamp set and one (optional) embellishment - basic supplies indeed! The 'Wishing You Well' stamp set is perfect for this kind of card; it's one of Stampin' Up!'s Distinktive stamps, where you can ink your stamp once yet create different opacities in a single stamped image, giving the illusion of dimension. The wreath and bow look layered, even though they have been stamped only once. Clever, right?

Mass Production Made Easy With The Stamparatus - My simple wreath with stamped bow and sentiment would be easy to stamp in multiples even if I did it 'freehand', but the days of that kind of mass-production are long gone for me now that I am the proud owner of the best ever stamping positioning tool, Stampin' Up!'s Stamparatus - this tool makes light work of this kind of stamping! I placed my wreath on one plate and my bow and sentiment on another, then inked and stamped without needing to reposition and got my simple stamping done in record time!

Add A Pearl - Or Thirteen - The dimensional inking of these stamps means that I could have just left my card as is, but I decided to add a sprinkling of tiny seed pearls throughout my wreath, a little like mistletoe berries, for some added interest. It seems despite my extensive ribbon collection, I'm more of a magpie - I can't resist a little sparkle or shimmer.

And The Winner Is ... I've been running a fun competition with my customers over on my Facebook page to see if they could guess correctly how long it took me to make 40 of these cards with the help of my Stamparatus. Well, the answer is just 17 minutes and 21 seconds - it took me longer than that to stick all of the pearls on afterwards! I'm pleased to announce the winner of my competition is Barbara Civil who guessed 17 minutes and 50 seconds - clearly already a seasoned Stamparatus user! Samantha Daglish gets the runner-up prize for her best guess of 7 minutes and 7 seconds; I'm afraid I'm just not that good however that is my new target! Congratulations both of you; look out for the postman as there will be a little something in the post to each of you to thank you for playing along this week!

Here is the visual summary of the key products used on today's project for you to pin for easy reference:


You can see all of my 'How To' summaries on my 'How To - Tips and Techniques' Pinterest board in case you've missed any. 

Enjoy your day; I have another day of prep, in readiness for an in-home kit party that I'm hosting for a group of friends this evening, although I am minus one of my James Juniors as Ben has gone to the Peak District for a few days with school on an outward bound trip so have a few less school runs for the next few days. I'll be back tomorrow with another project. Until then, happy stampin'!


Stampin' Up! Supplies Used:

Table built using Product Table Builder by The Crafty Owl - Independent Stampin' Up! Demonstrator.

Amazing Congratulations On Your New Little One

by Joanne James16. July 2018 08:00

I finally managed to get a little time in my craft room this weekend and made a card that was originally for this week's sketch challenge over at Freshly Made Sketches but also works for the challenge over at Color Throwdown and Addicted to CAS this week:


I changed the orientation of my card but kept the layout and decided to create a gender-neutral baby card - take a look:


 Here's the low-down on today's card:

Amazing Congratulations - The sentiment combinations from the Amazing Congratulations stamp set are perfect for this week's FMS sketch and even helped me get over my paranoia of a wonky sentiment (thanks for the challenge, girls!) I used my stamparatus to line up all three of the images that make up the main word - I love how this enables you to re-ink the same image too until you get the intensity you want; I would not be able to get such a great outline in Smoky Slate without it for sure.

A Pineapple Punch - I decided to go 'gender neutral' for my baby card - I love to have a few of these in my stash - and chose the new zingy and bright Pineapple Punch as my feature colour - it's so fresh! I used a strip of co-ordinating in-colour designer series paper along the edge and paired it with Daffodil Delight across the sentiment to get the contrast on the lettering.  

Hello Swirly Bird - I wanted something more than just the sentiment for my baby card, so decided to add a pair of proud parents in their nest courtesy of the Swirly Bird stamp set, which I haven't used in a while yet gave me just what I needed whilst keeping the clean and simple feel of my card.

I have one of my monthly technique classes this morning so will come back and edit this post with the visual summary of the key products used on today's project for you to pin for easy reference later. The organised me would have written this post yesterday, but alas a jug of Pimms and the Wimbledon Men's Tennis Finals took my attention instead! 

You can see all of my 'How To' summaries on my 'How To - Tips and Techniques' Pinterest board in case you've missed any. 

Enjoy your day and I'll be back tomorrow with another project. Until then, happy stampin'!


Stampin' Up! Supplies Used:

Table built using Product Table Builder by The Crafty Owl - Independent Stampin' Up! Demonstrator.

The Year Is Coming To An End - And So Are These Offers!

by Joanne James28. December 2017 23:30

Hello lovely readers! I hope you have all enjoyed wonderful Christmases. We have had a busy time here in the James household, with one poorly James Junior and a house full of guests, however I'm pleased to say we are currently enjoying a post-Christmas lull with some much needed peace, quiet and rest and relaxation before the new year begins.

The festivities have necessitated something of a blog break - my regular readers know this happens every year as I am yet prepared enough to have time to write all my posts in advance - and whilst my usual frequent blogging won't resume until the new year properly, I do have some projects to share, along with some news and reminders of offers that will end within the next few days. 


First things first - you have until the 31st December to reserve your Stamparatus, the amazing new one-of-a-kind stamp positioning tool by Stampin' Up! You can read more about this fantastic tool in my earlier blog post here however following the overwhelming popularity of the tool during the first reservation window (the entire allocated stock was reserve in under 15 minutes!) the ongoing reservation process was changed to allow an unlimited number of reservations (subject to one per customer) in a single period, scheduled to end at the end of December. The reservation window will close at 6.50am GMT on Sunday 31st December - you don't have to pay for your Stamparatus until you are notified that it is ready to ship (likely to be sometime from March onwards). This will be your last chance to order the best stamp positioning tool on the market until this tool launches fully in this year's new annual catalogue in June. 


You still have time to snap up a bargain in the year-end sales event: click here to see the stamps and accessories that are still available online and don't forget to add the current hostess code KRXDZQXE to your online order to receive an extra thank you in the post from me. There are also a whole range of other items that are not discounted that will also be leaving us when the current seasonal catalogue ends - you can find those in the online store here


Lastly, copies of the new Spring-Summer seasonal catalogue and the forthcoming Sale-A-Bration brochure will be in the post to those of my customers still to receive them within the next couple of days; if you haven't purchased from me in the last 12 months and don't already have a Stampin' Up! demonstrator and you would like to receive one, please get in touch with your details and I will happily pop one in the post to you.

Back with more news soon; meanwhile, happy stampin'!


Introducing The Stamparatus - The Best Stamp Positioning Tool EVER And How To Get Yours!

by Joanne James14. November 2017 15:20

Hello lovely readers! Apologies for an even longer blogging absence than usual - as many of you will know if you follow me on Facebook, I was at Stampin' Up!'s #Onstage2017 UK event at Solihull at the weekend, in readiness for the launch of the new Spring-Summer catalogue. Not only did I attend the event, I was one of the Onstage presenters and had the privilege of presenting one of the new product collections to the 480 demonstrators present. This was a great gig for me, as I love presenting and was so excited to share the things I had been working on secretly in the weeks leading up to the event. I will of course be sharing them with you too in due course, however today I have some news that is SO exciting it just can't wait!

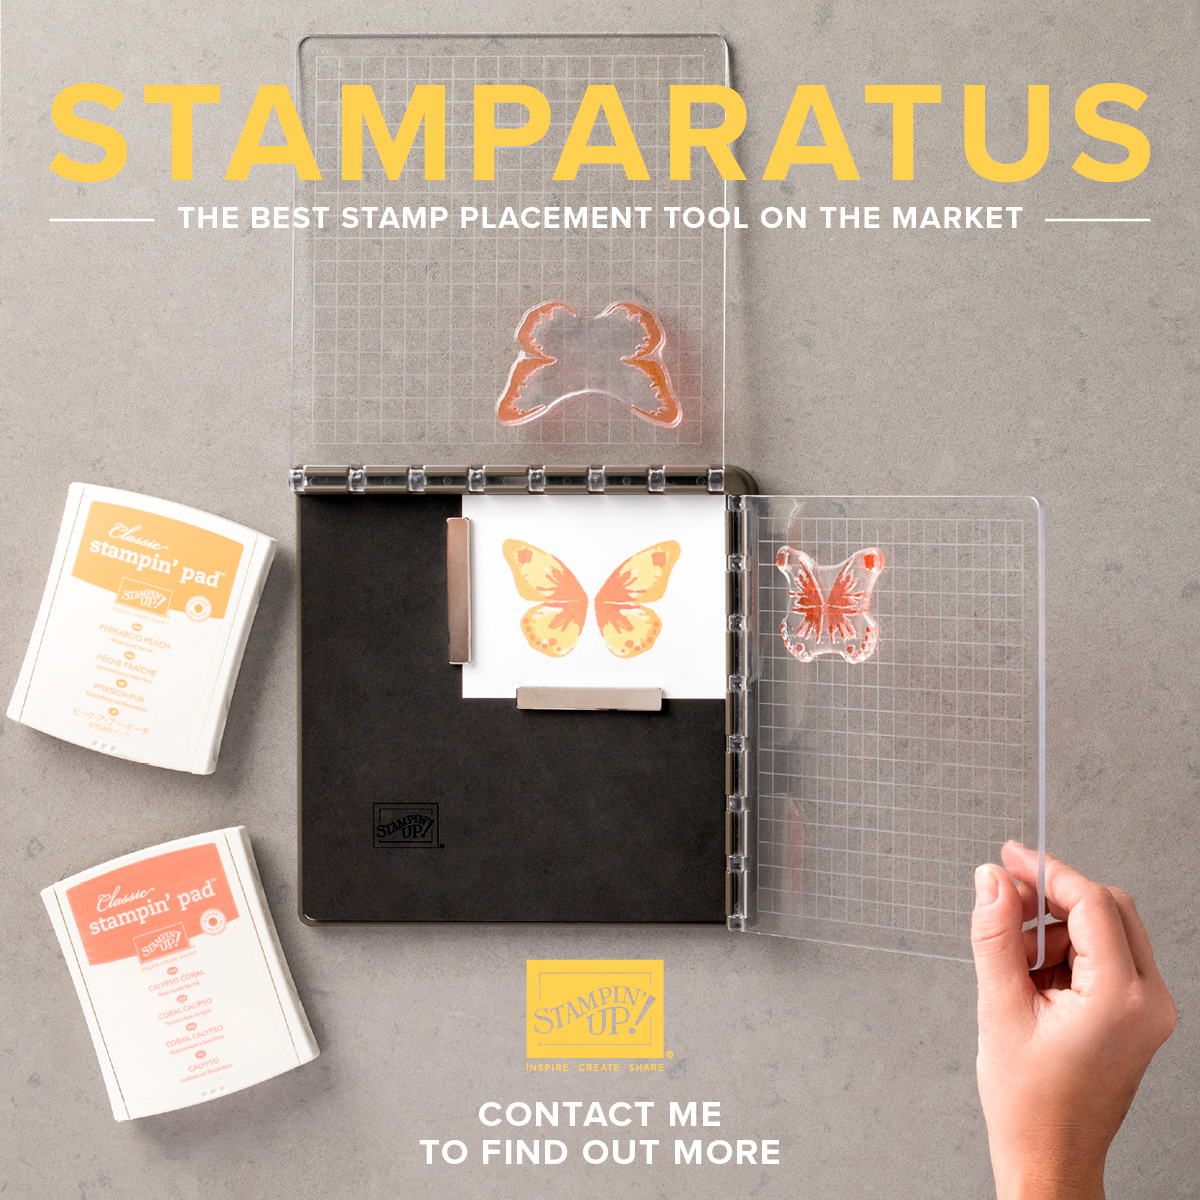
It’s big news when something breaks the mould and changes everything. The Stamparatus will change the way you stamp, and before long, you’ll wonder how you ever crafted without it! Why do YOU need one? You’ll fall in love with stamping all over again when you learn everything you can do with it!

  • Make multiples with ease
  • Consistently stamp crisp, clean images
  • If you want a darker impression, apply more ink and restamp—no need to start over
  • Make fewer mistakes, saving time and money
  • Easily create 2-step, 3-step, and 4-step stamped images using reversible plates
  • Develop new and specialised stamping techniques with adjustable stamping plates and precision placement

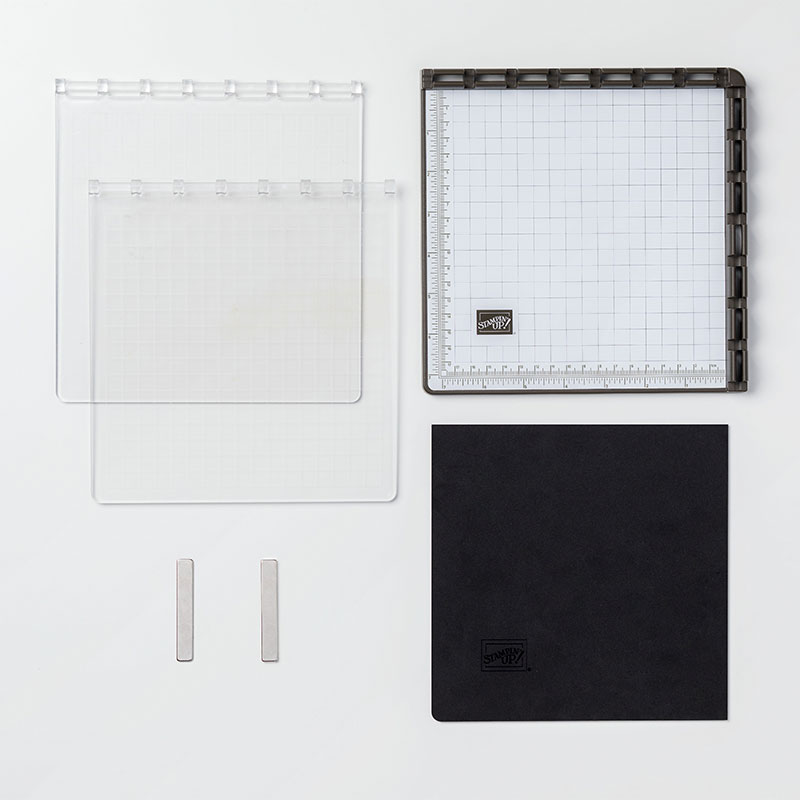
I am very excited about this product: the idea of a stamping positioning tool was conceptualised, designed and produced in collaboration with a select group of Stampin' Up! demonstrators, of whom I was one. Demonstrator input has been critical to the final design. This is a product that has been designed by demonstrators, for stampers - and it shows.  Here are the crucial details you need to know:

  • Compatible with Stampin’ Up!’s red rubber and photopolymer stamps
  • Includs a foam mat to use with photopolymer stamps
  • Rulers and gridlines for quick measuring
  • 2 open sides so you can stamp on larger paper
  • 2 reversible plates: a total of 4 surfaces to work with
  • 2 magnets to hold the paper in place
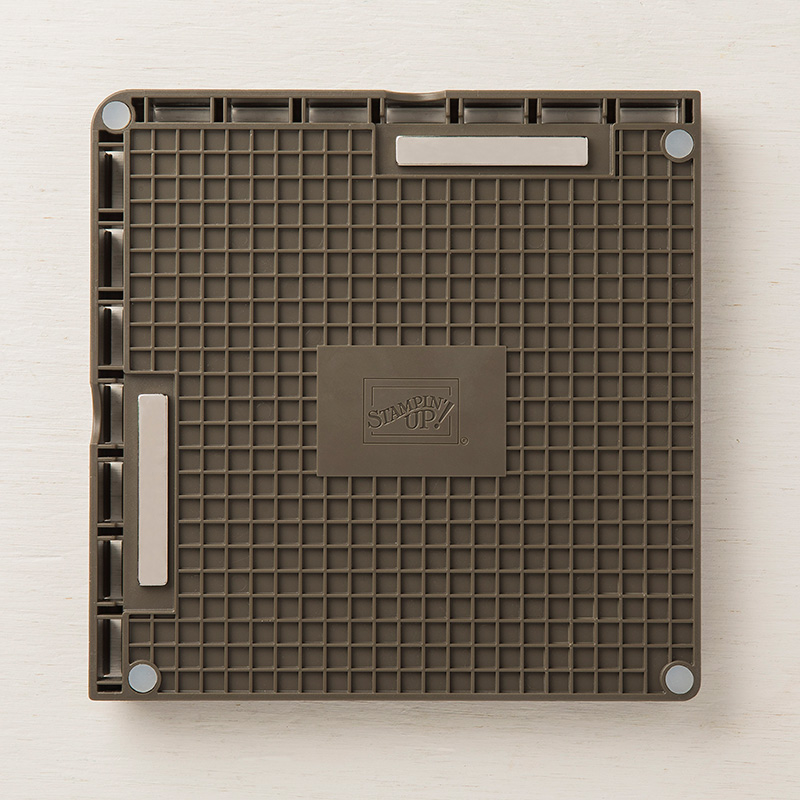
  • Magnet storage areas on the reverse
  • Retail Price: £44.00/59,00 €

 Here are some images of the tool that show these features in more detail:


And this animation shows just how easy it is to use:


Want the scoop on this life-changing tool? check out the 5 things you need to know in this informative video by Carrie at the Stampin' Up! Home Office:


With the launch of this tool, Stampin' Up!  are trying something different too: we are testing a new reservation system. And it acts like a true pre-order. You reserve your spot and we guarantee shipment as soon as the product arrives in our warehouse. Everyone will place reservations and receive their product at the same time. This system will allow us to get the product to market as soon as possible while avoiding backorders and efficiently managing inventory.

The global launch will feature three reservation windows. For each window, please note the following:

  • Reservation quantities are while supplies last only.
  • Limit is 1 tool per customer per reservation window, however you may participate in multiple reservation windows.
  • The 3 reservation windows and approximate delivery dates are as below:

16–30 November 2017

   -   Approx. 1 February 2018

5–30 December 2017

   -  Approx. 19 March 2018

15–30 January 2018

   -  Approx. 15 April 2018

So how can you get your hands on one?

You can PRE-ORDER your Stamparatus in any of the reservation windows over the next few months. The first window will open on Thursday 16th November at 9PM GMT - that's two days from now. To reserve yours then, simply visit my Online Store and log in. If you don't already have an account, set yourself one up. Make sure you see my name as your demonstrator in the top right corner of the screen.


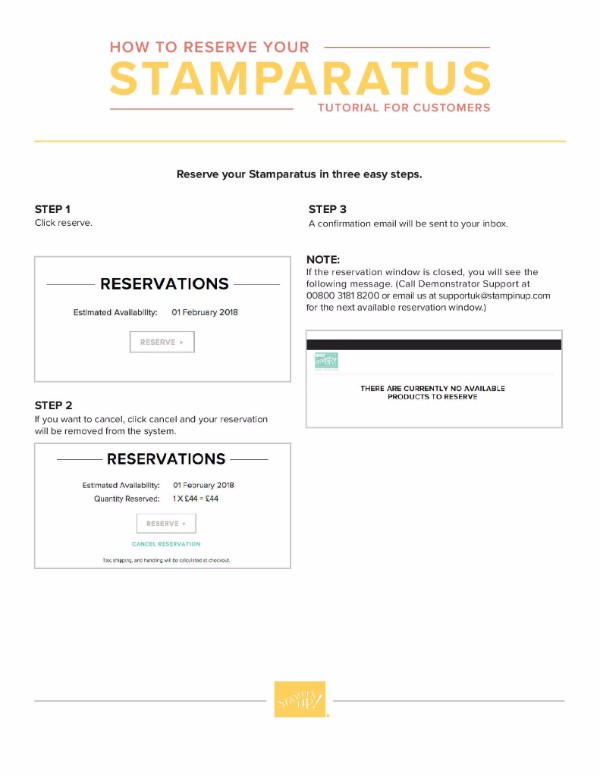
Once you are logged in, visit the STAMPARATUS page and click on RESERVE. You can see more instructions below if you decide to cancel or try to order outside of a reservation window. All the details regarding when you'll receive your Stamparatus and more detail on the points above can be found in the Customer Q&A document that you can read by clicking here

What Happens When Your Stamparatus Arrives?

Your Stamparatus will be added to a shopping basket for you, and you will sent an email asking you to complete the transaction and pay. You can add other Stampin' Up! goodies to your basket at that time, so you only pay one lot of P&P. If this is during either of the first two delivery windows, you will be checking out during Sale-A-Bration, so it's worth adding a little something to your basket to take your order over £45 so that you will qualify for a free Sale-A-Bration item too! Also, be sure to add my current HOST CODE for that month if your order is less than £150 - you can always find this in the 'Shop Online' box on the right hand side of my blog. You'll then earn fabulous rewards direct from me - including a free 'Stampin' With The Stamparatus' class to ensure you get the most out of this amazing new tool.

A long post today but there's a lot of information to communicate. If you've any questions or queries, do get in touch with me prior to Thursday.

Back tomorrow hopefully with a creative post! Until then, happy stampin'!


Mini Catalogue

BROWSE THE CATALOGUE

The mini catalogue is now live! Read and download your copy here.

Shop Online

Access my online shop 24 x 7, 365 days of the year:

Current March hostess code:

S9F2XJJW

Shop Online

Join My Team

It's always a great time to join Stampin’ Up! New team members can get £130 worth of products for only £99 + free business supplies + free shipping + all the fun being a part of Stampin’ Up! Stampin' Up! has something for everyone: join my growing team and benefit from my support to enjoy Stampin' Up! however you choose.

If you're interested, call me for a chat to understand how I can help you realise your goals. Alternatively, if you have already decided to sign up and you just can't wait, please click here for the link to the online form where you can sign up and order your starter kit right away! 

Latest Kit!

Stampin Cut and Emboss

The Rock Legend Kit has all you need to make 8 cards with coordinating envelopes. Along with the new Panda Friends Kit, both are available from January 4th for just £14 each - get yours here!

2023-24 Annual Catalogue

BROWSE THE CATALOGUE

Click on the catalogue for a full list of current SU! supplies - if you would like to order any of the items featured, please drop me a line at [email protected] or give me a call on 07773 421446 - I'd be happy to help.

New Online Exclusives

There will be new products available exclusively in the online store from 5 March - check them out here.

About Me

Hi I'm Joanne and live in Northampton and when I'm not looking after my husband and two beautiful children, am an avid crafter with a passion for all things Stampin' Up!

I must confess that I have never been a big rubber stamper - until I discovered Stampin' Up! that is. I love the fact that I can get such great results with co-ordinating stamps, inks, papers and punches - the possibilities are endless! Join me on my stamping journey as I share the things I love and be inspired to create amazing things yourself!

Follow Me

Monthly Newsletter

Box Builder

Click the button above to use Box Buster to create your custom box design using the Envelope Punch Board!

Kits Collection Now Available!

Stampin Cut and Emboss

The new Kits Collection from Stampin' Up! is now available!

Click here to see the current kits available and order yours online today.

I Design For


Stampin' Up Stuff

This is my personal blog and is not endorsed by Stampin’ Up! I hope you find it a plentiful source of ideas and personal inspiration but please don't copy my designs for contest submission or use for classes, publication or sale without express permission.