It's Sunday and time for this week's new challenge over at The Paper Players! It's the turn of our wonderful leader Nance to host this week and she has a clean and simple challenge for you to work with:
Remember in addition to the theme of "negative space", this week is a Clean-and-Simple (CAS) challenge! What do we mean by CAS?
- Minimal layers and embellishments
- Plenty of open space, aka "white" space
- Simple and uncluttered
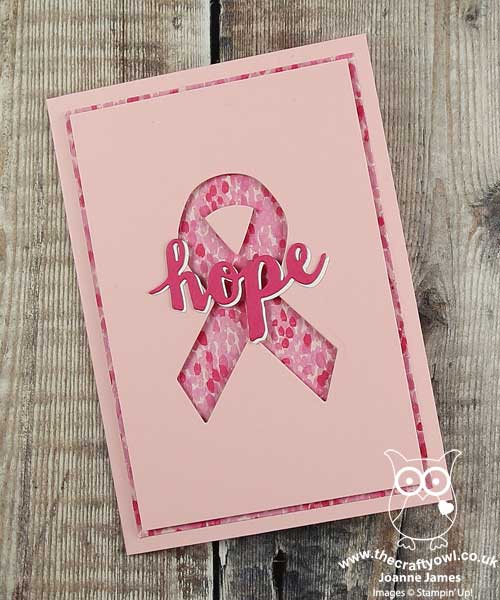
Now I love to use negative space on a card - if you browse my blog you will find tons of examples. Today though I have a card that is super quick and easy to recreate using a thinlit I haven't used before, that also showcases a glimpse of one of the fabulous designer series papers that is on offer as part of this month's 'buy 3, get 1 free' paper promotion - take a look:
Here's the low-down on today's card:
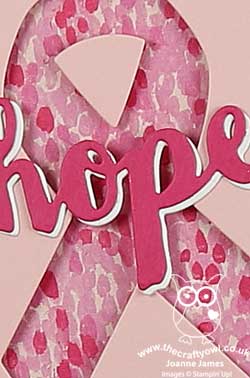
Negative Space - I am a big fan of using dies to create 'negative space' as I think it creates real interest on a clean and simple card. Today I chose to use the largest die in my Support Ribbon Framelits. This die cuts a ribbon shape and in order to retain this shape when you are using the negative, you need to remember to retain and add in the extra piece that forms the centre of the loop. This will be loose once you've made your diecut - the easiest way to ensure you get it in the right place is to place the positive diecut back into the gap to align the centre piece and stick it in place, before the removing the positive diecut once more.
Impressionist Pinks - I decided to add interest to my ribbon by using designer series paper in my negative space, and chose this gorgeous impressionist pattern of pinks from the Garden Impressions DSP set. I think this is my current favourite paper; good job it's in the 'buy 3, get 1 free' set so that I can stock up and save at the same time! Patterned paper should be used sparingly with lots of white (or in my case pink!) space surrounding it, to ensure a 'CAS' feel is retained.
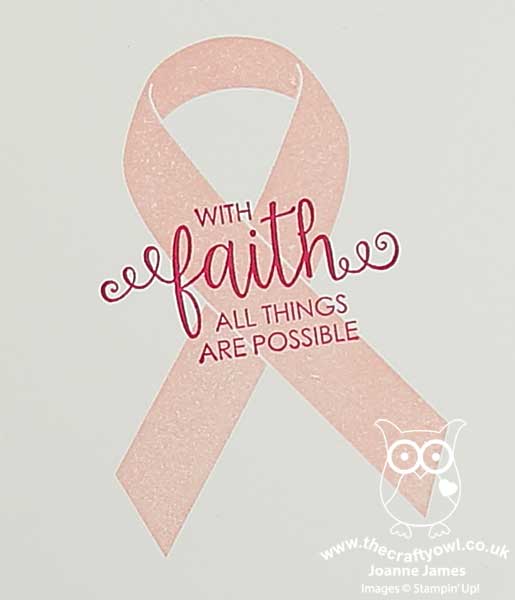
Hope and Courage - I overlaid my negative space with a stacked diecut of the word 'hope' from the Sunshine Wishes thinlits set, which I felt fitted with the theme of my card. Cancer is such a vicious disease, hope is essential for those diagnosed with it. It also tied in perfectly with the stamped inside of my card (the only stamping on today's card!), courtesy of the Ribbon of Courage stamp set:
I hope this card will be uplifting for the recipient and brighten their day.
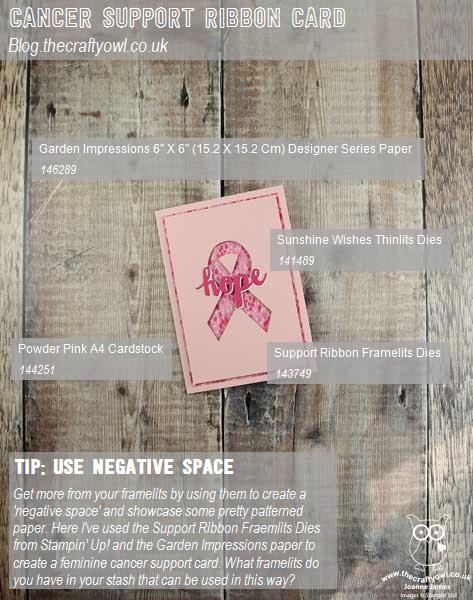
Here is the visual summary of the key products used on today's project for you to pin for easy reference:
You can see all of my Product and 'How To' summaries on my 'How To - Tips and Techniques' Pinterest board in case you've missed any.
Before you reach for your ink and papers, check out what our amazing team has created to inspire you this week:
The Paper Players Design Team
Here's a quick recap of our challenge rules:
1. Create a new paper project
2. Upload your creation to your blog with a link back to us and provide a direct link to the post featuring your challenge submission.
3. Please link your card to no more than four challenges, TOTAL.
4. Have FUN!
I can't wait to see your clean and simple creations and look forward to visiting your blogs this week! Enjoy the rest of your weekend - it looks like we are going to enjoy another day of sunshine here in the UK so I will be looking forward to spending some time in my garden, amongst other things. I'll be back tomorrow with another project; until then, happy stampin'!
Stampin' Up! Supplies Used: