by Joanne James2. April 2014 17:22Another quick post from me today before I head out for my second card class of the week with another of the cards that we are making, featuring the 'Blessed Easter' stamp. This time I paired the stamp with the Hardwood background - love this stamp, especially in Smoky Slate grey:
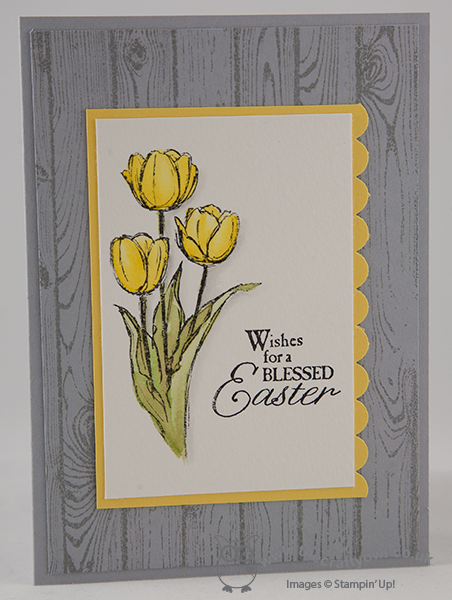
Unlike yesterday's card, I also used my Aquapainter to blend in some Smoky Slate ink around the tulips to create some subtle shading; shading in this way really makes the flowers stand out.
More lovely cards to share using this stamp in due course; off now to pack for my class.
Back tomorrow with another project - a rather special one too! until then, happy stampin!
Stampin' Up! Supplies Used:
by Joanne James1. April 2014 15:31Hello everyone! I can't quite believe it but James Juniors have broken up from school for their Easter holidays today - aargh! Where did that term go? Anyway, on the upside that will mean a few weeks of fun with hopefully not too much holiday homework. Today I've another quick post as I'm out hosting a crafty Stampin' Up! party this evening, so I'm blogging early (for me!) and thought I would share one of this week's class cards. In this month's classes my ladies are learning watercolouring techniques using Aquapainters and we are using the 'Blessed Easter' stamp set. All this month's cards are quite simple in design, as the aim is to spend the majority of the class time focusing on watercolouring and practising the technique rather than doing lots of stamping, cutting and sticking. Here is the first of this week's cards:
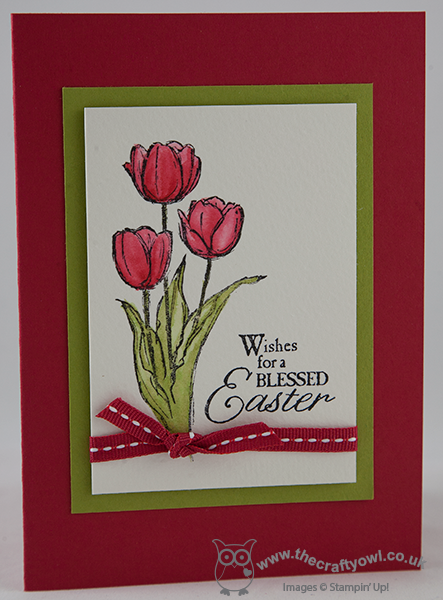
A Real Red card base and Pear Pizzazz panel, with the tulips and sentiment stamped onto watercolour paper using Jet Black Stazon and then coloured using the corresponding coloured inks and our Aquapainters. I think all the ladies in yesterday's class were pleasantly surprised at how easy it was to get a great result and the nice thing is even though everyone had the same tools, the cards all looked really different, depending on the individual shading and detail on the tulips. To finish we embellished with a piece of Real Red grosgrain ribbon.
That's all from me - I'm off to pack my bags for later. Back with more tulips later in the week; until then, happy stampin'!
Stampin' Up! Supplies Used:
by Joanne James29. March 2014 23:07I had a busy day in London yesterday so despite my best efforts to get ahead of myself I still didn't manage to blog yesterday and having had a class and put in my last Sale-A-Bration order I'm almost running out of time today, so before I do here is my intended share for yesterday, one of the Mother's Day cards I made in a couple of different colourways that I couldn't share before the day itself. Here it is in the predominantly pink colourway:
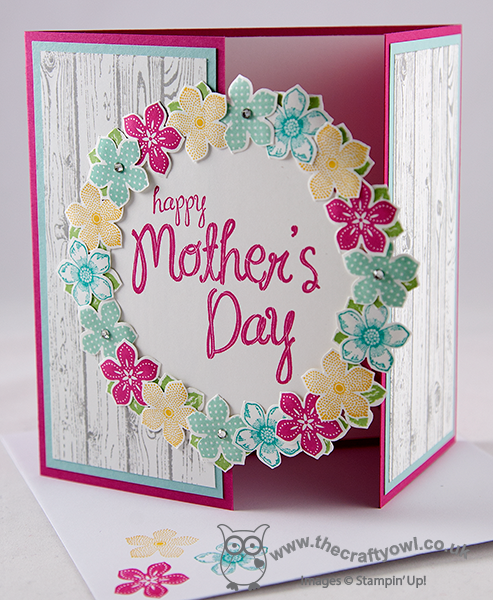
The card is similar to one I saw on Julie Kettlewell's blog here - I made a 5 1/2" x 5 1/2" square gatefold card and created an overlapping framed circle that I cut with my Circles Framelits and created a wreath of tiny stamped and punched flowers around the central bold 'Happy Mother's Day sentiment. I also made this card is an aqua colourway here using Coastal Cabana for the base:
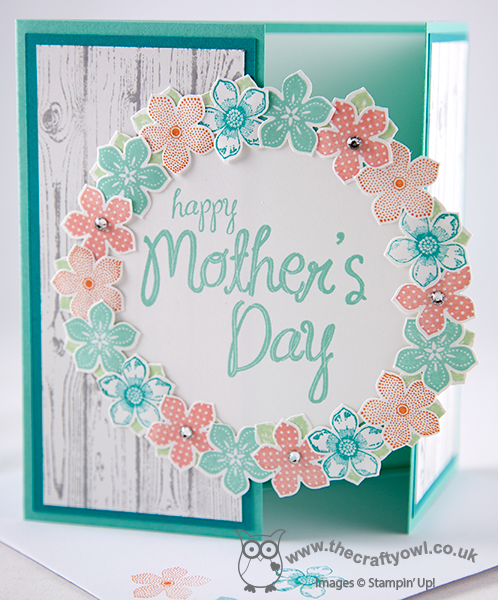
The hardwood background stamp makes such a great background for the focal point and some flower stamping inside and on the envelopes along with a few rhinestones just finishes off the card perfectly.
My Mother's Day was rather unconventional and was only spent with one of my offspring, which felt slightly strange, but Rebecca and I had a great day in London (she was so excited that she got to have her picture taken in front of Big Ben!) and the bonus is we get to have another Mother's Day next Sunday altogether to make up for it!
Back tomorrow with another project; until then, happy stampin'!
Stampin' Up! Supplies Used:
04fe73a3-d987-4b8e-ae26-b06fdce10abe|1|5.0|96d5b379-7e1d-4dac-a6ba-1e50db561b04
Tags: Hardwood, My Mother, Mother's Day, Petite Petals, Petite Petals Punch, Circles Framelits, Big Shot, Shop online, Stampin' Up, Stampin' Up Card, Stampin' Up Card ideas, Stampin' Up Supplies
Cards | Stamping
by Joanne James27. March 2014 22:55Today I’m sharing my entry for this week’s Less is More challenge where you have to create a card with three of something. I decided to indulge in a spot of watercolouring and use a new stamp of mine from the ‘Baby We’ve Grown’ stamp set:
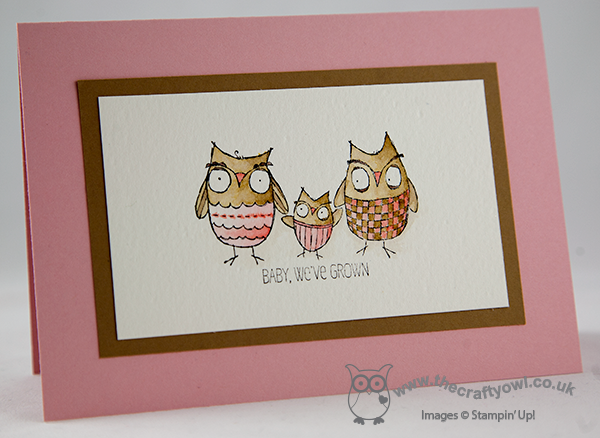
What can I say – I love this trio of owls! I’ve never purchased a dedicated baby-themed stamp set before, but I saw this set and it really appealed to me: a cute bunny, some of the sweetest baby shoes, some sentiments and well – those owls!
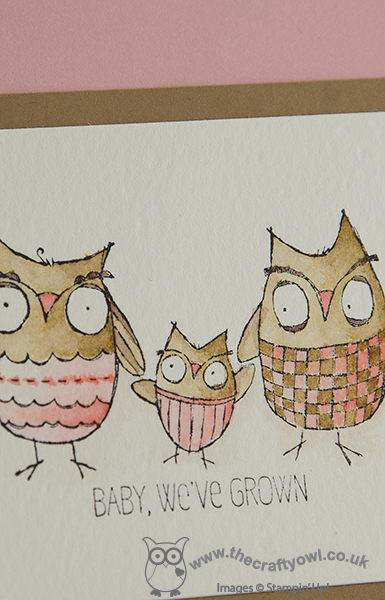
I simply stamped the image onto watercolour paper and coloured using my Aquapainter and a range of browns and pinks – this card is heading for my ‘baby girl’ pile – and mounted on a mat of Baked Brown Sugar and a card base of Blushing Bride. Well, this is ‘Less is More’ after all! I'm still a novice at this compared to some, yet I love the blending I get with an Aquapainter - here's a close up:
Back tomorrow with another project; until then, happy stampin’!
Stampin’ Up! Supplies Used:
by Joanne James27. March 2014 22:12It's all go in the office of The Crafty Owl - I've been busy finishing my last Mother's Day cards today and I've recorded two video tutorials, along with all of the other things mothers do in a day. I won't bore you with that list, but I'm sure lots of you are reading this thinking "I know what you mean!" :-) Anyway, today I have a Mother's Day card to share with you, which I made using this week's sketch over at The Paper Players. This is Sandy's sketch:
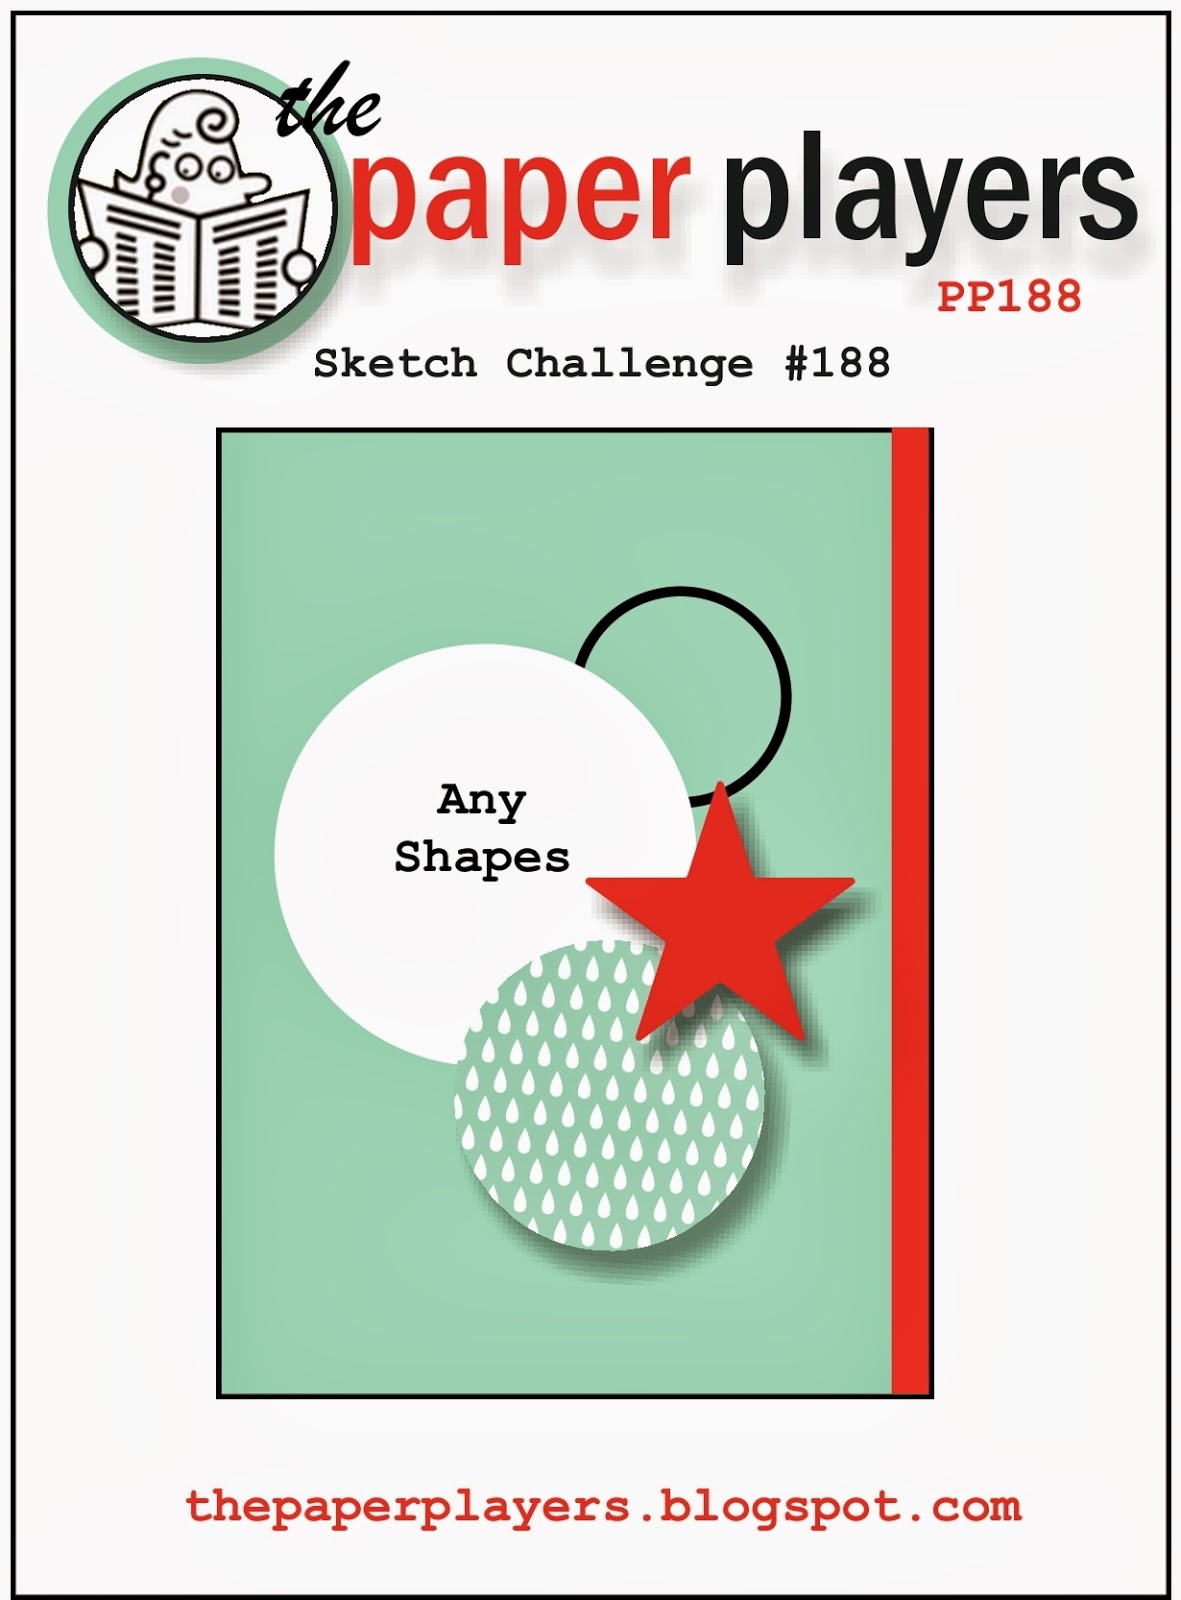
I loved the layered circles on this sketch and it allowed me to get out on paper an idea I've had floating around in my head for a while (love it when that happens!) So here is my card:
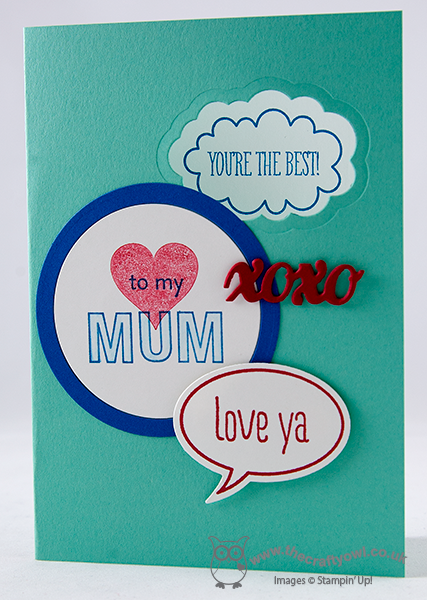
I used Coastal Cabana for my base, then cut out a 'window' using my Word Bubble framelits through to the stamped sentiment "You're the best!" on the inside, used my largest circle for my bespoke 'Mum' sentiment where I used two circles cut with my Circles framelits to create an inset so that I have a border without an extra layer here. I then added an ‘xoxo’ cut out with my Circle Card thinlit set, attached with rolled glue dots, and lastly my final layer with the ‘love ya’ word bubble, stamped, cut and mounted with dimensionals for height. The cut-out on the front gives a glimpse of what’s inside – here’s the close-up:
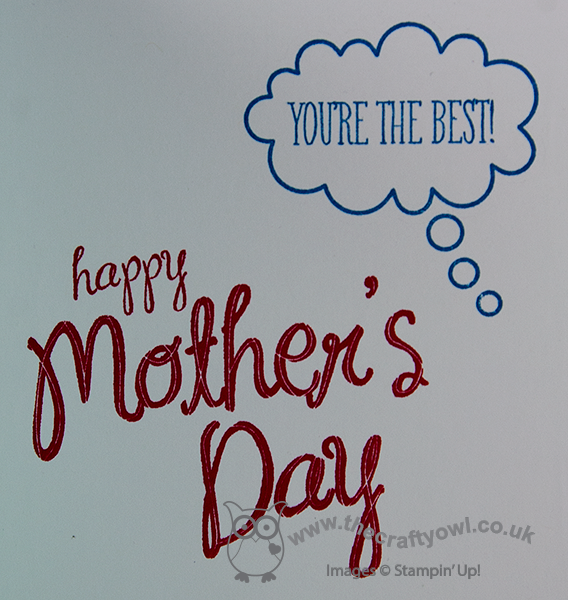
Now I know this is not such a typical Mother's Day card: not traditional colours, no flowers in sight. It's quite clean and graphic in nature, but I really like it! I think it’s a great card for a Mum who likes something a little different; I for one would be thrilled to receive this card (hint, hint James Juniors!)
That’s me for today; come back tomorrow to see my entry for this week’s Less is More challenge. Until then, happy stampin’!
Stampin’ Up! Supplies Used:
b7fea6a2-dd41-4749-bcf6-cf25637c1f2e|0|.0|96d5b379-7e1d-4dac-a6ba-1e50db561b04
Tags: Just Sayin', Magnetic Platform, ABC-123 Sketch Alphabet & Numbers, Big Shot, Perfect Pennants, Circles Framelits, My Mother, Mother's Day, Shop online, Stampin' Up, Stamp-a-ma-jig, Stampin' Up Card, Stampin' Up Card ideas, Stampin' Up Supplies
Cards | Stamping
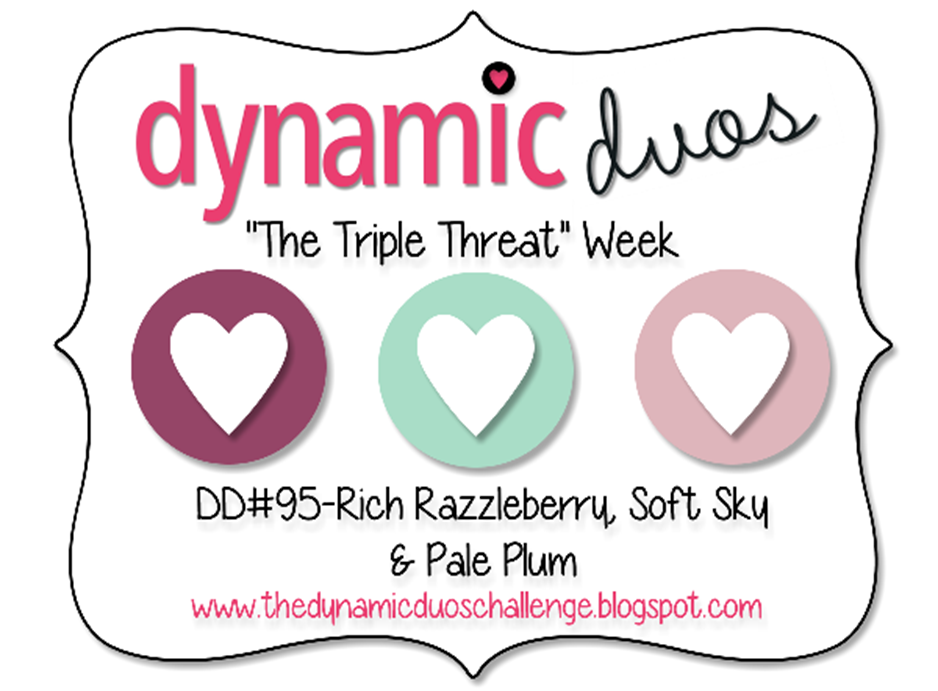
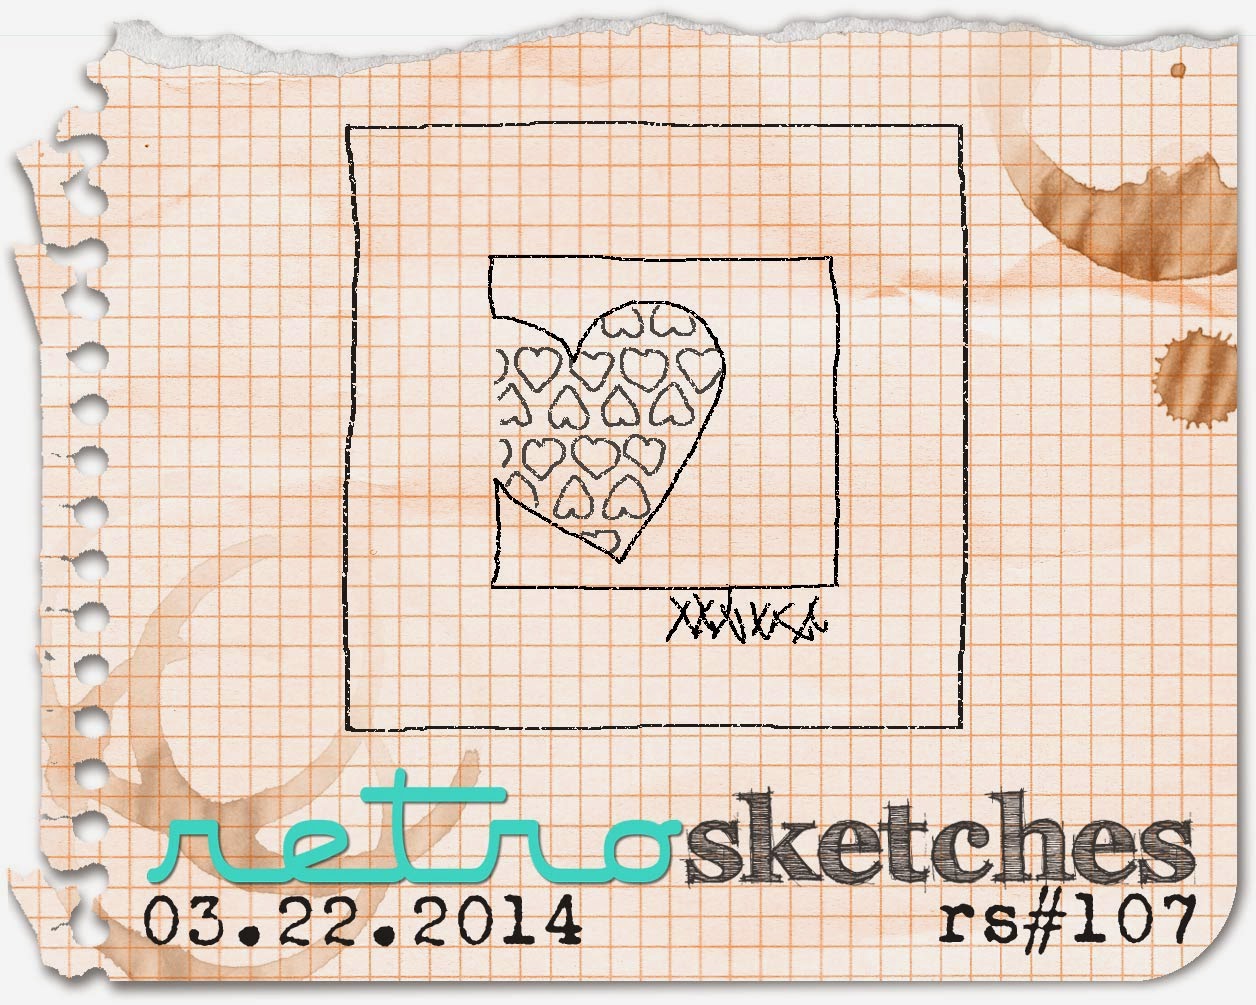
by Joanne James26. March 2014 21:28Another busy day today and my third night out in a row: today to a school concert, which was very entertaining with lots of singing and instrumentals. Now I'm back and today's card uses the colours over at Dynamic Duos this week, where it's actually 'Triple Threat' week and this week's sketch over at Retrosketches, which has an interesting decorative element:
And here is my card:
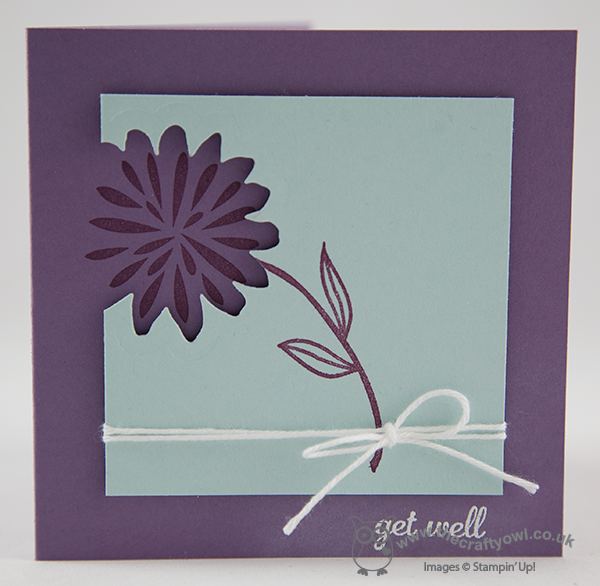
My card uses a single flower from the 'Simple Stems' stamp set and I printed the offset flower head on the base layer and the stem on a layer of Soft Sky, having cut out the area around the flower using the co-ordinating Secret Garden framelit. The Soft Sky layer was layered with dimensionals to give depth and allow a simple white baker's twine bow to be wrapped around the base.
As Pale Plum is a retired SU! colour, I substituted with Perfect Plum. I was a little concerned that it wouldn't have enough pink in it to work with the Rich Razzleberry, especially I had decided to experiment with stamping the Rich Razzleberry onto the contrasting Perfect Plum cardstock. I don't generally take two tones of the same colour and use them together in this way, but I quite like the effect - the Razzleberry 'warms' the Plum I think. I thought I would include a picture of my test card to show you how the effect differs depending on the colour ink you use:
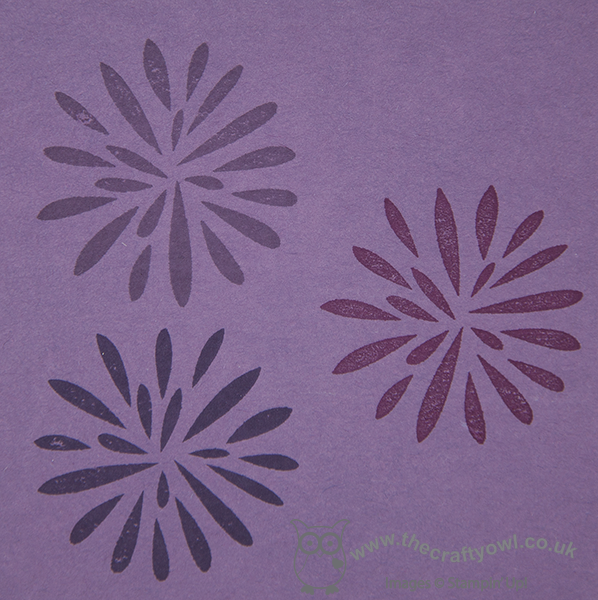
The flowers are stamped clockwise from bottom left in Elegant Eggplant, Perfect Plum then Rich Razzleberry on Perfect Plum cardstock - it's interesting to see how different they each look, don't you think?
Anyway, back to my card! I finished it with a little 'get well' sentiment that I stamped in Versamark and heat embossed in white. This card will be sending get well wishes to one of my lovely customers who is having major surgery at the end of this week; if you're reading this Chris, I hope you're up and about again soon!
That's all from me today - I'm off to catch up on my beauty sleep! Back tomorrow with another project; until then, happy stampin'!
Stampin' Up! Supplies Used:
6ecb3bac-f56d-4451-8bd2-10848e8f6755|0|.0|96d5b379-7e1d-4dac-a6ba-1e50db561b04
Tags: Big Shot, Magnetic Platform, Stampin' Up Supplies, Stampin' Up Card ideas, Stampin' Up Card, Stampin' Up, Stamp-a-ma-jig, Shop online, Secret Garden Framelits, Simple Stems, Express Yourself
Cards | Stamping
by Joanne James25. March 2014 23:00Good evening lovely blog readers - a quick post from me today as I've been out and had a full-on day today. I finally found the time to make a card for this week's challenge over at Create with Connie and Mary. They have a great design team with inspiring sketches and designs; this week it's a sketch challenge:
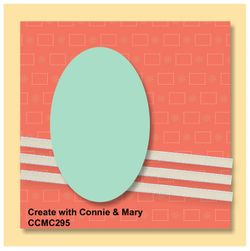
I decided to make an Easter card using the egg stamp from the Eggstra Spectacular stamp and designed a card that is entirely faithful to the sketch layout - here it is:
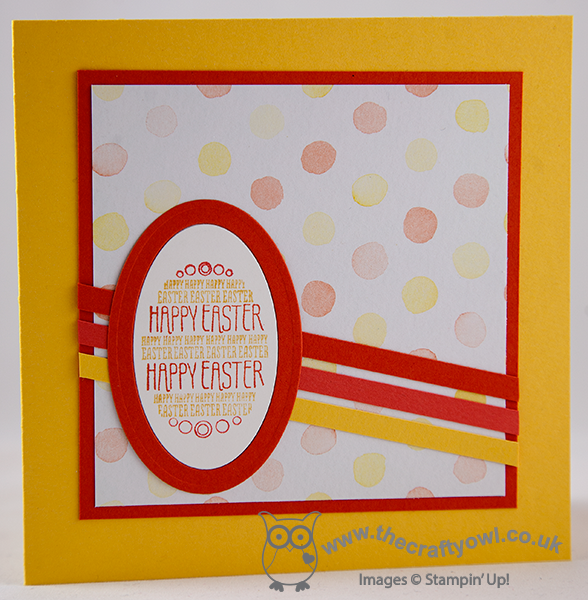
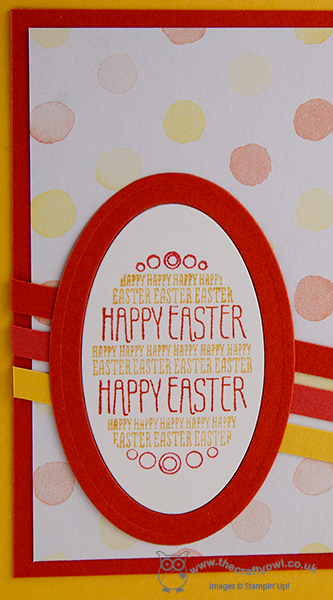
I made a 5" x 5" square card and using a piece of the lovely Watercolour Wonder DSP as my focal background and layered with some simple card stock strips, picking out the colours in the paper. I finished with an oval featuring the 'Happy Easter' stamp which I inked up with my Stampin' Write Markers in the same 3 colours as my paper strips. I inset this oval inside a larger one in Tangerine Tango as opposed to mounting it onto a base layer, as I wanted the oval to sit flat across the strips underneath. Here's a close up:
Hope you like today's card; back tomorrow with another project. Until then, happy stampin'!
Stampin' Up! Supplies Used:
by Joanne James23. March 2014 22:57Good morning blog readers! It's Monday and the start of another busy week. Today I'm sharing my card for this week's Pals Paper Art challenge. I was thrilled to be a Top 3 winner over at PPA last week with my flowerpot card (if you missed it, you can see it here). This week the Pals have a great sketch by the talented Margaret Moody:
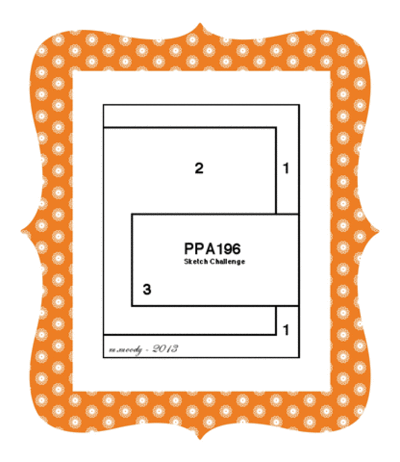
I was initially tempted to use a feature piece of DSP for panel 2, however I had some punched butterflies left over from preparing my weekend Spring banner class and decided instead to use them to create my card. Here it is:
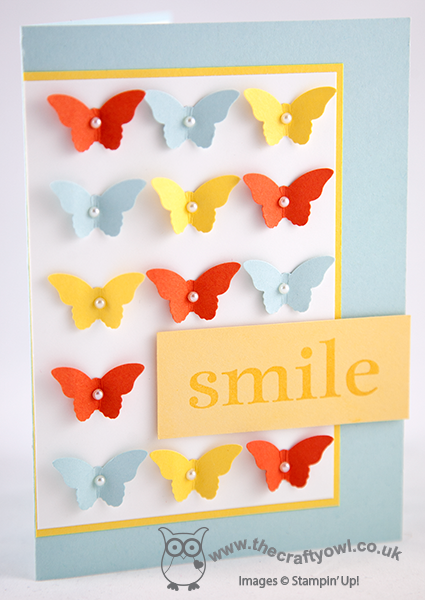
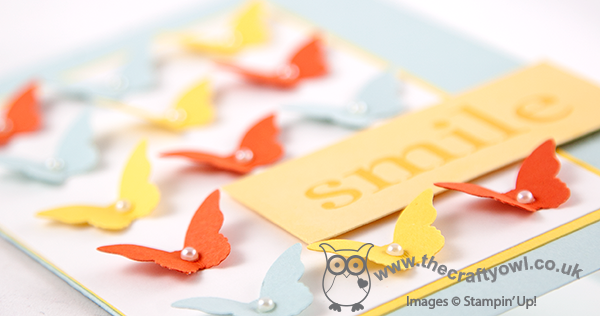
I used a Soft Sky base, then layered a Whisper White panel on Daffodil Delight and carefully aligned my punched butterflies. I finished by stamping the 'Smile' sentiment in Versamark and heat embossing with clear embossing powder onto a panel of So Saffron, which I raised on dimensionals. A simple layout that worked for me and saved my excess butterflies from the scrap box; who else hoards bits and pieces then never goes back to use them on a card, instead punching the shape from a fresh piece of cardstock? Go on, admit it - we've all done it ;-). I loved the mix of brights and subtles on this card and the feeling of spring that it conjures up.
I'm off to do some work before meeting some friends I haven't seen in a while for lunch. Back tomorrow with another project; until then, happy stampin'!
Stampin' Up! Supplies Used:
by Joanne James22. March 2014 21:25I've had a busy day today preparing for tomorrow's Spring Banner class - photos to follow - and working on some other projects, so just time for a quick post today. I'm sharing a thank you card designed by Monica Gale that we made at our January team training session:
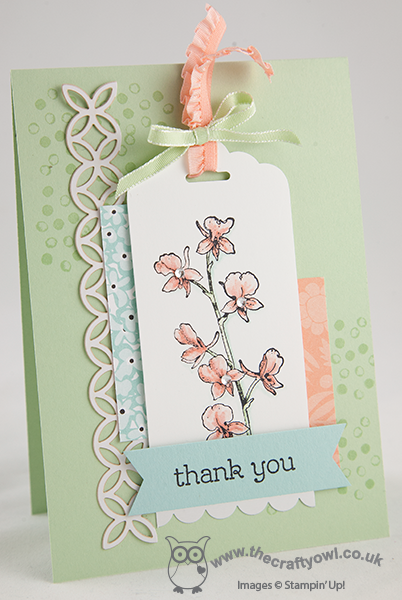
This is a lovely pastel card featuring the orchid stamp from the 'Happy Watercolour' set'. It is stamped onto a scallop topped tag and coloured with Stampin' Write markers and a blender pen and layered on a few layers of Sale-A-Bration Sweet Sorbet DSP in co-ordinating colours. along with an offcut from one of the laser-cut cards from the 'Simply Fabulous Simply Sent' kit sets. Some background stamping and a banner are stamped with two of the other stamps in the 'Happy Watercolour' set and the tag is finished with some ribbon and rhinestones to complete the look.
Come back tomorrow to see the outputs from tomorrow's Spring Banner class; until then, happy stampin'!
Stampin' Up! Supplies Used:
by Joanne James21. March 2014 20:48There are 10 days left until the end of Sale-A-Bration. Lots of you have taken advantage of the extra hostess benefits on offer to host a party or received one or more of the great free gifts on offer with every £45 spend. Today I thought I would take the opportunity to remind you of the benefits of joining Stampin' Up! as a demonstrator during Sale-A-Bration:
- The starter kit will be £99 and includes products of your choice up to the value of £150 - this is a whopping £51 of extra product!
- You will also receive a business supplies pack including annual and seasonal catalogues, order forms, etc.
- You will receive a 20% discount on every order you place
- You will also receive a 30% discount on the first order you place over £150 within the first 30 days of sign up
- You will receive 2 free months of Demonstrator Web Services
- If you reach £225 sales within the first quarter (ending 30th June 2014), you will maintain your demonstrator status until 30th September. If you don't, your demonstrator status will lapse, but without penalty; you have no obligation to purchase anything other than your starter kit if you don't want to.
- If you join my growing team, you will get to benefit from my knowledge, help and support in addition to that of one of the UK's most successful teams of demonstrators and the considerable resources provided by Stampin' Up itself. You will receive your own team welcome pack from me, along with your own complimentary copy of my demonstrator software Product Table Builder worth £35
Here's part of the welcome pack I sent to one of the lovely ladies who joined my team recently, designed to co-ordinate with a card I made for the Mojo Monday challenge recently (you can read more about how I made the card here):
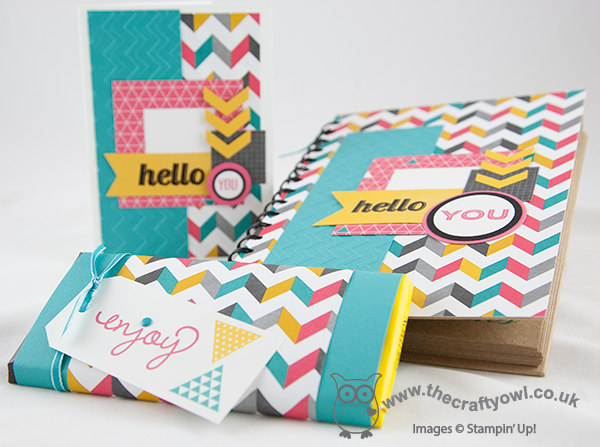
In addition she also received a handbook and other items that will be useful as she grows her Stampin' Up! business. Whether you want to feed your own crafting habit by having access to discounted craft supplies, or would like to earn a little (or a lot!) extra income and run your own business, I am here to support you in any way I can.
You have just 10 days to take advantage of the enhanced Sale-A-Bration sign up offer: contact me on 07773 421446 or joanne@thecraftyowl.co.uk if you would like to know more or alternatively sign up here today!
Back tomorrow with another project; until then, happy stampin'!
Stampin' Up! Supplies used:
a8ef88e1-1272-4286-8774-c6b7a2c0963c|0|.0|96d5b379-7e1d-4dac-a6ba-1e50db561b04
Tags: Kaleidoscope, Simply Celebrate, Perfect Pennants, Chevron Textured Embossing Folder, Circles Framelits, Square Framelits, Stampin' Up, Stampin' Up Card, Stampin' Up Card ideas, Stampin' Up Supplies, Chevron Border Punch
3D Projects | Cards | Join My Team | Product Table Builder | Sale-a-bration | Stamping