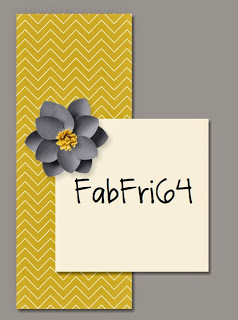
by Joanne James25. May 2015 19:20Well the Bank Holiday didn't bring the sunshine I was hoping for, but it did stay nice and dry and we managed a bracing long bike ride this afternoon, so it's all good! Today I have not one but two cards for you! The first one is my card for the current Fab Friday Challenge where they have a sketch challenge this week:
Before I share my card, a big thank you to the team over at Fab Friday for choosing my In-Colour thank you card as their Fab Fave - I'm honoured! You can see that card here. Now onto today's card:
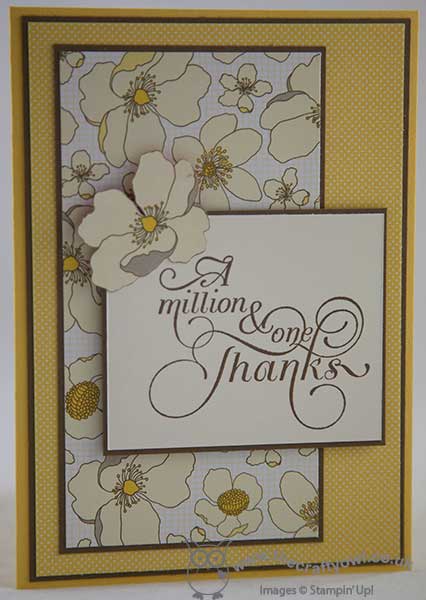
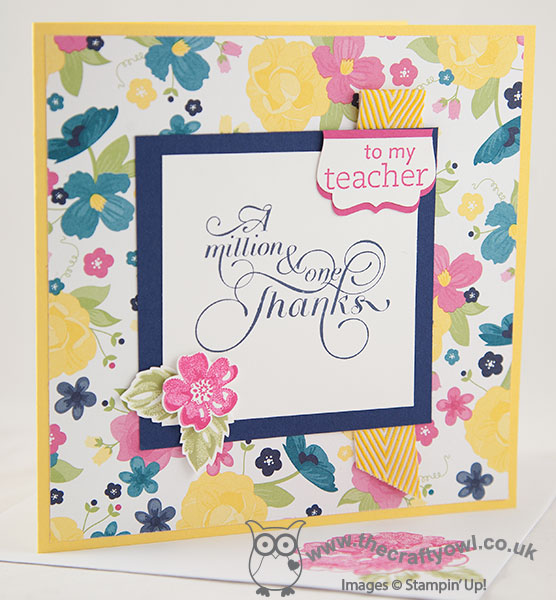
I'm still on my quest to use up more of my Designer Series Paper (I am such a DSP hoarder!) and this sketch was the perfect opportunity to showcase some. So no 'sneak peeks' today; instead a Daffodil Delight base with some mats in Soft Suede, and two of the patterns in the Park Lane pack. I used one of my favourite retiring thank you stamps, 'One in a Million', for my sentiment, stamped in Soft Suede onto Very Vanilla, and I chose to fussy cut one of the flowers for my accent. I liked the clean lines of this card so much, I made two identical ones - if you are one of my contactable online customers, you may find one winging its way to you to you this month!
My next card is for this week's TGIF challenge:
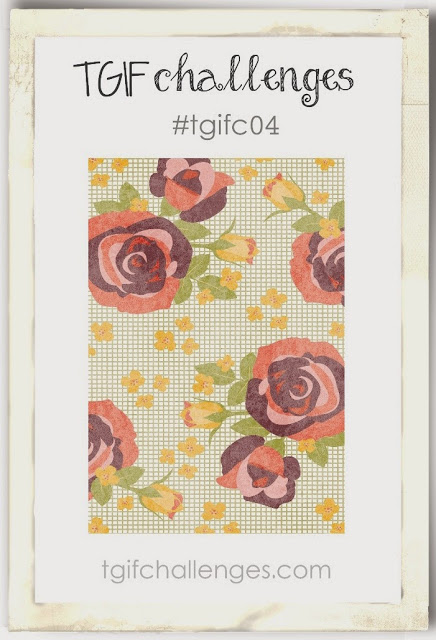
I saw the inspiration photo and I had my Painted Petals set out on my desk preparing for my technique class next month (this is the set we are going to be using) and I just knew the two would work together. Here's my card:
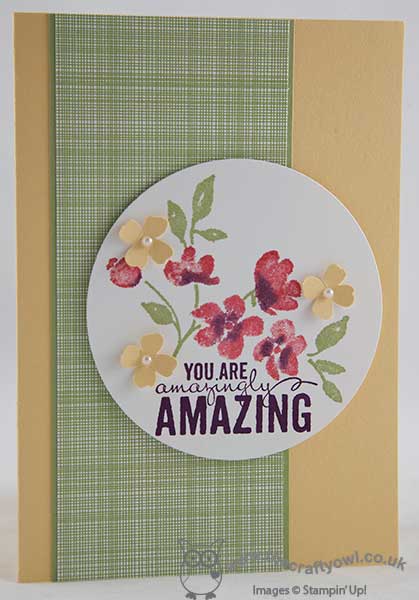
I used So Saffron for my card base and matted a strip of the already retired Gingham Garden DSP (I told you I was a DSP hoarder!) onto a strip of Pear Pizzazz and adhered this to the front of my card. I stamped the flowers on a large circle of Whisper White cut out using my Big Shot and Circles framelits, inking them with one of the new in-colours, Watermelon Wonder, and adding some Blackberry Bliss using my Stampin' Write marker to the flower centres before stamping. I stamped the sentiment in Blackberry Bliss too and to finish added a few So Saffron flowers, punched using one of the Itty Bitty Accent punches and centred with pearls. I popped this circle up on dimensionals to stand away from the card.
Please do check out the design team inspiration for both of the above challenges; they are some amazing cards on both blogs this week. I'll be back tomorrow with another card; until then, happy stampin'!
Stampin' Up! Supplies Used (Card 1):
Stampin' Up! Supplies Used (Card 2):
0084fcea-f009-4701-8df0-72f46e1d3ed5|0|.0|96d5b379-7e1d-4dac-a6ba-1e50db561b04
Tags: Million & One, Park Lane, Shop online, Shop Stampin' Up online, Stampin' Up, Stampin' Up Card, Stampin' Up Card ideas, Stampin' Up Supplies, Big Shot, Gingham Garden, Itty Bitty Accents Punch Pack, Painted Petals, Circles Framelits
Cards | Stamping
by Joanne James18. July 2014 15:53Apologies for my blog absence yesterday - I spent most of the day icing biscuits for teacher thank you gifts as today is the last day of the academic year for my James Juniors. I promise my self I'll start earlier every year, but what always seems to happen is I squeeze in a few more commissions and then also a few extra names get surrepticiously added to the list of thank yous by the children which means even more baking and icing!
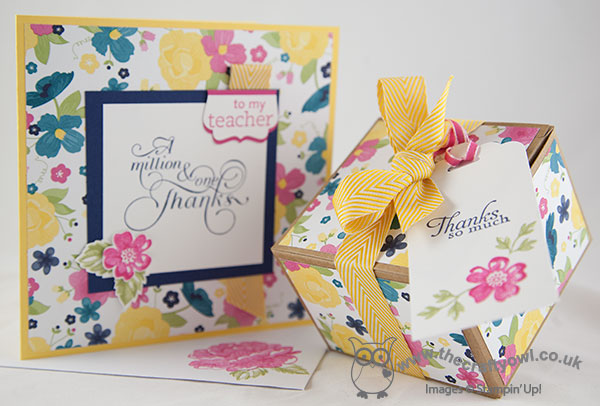
I've shared my teachers gifts on my blog previously - you can check them out here if you would like to be reminded - so today I thought I would share a matching card and gift box commission that I made for someone else to give to their teacher. So here is my card:
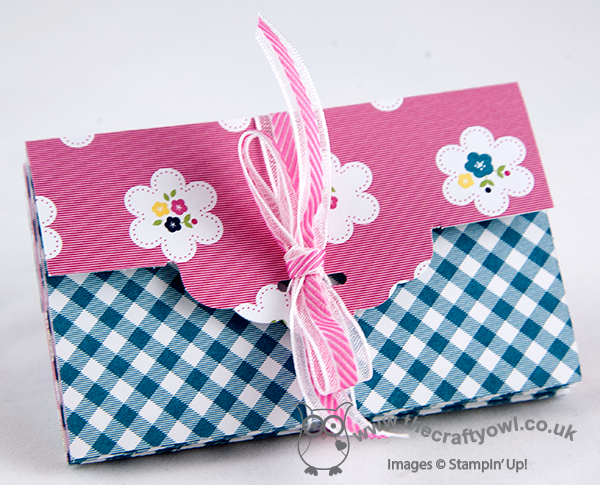
For my card I used the retired Gingham Garden DSP (this was requested - lucky I still have a pack!) however most of the other product is current and you could easily create this set in an alternative paper without the teacher tag as a thank you gift for someone special. The star of the show is definitely the 'Million and One' sentiment stamp - perfect to show your appreciation of someone special.
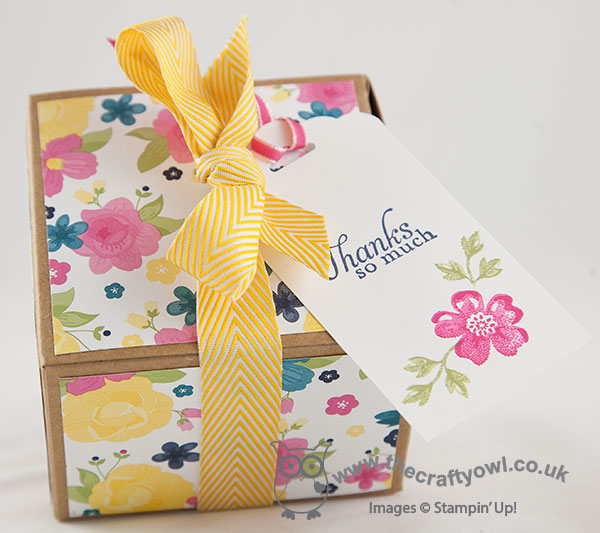
Here is the matching gift box - I love these kraft boxes, they are so useful and very sturdy, and at £2.75 for 4 represent great value. I'm doubly pleased that the Extra-Large Gift Boxes have returned and made it into the annual catalogue as a stock item - these are great for larger gifts.
Right, I've a few more jobs to do before I go and pack a picnic - we're off to see an outdoor theatre production of Peter Pan and The Lost Boys this evening. I've seen this theatre company perform the Railway Children previously, so I'm expecting great things - I'll report back tomorrow! Until then, happy stampin'!
Stampin' Up! Supplies Used:
b2c764e4-ee3d-4662-a516-9667d67d1b95|1|5.0|96d5b379-7e1d-4dac-a6ba-1e50db561b04
Tags: boxes, Gingham Garden, Million & One, Kraft Gift Boxes, Decorative Label Punch, For My Family, Scalloped Tag Topper Punch, Shop online, Stampin' Up, Stampin' Up Card, Stampin' Up Card ideas, Stampin' Up Supplies, Stamp-a-ma-jig, Stippled Blossoms
Boxes | Cards | Stamping
by Joanne James8. May 2014 14:54Hello everyone - my second video in a week! I'm cheating slightly, as I actually shot this video weeks ago but haven't got around to editing it until now. I made a lovely concertina fold Mother's Day card a while ago using the Scalloped Tag Topper Punch - you can see my original card here - which was based on a similar card made by Julie Kettlewell (you can see Julie's original card here). Having just gone to update my original post with the link to today's video, I realise I didn't mention her in my original post, which was very remiss of me and a complete oversight on my part, as I even mentioned her in today's video. Needless to say, I have now updated the original post!
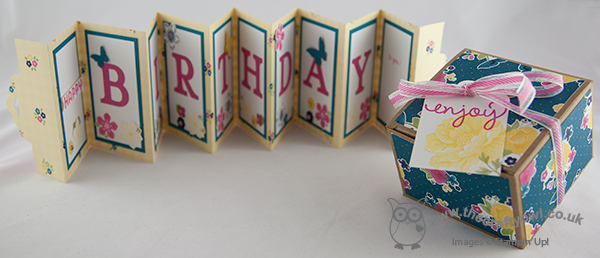
I love this concertina fold card style - it's great if you need a card that's just a little different. I made another card based on my original one, this time adapting it to a birthday card for a friend of mine who always puts so much thought into cards for others, I thought she deserved something special for her birthday too; here's my latest scalloped tag topper punch concertina fold card:
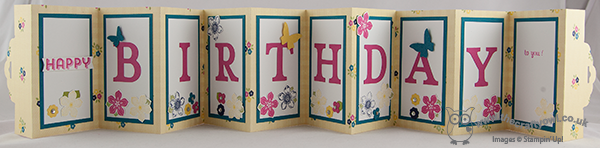
The dimensions are exactly the same as my original card - there is still enough space to stamp 'happy' on one panel, with 'birthday' spelled out on the subsequent panels leaving the last panel blank for your message (I also stamped a little 'to you!' on this panel, just to complete my message). I also decorated one of the Stampin' Up! Kraft gift boxes with some co-ordinating Gingham Garden DSP to make some pretty packaging for my accompanying gift - finished with a tag made with the Scalloped Tag Topper Punch - well, what else?! Here's a picture of both pieces together:
So, if you would like to make a Scalloped Tag Topper Concertina Fold Card - either for the forthcoming international Mother's Day or a birthday card, here's my video tutorial showing you everything you need to know:
If you would like to purchase any of the Stampin' Up! supplies featured in today's project, just contact me or click on the links in the table below to go straight to my online store.
Back tomorrow with another project; until then, happy stampin'!
Stampin' Up! Supplies Used:
83ecd8a3-a7da-4843-9788-9cf4d23e90f5|0|.0|96d5b379-7e1d-4dac-a6ba-1e50db561b04
Tags: 3D Projects, boxes, Kraft Gift Boxes, Gingham Garden, Typeset Alphabet, video tutorial, Stampin' Up, Stampin' Up Card, Stampin' Up Card ideas, Stampin' Up Supplies, Shop online, Scalloped Tag Topper Punch, Simply Celebrate, Stippled Blossoms, Petite Petals, Petite Petals Punch, Itty Bitty Punches, Fabulous Phrases, See Ya Later
3D Projects | Boxes | Cards | Stamping | Video Tutorials
by Joanne James25. April 2014 09:45Well, I don't know where yesterday went! I was so busy I didn't even manage a blog post; I had my card all ready and just didn't get it photographed. So in the interests of all things quick, here is the card that I had intended to blog yesterday - my second attempt at a CAS washi tape card for Nance's challenge over at The Paper Players this week:
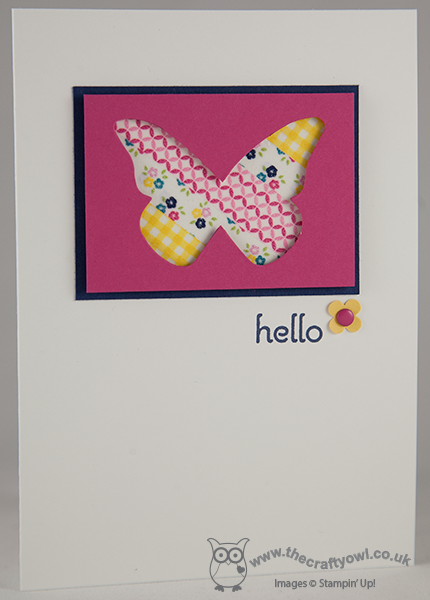
I have now replaced the earlier photograph with one of a better quality! this kind of card is so quick to create: my card is a simple white background with a Night of Navy mat for my image. I then took a rectangle of Whisper White and covered it in diagonal strips of co-ordinating Gingham Garden washi tape. As with my washi tape card earlier this week, you can use the washi tape directly onto coloured card for a diferent effect, but I wanted the colours to remain true here, so needed a white background. I then adhered this to the mat and lastly popped a Melon Mambo rectangle on with dimensionals, having first cut out a butterfly shape using my butterfly die. You could just leave it there, however I decided to add a little 'hello' greeting and a candy dot flower cut from one of my pieces of card scrap just to complete my card.
A quick card for a quick post! Everything is about speed today; I'm off to the hairdressers shortly and have a hundred and one jobs to do before I collect the James Juniors from school today for the weekend. I've already ticked a few off my list though this morning, so am making good progress!
Back tomorrow with another project; until then, happy stampin'!
Stampin' Up! Supplies Used:
cdf6f7a0-4ac0-49fc-93c5-947ffab64c10|0|.0|96d5b379-7e1d-4dac-a6ba-1e50db561b04
Tags: A Dozen Thoughts, Beautiful Butterflies Bigz Die, Big Shot, Candy Dot Brads, Gingham Garden, Itty Bitty Punches, Washi Tape, Shop online, Stampin' Up, Stampin' Up Card, Stampin' Up Card ideas, Stampin' Up Supplies
Cards | Stamping
by Joanne James19. March 2014 20:33Today I want to share with you another use for one of my new favourite punches - the scalloped tag top punch. This really is such a versatile punch that can be used in so many ways. There are lots of variations on how it can be used to make an unusual card closure - today's card is a fun, concertina style Mother's Day card, where the scalloped tag top punch is used to add detail to the closure. I saw a similar card to this on Julie Kettlewell's blog here and liked it so much I decided to create one. This is what the card looks like 'closed':
Ribbon is threaded through the punch out hole and around the card and tied in a bow to keep it shut, then when you undo the ribbon and open the card out, you see the message inside:
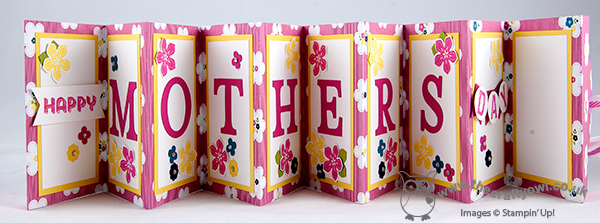
These cards are such fun to make and so easy. All you need is one sheet of 12" x 12" for the basic card. I used a sheet of the Gingham Garden DSP for my card, and layered the inside panels with Whisper White matted on Daffodil Delight. I cut the letters for 'Mothers' with my Typeset Alphabet die, but you could easily use an alphabet stamp set such as Morning Post or Notable Alphabet if you have one instead. I took the word 'Happy' from one of the 'See Ya Later' Sale-A-Bration stamp sets and the letters for 'Day' from my Sketched Alphabet individual stamps before punching out and layering on a mini banner. I then decorated with flowers stamped and punched from the Petite Petals bundle and the Itty Bitty Punches set in colours that co-ordinated with my chosen DSP. The last panel is left blank for you to write your personalised Mother's Day message.
I had intended to shoot a video tutorial on how to make one of these cards to accompany my series of Scalloped Tag Top Punch video tutorials, but time has not been on my side so I haven't managed it yet; I will look to complete one in the next week or so and when I do will update my blog with the link. Updated 8/5/14 - here is my video tutorial on how to make this card:
The best bits about this card: it's one of those projects where you don't have to deliberate over which side of your DSP to use, as you see both sides (dilemma avoided, for once) and also because of the closure, you don't need an envelope - this is a card and envelope in one! This style of card would work for lots of other occasions too - why not have a go and see what you come up with.
Back tomorrow with another project; until then, happy stampin'!
Stampin' Up! Supplies Used:
ea819749-b0b7-4e51-82ac-2f6a767b1ba6|0|.0|96d5b379-7e1d-4dac-a6ba-1e50db561b04
Tags: ABC-123 Sketch Alphabet & Numbers, Banner Punch, circle punch, See Ya Later, Shop online, Stampin' Up, Stampin' Up Card, Stampin' Up Card ideas, Stampin' Up Supplies, Typeset Alphabet, Scalloped Tag Topper Punch, Big Shot, Mother's Day, Gingham Garden
Cards | Stamping | Video Tutorials
by Joanne James19. March 2014 20:33Today I want to share with you another use for one of my new favourite punches - the scalloped tag top punch. This really is such a versatile punch that can be used in so many ways. There are lots of variations on how it can be used to make an unusual card closure - today's card is a fun, concertina style Mother's Day card, where the scalloped tag top punch is used to add detail to the closure. This is what the card looks like 'closed':
Ribbon is threaded through the punch out hole and around the card and tied in a bow to keep it shut, then when you undo the ribbon and open the card out, you see the message inside:
These cards are such fun to make and so easy. All you need is one sheet of 12" x 12" for the basic card. I used a sheet of the Gingham Garden DSP for my card, and layered the inside panels with Whisper White matted on Daffodil Delight. I cut the letters for 'Mothers' with my Typeset Alphabet die, but you could easily use an alphabet stamp set such as Morning Post or Notable Alphabet if you have one instead. I took the word 'Happy' from one of the 'See Ya Later' Sale-A-Bration stamp sets and the letters for 'Day' from my Sketched Alphabet individual stamps before punching out and layering on a mini banner. I then decorated with flowers stamped and punched from the Petite Petals bundle and the Itty Bitty Punches set in colours that co-ordinated with my chosen DSP. The last panel is left blank for you to write your personalised Mother's Day message.
I had intended to shoot a video tutorial on how to make one of these cards to accompany my series of Scalloped Tag Top Punch video tutorials, but time has not been on my side so I haven't managed it yet; I will look to complete one in the next week or so and when I do will update my blog with the link.
The best bits about this card: it's one of those projects where you don't have to deliberate over which side of your DSP to use, as you see both sides (dilemma avoided, for once) and also because of the closure, you don't need an envelope - this is a card and envelope in one! This style of card would work for lots of other occasions too - why not have a go and see what you come up with.
Back tomorrow with another project; until then, happy stampin'!
Stampin' Up! Supplies Used:
496e722e-02bc-47d9-8908-08b02d818f3c|0|.0|96d5b379-7e1d-4dac-a6ba-1e50db561b04
Tags: ABC-123 Sketch Alphabet & Numbers, Banner Punch, circle punch, See Ya Later, Shop online, Stampin' Up, Stampin' Up Card, Stampin' Up Card ideas, Stampin' Up Supplies, Typeset Alphabet, Scalloped Tag Topper Punch, Big Shot, Mother's Day, Gingham Garden
Cards | Stamping
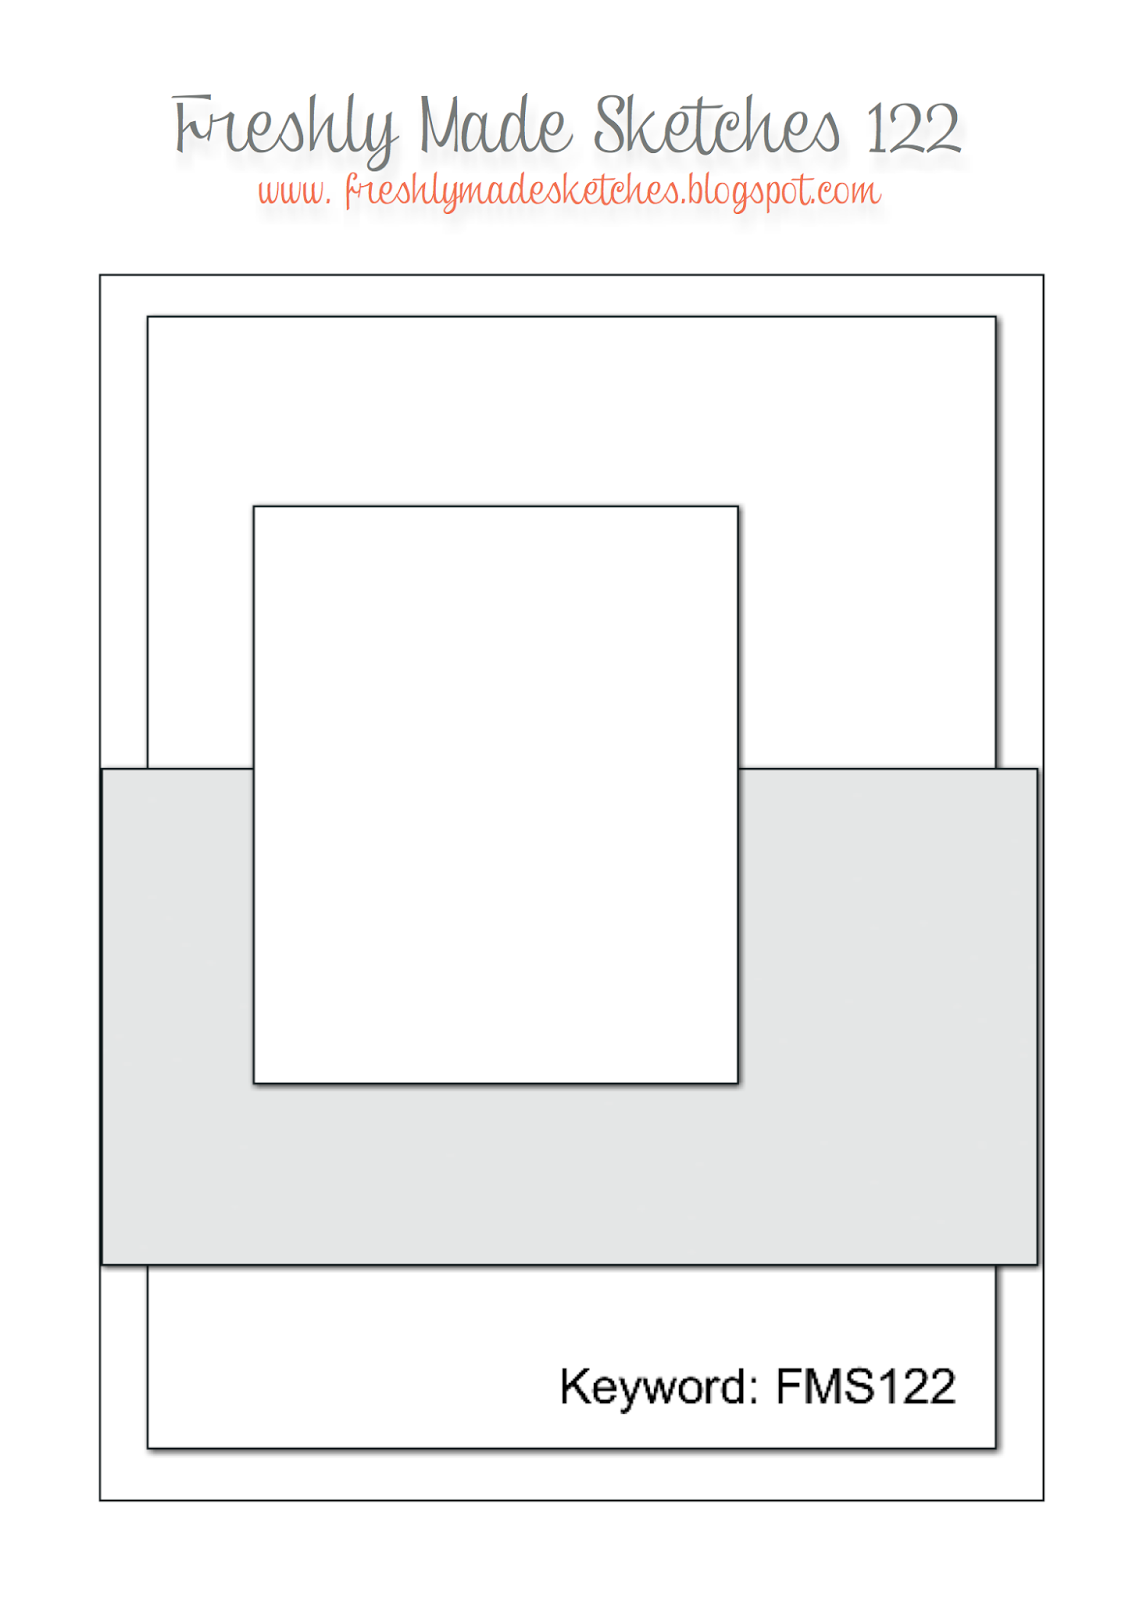
by Joanne James10. February 2014 12:28Today I'm sharing the card that was originally scheduled for yesterday! This card also uses the sketch layout at Freshly Made Sketches this week and I combined it with the colour challenge over at CAS Colours and Sketches this week:
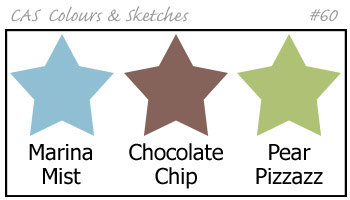
I decided to go with an adult masculine card (it's always good to have a few of these on standby!) and inked up my Simply Sketched hostess set for the focal point of my card:
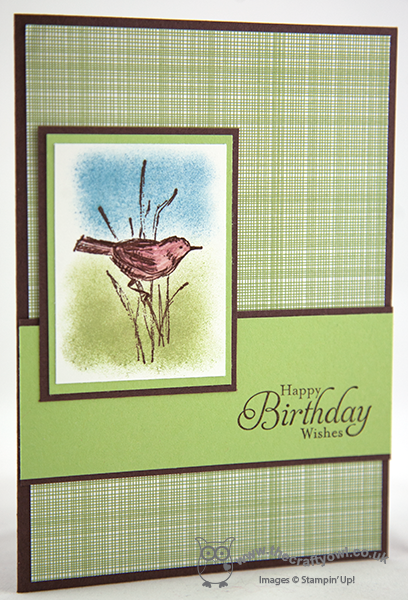
I stamped the little bird in Chocolate Chip ink and coloured him with a Chocolate Chip marker and blender pen, then used the blue and green to create a simple sponged background. I stamped my sentiment from the same stamp set on the front of the layered banner and used some of the Gingham Garden DSP to add interest without making the card too busy. This piece of Pear Pizzazz DSP seemed to be just right for this card, although you could be forgiven for not even knowing it's there as it isn't typical of the bright pink, indigo and yellow designs that are a key feature of this DSP pack.
I really like the understated finish of this card - and the little bird is perfect for a male card. This is the first time I've used the Simply Sketched stamp set and will definitely be making more with it. It has some lovely sketch stamps and three useful sentiments in a font that works with all kinds of cards. As I mentioned above, this set is an exclusive hostess set that can be yours only when you host a Stampin' Up! party. The current Sale-A-Bration promotion is a great time to host a party - not only will you and your party attendees get a free gift for every £45 you spend, but as the hostess you can earn an additional £25 in hostess benefits for qualifying party sales (£250 or more). If you would like to host a Stampin' Up! party, do give me a call or contact me to book a date.
I hope you like today's card; if you would like to see more ideas for using either today's sketch or the colour scheme, do pop by the Freshly Made Sketches and CAS Colours and Sketches blogs to see what the design teams and participants have created.
Back tomorrow with another project; until then, happy stampin'!
Stampin' Up! Supplies Used: