by Joanne James29. August 2015 09:00Good morning everyone - yay, it's the weekend! Today I'm sharing one of the cards from my last technique class using the Sprinkles of Life stamp set:
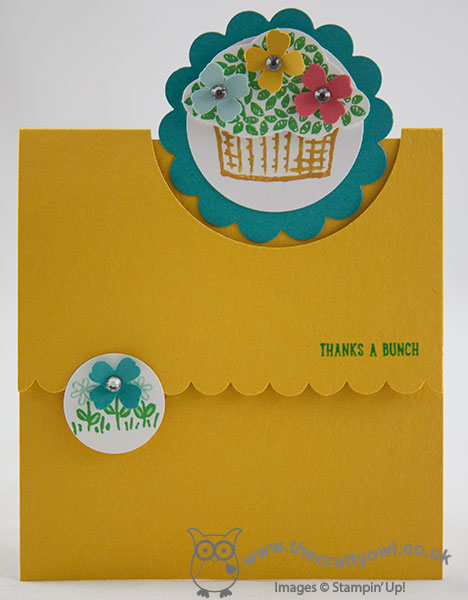
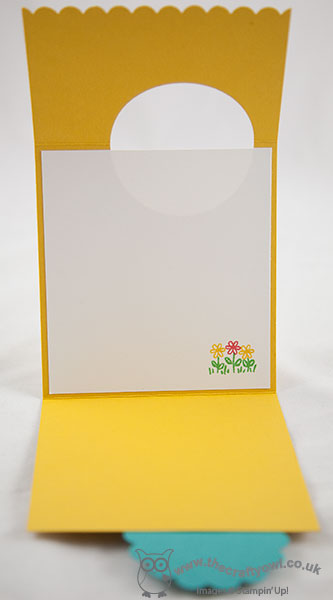
This is an example of a Flap Fold Card - Julie Davidson has a great tutorial which you can find on Splitcoast Stampers here. The 'how to' on this card is fairly straightforward to see from the pictures, but if you have any questions then leave me a comment below and I will happily provide more detail. This was our easy 'warm up' card for a class that also featured a couple of other fun folds, along with the great 'Sprinkles Of Life' set - this year's Stampin' Up! stamp set that fundraises for the Ronald McDonald House Charities charity. Here's a photo of the inside so that you can see how the fold works:
My next technique classes are on the 7th and 8th of September and will feature the new 'Reason For The Season' stamp set and co-ordinating Festive Flower Builder Punch. The class will cost £26 per person and this will include your own stamp set to take home. Alternatively, you can also purchase the co-ordinating punch at the time of class booking and pay £30 - this will mean your class will cost a mere 25 pence. if that's not great value, I don't know what is! All class reservations need to be made by tomorrow Sunday 31st August, so if you haven't already reserved a place and would like to join me, contact me by email at [email protected] to reserve your place.
I'm off on a boat trip today into the Wash along the north Norfolk coast in the hope we can spot some native seals; wish me luck!
Back tomorrow with another project; until then, happy stampin'!
by Joanne James25. May 2014 20:23Sunday is always a good day, but it's doubly good when followed by a Bank Holiday - looking forward to tomorrow already! We've had a restful day today after yesterday's busy one and also managed our first BBQ of the year, albeit having brought everything inside to eat as it was rather breezy outside. Today's card uses the colours over at this week's Colour Me...! challenge and Jen Mitchell's clean rectangular sketch over at Freshly Made Sketches for my layout:
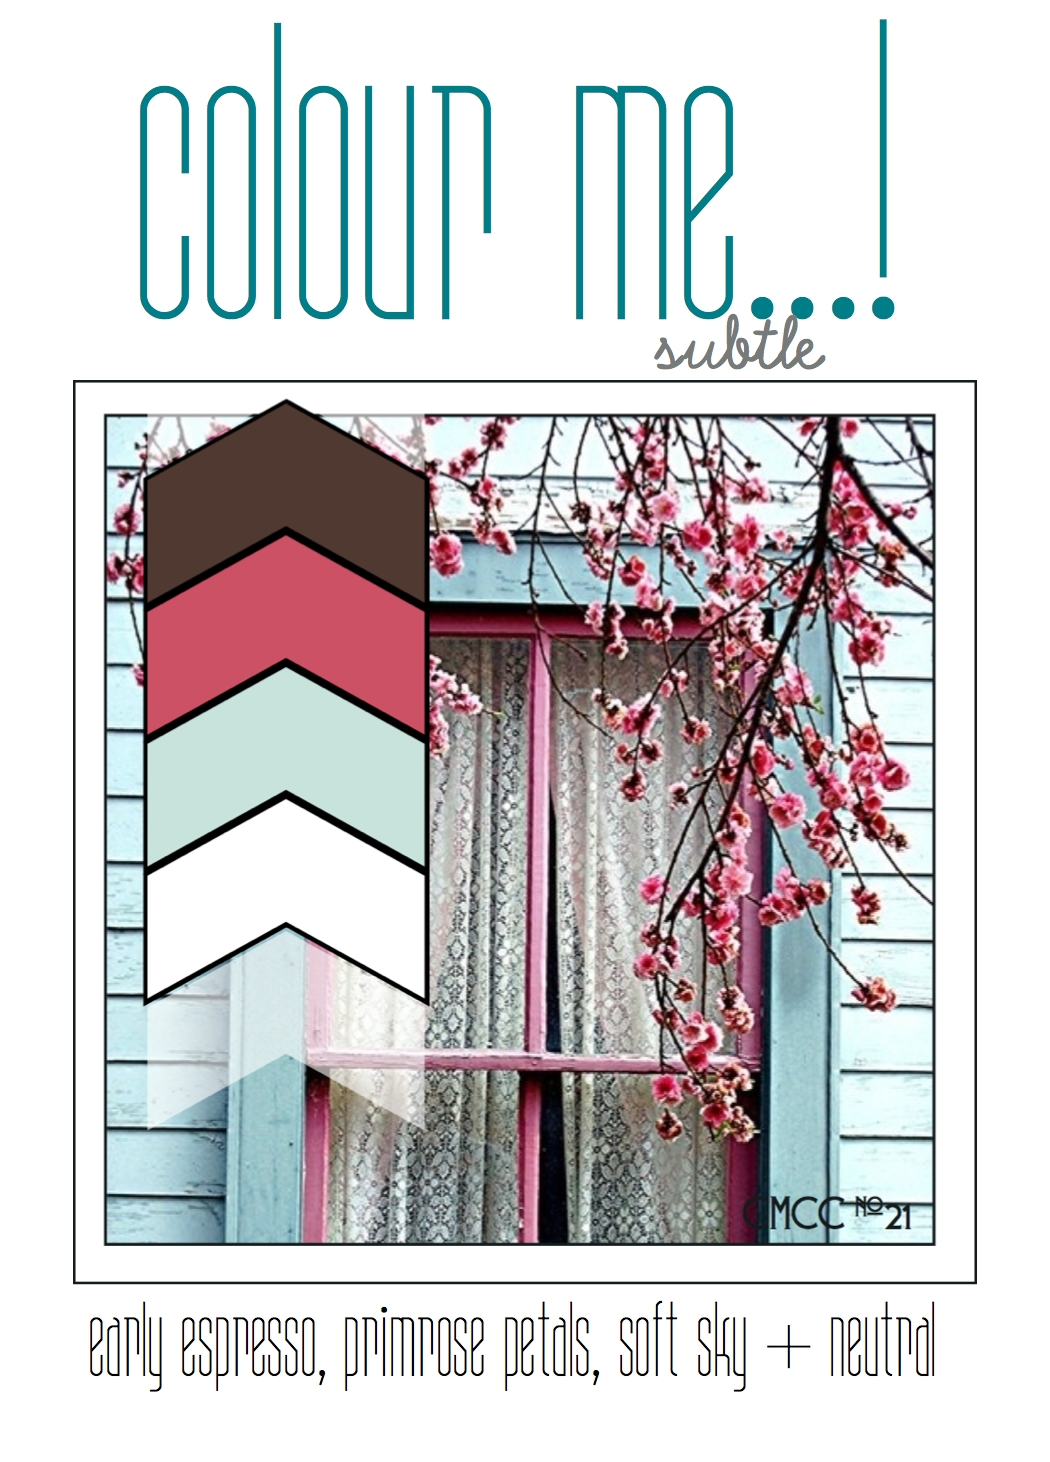
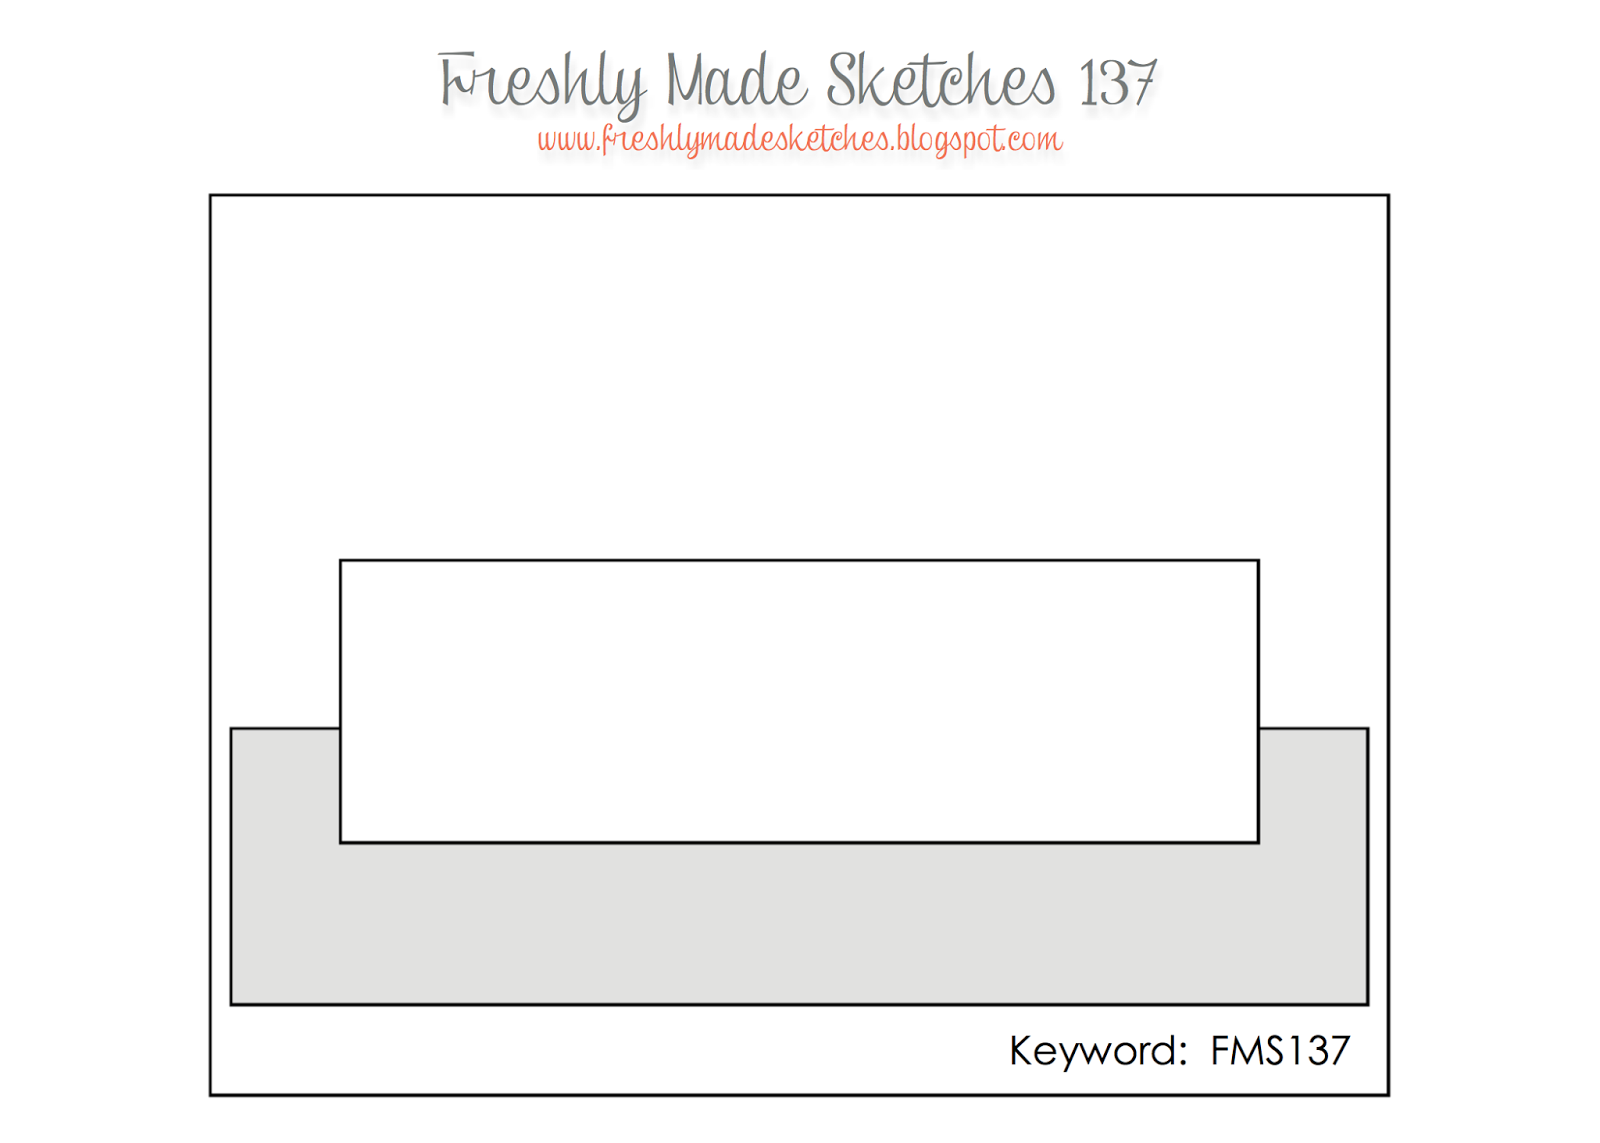
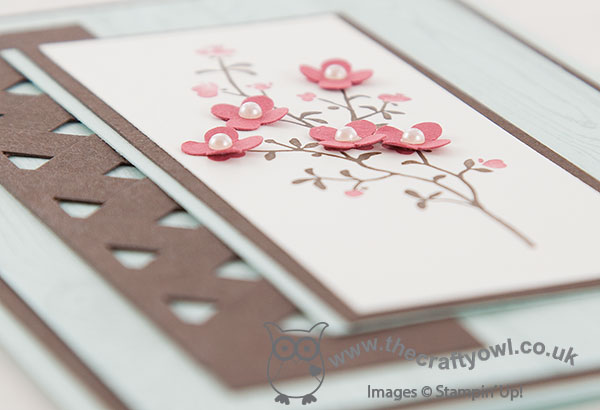
I rotated the sketch through 90 degrees to create my card and took my inspiration directly from the photo alongside the colour palette. Here is my card:
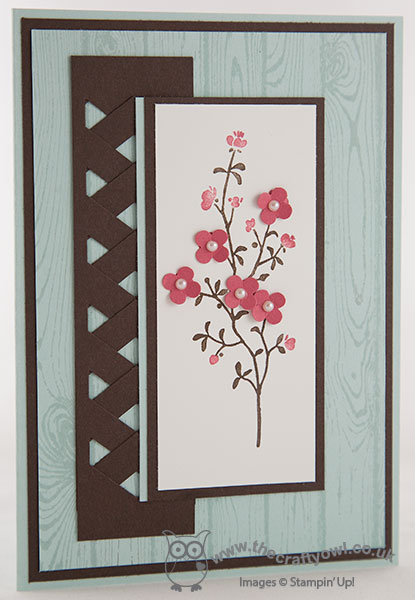
I used Soft Sky for my base and layered with a mat of Early Espresso and then a further layer of Soft Sky that I stamped with the Hardwood stamp in the same colour. I created a trellis using two pieces of Early Espresso punched with my Chevron Border punch and made the focal point of my card the cherry blossom from the Morning Meadow hostess stamp set, which I inked up with my Early Espresso and Primrose Petals marker pens then stamped onto Whisper White. I punched some flowers out of Primrose Petals cardstock using one of my Itty Bitty punches, added pearls to the centres and added these onto the stamped image on the largest flowers to add dimension and interest. I then matted this panel onto Early Espresso and added an off-centre panel of Soft Sky - this goes against the grain from a design perspective for me, but I needed to have the Early Espresso mat onto the Hardwood layer, yet broken with some Soft Sky on the opposite side so that the panel didn't just merge into the trellis and it looks so much better with than without, so convention is out of the window! I also chose not to use a sentiment on the front of my card as I didn't want to add another layer; I decided to keep my sentiment on the inside of my card.
I hope you like today's card; back tomorrow with another card. until then, happy stampin'!
Stampin' Up! Supplies Used:
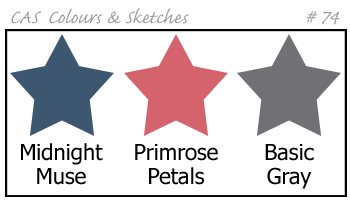
by Joanne James21. May 2014 16:41Today's card is a last minute entry for this week's CAS Colours and Sketches colour challenge, which is to use the following colours:
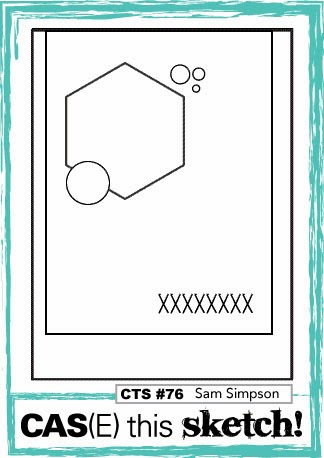
I also used the above sketch from CAS(E) This Sketch as my starting point, although I would be the first to admit that my card isn't the most literal of interpretations; the card I've prepared for tomorrow's blog post is much better! Here is my card:
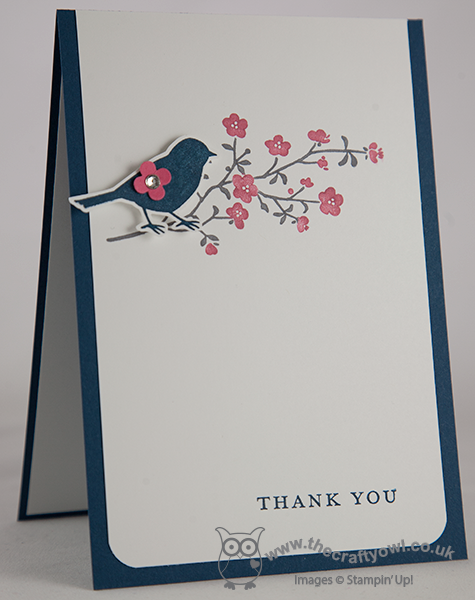
I decided to use the Morning Meadow hostess set for today's card - this set will only be available until the end of June, so if it's on your wishlist get in touch with me to book a party soon, otherwise you'll miss it. I inked the branch with my Basic Grey and Primrose Petals marker pens, then stamped the bird in Midnight Muse and fussy cut him and placed him on a dimensional, with a little rhinestone-centred punched flower for added interest. I allowed the tail of my bird to overhang the edge of the card - I think I'll join my card up to Addicted to CAS too, where the current challenge is 'off the edge'.
A quick post from me today; back tomorrow with another project. until then, happy stampin'!
Stampin' Up! Supplies Used:
by Joanne James8. May 2014 14:54Hello everyone - my second video in a week! I'm cheating slightly, as I actually shot this video weeks ago but haven't got around to editing it until now. I made a lovely concertina fold Mother's Day card a while ago using the Scalloped Tag Topper Punch - you can see my original card here - which was based on a similar card made by Julie Kettlewell (you can see Julie's original card here). Having just gone to update my original post with the link to today's video, I realise I didn't mention her in my original post, which was very remiss of me and a complete oversight on my part, as I even mentioned her in today's video. Needless to say, I have now updated the original post!
I love this concertina fold card style - it's great if you need a card that's just a little different. I made another card based on my original one, this time adapting it to a birthday card for a friend of mine who always puts so much thought into cards for others, I thought she deserved something special for her birthday too; here's my latest scalloped tag topper punch concertina fold card:
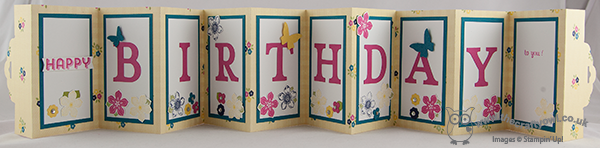
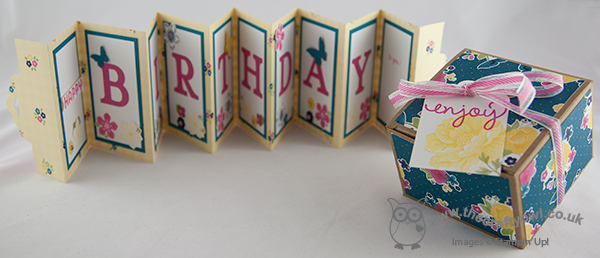
The dimensions are exactly the same as my original card - there is still enough space to stamp 'happy' on one panel, with 'birthday' spelled out on the subsequent panels leaving the last panel blank for your message (I also stamped a little 'to you!' on this panel, just to complete my message). I also decorated one of the Stampin' Up! Kraft gift boxes with some co-ordinating Gingham Garden DSP to make some pretty packaging for my accompanying gift - finished with a tag made with the Scalloped Tag Topper Punch - well, what else?! Here's a picture of both pieces together:
So, if you would like to make a Scalloped Tag Topper Concertina Fold Card - either for the forthcoming international Mother's Day or a birthday card, here's my video tutorial showing you everything you need to know:
If you would like to purchase any of the Stampin' Up! supplies featured in today's project, just contact me or click on the links in the table below to go straight to my online store.
Back tomorrow with another project; until then, happy stampin'!
Stampin' Up! Supplies Used:
83ecd8a3-a7da-4843-9788-9cf4d23e90f5|0|.0|96d5b379-7e1d-4dac-a6ba-1e50db561b04
Tags: 3D Projects, boxes, Kraft Gift Boxes, Gingham Garden, Typeset Alphabet, video tutorial, Stampin' Up, Stampin' Up Card, Stampin' Up Card ideas, Stampin' Up Supplies, Shop online, Scalloped Tag Topper Punch, Simply Celebrate, Stippled Blossoms, Petite Petals, Petite Petals Punch, Itty Bitty Punches, Fabulous Phrases, See Ya Later
3D Projects | Boxes | Cards | Stamping | Video Tutorials
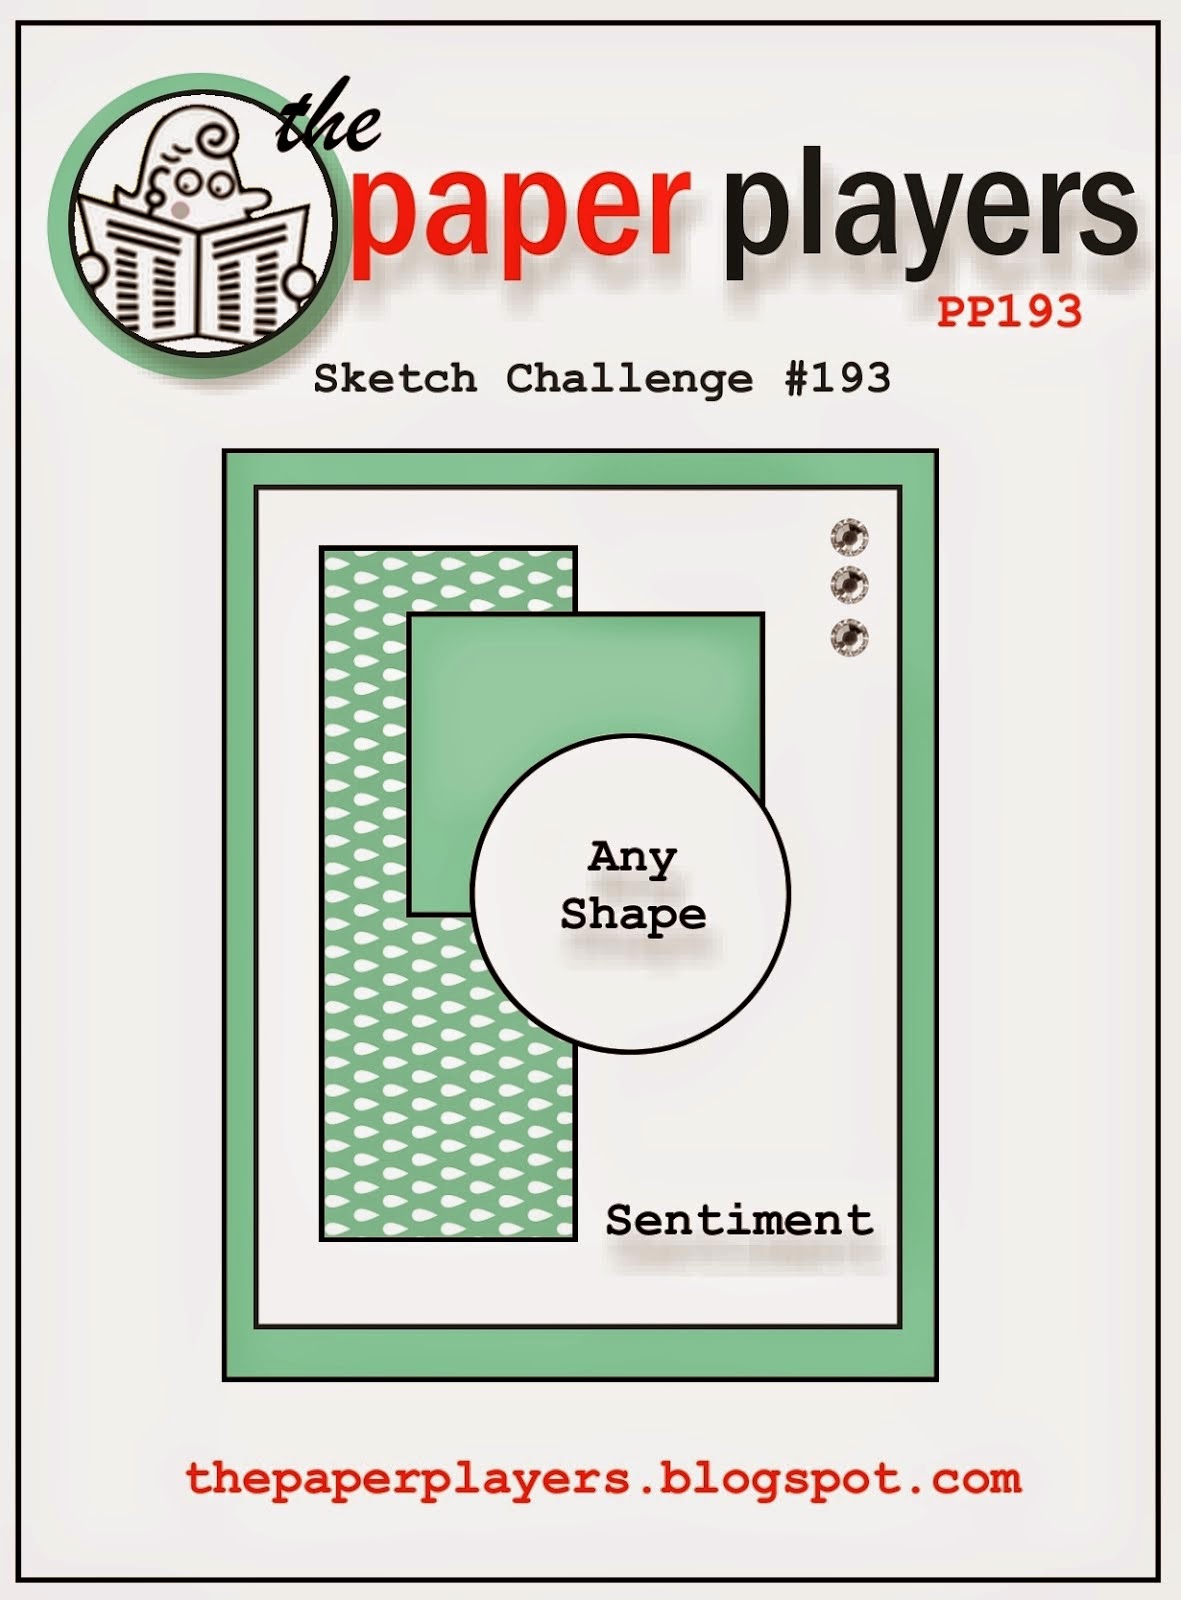
by Joanne James1. May 2014 21:48Back again with a creative post today - just in time to share my card for The Paper Players this week, where Anne Marie has this sketch challenge for us:
I decided to use a sheet of the flower patterned paper from the Fresh Prints DSP Stack as the starting point for my card; I love the pattern on this paper, but have been almost afraid to use it as it's so busy. Today I took the plunge - here's my card:
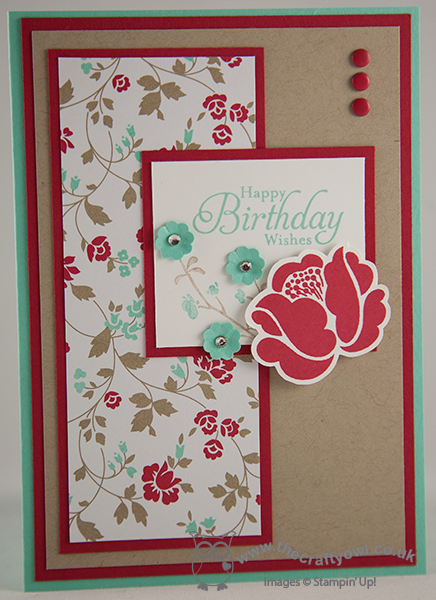
I used a Coastal Cabana base for my card, then matted a piece of Crumb Cake on Real Red and adhered to the base. I used the flower DSP for the main panel and broke slightly from the sketch to put my sentiment on the second rectangular panel, as opposed to the Crumb Cake layer. I stamped the blossom stamp from the Morning Meadow hostess set around it, having coloured it with my Crumb Cake and Coastal Cabana markers, then punched three flowers from Coastal Cabana cardstock using my Itty Bitty Flower punch and moulded them around the end of my paper piercing tool to shape them before adhering over some of the stamped blossoms. I then finished with a Real Red stamped flower from Simple Stems and three red candy dots (I really need these to be sold in packs of red only - I use more red ones than any other colour!!)
I'm quite pleased with the final result - the bold red borders really ground the busy flower pattern I think. I'm also linking this card up with SUO Challenges, where the challenge this week is to use a flower on your card.
Must go - I've grocery shopping to do before I turn in for the night (thank heavens for online grocery stores!)
Back tomorrow with another project; until then, happy stampin'!
Stampin' Up! Supplies Used:
by Joanne James25. April 2014 09:45Well, I don't know where yesterday went! I was so busy I didn't even manage a blog post; I had my card all ready and just didn't get it photographed. So in the interests of all things quick, here is the card that I had intended to blog yesterday - my second attempt at a CAS washi tape card for Nance's challenge over at The Paper Players this week:
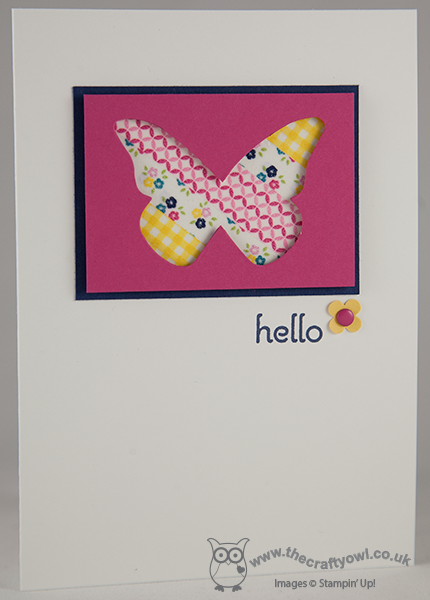
I have now replaced the earlier photograph with one of a better quality! this kind of card is so quick to create: my card is a simple white background with a Night of Navy mat for my image. I then took a rectangle of Whisper White and covered it in diagonal strips of co-ordinating Gingham Garden washi tape. As with my washi tape card earlier this week, you can use the washi tape directly onto coloured card for a diferent effect, but I wanted the colours to remain true here, so needed a white background. I then adhered this to the mat and lastly popped a Melon Mambo rectangle on with dimensionals, having first cut out a butterfly shape using my butterfly die. You could just leave it there, however I decided to add a little 'hello' greeting and a candy dot flower cut from one of my pieces of card scrap just to complete my card.
A quick card for a quick post! Everything is about speed today; I'm off to the hairdressers shortly and have a hundred and one jobs to do before I collect the James Juniors from school today for the weekend. I've already ticked a few off my list though this morning, so am making good progress!
Back tomorrow with another project; until then, happy stampin'!
Stampin' Up! Supplies Used:
cdf6f7a0-4ac0-49fc-93c5-947ffab64c10|0|.0|96d5b379-7e1d-4dac-a6ba-1e50db561b04
Tags: A Dozen Thoughts, Beautiful Butterflies Bigz Die, Big Shot, Candy Dot Brads, Gingham Garden, Itty Bitty Punches, Washi Tape, Shop online, Stampin' Up, Stampin' Up Card, Stampin' Up Card ideas, Stampin' Up Supplies
Cards | Stamping
by Joanne James17. February 2014 21:26Today I've had the most fun day. I was privileged to be invited to run a Crafty Owl birthday party for a 10 year old and her classmates, which was great fun. We made some wall art and they had a fun time punching shapes and using the Big Shot to create their masterpieces. When I run a craft party, I always create a punch art kit for the party bags so that the children can continue the crafty fun at home. For today's party, the birthday girl loves horses so I knew that a pony needed to feature on my card. I had a quick surf on Pinterest for some general inspiration then set to work creating my card. This is what I came up with:
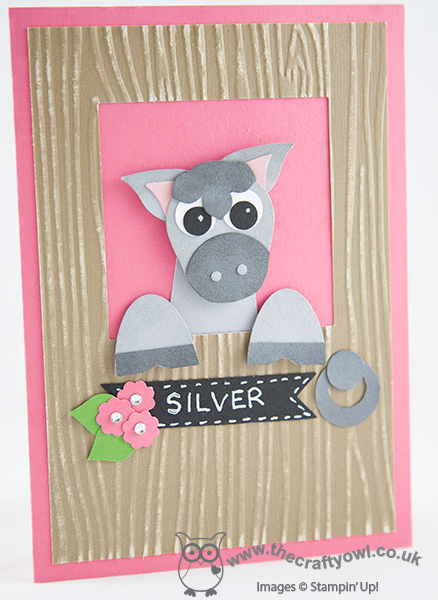
I used a variety of punches to create my card (see full list below) and some Core d'inations cardstock embossed with the woodgrain embossing folder to give texture to my stable door. I've always loved grey horses so made my card with a grey pony, but since my eight year-old informed me that this made it look like a donkey, the kits I made for the party girls all had brown horses to remove any doubt!
The girls loved their kits and I'm sure they will have had as much fun completing them as they did at the party itself. I'm linking today's card up with the challenge over at SUO Challenges where the theme this week is 'Punch Art', so this card fits perfectly.
I ended my day with a trip to the cinema to see the new Lego Movie; it was a great children's movie for half term and fulfilled one of Ben's main aims for the week, so all in all a good day was had by all.
Back tomorrow with another project; until then, happy stampin'!
Stampin' Up! Supplies Used:
45792198-643c-4601-ba20-b3a210ed6332|1|5.0|96d5b379-7e1d-4dac-a6ba-1e50db561b04
Tags: Big Shot, Owl Punch, bird builder punch, Bitty Banners Framelits, Itty Bitty Punches, Woodgrain TIEF, Merry Minis, Children's parties, Shop online, Stampin' Up, Stampin' Up Card, Stampin' Up Card ideas, Stampin' Up Supplies, Petite Petals Punch
Cards | Children's Parties | Host a Party | Punch Art
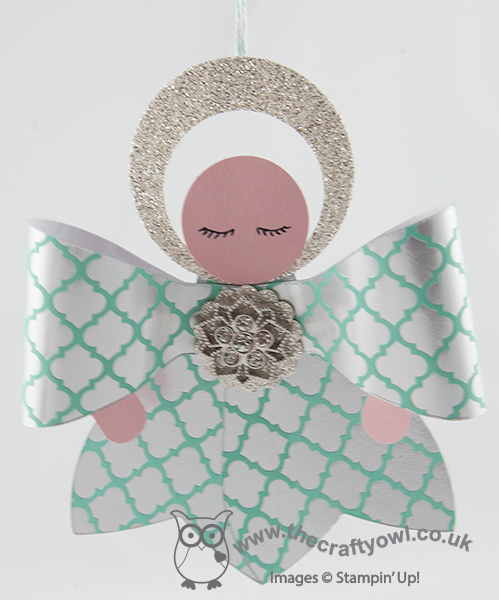
by Joanne James8. December 2013 16:00Another weekend of James family busy, busy. Yesterday: hairdressers, mad science parties and swimming gala on top of the usual homework and household chores. Today: swimming lessons, family lunch and decorating the house ready for Christmas. Finally I'm able to share today's post with a cute project: this adorable angel Christmas tree ornament made using the Stampin' Up! Gift Bow Bigz Die:
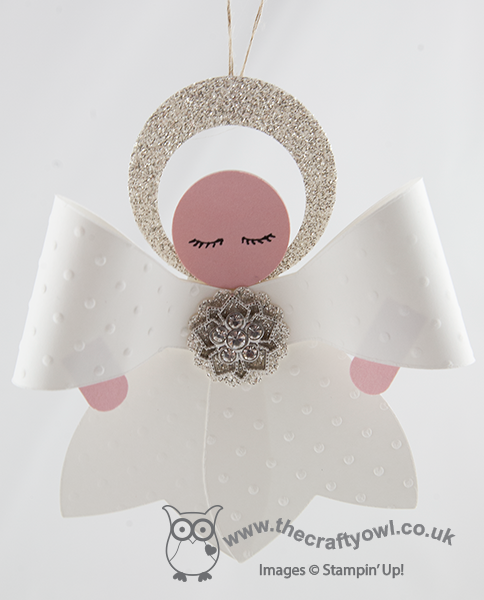
I've seen a few different examples of these angels on the internet; the first one I saw was on Tanya Bell's blog here which also included a great tip for getting even eyes. I'm not sure where the original idea came from, but as they are all a little different I thought I would share with you my version; I've been making lots of these to decorate the house this year and love that I can use my Gift Bow Die for so many more things than making bows. I made a video tutorial for you to show how I put these together; here it is:
The supplies and equipment you need to make an angel are listed below and the key measurements for the cardstock to make the main part which is the angel dress body are:
2 pieces cardstock: 10.5cm x 5cm
1 piece cardstock: 1.5cm x 8cm
These card sizes enable you to get three angels out of one sheet of A4 cardstock. Come back tomorrow for another project using the Gift Bow Bigz Die; until then, happy stampin'!
Stampin' Up! Supplies Used:
6dd3e7f4-e0fe-4cd0-b37d-78b3eb9e9c0a|0|.0|96d5b379-7e1d-4dac-a6ba-1e50db561b04
Tags: 3D Projects, Christmas, Gift Bow Bigz L Die, circle punch, Itty Bitty Punches, Perfect Polka Dots Embossing Folder, Shop online, Stampin' Up, Stampin' Up Card, Stampin' Up Supplies, Frosted Finish Embellishments
3D Projects | Punch Art | Video Tutorials
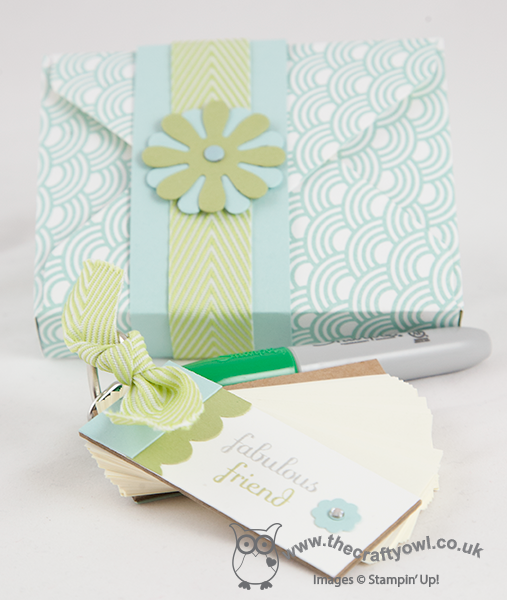
by Joanne James27. November 2013 21:02Today I'm sharing a gift I made for some of my most supportive stamping friends who I met up with at Convention. One of the great things about being a Stampin' Up! demonstrator is the friendships you make along the way - I have friends that I would never have met if it wasn't for Stampin' Up! and they are some of the most supportive when it comes to sharing successes, failures and ideas. Here is one of the gifts I made:
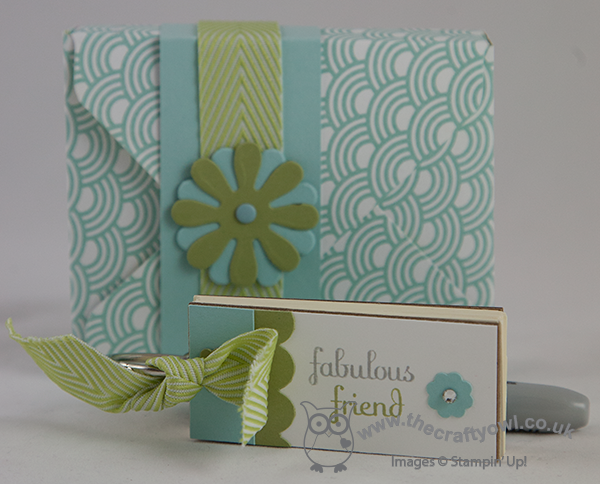
I found these cute little keyring notebooks in a local stationery store and customised them with stamps, punches and ribbon. I added a keyring Sharpie pen to each one, then made a little box with my Envelope Punch Board and closed with a co-ordinating belly band.
These are perfect for keeping in your handbag to always ensure you have a pen and paper to hand for quick notes.
Back tomorrow with another project. until then, happy stampin'!
Stampin' Up! Supplies Used:
by Joanne James26. November 2013 13:20Well, I'm back from Stampin' Up! 2013 European Convention and what can I say - my team and I had a blast! We came home exhausted, but having had the best time swapping, learning, meeting old friends, making new ones, 'sneak peeking' at some fabulous new products. Normal blogging is now resumed and I have lots of lovely things to show you, starting with the general swap that one of my downlines, Barbara, and I made for everyone we met at convention. It was something of a 'case' on the tag that features in this year's autumn-winter seasonal catalogue, but with a few changes to make it our own. Here is a picture of one of our finished swaps:
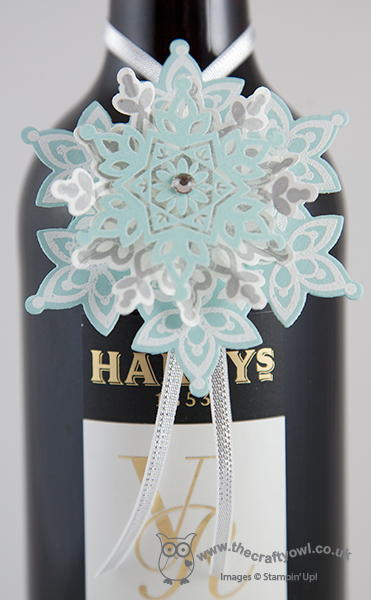
We also made some in a Pool Party/Island Indigo/Embossed Silver colourway - I will have to edit this post to include a photograph of one of these as I can't find one at the moment (might have to retake!) The snowflakes in the Festive Flurry set are great for making ornaments or 3-D tags or box-toppers with and you can layer just three snowflakes or all four to get a really large one. I shot a short video tutorial to show you how to put these layered snowflakes together to create this added dimension; grab your glue gun and click on the link below if you would like to see how to achieve it yourself - the video also shows the snowflake in the alternative colourway:
I hope you find the video useful and have fun creating your own snowflakes in lots of different colour combinations. Just before I leave you the supplies list for this project, I thought you might like to see a fun Convention picture of me with 2 of my downline team members - I'm the one in the middle with the stripey hat:

If you would like to join us for some fun - and chocolate! - at next year's European Convention in Brussels next October, get in touch for more information about the benefits of joining my team.
Back tomorrow with more swaps and gifts made for friends; until then, happy stampin'!
Stampin' Up! Supplies Used: