by Joanne James26. August 2014 15:30As I'm writing my post today there is finally a break in the rain - hurrah! I hope that everyone here in the UK had a lovely Bank Holiday weekend, despite the dreadful weather across most of the country yesterday. I am now home, having spent a long weekend away in Somerset with my extended family, celebrating my Mother-in-law's forthcoming 70th birthday. We were fortunate to have had wonderful weather and spent a great weekend on the beach, fossil hunting, playing rounders and generally having a relaxing time.
Today I'm sharing a card I made a while ago as one of the samples for the UK Regional Training Day where I was asked to do a 'wow' technique presentation using the Traveler stamp set. This card is one of the ones that was actually inspired by the set, rather than featuring it directly, although the old fashioned brownie camera that inspired my card does feature on the inside. I decided to try my hand at a shaker card and created it to look like an old fashioned camera - here's the front of my card:
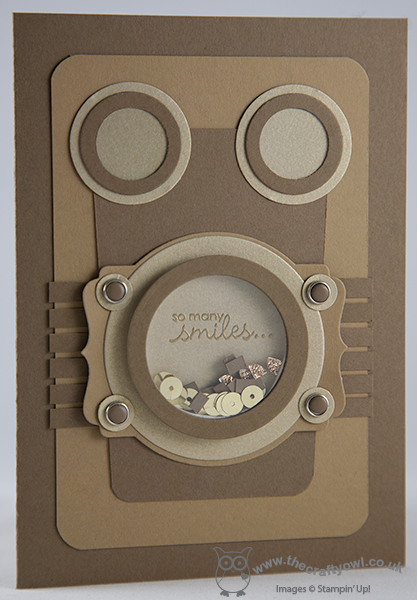
I used Soft Suede, Baked Brown Sugar and Brushed Gold cardstock and a variety of circle punches and both circle and deco label framelits to construct my shaker, and filled the window with gold sequins and some confetti squares cut using my fringe scissors from baked Brown Sugar cardstock and Champagne glimmer paper. I used the Petite Pairs sentiment set and heat embossed the first half of my sentiment in gold on the inside of my shaker frame. This was then continued on the inside of the card:
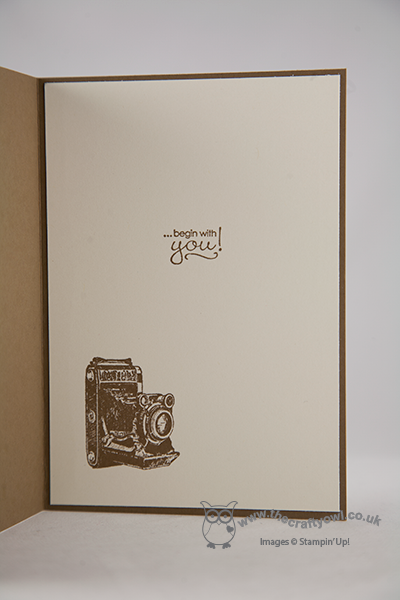
I also finished with the camera stamp. So what do you think - does my punch art camera shaker card bear any resemblance to the real thing? I thought this would make a fun masculine shaker card - proving even grown ups can be fun!
Back tomorrow with my Design Team card for this week's Colour Me...! challenge - and I have a fun 'sneak peek' Christmas card to share with you!
Until then, happy stampin'!
Stampin' Up! Supplies Used:
d8ff5816-b75b-4099-8492-98feab5b6931|0|.0|96d5b379-7e1d-4dac-a6ba-1e50db561b04
Tags: Traveler, Stampin' Up Supplies, Stampin' Up Card ideas, Stampin' Up Card, Stampin' Up, Shaker cards, Shop online, circle punch, Circles Framelits, Deco Labels Framelits, Petite Pairs, Candy Dots, Candy Dot Brads, corner punch
Cards | Punch Art | Stamping
by Joanne James3. July 2014 22:32Good evening all - I've had a busy week so far, most of it out and about so have spent next to no time in my craft room. Good job I have a few things that I've already prepared to share with you! Today I'm sharing one of the cards I made for my new catalogue launch event, featuring the Work of Art stamp set:
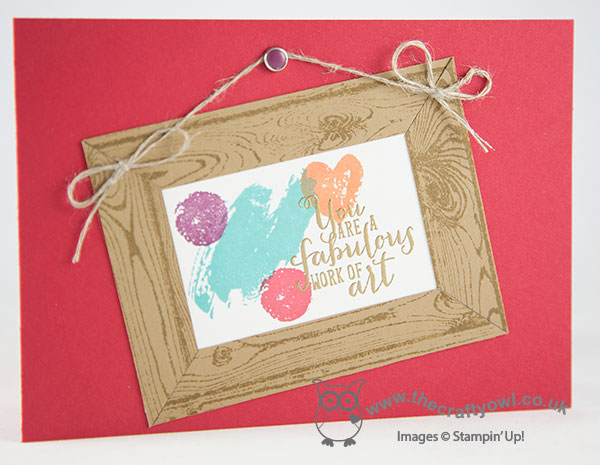
This set, comprising lots of brushstroke-type stamps can be used in lots of different ways and for this card I decided to use it to create my very own 'work of art'. I stamped four of the brushstroke stamps randomly on a piece of Whisper White cardstock, then stamped the sentiment in Versamark and heat embossed in gold. I then stamped the Hardwood stamp in Baked Brown Sugar on a piece of cardstock in the same colour and cut it into strips and created a frame for my picture. I finished off with some linen thread and a candy dot brad to hang it from on my Real Red wall.
Simple enough - but I like it! That's all from me today - a quick post as my bed is calling! Back tomorrow with another project; until then, happy stampin'!
Stampin' Up! Supplies Used:
by Joanne James25. April 2014 09:45Well, I don't know where yesterday went! I was so busy I didn't even manage a blog post; I had my card all ready and just didn't get it photographed. So in the interests of all things quick, here is the card that I had intended to blog yesterday - my second attempt at a CAS washi tape card for Nance's challenge over at The Paper Players this week:
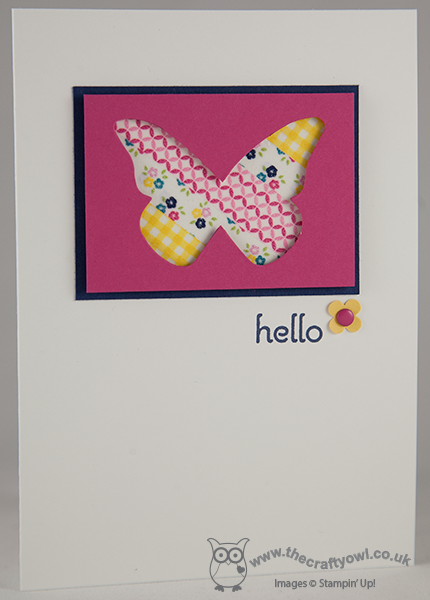
I have now replaced the earlier photograph with one of a better quality! this kind of card is so quick to create: my card is a simple white background with a Night of Navy mat for my image. I then took a rectangle of Whisper White and covered it in diagonal strips of co-ordinating Gingham Garden washi tape. As with my washi tape card earlier this week, you can use the washi tape directly onto coloured card for a diferent effect, but I wanted the colours to remain true here, so needed a white background. I then adhered this to the mat and lastly popped a Melon Mambo rectangle on with dimensionals, having first cut out a butterfly shape using my butterfly die. You could just leave it there, however I decided to add a little 'hello' greeting and a candy dot flower cut from one of my pieces of card scrap just to complete my card.
A quick card for a quick post! Everything is about speed today; I'm off to the hairdressers shortly and have a hundred and one jobs to do before I collect the James Juniors from school today for the weekend. I've already ticked a few off my list though this morning, so am making good progress!
Back tomorrow with another project; until then, happy stampin'!
Stampin' Up! Supplies Used:
cdf6f7a0-4ac0-49fc-93c5-947ffab64c10|0|.0|96d5b379-7e1d-4dac-a6ba-1e50db561b04
Tags: A Dozen Thoughts, Beautiful Butterflies Bigz Die, Big Shot, Candy Dot Brads, Gingham Garden, Itty Bitty Punches, Washi Tape, Shop online, Stampin' Up, Stampin' Up Card, Stampin' Up Card ideas, Stampin' Up Supplies
Cards | Stamping
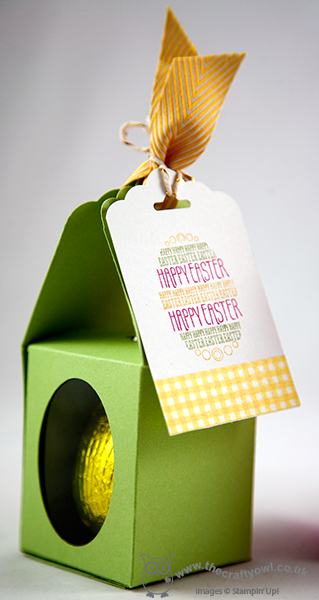
by Joanne James3. April 2014 21:03Evening everyone! I promised you a special project today and here it is! Several months ago Stampin' Up! asked me if I would create an Easter box for a magazine commission and that magazine hits the shelves of the newsagents today! The box I created for Stampin' Up! is featured in the April 2014 issue of Prima Baby and Parenting and is part of an extended feature on Easter Family Fun - great things to make and do with your family this Easter. There are cute cakes and biscuits to bake and this fabulous Easter egg box to make:
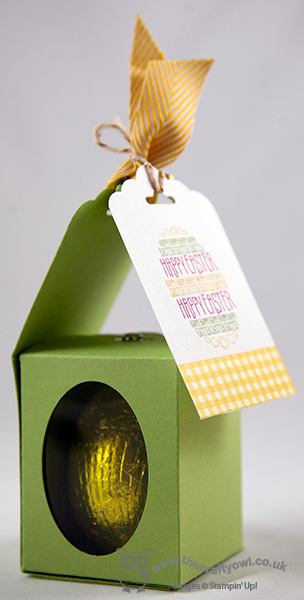
Here's another shot from a different angle showing a close up of the tag, stamped with the egg from the 'Eggstra Spectacular' stamp set:
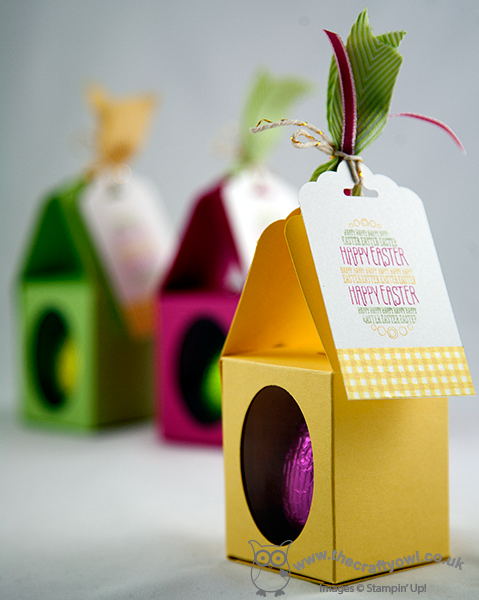
Lastly the trio of boxes that the magazine used for the title page of the two-page spread:
Here is my photograph of the title page in the magazine itself - the facing page contains a step-by-step 'how to' tutorial showing how to make it:
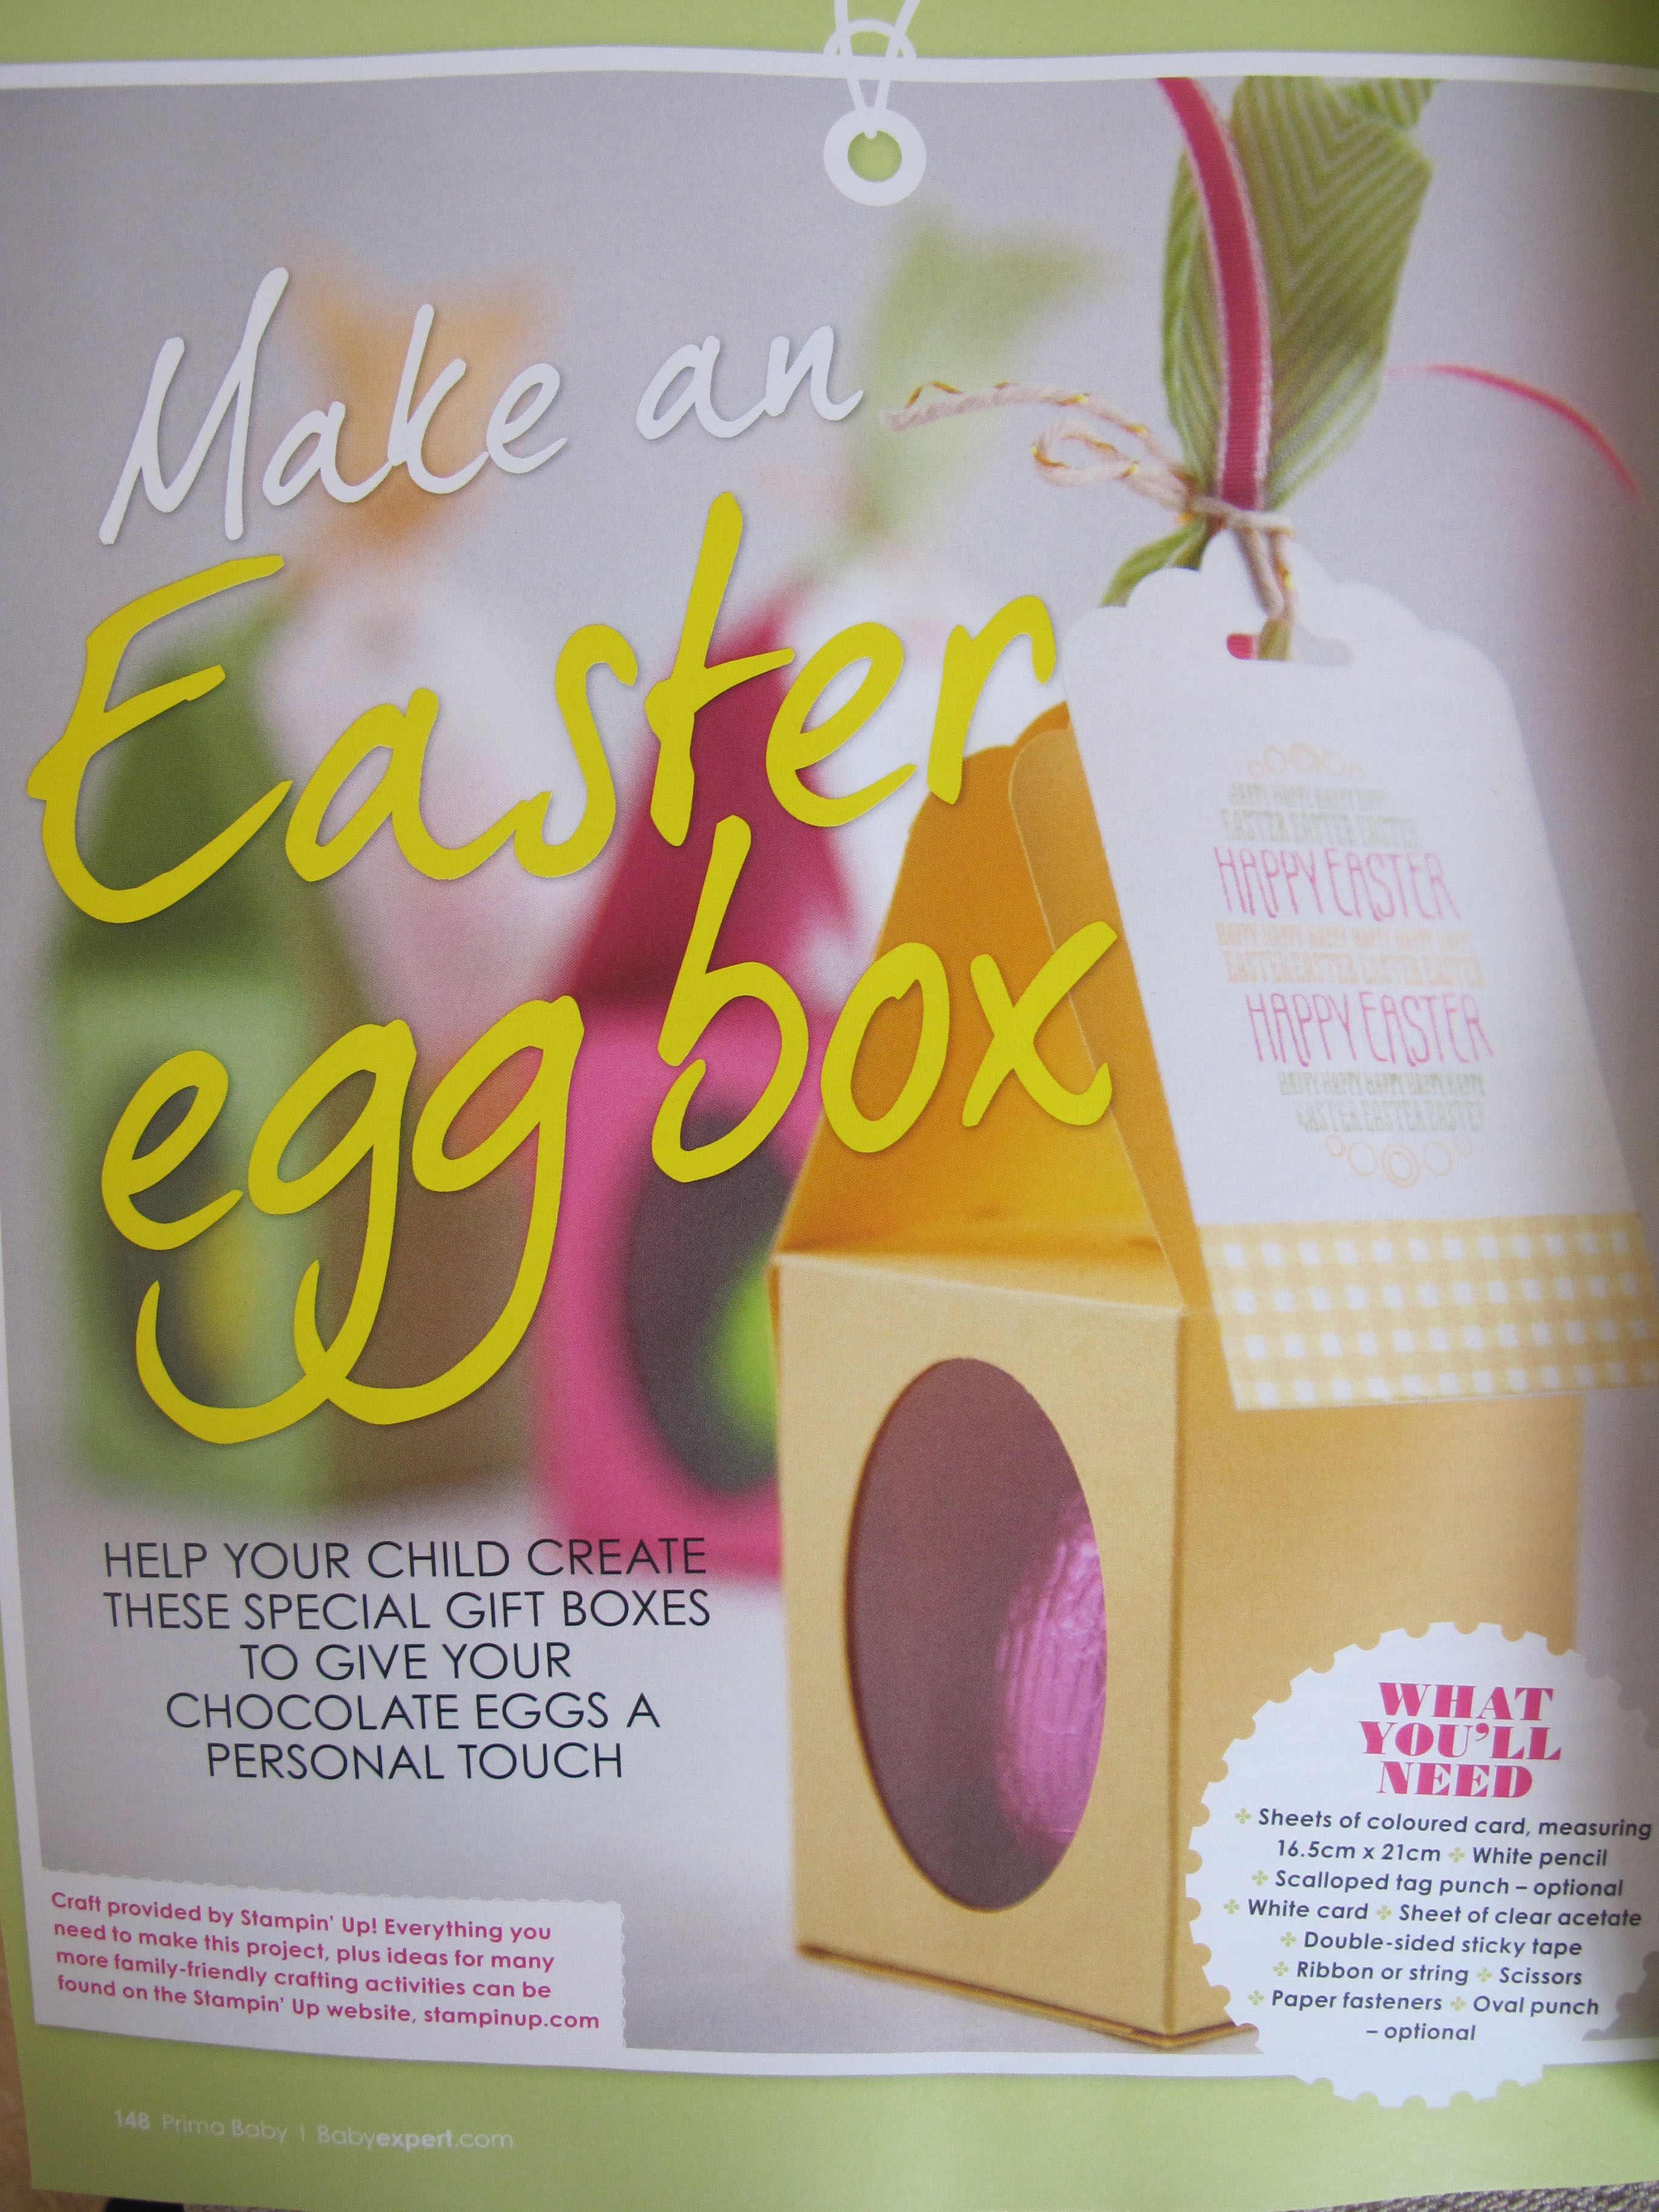
The sides of the body of the finished box measures 2" x 2 1/2" which is perfect for a small Easter egg (I used the ones you can buy in packs for Easter egg hunts) but this box could be used for anything small and attractive where you want to give a glimpse of the contents. If you would like a copy of the tutorial you can see it in this month's Prima Baby magazine - if you live in Northampton, you'd better get to the shops quick though before I buy all the copies :-) I also made a short video tutorial showing you how I made this box - click the link below to watch it:
That's all from me today; back tomorrow with another project; happy stampin'!
Stampin' Up! Supplies Used:
5a410a65-8882-46df-b9d9-50c6b2560efa|0|.0|96d5b379-7e1d-4dac-a6ba-1e50db561b04
Tags: 3D Projects, boxes, Candy Dot Brads, Easter, Eggstra Spectacular, Scalloped Tag Topper Punch, Shop online, Stampin' Up, Stampin' Up Card, Stampin' Up Card ideas, Stampin' Up Supplies, video tutorial
3D Projects | Boxes | Stamping
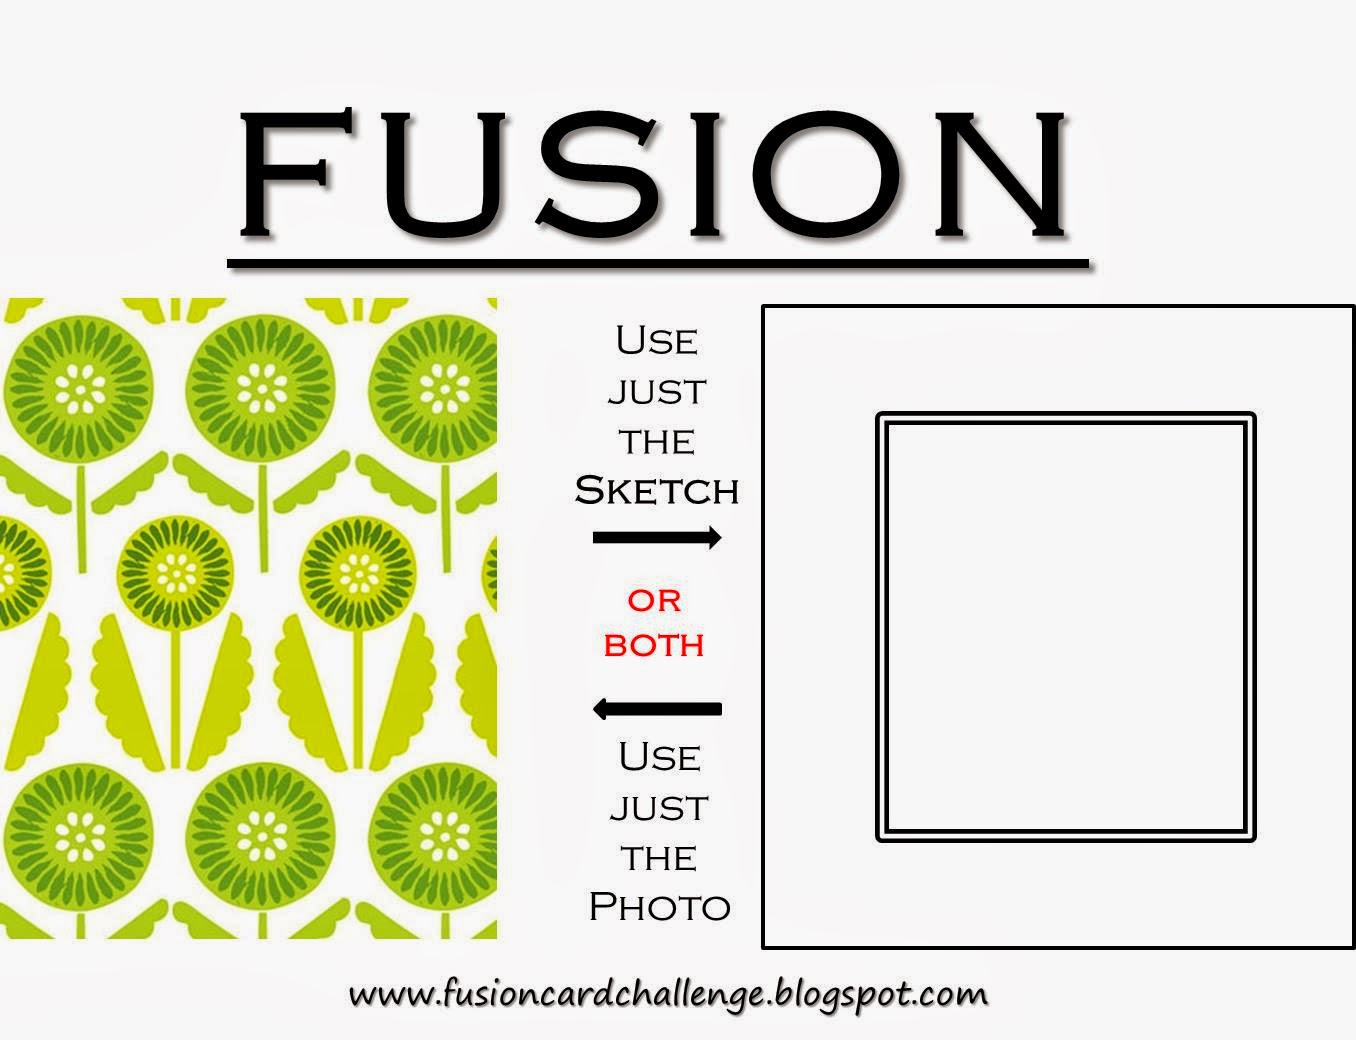
by Joanne James20. March 2014 21:27Good evening blog readers! Today I have a simple Spring flower card to share with you; simple in execution, yet I have been pondering its execution for almost a week. Why? Well, the challenge over at Less is More this week is to use masking or stencilling on your card. As I don't own much in the way of stencils and generally make my own templates if I want to mask or stencil something, I've been deliberating what to do. Then I saw the photo inspiration over at Fusion this week -
and I had a sudden flash of inspiration. Here is my card:
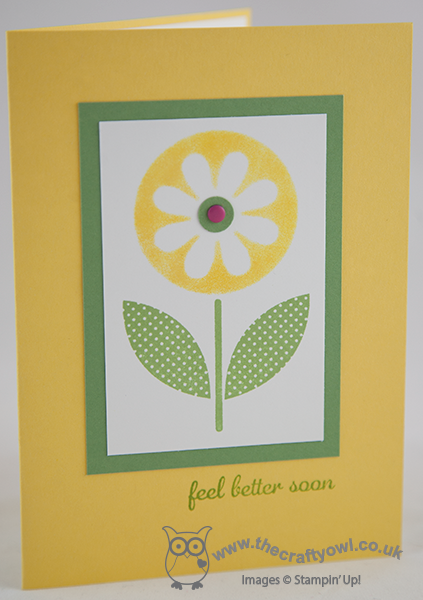
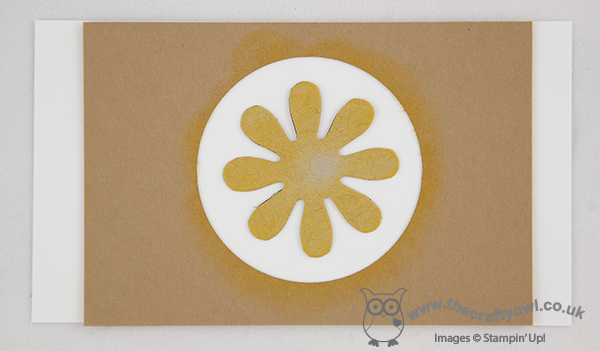
I kept with the yellows and greens of the inspiration photo and used Daffodil Delight and Wild Wasabi as I wanted my card to have a light, bright spring feel. I was tempted to stencil a repeating pattern, but decided instead to go with a single graphic flower instead for greater impact. I created the flowerhead by making my own stencil from a piece of card with a punched out circle and once in place on my white card, I positioned a flower cut with my Blossom Party Originals Die in the centre with some low-tack adhesive and sponged yellow ink onto the space in between - here's a photo of my makeshift mask/stencil which might make more sense:
For the stem I used a retired stamp from a set called 'Sweetheart'; this was the first ever stamp set I purchased so I feel I can't part with it for sentimental reasons and it was just perfect for this card. I finished with a simple sentiment and a bright pink candy dot layered on a small punched circle.
I'm also linking this card up with the lovely peeps over at The Paper Players this week, where Jaydee's challenge this week is to create something clean and simple with the theme of 'Spring'; I'm pretty sure today's card fits the bill.
Back tomorrow with another project; until then, happy stampin'!
Stampin' Up! Supplies Used:
by Joanne James11. July 2013 22:06Another mad busy day today, working on several commissions, a few household chores and preparing for the last day of the school term tomorrow. As promised, here's the other card Barbara and I made when we were busy embossing the other day - a sunny yellow base with a heat embossed white daisy pattern:
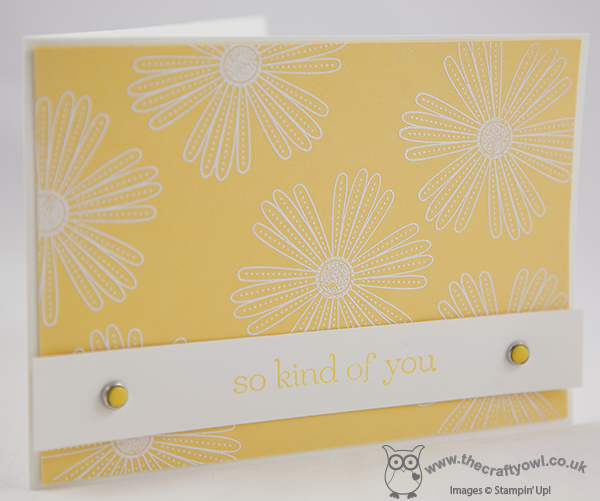
Here's a close up of the embossed detail where you can see the raised pattern:
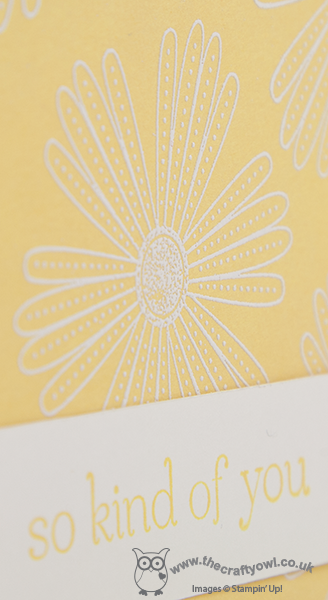
I love the simplicity of this kind of card and Barbara and I originally left ours with the embossed panel taking centre stage, but I later decided to add a sentiment from the Sweet Essentials stamp set and two of the lovely new build-a-brads with Daffodil Delight candy dots (did you guess the new product correctly?!)
Just a reminder too that 'Sweet Essentials' is one of the greeting stamp sets available at 25% off this month - it can be yours for £10.46 (clear mount).
Back tomorrow with another project - another of my new annual catalogue favourites. Until then, happy stampin'!
Stampin' Up Supplies:
Stamps: Sweet Essentials
Cardstock: Whisper White, Daffodil Delight
Ink/Stampin' Write Markers: Daffodil Delight, Versamark
Tools: Heat Gun
Finishing Touches: White Embossing Powder, Brights Candy Dots, Candy Dots Brad Bases