by Joanne James14. June 2015 10:00It's Sunday and time for a new challenge over at the Paper Players. Thank you to everyone who played along with my challenge last week - your entries were awesome! This week it is the turn of the super talented Sandy and she has a fun colour challenge for us:
With the 4th of July not far away, there are lots of patriotic themed cards floating about the internet. Thought of American independence and the stars on this week's badge inspired me to create my card this week:
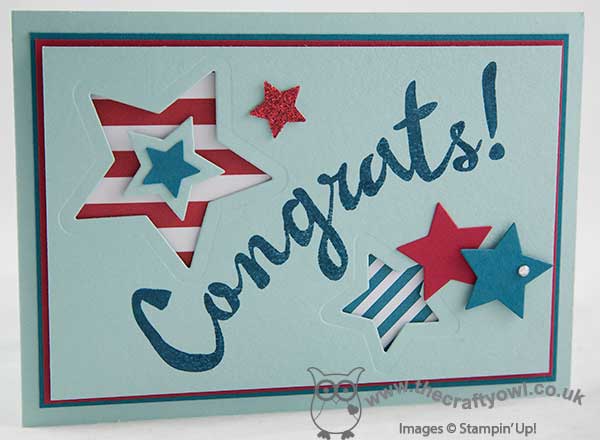
I chose to use the Congrats! stamp from the 'Bravo!' stamp set as my focal sentiment, stamped in Island Indigo onto my Pool Party base, and die cut some stars around it using my Big shot and Stars framelits to decorate. I used a couple of snippets of retired DSP behind the negative space (the indigo stripes are from the 'All Abloom' pack and the red stripes from the 'Fresh Prints' DSP stack) and popped some stars up on dimensionals for a little extra lift. A red glimmer star punched with my Itty Bitty star punch and a single rhinestone finish my card.
This card is ready for one of my lovely team who is close to promoting this month; I am willing her to get there so am thinking positively and I know I'll be sending this out real soon. I'm also linking up to SUO Challenges where the challenge is appropriately 'stars and stripes'. Before you reach for your ink and papers, check out what our amazing team has created to inspire you this week:
The Paper Players Design Team
Here's a quick recap of our challenge rules:
1. Create a new paper project
2. Upload your creation to your blog with a link back to us and provide a direct link to the post featuring your challenge submission.
3. Please link your card to no more than three challenges, TOTAL.
4. Have FUN!
I look forward to seeing your colourful creations in the gallery this week. I'm off to begin a couple of days of birthday celebrations - we are starting early and making the most of it - after all, you're only 10 once!
Back tomorrow with another project; until then, happy stampin'!
Stampin' Up! Supplies Used:
6189c6d4-96db-45f4-a16e-86d644692005|0|.0|96d5b379-7e1d-4dac-a6ba-1e50db561b04
Tags: Bravo, Big Shot, Magnetic Platform, Shop online, Shop Stampin' Up online, Stampin' Up, Stampin' Up Card, Stampin' Up Card ideas, Stampin' Up Supplies, Star Framelits, The Paper Players, Fresh Prints DSP Stack, All Abloom
Cards | Stamping
by Joanne James9. June 2014 11:18Happy Monday lovely blog readers! Lots to do this week, but the sun is shining so all is good with the world! Today I am sharing my first 2014-15 Annual Catalogue 'sneak peek' with you - yay! Whilst there is some sadness as we say goodbye to the old catalogue - and I'm not done with it yet! - there is also the excitement of the new and today's clean and graphic card contains a little of both.
Today's card is this week's entry for the 'Colour Me...!' challenge where we are working with monochromatic Coastal Cabana:
The card I'm sharing features one of the stamps form the new 'Traveler' stamp set that I was asked to demonstrate recently at the Stampin' Up! UK Regional training event in Telford recently. This set is a collection of old fashioned images with a travel theme and I must confess the first time I saw it I did wonder what I was going to do with it as 'vintage' really isn't my style and this isn't a set I would have selected by choice. Turns out I've had great fun with it, mostly creating unusual cards that are much more in keeping with my style; if you look at today's challenge entry you'll see what I mean:
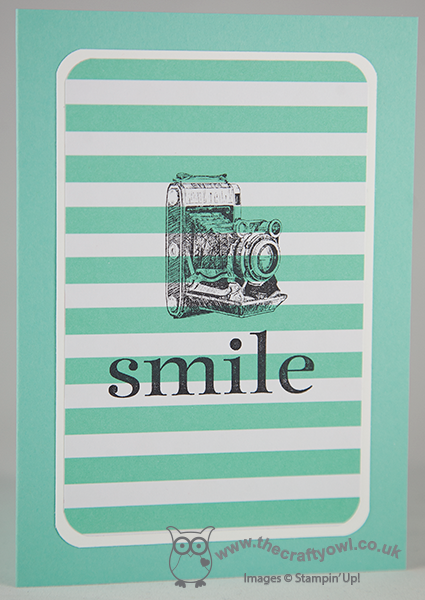
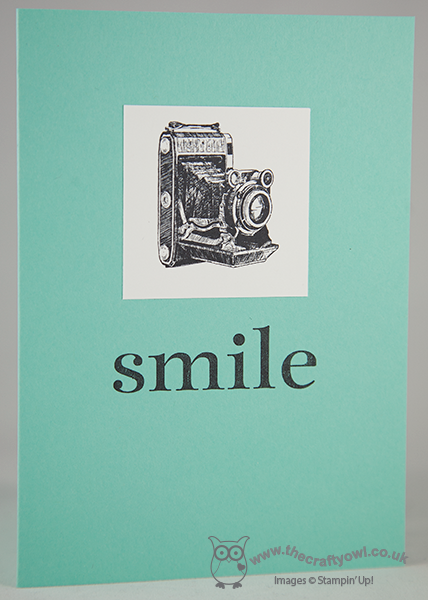
This card uses a Coastal Cabana base, then the focal panel is a piece of white and Coastal Cabana-striped paper from the Fresh Prints DSP stack, onto which I've stamped the old fashioned camera in black stazon, coupled with the 'smile' sentiment from the retiring Happy Day stamp set - I will miss this stamp set so much! I then rounded the corners and matted onto a piece of Whisper White cardstock before adhering to my base. So a super simple design, but I think quite effective. Quite a modern take on such a vintage-looking stamp and it also makes the DSP look quite different when used in this way. The striped paper so reminds me of deckchairs!
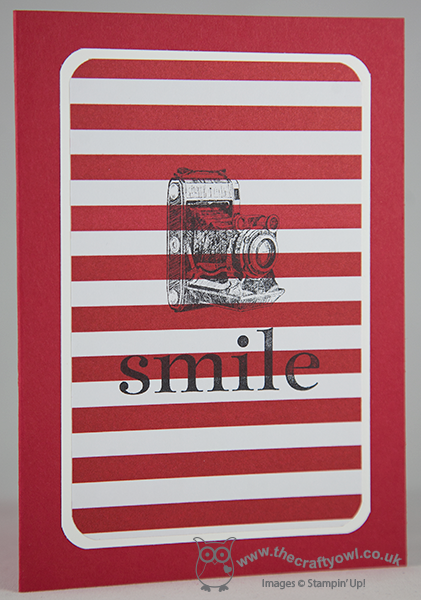
Whilst I was playing with this stamp and colour, I also created a co-ordinating card using a single central block:
Then inspired by the other striped paper in the Fresh Prints DSP stack, I created the same pair of cards in Real Red:
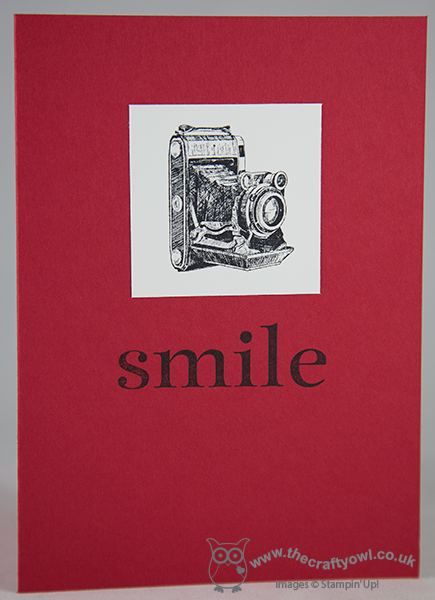
I like these too but the Coastal Cabana is my favourite! Hope you like today's sneak peeks - more to come in coming weeks! Don't forget the retiring lists are still active; if you're after the 'Happy Day' set, click on the link to the shop below as it will only be available until 30 June.
Back tomorrow with another 'blast from the past' card; until then, happy stampin'!
Stampin' Up! Supplies Used:
by Joanne James4. June 2014 10:13Well Sunday's summer sunshine was definitely short-lived; the grey of yesterday has turned into steady and continuous pouring rain so far this morning - yuk! Still, today's card for the CAS Colours and Sketches Challenge will cheer you up I hope; this week it is a double challenge to use both the sketch and colour palette:

Firstly, a quick thank you to the ladies over at CAS for choosing me as one of their winners last week (you can see my winning card here). Someone I asked me recently how I get on with my challenge entries, as I don't often post the outcome here. I sometimes post a win on my Facebook page but the one place I try and keep track of all my wins is my Pinterest board here - so if you're ever interested to see my growing badge collection, pop on over and take a look.
Anyway, onto today's card! I used a piece of paper from the Fresh Prints DSP stack as the inspiration for today's card - these stacks are great and I'm so pleased that there are going to be some new ones appearing in the forthcoming new annual catalogue. Here is my card:
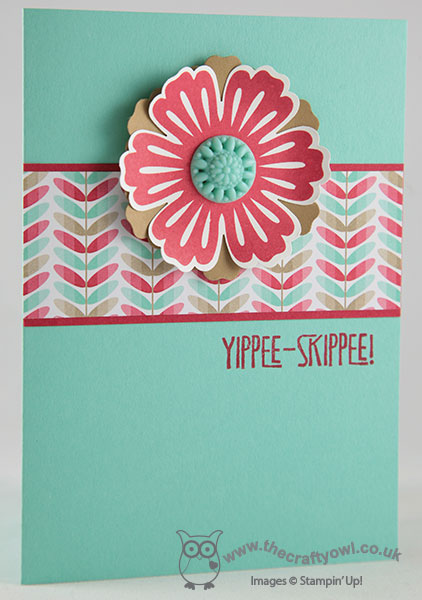
I love this Orla Kiely-inspired pattern - it always reminds me of flower stems, so it seemed appropriate to use a statement flower as my focal point in place of the arrow on the sketch and what better than that old favourite, Mixed Bunch (staying for next year's catalogue - hurrah!) I used Coastal Cabana for my card base and layered my DSP strip on a mat of Real Red cardstock. I then stamped my flower in Real Red ink on Whisper White, punched it out with the co-ordinating Blossom punch (got to love a matching punch!) and backed this with another flower punched from Baked Brown Sugar cardstock, which I offset slightly so that you could see it through the gaps of the petals of the top flower. I finished my flower with an in-colour Boutique Details in Coastal Cabana; it's not often I dip into my pot of these, but it provided the perfect finish to my bold flower here. Lastly, I added my 'Yippee Skippee!' sentiment from the stamp set of the same name in red to the card base.
A clean and simple card that could be used for lots of occasions and brings the challenge colours together nicely. I am also going to link my card up with the challenge over at 'Less is More' this week where the challenge is to use two different stamp sets; pretty good, considering there are only two actual stamped images on the whole card!
Back tomorrow with another card; until then, happy stampin'!
Stampin' Up! Supplies Used:
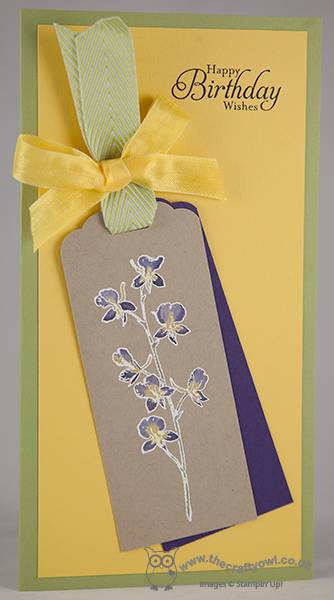
by Joanne James10. May 2014 20:55A quick post from me this evening as I sit with my feet up relaxing following today's all day workshop. We had a lovely time and everyone left with lots of completed projects and plenty of leftover bits and pieces to make lots more things at home. The following card, designed by Monica Gale, was one of my favourite projects:
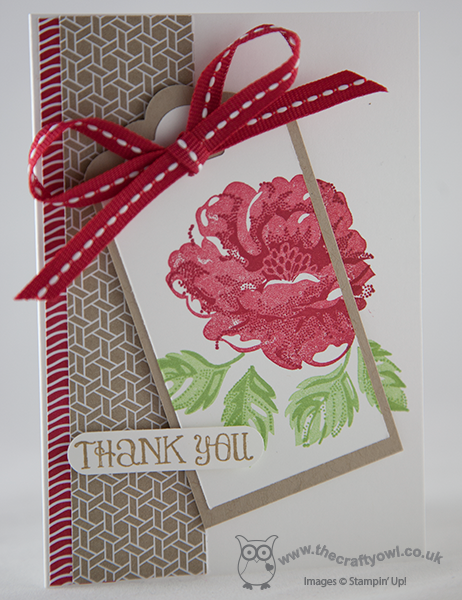
The feature of the card is a Stippled Blossoms rose that is stamped partially off the tag; this is backed with a couple of strips of Fresh Prints DSP and then finished with a red grosgrain ribbon bow and a sentiment cut with the word window punch. A simple enough card but a great way to use the Stippled Blossoms stamps and great practice for getting to grips with your stamp-a-ma-jig. I'm on a mission to make sure all my ladies can use theirs and truly reap the benefits (much to their dismay at times, I'm sure!) of this amazing little plastic sheet and its accompanying t-piece. Thanks ladies for your patience!
My next monthly card class is on Monday 2nd June and will be featuring the 'Springtime Hello' stamp set. If you live in or around Northampton and would like to come along, please do get in touch for more details - experienced and non-experienced crafters welcome.
Back tomorrow hopefully with a special blog post for you; until then, happy stampin'!
Stampin' Up! Supplies Used:
5b70a00c-4938-4cf1-86fd-79b4b2a7a072|0|.0|96d5b379-7e1d-4dac-a6ba-1e50db561b04
Tags: Classes, Lots of Thanks, Shop online, Stippled Blossoms, Scalloped Tag Topper Punch, Fresh Prints DSP Stack, Stamp-a-ma-jig, Stampin' Up, Stampin' Up Card, Stampin' Up Card ideas, Stampin' Up Supplies
Cards | Classes | Stamping
by Joanne James9. May 2014 20:39Good evening lovely blog readers! I've had a busy day today with lots of household chores and last minute preparations for an all day class that I'm running tomorrow with some of my favourite crafting ladies. Today I thought I would share with you one of the projects that we are making at our class tomorrow - a cute little tote made using the Envelope Punch Board:
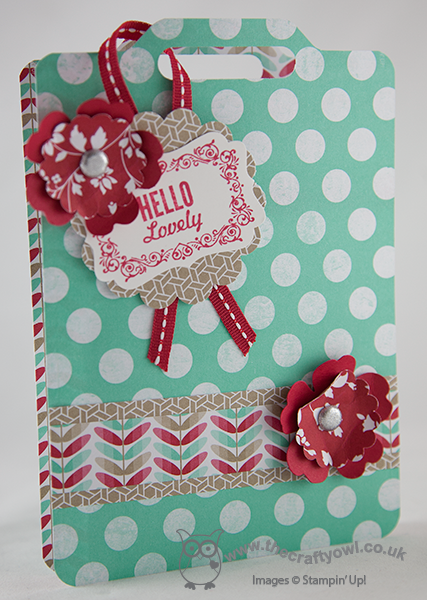
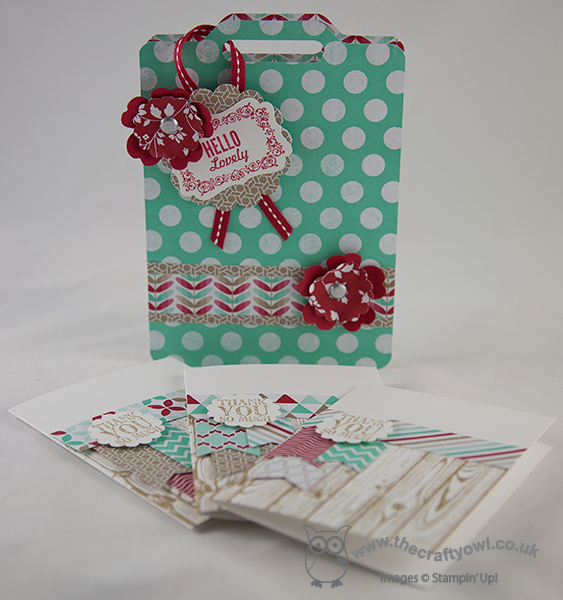
This project was designed by Monica Gale and is one that I made at our last team quarterly training day. It's made using the papers from the Fresh Prints DSP stack and decorated with a tag stamped from the 'Hello Lovely' stamp set. I just love the colours and patterns in this paper stack and as a card maker these papers offer such great value for money at just £6.25 for 48 sheets. We are also making a set of thank you notelets to go inside - this would make such a nice little gift for someone. I'm looking forward to making this and lots of other projects with my ladies tomorrow; if you live in or around Northampton and would be interested in attending any of my cardmaking or project classes, you can find my current class schedule here or just contact me for more information.
That's all from me; back tomorrow with another project. until then, happy stampin'!
Stampin' Up! Supplies Used:
a6422178-75d4-44d0-af72-a6fe6fdec35d|0|.0|96d5b379-7e1d-4dac-a6ba-1e50db561b04
Tags: 3D Projects, Classes, Decorative Label Punch, Envelope Punch Board, Fresh Prints DSP Stack, Hello Lovely, Lots of Thanks, scallop circle punch, Shop online, Stampin' Up, Stampin' Up Card, Stampin' Up Card ideas, Stampin' Up Supplies, Pansy punch, Word Window Punch, Hardwood
3D Projects | Cards | Classes | Envelope Punch Board | Stamping
by Joanne James1. May 2014 21:48Back again with a creative post today - just in time to share my card for The Paper Players this week, where Anne Marie has this sketch challenge for us:
I decided to use a sheet of the flower patterned paper from the Fresh Prints DSP Stack as the starting point for my card; I love the pattern on this paper, but have been almost afraid to use it as it's so busy. Today I took the plunge - here's my card:
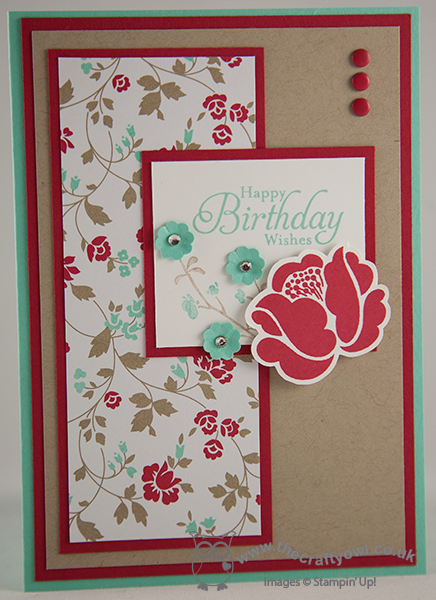
I used a Coastal Cabana base for my card, then matted a piece of Crumb Cake on Real Red and adhered to the base. I used the flower DSP for the main panel and broke slightly from the sketch to put my sentiment on the second rectangular panel, as opposed to the Crumb Cake layer. I stamped the blossom stamp from the Morning Meadow hostess set around it, having coloured it with my Crumb Cake and Coastal Cabana markers, then punched three flowers from Coastal Cabana cardstock using my Itty Bitty Flower punch and moulded them around the end of my paper piercing tool to shape them before adhering over some of the stamped blossoms. I then finished with a Real Red stamped flower from Simple Stems and three red candy dots (I really need these to be sold in packs of red only - I use more red ones than any other colour!!)
I'm quite pleased with the final result - the bold red borders really ground the busy flower pattern I think. I'm also linking this card up with SUO Challenges, where the challenge this week is to use a flower on your card.
Must go - I've grocery shopping to do before I turn in for the night (thank heavens for online grocery stores!)
Back tomorrow with another project; until then, happy stampin'!
Stampin' Up! Supplies Used:
by Joanne James12. April 2014 21:39I've had a lovely day today with members of my team at our quarterly training day; it's always such fun to get together with some of the wider team and meet up with friends I don't see all that often. Today I'm sharing a birthday card that I made for one of my downline who celebrated her birthday this week. I used this week's Mojo Monday sketch and the colours and photo over at Colour Q for the inspiration for my design:

I love the bright and bold colours over at Colour Q this week and the pattern on the sundress had me reaching for my Simple Stems set again to try and capture those bright flowers. Here is my finished card:
I used a piece of spotty Coastal Cabana DSP from the Fresh Prints paper stack as my angled background, then layered three flowers as the anchor for my birthday flag. I stamped the largest flower twice in Tangerine Tango and once in Pumpkin Pie, and having cut one of the flowers using my Secret Garden framlits, fussy-cut the remaining two flowers into sections, then layered them with a Tangerine Tango base, Pumpkin Pie middle layer and Tangerine Tango flower centre. I then popped them up on dimensionals to give a real 3D effect to this flower. I stamped the remaining two flowers in Bermuda Bay, then overlapped all three flowers - this photo shows the layering really well:
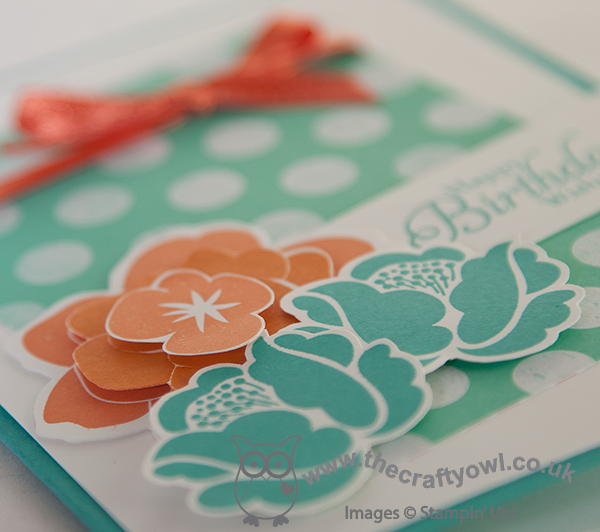
I used a piece of retired Tangerine Tango ribbon for my bow - I was tempted to use white, but decided my card needed another pop of orange amongst the lovely turquoise blues, so there you have it.
That's all for today; back tomorrow with another card, until then happy stampin'!
Stampin' Up! Supplies Used:
by Joanne James6. April 2014 19:00Good evening lovely blog readers! Today I'm sharing a card (well, actually two!) that I made a little while ago but that I didn't share with you at the time. I made this card using an old Freshly Made Sketches layout - here is my card:
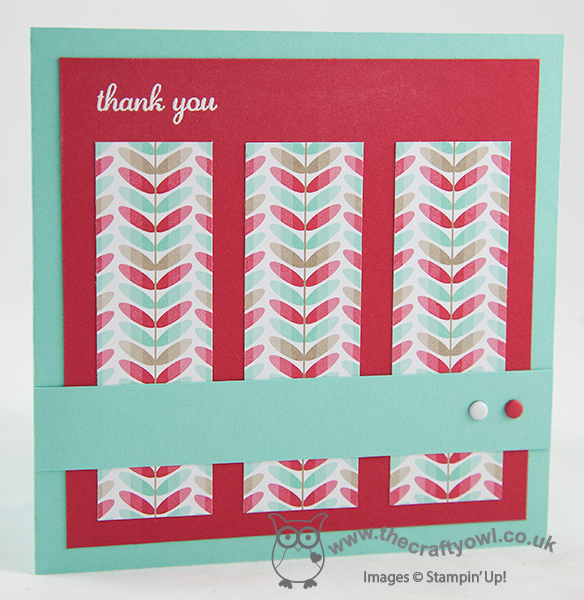
My card uses the Fresh Prints DSP stack - this paper stack is great value and perfect for cards and the pattern I've used on this card is one of my favourites: an Orla Kiely-inspired design I think and one that also appeared in last year's Sycamore Street Sale-A-Bration DSP pack, but this time updated with some fresh colours for the new season. I cut three panels, having centralised the pattern, and matted it on Real Red and a Pool Party base, with a Pool Party banner finished with two co-ordinating candy dots. The original sketch had only two dots and I wrestled with myself to not use three (I think things looks better in threes!) but I decided that the two dots balanced the sentiment on the top left-hand side of the card, so left alone! I stamped my sentiment in Versamark and heat-embossed with Whisper White embossing powder, because whilst I didn't want it to dominate my card, I didn't want it to get lost either. This was the card I was happy with, but I promised two cards today and thought I would show you the first one I made; it was slightly smaller in size but to the same layout, but instead of centralising the pattern on each individual strip, I simply cut a piece of paper equally into three. It gives quite a different effect - see what I mean:
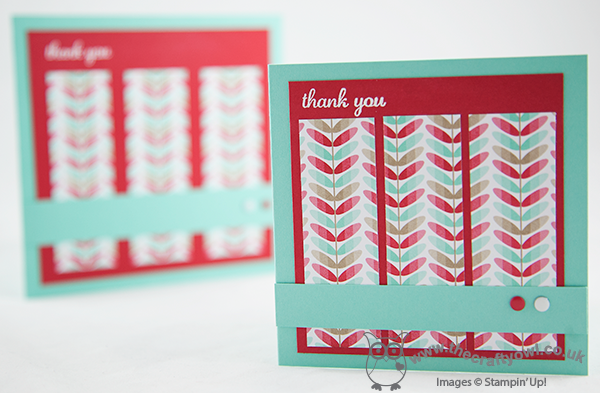
This cut really didn't work for me, as I felt such a clean card need the symmetry in the pattern - hence the second version. Here are both cards in focus side by side - which one do you prefer?
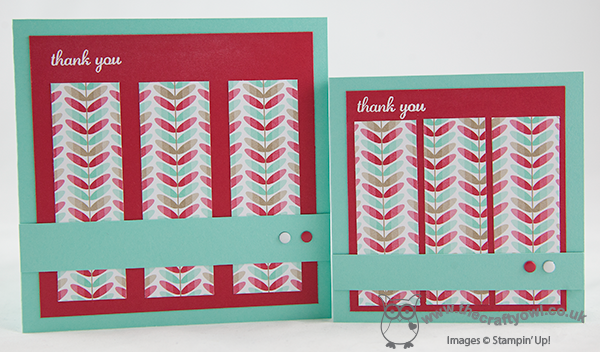
Who would have thought that such a simple card took so much thought? But for me, that's the difference between a good card and a great card! Lesson over for today; I'm off to listen to the next instalment of Harry Potter, our current bedtime reading book.
Back tomorrow with another project; until then, happy stampin'!
Stampin' Up! Supplies Used:
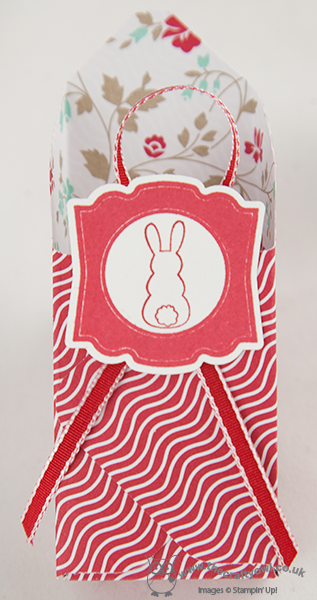
by Joanne James11. March 2014 15:13Firstly, thank you to everyone who has left comments on my blog, Facebook page, youTube channel or emailed me in person with comments and praise for my new Box Buster tool - I am genuinely touched that you have gone out of your way to share with me what a great tool you think this is and I'm delighted to be able to share it with you. Today I'm back with another video tutorial showing you a different box that you can make using your Envelope Punch Board - an open topped Easter bunny treat box - made using paper from the lovely Fresh Prints Designer Series Paper stack:
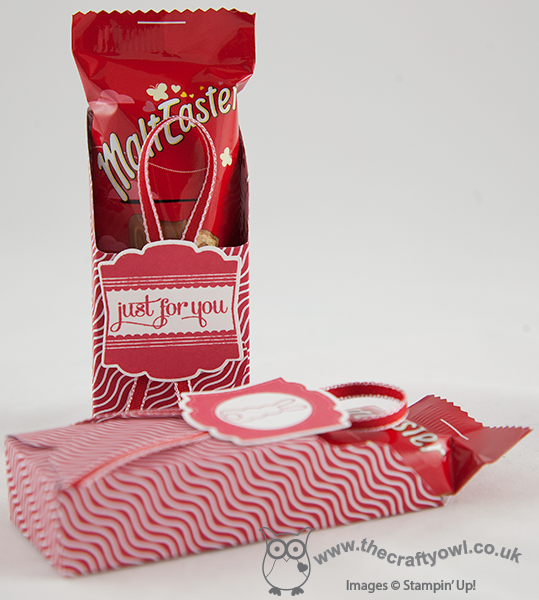
Sometimes you want to be able to see the contents of your box and today's box is just perfect for that. It also means that when you're making your box out of such lovely double-sided designer paper, you get a lovely glimpse of the reverse side too:
I love the Fresh Prints DSP stack - these paper stacks are great for small boxes and perfect if you're a card maker; I always get through several of these each season! Today's boxes were made to fit the Malteser Easter bunnies that are currently on sale in store right now, but as always with the aid of my Box Buster tool you could adapt the same style box to fit any size contents, just by measuring them; Box Buster from The Crafty Owl will do all the hard work for you and tell you what size paper you need and where you should make your punch marks. So, without further ado, here's what you've all been waiting for - the link to today's video:
)
I hope you found the tutorial useful - there's lots more still to come! Don't forget - you can access the Box Buster tool via the button on the right hand side of my blog home page or simply by clicking here.
Back tomorrow with another project; until then, happy box making!
Stampin' Up! Supplies Used:
c5d11fe0-3556-4a4f-8586-67c08127827c|0|.0|96d5b379-7e1d-4dac-a6ba-1e50db561b04
Tags: Box Buster, boxes, Artisan Label Punch, Eggstra Spectacular, Easter, Envelope Punch Board, Fresh Prints DSP Stack, Label Love, Shop online, Stamp-a-ma-jig, Stampin' Up, Stampin' Up Card ideas, Stampin' Up Supplies, video tutorial
Box Buster | Boxes | Envelope Punch Board | Video Tutorials
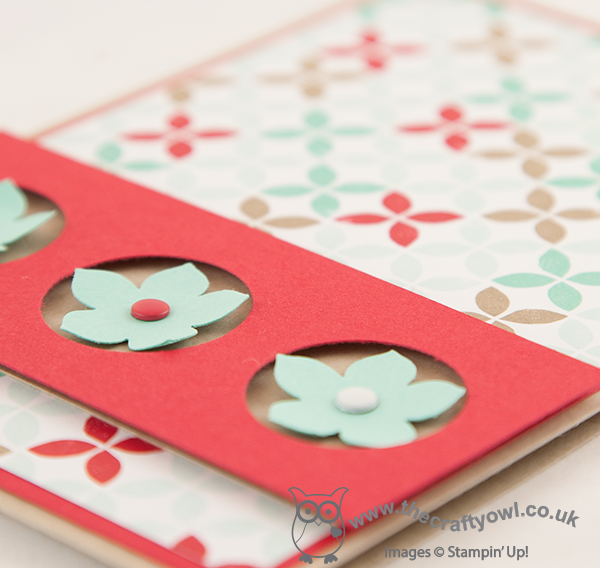
by Joanne James4. March 2014 16:28I'll be back later with another video tutorial showing you how to make another 'any size' box using your Stampin' Up! Envelope Punch Board and Box Buster from The Crafty Owl, but meanwhile I managed to grab a quick few minutes this morning to make a card for this week's Pals Paper Arts challenge. There is a great sketch from Nicole Watt this week that offers so many possibilities:
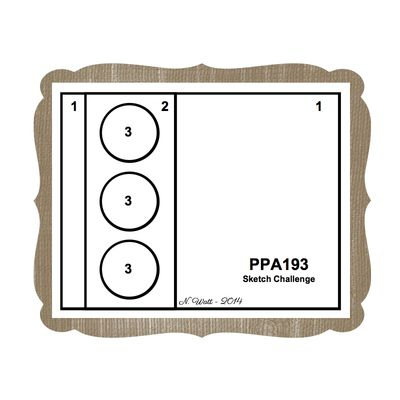
I've had my card in my head since I first saw the sketch, but only managed to get it translated into an actual card today. So here is my take on the sketch:
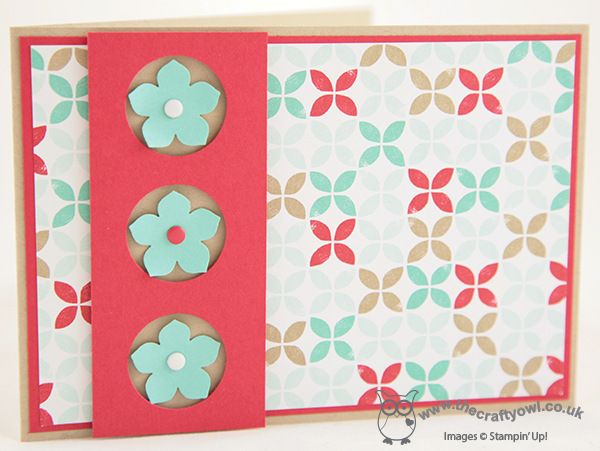
I went for a modern graphic card, using a sheet of the Fresh Prints Designer Series Paper Stack for my colour scheme. I punched the flowers using my Petite Petals punch without stamping them with the co-ordinating stamp set first, as I wanted to limit the pattern to the paper. I set the flowers in a section that has three holes punched with the 1" circle punch and raised this up on dimensionals to add some depth and give the flowers more of a 3D effect. I finished each of the flowers with a candy dot in either Real Red or Whisper White. having finished the card, I realised that it was one of life's rarities - no stamping! I really like this sketch layout and I'm sure will be using it again.
Back later with another video tutorial for you; until then, happy stampin'!
Stampin' Up! Supplies Used: