by Joanne James25. April 2014 09:45Well, I don't know where yesterday went! I was so busy I didn't even manage a blog post; I had my card all ready and just didn't get it photographed. So in the interests of all things quick, here is the card that I had intended to blog yesterday - my second attempt at a CAS washi tape card for Nance's challenge over at The Paper Players this week:
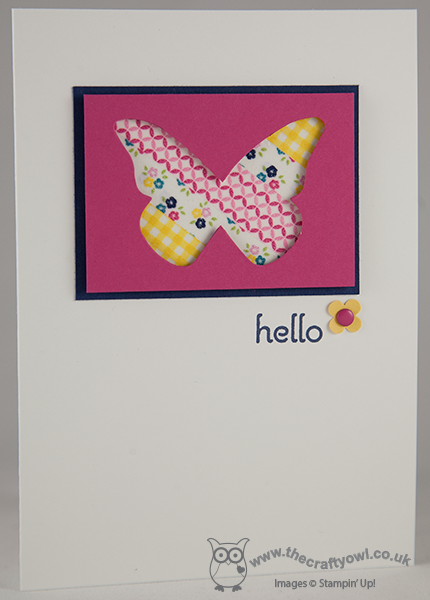
I have now replaced the earlier photograph with one of a better quality! this kind of card is so quick to create: my card is a simple white background with a Night of Navy mat for my image. I then took a rectangle of Whisper White and covered it in diagonal strips of co-ordinating Gingham Garden washi tape. As with my washi tape card earlier this week, you can use the washi tape directly onto coloured card for a diferent effect, but I wanted the colours to remain true here, so needed a white background. I then adhered this to the mat and lastly popped a Melon Mambo rectangle on with dimensionals, having first cut out a butterfly shape using my butterfly die. You could just leave it there, however I decided to add a little 'hello' greeting and a candy dot flower cut from one of my pieces of card scrap just to complete my card.
A quick card for a quick post! Everything is about speed today; I'm off to the hairdressers shortly and have a hundred and one jobs to do before I collect the James Juniors from school today for the weekend. I've already ticked a few off my list though this morning, so am making good progress!
Back tomorrow with another project; until then, happy stampin'!
Stampin' Up! Supplies Used:
cdf6f7a0-4ac0-49fc-93c5-947ffab64c10|0|.0|96d5b379-7e1d-4dac-a6ba-1e50db561b04
Tags: A Dozen Thoughts, Beautiful Butterflies Bigz Die, Big Shot, Candy Dot Brads, Gingham Garden, Itty Bitty Punches, Washi Tape, Shop online, Stampin' Up, Stampin' Up Card, Stampin' Up Card ideas, Stampin' Up Supplies
Cards | Stamping
by Joanne James23. March 2014 18:16This morning I held one of my weekend project classes. They generally last longer than my monthly card classes and are a great opportunity to do something different and a little more involved. Following a successful class last December to make festive Christmas banners (you can read more about that and see our wonderful creations here), at the request of a few of the ladies who attended I decided to hold one to make a Spring/Easter banner with the other half of our banner kits. I chose a colour scheme that would compliment that of the Burlaps and Blooms wreaths that several of us made at my last weekend project class - you can see my finished wreath here. So here is my completed banner:
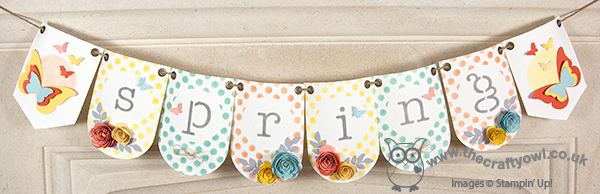
I chose to feature the word 'Spring' on my banner, as I am intending to leave it up to decorate for a while, but some of the ladies in my class made one that featured the word 'Easter'. We stencilled our backgrounds and letters using the now retired Build a Banner stencil kit in Daffodil Delight, Tangerine Tango and Pool Party with lettering in Smoky Slate.
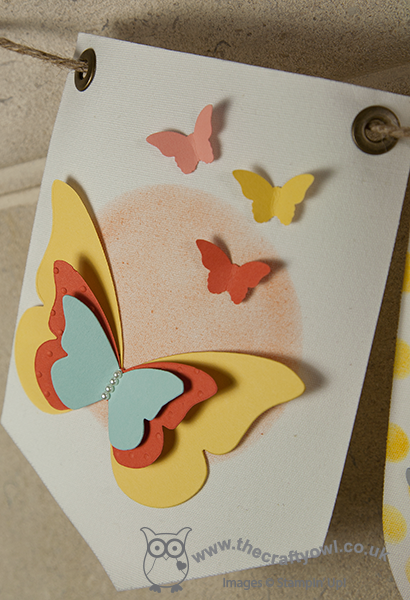
The banner is decorated with flowers made with the Spiral Flower Originals Die and punched and die-cut butterflies. Here are some close ups of the individual banner pieces - this is the first piece, with a layered butterfly with a lightly embossed layer and some tiny ones punched out with the Itty Bitty Butterfly punch:
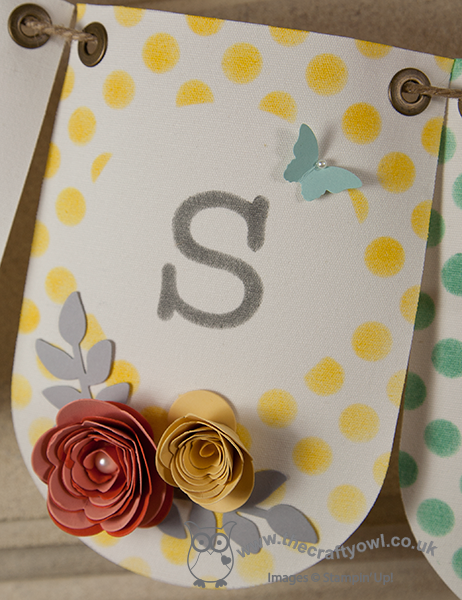
Here's a close-up of one of the letters, along with a couple of the spiral flowers; a single yellow flower and a two-tone blue flower, finished with some Smoky Slate leaves cut out with the Secret Garden framelits:
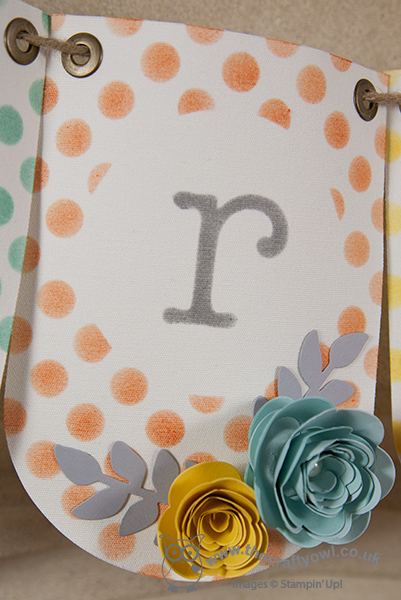
This one has a So Saffron single flower and a two-tone one in Tangerine Tango and Crisp Cantaloupe, finished with an extra-large pearl, along with a bitty blue butterfly:
My banner simply served as inspiration and as is often the way with this kind of class, everyone makes theirs slightly differently and adds their own unique touch. If you hop on over to my Facebook page, you will be able to see the finished banner that Julie, one of the lovely ladies who attended the class made - different to mine, yet equally gorgeous!
If you live in Northampton and would like to join any of my card or project classes, check out my schedule of forthcoming classes here or contact me for more information.
Back tomorrow with a card to share; until then, happy stampin'!
Stampin' Up! Supplies Used:
18734ef9-f47f-4512-85c9-0769a33a3f56|1|3.0|96d5b379-7e1d-4dac-a6ba-1e50db561b04
Tags: 3D Projects, Big Shot, Bitty Butterfly Punch, Butterflies, Classes, Decorative Dots Textured Impressions Embossing Folder, Easter, Home Décor, Secret Garden Framelits, Shop online, Spiral Flower Originals Die, Stampin' Up, Stampin' Up Card, Stampin' Up Card ideas, Stampin' Up Supplies, Stencilling, Beautiful Butterflies Bigz Die
3D Projects | Classes | Stamping