by Joanne James26. February 2016 23:08Yay it's Friday! My day feels like it's been a long one and I am looking forward to the weekend for sure! Today I have a card for this week's challenge over at Retrosketches which also fits the bill for the new challenge over at As You See It:


I decided to make another Easter card, this time using some of my Sale-A-Bration Wildflower Fields designer series paper and the lovely Easter sentiment in the 'Suite Sayings' stamp set:
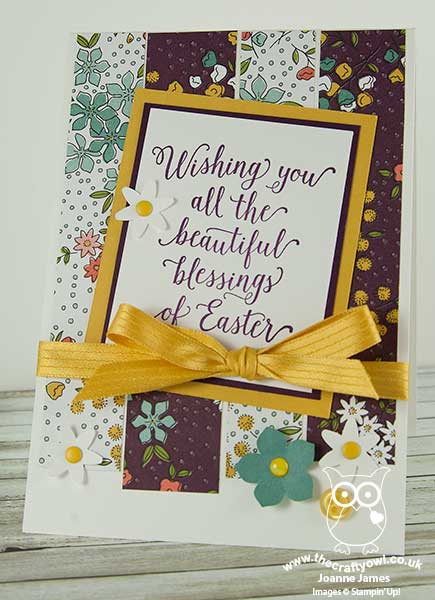
I used extra-thick Whisper White for my card base and added alternating strips of the bold flower patterned papers for my background. I tweaked the sketch slightly in as much as I used the central panel to showcase my sentiment, which broke up the detail of the busy paper, and chose Blackberry Bliss and Hello Honey for my ink, mats and ribbon colours. I embellished with a few flowers punched with my Petite Petals and Blossom Bunch punches and a retired Hello Honey button. This is the first stamp I've used in my 'Suite Sayings' stamp set; this is such a versatile set with a great variety of sentiments - I think this Easter one is my favourite though.
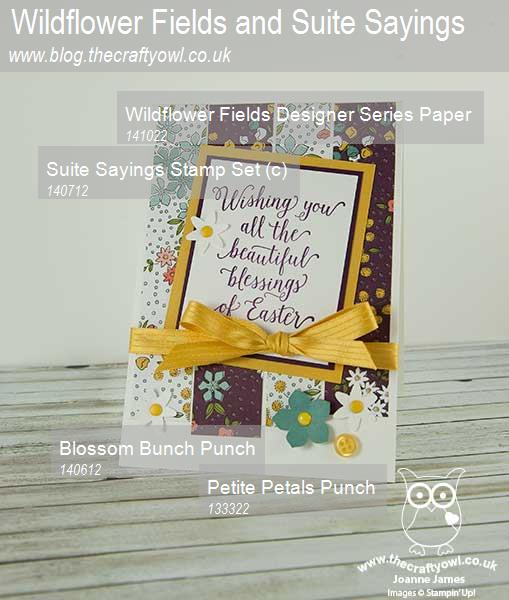
Here's today's visual reference showing the key supplies used to make today's card:
That's all from me today; back tomorrow with another project. Until then, happy stampin'!
Stampin' Up! Supplies Used:
b7576886-7d36-4d6d-a68b-401c1b9900b7|0|.0|96d5b379-7e1d-4dac-a6ba-1e50db561b04
Tags: Wildflower Fields, Stampin' Up Supplies, Stampin' Up Card ideas, Stampin' Up Card, Stampin' Up, Shop online, Shop Stampin' Up online, Sale-A-Bration 2016, Suite Sayings, Petite Petals Punch, Blossom Bunch Punch, Easter
Cards | Sale-a-bration | Shop Online | Stamping
by Joanne James6. May 2015 09:37Good morning everyone - today I have something a little different for you! I ran a very successful class a little while ago to make a beautiful home decor Spring flower wreath. I am demonstrating how to make this wreath at a Spring Open Evening at Bell Of Northampton this evening so thought this was a good opportunity to share it with you too:
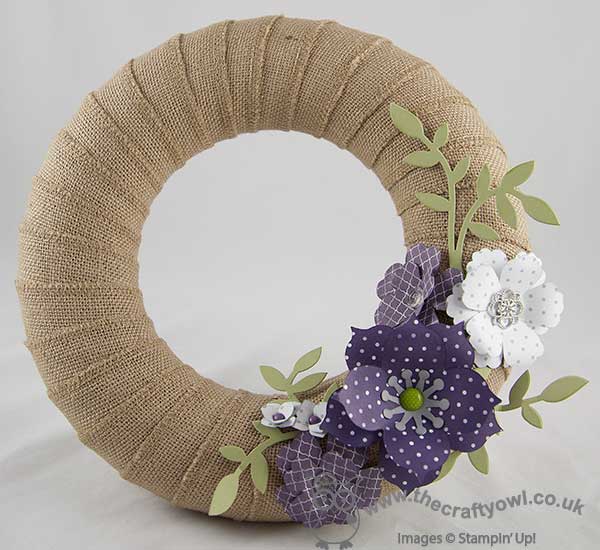
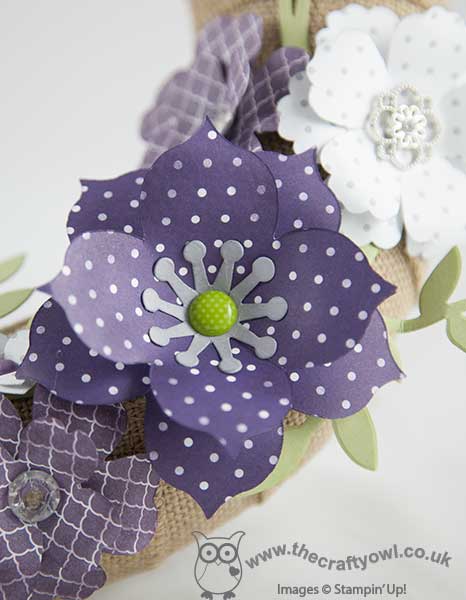
We started with a polystyrene wreath base and covered it with a roll of burlap, then decorated it with a selection of flowers made with a variety of dies and punches. The largest flower, leaves and the bases for the medium flowers were made using the Big Shot and Flower Frenzy Bigz L Die; the remaining flowers were made using a combination of the retiring Blossom punch, the Pansy punch and the Petite Petals punch. The Blossom punch and Flower Frenzy Bigz die are now out of stock, as is the patterend paper that I used, but you could make something similar with other punches and dies. We used a variety of buttons, brads and embellishments to decorate our flowers: I used Vintage Faceted Buttons, Something Borrowed Embellishments and some retired brads from my stash to decorate mine. I chose Elegant Eggplant, Smoky Slate and Pear Pizzazz as my colourway but each of the ladies tailored their colour choices and embellishments to their personal preferences. Here's a closeup of my flowers - I think they are gorgeous:
I created an album with pictures of their finished wreaths on my Facebook page here - you really should go and check them out as there are some amazing pieces and they all look so very different in the various colourways. If you haven't already, perhaps you could give me a 'like' whilst you're there - I'm only 10 away from my next milestone!
If you live in or around Northampton and would like to see me demonstrate how to make these flowers, do pop along to Bell's between 6-9pm this evening:
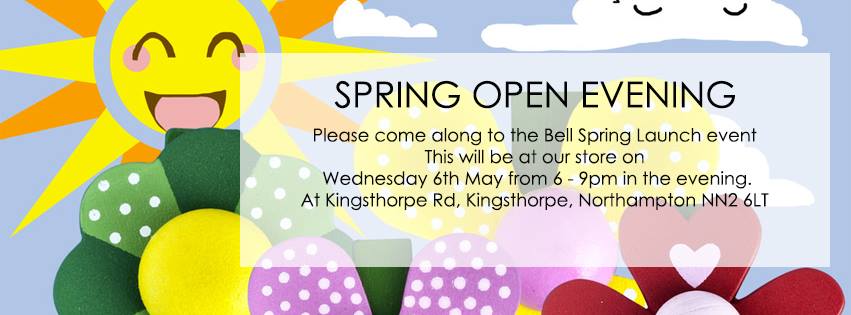
I hope you like today's project - it's one of my favourites! Back tomorrow with a card for this week's new challenge over at Create With Connie and Mary. Until then, happy stampin'!Full details via the link above and on my Facebook Page. There are lots of other demonstrations taking place - there will be someone fabulous chefs in residence cooking up delicious treats, a little pampering as well as other in-store delights that will all make for a pleasant browsing experience.
Stampin' Up! Supplies Used:
4946a4b9-930f-4216-b7d6-268e638019dd|0|.0|96d5b379-7e1d-4dac-a6ba-1e50db561b04
Tags: 3D Projects, Wreaths, Blossom Punch, Pansy punch, Petite Petals Punch, Big Shot, Flower Frenzy Bigz Die, Shop online, Stampin' Up! Demonstration, Stampin' Up, Stampin' Up Supplies, Something Borrowed
3D Projects | Classes | Promotions | Stampin' Up! Events
by Joanne James17. September 2014 07:00This is the first of a number of blog posts today - so get comfy, lovely readers!
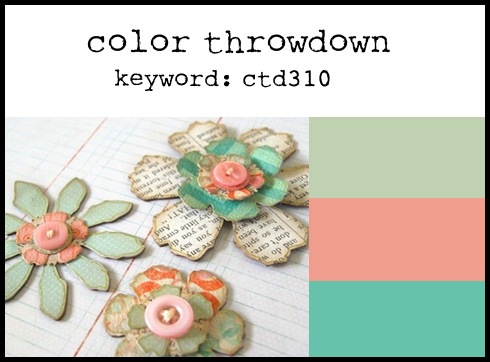
This is a bonus post for you today - following my card being chosen as the 'Featured Stamper' card at The Color Throwdown last week - you can see that card here - I was asked by the lovely Tammy Hershberger to be their Guest Star stamper this week for challenge number 310. So if you are reading my blog for the first time having popped over from CTD - welcome! Here is the colour palette and inspiration photo for this week's challenge:
I took the inspiration for my card from the colours and the photo and decided to go with something floral, featuring buttons and also some typeset designer series paper, albeit as the background for my flowers. Here is my card:
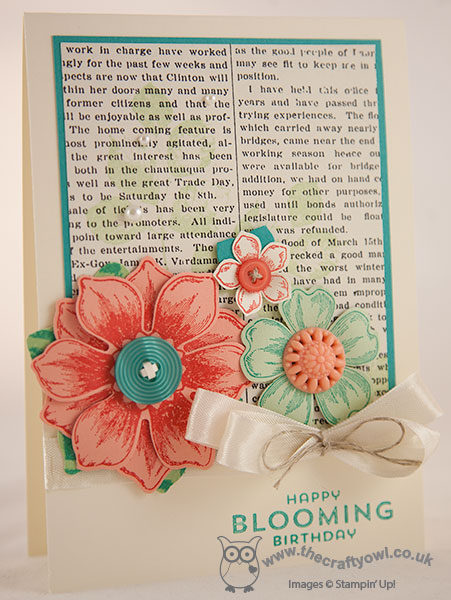
I used the leaves from the 'Kinda Eclectic' stamp set to stamp onto my typeset paper, then stamped a trio of flowers - Beautiful Bunch, Flower Shoppe and Petite Petals - in the challenge colours and created some nicely layered blooms with a variety of button centres to finish them off. I decided to finish off with something of a fussy bow using Vanilla seam binding ribbon tied with linen thread and the birthday sentiment from the Flower Patch stamp set. A bit of a departure from my usual style, and quite a product-heavy card too I'm afraid, but that's not always a bad thing!
Check out The Color Throwdown challenge page to see how the other designers have interpreted this week's challenge.
As for me, I have some work to do then a very important match to attend to this afternoon: my youngest is playing in his first rugby match at school so I'm off to cheer him along and remind him to wear his gumshield!!
Back tomorrow with another project; until then, happy stampin'!
Stampin' Up! Supplies Used:
dc6fd7c9-3a1f-4816-a88f-64139ba44a49|0|.0|96d5b379-7e1d-4dac-a6ba-1e50db561b04
Tags: Beautiful Bunch, Fun Flower Punch, Petite Petals Punch, Petite Petals, Pansy punch, Flower Shop, Typeset, Stampin' Up Supplies, Stampin' Up Card ideas, Stampin' Up Card, Stampin' Up, Shop online, Flower Patch
Cards | Stamping
by Joanne James5. July 2014 16:08Not quite the early card I'd hoped for today - no time between the theatre and swimming gala, but I'm here now! Today's card is made with the challenge over at Fusion in mind. I saw the inspiration photo and just had to have a go - I love the bold poppies and stripes on that dress!
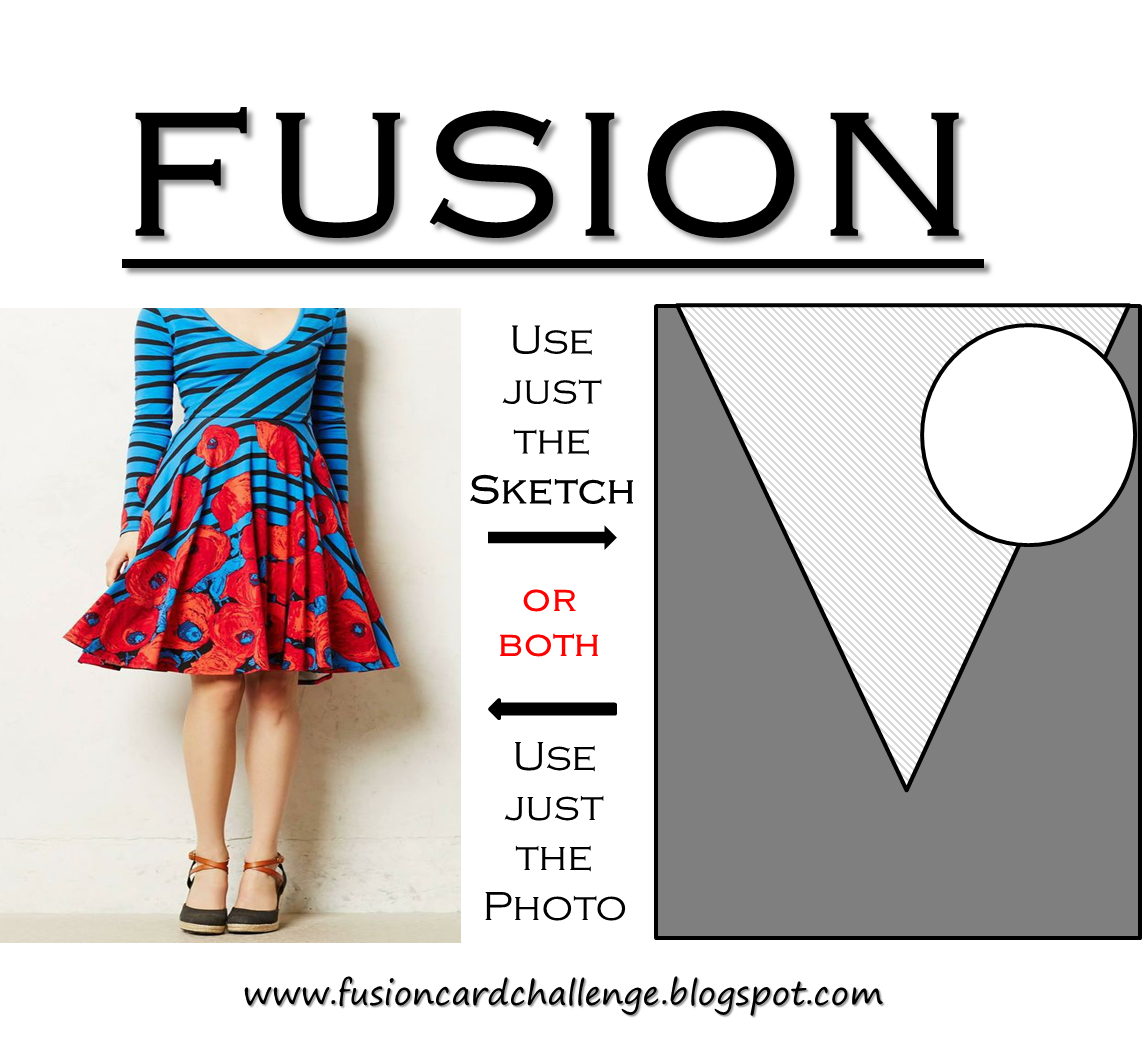
I decided the sketch wasn't for me so went with my own layout and this is what I came up with:
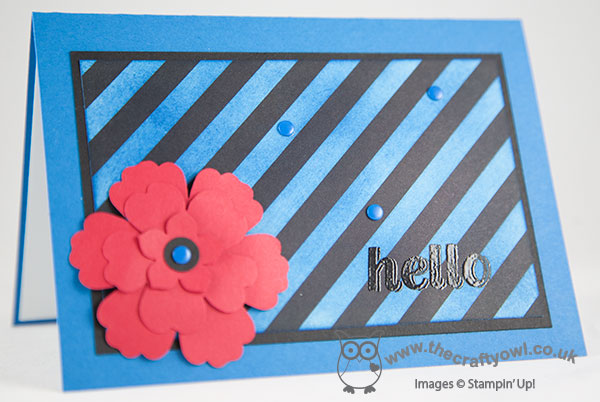
A bright and cheery 'hello' card, with a Real Red punched and layered flower set against the bold black and blue striped background. Wondering where I found my DSP? It's actually a piece of the retired Kaleidescope DSP which was originally black and white striped; I simply sponged the white stripes with Pacific Point ink to achieve the look I was after. Not a task for the faint-hearted - my hands were so blue afterwards I looked like I'd been Smurfed, but I was really pleased with the effect so it was worth it. I then finished it off with a simple 'hello' greeting (from the retired 'Simply Celebrate' stamp set) stamped in Versamark and heat embossed in black so that it would stand out against the striped background. A few blue candy dots just finish things off.
That's all from me today; back tomorrow with my first Design Team card for the Paper Players. until then, happy stampin'!
Stampin' Up! Supplies Used:
by Joanne James8. May 2014 14:54Hello everyone - my second video in a week! I'm cheating slightly, as I actually shot this video weeks ago but haven't got around to editing it until now. I made a lovely concertina fold Mother's Day card a while ago using the Scalloped Tag Topper Punch - you can see my original card here - which was based on a similar card made by Julie Kettlewell (you can see Julie's original card here). Having just gone to update my original post with the link to today's video, I realise I didn't mention her in my original post, which was very remiss of me and a complete oversight on my part, as I even mentioned her in today's video. Needless to say, I have now updated the original post!
I love this concertina fold card style - it's great if you need a card that's just a little different. I made another card based on my original one, this time adapting it to a birthday card for a friend of mine who always puts so much thought into cards for others, I thought she deserved something special for her birthday too; here's my latest scalloped tag topper punch concertina fold card:
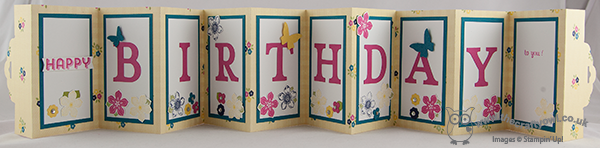
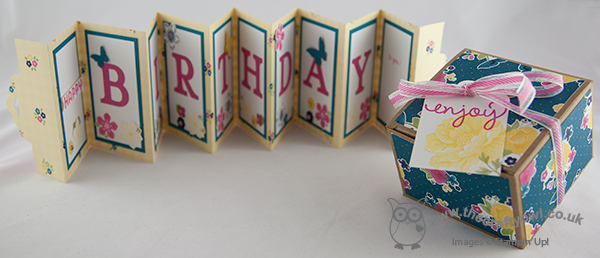
The dimensions are exactly the same as my original card - there is still enough space to stamp 'happy' on one panel, with 'birthday' spelled out on the subsequent panels leaving the last panel blank for your message (I also stamped a little 'to you!' on this panel, just to complete my message). I also decorated one of the Stampin' Up! Kraft gift boxes with some co-ordinating Gingham Garden DSP to make some pretty packaging for my accompanying gift - finished with a tag made with the Scalloped Tag Topper Punch - well, what else?! Here's a picture of both pieces together:
So, if you would like to make a Scalloped Tag Topper Concertina Fold Card - either for the forthcoming international Mother's Day or a birthday card, here's my video tutorial showing you everything you need to know:
If you would like to purchase any of the Stampin' Up! supplies featured in today's project, just contact me or click on the links in the table below to go straight to my online store.
Back tomorrow with another project; until then, happy stampin'!
Stampin' Up! Supplies Used:
83ecd8a3-a7da-4843-9788-9cf4d23e90f5|0|.0|96d5b379-7e1d-4dac-a6ba-1e50db561b04
Tags: 3D Projects, boxes, Kraft Gift Boxes, Gingham Garden, Typeset Alphabet, video tutorial, Stampin' Up, Stampin' Up Card, Stampin' Up Card ideas, Stampin' Up Supplies, Shop online, Scalloped Tag Topper Punch, Simply Celebrate, Stippled Blossoms, Petite Petals, Petite Petals Punch, Itty Bitty Punches, Fabulous Phrases, See Ya Later
3D Projects | Boxes | Cards | Stamping | Video Tutorials
by Joanne James29. March 2014 23:07I had a busy day in London yesterday so despite my best efforts to get ahead of myself I still didn't manage to blog yesterday and having had a class and put in my last Sale-A-Bration order I'm almost running out of time today, so before I do here is my intended share for yesterday, one of the Mother's Day cards I made in a couple of different colourways that I couldn't share before the day itself. Here it is in the predominantly pink colourway:
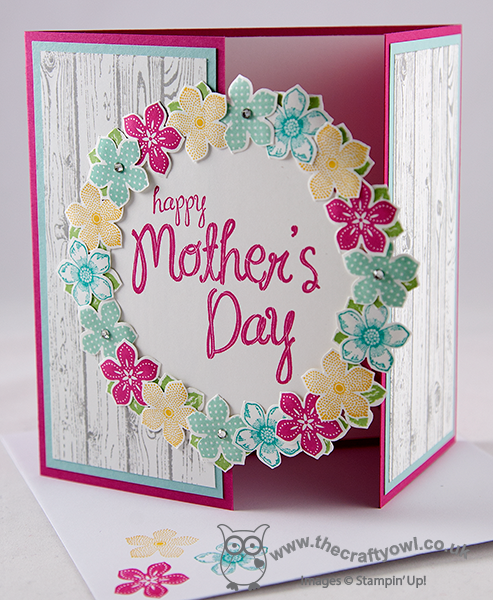
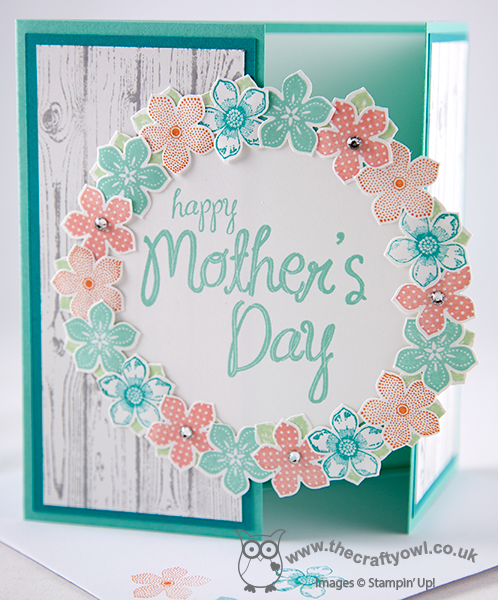
The card is similar to one I saw on Julie Kettlewell's blog here - I made a 5 1/2" x 5 1/2" square gatefold card and created an overlapping framed circle that I cut with my Circles Framelits and created a wreath of tiny stamped and punched flowers around the central bold 'Happy Mother's Day sentiment. I also made this card is an aqua colourway here using Coastal Cabana for the base:
The hardwood background stamp makes such a great background for the focal point and some flower stamping inside and on the envelopes along with a few rhinestones just finishes off the card perfectly.
My Mother's Day was rather unconventional and was only spent with one of my offspring, which felt slightly strange, but Rebecca and I had a great day in London (she was so excited that she got to have her picture taken in front of Big Ben!) and the bonus is we get to have another Mother's Day next Sunday altogether to make up for it!
Back tomorrow with another project; until then, happy stampin'!
Stampin' Up! Supplies Used:
04fe73a3-d987-4b8e-ae26-b06fdce10abe|1|5.0|96d5b379-7e1d-4dac-a6ba-1e50db561b04
Tags: Hardwood, My Mother, Mother's Day, Petite Petals, Petite Petals Punch, Circles Framelits, Big Shot, Shop online, Stampin' Up, Stampin' Up Card, Stampin' Up Card ideas, Stampin' Up Supplies
Cards | Stamping
by Joanne James29. March 2014 22:13A quick (and late!) post from me today - I have one of the busiest weekends ever today and tomorrow. I've been putting the final touches to my class preparation for next week today and have spent the evening at the swimming pool with Rebecca as she was participating in a swimming gala. We are having a real 'girls versus boys' weekend; we each went to our separate swimming pools today (and Granny came along to watch Rebecca for the first time today too) and tomorrow Rebecca and I are travelling to London so that she can take part in an inter-school music festival with the rest of her school choir, whilst the boys have a fun day doing their own thing at home.
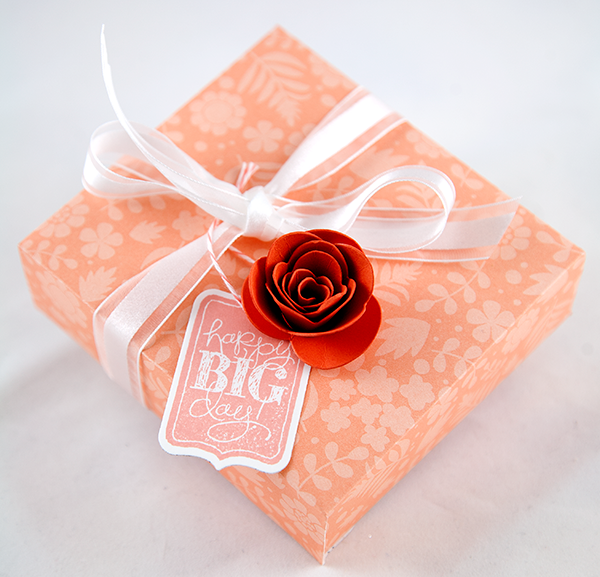
Anyway, with all that in mind there will be a couple of quick posts from me over the next couple of days. Today I'm sharing a gift I made for one of my customers who celebrated her birthday recently. If you follow me on Facebook, you will have see this photograph I posted yesterday of a lovely box I made using the Sweet Sorbet papers (yours free with a £45 spend during Sale-A-Bration - only 2 more days to go to plae a Sale-A-Bration order!)and my Box Buster tool and Envelope Punch Board:
Today I thought I would share what was inside - a sweet little box frame:
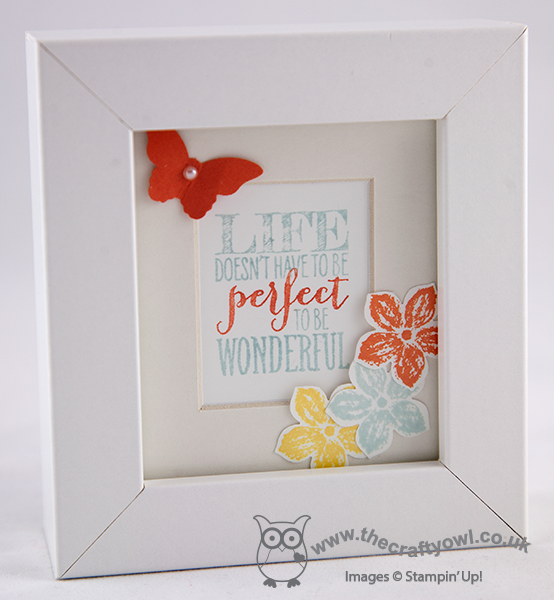
Just a simple stamped sentiment, decorated with a punched butterfly and a few flowers stamped and punched using the Petite Petals stamp set and co-ordinating punch. A decorated frame makes a lovely gift.
Back tomorrow with a card (or two!); until then, happy stampin'!
Stampin' Up! Supplies Used:
65600cd8-bb9b-4ae6-86f9-55f983360d71|0|.0|96d5b379-7e1d-4dac-a6ba-1e50db561b04
Tags: 3D Projects, Box Buster, boxes, Envelope Punch Board, Bitty Butterfly Punch, Petite Petals, Petite Petals Punch, Perfect Pennants, Shop online, Sale-a-bration 2014, Sweet Sorbet, Stamp-a-ma-jig, Stampin' Up, Stampin' Up Card, Stampin' Up Card ideas, Stampin' Up Supplies
3D Projects | Envelope Punch Board | Sale-a-bration | Stamping
by Joanne James4. March 2014 16:28I'll be back later with another video tutorial showing you how to make another 'any size' box using your Stampin' Up! Envelope Punch Board and Box Buster from The Crafty Owl, but meanwhile I managed to grab a quick few minutes this morning to make a card for this week's Pals Paper Arts challenge. There is a great sketch from Nicole Watt this week that offers so many possibilities:
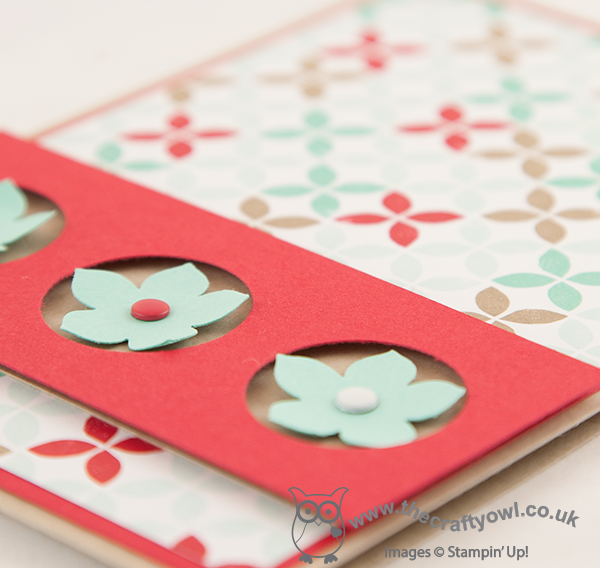
I've had my card in my head since I first saw the sketch, but only managed to get it translated into an actual card today. So here is my take on the sketch:
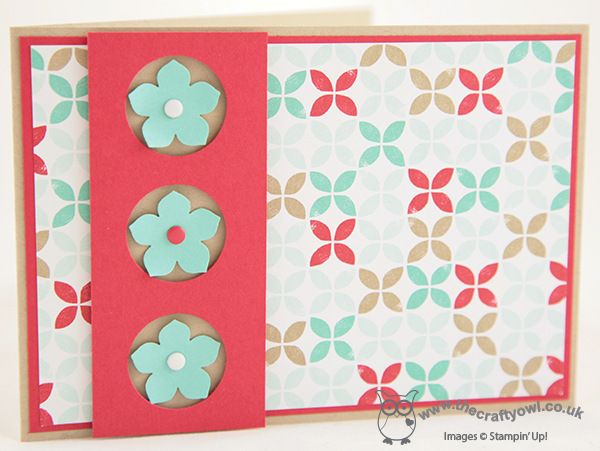
I went for a modern graphic card, using a sheet of the Fresh Prints Designer Series Paper Stack for my colour scheme. I punched the flowers using my Petite Petals punch without stamping them with the co-ordinating stamp set first, as I wanted to limit the pattern to the paper. I set the flowers in a section that has three holes punched with the 1" circle punch and raised this up on dimensionals to add some depth and give the flowers more of a 3D effect. I finished each of the flowers with a candy dot in either Real Red or Whisper White. having finished the card, I realised that it was one of life's rarities - no stamping! I really like this sketch layout and I'm sure will be using it again.
Back later with another video tutorial for you; until then, happy stampin'!
Stampin' Up! Supplies Used:
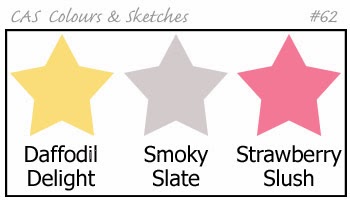
by Joanne James26. February 2014 14:09Today I've a card quite different to yesterday's - I finally caved and purchased the Hardwood background stamp, having seen so many beautiful samples of it on other people's cards and projects. I almost didn't, as I already own Woodgrain and the Wood embossing folder; but I loved the panelled effect so in my basket it went and I have inked it up for the very first time for this project. I am taking my colour inspiration from CAS Colours and Sketches this week and the tag focal point of my card was inspired by the sketch over at Retrosketches, where tags are the order of the day:
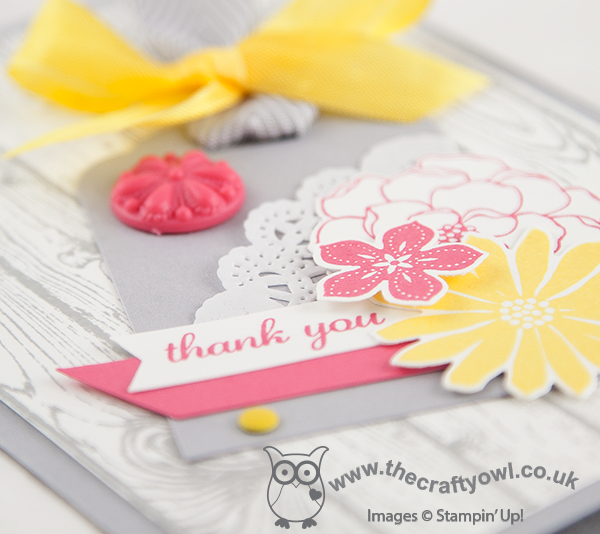
So without further ado, let me share my card with you:
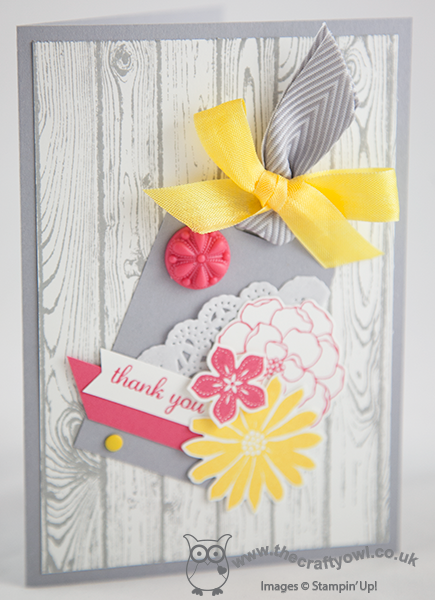
With the Hardwood stamp as my neutral whitewashed background, I used a combination of Secret Garden flowers along with a little pink one from Petite Petals to decorate my tag, the tag itself being punched with the Scalloped tag Topper Punch (such a versatile punch!). I then decorated my tag with a doily, an in-colour embellishment in Strawberry Slush, a Daffodil Delight candy dot and some lovely Smoky Slate Chevron Ribbon tied with some yellow seam binding ribbon along with a double-layered sentiment tag. I'm hoping I didn't get too carried away to qualify for CAS Colours and Sketches this week - I ended up with more layering and detail than I originally intended when I started out with this card, but I must say I really like the effect and love the colour combination.
That's all from me today - back tomorrow with another project. until then, happy stampin'!
Stampin' Up! Supplies Used:
904fba74-59d8-4a25-8f39-75510e042374|0|.0|96d5b379-7e1d-4dac-a6ba-1e50db561b04
Tags: Big Shot, Petite Petals Punch, Petite Petals, Secret Garden, Secret Garden Framelits, Shop online, Stampin' Up, Stampin' Up Card, Stampin' Up Card ideas, Stampin' Up Supplies, Hardwood
Cards | Stamping
by Joanne James17. February 2014 21:26Today I've had the most fun day. I was privileged to be invited to run a Crafty Owl birthday party for a 10 year old and her classmates, which was great fun. We made some wall art and they had a fun time punching shapes and using the Big Shot to create their masterpieces. When I run a craft party, I always create a punch art kit for the party bags so that the children can continue the crafty fun at home. For today's party, the birthday girl loves horses so I knew that a pony needed to feature on my card. I had a quick surf on Pinterest for some general inspiration then set to work creating my card. This is what I came up with:
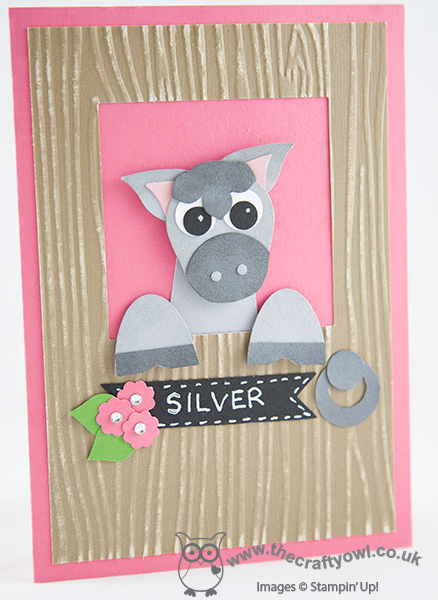
I used a variety of punches to create my card (see full list below) and some Core d'inations cardstock embossed with the woodgrain embossing folder to give texture to my stable door. I've always loved grey horses so made my card with a grey pony, but since my eight year-old informed me that this made it look like a donkey, the kits I made for the party girls all had brown horses to remove any doubt!
The girls loved their kits and I'm sure they will have had as much fun completing them as they did at the party itself. I'm linking today's card up with the challenge over at SUO Challenges where the theme this week is 'Punch Art', so this card fits perfectly.
I ended my day with a trip to the cinema to see the new Lego Movie; it was a great children's movie for half term and fulfilled one of Ben's main aims for the week, so all in all a good day was had by all.
Back tomorrow with another project; until then, happy stampin'!
Stampin' Up! Supplies Used:
45792198-643c-4601-ba20-b3a210ed6332|1|5.0|96d5b379-7e1d-4dac-a6ba-1e50db561b04
Tags: Big Shot, Owl Punch, bird builder punch, Bitty Banners Framelits, Itty Bitty Punches, Woodgrain TIEF, Merry Minis, Children's parties, Shop online, Stampin' Up, Stampin' Up Card, Stampin' Up Card ideas, Stampin' Up Supplies, Petite Petals Punch
Cards | Children's Parties | Host a Party | Punch Art