Merry Moments Plaid CAS Christmas Card

by Joanne James3. May 2016 13:32

Everyone is back to school and work today so the house is quiet once more. I do love a long weekend, but if we had them all the time I guess we wouldn't appreciate them! Now don't worry, I've not gone mad - it's true, I have made a Christmas card today!! Today's card is for a few challenges and Christmas just seemed a good way to go!


The code word at Addicted to CAS is 'Plaid' which always makes me think of Christmas and the sketch over at CAS(E) This Sketch reminded me of ribbon around a gift and I knew it would be a perfect way to feature designer paper on my card yet still allow for lots of white space to suit the Less Is More challenge this week. So that is how Christmas was where I ended up: 

So here's the low-down on today's card:

Merry Moments - There are two plaid patterns in the Merry Moments designer series paper collection: one is predominantly Mossy Meadow in colour with a white plaid pattern, the other is the one I used here with a white base and a red, grey and green plaid. I chose this one because although it has more colours in the mix, the white base makes it very light and so it is the perfect base for my CAS card. I aligned the horizontal diagonal of my paper with the open cut space of the sketch, as opposed to the vertical. This creates more cohesion and leads the eye to the sentiment. 

A Christmas Sentiment - I chose to use a sentiment from the Embellished Ornaments stamp set for my card. This is a Christmas set that is on carryover and has two of my favourite festive sentiments. I stamped it in Mossy Meadow and added a Perfect Accent, coloured red with my Sharpie, for extra festive feel.

White Space - The sketch layout I've used today really lends itself to 'white space'. I've talked about what makes a clean and simple card before and how to use 'white space' - you can read more about that here. Clean and simple designs do not always have to contain truly 'white' space, but they rarely use pattern in large quantities.

So Christmas as Summer approaches, yet my card uses products that are available in the annual catalogue all year round, so if being prepared is your thing you might want to join me and make one too!

Here's the visual summary of the key supplies used to make this card for you to save for future reference:


You can see all of my 'How To' summaries on my 'How To - Tips and Techniques' Pinterest board in case you've missed any. 

That's all from me today; a basket of ironing awaits! I'll be back tomorrow with another project; until then, happy stampin'!


Stampin' Up! Supplies Used: 

Table built using Product Table Builder by The Crafty Owl - Independent Stampin' Up! Demonstrator.

Botanical Builders Happy Birthday

by Joanne James2. May 2016 21:27

I hope you've all had a lovely day and for those of you like me in the UK that you've enjoyed the Bank Holiday. I managed to squeeze in a little gardening before the rain set in this afternoon, at which point I came inside to craft. I made this card for a couple of challenges:


I loved the colour palette and inspiration over at Color Throwdown this week so couldn't resist squeezing in an entry, and I used the new sketch over at Mojo Monday for my layout. Here's my card:

My card was inspired by the Color Throwdown inspiration photo and those amazing cakes and florals - here's the low-down on how I made it:

Stylish Stripes - I used Night of Navy for my card base and adhered a full panel of Night of Navy that I embossed with the Stylish Stripes Textured Impressions Embossing folder to the card front, to echo the diagonal swirls of the cake icing on the photo. This is one of my most used embossing folders and I shall be sad to see it retire at the end of this month; if you haven't got one, snap it up now before it's too late.

Happy Birthday Everyone - The sentiment on my card is from the exclusive hostess set 'Happy Birthday Everyone'. I just love this font and the accompanying finishing sentiments that go with it. I finished the inside of my card with 'to a good friend' as this is where my card is headed as one of mine has a birthday this week.

Botanical Builder Flowers - I never tire of my Botanical Builder framelits and these white and yellow flowers really pop against the navy base of my card. I also added a thin border of Daffodil Delight, cut using my retired large scallop edgelit die. 

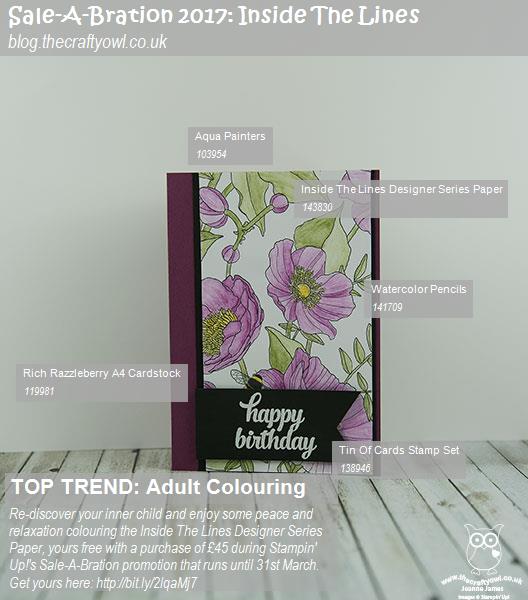
Here is the visual summary of the key products used on today's project for you to pin for easy reference:
 

You can see all of my 'How To' summaries on my 'How To - Tips and Techniques' Pinterest board in case you've missed any. 

A little extra for you today too: I bought my friend a little something to go with her card and wrapped that in a box made using some Regals designer series paper and made with my Box Buster tool and trusty Envelope Punch Board. Here's a picture:

Isn't that pretty? So nice when you can co-ordinate your card and gift and Stampin' Up! certainly does make that easy for us!

That's all from me today; back tomorrow with another project. until then, happy stampin'! 


Stampin' Up! Supplies Used:

Table built using Product Table Builder by The Crafty Owl - Independent Stampin' Up! Demonstrator.

Let's Get Away Project Life Bicycle Card

by Joanne James1. May 2016 09:00

It's Sunday and time for a new challenge over at The Paper Players! It's the turn of our fearless leader Nance to host our challenge this week and she has a fun theme challenge for you to play along with:

   PPA-298-Apr28

For my card this week I decided to do something a little different and make a card featuring a couple of my Project Life cards. As a family we do a lot of cycling and it often features in my memory keeping, so it was a tough decision to actually part with this one and use it on a card! When I saw Ginger's sketch layout over at Pals Paper Arts this week it was perfect for showcasing an alternative use for my Project Life cards so I 'bit the bullet' and this is what I came up with:


My card is A5, so slightly larger than usual, in order to accommodate my pair of Project Life cards, yet it really was quite straightforward to put together as the Project Life cards do so much of the creative work. That said, there are a few things worth highlighting:

Let's Get Away - The Project Life cards featured on today's card are from the 'Let's Get Away' box set. This set is perfect for documenting your travels, near and far and contains lots of transport, including cars, aeroplanes and bicycles. What's more, this set is retiring so now is the perfect time to pick it up at a bargain price. The card I chose is perfect for today's challenge, with illustration and sentiment all in one. Here's a closer look at it in all its glory:

I mounted it onto a mat of Bermuda Bay for added definition and rounded the corners using my Project Life corner rounder punch. The second large polka dot card is one of the filler cards from the same set.

Bicycle Wheel Background - The stamp that I've used for my background is from the 'Balloon Celebration' set in the seasonal catalogue. I'm not exactly sure what this stamp is intended to be, but to me has always felt like a bicycle wheel - although I've no idea what that has to do with balloons! The open design works well to create interest in the background and incorporate my base and mat colours, which ties it in with my feature cards. 

Balloon Trio - As an added detail, I punched out a trio of coloured balloons using the mini balloon punch in the Party Punch Pack (you are so going to snap this up before it retires at the end of this month!) and adhered them over the top of the original ones that decorated the Project Life card, popping the pink one on a dimensional. They are slightly larger than the printed ones, so create a nice overhang and cover completely the printed balloons without any further work being required.

Here is the visual summary of the key products used on today's project for you to pin for easy reference:


You can see all of my 'How To' summaries on my 'How To - Tips and Techniques' Pinterest board in case you've missed any. 

Before you reach for your ink and papers, check out what our amazing team has created to inspire you this week:

The Paper Players Design Team
 
 
Here's a quick recap of our challenge rules:
 
1.  Create a new paper project
2.  Upload your creation to your blog with a link back to us and provide a direct link to the post featuring your challenge submission.
3.  Please link your card to no more than four challenges, TOTAL.
4.  Have FUN! 


I look forward to seeing what you make of our theme this week. We are off to basketball this morning but no hockey today as the season has officially ended. If the weather forecast is correct and we are in for an afternoon of rain, we will be snuggling up on the sofa for a family movie afternoon watching the classic 'The Wizard of Oz'. Rebecca has an audition for a role in a school production of this musical this week, so is keen to 'gen up' on all aspects. Her practising of 'Somewhere Over the Rainbow' is coming along nicely - Judy Garland, eat your heart out!

Back tomorrow with another project; until then, happy stampin'!


Stampin' Up! Supplies Used:

Table built using Product Table Builder by The Crafty Owl - Independent Stampin' Up! Demonstrator.

Choose Happiness Bird Print Card

by Joanne James30. April 2016 09:00


Yay it's the weekend - and the start of a long one for those of us here in the UK as we have a Bank Holiday on Monday! the weather forecast is poor, so I'm thinking this may offer a great opportunity for getting in some quality crafting time. Here's hoping! Today I have a card for a couple of challenges: I used the colours over at Global Design Project and this week's sketch over at Freshly Made Sketches:

This colour palette is quite similar to the one we used over at Create With Connie and Mary this week, yet I was inspired to use it in a completely different way - take a look:

Here's the low-down on today's card:

Offset Frames - My first thought when I saw the FMS sketch was to add a strip of something to the panel down the left side, but as I started to put my card together I realised I didn't want to introduce any additional pattern and decided instead to create offset frames and allow the Night of Navy to take a more prominent role.

Bird of Happiness - I love this little bird from the 'Choose Happiness' stamp set and have wanted to use him to create a pattern for some time. Since he is about to retire, I thought it was about time I got onto it! My panel was the perfect size for a tic-tac-toe of birdies in all three colours (Night of Navy is the winner here too!)

A Touch of Lace - I decided to stamp my sentiment in navy onto Calypso Coral to give more emphasis to the two strongest colours of the trio and matted it with a thin border of Night of Navy too. I decided to add just a little sliver of Venetian crochet trim to the edge of my sentiment for a little embellishment.

Here is the visual summary of the key products used on today's project for you to pin for easy reference:


You can see all of my 'How To' summaries on my 'How To - Tips and Techniques' Pinterest board in case you've missed any. 

I'll be back tomorrow with my card for this week's new challenge over at The Paper Players. Until then, happy stampin'!


Stampin' Up! Supplies Used: 

Table built using Product Table Builder by The Crafty Owl - Independent Stampin' Up! Demonstrator.

Tags: , , , , , ,

Cards | Shop Online | Stamping

Kind Koala Says Goodbye!

by Joanne James28. April 2016 08:05

Today it's time for a new challenge over at Create With Connie and Mary and this week we have a colour combination for you:


I decided that the Smoky Slate of today's colour combo was perfect for a card using one of my favourite single stamps in the annual catalogue, Kind Koala, that is retiring at the end of May:

Here's the low-down on today's card:

Kind Koala - This cute koala image is a great single stamp - image and sentiment all in one, with a flower that can be dressed up in so many ways. I coloured my koala in Smoky Slate and shaded in some Night of Navy on the word 'you'. For the flower, I stamped it again on Calypso Coral cardstock, fussy cut it out and paper-pieced it onto my card, adding a tiny Very Vanilla punched flower from my scraps box and finished with a navy candy dot.

A Border of Stripes - Do you recognise my patterned paper? It's one from my favourite Pretty Petal Designer Series Paper Stack. The Calypso Coral stripes were the perfect compliment to my Calypso Coral card base and koala image, which I stamped on Very Vanilla to tie in with the Very Vanilla stripes of the paper.

There's Always Room For A Bow - The clean and simple design and layout of today's card allows for a rather over-the-top double bow and button combo, to highlight more of the challenge colours. The Night of navy seam binding ribbon ties a beautiful bow - this card will definitely need a box rather than an envelope to keep it looking pristine though!


Here is the visual summary of the key products used on today's project for you to pin for easy reference:


You can see all of my 'How To' summaries on my 'How To - Tips and Techniques' Pinterest board in case you've missed any. 

I'll be sorry to see this sweet little stamp retire - on the upside, there will be lots of great stamps to take its place!

Do visit the other Design Team members to see what they did with this week's colours; there's lots of inspiration over on their blogs too!

Enjoy your day and I'll be back tomorrow with another project; until then, happy stampin'!


Stampin' Up! Supplies Used:

  • Pretty Petals Designer Series Paper Stack
  • Calypso Coral A4 Cardstock
  • Very Vanilla A4 Cardstock
  • Subtles Designer Buttons
  • Night Of Navy 1/2" Seam Binding Ribbon
  • Basic Black Archival Stampin’ Pad
  • Many Marvelous Markers

Tags: , , , , , ,

Cards | Shop Online | Stamping

Friendly Wishes Onstage Swap Cards

by Joanne James27. April 2016 19:00

Mid-week already! I spent a pleasant morning at my Coffee and Card Session at Bell's in Kingsthorpe, Northampton making birthday cards and the afternoon at my desk. Today I'm sharing the card that was my swap at the Stampin' Up! UK Onstage Local event that I attended with some of my team the weekend before last. The event itself was a blast! I thought it was about time I shared some photos with you, so here goes!

I was treated to a wonderful Centre Stage reception the evening before the main event with other Stampin' Up! leaders - here's a picture of the beautiful table settings:


I managed a quick selfie with my good friend Louise Sims, only to be right royally photo-bombed by the equally charming if mischievous Natalie O'Shea:


We got our hands on the new catalogue - here's me with mine courtesy of the lovely Dave Baugh, Stampin' Up!'s Vice President of Global Operations who came all the way from Utah to join us for the event:


It really is a good one! Here's also a photo of some of my team enjoying the day of presentations and new product reveals:


I could share a ton of new product 'spoilers' too, but with more than a month to go still until the new catalogue is officially released, I think I'll save those for nearer the time!

Anyway, onto today's creative make - my swap for this event, using some retiring accessories but featuring the 'Friendly Wishes' stamp set that I'm pleased to say will be carrying over to the new catalogue: 

I made these in a range of colourways - the one I've featured here is in Pumpkin Pie and Rich Razzleberry - read on for the low-down on this card:

Brights - I love the Brights colour collection and as I wanted my swap to be bright and colourful this family was the natural choice. I actually chose my colour combinations based on ... the candy dots I had most of in my part-used packets! I use lots of these, but find myself using some colours way more than others. I used a card base of Pumpkin Pie, then used accents in this colour and the contrasting Rich Razzleberry to highlight my black and white stamping, including a cotton seam binding ribbon bow.

Black and White Everyday Chic - I stamped my sentiment from the 'Friendly Wishes' stamp set in Archival Black on Whisper White cardstock, to give a clean, crisp design that was easy to replicate - an important consideration when you are mass-producing a design. To compliment this, I used two different patterns of the black and white Everyday Chic Designer Series Paper to border my focal sentiment, elements of which I highlighted with my Stampin' Write marker. This is a great way to add interest and makes this designer series paper very versatile.

Itty Bitty Flowers - My final embellishment was a pair of Itty Bitty Accents Punch Pack punched flowers, each finished with a contrasting candy dot. I can't quite believe that this punch pack is retiring - I've used all three of these little punches on many, many projects but I think it's this itty bitty flower I will miss the most.

Here is the visual summary of the key products used on today's project for you to pin for easy reference:


You can see all of my 'How To' summaries on my 'How To - Tips and Techniques' Pinterest board in case you've missed any. 

I had some lovely swaps in return which the ladies in my classes have 'ooh'd and ahh'd' over this week. I'll be back tomorrow with my card for this week's new challenge over at Create With Connie and Mary; until then, happy stampin'!


Stampin' Up! Supplies Used: 

Table built using Product Table Builder by The Crafty Owl - Independent Stampin' Up! Demonstrator.

Grateful Bunch Spritzed Watercolour Butterfly Card

by Joanne James26. April 2016 19:00

Today I'm sharing the second of my technique class cards with you, featuring the Grateful Bunch stamp set:

This card features the butterfly and lace panel from the stamp set and was inspired by the sample in the seasonal catalogue. Here's the low-down on today's card:

Two of Three Curvy Corners - I created a layered bookmark-style panel on my card featuring the soon-to-be retired Curvy Corner Trio Punch. This versatile punch adds a beautiful decorative finish to the corners of my panel; in order to allow the top corners to be shown to full effect, I trimmed away the corners of the watercolour layer using my 1 1/4" circle punch.

Watercolour Butterflies - I stamped each of the butterflies in turn, spritzing the inked stamp with a fine mist of water before stamping onto the watercolour paper panel to create the washed watercolour look. The trick is to use a bright colour and not to over-spritz to get a good quality image.

Lovely Lace - I added a Pool Party tone-on-tone lace border to my base card along the edge of my raised panel, along with some metallic gold thread for just a hint of luxe.

Here is the visual summary of the key products used on today's project for you to pin for easy reference:


You can see all of my 'How To' summaries on my 'How To - Tips and Techniques' Pinterest board in case you've missed any. 

I designed this card with my class ladies in mind, all of whom love the versatility of the Curvy Corner Trio Punch. A couple of them are avid scrapbookers and love that they can 'pretty' their scrapbook pages with it, as well a create fancy inserts and mats and layers for cards. 

That's all from me today; I'll be back tomorrow with another project. until then, happy stampin'!


Stampin' Up! Supplies Used: 

Table built using Product Table Builder by The Crafty Owl - Independent Stampin' Up! Demonstrator.

Grateful Bunch Paper Pierced Card

by Joanne James25. April 2016 21:05


Another Monday, another week! I had the second of this month's technique classes this morning and thought today I would share one of my class cards with you. Today's class featured the Grateful Bunch stamp set and co-ordinating Blossom Bunch Punch and looked at the technique of paper-piercing.


This card was inspired by a similar one that was featured in our recent demonstrator magazine, Stampin' Success, a really useful resource for Stampin' Up! demonstrators. The key features of my card today are as follows:

Paper Piercing - The pointelist style of the leaves in the 'Grateful Bunch' stamp set really compliment the paper-piecing on this card. I used my Updated Essentials paper piercing templates to pierce both a border on my Crumb Cake base layer and also the word 'you' onto my Calypso Coral banner. I then finished my sentiment with a partial stamp of one of the sentiments in the stamp set (omitting the 'you').

Ways With Washi - Washi tape can be used in oh so many ways! Here I added a strip of Everyday Chic Designer Washi Tape to the edge of my white layer for added visual interest. 

Black Perfect Accents - I stamped my trio of flowers in Memento Black ink on Whisper White cardstock, coloured them in with my Calypso Coral marker and finished them with a trio of Perfect Accents, coloured black with my Sharpie for the perfect shiny centre.

I just love the clean, modern feel of these stamps and the co-ordinating punch makes cutting out these flowers a cinch. Even better, this is one of the great value bundles in the current seasonal catalogue - a saving of 15% if you buy both items together. The good news is that both of these products is carrying over to the new annual catalogue - the bad news is that they will not be available as a bundle, so buy now to take advantage of this saving. The ladies in my class today love this card, although found their first foray into paper piercing more challenging than they had first thought. 

Here is the visual summary of the key products used on today's project for you to pin for easy reference:


You can see all of my 'How To' summaries on my 'How To - Tips and Techniques' Pinterest board in case you've missed any. 

Back tomorrow with another project; until then, happy stampin'!


Stampin' Up! Supplies Used: 

Table built using Product Table Builder by The Crafty Owl - Independent Stampin' Up! Demonstrator.

First Sight Mother's Day Card

by Joanne James24. April 2016 09:00

No blog posts for the last couple of days as I've just been too tired and unable to fit it all in. However today it's Sunday and time for a new challenge over at The Paper Players! It's my good friend Claire's turn to host our challenge this week and she has a great sketch challenge for you to play along with:


Claire's sketch has some lovely layers that were crying out for some designer series paper and I've seen a few challenges out there with 'Mother' as their theme, including this week's TGIF Challenge, so for my card this week I decided to use some Love Blossoms DSP and my favourite sentiment stamp from the 'First Sight' stamp set:


Here's the low-down on today's card:

The Mother of all Sentiments - The 'First Sight' stamp set has some lovely sentiments, all with love at their heart. The one I've used on my card today is my favourite though; what Mother wouldn't be touched to receive a card featuring these words? I also stamped the flourish from the same set onto the base of my card in Versamark and heat embossed it clear, to add additional interest without competing with the other elements of my card.

Love Blossoms - The vertical panels on the sketch needed either pattern or texture; I chose to go with pattern and chose three complimentary patterns from the Love Blossoms DSP stack. I kept the colours similar, and used these for the main blocks of colour on my card.

All that Glitters - ...is not gold, or at least not on today's card! I chose to mount my sentiment on a circle of white Dazzling Diamonds glimmer paper to add a little sparkle and create focus, but maintain the balance of white on my card. Some split jute ribbon, a pink button and a sprinkle of pink and clear sequins complete my card.

Here is the visual summary of the key products used on today's project for you to pin for easy reference:


You can see all of my 'How To' summaries on my 'How To - Tips and Techniques' Pinterest board in case you've missed any. 

Before you reach for your ink and papers, check out what our amazing team has created to inspire you this week:

The Paper Players Design Team
 
 
Here's a quick recap of our challenge rules:
 
1.  Create a new paper project
2.  Upload your creation to your blog with a link back to us and provide a direct link to the post featuring your challenge submission.
3.  Please link your card to no more than four challenges, TOTAL.
4.  Have FUN! 


I look forward to seeing what you make of our sketch this week. We are off to basketball today and then Rebecca and I have a little Mother and Daughter crafting time planned tomorrow afternoon; should be fun!

Back tomorrow with another project; until then, happy stampin'!


Stampin' Up! Supplies Used:

Table built using Product Table Builder by The Crafty Owl - Independent Stampin' Up! Demonstrator.

Time for a Cupcake Party!

by Joanne James21. April 2016 08:05

Today it's time for a new challenge over at Create With Connie and Mary and this week we have a great sketch for you:


I decided to use the 'Cupcake Party' stamp set for both the greeting and embellishment on my card today, with some splashes of gold and an interesting co-ordinating background:


Cupcake Party - I haven't used this stamp set and punch in a while - and now they are both going away! I decided to use some bright orange frosting to contrast with the blues of my card - and added a Bermuda Bay candle with a gold Wink of Stella flame. If either of these items are on your wishlist, snap them up from the online store before it's too late. 

A Happy Pattern - I've been intrigued for a while that one of the stencils in the Happy Patterns pack co-ordinates perfectly with the cupcake case in the cupcake Party stamp set. I sponged my background in Pool Party onto my Pool Party card base to create a co-ordinated yet subtle background.

Splashes of Gold - My card features quite a few gold elements for sparkle and shine today: a gold foil frame for my ombre sentiment (inked with Island Indigo, Bermuda Bay and Pool Party markers), gold Wink of Stella for my candle flame, some gold metallic thread and a sprinkle of gold sequins. On this card all that glitters most certainly is gold - I think it adds to the party feel!

Here is the visual summary of the key products used on today's project for you to pin for easy reference:


You can see all of my 'How To' summaries on my 'How To - Tips and Techniques' Pinterest board in case you've missed any. 

Do visit the other Design Team members to see how they interpreted this week's sketch; there's lots of inspiration over on their blogs too!

Enjoy your day and I'll be back tomorrow with another project; until then, happy stampin'!


Stampin' Up! Supplies Used: 

  • Cupcake Party Wood-Mount Stamp Set
  • Cupcake Builder Punch
  • Sponge Daubers
  • Happy Patterns Decorative Masks
  • Tags & Labels Framelits Dies
  • Tangerine Tango Classic Stampin' Pad
  • Bermuda Bay Classic Stampin' Pad
  • Bermuda Bay A4 Cardstock
  • Pool Party Classic Stampin' Pad
  • Pool Party A4 Cardstock
  • Whisper White A4 Cardstock
  • Metallics Sequin Assortment
  • Gold Metallic Thread
  • Gold Foil Sheets
  • Island Indigo Classic Stampin' Pad

New Online Exclusives

There are new products available exclusively in the online store from 5 November - check them out here.

Latest Kits!

Stampin Cut and Emboss

The Layered Landscapes Kit and Nature's Paintings Kit are the latest kits in the online store - get yours here!

Shop Online

Access my online shop 24 x 7, 365 days of the year:

Current November hostess code:

9NKXDTTR

Shop Online

Mini Catalogue

BROWSE THE CATALOGUE

'Tis The Season - the new Stampin' Up! Mini Catalogue is here! For more details and to download your copy click here

Scrapbooking

Stampin' Up! has introduced a new range of 12x12" scrapbooking product and kit - the full range is now available to purchase online. To download a copy of the new digital Scrapbooking Catalogue click here.

2024-25 Annual Catalogue

BROWSE THE CATALOGUE

Click on the image to download your copy of the 2024-25 annual catalogue. For a full list of current SU! supplies, go to my online store. If you would like any help or advice, please drop me a line at joanne@thecraftyowl.co.uk or give me a call on 07773 421446 - I'd be happy to help.

Join My Team

It's always a great time to join Stampin’ Up! New team members can get £130 worth of products for only £99 + free business supplies + free shipping + all the fun being a part of Stampin’ Up! Stampin' Up! has something for everyone: join my growing team and benefit from my support to enjoy Stampin' Up! however you choose.

If you're interested, call me for a chat to understand how I can help you realise your goals. Alternatively, if you have already decided to sign up and you just can't wait, please click here for the link to the online form where you can sign up and order your starter kit right away! 

About Me

Hi I'm Joanne and live in Northampton and when I'm not looking after my husband and two beautiful children, am an avid crafter with a passion for all things Stampin' Up!

I must confess that I have never been a big rubber stamper - until I discovered Stampin' Up! that is. I love the fact that I can get such great results with co-ordinating stamps, inks, papers and punches - the possibilities are endless! Join me on my stamping journey as I share the things I love and be inspired to create amazing things yourself!

Follow Me

Monthly Newsletter

Box Builder

Click the button above to use Box Buster to create your custom box design using the Envelope Punch Board!

Kits Collection Now Available!

Stampin Cut and Emboss

The new Kits Collection from Stampin' Up! is now available!

Click here to see the current kits available and order yours online today.

I Design For


Stampin' Up Stuff

This is my personal blog and is not endorsed by Stampin’ Up! I hope you find it a plentiful source of ideas and personal inspiration but please don't copy my designs for contest submission or use for classes, publication or sale without express permission.