News Flash - You Are Awesome ... And So Are Extra Stampin' Rewards During June!

by Joanne James2. June 2016 08:05

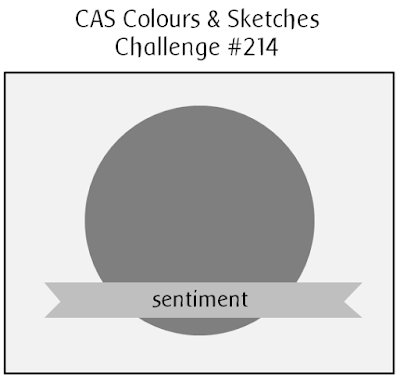
Today it's time for a new challenge over at Create With Connie and Mary and this week we have a sketch for you:


For my card today I decided to use one of the new hostess sets, 'Pun Intended', along with some new paper from the Playful Palette Designer Series Paper Stack:


Here's the low-down on today's card:

News Flash - You Are Awesome - ... and so are the extra Stampin' Rewards you could get if you hosted a Stampin' Up! party in June! The 'Pun Intended' stamp set has lots of fun images, including a bee, a light bulb and some super-punny sentiments. This set is exclusive to hostesses - and with an extra £25 of Stampin' Rewards for all party sales of £250 or more, you will have more than enough rewards for to get your hands on this stamp set or any of the other fabulous new hostess sets or other new catalogue goodies. I'm in love with this retro camera; here I've stamped it in black and punched out two circles to give a 3D look to the lens - I have lots more ideas for it though, so stay tuned!

Playful Palette - The Playful Palette suite contains lots of lovely products, including a designer series paper stack that includes papers with three of five of the new in-colours. It also contains some great black and vanilla patterns, such as the one I've used to create the background panel for my card today.

Watermelon Wonder-ful - When deciding what colour to choose to compliment my black/vanilla colour combo, I decided I would highlight the heart on my sentiment banner and wanted a red that was not too 'red', so happened upon Watermelon Wonder, one of my in-colour favourites from last year. It was the perfect colour for my card base and flagged banner too. I also added a little epoxy heart to add shine and subtle dimension to my heart, along with the final trio of rhinestones for sparkle.

Here is the visual summary of the key products used on today's project for you to pin for easy reference:


You can see all of my 'How To' summaries on my 'How To - Tips and Techniques' Pinterest board in case you've missed any. 

Do visit the other Design Team members to see what they did with this week's sketch; there's lots of inspiration over on their blogs too!

Enjoy your day and I'll be back tomorrow with another project; until then, happy stampin'!


Stampin' Up! Supplies Used:

  • Pun Intended Photopolymer Stamp Set
  • Playful Palette Designer Series Paper Stack
  • Tuxedo Black Memento Ink Pad
  • Very Vanilla A4 Cardstock
  • Basic Black A4 Cardstock
  • Watermelon Wonder A4 Cardstock
  • Watermelon Wonder Classic Stampin' Pad
  • Banner Triple Punch
  • Rhinestone Basic Jewels

The New 2016-17 Stampin' Up! Annual Catalogue Is Here!

by Joanne James1. June 2016 09:00

The wait is over - it's June 1st and the new 2016-17 Stampin' Up! Annual Catalogue is here! I have updated my links on the right hand side of my blog and you will find a permanent link to the new catalogue there, but for today you need look no further than the picture below which will take you straight to the new catalogue:


The catalogue is fantastic, with so many great new products to choose from. The new catalogue is posted above and will be permanently linked via my blog if you don’t have a paper copy. If you have your paper copy and just want to go straight to the shop to place your order, click here. Don't forget to add the hostess code for June R2QV9WE6 if your order is less than £150 and ensure your preferences are set to 'contactable' to receive a thank you in the post from me.

As if that wasn't enough though, there are also two fantastic promotions that make this catalogue launch even sweeter:


  • Earn Additional Stampin' Rewards with a single order or qualifying party sales  You can earn an additional £25 in Stampin' Rewards when you place an individual order for or reach qualifying party sales of £250 or more during the month of June. Don't forget these Stampin' Rewards can also be used towards a starter kit if you choose to join Stampin' Up! as a demonstrator - making the starter kit even better value! I still have some calendar dates free in June so if you would like to host your own Stampin' Up! party and take full advantage of the extra rewards, then please do get in touch! Which brings me on to the next 'big news' item for today:


  • Earn Free Stamps in June’s Promotion for New SU! Joiners.  June 1 also kicks off a new promotion for customers to become demonstrators.  As a demonstrator on my team, you will belong to a friendly team where you get to be the first to see and order products from upcoming catalogues. You also get to earn a discount on the products you already love – with no risks or penalties if you don't meet your quarterly minimum.  Starting today when you join, you also earn two free stamp sets of your choice (they’ll be added to your starter kit). These can be any stamps at all from the new catalogue - so if you choose wisely (think alphabets and large sentiment sets!) these two stamp sets alone could be worth £91 or more. The Starter Kit is £99 for £130 of free product of your choice. My team is a mix of both hobby stampers and business demonstrators and I love and appreciate them all.  If you would like to take to me about becoming a demonstrator and joining us, please do get in touch for a no obligation chat about the benefits or call in at my open house event next week. Alternatively if you know this is the deal for you, don't delay and click here to join today!


  • Save The Date - I will be holding my Annual Catalogue Open House Launch next week on Friday 10th June - if you live in or around Northampton this is a great opportunity for you to see some of the products up close, take advantage of my BOGOF sale of retired stamp sets, do a make and take and more! More details to follow in a separate post but if you would like to put your name down for this exclusive event then do get in touch!

That's a lot of information for one post; if I were you I would put the kettle on, put your feet up and get comfy and settle down with your new catalogue for a browse and start creating that all-important wish list!

Back tomorrow with a new project; until then, happy shopping!

Schoolhouse Teacher Thank You Card

by Joanne James30. May 2016 09:00

Bank Holiday Monday - what better than a long weekend! I spent yesterday catching up on some gardening and had dinner with my in-laws and nephew, which made for a nice change. Today my parents are visiting so I'm looking forward to more time in the garden and another BBQ - is it me, or is there something that makes food taste so much better when cooked and eaten outdoors?!

Anyway, my card for today uses this week's sketch over at Less is More; I was so pleased to see my turtle card from a couple of weeks ago chosen as a Top 3 card this week - the competition over there is stiff, so this makes a win all the more special (thank you ladies!) With only 6 weeks to go until the end of the school year here in the UK, I thought it was time to get cracking on my teacher thank you cards, so here is today's card:

Here's the low-down on today's card:

ABC, 123 - I used a piece of retiring Schoolhouse Designer Series Paper to cover one of the portions of my background on my extra-thick Whisper White card base. Perfect for adding to the school theme, whilst leaving the all-important white space.

An Apple For The Teacher - I stamped my apple from the retiring 'Apple of My Eye' set in Real Red and fussy cut it out, cutting the leaf out separately and adding it on top. I'm not sure that children give an apple to their teacher any more (we are more likely to send cake in to ours!) Nevertheless this is such a good stamp set for teacher cards - a keeper, for sure.

Thanks, You're The Best - I finished my card with a die cut sentiment cut using my Big Shot and 'thanks' from the Greetings Thinlits. I used black cardstock and stamped the front in Versamark and heat embossed with black embossing powder a few times to give a nice shiny finish. I popped this up on dimensionals aligned with my apple and finished my card inside with 'you're the best' from the 'Sunburst Sayings' stamp set.

Easy and quick to create - just what you need if you've lots of these to make. Here is the visual summary of the key products used on today's project for you to pin for easy reference:


You can see all of my 'How To' summaries on my 'How To - Tips and Techniques' Pinterest board in case you've missed any. 

Enjoy your day and I'll be back tomorrow with another project; until then, happy stampin'!


Stampin' Up! Supplies Used:

Table built using Product Table Builder by The Crafty Owl - Independent Stampin' Up! Demonstrator.

Bear Hugs - Love You Paper Bear

by Joanne James29. May 2016 09:00

It's Sunday and time for a new challenge over at The Paper Players! It's my turn to host our challenge this week and I have my very own tic-tac-toe board for you to play along with:

    PPA-302-May26

Tic Tac Toe - hmmm, so many possibilities! For my card this week I decided to go with the diagonal - yellow, die-cut, paper clip - and using this week's Pals Paper Arts sketch for my layout, this is what I came up with:


My card is a card from a special little girl to her precious Daddy - here's the low-down:

Bear Hugs - The front of my card features the baby bear from the Bear Hugs stamp set, cut out with the co-ordinating Bear Hugs framelits. I also fussy cut his nose and added a couple of pearls coloured black with my Sharpie for eyes. These little bears are so cute - I'm glad that these are being carried over to the new catalogue. I also carried this little sweetie over to the inside, where I paired her with her Daddy and finished the final part of the sentiment:


Bow Paper Clip - I added my oversize bow paper clip with a little white seam binding ribbon tied around the middle to the ear of my little bear for an obvious feminine touch. 

A Daffodil Delight - I added a piece of Daffodil Delight flower-patterned designer series paper from the Brights DSP Stack for the main panel of my card. I wanted my card to feel girly, even though the recipient was the world's best Dad - I think he'll appreciate it! I think the yellow really compliments the Soft Suede too; here's my colour combo should you wish to save it:


I'm also linking up with the team over at Just Add Ink where the challenge this week is to 'Just Add B' which in my case, is B for Bear.

Here is the visual summary of the key products used on today's project for you to pin for easy reference:


You can see all of my 'How To' summaries on my 'How To - Tips and Techniques' Pinterest board in case you've missed any. 

Whilst I love the bright yellow and cute bear, I must confess the execution of today's card is lacking a little something. I played around with it lots and couldn't work out exactly what it was that wasn't working, so in the end time constraints meant I had to just go with it. Don't you just hate it when that happens?!

Before you reach for your ink and papers, check out what our amazing team has created to inspire you this week:

The Paper Players Design Team
 
 
Here's a quick recap of our challenge rules:
 
1.  Create a new paper project
2.  Upload your creation to your blog with a link back to us and provide a direct link to the post featuring your challenge submission.
3.  Please link your card to no more than four challenges, TOTAL.
4.  Have FUN! 


I look forward to seeing how many different combinations you make with my board this week. We are off to basketball today and are having a little James family get-together later, which should be fun. Otherwise the day will be spent clearing up the mess that was yesterday's flooded kitchen. We had such a busy day, that included shopping for Rebecca's new bike, a trip to the garden centre and a mow of the lawns, that when a pipe burst in the kitchen as we were cooking dinner we spent the rest of the evening filling bowls, waiting for emergency plumbers and mopping up. Hence no blog post yesterday - just too exhausted! Today I'm hoping will be the start of the restful Bank Holiday I was hoping for...

Back tomorrow with another project; until then, happy stampin'!


Stampin' Up! Supplies Used:

Table built using Product Table Builder by The Crafty Owl - Independent Stampin' Up! Demonstrator.

Tags: , , , , , , ,

Cards | Shop Online | Stamping

Hearth & Home Thinlits Roman Blind Card

by Joanne James27. May 2016 08:00

Happy Friday everyone! Today I'm sharing a card that I made in my shaker card technique class that featured the Hearth & Home Thinlits at the back end of last year:


So long ago I know, and whilst some of the products on this card are retiring (namely the flower and bird punches, the Alphabet Rotary Stamp and the ribbon), the Hearth & Home Thinlits are staying so it's still worth a share! Not only that, but the new Foam Adhesive Strips that are coming in the new catalogue will make this kind of card a breeze. 

This one isn't a shaker card; I made a little video tutorial to show how I created my colourful roman blind window treatment and have finally got around to editing it, so here it is:


I'm so glad the Hearth & Home Thinlits are staying, they really are so useful. I'm looking forward to seeing what new ribbons are coming our way to see how I can give my next window a makeover!

Here is the visual summary of the key products used on today's project for you to pin for easy reference:


You can see all of my 'How To' summaries on my 'How To - Tips and Techniques' Pinterest board in case you've missed any. 

That's all from me today; back tomorrow with another project. Until then, happy stampin'!


Stampin' Up! Supplies Used: 

Table built using Product Table Builder by The Crafty Owl - Independent Stampin' Up! Demonstrator.

Cupcake Party Punch Subtles Birthday Card

by Joanne James26. May 2016 08:05

Today it's time for a new challenge over at Create With Connie and Mary and this week we have a colour combination for you:


When I saw today's colours, I thought Easter, ice-cream and cupcakes in that order! I went with the latter as I had a card in mind that I had wanted to try out for a little while - here it is:


I CASE'd the idea for today's card from this fabulous masculine card from the talented Bruno Bertucci. I fell in love with Bruno's fabulous masculine birthday card and when I saw this week's colours, I knew I was going to have to re-create an altogether more feminine take on Bruno's card, whilst preserving the clean and graphic layout. A change of colours and punch and there you have it - thank you Bruno for the inspiration! Here's the low-down on today's card:

Farewell Mini Muffin - The trio of punches that comprise the Party Punch Pack in the Spring-Summer seasonal catalogue are not carrying over into the new annual catalogue - boo hoo! Along with the candle and balloon, this adorable mini muffin (or cupcake if you prefer!) will be retiring, so snap up a set now. I promise you that I will not be selling on mine, so don't expect to see them in a retiring items sale any time soon. you have been warned :-)

Sunburst Sayings - My sentiment is from the Sunburst Sayings stamp set - slim and perfectly in keeping with this graphic card. I anchored mine with a pink candy dot too by way of embellishment.

Party With Cake - Another great birthday set with some fun sentiments that I used for the inside of my card, which you can see in my thumbnail above. I love the typewriter-style font that accompanies the main sentiment too.

Here is the visual summary of the key products used on today's project for you to pin for easy reference:


You can see all of my 'How To' summaries on my 'How To - Tips and Techniques' Pinterest board in case you've missed any. 

Do visit the other Design Team members to see what they did with this week's colours; there's lots of inspiration over on their blogs too!

Enjoy your day and I'll be back tomorrow with another project; until then, happy stampin'!


Stampin' Up! Supplies Used: 

  • Party Punch Pack
  • Party With Cake Wood-Mount Stamp Set
  • Sunburst Sayings Clear-Mount Stamp Set
  • So Saffron A4 Cardstock
  • Blushing Bride A4 Cardstock
  • Mint Macaron A4 Cardstock
  • Mint Macaron Classic Stampin' Pad
  • Whisper White A4 Thick Cardstock

Video Tutorial: How To Make Baker's Twine Looped Flowers

by Joanne James25. May 2016 20:03

Wednesday - how did we get to the middle of the week already?! I've had a busy couple of days, with today including my fortnightly coffee and card drop-in session at Bells in Kingsthorpe, Northampton followed by a get-together over lunch with one of my team members. I am busy preparing my new catalogue samples and getting my catalogues ready to go out to both my online and face to face customers. If you've purchased Stampin' Up! products from me in the last six months, a complimentary catalogue will be winging its way out to you within the next week. If you haven't purchased from me recently but would like a copy of the new catalogue, please do get in touch with me either via email joanne@thecraftyowl.co.uk or by phone and I will arrange to send a catalogue out to you too!

Today I have a video tutorial to share with you! Do you remember this card that I made a while ago?


I used this fun flower embellishment made with the It's My Party Baker's twine to decorate my Botanical Builder Framelits Die colour-blocked card. You can read more about it on the original blog post here if you missed it or would like to refresh your memory.

I promised you a video tutorial on how to make those cute baker's twine looped flower embellishments and finally here it is: 

They really are such fun to make and can be used to dress up cards and packaging and can be made from all kinds of baker's twine and linen thread. 

I hope you enjoyed today's video and it inspires you to have a go and try something new. I'll be back tomorrow with a fun birthday card for this week's new challenge over at Create With Connie and Mary. Until then, happy stampin'!

Confetti Celebration Shaker Card

by Joanne James23. May 2016 16:05

Happy Monday everyone! I've spent a busy day doing housework today, with the result that 'Chez James' now looks as neat as a pin and the ironing basket is completely empty, so I am writing my blog post before collecting Rebecca from school. I am collecting her from her rounders practice a little earlier than usual today as her singing lesson this week has been rescheduled; she is off on a school trip to Harry Potter world at Elstree Studios on Wednesday - lucky girl! 

So today's card uses yesterday's Paper Players sketch again, but this time to make a shaker card for this week's challenge over at Pals Paper Arts:

   Pals Paper Arts PPA301

I loved this bright and cheery colour combo and there are some lovely Design Team cards this week. My fellow Paper Players designer Linda Callahan also used them on her Paper Players card yesterday (you can see Linda's card here) with some gorgeous florals. I decided to go with a shaker card for my entry - take a look:

For today's card the colours may well be familiar to you, but there are some fabulous 'sneak peeks' of new catalogue product:

Time to Party With Confetti Celebration - Confetti Celebration is a fun new stamp set with all the making of a good party: decorations (check out the string of lights that I used on the front of my card), stars, balloons and some great sentiments. Both of the sentiments on my card are in this new set and I love that the 'Hooray' is framed perfectly in the shaker window.

Lots of Sprinkles - The sprinkles for today's shaker were created with a new punch of the same name. The Sprinkles Punch will be perfect for creating table confetti or the insides for shakers in a range of colours and glimmer papers. I colour-co-ordinated mine with the challenge colours and added a few gold star sequins too for good measure.

A Hidden Shaker 'Gem' - The best thing about today's shaker card is the one thing you can't see! A strange thing to say I know, but the new catalogue has a new supply item that will revolutionise shaker card construction: foam adhesive strips! Just like the ones in the Christmas shaker card kits in the last Autumn-Winter seasonal catalogue, they are a little deeper than Dimensionals and give just the right height for a good shaker card. I am going to get so much use out of these!

Here is the visual summary of the key products used on today's project for you to pin for easy reference:


You can see all of my 'How To' summaries on my 'How To - Tips and Techniques' Pinterest board in case you've missed any. 

Enjoy your day and I'll be back tomorrow with another project; until then, happy stampin'!


Swirly Scribbles Bird's Nest Baby Card

by Joanne James22. May 2016 09:00


It's Sunday and time for a new challenge over at The Paper Players! It's the turn of the queen of diecuts, the lovely Laurie, to host our challenge this week and she has a fun sketch for you to play along with:


As you know, I love a good sketch and for my card this week I had so many ideas! I will be using this sketch for my card tomorrow too; today I decided to feature a die from one of my favourite sets from the new catalogue called the Swirly Scribbles Thinlits and make not one, but two, new baby cards featuring two of the new in-colours. 

Here is the first one, a baby boy card featuring the new blue, Dapper Denim:


Here is the second baby card, featuring the new pink, Flirty Flamingo: 


Now I know I'm biased, but aren't they just the cutest?! Here is the low-down on today's card:

Swirly Scribbles Thinlits - There are some great swirl, flower and leaf dies in this set - the one that I used here makes the cutest bird's nest backdrop for the cute birdie ready to welcome her babies to the world.

Swirly Bird Masking and Kissing - I did some masking and kissing of the stamps to create my little bird in her nest: first, I stamped the nest twice in Soft Suede, and cut one of them out and used it as a mask so that I could stamp my bird and eggs in the nest. I also created some light speckling on my eggs by inking the 'grunge' stamp in the set in Soft Suede, inking the eggs in Sahara Sand, then 'kissing' the two together before stamping them into the nest. You can get a closer look at this on these close up images below:


Perfectly Wrapped Border - I used a mat of each of the new in-colours that I featured on my cards to accentuate the colour and decided to add an additional border detail as per the stitched detail on the sketch. I used one of the border stamps from the 'Perfectly Wrapped' stamp set; this set is photopolymer which makes lining up a breeze. 

Hello Baby Bear - I couldn't finish today's write-up without a nod to the sentiment on today's card. This is one from an adorable set called 'Baby Bear' that also features in the new catalogue and is finished on the inside of the card with '...welcome to the world!'. Perfect for today's card.

I love these dies and the co-ordinating stamp set; you can be sure you'll be seeing lots more projects with them. 

Here is the visual summary of the key products used on today's project for you to pin for easy reference:

Baby Boy Dapper Denim card, with a masking tip:

Flirty Flamingo baby girl card, with a kissing technique tip:


You can see all of my 'How To' summaries on my 'How To - Tips and Techniques' Pinterest board in case you've missed any. 

We do rather have birds on the brain in our house at the moment; the baby blue tits in our nesting box hatched about 10 days ago and we are watching the bird cam with interest on a daily basis. There are seven healthy babies and the mum and dad spend many hours each day flying in and out with caterpillars and bugs to feed the young chicks. Here is a photo of them waiting to be fed:


Apologies for the poor photo - the quality isn't great - but I can honestly say watching these little chicks grow is the best tv drama ever, they are so entertaining! Hopefully I'll be able to get some photos of them as they leave the nest when they are grown and share those at a later date.

Before you reach for your ink and papers, check out what our amazing team has created to inspire you this week:

The Paper Players Design Team
 
 
Here's a quick recap of our challenge rules:
 
1.  Create a new paper project
2.  Upload your creation to your blog with a link back to us and provide a direct link to the post featuring your challenge submission.
3.  Please link your card to no more than four challenges, TOTAL.
4.  Have FUN! 


I look forward to seeing how you interpret this week's sketch. We are off to basketball today and are then looking forward to a restful afternoon, with either some time in the garden weather-permitting or indoors watching a movie and the antics of our own baby bird family!

Back tomorrow with another card that also uses this sketch, but is quite different in terms of execution; until then, happy stampin'!


Shine On Rose Wonder Thank You Card

by Joanne James19. May 2016 08:05

Today it's time for a new challenge over at Create With Connie and Mary and this week we have a sketch for you:


For my card today I decided on a bold injection of colour and went for a kraft and Watermelon Wonder colour combination - take a look:


Here's the low-down on today's card:

Shine On - This Shine On Specialty Designer Series Paper is great for boxes and bags as it's so sturdy but also works really well on cards. I love the way that one side is foiled and the other side features bold patterns in bright colours, like the Watermelon Wonder pattern that I chose to feature for the horizontal panels on my card today. The colour really 'pops' against the kraft cardstock and looks even more vibrant than usual and is accentuated by a thin mat in the same colour. 

Rose Garden Thinlit Flower - I stayed true to the sketch and added a flower using the thinlits from the Rose Garden set. This little flower head can be overshadowed by the larger rose thinlits in this set, but is equally attractive and works well when offset slightly with the leaf stem and popped up on some dimensionals.

Rose Wonder Sentiment - This is almost a no-stamping card today - save for my thank you sentiment, from the co-ordinating Rose Wonder stamp set, which has some lovely scripts and wording. Whilst the stamp set and thinlits are carrying over to the new catalogue, the current 15% off bundle price isn't. So if this set is on your wish list, you have until the end of May to take full advantage of the additional saving.

Here is the visual summary of the key products used on today's project for you to pin for easy reference:


You can see all of my 'How To' summaries on my 'How To - Tips and Techniques' Pinterest board in case you've missed any. 

Do visit the other Design Team members to see what they did with this week's sketch; there's lots of inspiration over on their blogs too!

I have a day of housework and chores planned today; not exciting but necessary! Enjoy your day and I'll be back tomorrow with another project; until then, happy stampin'!


Stampin' Up! Supplies Used:

  • Rose Wonder Photopolymer Bundle
  • Shine On Specialty Designer Series Paper
  • Watermelon Wonder A4 Cardstock
  • Kraft 12" X 12" Cardstock
  • Cucumber Crush A4 Cardstock
  • Basic Black Archival Stampin’ Pad
  • Rhinestone Basic Jewels

Tags: , , , , , ,

Cards | Shop Online | Stamping

New Online Exclusives

There are new products available exclusively in the online store from 5 November - check them out here.

Latest Kits!

Stampin Cut and Emboss

The Layered Landscapes Kit and Nature's Paintings Kit are the latest kits in the online store - get yours here!

Shop Online

Access my online shop 24 x 7, 365 days of the year:

Current November hostess code:

9NKXDTTR

Shop Online

Mini Catalogue

BROWSE THE CATALOGUE

'Tis The Season - the new Stampin' Up! Mini Catalogue is here! For more details and to download your copy click here

Scrapbooking

Stampin' Up! has introduced a new range of 12x12" scrapbooking product and kit - the full range is now available to purchase online. To download a copy of the new digital Scrapbooking Catalogue click here.

2024-25 Annual Catalogue

BROWSE THE CATALOGUE

Click on the image to download your copy of the 2024-25 annual catalogue. For a full list of current SU! supplies, go to my online store. If you would like any help or advice, please drop me a line at joanne@thecraftyowl.co.uk or give me a call on 07773 421446 - I'd be happy to help.

Join My Team

It's always a great time to join Stampin’ Up! New team members can get £130 worth of products for only £99 + free business supplies + free shipping + all the fun being a part of Stampin’ Up! Stampin' Up! has something for everyone: join my growing team and benefit from my support to enjoy Stampin' Up! however you choose.

If you're interested, call me for a chat to understand how I can help you realise your goals. Alternatively, if you have already decided to sign up and you just can't wait, please click here for the link to the online form where you can sign up and order your starter kit right away! 

About Me

Hi I'm Joanne and live in Northampton and when I'm not looking after my husband and two beautiful children, am an avid crafter with a passion for all things Stampin' Up!

I must confess that I have never been a big rubber stamper - until I discovered Stampin' Up! that is. I love the fact that I can get such great results with co-ordinating stamps, inks, papers and punches - the possibilities are endless! Join me on my stamping journey as I share the things I love and be inspired to create amazing things yourself!

Follow Me

Monthly Newsletter

Box Builder

Click the button above to use Box Buster to create your custom box design using the Envelope Punch Board!

Kits Collection Now Available!

Stampin Cut and Emboss

The new Kits Collection from Stampin' Up! is now available!

Click here to see the current kits available and order yours online today.

I Design For


Stampin' Up Stuff

This is my personal blog and is not endorsed by Stampin’ Up! I hope you find it a plentiful source of ideas and personal inspiration but please don't copy my designs for contest submission or use for classes, publication or sale without express permission.