by Joanne James24. February 2014 20:29Good evening blog readers! I managed to grab a few hours this afternoon to catch up on some crafting (a reward to myself for getting some of my admin out of the way this morning!) and I made a card using both this week's 'tall and skinny' Mojo Monday sketch and the colours over at Colour Q:
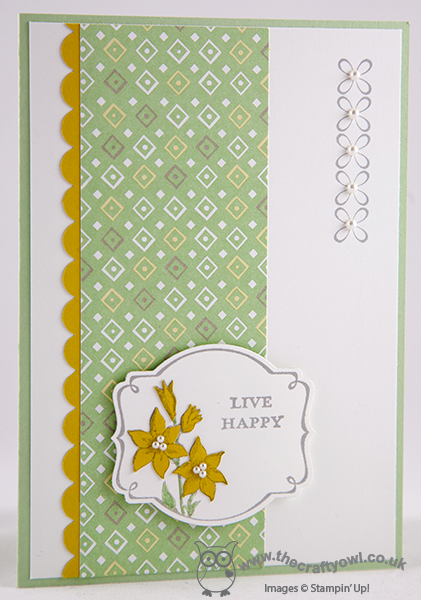
I don't often make 'tall and skinny' cards and historically was always put off by not having the correct sized envelope, but now I have my Envelope Punch Board, irregular envelope sizes don't phase me at all! As for the Colour Q challenge, well you may remember when I made this card a few weeks ago that I confessed I had two ink pads in my stash that I had owned for more than 12 months and never broke the cellophane wrapper on; one of them was Garden Green, that I used on the previous card; the other - Always Artichoke. So when I saw this colour challenge, I just had to have a go! Now Peach Parfait and Apricot Appeal are retired SU colours; I did have an old inkpad and some Peach Parfait cardstock, which I've used, but no Apricot Appeal, so I substituted with Pumpkin Pie instead. Here is my card:
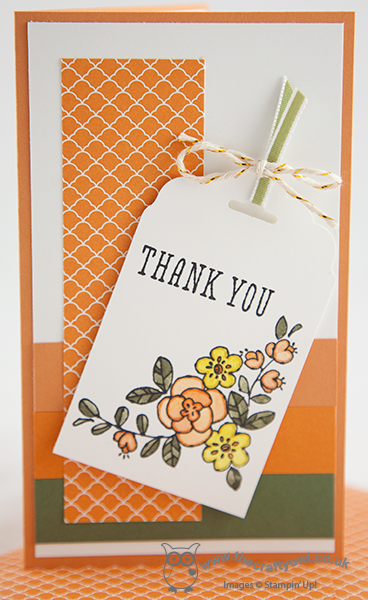
I followed the background layering of the sketch with solid colour cardstock and overlaid with a slim panel of Pumpkin Pie Brights DSP. Instead of a circle as my focal point, I decided to use a tag punched with my Scalloped Tag Topper Punch. I cut my cardstock slightly wider than the 2" groove in order that it could accommodate my corner flower stamp from the 'You're So Grateful' stamp set. I stamped the image in black Stazon and used my Aquapainter to colour in the design. When the image had dried, I went around the inside edge of the image with the co-ordinating colour marker pen to give it added definition. I have one small confession, which is that I used a small piece of Old Olive ribbon to finish off my tag as it was the closest match I had to Always Artichoke. And finally - I made a co-ordinating envelope!
Hope you like today's card; I'll be back tomorrow with a very special punch art creation, so do check back to see what I've made. Until then, happy stampin'!
Stampin' Up! Supplies Used:
by Joanne James21. February 2014 22:37One last quick post from me today - call it an early post for tomorrow! I saw the current sketch over at Retrosketches and was really keen to have a go as I managed to squeeze in a little extra crafting time this afternoon, so thought I would combine it with the challenge over at Addicted to CAS this week:

Now I don't have a current coffee stamp, but I do have a cute little stamp that was part of one of last year's Sale-A-Bration sets that I knew would fit the bill. Here is my card:
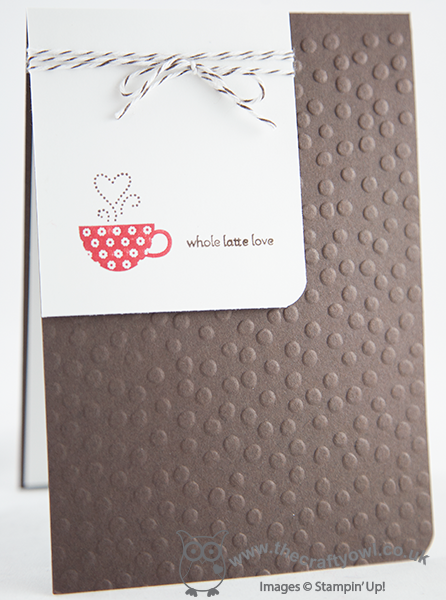
I used coffee as the inspiration for my colour scheme too, with my base card of Early Espresso picked up in the co-ordinating baker's twine. I coloured my coffee cup in red to give a pop of colour and embossed my card base with the Decorative Dots Textured Impressions Embossing Folder to add texture and interest.
That's all from me; I'm off to catch up on a little late night TV. Back tomorrow with another project; until then, happy stampin'!
Stampin' Up! Supplies Used:
by Joanne James21. February 2014 21:01So here is my second card of the day, just in time for this week's challenge over at Less is More where the theme this week is 'masculine cards'. I decided to use the 'Cool Kid' stamp set for my card; when I saw this stamp set I just had to have it - my children always get so excited if they have been chosen as the class 'cool kid' for the day at school. So here is my card:
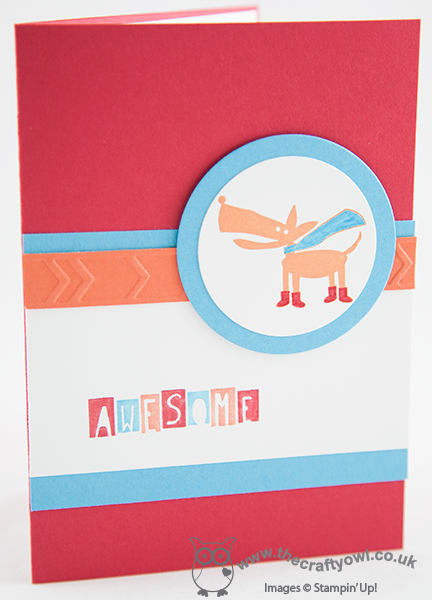
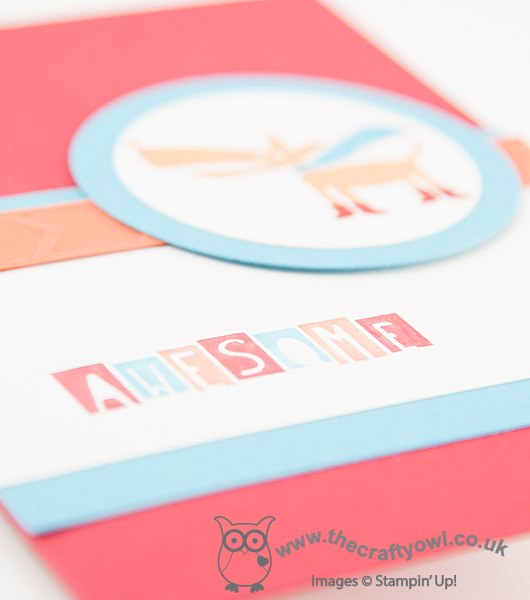
I chose to use the Brights colour combination of Real Red, Tempting Turquoise and Tangerine Tango for my card - all colours my son would love! - and having stamped the dog in orange, I coloured in his scarf and boots with my Stampin' Write markers. I used the blue to outline both my circle and sentiment panel, then picked up the orange with a thin strip cut from a piece of cardstock embossed with the new Arrows Textured Impressions Embossing Folder. I inked up the sentiment using my markers too, so that I could have multi-coloured lettering - I love the effect that this give on this card.
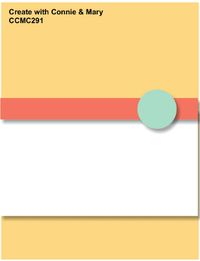
I used this week's sketch over at Create with Connie and Mary for my layout.
Back soon with another card; until then, happy stampin'!
Stampin' Up! Supplies Used:
by Joanne James19. February 2014 21:02Good evening blog readers! My busy days continue as this week the James juniors are off school as it's half term. Today has been a day of piano and singing practice, book reading and review writing, nail painting and telling the time problems, with a little basketball and a couple of baskets of ironing thrown in! Crafting time is in short supply this week, so today I'm sharing with you a stepped up version of a card that we made in my Sale-A-Bration card class this month. This card was a CASE of this one by Mary Fish, although I tweaked a few things, primarily the colour scheme as I wanted to use the Pistachio Pudding DSP from the Sale-A-Bration set. Here is my card:
I stamped the image twice, once on Whisper White for the label, which I cut out using the Big Shot and Deco label Framelits and once on Summer Starfruit, which is the piece that I used to cut the flowers from. I paper-pieced all four of the flowers on this card and coloured the leaves and stems with a Pistachio Pudding marker, then finished with a few pearls. I think this would make quite a nice Easter card too, with an alternative sentiment.
Back tomorrow with another project; until then, happy stampin'!
Stampin' Up! Supplies Used:
by Joanne James12. February 2014 09:56So I didn't quite manage to squeeze in another 'make' for you yesterday, but I'm here bright and breezy (or should that be windswept, given the gales we've had here for the last day or so!) this morning with today's card. Given my recent dalliances with the colour black, I thought I would try something different using black cardstock and one of my most favourite stamps - yes, the Flowerfull Heart (still available to order until Friday if you'd like one - click on the link to my online shop below!) Here is my card:
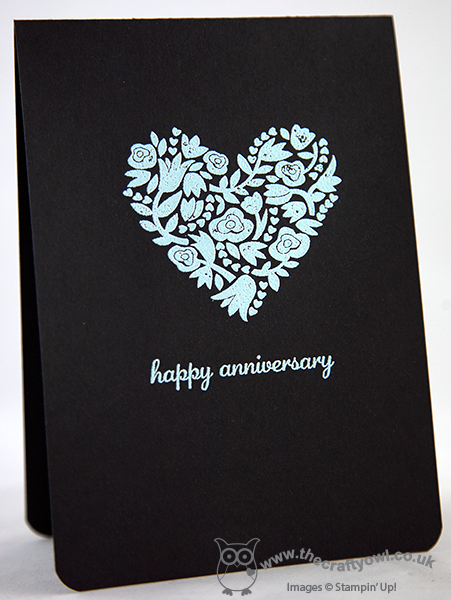
Now, I know you might be thinking "Anniversary card - on black??!" but hear me out! I wanted to use this stamp again with some heat embossing; I toyed with gold (well, it worked pretty well on this card I think) but eventually decided to use Pool Party embossing powder. My colour combination was inspired by one of the DSP patterns in the Sweet Sorbet pack that is available as one of the free Sale-A-Bration gifts currently when you spend £45 or more - the little blue Pool Party flowers with black centres. I would not necessarily have thought about using these colours together had it not been for this paper. A simple sentiment from the 'Express Yourself' hostess set (such a versatile set of greetings in a very usable font, it can be yours when you host a Stampin' Up! party - contact me to book yours) finishes this simple card.
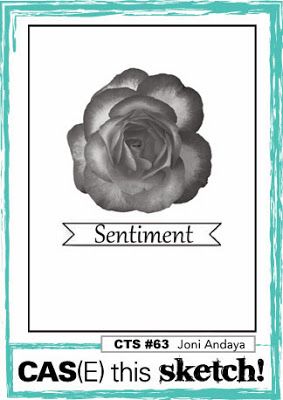
So what do you think - a colour combination that works or one to be avoided, especially on a romantic card? I'd love to know what you think. I'm also linking this card up with the 'One Layer Card - Anything Goes' challenge over at Less is More this week (currently the only card using black for it's 'white space' - should I be worried?!) and CAS(E) This Sketch as my card uses their sketch again:
Funny how you can use the same two starting points, yet end up with two cards that couldn't be more different. Back tomorrow with another project; until then, happy stampin'!
Stampin' Up! Supplies Used:
9fe4b513-b28f-441e-b5cc-fe0fd6c2169c|0|.0|96d5b379-7e1d-4dac-a6ba-1e50db561b04
Tags: Embossing, Flowerfull Heart, Host a Party, Express Yourself, one layer cards, Sale-a-bration 2014, Shop online, Stamp-a-ma-jig, Stampin' Up, Stampin' Up Card, Stampin' Up Card ideas, Stampin' Up Supplies, Anniversary, Weddings
Cards | Host a Party | Promotions | Sale-a-bration | Stamping
by Joanne James12. February 2014 09:08Another early post from me today - makes me look organised, but if you'd witnessed the library book hunt that rampaged through the James household this morning before school, you could be forgiven for thinking otherwise! As promised, today's card uses the same stamp from the 'From This Day Forward' set that I used yesterday, but to give a completely different effect. Here is my card:
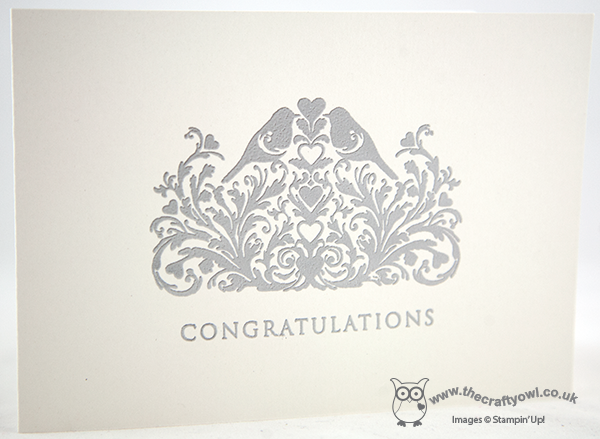
The photograph really doesn't do this card justice (not least because it is so difficult to get a great shot of an almost all-white card!) but up close, this card is really beautiful; I stamped the image and sentiment in Versamark onto Shimmery White cardstock - a lovely cardstock for this kind if project, it is flecked with minute specks of shimmer glitter and catches the light beautifully - and then heat embossed with silver embossing powder to add texture (important when your card is only one layer) and a lovely sheen).
It just goes to show that you don't always need lots of layers to create an impactful card - I'm getting quite into this one layer thing!
I'm going to link up today's card with this week's challenge over at 'Less is More' where the challenge is 'One layer - anything goes' and at CAS(E) this Sketch, as I used this sketch for my layout (turned through 90 degrees).
I'm off to get crafty - lots to do today! I might even pop back later and squeeze in another post.
Until then, happy stampin'!
P.S.: In case you're wondering we found the library book eventually - phew!
Stampin' Up! Supplies Used:
by Joanne James11. February 2014 09:58Good morning lovely blog readers! This morning's card is one I made as an acceptance card for a wedding invitation received recently. I actually had the stamp out on my desk for an alternative card which I will share with you tomorrow, when I decided it might work with this week's colour challenge combination at Pals Paper Arts:
When I originally saw this colour combination I did immediately think 'Valentine' (well, it's that time of year, right?!) Truth is, I've made lots of Valentine's cards already this year and I just don't have that many Valentine's to send them to! Instead, this is what I came up with:
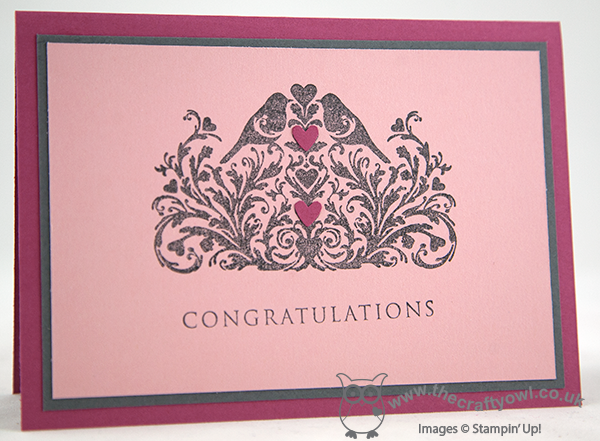
I decided to keep the design quite simple and stamped the image and sentiment in Basic Grey directly onto the Blushing Bride cardstock. I wasn't sure about this beforehand, but it looks so much nicer than on white, which left the image too stark. I quite like the slightly mottled effect of the stamping, which reminds me of stone, however this was more by accident than design - my Basic Grey inkpad is one of my few remaining old style pads and having used it to stamp a solid image, you can really see the difference when compared to the finish of the new foam pads. Needless to say, I have since ordered a new Basic Grey foam pad! I also stamped the image onto a scrap of Rose Red and cut out the two hearts with my paper snips and just paper pieced them in place - none of my myriad of heart punches, stamps or framelits were quite the right shape to take care of this for me. Worth it though, just to give a little 'pop' of colour and bring the colour scheme together.
I hope you like today's card; come back tomorrow to see an alternative card using this same stamp and don't forget to check out the folks over at Pals Paper Arts for more great ideas using this colour combination. Until then, happy stampin'!
Stampin' Up! Supplies Used:
by Joanne James2. February 2014 20:33Good evening lovely blog readers! A super weekend has been had by all in the James household: lots of swimming and crafting in preparation for this week's classes featuring the lovely Sale-A-Bration goodies. Today's card is one I made earlier in the week using the sketch challenge at Pals Paper Arts this week - here's the sketch:
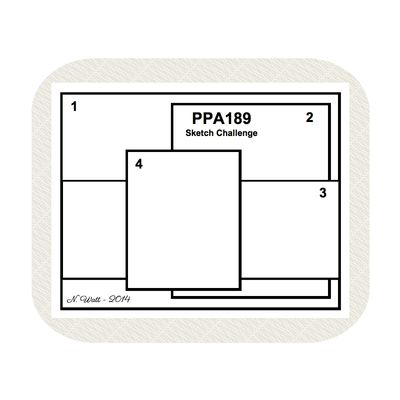
Whilst I followed the layout of the sketch, I changed out blocks 2 and 4 for heart shapes which I cut with my hearts Framelits - take a look at my card and you'll see what I mean:
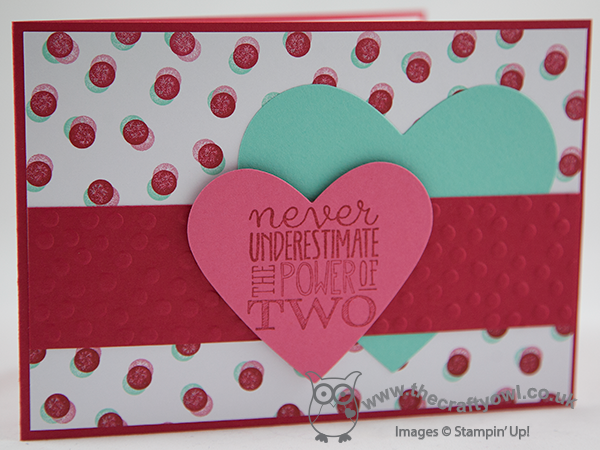
I kept my card quite simple and took my colour inspiration from the sheet of paper I used from the new Fresh Prints DSP stack in the Spring-Summer seasonal catalogue. This is a lovely paper stack which predominantly features Real Red, Whisper White, Coastal Cabana and Crumb Cake, but there are a few patterns that include pink too, such as the one I've used here. The sentiment is from the 'Yippee-Skippee!' stamp set and could have several uses: I've used it in the context of a loved one for a Valentine's/anniversary card, but I think it would be great on a baby card to welcome the arrival of twins too. I can also see me using it on a scrapbook page featuring my Junior James' - they are a formidable pair when they get together! Lastly, I embossed the central panel with the SAB decorative dots folder to echo the pattern of the background paper.
I hope you like today's card - if the above sketch layout appeals to you, do pop over to the Pals Paper Arts blog to see what the design team did with the sketch. I have the first of this week's classes tomorrow, but do pop back here for another project - all being well I might even have another video edited for you!
Until then, happy stamping!
Stampin' Up! Supplies Used:
b9241dec-2a1a-4934-b00d-4fcb976d7ef2|0|.0|96d5b379-7e1d-4dac-a6ba-1e50db561b04
Tags: Big Shot, Decorative Dots Textured Impressions Embossing Folder, Hearts Framelits, Fresh Prints DSP Stack, Shop online, Stampin' Up, Stamp-a-ma-jig, Stampin' Up Card, Stampin' Up Card ideas, Stampin' Up Supplies, Yippee Skippee
Cards | Sale-a-bration | Stamping
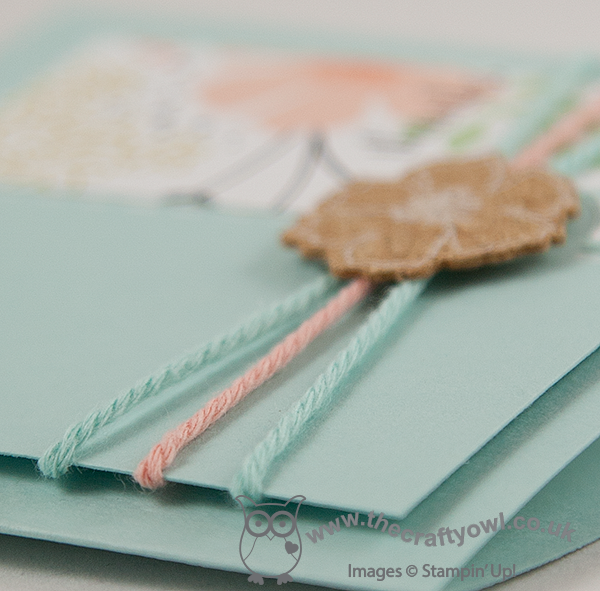
by Joanne James31. January 2014 23:00A quick post from me today using more of the Sale-A-Bration goodies that you can receive with each £45 spend. Today I've made a couple of cards featuring the Sweet Sorbet paper and highlighting some of the lovely items in the Sweet Sorbet accessory pack. The pack contains some handy self-adhesive cork embellishments and some super-chunky baker's twine - here's the first of my cards:
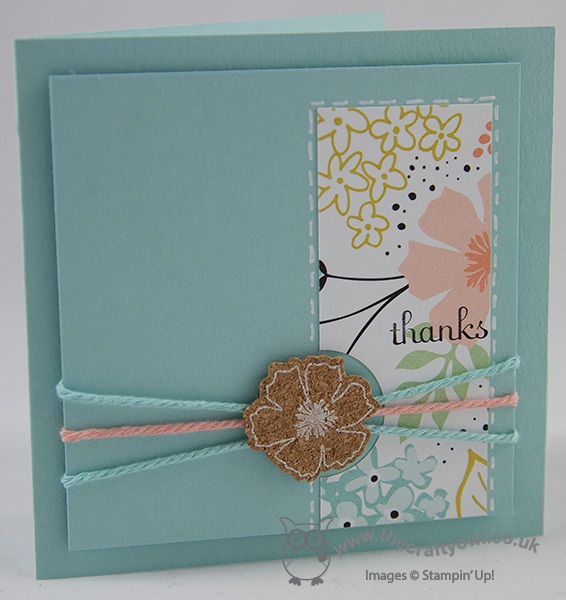
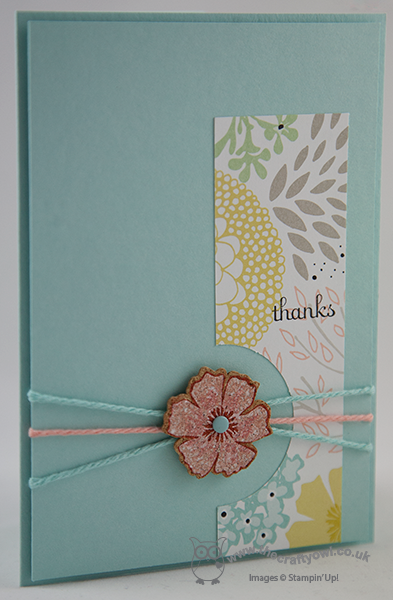
I used a simple panel of DSP on a square layered Pool Party base, with a semi-circle cut out around a cork flower, attached above three pieces of co-ordinating chunky baker's twine. I then simply stamped 'thanks' and outlined my DSP with my white gel pen. For my second card I used the same colourway on a rectangular base and cut a larger semi-circle out of the DSP to accommodate a larger flower which is actually pre-painted white, but as you can see from the photo can be coloured - I coloured mine in Crisp Cantaloupe and Calypso Coral using Stampin' Write markers and added a Pool Party Candy Dot:
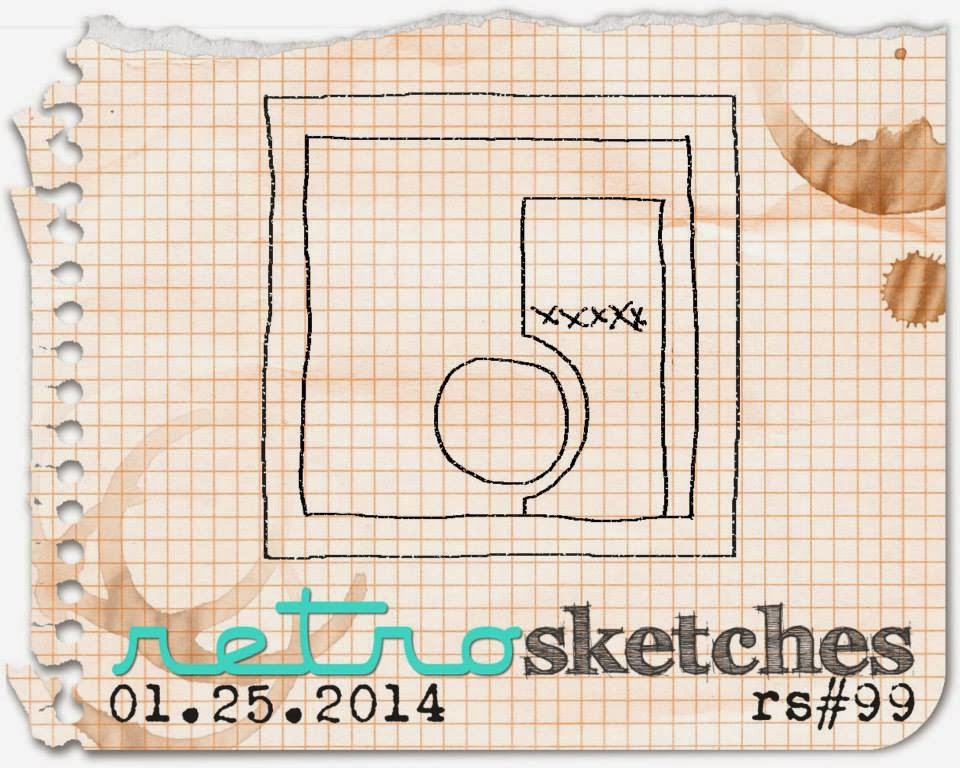
These cork flowers are a fun embellishment for something a little different, with lots of creative possibilities especially if you colour them. I'm linking the first of today's cards up to this week's Retrosketches card challenge - I used this sketch as the inspiration for both of my cards.
Back tomorrow with another fun project; until then, happy stampin'!

Stampin' Up! Supplies Used:
by Joanne James29. January 2014 22:26Today I'm sharing my entry to this week's Paper Players challenge, which has this great sketch by Ann Schach as the starting point:
I love the idea of the 'hidden message' tag on the front of this card. I got out some Sale-A-Bration goodies and another new stamp from the Spring-Summer catalogue and this is the card that I came up with:
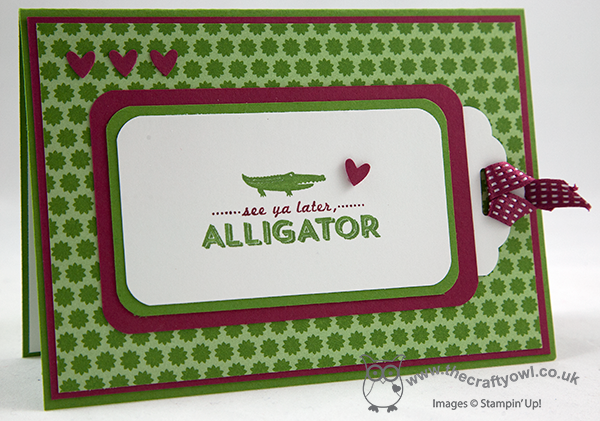
This is the outside of my card, using the alligator stamp from the 'See Ya Later' stamp set - free with a £45 spend during Sale-A-Bration. I chose the bold in-colours of Gumball Green and Raspberry Ripple for my card and I partially inked my stamp using Stampin' Write markers, as I didn't want to include the bottom bit of the sentiment - and this is the reason why:
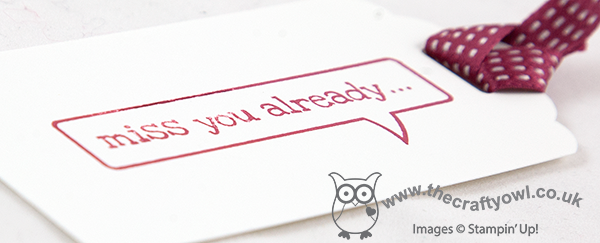
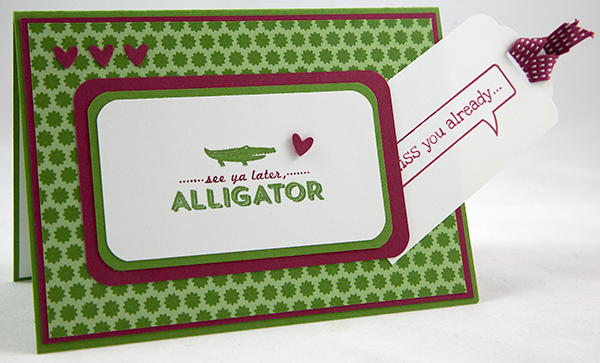
I made a pull-out tag with the new Scalloped Top Tag Punch and stamped it with one of the Just Sayin' word bubble stamps - how cute is that?! Here's another photo of it sticking out of the card at a jaunty angle (not so sure about this now, but seemed like a good idea at the time!!):
Some ribbon to pull the tag and a few hearts punched out using my trusty owl punch complete this card. I like this idea a lot and am sure I will be using this layout again. If you like it too, pop on over to the Paper Players page and check out this week's Design Team inspiration; there's some great work there and I particularly love Ann's card - the detail is amazing!
I'm off to get on with the big basket of ironing that I've been putting off for too many days now; still, I'm meeting up with some of my Stampin' Up! team this afternoon, so that is definitely something nice to look forward to.
Back tomorrow with another card; until then, happy stampin'!
Stampin' Up! Supplies Used: