by Joanne James2. March 2016 09:00It's Wednesday and you know what that means: a new collection of Wednesday Weekly Deals! These offers are valid for one week only. As always, a new collection of deals will be announced next Wednesday.
If you want to take advantage of any of the deals on offer, you can support my business by placing your order online by clicking here or using the link to my store on the right hand side of my blog page where it says 'Shop Online' or with me in person. Don't forget to add the new Hostess Code for March XDZGYVJC if your order is under £150 and be sure to make sure that you don't check the 'no contact' box if you'd like to be kept updated with the progress of you order and receive a little thank you in the post from me.
Here's a summary of this week's one-week only Wednesday deals - click on each item to go to the online store to purchase:
Some old favourites here - if you've had your eye on them and been waiting for the opportunity to grab a bargain, this could be it!
Back later with today's creative project; until then, happy shopping!
4ec81582-6d5a-4494-87a1-b78c282cd3ed|0|.0|96d5b379-7e1d-4dac-a6ba-1e50db561b04
Tags: Promotions, Shop online, Shop Stampin' Up online, Stampin' Up, Stampin' Up Card, Stampin' Up Card ideas, Stampin' Up Supplies, Wednesday Weekly Deals, Chalk Talk Framelits, Decorative Dots Textured Impressions Embossing Folder, Envelope Paper, Perfect Pennants
Promotions | Shop Online | Stamping
by Joanne James27. May 2015 08:00A quick card for this week's challenge over at CAS(E) This Sketch where they have this rather cool sketch to play with this week:
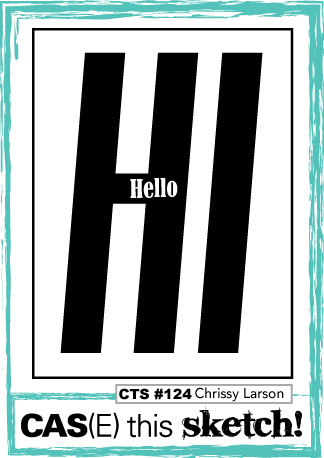
I thought the sketch would be a great opportunity to create a montage of the new 2015-17 in-colours - take a look:
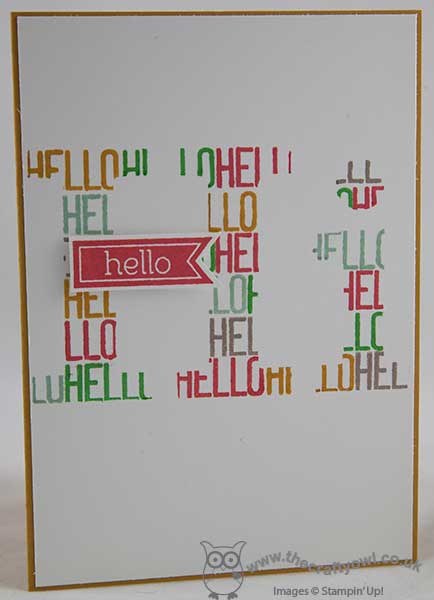
This is my first, rather literal, take on the sketch. I cut a stencil of the word 'Hi' using my Silhouette E-Cutter and then used the 'Hello' portion of the 'Hello Life' stamp in the set of the same name to fill the stencil by repeatedly stamping in each of the new in-colours: Delightful Dijon, Mint Macaron, Watermelon Wonder, Tip Top Taupe and Cucumber Crush. Once I'd filled in the whole area, I stamped one of the Perfect Pennants stamps in Watermelon Wonder and popped this on a dimensional. I think this is my favourite of the new in-colours, although I'm rather taken with the greens too! Which one is your favourite? I'd love you to leave a comment letting me know which one appeals to you.
Come back later for my second, altogether different take on this sketch! Until then, happy stampin'!
by Joanne James7. January 2015 10:21Good morning everyone! Today I have my card for this week's challenge over at Create with Connie and Mary which uses a fun colour combo:
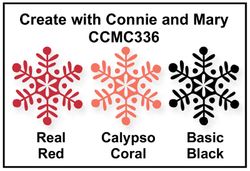
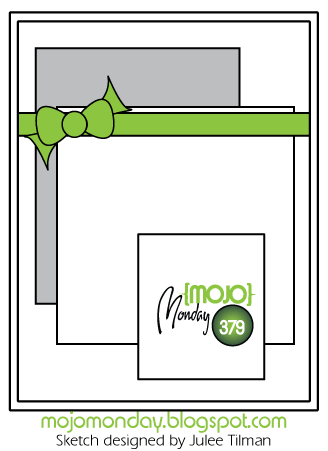
I was immediately drawn to the new 'Stacked with Love' DSP stack for my card, as the challenge colours are three of those that feature in the pack. As I was musing how to tie the colours in with the black elements and what stamps I should use, I saw this week's sketch over at Mojo Monday and knew immediately what direction I was going to go in. Here is my card:
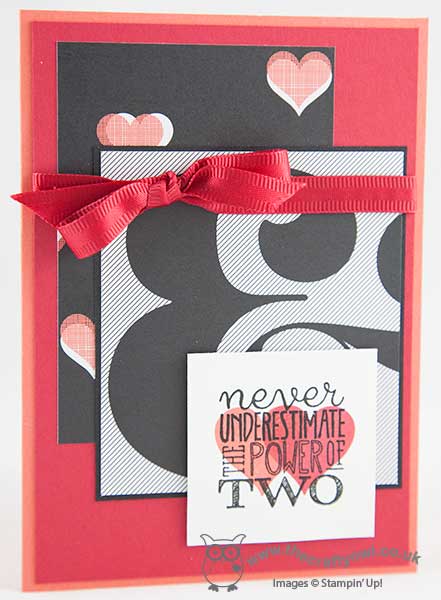
I am always a little wary of mixing DSPs on a card; I am a secret hoarder of DSP yet tend to use it quite sparingly on cards and must confess that I wasn't sure that I was ever going to use the big ampersand piece of DSP on a card, yet the minute I saw this sketch I knew it would be perfect to tie the other DSP to my sentiment. I stamped the sentiment from the 'Yippee Skippee' stamp set in Versamark and heat embossed it in black so that it has a nice shine, (although it is difficult to see that from the photograph), having first stamped two hearts in the challenge colours, one overlaid on top of the other. The heart is from the Perfect Pennants set; today's card is a great example of how you can find sentiments and images in 'generic' sets that will enable you to make a themed card such as this one for an anniversary or Valentine's Day, without needing a theme-specific stamp set. I finished my card with some of the now retired satin ribbon from the seasonal catalogue as I liked the shine, but some 1/4" red cotton ribbon would work just as well.
That's my card for today; I'm off to stamp some more samples using my lovely Sale-A-Bration goodies ready for an informal Open House gathering that I'm hosting for my customers on Friday. If you love in or around Northampton and would like to attend, please get in touch for more details.
Back tomorrow with another project; until then, happy stampin'!
Stampin' Up! Supplies Used:
by Joanne James29. July 2014 15:11The sun is shining here in the UK today and I have a similarly bright and beautiful card for you - no snowflakes today, I promise! Today's card uses the sketch over at Pals Paper Arts as its starting point:
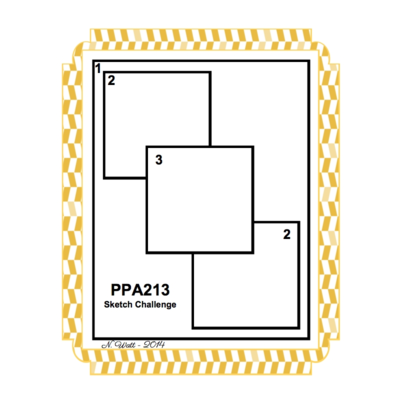
I love a good sketch and there are lots of them out there in blog land this week; I liked the squares on this one, so many possibilities! I took the opportunity to use mine to showcase another of the gorgeous patterns in the All Abloom Designer Series Paper stack - here's my card:
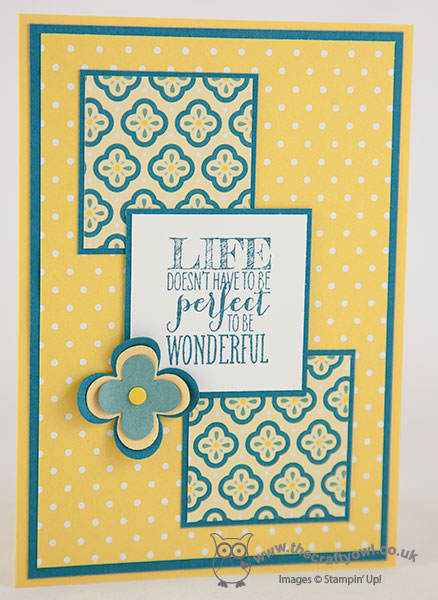
My base card is Daffodil Delight with a mat of Island Indigo, followed by a sheet of yellow polka dots from the Brights DSP collection - these colours echo those of my chosen feature DSP. I matted my patterned squares on Island Indigo too and did the same for my central square, which I chose to include my sentiment. Lastly, I finished with a layered flower made with my 'vintage' Floral Fusion Sizzlits centred with a candy dot. I know this is now retired, but it made the perfect flower to echo the pattern in my chosen paper.
That's all from me today - I have a few more jobs to do before rewarding myself with a bike ride, so must get on! Back tomorrow with my card for this week's Colour Me...! design team card and the Wednesday Weekly Deals.
Until then, happy stampin'!
Stampin' Up! Supplies Used:
by Joanne James13. July 2014 08:00It's Sunday and today I'm sharing my weekly card designed for this week's challenge over at The Paper Players, where I'm a Guest Designer for the next few months. This week we LeAnne is hosting and she has a colour challenge for us using the following colour palette:
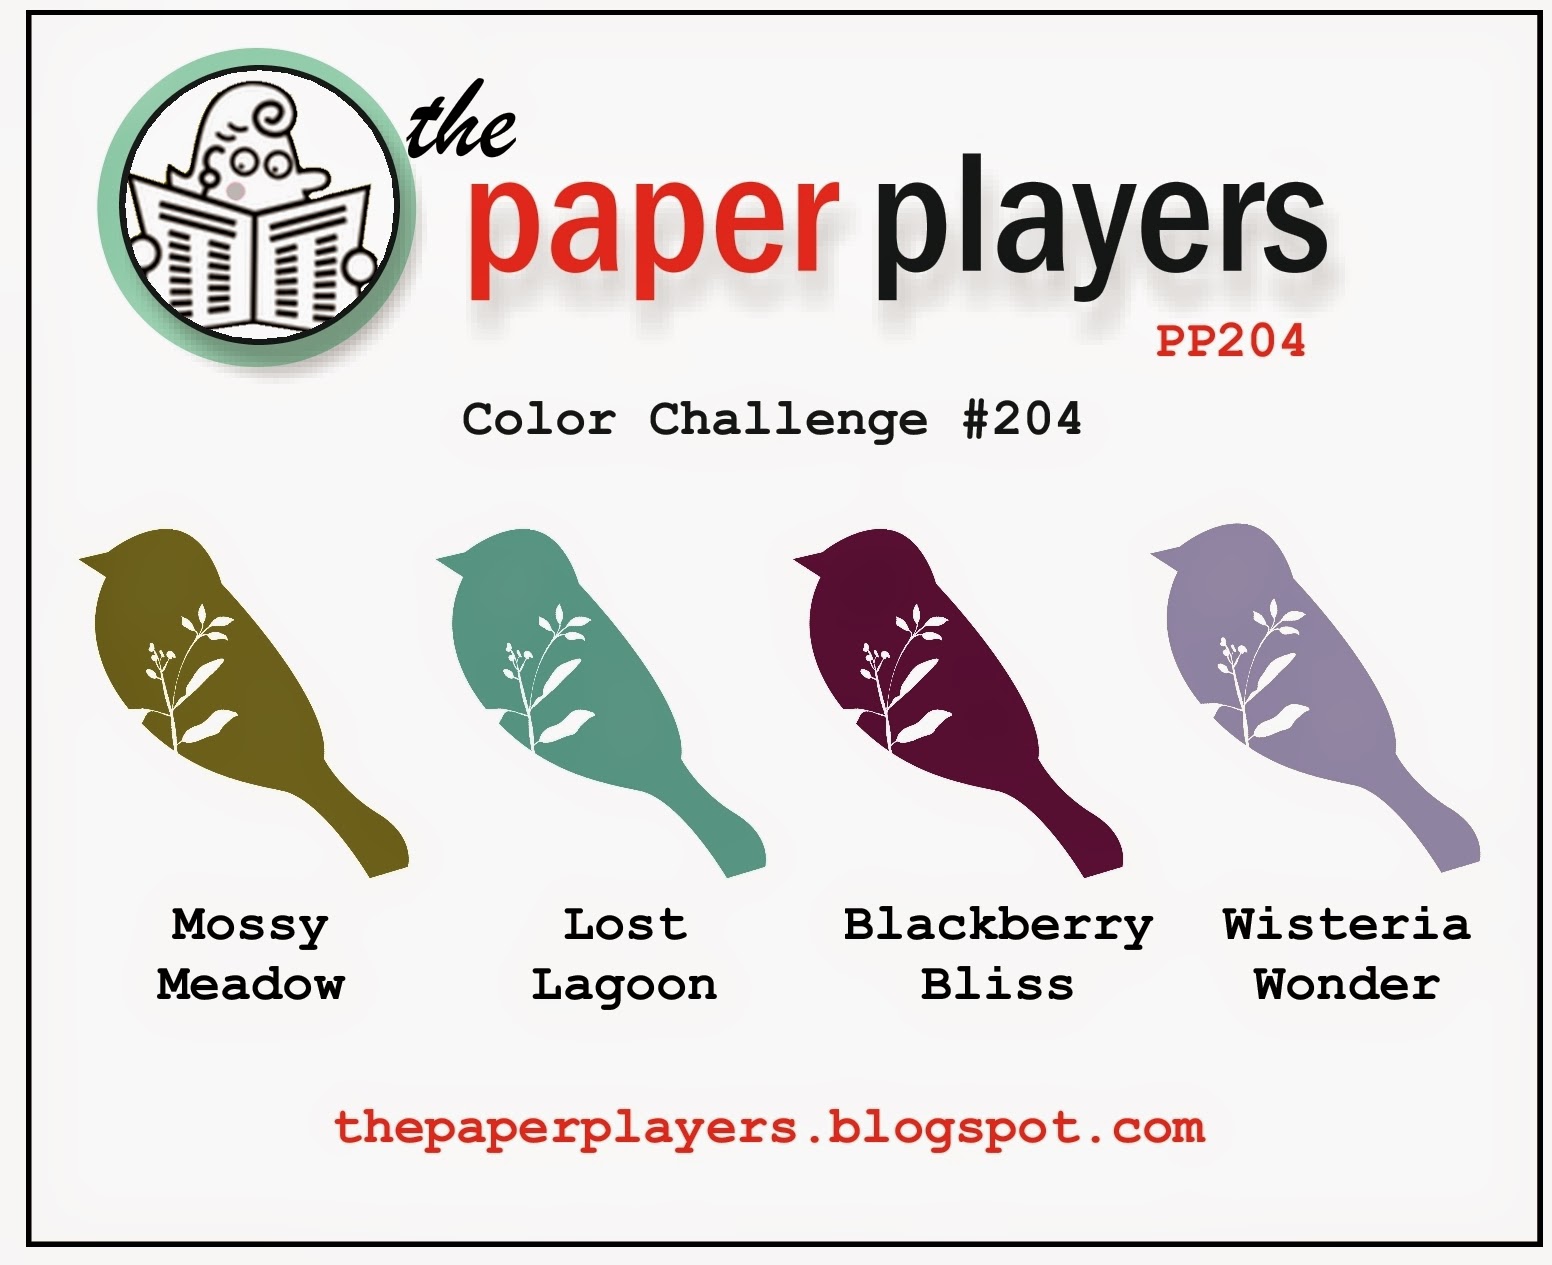
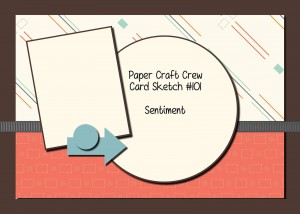
I also used the sketch over at The Paper Craft Crew this week for the layout of my card. I chose to make the new In-Colours of Blackberry Bliss and Lost Lagoon the focus of my card, but the other two colours also feature - take a look:
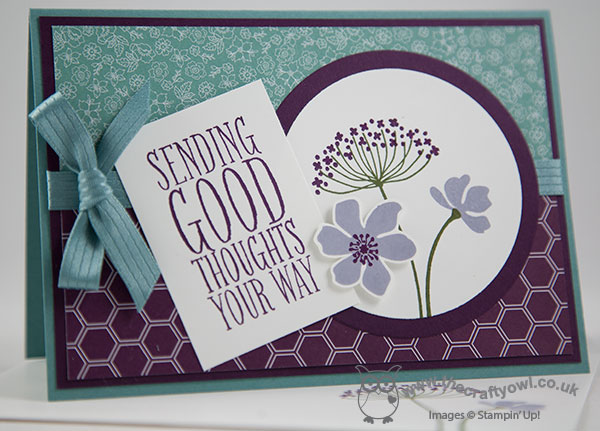
I used two pieces of DSP for the background of my card - the honeycomb from the Midnight DSP stack and the tiny blue flowers from the All Abloom DSP stack and I used a piece of the lovely Lost Lagoon satin ribbon to cover the join and create a statement bow. As these papers both have quite busy patterns, I decided to go with a fairly simple stamped focal point, with a sentiment from the 'Perfect Pennants' alongside a simple floral circle using Summer Silhouettes in Mossy Meadow, Blackberry Bliss and Wisteria Wonder. Lastly, I fussy cut one of the Wisteria Wonder flowers and mounted it onto a dimensional for extra interest.
I hope you like my card today and that it inspires you to hop on over to the Paper Players challenge blog to join in and upload your challenge creations. The Paper Player challenge takes place weekly, opening on a Sunday at 8am (PST) and closes at noon on Friday (PST). Here's a quick recap of our challenge rules:
1. Create a new paper project
2. Upload your creation to your blog with a link back to us and provide a direct link to the post featuring your challenge submission.
3. Please link your card to no more than three challenges, TOTAL.
4. Have FUN!
We look forward to seeing your colourful creations! Right I'm off to a ballet exam today (chauffeur not dancer, of course!). Back tomorrow with another project; until then, happy stampin'!
Stampin' Up! Supplies Used:
by Joanne James19. May 2014 19:19I haven't had any time for crafting today, so I'm going to share with you a simple pop up card designed by Monica Gale that I made at our quarterly training session last month and that I made with my ladies at our recent Fresh Prints All Day Craft Event - here is the outside of the card:
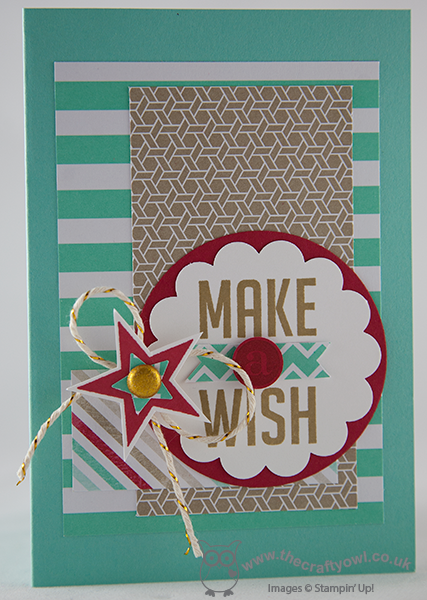
I added a few layers of Fresh Prints papers onto a Coastal Cabana card base, then stamped the 'Make a Wish' stamp from the Perfect Pennants set in Crumb Cake and punched out with a 2 3/8" Scalloped Circle punch layered onto a 2 1/2" circle out of Real Red cardstock, The banner was cut from a scrap of DSP and the 'a' stamped on red card and punched out and popped on a dimensional for added dimension. To decorate, I stamped a star from 'Simply Stars' in Real Red on Whisper White cardstock, added a DSP star using the Merry Minis star punch and secured with a gold glimmer brad with a twist of gold threaded baker's twine behind for a little added sparkle.
Inside the card there is a really simple little pop up made by cutting two short horizontal slits in the liner, which is made out of a notelet:
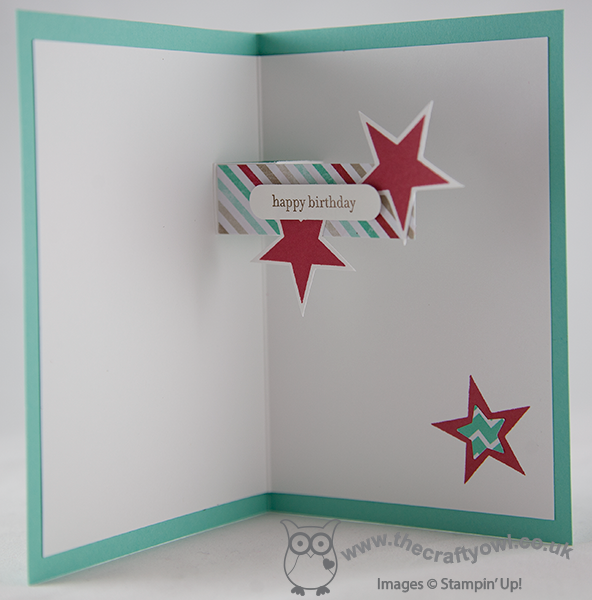
A few more stars and a simple birthday greeting and it's done - a fun little pop card suitable for either gender. I'm hoping to get into my craft room tomorrow and catch up on my crafting, although there is a big basket of ironing competing for my attention, so might need to get that out of the way first!
Either way, back tomorrow with another project; until then, happy stampin'!
Stampin' Up! Supplies Used:
by Joanne James19. April 2014 21:56Good evening everyone! I hope you are all making the most of the long Easter weekend. I've been busy decorating and making new wall art for Ben's Lego-themed bedroom today. I also got to spend a couple of hours in my craft room, but unfortunately tidying and re-organising rather than creating today. So a quick post from me this evening to share a scrapbook page I made at our team training event last week.
The page was designed by the lovely Bekka Prideaux and is in the style of a Project Life page - i.e. divided into regular sized sections with space for journaling and photos, just like those designed by Becky Higgins, the creator of the hugely successful modern day scrapbooking phenomenon that is Project Life. Here is my page, finished with photos from the Dads, Lads & Lasses camping trip that was held at school last September:
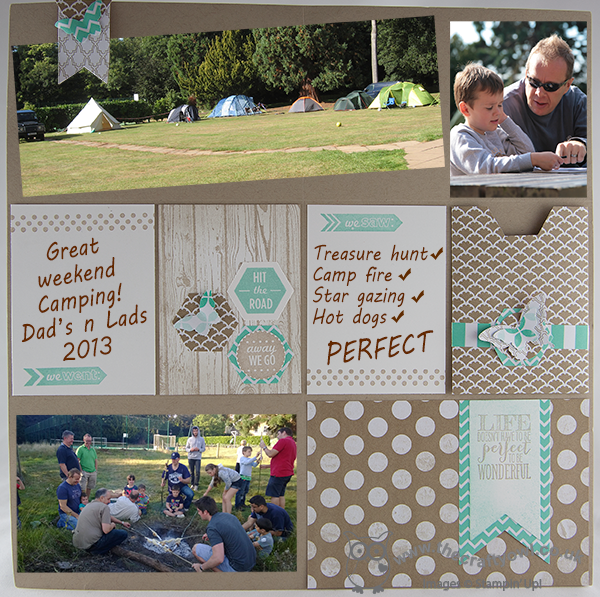
This style of scrapbooking appeals to busy mums like me; I take lots of photographs and need a quick and easy method of presenting them and recording my memories, so I'm thrilled that Stampin' Up! has joined forces with Becky Higgins to produce our very own line of Project Life-themed accessories in the new Annual Catalogue, out in July - read all about it in my earlier post here. As a demonstrator, one of my perks is that I'll be able to get my hands on this and other new and exciting offerings ahead of customers and I can assure you I'll be first in line for this one!
If you'd like to be one of the first to get your hands on Stampin' Up's new range of Project Life accessories, now is a great time to join my team of Stampin' Up! demonstrators. If you're interested, please do get in touch - I would love to share with you the benefits that being a part of my Stampin' Up! team of demonstrators brings.
Back tomorrow with another project; until then, happy stampin'!
Stampin' Up! Supplies Used:
by Joanne James7. April 2014 19:53Good evening blog readers! I managed to get a little time in my craft room today (a reward to myself for finishing the housework :-) ) so thought I would make a quick card for this week's Pals Paper Arts challenge, where they are having their first colour challenge of Spring 2014 and would like us to work with the following colours:
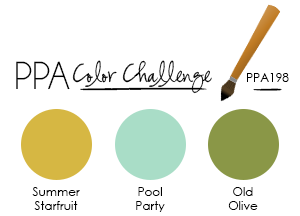
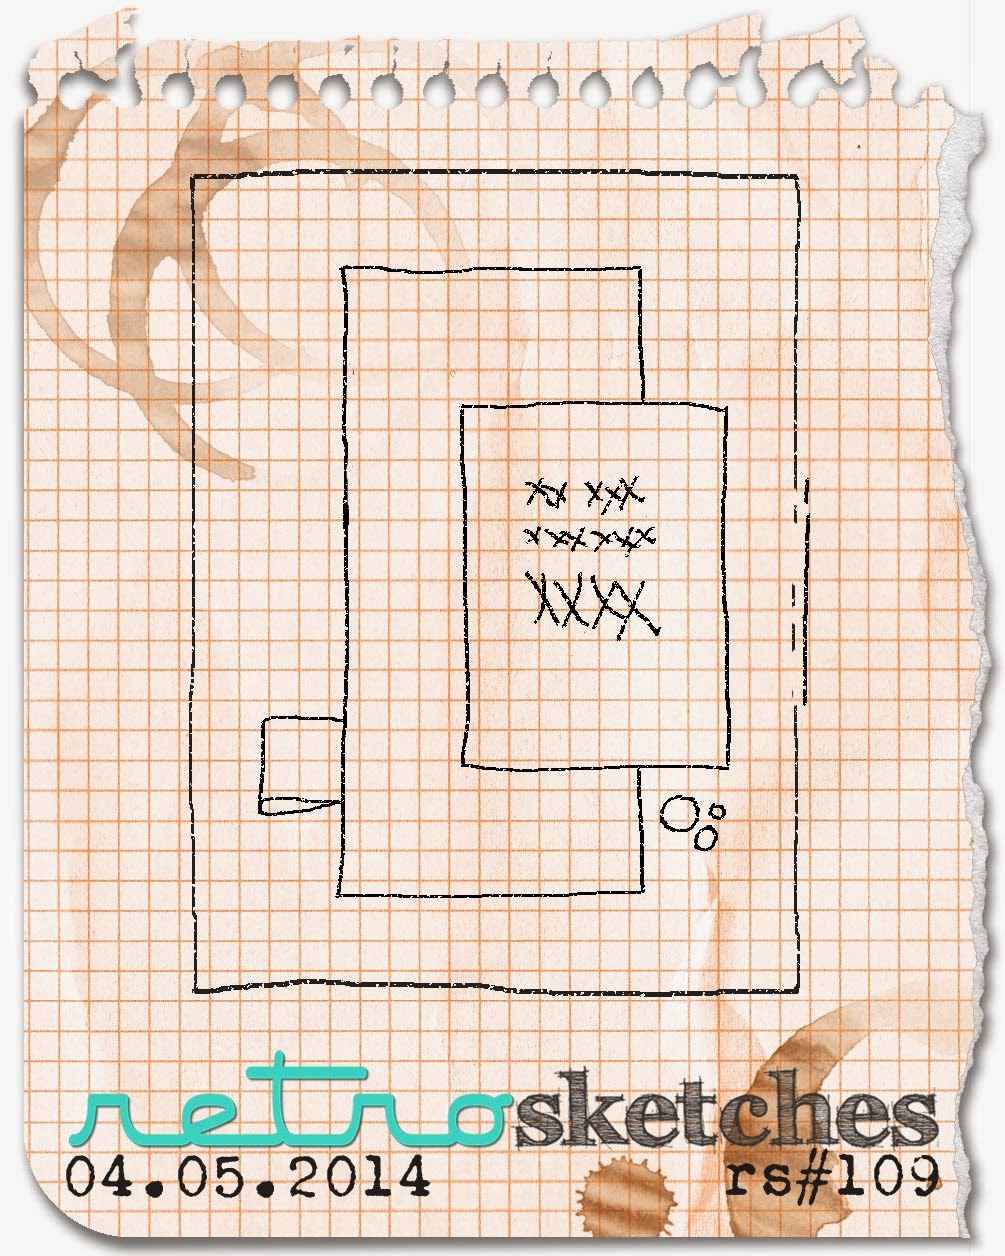
This is not a colour combination I would choose independently, but I really like it - I think the three colours work really well together. I decided to use one of the flowers from the Simple Stems stamp set and this week's sketch over at Retrosketches, and this is what I eventually came up with:
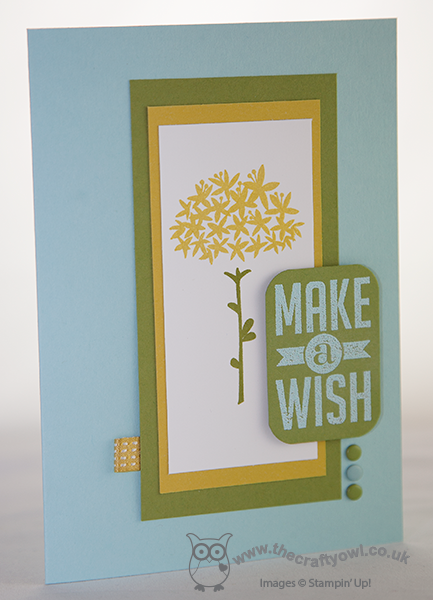
I say eventually, because this didn't turn out to be a quick card at all - it was one of those where the idea in your head doesn't fall onto the paper quite as easily as you hoped it would; I had about four aborted attempts before this one! That said, I love this flower for the Simple Stems set; it reminds me of a dandelion clock, which was the reason for pairing it with the 'Make a Wish' sentiment from the Perfect Pennants set. I stamped my sentiment in Versamark and heat embossed in Pool Party embossing powder to give it some texture and make it stand out against the Old Olive background. A small loop of ribbon and a trio of candy dots complete my card.
Back tomorrow with another project; until them, happy stampin'!
Stampin' Up! Supplies Used:
by Joanne James29. March 2014 22:13A quick (and late!) post from me today - I have one of the busiest weekends ever today and tomorrow. I've been putting the final touches to my class preparation for next week today and have spent the evening at the swimming pool with Rebecca as she was participating in a swimming gala. We are having a real 'girls versus boys' weekend; we each went to our separate swimming pools today (and Granny came along to watch Rebecca for the first time today too) and tomorrow Rebecca and I are travelling to London so that she can take part in an inter-school music festival with the rest of her school choir, whilst the boys have a fun day doing their own thing at home.
Anyway, with all that in mind there will be a couple of quick posts from me over the next couple of days. Today I'm sharing a gift I made for one of my customers who celebrated her birthday recently. If you follow me on Facebook, you will have see this photograph I posted yesterday of a lovely box I made using the Sweet Sorbet papers (yours free with a £45 spend during Sale-A-Bration - only 2 more days to go to plae a Sale-A-Bration order!)and my Box Buster tool and Envelope Punch Board:
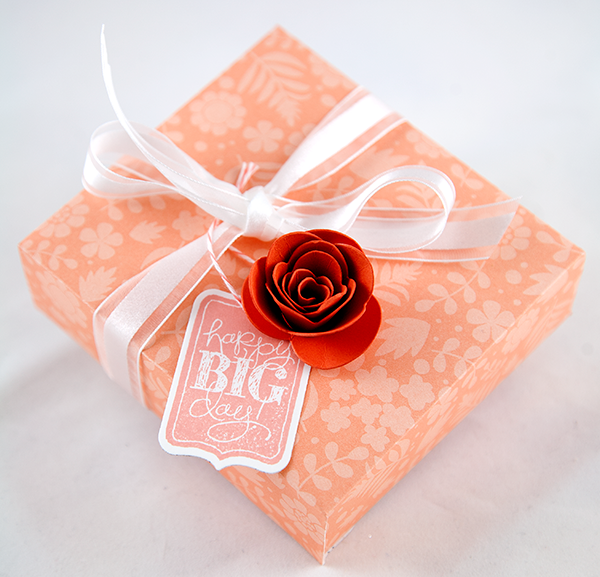
Today I thought I would share what was inside - a sweet little box frame:
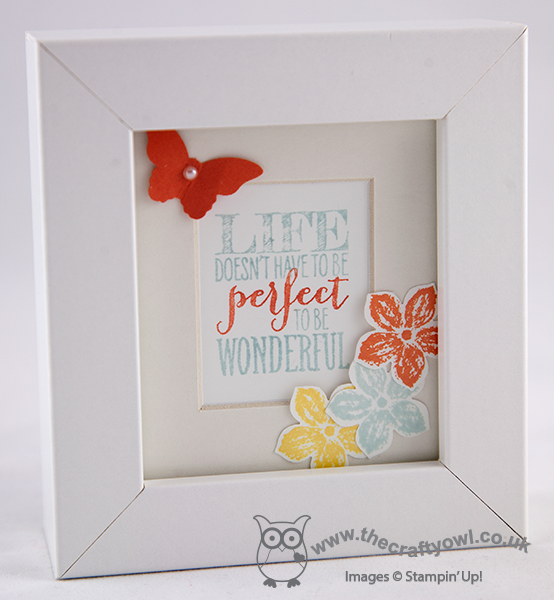
Just a simple stamped sentiment, decorated with a punched butterfly and a few flowers stamped and punched using the Petite Petals stamp set and co-ordinating punch. A decorated frame makes a lovely gift.
Back tomorrow with a card (or two!); until then, happy stampin'!
Stampin' Up! Supplies Used:
65600cd8-bb9b-4ae6-86f9-55f983360d71|0|.0|96d5b379-7e1d-4dac-a6ba-1e50db561b04
Tags: 3D Projects, Box Buster, boxes, Envelope Punch Board, Bitty Butterfly Punch, Petite Petals, Petite Petals Punch, Perfect Pennants, Shop online, Sale-a-bration 2014, Sweet Sorbet, Stamp-a-ma-jig, Stampin' Up, Stampin' Up Card, Stampin' Up Card ideas, Stampin' Up Supplies
3D Projects | Envelope Punch Board | Sale-a-bration | Stamping
by Joanne James27. March 2014 22:12It's all go in the office of The Crafty Owl - I've been busy finishing my last Mother's Day cards today and I've recorded two video tutorials, along with all of the other things mothers do in a day. I won't bore you with that list, but I'm sure lots of you are reading this thinking "I know what you mean!" :-) Anyway, today I have a Mother's Day card to share with you, which I made using this week's sketch over at The Paper Players. This is Sandy's sketch:
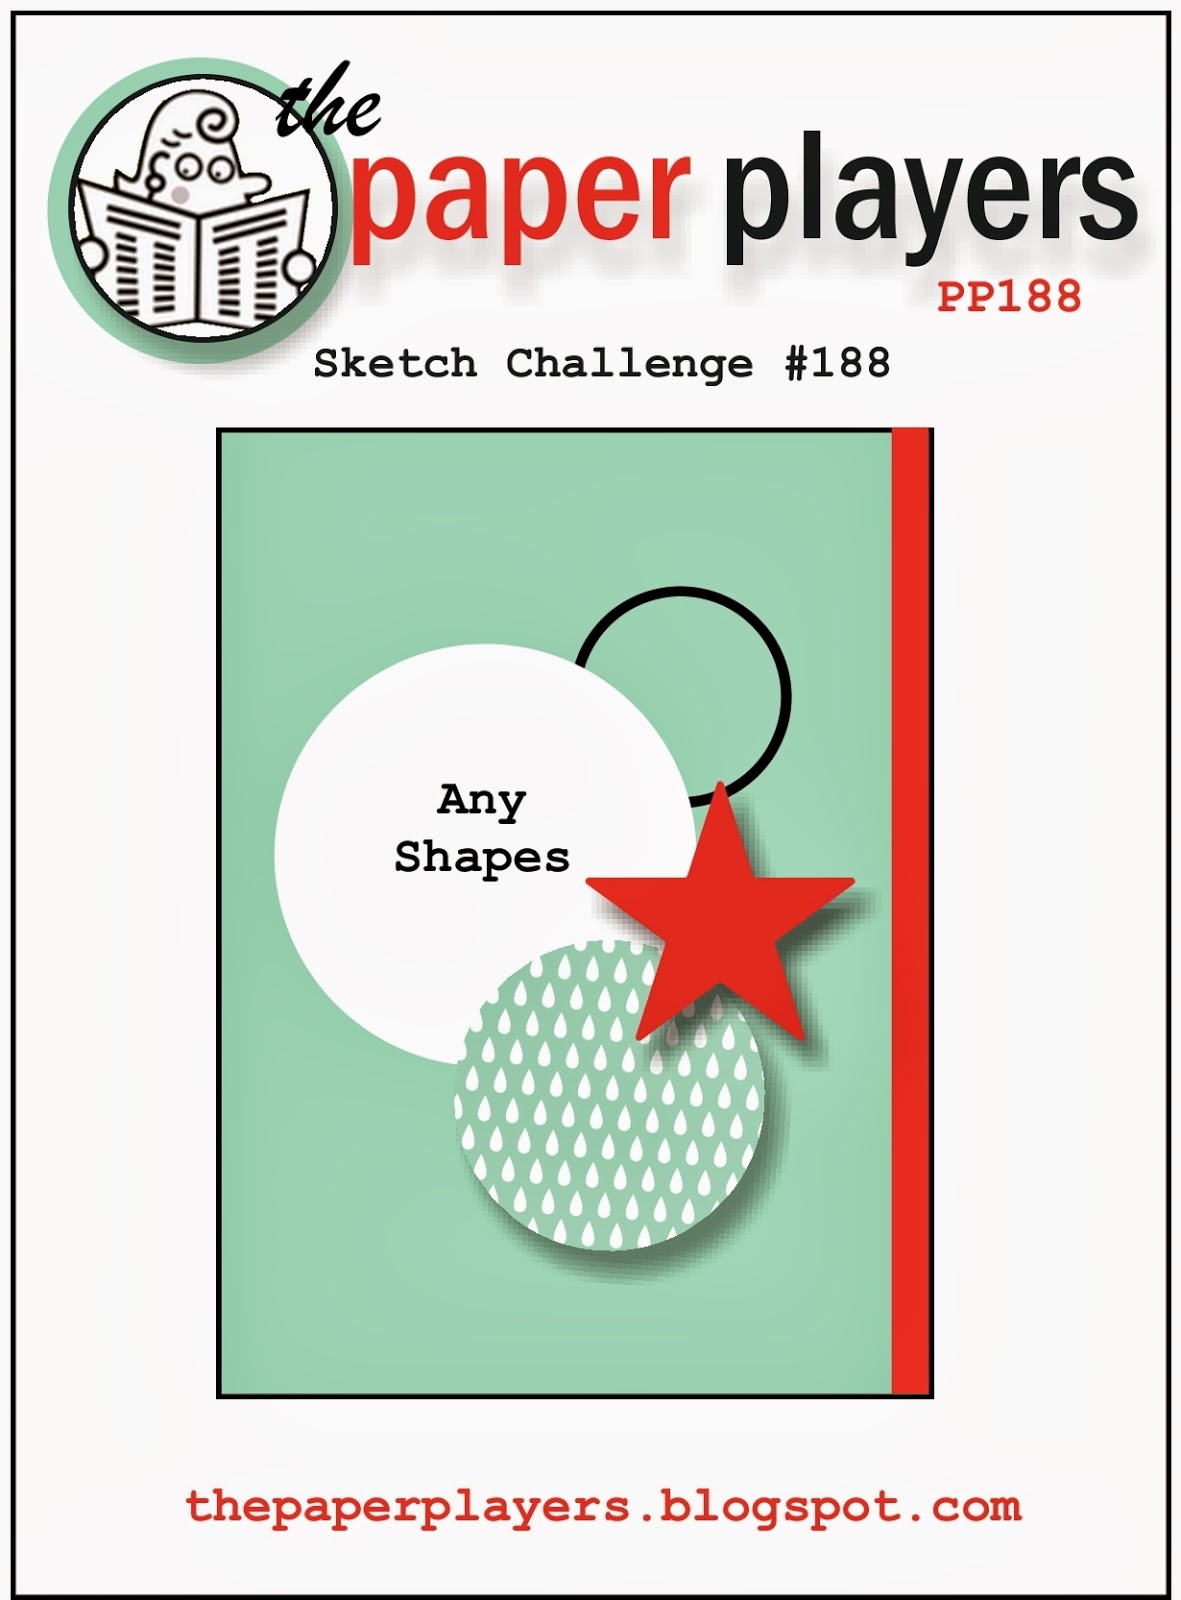
I loved the layered circles on this sketch and it allowed me to get out on paper an idea I've had floating around in my head for a while (love it when that happens!) So here is my card:
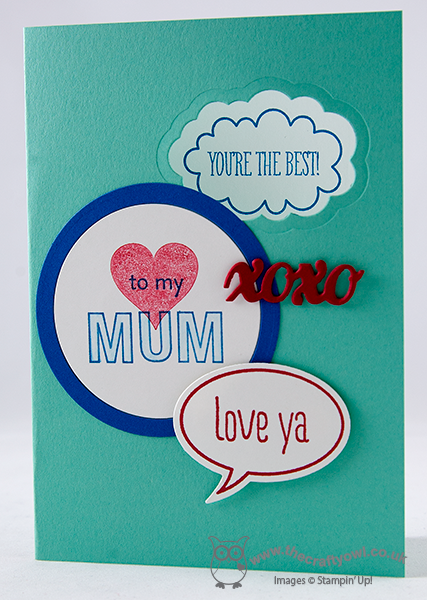
I used Coastal Cabana for my base, then cut out a 'window' using my Word Bubble framelits through to the stamped sentiment "You're the best!" on the inside, used my largest circle for my bespoke 'Mum' sentiment where I used two circles cut with my Circles framelits to create an inset so that I have a border without an extra layer here. I then added an ‘xoxo’ cut out with my Circle Card thinlit set, attached with rolled glue dots, and lastly my final layer with the ‘love ya’ word bubble, stamped, cut and mounted with dimensionals for height. The cut-out on the front gives a glimpse of what’s inside – here’s the close-up:
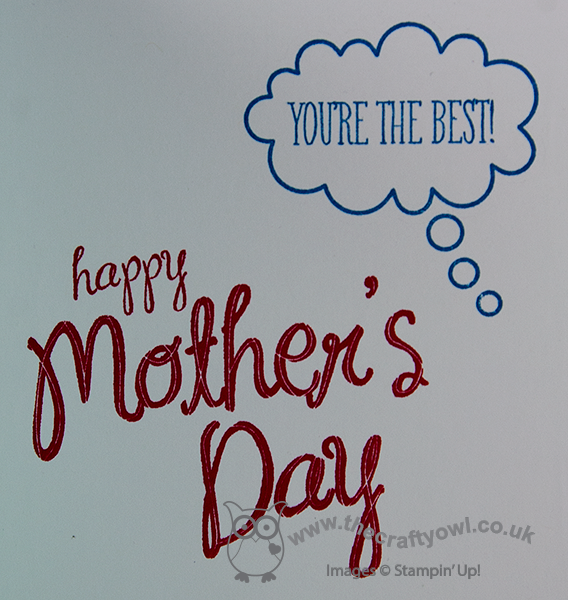
Now I know this is not such a typical Mother's Day card: not traditional colours, no flowers in sight. It's quite clean and graphic in nature, but I really like it! I think it’s a great card for a Mum who likes something a little different; I for one would be thrilled to receive this card (hint, hint James Juniors!)
That’s me for today; come back tomorrow to see my entry for this week’s Less is More challenge. Until then, happy stampin’!
Stampin’ Up! Supplies Used:
b7fea6a2-dd41-4749-bcf6-cf25637c1f2e|0|.0|96d5b379-7e1d-4dac-a6ba-1e50db561b04
Tags: Just Sayin', Magnetic Platform, ABC-123 Sketch Alphabet & Numbers, Big Shot, Perfect Pennants, Circles Framelits, My Mother, Mother's Day, Shop online, Stampin' Up, Stamp-a-ma-jig, Stampin' Up Card, Stampin' Up Card ideas, Stampin' Up Supplies
Cards | Stamping