For The Record Birthday Card FF111

by Joanne James10. June 2022 09:00

Today I have my card for the new challenge over at Festive Friday. 


The challenge that we are celebrating this week is 'World Music Day' which is on June 21st. Remember the fun thing is that at Festive Friday you do not need to actually celebrate the occasion; your goal is to simply use three or more items from the inspiration list on your project. This week I totally got on board with the theme! I live in a household of music-makers and used music notes, black, white, embossing and circles and using the current layout over at Try Stamping on Tuesday this is what I came up with:


Here's the low-down on today's card:

For The Record - 'For The Record' is a great set for music lovers! The vinyl record makes for a great centrepiece for any card and the variety of sentiments mean that it can be used for lots of different occasions too. In addition to the record on the front of my card, I added a trio of brightly coloured records to both the inside and my envelope to decorate - here you can also see one of the sentiments in this set:


An Embossing Double - I have both wet and dry embossing on my card: I heat-embossed my sentiment and vinyl record for added shine to highlight the groove detail and added a dry embossed background layer of notes and sheet music using my Merry Melody Embossing folder:


The challenge over at The Alphabet Challenge Blog is 'E is for Embossing' this week so I'll be joining in with my card there too.

An Unexpected Find - Did you recognise the designer paper I used on my card today? It's actually taken from the new 'Butterfly Kisses' paper pack. The stripes in the design are diagonal, but I cut the sheet at an angle (you can see it in the photo at the bottom of the post) and then cut the lines at different heights - I thought it looked like the outputs on a sound mixing desk and it was a great way to add a pop of bright colour to my music-themed card. What do you think - does it work? I'd love to know your thoughts - please do leave me a comment below!

 I hope you like today's card - if you are considering adding the 'For The Record' stamp set to your collection, you only have until the end of the month to do so before it retires for good. The good news is that it is currently available as part of the Last Chance Promotion at 50% off for just £10.50 - bargain!

Here is the visual summary of the key products used on today's project for you to pin for easy reference:


You can see all of my 'How To' summaries on my 'How To - Tips and Techniques' Pinterest board in case you've missed any. 

How does our board inspire you? I can’t wait to see what YOU create! For more inspiration, be sure to visit the rest of the  Festive Friday Challenge Design team:

Ann Schach
Beth McCullough
Sharon Hashimoto Burkert
Melanie Hungerford
Helen Jennings
Stephanie Lanzalotto
Melva Peters
Jaydee
Diane Evans
Joanne James

Enjoy your day and I'll be back tomorrow with another project. Until then, happy stampin'!


Stampin' Up! Supplies Used:

Table built using Product Table Builder by The Crafty Owl - Independent Stampin' Up! Demonstrator.

Happy Birthday Lemon Shaker Card TTT124

by Joanne James29. July 2021 17:00

It's Thursday and time for a new challenge over at TicTacToe! It's the turn of Team X to host this week and I am the featured designer this week! This is the fun board that I came up with: 


I chose lots of my favourite things for my board this week and I am thrilled that the Design Team truly rose to the challenge - especially with the fabulous shaker cards in the mix this week! I went on the top left-bottom right diagonal with fruit/designer series paper/shaker for my card today and used both the sketch layout and the lemons in those hydrangea vases over at Fusion as the inspiration for my shaker card today - take a look:


Here's the low-down on today's card:

Yellow is one of my favourite colours to create with, especially bright yellow - there is something so cheery about yellow! I used some retired paper covered in lemons for the background to my shaker, and used a combination of sequins, gems and bits and pieces on my shelf for the contents of my shaker. I added a semi-circle with a sentiment from the 'In Symmetry' stamp set to the front of my shaker and modified the happy birthday sentiment from the 'In Bloom' stamp set for the inside of my card: 


I thought this punny sentiment would raise a smile and added a smiley lemon to finish too. I made this card for one of Rebecca's friends - I know it will appeal to her quirky sense of humour!

Here you can see my shaker elements in more detail - so sparkly!


Here is the visual summary of the key products used on today's project for you to pin for easy reference:


You can see all of my Product and 'How To' summaries on my 'How To - Tips and Techniques' Pinterest board in case you've missed any. 

A tictactoe board offers so many creative possibilities - how does this week's board inspire you? Why not have a go? We would love to see you in the gallery and who knows - you might be selected for Designer's Choice and be eligible to be a guest designer on a future challenge. 

Enjoy your evening; I'll be back tomorrow with another project. Until then, happy stampin'!


Stampin' Up! Supplies Used: 

Table built using Product Table Builder by The Crafty Owl - Independent Stampin' Up! Demonstrator.

Friendly Silhouettes Diecut Sunset Celebrate You Card

by Joanne James11. August 2020 20:30

A super late post today as I have been busy celebrating - as of today I am officially the mother of not one, but two, teenagers! Lots of present opening, special meals, ice cream cake and candles and no time for crafting, but I wouldn't have it any other way! Luckily I made a card last week using the inspiration photo and sketch over at Inspired By so thought I'd share that with you today. Here's the inspiration photo and sketch:


It just so happens that I used the same dies, the Friendly Silhouettes Dies, that I used for my last Inspired By entry - here's a different take:


Some simple diecuts ( I used the retired 'Celebrate You' celebrate die for my sentiment) brought my card together in a jiffy, with a little stamping using the 'Friend like You' stamp set on the inside to finish: 


Here is the visual summary of the key products used on today's project for you to pin for easy reference:


You can see all of my 'How To' summaries on my 'How To - Tips and Techniques' Pinterest board in case you've missed any. 

Enjoy your evening and I'll be back tomorrow with another project. Until then, happy stampin'!


Stampin' Up! Supplies Used:

Table built using Product Table Builder by The Crafty Owl - Independent Stampin' Up! Demonstrator.

Layered Gingerbread In A Jar - The Perfect Homemade Christmas Gift PP373

by Joanne James3. December 2017 09:00

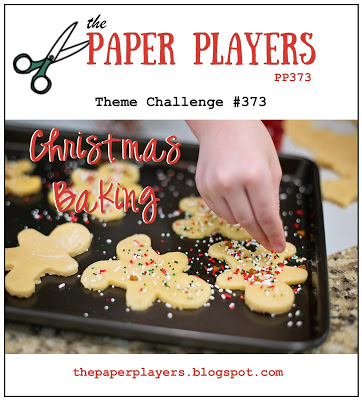
It's Sunday and time for this week's new challenge over at The Paper Players! The lovely Laurie is the hostess this week and she has a rather delicious seasonal theme for us to work with:
    

I'm also linking up with the team over at Stamp Ink Paper this week who are looking at Christmas wrapping and packaging solutions. I love to make gingerbread at this time of year but it's still a little early for me to have baked and wrapped creatively, so instead I decided to share with you a little something that I've been preparing for Ben's school Christmas Fayre the week after next that fits Laurie's theme perfectly. They are having a 'Jam Jar Tombola' stall, so I've been busy making up jars of all kinds for the children to win, including some jars of dry ingredients that they can use for their own festive baking. Here's one of my jars for gingerbread cookies - take a look:
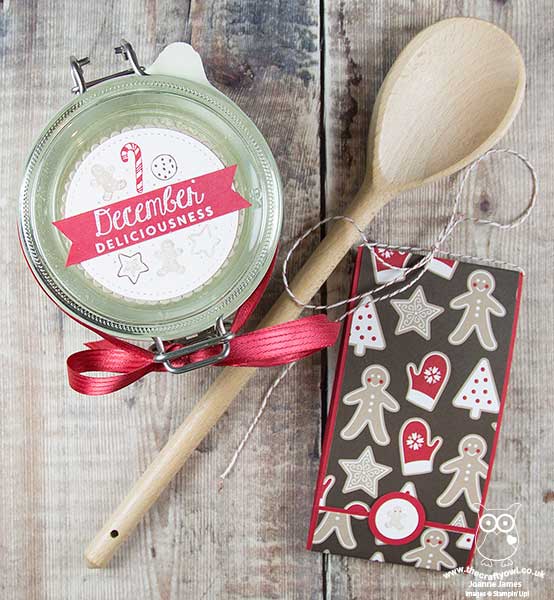
 

These really are so easy to make: you simply layer the dry ingredients into a kilner jar, then decorate and add a tag with the details of any ingredients you need to add and the method. 

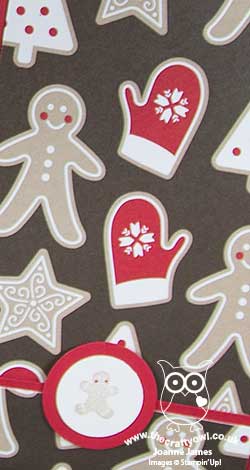
I used the 'December Deliciousness' stamp from the 'My Little Things' stamp set to decorate my jar, using my markers to selectively colour each of the elements in and adding a heat-embossed sentiment banner across the middle to create a decorated top to my jar. I paired it with some retired paper that fits perfectly with my theme for a folded tag that includes the ingredients and recipe, some ribbon and a wooden spoon that I will be tying to the side of the jar too ready for stirring - you could also add a gingerbread cutter if you have one.

I'm a big fan of homemade gifts at Christmas and there is no limit to the things you can put in a jar; with a little decoration this kind of thing can make a thoughtful, presentable gift.

If you would like to make a jar like mine, I've included the details from the inside of my folded tag below:

Easy Gingerbread Biscuits

This jar contains:

  • 100g soft light brown sugar
  • 1 tsp ginger, ¼ tsp allspice
  • ¼ tsp cinnamon, 225g plain flour
  • ½ tsp baking powder
  • ½ tsp bicarbonate of soda


You will need to add:

  • 150g melted butter
  • 1 tbsp golden syrup
  • 1 egg yolk


Method:

  • Mix 150g melted butter with 1 tbsp golden syrup and 1 egg yolk.
  • Add to the dry ingredients, mix well, then knead to a dough.
  • Chill for 15 mins then roll out.
  • Cut into biscuits and bake at 200C/180C fan/gas 6 for 8-10 mins. Cool on a wire rack.


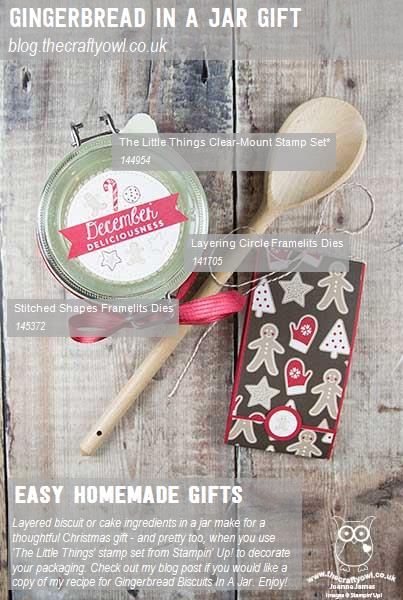
Here is the visual summary of the key products used on today's project for you to pin for easy reference:
 

You can see all of my Product and 'How To' summaries on my 'How To - Tips and Techniques' Pinterest board in case you've missed any. 

Before you reach for your ink and papers, check out what our amazing team has created to inspire you this week:

The Paper Players Design Team
 
 
Here's a quick recap of our challenge rules:
 
1.  Create a new paper project
2.  Upload your creation to your blog with a link back to us and provide a direct link to the post featuring your challenge submission.
3.  Please link your card to no more than four challenges, TOTAL.
4.  Have FUN! 


I look forward to seeing what you create with this week's theme. Enjoy the rest of your weekend as it will be over all too quickly; my Christmas festivities have truly started in earnest this week and I am busier than ever! I am off to run a pre-Christmas Stampin' Up! party for a customer and her friends this afternoon, then will be returning home to put the finishing touches to my class preparations for my Delightful Daises Technique Class tomorrow and complete my 100 card challenge for the Ronald McDonald Christmas Cheer campaign that is happening in the UK this weekend.

I'll be back as soon as time allows with more projects; until then, happy stampin'!


Stampin' Up! Supplies Used: 

Table built using Product Table Builder by The Crafty Owl - Independent Stampin' Up! Demonstrator.

Irresistibly Floral Spring Thank You Card

by Joanne James22. February 2017 07:00

Today I'm sharing a card for this week's challenge over at CAS(E) This Sketch:

I decided to break out one of my new sponge brayers and some Irresistibly Floral embossed paper for my card today - take a look:


Here's the low-down on today's card:

Easy Embossing - I decided to brayer the circle shape onto a piece of Irresistibly Floral Specialty Designer Series Paper using a sponge brayer. This is the first time I've brayered with one of these and I must confess I'm rather impressed - they make it so easy to get a smooth graduated finish and are great for this kind of ink technique, really bringing out the pattern of the paper. I created a simple circle stencil using a spare piece of cardstock and my Circle Framelits and brayered from bottom left to top right of my circle as I wanted to try and emulate the less-than-perfect circle of the sketch. As for the paper - this patterned clear-embossed white paper is great for colouring and sponging - a great embossed finish without any for of Versamark or heat tool required. Cheating? No! Easy? Most definitely!!

Co-ordinating Florals - I stamped a flower from the Falling Flowers stamp set and diecut it and a couple of leaves from the co-ordinating May Flowers Framelits to ground my simple diecut sentiment (cut from the now retired Greetings Thinlits - still one of my go-to sets!) This bundle which you can see on page 127 of the annual catalogue also co-ordinates with the patterns on the Irresistibly Floral embossed paper - and makes designing easy!

Fresh Colour Combination - I chose a fresh, spring colour combination of pink and green to compliment my contrasting black and white background and sentiment today - here it is if you would like to save it for future inspiration too:


Here is the visual summary of the key products used on today's project for you to pin for easy reference:


You can see all of my 'How To' summaries on my 'How To - Tips and Techniques' Pinterest board in case you've missed any. 

Enjoy your day and I'll be back tomorrow with another project. Until then, happy stampin'!


Stampin' Up! Supplies Used:

Table built using Product Table Builder by The Crafty Owl - Independent Stampin' Up! Demonstrator.

Project Life by Stampin' Up! Hello Lovely Card

by Joanne James20. August 2016 22:08

I hope you are enjoying the weekend! I managed to squeeze in a little crafting time this afternoon and made a card for this week's challenge over at Mojo Monday:

I had been sorting through some Project Life and was struck by the lovely natural florals and phrases in my Hello Lovely card box so decided to use one of them as the focal point for my card today. Take a look:


Here's the low-down on today's card:

Hello Lovely Project Life - The Hello Lovely Project Life set has some great sentiments to illustrate your Project Life pages and record those special times with loved ones. They can also work as the focal point for a card too: I've used one of the 3" x 4" cards that I cropped to focus on the sentiment. 

Mix It Up - I am always torn when it comes to using PL cards for something other than memory-keeping; I love to use them in my recording too much! I wanted to use the leaf pattern and black and white watercolour striped cards for the circle and background elements of my card, but they both had designs on the reverse that I wanted to use for memory-keeping. How did I solve my dilemma? I found some very similar patterned papers in the retired English Garden and Go Wild designer series papers that I could use instead - crisis averted!

Pool Party Blue - Black and white are the dominant colours on my card, but the hint of green and the blue Pool Party base picked out from flowers on the PL card, belly band, twine and sequin embellishment play a key role in lightening and brightening this otherwise monochromatic colour scheme. 

Here is the visual summary of the key products used on today's project for you to pin for easy reference:


You can see all of my 'How To' summaries on my 'How To - Tips and Techniques' Pinterest board in case you've missed any. 

Enjoy your day and I'll be back tomorrow with this week's card for our new challenge over at The Paper Players. Until then, happy stampin'!


Stampin' Up! Supplies Used:

Table built using Product Table Builder by The Crafty Owl - Independent Stampin' Up! Demonstrator.

Tags: , , , , , , ,

Cards | Project Life | Shop Online

A Little Foxy Festive Reindeer

by Joanne James3. July 2016 09:00

It's been a busy week with blogging every other day I'm afraid as there is just so much happening in the James household. Rebecca gave a sterling performance as Dorothy in the Wizard of Oz on Thursday and whilst Friday evening was a relatively quiet one, I did not manage a post! Yesterday I did manage to finish my preparations for next week's classes and make a few more cards, so onwards and upwards as the saying goes! 

Today it's Sunday and time for a new challenge over at The Paper Players! It's the turn of the lovely Sandy to host this week and she has a festive themed challenge for us to play along with:


Christmas in July - now that is what I call organised! For my card this week I decided to use my Foxy Friends bundle again - this time to create a cute reindeer for my Christmas card. I also used this week's Mojo Monday sketch and the Color Throwdown colour palette for my creation:


Here's the low-down on today's card:

A Little Foxy Festive Reindeer - As I mentioned last week, the 'Foxy Friends' stamp set makes all kinds of cute baby critters and woodland animals - including a festive reindeer. Aren't those little antlers just adorable?

Lots of Labels - I decided to frame my stamped reindeer with a double mat in Real Red and Chocolate Chip using the Lots of Labels framelits. These framelits are great for layering and create a little more interest than a standard rectangle.

Red-Nosed Rudolf - I have used a number of retired products on my card today: the red button, the circle framelits to cut the background circle and the paper that I used for it (it's so vintage I don't even remember its name!) but since the background paper has a lovely glittery red polka dot pattern, I decided I did need to use one of my new favourite embellishments to finish my card in style: a Real Red Enamel Shape circle - the perfect finishing touch for my reindeer's nose!

I just love the versatility of this stamp set; that coupled with my first Christmas card of the year I think makes this a worthy card! Here is the visual summary of the key products used on today's project for you to pin for easy reference:


You can see all of my 'How To' summaries on my 'How To - Tips and Techniques' Pinterest board in case you've missed any. 

Before you reach for your ink and papers, check out what our amazing team has created to inspire you this week:

The Paper Players Design Team
 
 
Here's a quick recap of our challenge rules:
 
1.  Create a new paper project
2.  Upload your creation to your blog with a link back to us and provide a direct link to the post featuring your challenge submission.
3.  Please link your card to no more than four challenges, TOTAL.
4.  Have FUN! 

I look forward to seeing your Christmas creations in the gallery this week.

It is another big day in the James household today: Ben was selected for the Northamptonshire county allstars under-10s basketball team and he has his first match against Oxfordshire this afternoon. It's a big deal as he is one of only 12 children selected across the whole of the county - and we are all going to cheer him on for his match. Wish him luck!

Back tomorrow with another project; until then, happy stampin'!


Stampin' Up! Supplies Used:

Table built using Product Table Builder by The Crafty Owl - Independent Stampin' Up! Demonstrator.

Father's Day Captain America Hero Card

by Joanne James14. June 2016 14:45

I'm back again! Apologies for yesterday's lack of blog post; at this time of year the last few weeks of the academic year are always busy, so it sometimes means my daily blog schedule is disrupted. Do bear with me - it's often not for want of things to share and more the time to write the posts, in amongst other commitments to my family, customers and team. There will always be posts to coincide with my design team commitments; there just might be the odd day when I don't make it to the laptop! Anyway today I do have a fun share that uses this week's colours over at The Paper Players again and the sketch layout at CAS Colours and Sketches:


My fellow Paper Player LeAnne, who chose this week's colours, also chose to use this sketch for her Sunday card (you can check it out along with the other Paper Player Team cards here) and whilst I was working on my team card, I also came up with this one that would make a fun last-minute Father's Day card:


I am using a few retired products on today's card, but you could quite easily substitute these with other similar products such as the scalloped tag topper punch, layered circle thinlits and an alternative alphabet stamp set such as the new Labeler Alphabet. Here's the low-down on today's card:

My Hero Captain America - The layered circle element on my card is inspired by the shield belonging to that all-American superhero Captain America. I used my circle framelits and the challenge colours, with a circle of silver foil card, to create my shield. I decided to make this card into a Father's Day card, but the sentiment could also be adapted for a younger boy's birthday card, which given the popularity of Marvel comic book heroes with my 8 year old and his friends currently is something I definitely need to look into!

Calling All Heroes - I used the Retired 'Calling All Heroes' stamp set for my custom sentiment on my tag; this comic book script adds just the right feel for my card. For my UK readers who might be thinking 'what set?' this set was available only in the USA. I was sent a set by the lovely LeAnne (thank you again!) and I knew that I would get lots of use from it with its fun comic book and superhero images. I also used other images from the set to decorate the inside of my card. For me it's a keeper!

It's In The Stars - Lastly, I punched a white star for the centre of my shield using the medium star punch and embossed the background panel for my cardfront using the Lucky Stars embossing folder to add texture and interest and tie in with my overall theme. 

Here is the visual summary of the key products used on today's project for you to pin for easy reference:


You can see all of my 'How To' summaries on my 'How To - Tips and Techniques' Pinterest board in case you've missed any. 

Enjoy your evening. I'm off to bake and ice some cupcakes for a very special birthday girl who will be celebrating tomorrow. I'll be back then with another project; until then, happy stampin'!


Stampin' Up! Supplies Used:

Table built using Product Table Builder by The Crafty Owl - Independent Stampin' Up! Demonstrator.

Confetti Celebration Shaker Card

by Joanne James23. May 2016 16:05

Happy Monday everyone! I've spent a busy day doing housework today, with the result that 'Chez James' now looks as neat as a pin and the ironing basket is completely empty, so I am writing my blog post before collecting Rebecca from school. I am collecting her from her rounders practice a little earlier than usual today as her singing lesson this week has been rescheduled; she is off on a school trip to Harry Potter world at Elstree Studios on Wednesday - lucky girl! 

So today's card uses yesterday's Paper Players sketch again, but this time to make a shaker card for this week's challenge over at Pals Paper Arts:

   Pals Paper Arts PPA301

I loved this bright and cheery colour combo and there are some lovely Design Team cards this week. My fellow Paper Players designer Linda Callahan also used them on her Paper Players card yesterday (you can see Linda's card here) with some gorgeous florals. I decided to go with a shaker card for my entry - take a look:

For today's card the colours may well be familiar to you, but there are some fabulous 'sneak peeks' of new catalogue product:

Time to Party With Confetti Celebration - Confetti Celebration is a fun new stamp set with all the making of a good party: decorations (check out the string of lights that I used on the front of my card), stars, balloons and some great sentiments. Both of the sentiments on my card are in this new set and I love that the 'Hooray' is framed perfectly in the shaker window.

Lots of Sprinkles - The sprinkles for today's shaker were created with a new punch of the same name. The Sprinkles Punch will be perfect for creating table confetti or the insides for shakers in a range of colours and glimmer papers. I colour-co-ordinated mine with the challenge colours and added a few gold star sequins too for good measure.

A Hidden Shaker 'Gem' - The best thing about today's shaker card is the one thing you can't see! A strange thing to say I know, but the new catalogue has a new supply item that will revolutionise shaker card construction: foam adhesive strips! Just like the ones in the Christmas shaker card kits in the last Autumn-Winter seasonal catalogue, they are a little deeper than Dimensionals and give just the right height for a good shaker card. I am going to get so much use out of these!

Here is the visual summary of the key products used on today's project for you to pin for easy reference:


You can see all of my 'How To' summaries on my 'How To - Tips and Techniques' Pinterest board in case you've missed any. 

Enjoy your day and I'll be back tomorrow with another project; until then, happy stampin'!


Hot Pink Picture Perfect Hummingbird Card

by Joanne James10. May 2016 22:00

Good evening everyone! I hope your week has started well. I've had my first technique class of the month yesterday along with both a rounders and cricket match (observing not participating, and both wins!), and a second technique class and this month's Project Life Memory Keeping class today so it's been a busy couple of days. Just time to pop in this evening and share the first of the cards from this month's technique class, featuring the Hummingbird in the 'Picture Perfect' stamp set. I used this week's sketch over at As You See It for my layout:

AYSIChallenge134   SIP One Element Wonder 47 800

I'm also linking up with Stamp Ink Paper again this week, as their challenge is to feature one main element on your project and make it really stand out. The hummingbird is the most tricky stamp in the set to align, but when you get it right is so worth it in terms of the result. Here is my finished card:

Here's the low-down on today's card:

Picture Perfect Hummingbird - 'Picture Perfect' is a multi-step image stamp set, with each of the stamps having two, three or four layers. The hummingbird comes in four pieces; for my bird I stamped my first layer in Bermuda Bay, I stamped the second stamp in Melon Mambo, the third layer in Pacific Point and the fourth and final one in Night of Navy. Whilst it sounds complicated, this set is made from photopolymer which makes lining up the images really straightforward. I find it helpful to use the eye to align the images and use a piercing mat or similar foam pad as a base for your stamping for an even image. I do prefer to stamp my bird in the order that the stamps are numbered and if all else fails, a stamp-a-ma-jig will help you to align the images perfectly.  It is definitely a stamp where positioning improves with practice and I must say my ladies today stamped with amazing results, each producing four perfectly stamped hummingbirds on the first attempt!

Partial Die Cutting using Circle Framelits - I stamped my bird onto a piece of Whisper White and having fussy cut his wing tip by hand, I then cut a partial circle up to the diagonal before adhering behind so that it aligned with my cut away circle on my card base. Circle Framelits are invaluable for this kind of partial diecutting, as you simply roll through the Big Shot to the desired point without cutting the whole way through. I've used this technique with this stamp before here; it adds an interesting detail to an otherwise clean and simple card.

Pop of Pink - Melon Mambo is one of my favourite pinks in the Stampin' Up! colour collections and whilst there is only the smallest amount featured on the throat of my bird, I picked up this colour in both my card base and satin knotted ribbon to give a real pop of colour to my otherwise blue card.

Here's today's visual summary of the key things needed to make today's card for easy reference:


You can see all of my 'How To' summaries on my 'How To - Tips and Techniques' Pinterest board in case you've missed any. 

That's all from me today; I have another busy day tomorrow, with my Coffee and Card Drop In Session at Bell of Northampton in Kingsthorpe and I'll also be at the in-store Spring Open Evening at Bells too. you can find full details on the latter here

Hopefully I'll squeeze in time for a quick blog post with another of my Picture Perfect class cards. Until then, happy stampin'!


Stampin' Up! Supplies Used:

Table built using Product Table Builder by The Crafty Owl - Independent Stampin' Up! Demonstrator.

Current Promotions

Stampin Cut and Emboss

Save up to 30% off on all your favourite kits from 1 to 31 October! 

Click here to see the current kits available and order yours online today.

Join My Team

It's always a great time to join Stampin’ Up! During October you can get even more in your starter kit! New team members can get £160 worth of products for only £99 + free business supplies + free shipping + all the fun being a part of Stampin’ Up! Stampin' Up! has something for everyone: join my growing team and benefit from my support to enjoy Stampin' Up! however you choose.

If you're interested, call me for a chat to understand how I can help you realise your goals. Alternatively, if you have already decided to sign up and you just can't wait, please click here for the link to the online form where you can sign up and order your starter kit right away! 

Shop Online

Access my online shop 24 x 7, 365 days of the year:

Current October hostess code:

4XPEYCB9

Shop Online

Scrapbooking

Stampin' Up! has introduced a new range of 12x12" scrapbooking product and kit - the full range is now available to purchase online. To download a copy of the new digital Scrapbooking Catalogue click here.

Mini Catalogue

BROWSE THE CATALOGUE

'Tis The Season - the new Stampin' Up! Mini Catalogue is here! For more details and to download your copy click here

2024-25 Annual Catalogue

BROWSE THE CATALOGUE

Click on the image to download your copy of the 2024-25 annual catalogue. For a full list of current SU! supplies, go to my online store. If you would like any help or advice, please drop me a line at joanne@thecraftyowl.co.uk or give me a call on 07773 421446 - I'd be happy to help.

Latest Kits!

Stampin Cut and Emboss

The Christmas Ornaments Kit and Card Keeper Kit are the latest kits in the online store - get yours here!

New Online Exclusives

There are new products available exclusively in the online store from 5 November - check them out here.

About Me

Hi I'm Joanne and live in Northampton and when I'm not looking after my husband and two beautiful children, am an avid crafter with a passion for all things Stampin' Up!

I must confess that I have never been a big rubber stamper - until I discovered Stampin' Up! that is. I love the fact that I can get such great results with co-ordinating stamps, inks, papers and punches - the possibilities are endless! Join me on my stamping journey as I share the things I love and be inspired to create amazing things yourself!

Follow Me

Monthly Newsletter

Box Builder

Click the button above to use Box Buster to create your custom box design using the Envelope Punch Board!

Kits Collection Now Available!

Stampin Cut and Emboss

The new Kits Collection from Stampin' Up! is now available!

Click here to see the current kits available and order yours online today.

I Design For


Stampin' Up Stuff

This is my personal blog and is not endorsed by Stampin’ Up! I hope you find it a plentiful source of ideas and personal inspiration but please don't copy my designs for contest submission or use for classes, publication or sale without express permission.