by Joanne James29. March 2014 23:07I had a busy day in London yesterday so despite my best efforts to get ahead of myself I still didn't manage to blog yesterday and having had a class and put in my last Sale-A-Bration order I'm almost running out of time today, so before I do here is my intended share for yesterday, one of the Mother's Day cards I made in a couple of different colourways that I couldn't share before the day itself. Here it is in the predominantly pink colourway:
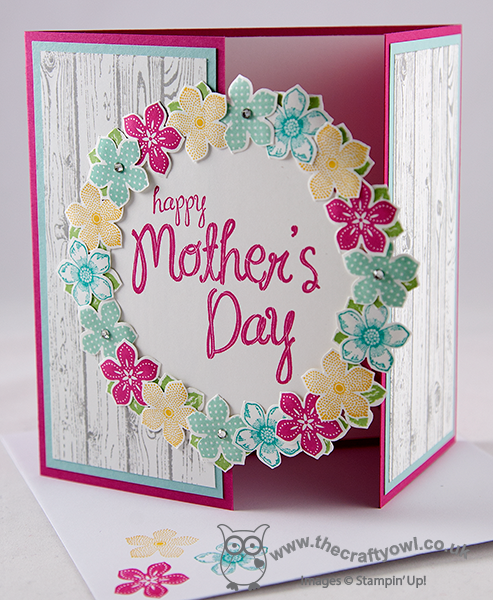
The card is similar to one I saw on Julie Kettlewell's blog here - I made a 5 1/2" x 5 1/2" square gatefold card and created an overlapping framed circle that I cut with my Circles Framelits and created a wreath of tiny stamped and punched flowers around the central bold 'Happy Mother's Day sentiment. I also made this card is an aqua colourway here using Coastal Cabana for the base:
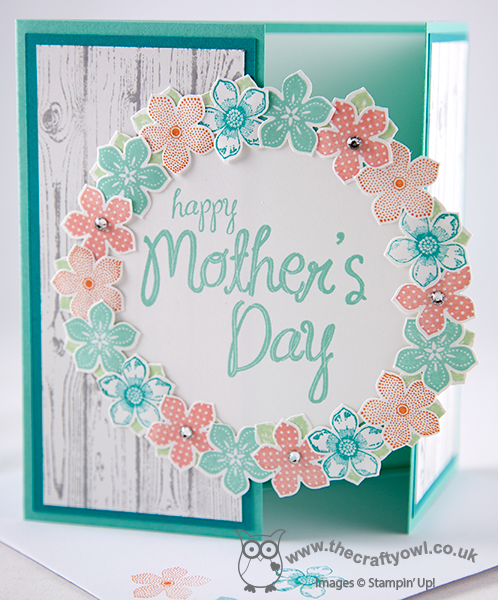
The hardwood background stamp makes such a great background for the focal point and some flower stamping inside and on the envelopes along with a few rhinestones just finishes off the card perfectly.
My Mother's Day was rather unconventional and was only spent with one of my offspring, which felt slightly strange, but Rebecca and I had a great day in London (she was so excited that she got to have her picture taken in front of Big Ben!) and the bonus is we get to have another Mother's Day next Sunday altogether to make up for it!
Back tomorrow with another project; until then, happy stampin'!
Stampin' Up! Supplies Used:
04fe73a3-d987-4b8e-ae26-b06fdce10abe|1|5.0|96d5b379-7e1d-4dac-a6ba-1e50db561b04
Tags: Hardwood, My Mother, Mother's Day, Petite Petals, Petite Petals Punch, Circles Framelits, Big Shot, Shop online, Stampin' Up, Stampin' Up Card, Stampin' Up Card ideas, Stampin' Up Supplies
Cards | Stamping
by Joanne James27. March 2014 22:12It's all go in the office of The Crafty Owl - I've been busy finishing my last Mother's Day cards today and I've recorded two video tutorials, along with all of the other things mothers do in a day. I won't bore you with that list, but I'm sure lots of you are reading this thinking "I know what you mean!" :-) Anyway, today I have a Mother's Day card to share with you, which I made using this week's sketch over at The Paper Players. This is Sandy's sketch:
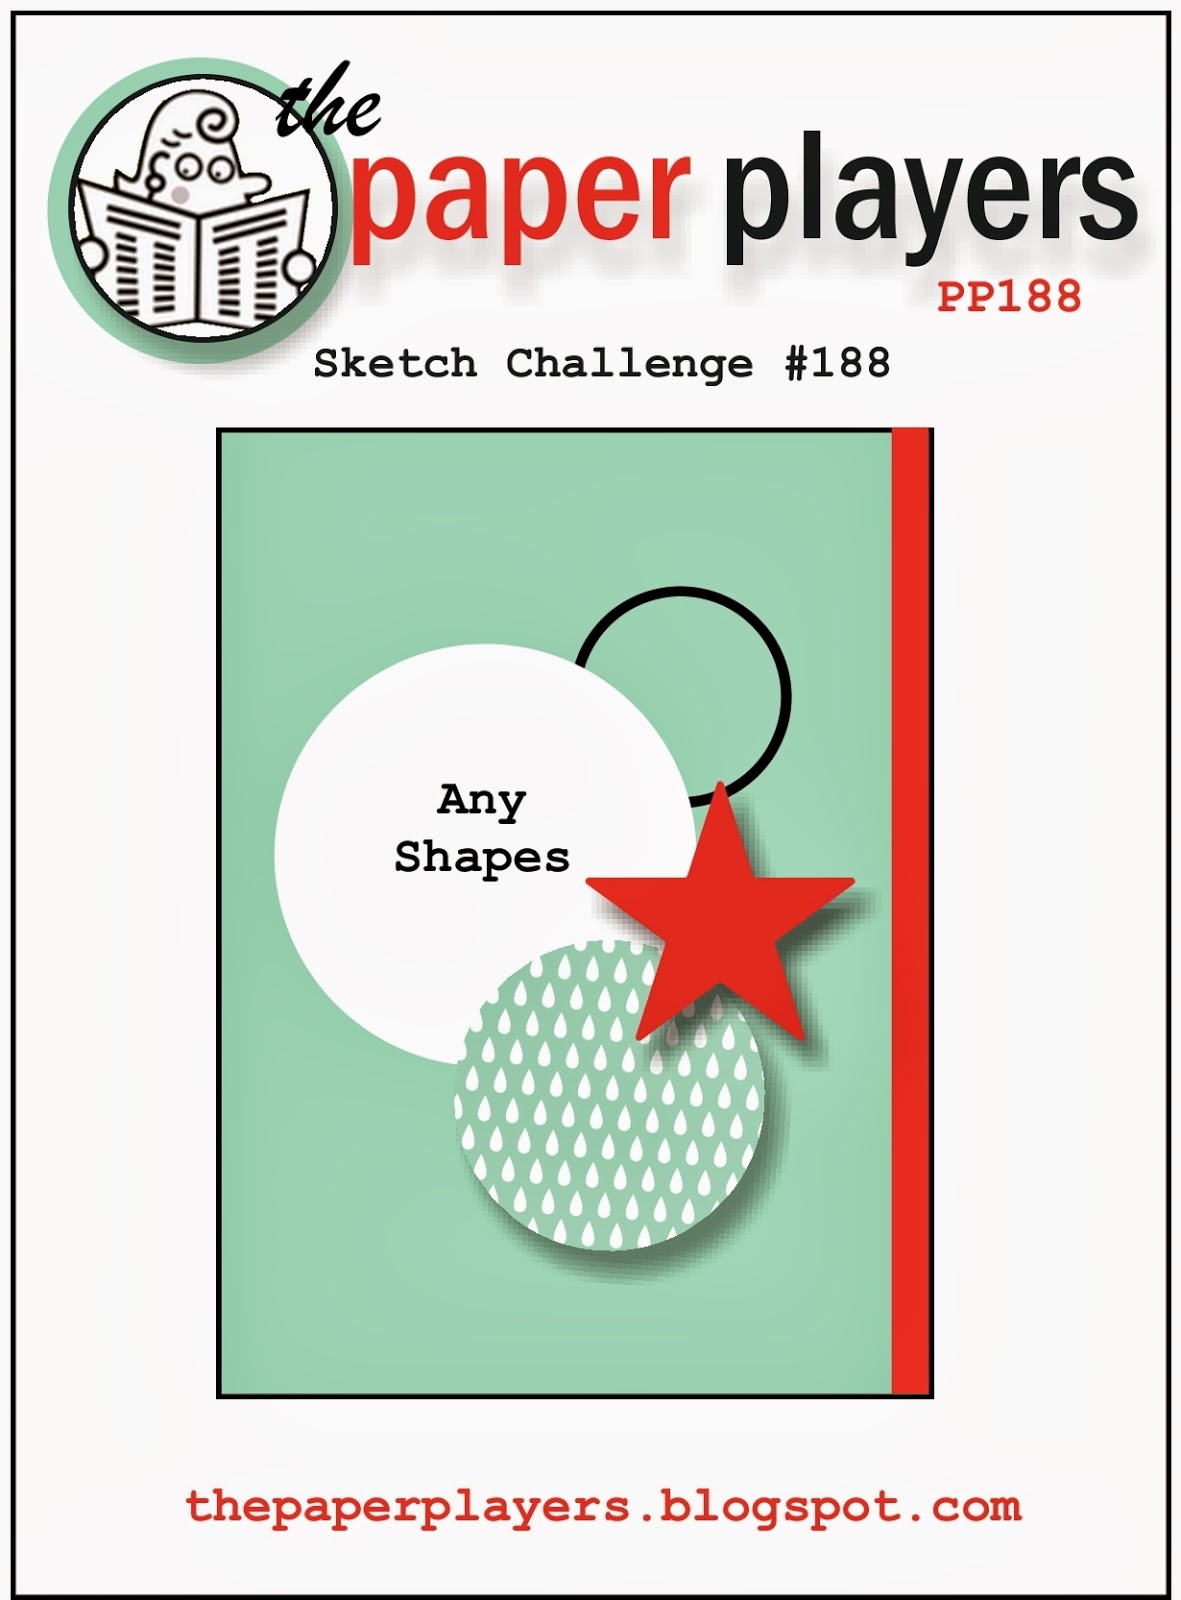
I loved the layered circles on this sketch and it allowed me to get out on paper an idea I've had floating around in my head for a while (love it when that happens!) So here is my card:
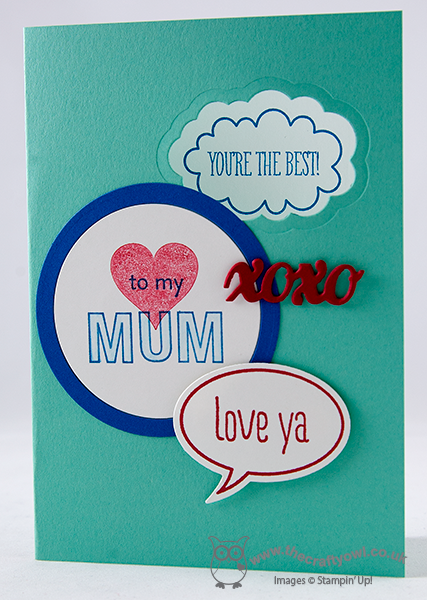
I used Coastal Cabana for my base, then cut out a 'window' using my Word Bubble framelits through to the stamped sentiment "You're the best!" on the inside, used my largest circle for my bespoke 'Mum' sentiment where I used two circles cut with my Circles framelits to create an inset so that I have a border without an extra layer here. I then added an ‘xoxo’ cut out with my Circle Card thinlit set, attached with rolled glue dots, and lastly my final layer with the ‘love ya’ word bubble, stamped, cut and mounted with dimensionals for height. The cut-out on the front gives a glimpse of what’s inside – here’s the close-up:
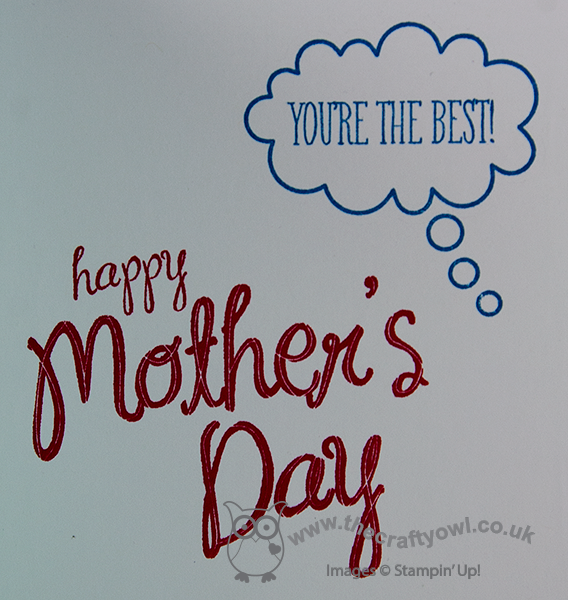
Now I know this is not such a typical Mother's Day card: not traditional colours, no flowers in sight. It's quite clean and graphic in nature, but I really like it! I think it’s a great card for a Mum who likes something a little different; I for one would be thrilled to receive this card (hint, hint James Juniors!)
That’s me for today; come back tomorrow to see my entry for this week’s Less is More challenge. Until then, happy stampin’!
Stampin’ Up! Supplies Used:
b7fea6a2-dd41-4749-bcf6-cf25637c1f2e|0|.0|96d5b379-7e1d-4dac-a6ba-1e50db561b04
Tags: Just Sayin', Magnetic Platform, ABC-123 Sketch Alphabet & Numbers, Big Shot, Perfect Pennants, Circles Framelits, My Mother, Mother's Day, Shop online, Stampin' Up, Stamp-a-ma-jig, Stampin' Up Card, Stampin' Up Card ideas, Stampin' Up Supplies
Cards | Stamping
by Joanne James19. March 2014 20:33Today I want to share with you another use for one of my new favourite punches - the scalloped tag top punch. This really is such a versatile punch that can be used in so many ways. There are lots of variations on how it can be used to make an unusual card closure - today's card is a fun, concertina style Mother's Day card, where the scalloped tag top punch is used to add detail to the closure. I saw a similar card to this on Julie Kettlewell's blog here and liked it so much I decided to create one. This is what the card looks like 'closed':
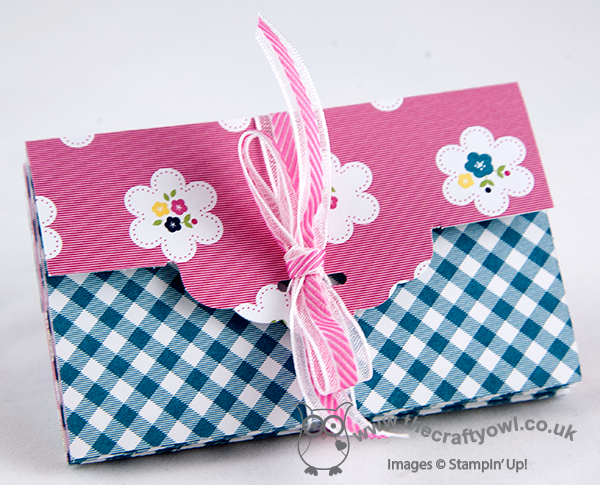
Ribbon is threaded through the punch out hole and around the card and tied in a bow to keep it shut, then when you undo the ribbon and open the card out, you see the message inside:
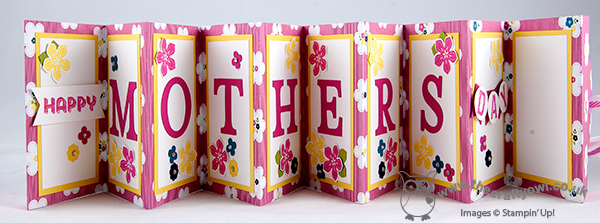
These cards are such fun to make and so easy. All you need is one sheet of 12" x 12" for the basic card. I used a sheet of the Gingham Garden DSP for my card, and layered the inside panels with Whisper White matted on Daffodil Delight. I cut the letters for 'Mothers' with my Typeset Alphabet die, but you could easily use an alphabet stamp set such as Morning Post or Notable Alphabet if you have one instead. I took the word 'Happy' from one of the 'See Ya Later' Sale-A-Bration stamp sets and the letters for 'Day' from my Sketched Alphabet individual stamps before punching out and layering on a mini banner. I then decorated with flowers stamped and punched from the Petite Petals bundle and the Itty Bitty Punches set in colours that co-ordinated with my chosen DSP. The last panel is left blank for you to write your personalised Mother's Day message.
I had intended to shoot a video tutorial on how to make one of these cards to accompany my series of Scalloped Tag Top Punch video tutorials, but time has not been on my side so I haven't managed it yet; I will look to complete one in the next week or so and when I do will update my blog with the link. Updated 8/5/14 - here is my video tutorial on how to make this card:
The best bits about this card: it's one of those projects where you don't have to deliberate over which side of your DSP to use, as you see both sides (dilemma avoided, for once) and also because of the closure, you don't need an envelope - this is a card and envelope in one! This style of card would work for lots of other occasions too - why not have a go and see what you come up with.
Back tomorrow with another project; until then, happy stampin'!
Stampin' Up! Supplies Used:
ea819749-b0b7-4e51-82ac-2f6a767b1ba6|0|.0|96d5b379-7e1d-4dac-a6ba-1e50db561b04
Tags: ABC-123 Sketch Alphabet & Numbers, Banner Punch, circle punch, See Ya Later, Shop online, Stampin' Up, Stampin' Up Card, Stampin' Up Card ideas, Stampin' Up Supplies, Typeset Alphabet, Scalloped Tag Topper Punch, Big Shot, Mother's Day, Gingham Garden
Cards | Stamping | Video Tutorials
by Joanne James19. March 2014 20:33Today I want to share with you another use for one of my new favourite punches - the scalloped tag top punch. This really is such a versatile punch that can be used in so many ways. There are lots of variations on how it can be used to make an unusual card closure - today's card is a fun, concertina style Mother's Day card, where the scalloped tag top punch is used to add detail to the closure. This is what the card looks like 'closed':
Ribbon is threaded through the punch out hole and around the card and tied in a bow to keep it shut, then when you undo the ribbon and open the card out, you see the message inside:
These cards are such fun to make and so easy. All you need is one sheet of 12" x 12" for the basic card. I used a sheet of the Gingham Garden DSP for my card, and layered the inside panels with Whisper White matted on Daffodil Delight. I cut the letters for 'Mothers' with my Typeset Alphabet die, but you could easily use an alphabet stamp set such as Morning Post or Notable Alphabet if you have one instead. I took the word 'Happy' from one of the 'See Ya Later' Sale-A-Bration stamp sets and the letters for 'Day' from my Sketched Alphabet individual stamps before punching out and layering on a mini banner. I then decorated with flowers stamped and punched from the Petite Petals bundle and the Itty Bitty Punches set in colours that co-ordinated with my chosen DSP. The last panel is left blank for you to write your personalised Mother's Day message.
I had intended to shoot a video tutorial on how to make one of these cards to accompany my series of Scalloped Tag Top Punch video tutorials, but time has not been on my side so I haven't managed it yet; I will look to complete one in the next week or so and when I do will update my blog with the link.
The best bits about this card: it's one of those projects where you don't have to deliberate over which side of your DSP to use, as you see both sides (dilemma avoided, for once) and also because of the closure, you don't need an envelope - this is a card and envelope in one! This style of card would work for lots of other occasions too - why not have a go and see what you come up with.
Back tomorrow with another project; until then, happy stampin'!
Stampin' Up! Supplies Used:
496e722e-02bc-47d9-8908-08b02d818f3c|0|.0|96d5b379-7e1d-4dac-a6ba-1e50db561b04
Tags: ABC-123 Sketch Alphabet & Numbers, Banner Punch, circle punch, See Ya Later, Shop online, Stampin' Up, Stampin' Up Card, Stampin' Up Card ideas, Stampin' Up Supplies, Typeset Alphabet, Scalloped Tag Topper Punch, Big Shot, Mother's Day, Gingham Garden
Cards | Stamping
by Joanne James17. March 2014 21:45I've had a great start to my week today with a pleasant morning smelling fragrances and catching up with some good friends. Today I'm sharing my entry for this week's Paper Pal Arts Colour Challenge:
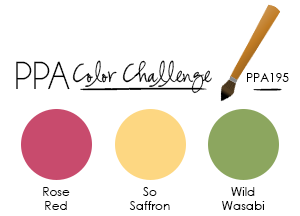
When I saw these colours, I immediately thought how lovely they would be for a spring flower bouquet. I decided to get out my Secret Garden stamp set and framelits and start creating - here's my card:
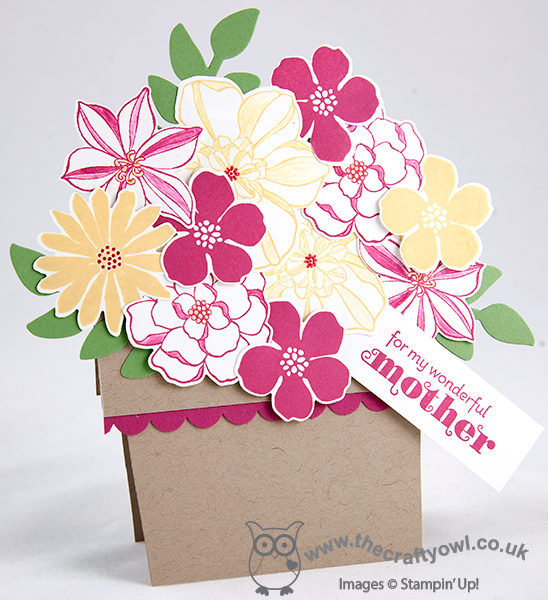
Not quite a bouquet, granted - I went for a Crumb Cake flowerpot instead! I then stamped a variety of flowers, colouring some of them with ink and a blender pen and layered them, raising some of them on dimensionals, to fill my flowerpot. A few Wild Wasabi leaves to add some green and a 'For my mother' gift tag complete my card. I think this would make a lovely Mother's Day card and the flowers would certainly last longer than the real thing.
Only two more weeks until Mothering Sunday here in the UK, so if you haven't thought about your cards yet, you'd better get started! I hope you liked today's card - back tomorrow with another project; until then happy stampin'!
Stampin' Up! Supplies Used:
dd8fc08e-b87f-4885-8be2-d2f86dcab76d|0|.0|96d5b379-7e1d-4dac-a6ba-1e50db561b04
Tags: Delightful Dozen, Mother's Day, Stampin' Up Supplies, Stampin' Up Card ideas, Stampin' Up Card, Stampin' Up, Shop online, Secret Garden Framelits, Secret Garden, Blender Pen, Big Shot
Cards | Stamping
by Joanne James2. March 2014 23:23Today it's the first Monday of the month, which means one thing - card class! I'm looking forward to a fun afternoon with the ladies in the first of my classes this week, but before I go I have the first of today's blog posts for you - my card for this week's challenge over at Freshly Made Sketches. This week Narelle has designed the following sketch layout:
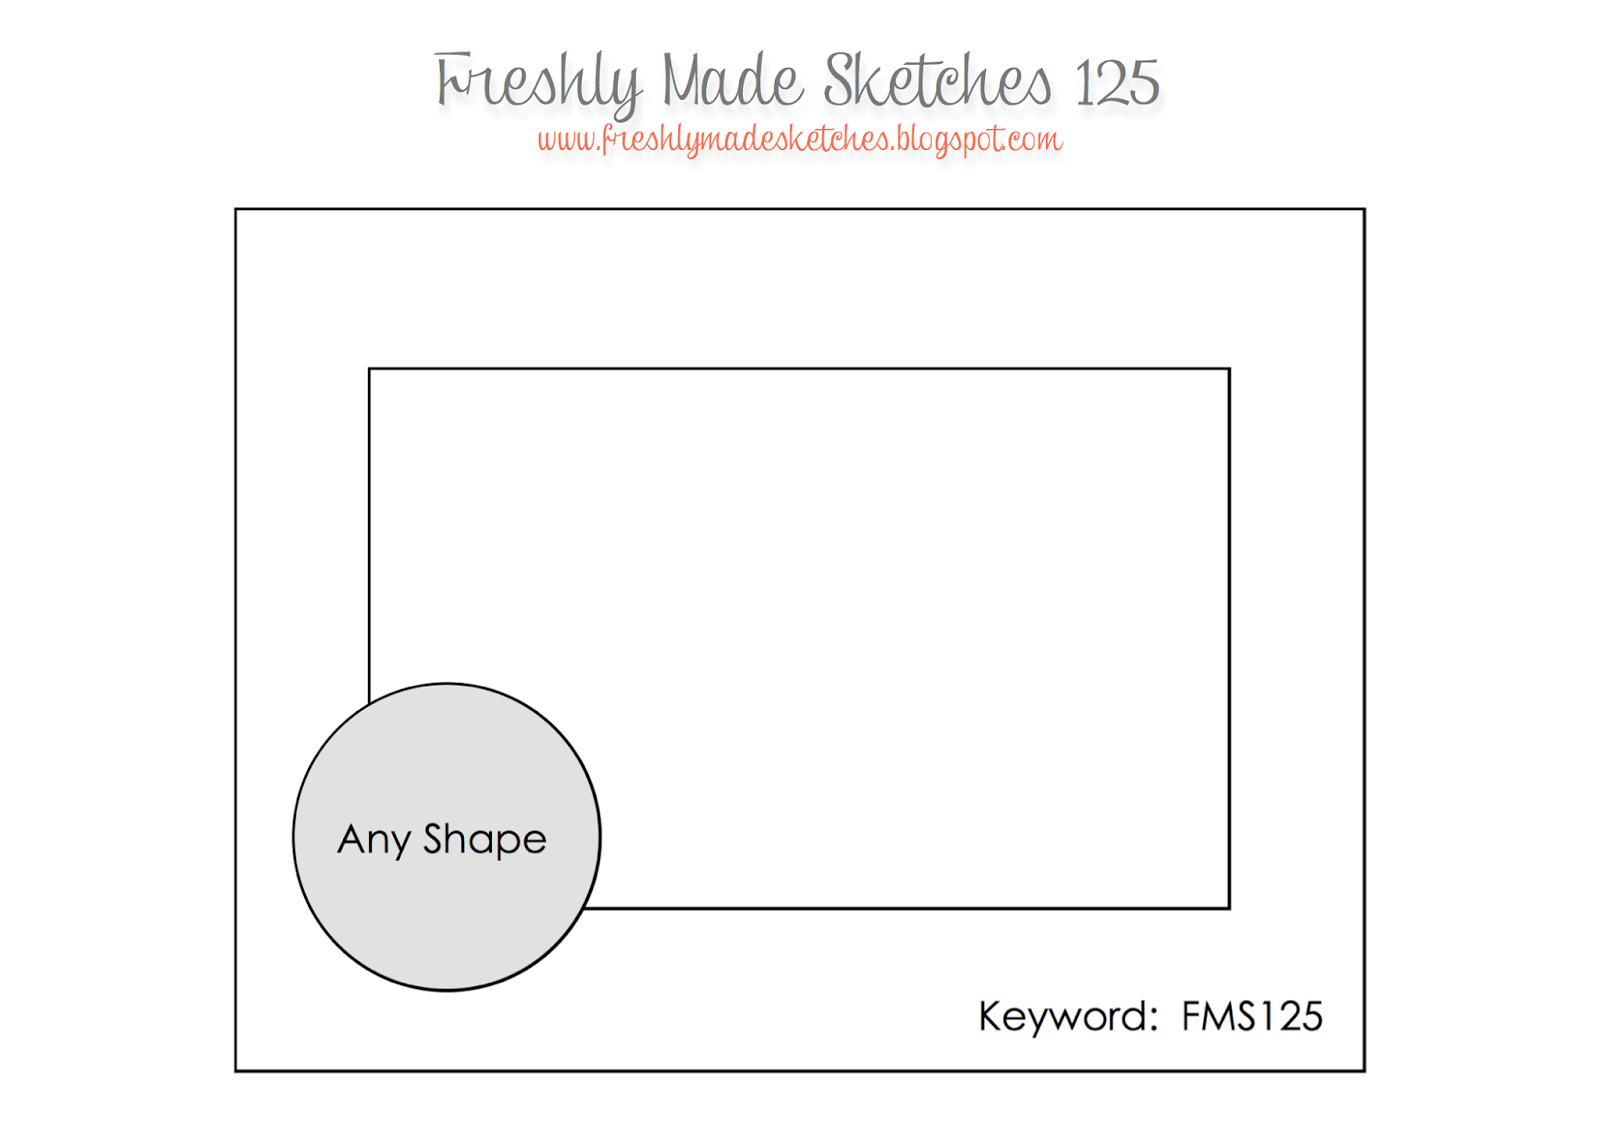
Since Mothering Sunday falls at the end of March here in the UK (earlier than my readers from across the pond) I decided it's time to start card making with Mothers in mind, so here's what I did with today's sketch:
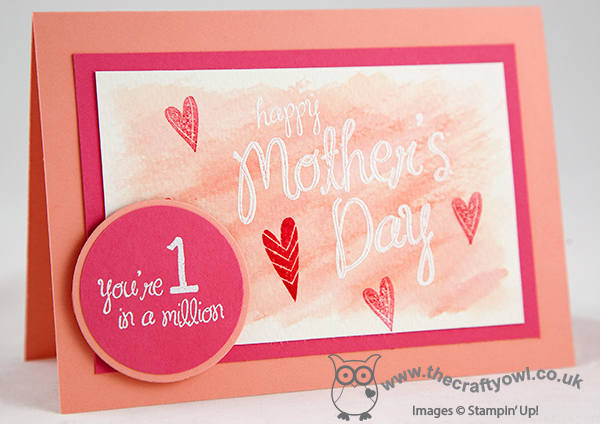
Using watercolour paper, I heat embossed my Happy Mother's Day sentiment in white and then using my Aquapainter and some Crisp Cantaloupe ink, I created a watercolour background. When the paper was dry, I stamped the hearts from the same set in Strawberry Slush ink over the top, stamping off some of them to create a variation in colour intensity. I stuck with the circle shape to highlight 'You're 1 in a Million' and also heat embossed this in white directly onto Strawberry Slush cardstock matted onto Crisp Cantaloupe, to echo the matting on the main section of my card. It almost looks like a badge doesn't it?
Back later with a very exciting video tutorial for you - how to make a box of any size using your envelope punch board - you're not going to want to miss it!
Until then, happy stampin'!
Stampin' Up! Supplies Used: