Bubble Over - Clean and Simple Birthday Card

by Joanne James16. February 2018 20:00

Today I'm sharing one of my Onstage stamper projects from last November when I had the pleasure of presenting the Bubble Over Bundle to the demonstrators that attended the UK event in Solihull. Onstage events are such fun and I love having the opportunity to create with new sets and share the possibilities with other like-minded demonstrators. Here are a couple of photos of me in action, courtesy of my lovely downline Helen - this is me as I took the stage (as you can see we are sat a long way back!): 


Then a slightly better shot of me in action, talking through the features of this suite:


Lastly, one more of me sharing the first of my projects - the one I'm going to share with you today:


The Bubble Over Bundle is great fun, with lots of bits and pieces and is also a set with universal appeal - a great set for teens and adults alike with a mix of sentiments for lots of different occasions. 

Here's the first of my cards, a clean and simple card that requires minimal stamping and no diecutting - take a look:


I simply stamped the bottles in a variety of bold, bright colours across the bottom of my card front - the stamps are photopolymer, so super easy to align (I used the edges of the labels as a guide) then filled the upper portion of my card with bubbles stamped in co-ordinating colours. I added a simple sentiment banner which I cut by hand and stepped up the decoration slightly by adding a sprinkling of the Glitter & Clear Epoxy Shapes to the bubbles on my card - they are quite difficult to see on my card as they fit the stamped bubbles exactly, but add a lovely hint of sparkle to the bubbles - if you look really closely you can see them more easily in this close-up shot:


Here is the visual summary of the key products used on today's project for you to pin for easy reference:


You can see all of my 'How To' summaries on my 'How To - Tips and Techniques' Pinterest board in case you've missed any. 

A super simple card to start off my Bubble Over suite of projects. So one last photo to share with you - this one is of me and just some of my lovely team who attended Onstage with me:

Image may contain: 5 people, people smiling, people sitting, table and indoor

Love these girls! Onstage events are just one of the ways that we spend time together enjoying everything that we love about Stampin' Up!. If you love to craft or are looking for a business opportunity that offers fun, friendship and the ability to earn an income doing something you love, then I would love to chat to you about joining my team and sharing these experiences with you too. If you would like to understand more, there's no better time than during Sale-A-Bration to consider joining. You can read more about the current offer here, call me for a chat or if you are reading this and know it's for you, then simply click here to complete the paperwork.

Enjoy your day and I'll be back tomorrow with another project. Until then, happy stampin'!


Stampin' Up! Supplies Used:

Table built using Product Table Builder by The Crafty Owl - Independent Stampin' Up! Demonstrator.

Mediterranean Moments Cafe Card

by Joanne James29. January 2018 21:00

Today I'm back with an annual catalogue faithful and sharing a card I made using a set that has been sitting on my shelf rather neglected for a little while, so I thought I would remedy that and enter a couple of online challenges at the same time:


I love the CAS Colours and Sketches sketch this week and then surprised myself by choosing the colours over at Just Add Ink to go with it - take a look:


Here's the low-down on today's card:

Mediterranean Moments - Mediterranean Moments first appeared in last year's Spring-Summer seasonal catalogue and fortunately carried over into the annual catalogue. I love these sketched images, inspired by Million Sales Achiever Susan Nygaard - the one I've used today though is the only one in my set that I've never used before. When I saw this colour combination I wasn't sure what to make of it, despite the lovely design team cards, and then I was flicking through my catalogue looking for something else and suddenly there it was - I could see the green metal cafe chairs and I knew this stamp would be perfect! 

A Little Watercolouring - I decided to stamp my image in Versamark and heat emboss it in white, and ring the changes with a Crumb Cake card base, then give the whole thing a wash of white craft ink before watercolouring with my greens and a little more Crumb Cake ink. This was a good way to incorporate my neutral and allow my greens to blend with each other. I hand-doodled my border using my white gel pen.

A Sentiment Combination - My sentiment combination is a trimmed stamped 'hello' from the 'oh hello' stamp in the Colour Me Happy set, along with the word 'friend' snipped from the Lovely Word Thinlits. A fun pairing that is just right for the intended recipient of my card. 

Here is the visual summary of the key products used on today's project for you to pin for easy reference:


You can see all of my 'How To' summaries on my 'How To - Tips and Techniques' Pinterest board in case you've missed any. 

This post was really meant for tomorrow but I'm putting it live early as I want to catch the CAS Colours and Sketches link up. So for Tuesday - enjoy your day and I'll be back tomorrow with another project. Until then, happy stampin'!


Stampin' Up! Supplies Used:

Table built using Product Table Builder by The Crafty Owl - Independent Stampin' Up! Demonstrator.

Clean And Simple Panda Love Notes For The Paper Players PP377

by Joanne James21. January 2018 09:00

It's Sunday and time for this week's new challenge over at The Paper Players! It's my turn to host this week and I have a topical clean and simple challenge for you to work with:
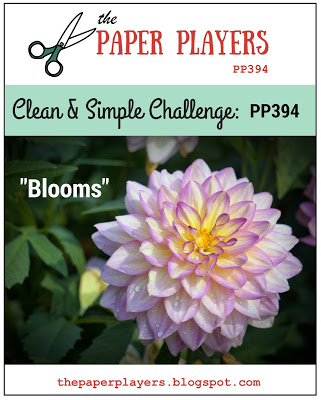
     

It's almost February and with Valentine's Day around the corner love is definitely in the air, so what better time to send a little love note or two to the one you love? I have a super clean-and-simple card to share with you this week that is also perfect for this week's challenge over at Less Is More - take a look:


Here's the low-down on today's card:

Love You Panda - I couldn't resist using another of these cute little pandas on my card today - this time it had to be the one proudly holding his own little love note, perfect for my theme! I simply stamped him in black, coloured in the heart on his envelope and surrounded him with bright pink love hearts, from the Heart Happiness set. Inside I stamped my sentiment, also from the 'Party Pandas' stamp set, along with another spray of hearts:

And that's it - super simple, super cute!

The Perfect Note - I used one of the new Whisper White Narrow Note Cards for my one-layer love note today - they measure 6.4cm x 11.4cm, small and narrow and the perfect size for a note to tuck into a pocket, lunch box or gift package. 

Painted With Love Envelope Liners - My little note card was so quick and easy to put together, I decided to add another surprise pop of colour with an envelope liner on the flap of my envelopes. I simply punched a whole bunch of circles out of the Painted With Love Specialty Designer Series Paper using my 2" circle punch and adhered them to the inner flap of my envelope. 

I love my little note card so much, I made a whole bunch of them - I used a selection of papers and stamped my pandas both horizontally and vertically, with hearts in each of the colours that feature in the Painted With Love paper - here's a shot of a bunch of them together:


These are perfect for me to slip into the James Juniors' blazer pockets for a surprise note at school; we are also going to make a whole bunch more for the children to share with their friends too - it's nice to let your besties know they are loved too! They really are so simple to make - it's taken me longer to write this blog post that to actually make all of these cards!

Here is the visual summary of the key products used on today's project for you to pin for easy reference:
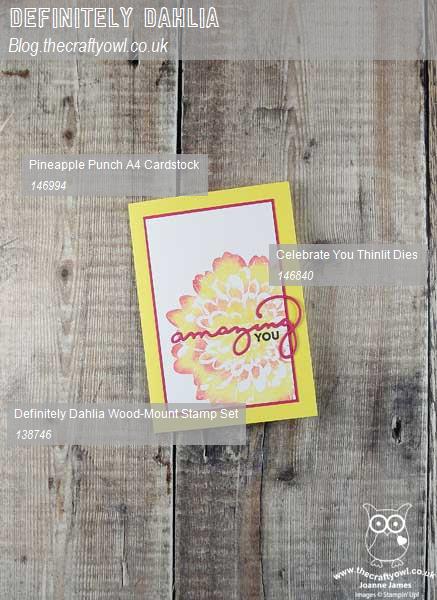
 

You can see all of my Product and 'How To' summaries on my 'How To - Tips and Techniques' Pinterest board in case you've missed any. 

Before you reach for your ink and papers, check out what our amazing team has created to inspire you this week:

Here's a quick recap of our challenge rules:
 
1.  Create a new paper project
2.  Upload your creation to your blog with a link back to us and provide a direct link to the post featuring your challenge submission.
3.  Please link your card to no more than four challenges, TOTAL.
4.  Have FUN!

Don't forget the theme is clean and simple this week - so minimal layers and embellishments and lots of white space. I can't wait to see what you create and look forward to visiting your blogs this week! Enjoy the rest of your weekend as it will be over all too quickly. I'll be back tomorrow with another project; until then, happy stampin'!


Stampin' Up! Supplies Used: 

Table built using Product Table Builder by The Crafty Owl - Independent Stampin' Up! Demonstrator.

Warm and Cozy Clean And Simple Christmas Sweater PP371 GDP113

by Joanne James19. November 2017 09:00

It's Sunday and time for this week's new challenge over at The Paper Players! It's the turn of the super-talented Sandy, to host this week and she has a fun clean and simple challenge for us to work with:


I'm a little late with my post today - I am still struggling to keep up with everything as I am so very busy at the moment - but I couldn't miss the opportunity to join in with Sandy's clean and simple 'warm and cozy' challenge in this week's Global Design Project challenge colours - take a look:


Here's the low-down on today's card:

Warm and Cozy - When I think of cold winter days, I think of mittens, gingerbread latte and woolly jumpers; so what better than a Christmas jumper to fit with the 'warm and cozy' theme? There are some fun sweaters in the 'Christmas Sweaters' stamp set; I decided to go with the simple striped one with a snowflake centrepiece for my clean and simple card. With a nod to the lovely Sandy who is such an expert colourer, I decided to get out my new Stampin' Blends to colour my sweater. I'm not sure I'm as good as Sandy when it comes to colouring, but it sure is fun and allowed me a peaceful 10 minutes in my otherwise hectic day!

Deck The Halls - I knew I wanted to use a few simple embellishments and I didn't want to add too many layers to my clean and simple card, so I decided to create a little patterned background with my sentiment to sit behind my sweater. I used my stamp-a-ma-jig to line up my sentiment and just stamped it repeatedly in Cherry Cobbler ink. Keeping this detail to one area of the card allows me to preserve the 'white space' that is a key feature of a clean and simple card.

All Good Things Come In Threes - Along with the trio of festive colours that feature on my sweater, I have also used a trio of embellishments: a (retired) wooden snowflake, a Pool party twine bow and some Pool Party enamel shapes for some added fun detail. I tried to keep my embellishments to a minimum given this week's theme but couldn't resist these additional touches to complete my warm and cozy card.

Here is the visual summary of the key products used on today's project for you to pin for easy reference:
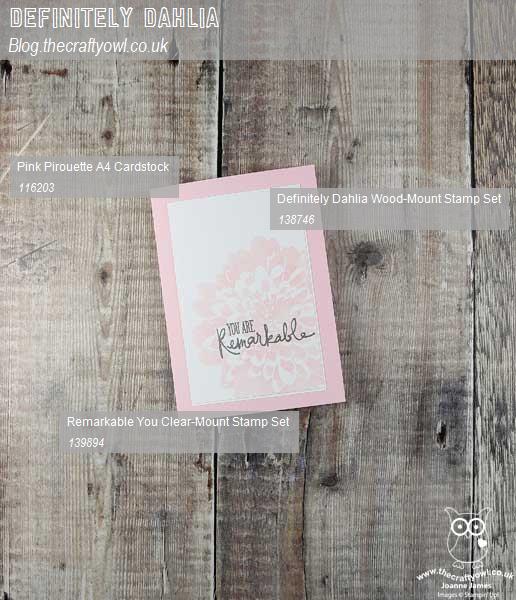
 

You can see all of my Product and 'How To' summaries on my 'How To - Tips and Techniques' Pinterest board in case you've missed any. 

Before you reach for your ink and papers, check out what our amazing team has created to inspire you this week:

The Paper Players Design Team
 
 
Here's a quick recap of our challenge rules:
 
1.  Create a new paper project
2.  Upload your creation to your blog with a link back to us and provide a direct link to the post featuring your challenge submission.
3.  Please link your card to no more than four challenges, TOTAL.
4.  Have FUN!

Don't forget the theme is clean and simple this week - so minimal layers and embellishments and lots of white space. I can't wait to see what you create and look forward to visiting your blogs this week! Enjoy the rest of your weekend as it will be over all too quickly; I'll be back later with news of a fantastic week of promotions that will be starting tomorrow and hope to resume something like normal blogging service this week. Until then, happy stampin'!


Stampin' Up! Supplies Used: 

Table built using Product Table Builder by The Crafty Owl - Independent Stampin' Up! Demonstrator.

Quilted Christmas Star Quick and Easy Card

by Joanne James24. October 2017 21:00

I've had a busy day with the last of this month's technique classes - I'll share these cards later this week - and a couple of hours of garden tidying ready for the winter. Today I'm sharing another card using our sketch this week over at The Paper Players. Here's a reminder of the sketch:

You can see my original card here; I liked this sketch so much I made a second card too - take a look:


Here's the low-down on today's card:

Quilted Christmas - I used two of the Quilted Christmas patterned papers on today's card. The festive papers and colours in this pack make co-ordination easy and I love this traditional red and green colour combination. 

Add A Banner - The simple banner on my card is 2" wide and was punched with the Triple Banner Punch. This is one of my most useful and most used punches and whilst it gets lots of love I don't often give it a shout-out in my blog write-ups as it's one of those punches that I almost take for granted and there always seems to be something more exciting to talk about. Well, not today - three cheers for the Triple Banner Punch!

All About The Stitching - There is a common thread (pardon the pun!) running through today's card design and that is 'stitching'. From the patterns of my paper, to the stitched border that I used for my sentiment panel, along with the baker's twine bow and that pretty stitched felt star embellishment, stitching links them all and results in a clean and simple card with a seamless design. 

A simpler version of Sunday's card using the same layout, yet I love it - might have to knock a few more of these out to boost my Christmas card stocks! 

Here is the visual summary of the key products used on today's project for you to pin for easy reference:


You can see all of my 'How To' summaries on my 'How To - Tips and Techniques' Pinterest board in case you've missed any. 

Enjoy your day and I'll be back tomorrow with another project. Until then, happy stampin'!


Stampin' Up! Supplies Used:

Table built using Product Table Builder by The Crafty Owl - Independent Stampin' Up! Demonstrator.

Painted Harvest Christmas Wreath CAS Card

by Joanne James11. October 2017 20:51

Wednesday already?! Just time for a really quick share of another clean-and-simple Christmas Wreath using the Painted Harvest stamp set that I made with some ladies in a Christmas card class a couple of weeks ago:


Here's the low-down on today's card:

A Christmas Wreath - Today's Painted Harvest stamp set Christmas wreath uses the largest of the petal stamps, stamped once in Wild Wasabi then rotated through 180 degrees before inking and stamping again in Garden Green over the top. This gives a much fuller, more dimensional wreath than the one on Monday's card. I then used the small dot stamp to stamp my Real Red berries.

Painted Autumn - I added a narrow strip of Painted Autumn designer series paper to my card; I love that the reverse side of our papers often feature a more neutral design, such as these watercoloured stripes, that lend themselves to more than just autumn/fall projects. Some of the ladies in my class used the leafy pattern on the reverse of this strip and I must say that looked great too. I'm so happy the Painted Autumn papers are included in the 'buy 3, get 1 free' offer on designer series paper this month too - all the more reason to stock up!

Season's Greetings - Today's card features a big, bold sentiment from the 'Snowflake Sentiments' set, perfect for today's card and not a snowflake in sight!

Here is the visual summary of the key products used on today's project for you to pin for easy reference:


You can see all of my 'How To' summaries on my 'How To - Tips and Techniques' Pinterest board in case you've missed any. 

Hopefully I'll be back tomorrow with another project. Until then, happy stampin'!


Stampin' Up! Supplies Used:

Table built using Product Table Builder by The Crafty Owl - Independent Stampin' Up! Demonstrator.

Beautiful Bouquet Three Ways From Simple to Stepped Up

by Joanne James4. August 2017 08:00

Happy Friday everyone! School holidays have got the better of me this week and with an all-day technique class too and pre-order of my seasonal goodies from the new Autumn-Winter catalogue, I've just not had the opportunity for blogging. I've plenty of makes to share with you though and today to thank you for your patience this week I thought I would show you not one, not two but three cards - another trio from simple to stepped up, this time featuring the Beautiful Bouquet Bundle that you can find on pages 92-93 of the 2017 Annual Stampin' Up! catalogue.

The Beautiful Bouquet stamp set has a wonderful collection of both florals and sentiments that are suitable for a wide variety of occasions and when paired with the co-ordinating Bouquet Bunch Framelits Dies can be used to make the most amazing 3D floral bouquets. The set really does offer something for every kind of crafter; I started out with the following basic colour combination and set to work:


Clean and Simple - Quick And Easy - If you're short on time or new to crafting, this set is great for a simple one layer card like this one:


All you need to do is take a sheet of Extra Thick Whisper White for your card base, stamp your stems and a few carefully chosen blooms directly onto the card front along with a sentiment of your choice, add a few rhinestones and your card is done. Bright colours that compliment each other and some contrasting flower centres really help this simple card to have a big impact.

Step It Up - If you have a bit more time and are feeling more adventurous, using a few extra tools and embellishments will allow you to 'step up' your card and create something with a little more depth and detail, whilst still relatively easy to make:


My second card follows the same basic layout as the first, however this time I've used the framelits to cut out the bow and the flower heads and popped them up on dimensionals, and some circle punches to punch out my sentiment and layer it onto some Berry Burst cardstock for extra pop. In addition to the rhinestones, I've added a little tab of Daffodil Delight Double-Stitched Ribbon to my sentiment circle for an extra touch.

Going For Gold - Stepped Up To The Max - If you have the time and want to really explore a wide range of techniques, tools and embellishments, it's possible to use the Beautiful Bouquet Bundle to create something really special:


My third card is a CASE of the card on page 93 of the Stampin' Up! catalogue and really goes to town: the framelits have been used to diecut the entire bouquet, having stamped the flower heads first, and layered onto some background-stamped squares cut with the Layering Squares Framelits and an embossed background (my card uses the retired Large Polka Dot TIEF but you could of course use the current Polka Dot Basics Textured Impressions Embossing Folder as per the catalogue sample). There are some additional colours, doilies, linen thread and a sprinkling of the gorgeous glitter enamel dots that really help to make this card something special.

Here are the visual summaries of the key products used on today's projects for you to pin for easy reference:


You can see all of my 'How To' summaries on my 'How To - Tips and Techniques' Pinterest board in case you've missed any. 

So which of the above cards is your favourite? Do leave me a comment below, I'd love to hear your thoughts. I love them all and as I have the bundle, like the fact that I can choose my style depending on how the mood - or in my case time available - takes me! I have a few more cards to share using this set, so stay tuned next week if florals are your thing.

Enjoy your day and I'll be back tomorrow with another project, quite possibly with something of a more seasonal nature. Until then, happy stampin'!


Stampin' Up! Supplies Used:

Table built using Product Table Builder by The Crafty Owl - Independent Stampin' Up! Demonstrator.

Mini Catalogue

BROWSE THE CATALOGUE

The mini catalogue is now live! Read and download your copy here.

Shop Online

Access my online shop 24 x 7, 365 days of the year:

Current April hostess code:

VDKNV7BH

Shop Online

Join My Team

It's always a great time to join Stampin’ Up! New team members can get £130 worth of products for only £99 + free business supplies + free shipping + all the fun being a part of Stampin’ Up! Stampin' Up! has something for everyone: join my growing team and benefit from my support to enjoy Stampin' Up! however you choose.

If you're interested, call me for a chat to understand how I can help you realise your goals. Alternatively, if you have already decided to sign up and you just can't wait, please click here for the link to the online form where you can sign up and order your starter kit right away! 

Latest Kit!

Stampin Cut and Emboss

The Rock Legend Kit has all you need to make 8 cards with coordinating envelopes. Along with the new Panda Friends Kit, both are available from January 4th for just £14 each - get yours here!

2023-24 Annual Catalogue

BROWSE THE CATALOGUE

Click on the catalogue for a full list of current SU! supplies - if you would like to order any of the items featured, please drop me a line at [email protected] or give me a call on 07773 421446 - I'd be happy to help.

New Online Exclusives

There are new products available exclusively in the online store from 5 March - check them out here.

About Me

Hi I'm Joanne and live in Northampton and when I'm not looking after my husband and two beautiful children, am an avid crafter with a passion for all things Stampin' Up!

I must confess that I have never been a big rubber stamper - until I discovered Stampin' Up! that is. I love the fact that I can get such great results with co-ordinating stamps, inks, papers and punches - the possibilities are endless! Join me on my stamping journey as I share the things I love and be inspired to create amazing things yourself!

Follow Me

Monthly Newsletter

Box Builder

Click the button above to use Box Buster to create your custom box design using the Envelope Punch Board!

Kits Collection Now Available!

Stampin Cut and Emboss

The new Kits Collection from Stampin' Up! is now available!

Click here to see the current kits available and order yours online today.

I Design For


Stampin' Up Stuff

This is my personal blog and is not endorsed by Stampin’ Up! I hope you find it a plentiful source of ideas and personal inspiration but please don't copy my designs for contest submission or use for classes, publication or sale without express permission.