Friendly Silhouettes Diecut Sunset Celebrate You Card

by Joanne James11. August 2020 20:30

A super late post today as I have been busy celebrating - as of today I am officially the mother of not one, but two, teenagers! Lots of present opening, special meals, ice cream cake and candles and no time for crafting, but I wouldn't have it any other way! Luckily I made a card last week using the inspiration photo and sketch over at Inspired By so thought I'd share that with you today. Here's the inspiration photo and sketch:


It just so happens that I used the same dies, the Friendly Silhouettes Dies, that I used for my last Inspired By entry - here's a different take:


Some simple diecuts ( I used the retired 'Celebrate You' celebrate die for my sentiment) brought my card together in a jiffy, with a little stamping using the 'Friend like You' stamp set on the inside to finish: 


Here is the visual summary of the key products used on today's project for you to pin for easy reference:


You can see all of my 'How To' summaries on my 'How To - Tips and Techniques' Pinterest board in case you've missed any. 

Enjoy your evening and I'll be back tomorrow with another project. Until then, happy stampin'!


Stampin' Up! Supplies Used:

Table built using Product Table Builder by The Crafty Owl - Independent Stampin' Up! Demonstrator.

Minnie Mouse Punch Art Birthday Card

by Joanne James21. January 2019 11:00


This is my second post for you today - you can see my earlier post here in case you missed it. I managed to grab a little crafting time in my office on Saturday afternoon and having seen the challenge over at TGIF Challenges this week just knew I had to take part! I also used this week's sketch over at Freshly Made Sketches for my layout:


Anyone that knows me well knows that I am a Disney addict!  For me there is only one Mickey Mouse (he lives in Florida) and Magic Kingdom is without question THE happiest place on earth (and I've done a fair bit of travelling in my time!) I've made a number of Disney-themed cards before (you can see a couple of my favourites here and here - just search my blog with the term 'Disney' to see lots of similar inspiration) and they are often rather detailed affairs, however today I went for something super-quick to make - I think I was just so excited! Here's my card:


I decided to create a fun Minnie Mouse punch art: all you need is a large circle punch (I used a 2 1/4" punch) and two smaller punched circles (I used a 1 1/4" circle punch) to create a Mickey Mouse shape. You can scale these circles according to your desired finished size. 

My card absolutely had to be red and I used a piece of retired red and white polka dot paper for the centre panel, inspired by the lovely Minnie's iconic dress; you could substitute a piece of the current Real Red spotted paper from the Regals 6x6" DSP pack if you aren't such a purist. To create Minnie's bow, I used two diecut hearts from the new Be Mine Stitched Framelits set and added a little bling with a clear faceted gem. A bold 'celebrate' sentiment diecut finished the front of my card.

With the outside taken care of, I used one of the greetings from the Magical Mermaid stamp set for the inside of my card. I inked it up with my Stampin' Write markers so that I would get the two-tone effect and could easily omit the sprig detail:


I might send this card to me, I love it so much! Here is the visual summary of the key products used on today's projects for you to pin for easy reference:


You can see all of my Product and 'How To' summaries on my 'How To - Tips and Techniques' Pinterest board in case you've missed any. 

Enjoy your day; I am hoping mine is going to be a productive office day - if I get all of my admin tasks completed, i may even manage a little stamping time! I'll be back tomorrow with another project. Until then, happy stampin'!


Stampin' Up! Supplies Used: 

Table built using Product Table Builder by The Crafty Owl - Independent Stampin' Up! Demonstrator.

Farewell Definitely Dahlia, Hello Pineapple Punch PP394

by Joanne James20. May 2018 09:00

It's Sunday and time for this week's new challenge over at The Paper Players! I'm back following my week off and raring to go. It's the turn of the wonderful Laurie to host this week and she has a clean and simple challenge for you to work with:
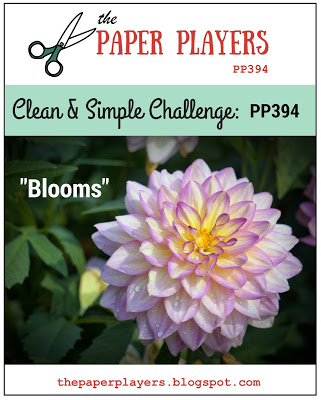
 

Remember in addition to the theme of "blooms", this week is a Clean-and-Simple (CAS) challenge!  What do we mean by CAS?

  • Minimal layers and embellishments
  • Plenty of open space, aka "white" space
  • Simple and uncluttered

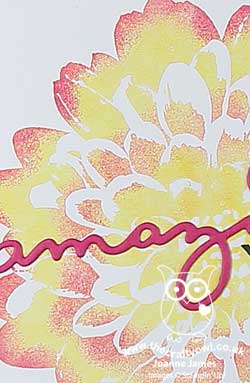
I have a couple of cards of cards to share with you today (and another tomorrow!) that fit this week's theme. I decided to use the retiring 'Definitely Dahlia' stamp for my cards today, and was very much inspired by our badge this week created by the oh-so-talented Nance. Here's my single clean and simple bloom:
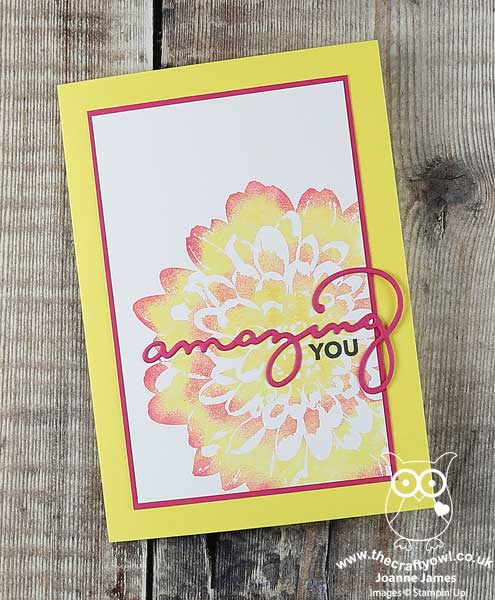
 

Here's the low-down on today's card:

Farewell Definitely Dahlia - I will miss the 'Definitely Dahlia' background stamp, as it is so great for CAS cards. Whether you simply stamp 'as is' (see my uber-CAS card below) or do as I have here, where I inked with two colours to create a two-tone effect, this is a stamp that needs little else for a clean and simple card - the stamp really does much of the work.

Hello Pineapple Punch - I used one of the new in-colours, Pineapple Punch, to create the base layer of colour for my dahlia, stamping off once before adding some Melon Mambo pink with a sponge dauber to the petal edges to create a pretty two-tone effect. This adds a little more depth and interest to the final stamped image. I really like the new in-colours this year - they work so well as a collection and compliment many of the other colours in our palette.

Amazing You - I finished my card with a stamped and diecut sentiment from the 'Celebrate You' thinlits set - can't wait for these to become available in the new catalogue, you know how much I love a diecut thinlit :-) 

Here is the visual summary of the key products used on today's project for you to pin for easy reference:
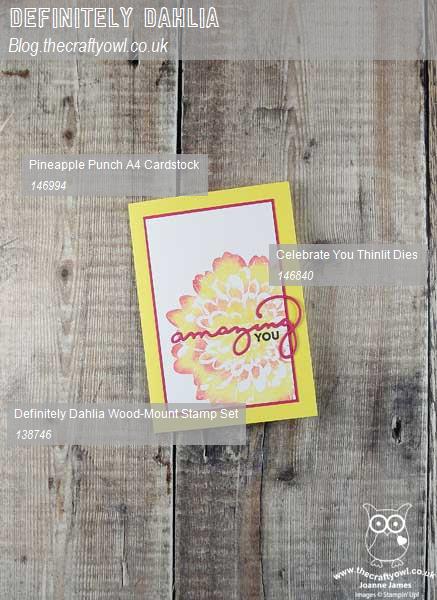
 

You can see all of my Product and 'How To' summaries on my 'How To - Tips and Techniques' Pinterest board in case you've missed any. 

Before I go, here's another version of the same card, this time super clean-and-simple in style, that I made for the current mix it up challenge over at Sugar Pea Designs, using both sketch and photo inspiration:

Whilst I didn't choose a rose for my flower, I did go with the pale pink and a single bloom, and I used the sketch. Here's my card:
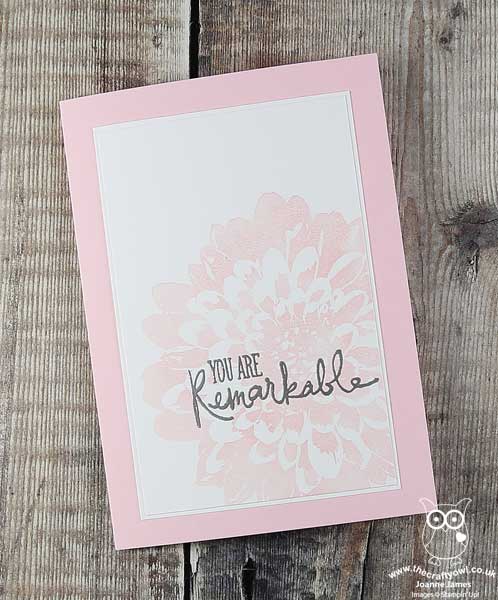
 

I simply stamped my dahlia in retiring Pink Pirouette ink, stamping off once to get a pale flower, heat embossed my sentiment from another retiring stamp set, Remarkable You, in silver and mounted on a Pink Pirouette card base. 

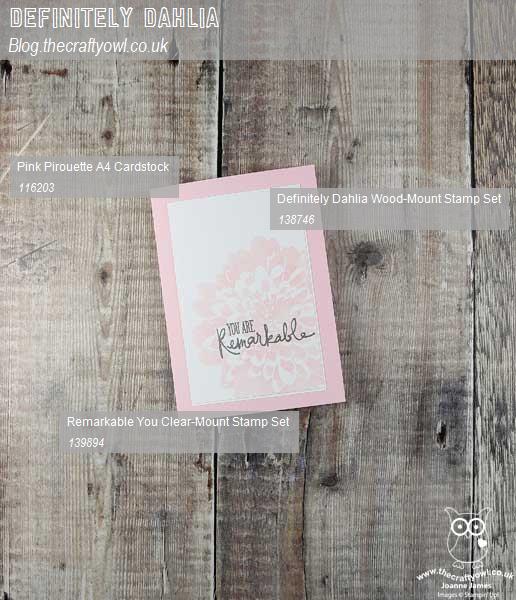
Here is the visual summary of the key products used on today's project for you to pin for easy reference:
Before you reach for your ink and papers, check out what our amazing team has created to inspire you this week:

Here's a quick recap of our challenge rules:
 
1.  Create a new paper project
2.  Upload your creation to your blog with a link back to us and provide a direct link to the post featuring your challenge submission.
3.  Please link your card to no more than four challenges, TOTAL.
4.  Have FUN!
 
I can't wait to see your clean and simple creations and look forward to visiting your blogs this week! Enjoy the rest of your weekend - it looks like we are going to enjoy another day of sunshine here in the UK so I will be looking forward to spending some time in my garden, amongst other things. I'll be back tomorrow with another project; until then, happy stampin'!


Stampin' Up! Supplies Used: 

Table built using Product Table Builder by The Crafty Owl - Independent Stampin' Up! Demonstrator.

Sweet Soiree 18th Birthday Card

by Joanne James26. April 2018 20:30

I've had a few cards to make of late for milestone birthdays so thought I'd share one of them today, that uses last week's Freshly Made Sketches layout as inspiration - take a look:


I decided to use up some of the leftover bits and pieces from my Sweet Soiree Embellishment Kit (I just love this - it really does keep on going!) and layer a cake with some of the flowers, along with a silver doily, a circle of silver spotted acetate and a proper sparkly die cut sentiment  - so glad these 'Celebrate You' thinlits from this year's Sale-A-Bration offering are carrying over to the new annual catalogue. A background of co-ordinating Sweet Soiree paper and no stamping - well not on the front of my card anyway! I did stamp on the envelope and on the inside of my card:


I also added some numbers from the kit and a strip of foil washi tape to the inside of my card just to finish things off. Suitably special without being too over the top, I think - I'd love to hear your views, do feel free to leave me a comment below!

Here is the visual summary of the key products used on today's project for you to pin for easy reference:


You can see all of my 'How To' summaries on my 'How To - Tips and Techniques' Pinterest board in case you've missed any. 

I'll be back tomorrow with another project. Until then, happy stampin'!


Stampin' Up! Supplies Used:

Table built using Product Table Builder by The Crafty Owl - Independent Stampin' Up! Demonstrator.

Celebrate Amazing You

by Joanne James13. February 2018 21:00

Today I'm sharing a card that I made in one of my February card classes that I haven't yet shared here on my blog - take a look:


Here's the low-down on today's card:

What's Better Than Free? - What's better than free? Not a lot in my book, especially when it's free Stampin' Up! goodies too! Sale-A-Bration is all about giving you more - whether you spend, host a party or join as a demonstrator with Stampin' Up! during this awesome promotion. You can read more about it here. Today's card features 2 free Sale-A-Bration items: the first is the 'Amazing You' stamp set, which I used to decorate the sentiment label, inside panel and envelope of my card. As with the other stamp sets that can be yours free with a £45 purchase, these stamp sets will only be available during Sale-A-Bration - once the promotion is over, we will say goodbye to them forever, so it's important you place your order before the end of March in order to benefit.

Amazing You - The second free item on today's card is the 'amazing' die cut from the 'Celebrate You' thinlits dies; these can be yours with a £90 purchase. These thinlits co-ordinate with the 'Amazing You' stampset - but will also be available beyond the end of Sale-A-Bration as they are going to be in the new 2018-19 annual catalogue. I am so thrilled that these thinlits are carrying over - they really are a great size and style to work on lots of different projects. 

Touches of Texture - The gold glimmer sentiment diecut is definitely the star of this card - all that sparkle and shine, along with some texture that makes this a rather tactile card. There are lots of other elements that add texture to this card too - the banner embossed with the hexagonal embossing folder, some twine, along with the leaves and the cutout background panel.

Here is the visual summary of the key products used on today's project for you to pin for easy reference:


You can see all of my 'How To' summaries on my 'How To - Tips and Techniques' Pinterest board in case you've missed any. 

I'll be back tomorrow with another project. Until then, happy stampin'!


Stampin' Up! Supplies Used:

Table built using Product Table Builder by The Crafty Owl - Independent Stampin' Up! Demonstrator.


Painted With Love Hearts Valentine Card and Co-ordinating Fold Flat Top Heart Box

by Joanne James4. February 2018 09:00

It's Sunday and time for this week's new challenge over at The Paper Players! It's the turn of my lovely and talented friend Claire to host this week and she has a rather timely theme challenge for you to work with:


February at last and Valentine's is on the way! I have both a card and gift box to share with you this week and hearts were definitely on my mind when I started creating - take a look:


Here's the low-down on today's card:

Painted With Love - Whilst I used this week's sketch over at As you See It as the inspiration for the layout for my card today, the Painted With Love papers are most certainly the inspiration for my colour scheme. I couldn't wait to use these colourful papers with their gold foil accents on my project, and carried through the shades of purple and pink to the rest of my card design. Here's my colour palette in case you would like to save it for your future inspiration:


Hearts A Plenty - Both the teams over at CAS-ual Fridays and SUO Challenges are looking for hearts, hearts and more hearts this week. I've used a combination of hearts in all different sizes stamped from the 'Heart Happiness' stamp set and some diecuts using the Sweet and Sassy Framelit Dies, along with a sprinkling of gold metallic heart shapes for my full heart quota.

Love You - My sentiment is a combination of a 'love' diecut from the Sunshine Wishes Framelits and 'YOU' from the Sale-A-Bration 'Celebrate You Thinlits' - I love being able to play around and take bits and pieces from my collection to create the perfect combination. I also added a little stamping to the inside - this lovely stamp from the 'Petal Passion' set: 

I also created a co-ordinating box with a heart fold flat closure in the same paper, perfect to enclose a Valentine's treat - here it is with my card: 


I may well do another blog post on the box - it's very pretty and turned out even better than I hoped it would! Here is the visual summary of the key products used on today's project for you to pin for easy reference:


You can see all of my Product and 'How To' summaries on my 'How To - Tips and Techniques' Pinterest board in case you've missed any. 

Before you reach for your ink and papers, check out what our amazing team has created to inspire you this week:

Here's a quick recap of our challenge rules:
 
1.  Create a new paper project
2.  Upload your creation to your blog with a link back to us and provide a direct link to the post featuring your challenge submission.
3.  Please link your card to no more than four challenges, TOTAL.
4.  Have FUN!

I can't wait to see how you interpret this week's theme and look forward to visiting your blogs this week! Blogland has lots of challenges with love in mind so I think this could be something of a theme around here in coming days! Enjoy the rest of your weekend as it will be over all too quickly. We were out at a swimming gala yesterday and Ben has a basketball tournament today, so it's all go here. I'll be back tomorrow with another project; until then, happy stampin'!


Stampin' Up! Supplies Used: 

Table built using Product Table Builder by The Crafty Owl - Independent Stampin' Up! Demonstrator.

Celebrate With The Party Pandas!

by Joanne James10. January 2018 21:30

Just popping in this evening with a quick and simple card that I made to go out with my catalogues using two of the great sets that you can get for free with a qualifying purchase during Sale-A-bration - take a look:


I needed a card that would be good for mass production so the key is to keep things simple - a panda from the 'Party Pandas' set that is free with a £45 purchase during Sale-A-Bration, with the balloon coloured in with my Calypso Coral Stampin' Blends markers to co-ordinate with the Celebrate diecut from the 'Celebrate You' Thinlit Dies set - it's a Stampin' Up! first to have these fabulous thinlits as a Sale-A-Bration item and these can be yours free with a £90 purchase. A sprinkle of rhinestones completes my card. I adore both of these items and am thrilled I managed to get them for free with my Stampin' Up! purchases - bonus! You can look forward to lots more projects featuring these items. They can be yours too - just follow the links below to place an online order or get in touch if you are local.

Here is the visual summary of the key products used on today's project for you to pin for easy reference:


You can see all of my 'How To' summaries on my 'How To - Tips and Techniques' Pinterest board in case you've missed any. 

I'll be back tomorrow with another project. Until then, happy stampin'!


Stampin' Up! Supplies Used:

Table built using Product Table Builder by The Crafty Owl - Independent Stampin' Up! Demonstrator.

Happy New Year 2018 Celebrate You Shaker Card #GDP119

by Joanne James2. January 2018 21:00

Hello lovely readers - and a happy new year to you all! Today I'm sharing a card that I made for some friends with whom welcomed in the new year - I was still enjoying the 'morning after the night before' yesterday so from a blog perspective today heralds the beginning of the end of my festive blog break! I'm also linking up with a couple of challenges - the current challenge over at Global Design Project where the theme is all about celebrating at home and the lovely ladies over at As You See It who are all about the sparkle for their first challenge of the year:


My card was inspired by my 2017 new year card, minus the owl of course (you can see that card in a previous post here) and has a little 'something old ... and lots new' about it - take a look:


Here's the low-down on today's card:

A Window Into 2018 - I used my much-loved Large Numbers Framelits to create fun shaker-card windows in the front of my card. This is so easy to do; you just need to remember to keep the middle of the 0 and 8 to complete the negative image. If you place the numbers that you've cut out over the window sheet without sticking them down, they will allow you to position the negative pieces in just the right position when you remove the numbers again. 

All That Glitters - My decision to create a shaker card was largely because I was looking for an opportunity to use these amazing gold glitter flakes from the new Spring-Summer catalogue that launches tomorrow. Check out the close-up below - aren't they gorgeous? So sparkly! 

Celebrate ... Amazing You - The main front panel of my card features a stamp from a new Sale-A-Bration set, Amazing You (stamped in Versamark and heat embossed in gold and silver) and the word 'celebrate' cut from silver glimmer paper using another of this year's Sale-A-Bration free items - a set of thinlits dies called 'Celebrate You' that co-ordinate with the stamp set and are available free with a £90 purchase. More news on Sale-A-Bration tomorrow, but I hope these sneak-peeks have got you all excited about the fabulous things that are to come!

Here is the visual summary of the key products used on today's project for you to pin for easy reference:


You can see all of my 'How To' summaries on my 'How To - Tips and Techniques' Pinterest board in case you've missed any. 

I'll be back tomorrow with all of the news and information on the 2018 Sale-A-Bration promotion and the launch of the new Spring-Summer seasonal catalogue. Until then, happy stampin'!


Stampin' Up! Supplies Used:

Table built using Product Table Builder by The Crafty Owl - Independent Stampin' Up! Demonstrator.

Mini Catalogue

BROWSE THE CATALOGUE

The mini catalogue is now live! Read and download your copy here.

Shop Online

Access my online shop 24 x 7, 365 days of the year:

Current April hostess code:

VDKNV7BH

Shop Online

Join My Team

It's always a great time to join Stampin’ Up! New team members can get £130 worth of products for only £99 + free business supplies + free shipping + all the fun being a part of Stampin’ Up! Stampin' Up! has something for everyone: join my growing team and benefit from my support to enjoy Stampin' Up! however you choose.

If you're interested, call me for a chat to understand how I can help you realise your goals. Alternatively, if you have already decided to sign up and you just can't wait, please click here for the link to the online form where you can sign up and order your starter kit right away! 

Latest Kit!

Stampin Cut and Emboss

The Rock Legend Kit has all you need to make 8 cards with coordinating envelopes. Along with the new Panda Friends Kit, both are available from January 4th for just £14 each - get yours here!

2023-24 Annual Catalogue

BROWSE THE CATALOGUE

Click on the catalogue for a full list of current SU! supplies - if you would like to order any of the items featured, please drop me a line at [email protected] or give me a call on 07773 421446 - I'd be happy to help.

New Online Exclusives

There are new products available exclusively in the online store from 5 March - check them out here.

About Me

Hi I'm Joanne and live in Northampton and when I'm not looking after my husband and two beautiful children, am an avid crafter with a passion for all things Stampin' Up!

I must confess that I have never been a big rubber stamper - until I discovered Stampin' Up! that is. I love the fact that I can get such great results with co-ordinating stamps, inks, papers and punches - the possibilities are endless! Join me on my stamping journey as I share the things I love and be inspired to create amazing things yourself!

Follow Me

Monthly Newsletter

Box Builder

Click the button above to use Box Buster to create your custom box design using the Envelope Punch Board!

Kits Collection Now Available!

Stampin Cut and Emboss

The new Kits Collection from Stampin' Up! is now available!

Click here to see the current kits available and order yours online today.

I Design For


Stampin' Up Stuff

This is my personal blog and is not endorsed by Stampin’ Up! I hope you find it a plentiful source of ideas and personal inspiration but please don't copy my designs for contest submission or use for classes, publication or sale without express permission.