Unicorns Myths and Magic For The Paper Players PP389

by Joanne James15. April 2018 09:00

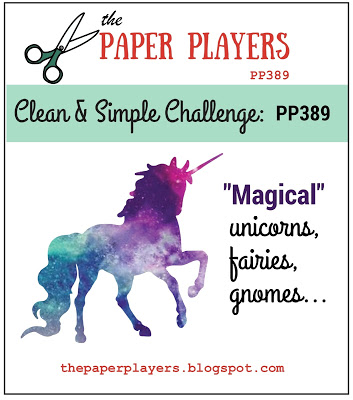
It's Sunday and time for this week's new challenge over at The Paper Players! It's the awesomely artistic Sandy's turn to host this week and she has a clean and simple challenge for you to work with and a fun 'magical' theme:


I used this week's sketch from Freshly Made Sketches again (Karren definitely came up trumps with this one!) and just had to go with unicorns for my card today - take a look:


Here's the low-down on today's card:

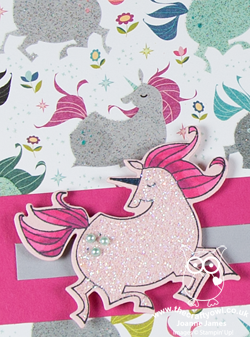
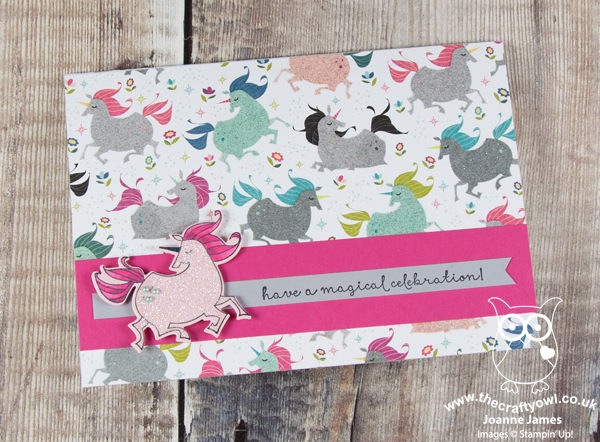
Myths And Magic - So I broke one of my 'clean and simple' rules with today's card in my use of designer series paper across the whole of my card front; this Myths and Magic DSP is to good to cut down though. I am happy to pass up my 'white space' for these sweet, sparkly unicorns - I love them! Each and every one of them shimmers with glitter. 

A Magical Unicorn Day - I stamped and coloured another unicorn to anchor my sentiment and covered the body of this one in Dazzling Diamonds glitter too - Wink of Stella wasn't enough for this one! I also added a trio of pearls that I coloured with my Pool Party Stampin' Blends. My unicorn had to be pink - this is headed for a girly girl, so nothing else would do.

Fairy Words - I added a solid banner of Melon Mambo to back my skinny sentiment, taken from the 'Fairy Celebration' set, as this suited the sketch better than those in Magical Day. 

Here is the visual summary of the key products used on today's project for you to pin for easy reference:


You can see all of my Product and 'How To' summaries on my 'How To - Tips and Techniques' Pinterest board in case you've missed any. 

I am so sad that this set is retiring at the end of May - it's one of my favourites in the current seasonal catalogue and I haven't used it nearly enough! Rebecca is obsessed with mermaids and unicorns, so I know I will get plenty more use from it yet; I definitely won't be parting with it anytime soon, for sure.

Before you reach for your ink and papers, check out what our amazing team has created to inspire you this week:

Here's a quick recap of our challenge rules:
 
1.  Create a new paper project
2.  Upload your creation to your blog with a link back to us and provide a direct link to the post featuring your challenge submission.
3.  Please link your card to no more than four challenges, TOTAL.
4.  Have FUN!

Don't forget the theme is clean and simple this week - so minimal layers and embellishments and aim for lots of white space. I can't wait to see what you create and look forward to visiting your blogs this week! Enjoy the rest of your weekend as it will be over all too quickly. We are finally getting some nice weather here in the UK so I will be aiming to spend as much time outdoors as possible; I think Spring may finally be on its way. I'll be back tomorrow with another project; until then, happy stampin'!


Stampin' Up! Supplies Used: 

Table built using Product Table Builder by The Crafty Owl - Independent Stampin' Up! Demonstrator.

This Little Piggy Believes Slider Card

by Joanne James14. April 2018 21:30

I managed to get into my craft room yesterday for the first time in over a week and spent a pleasant few hours attempting a few of my favourite challenges and creating some cards to share with you over the next few days. Today I'm sharing a card using this week's sketch from Freshly Made Sketches - the lovely Karren Johnson is hosting and the minute I saw her sketch an idea popped into my head which also fits the bill at CASology  this week:

This is a sketch with so many possibilities (I actually made a few different cards with it!) but I thought it would be perfect to create a fun slider card with a hidden message. Here is my card using one of the sweet little pigs from the 'This Little Piggy' stamp set - take a look:


I used a white cardbase and adhered a panel of Myths and Magic Specialty Designer Series Paper across the lower half, having first cut a channel to accommodate my slider and the first part of my message. I coloured my pig with Stampin' Blends and added a liberal coat of clear Wink of Stella to his wings, then fussy cut him and added him to my pull tab strip. When you pull the tab to the right, the little piggy 'flies' across the card and reveals the second part of the sentiment:


How fun is that?! A clean and simple card to wish someone good luck or congratulations, with a fun surprise element.

Here is the visual summary of the key products used on today's project for you to pin for easy reference:


You can see all of my 'How To' summaries on my 'How To - Tips and Techniques' Pinterest board in case you've missed any. 

Enjoy your day and I'll be back tomorrow with another project for this week's new challenge over at The Paper Players. Until then, happy stampin'!


Stampin' Up! Supplies Used:

Table built using Product Table Builder by The Crafty Owl - Independent Stampin' Up! Demonstrator.

Sunshine and Rainbows For The Paper Players PP385

by Joanne James18. March 2018 09:00

It's Sunday and time for this week's new challenge over at The Paper Players! It's Nance's turn to host this week and she has a clean and simple challenge for you to work with:


I decided to take Nance's challenge literally and have a clean-and-simple rainbow card to share with you this week - take a look:


Here's the low-down on today's card:

Build A Rainbow The Easy Way - Today's card features a fun rainbow made using the Rainbow Builder Framelits Dies - these really do make building a rainbow super quick and easy. I ran all 7 pieces through the Big Shot at the same time and held them together with some washi tape across the back.

Myths and Magic - I don't usually use designer paper on a clean and simple card, but I couldn't resist a background of clouds and sky courtesy of this fun pattern fro the Myths and Magic Specialty DSP Pack. It makes the perfect backdrop for my bright rainbow and layered clouds.

Sunshine and Rainbows -  My card is mostly made up of diecuts and has very little stamping - just the sunshine and the sentiment. I decided to continue the rainbow theme into my sentiment stamp and coloured it with the colours of my rainbow using sponge daubers for a fun variegated effect.

Whilst my card is a little more layered than I usually go with for clean and simple, this card is really straightforward and super quick to put together and I love the pop of bright colour that the rainbow gives. Here is the visual summary of the key products used on today's project for you to pin for easy reference:


You can see all of my Product and 'How To' summaries on my 'How To - Tips and Techniques' Pinterest board in case you've missed any. 

Before you reach for your ink and papers, check out what our amazing team has created to inspire you this week:

Here's a quick recap of our challenge rules:
 
1.  Create a new paper project
2.  Upload your creation to your blog with a link back to us and provide a direct link to the post featuring your challenge submission.
3.  Please link your card to no more than four challenges, TOTAL.
4.  Have FUN!

Don't forget the theme is clean and simple this week - so minimal layers and embellishments and lots of white space. I can't wait to see what you create and look forward to visiting your blogs this week! Enjoy the rest of your weekend as it will be over all too quickly. I'm meeting an old school friend today and we are going on a course to brush up on our Copperplate Calligraphy skills, assuming the snow we are expecting here in the UK (again!) doesn't scupper our plans.

I'll be back tomorrow with another project; until then, happy stampin'!


Stampin' Up! Supplies Used: 

Table built using Product Table Builder by The Crafty Owl - Independent Stampin' Up! Demonstrator.

Myths And Magic And A Regal Wizard

by Joanne James16. January 2018 22:00

I've had a busy start to my week and I'm finally managing to share a card I designed for the current challenge over at Less is More - I'm so glad the ladies have gone to a 2 week challenge as I'm hoping it will give me time to play along more often, I just love their challenges! Their first challenge of the new year is to use purples on your card:

I love the colour purple! I didn't realise that I like it so much until a friend pointed out to me one day that I often wear purple or accessorise with purple - how funny is that?! Anyway, as much as I like it I don't use it all that often on my cards so this challenge was a good opportunity to remedy that. And a perfect opportunity to break out my most favourite of new stamp sets - take a look:


Yes, I adore the Myths and Magic suite in the new seasonal catalogue; I mean, wizards, dragons, knights, mermaids and unicorns - what's not to love?! I chose to work with the wizard today - isn't he just adorable? Here's the low-down on today's card:

A Little Paper Piecing - I decided to use some of the lovely Myths and Magic Specialty Designer Series Paper for my wizard's outfit. Many of the designs in this paper pack have a glitter finish - the one that I chose for my wizard's cloak is Fresh Fig with sparkly silver stars. Use of patterned paper on a clean and simple card is generally frowned upon, unless it's in very small quantities as I've used it here. I stamped the wizard from the 'Magical Day' stamp set onto my card base and again onto the patterned paper, then cut out the wizard's cloak and hat and adhered it to my card base, colouring the remaining parts of the wizard with my Stampin' Blends. 

Ombre, Ombre - Whilst I've used Fresh Fig as my dominant purple, I've also combined with Rich Razzleberry and Sweet Sugarplum to create an ombre effect for the large word 'magical' in my sentiment and in the stamped stars beneath my sparkly magic. This is a fun way to bring additional purples into my design. Here's my colour combination if you would like to save it to use on your projects:


A Mystical Crystal Ball - having stamped the colours in the magic stars rising from my crystal ball, I then decided to add a liberal dose of Dazzling Diamonds glitter; something I don't do often but it definitely adds to the magic feel of this card and is so sparkly in real life. I have a top tip for you too with the crystal ball; I've often struggled to adhere vellum so that the adhesive is invisible. I added my vellum to a self adhesive sheet before punching out a 1/2" circle and voila - a circle with invisible adhesive, perfect!

Here is the visual summary of the key products used on today's project for you to pin for easy reference:


You can see all of my 'How To' summaries on my 'How To - Tips and Techniques' Pinterest board in case you've missed any. 

I'll be back tomorrow with another project. Until then, happy stampin'!


Stampin' Up! Supplies Used:

Table built using Product Table Builder by The Crafty Owl - Independent Stampin' Up! Demonstrator.

Mini Catalogue

BROWSE THE CATALOGUE

The mini catalogue is now live! Read and download your copy here.

Shop Online

Access my online shop 24 x 7, 365 days of the year:

Current April hostess code:

VDKNV7BH

Shop Online

Join My Team

It's always a great time to join Stampin’ Up! New team members can get £130 worth of products for only £99 + free business supplies + free shipping + all the fun being a part of Stampin’ Up! Stampin' Up! has something for everyone: join my growing team and benefit from my support to enjoy Stampin' Up! however you choose.

If you're interested, call me for a chat to understand how I can help you realise your goals. Alternatively, if you have already decided to sign up and you just can't wait, please click here for the link to the online form where you can sign up and order your starter kit right away! 

Latest Kit!

Stampin Cut and Emboss

The Rock Legend Kit has all you need to make 8 cards with coordinating envelopes. Along with the new Panda Friends Kit, both are available from January 4th for just £14 each - get yours here!

2023-24 Annual Catalogue

BROWSE THE CATALOGUE

Click on the catalogue for a full list of current SU! supplies - if you would like to order any of the items featured, please drop me a line at [email protected] or give me a call on 07773 421446 - I'd be happy to help.

New Online Exclusives

There are new products available exclusively in the online store from 5 March - check them out here.

About Me

Hi I'm Joanne and live in Northampton and when I'm not looking after my husband and two beautiful children, am an avid crafter with a passion for all things Stampin' Up!

I must confess that I have never been a big rubber stamper - until I discovered Stampin' Up! that is. I love the fact that I can get such great results with co-ordinating stamps, inks, papers and punches - the possibilities are endless! Join me on my stamping journey as I share the things I love and be inspired to create amazing things yourself!

Follow Me

Monthly Newsletter

Box Builder

Click the button above to use Box Buster to create your custom box design using the Envelope Punch Board!

Kits Collection Now Available!

Stampin Cut and Emboss

The new Kits Collection from Stampin' Up! is now available!

Click here to see the current kits available and order yours online today.

I Design For


Stampin' Up Stuff

This is my personal blog and is not endorsed by Stampin’ Up! I hope you find it a plentiful source of ideas and personal inspiration but please don't copy my designs for contest submission or use for classes, publication or sale without express permission.