Waves Of Inspiration Oceanfront One Layer Card PP645

by Joanne James18. June 2023 08:00

Today it's Sunday and time for this week's new challenge over at The Paper Players! It's the turn of the fabulous Jaydee to host this week and she has a clean and simple challenge for us to work with:


I know they aren't everyone's cup of tea, but I do love a good one layer card! I decided to use the 'everything beach' inspiration from another of my favourite clean and simple challenges, AAA Cards, to create my one layer wonder for you today - take a look:


Here's the low-down on today's card:

One of the challenges with a one layer card is the ability to create a scene with depth, without having actual layers to do it. This is where technique such as masking and stencilling can prove really useful. For my card today, I first stamped the pelican from the 'Waves of Inspiration' stamp set in Smoky Slate. I added a touch of colour to this image with my watercolour pencils; not generally my first choice of colouring medium, but super useful when creating a one layer card, as you won't get any bleeding of colour onto the reverse, something which is unavoidable if you are colouring with Stampin' Blends markers, for example. I then stamped the same image onto a post-it note and fussy cut it to create a mask; I positioned this over the stamped image on my card so that I could add my background. 

I decided to stamp my sea in Lost Lagoon (I applied the ink to my stamp using a blending brush for a soft finish), using the sea stamp in the 'Oceanfront' stamp set. It isn't wide enough to cover the width of the card, but it was easy to extend the stamp by first stamping one side of the mask, then repositioning the card and stamping the other side, being careful to ink only the edge of the sea stamp and not overstamp the sea to the left of the mask. I then used a cloud stencil and some Pool Party ink and a blending brush to add in a hint of cloudy sky behind the pelican - you can see that better on the close up below:

Finally I added a trio of seagulls in Basic Grey and stamped my sentiment in black just above the horizon line. I didn't add any embellishments and by keeping my design to the bottom third of my card managed to preserve that all-important 'white space' of a clean and simple card too.

Here is the visual summary of the key products used on today's project for you to pin for easy reference:


You can see all of my Product and 'How To' summaries on my 'How To - Tips and Techniques' Pinterest board in case you've missed any. 

Before you reach for your ink and papers, check out what our amazing team has created to inspire you this week:

Here's a quick recap of our challenge rules:
 
1.  Create a new paper project - remember for this challenge your design should be clean and simple
2.  Upload your creation to your blog with a link back to us and provide a direct link to the post featuring your challenge submission.
3.  Please link your card to no more than four challenges, TOTAL.
4.  Have FUN!

Enjoy your day; It's Father's Day here in the UK today so whilst I might be looking forward to enjoying another day of sunshine and relaxation (fingers crossed!), I suspect it might be the DH who will have his feet up! I'll be back tomorrow with another project. Until then, happy stampin'!


Stampin' Up! Supplies Used: 

Table built using Product Table Builder by The Crafty Owl - Independent Stampin' Up! Demonstrator.

Tree Rings Embossed Geode Card TTT210

by Joanne James25. May 2023 16:00

It's Thursday and time for a new challenge over at TicTacToe! It's the turn of Team X to host this week and the lovely Vicky is our featured designer this week. This is the fun board that we are playing along with: 


I went across the bottom row with diecut, ombre and shapes to create a masculine card for this week's TGIF Challenge that gave me the opportunity to use some existing product in a whole new way - take a look:


Here's the low-down on today's card:

I was captivated by the fabulous blues of the Just Us Girls mood board this week and I was excited to see the geode in the top right photo, as I've wanted to try and create one of these for a while. I saw a card by fellow demonstrator Carrie Button that used the Tree Rings Dies and co-ordinating embossing folder to create a geode and wanted to have a go (here's a link to her helpful video tutorial if you'd like to take a look at how she did it). I made my geode slightly differently so I've included step by step instructions in case you'd like to recreate:

  • Take a piece of Tahitian Tide cardstock and run through the Tree Rings Hybrid Embossing Folder, having inked the upper side of the EF with Versamark.
  • Heat emboss the embossed tree ring with metallic silver embossing powder and cut out with co-ordinating die.
  • Colour the geode: use a Basic Grey Stampin' Write marker for the outside, then use a combination of Tahitian tide, Azure Afternoon and Blueberry Bushel Blends to colour the inner rings.
  • Add fine line detail with Stampin' Write markers in the same colours.
  • Brush the ombre blue section with clear Wink of Stella, then add some loose (retired) Dazzling Diamonds Glitter to the centre.
  • Finish the centre by adhering a combination of blue and clear rhinestone basic jewels (colour them with your Stampin' Blends).

That's it! Check out the sparkly detail - I can't tell you just how awesome this is in real life:


I wanted my geode to take centre stage, so the only other decoration was a strip of (retired) Mercury Glass Acetate that I added to my Blueberry Bushel card base. I used a sentiment from the 'Waves of Inspiration' stamp set as I though this worked well - this geode is most definitely a thing of beauty as far as I'm concerned!

Here is the visual summary of the key products used on today's project for you to pin for easy reference:


You can see all of my Product and 'How To' summaries on my 'How To - Tips and Techniques' Pinterest board in case you've missed any. 

A tictactoe board offers so many creative possibilities - how does this week's board inspire you? Why not have a go? We would love to see you in the gallery and who knows - you might be selected for Designer's Choice and be eligible to be a guest designer on a future challenge. 

Enjoy your day; today is the last exam day for the James Juniors this side of half-term; we are looking forward to a brief, if revision-filled, respite for the next week, before we start again. The youngest of the James Juniors proudly announced this morning that he has passed the halfway point - ever the optimist, bless him! I'll be back tomorrow with another project. Until then, happy stampin'!


Stampin' Up! Supplies Used: 

Table built using Product Table Builder by The Crafty Owl - Independent Stampin' Up! Demonstrator.

Waves of Inspiration Striped Birthday Card

by Joanne James20. February 2023 16:29

Today I've a quick post in between my housework to share a card I made for a few challenges:


I was intrigued by Kim's stripes on her Freshly Made Sketches layout this week and wanted to try and use them for a slightly different, slightly abstract card using the trio of blues over at Color Daretake a look:


Here's the low-down on today's card:

I added a panel of alternating stripes and used these as a backdrop for a pair of waves in white and (retired) night of Navy foil, cut with my Waves Dies - I thought these colours had quite a nautical feel to them. A simple birthday sentiment from the co-ordinating 'Waves of Inspiration' stamp set completed the front of my card:


I added a little decoration to the inside of my card, this time stamping the wave and adding a trio of stripes to extend it to the edge, along with another sentiment from the set:


A clean and simple card that will be perfect for a masculine birthday - so I'm linking up over at Sparkles too where they are creating for 'men only' this month and over at the Alphabet Challenge Blog where they are on 'W for Water'.

Here is the visual summary of the key products used on today's project for you to pin for easy reference:


You can see all of my 'How To' summaries on my 'How To - Tips and Techniques' Pinterest board in case you've missed any. 

Short and sweet from me today - dinner needs to be prepared and there is an overflowing ironing basket to be tackled! Enjoy the rest of your day and I'll be back tomorrow with another project. Until then, happy stampin'!


Stampin' Up! Supplies Used:

Table built using Product Table Builder by The Crafty Owl - Independent Stampin' Up! Demonstrator.

Waves of Inspiration CAS Shaker Card CCS 470

by Joanne James17. May 2022 12:00

It's Tuesday and time for a new challenge over at CAS Colours & Sketches. Shannon is hosting this month and this week we have our second colour challenge of the month: 


I love Shannon's fresh colour palette of aquas with a touch of silver this week! These colours immediately made me think of the sea so for my card today I had to make another card using the Waves of Inspiration bundle - take a look: 


Here's the low-down on today's card:

Waves of Inspiration - These beautiful sea greens were perfect to showcase another of those cresting waves from the Waves of Inspiration stamp set. Since this card is all about the clean and simple, I wanted to minimise the layers on my card and be sure to preserve my 'white space'. I masked off the centre of my card base so that only a portion of the wave would be visible, leaving me a wide unstamped border. The Stamparatus is a must for easily achieving this kind of stamping - masking paper would be easier, but this is how I did it using post-it notes:


To Shake Or Not To Shake? - I decided to create a simple shaker card, using a mix of sparkle & shine sequins for a touch of silver along with a few odd Coastal Cabana coloured sequins from my stash, and a simple window frame in white made using my Stitched Rectangle Dies:


I debated with myself whether a shaker card could be considered clean and simple, but having consulted with my lovely teamies we agreed it could: this card meets our 'clean and simple' criteria of 'uncluttered, with white or open space and minimal layers and embellishments' - so I hope you like it!

Silver Surfer - I decided to add a touch more silver and cut out one of the wave dies from some retired metallic silver glimmer paper and added it to the front of my shaker window for some extra sparkle. 

Here is the visual summary of the key products used on today's project for you to pin for easy reference:


You can see all of my 'How To' summaries on my 'How To - Tips and Techniques' Pinterest board in case you've missed any. 

As a reminder, for our colour challenges, you must use all of the stated challenge colours. You may also use neutral colours; however, the challenge colours should be the most noticeable ones featured on your card. We use Stampin' Up! colour names for reference, but you are welcome to use any other companies' products as long as you match the challenge colours as closely as possible.

I'm also linking today's card up over at Paper Craft Crew where their 'shiny celebration' inspiration challenge closes today.

Enjoy your day and I'll be back tomorrow with another project. Until then, happy stampin'!


Stampin' Up! Supplies Used:

Table built using Product Table Builder by The Crafty Owl - Independent Stampin' Up! Demonstrator.

Waves of The Ocean Pocket Edge To Edge Shaker Card

by Joanne James2. May 2022 10:00

Happy Bank Holiday Monday to my UK readers! Today I'm sharing a card that uses the colour palette over at Hand Stamped Sentiments

I'm loving all of the blue colour palettes that are about at the moment, especially since I have been giving my Waves of The Ocean Suite a workout and the two pair perfectly! I thought the HSS colours were perfect for a little project that I've been wanting to have a go at for a while - an edge to edge pocket shaker card. My good blog friend and fellow Tic Tac Toe challenge team member Stef Perry over at Perry Papercrafts made this fabulous card a while ago and I have been wanting to have a go and thought that the Waves of Inspiration bundle would be just the thing to make my own version - take a look:


Here's the low-down on today's card:

Waves Of The Ocean - Since this card is really all about the shaker, the stamping is fairly simple. I used all three ink colours to create my blended seascape background using my blending brushes and stamped a single wave in Versamark and heat embossed it in white; this forms the base of my shaker. 

A Pocket Shaker - creating the shaker itself is rally easy. You just need a flimsy acetate pocket - the wrapping that your new dies come in is perfect for this - then you attach it to the back of the panel on three sides to form a pocket, fill with the sequins on your choice (I used some retired ones from the Whale of a Time suite, minus the pink shells, along with some clear, white and silver ones) before taping the fourth side shut. You then mount this panel on your card front, and add any additional diecuts to the front of your card; I layered a Coastal Cabana foil and white cardstock pair of waves cut with the Waves Dies over my stamped image, and snipped a sentiment and added it to the opposing corner:


The sequins still move around the front of the card, although a little less freely than with a traditional shaker. On the upside there is less bulk though so this kind of card is great for posting. I just love this idea and am really happy with how this card turned out - thanks Stef for the inspiration, I knew I'd get around to making one eventually!

Going, Going, Gone - Today is your final reminder that lots of things are ending today - it is the last day that the following items will be available:

  • Last Chance Products, stamps and accessories from the current 2020-21 Stampin' Up! Annual Catalogue
  • All Together exclusive paper, stamps and dies (only the skin tone Blends are carrying over to the new annual catalogue)
  • Waves of The Ocean Suite exclusive papers, foils and embellishments (only the stamp set and dies are carrying over to the new annual catalogue)

When tomorrow comes, it will be all about the new annual catalogue so if any of the above are still on your list, you best click the links below and hop over to the online store today! 

Here is the visual summary of the key products used on today's project for you to pin for easy reference:


You can see all of my 'How To' summaries on my 'How To - Tips and Techniques' Pinterest board in case you've missed any. 

Enjoy your day; I will be back later with one (maybe two!) posts as I have a few makes 'in progress' on my desk along with news of a great new joining offer that will be starting tomorrow to coincide with the new annual catalogue launch - exciting stuff! Until then, happy stampin'!


Stampin' Up! Supplies Used:

Table built using Product Table Builder by The Crafty Owl - Independent Stampin' Up! Demonstrator.

#SimpleStamping on Saturday with Waves of Inspiration

by Joanne James23. April 2022 18:58

Hi everyone! I have a quick post today following on from yesterday's post showcasing the wave in the 'Waves of Inspiration' stamp set. I mentioned in yesterday's post that this wave would make a great #SimpleStamping card so today I wanted to show you a pared-down, basic example of that using this week's Freshly Made Sketches layout courtesy of the lovely Kim:


And here's my #SimpleStamping card:


I used the same broad layout for yesterday's card (Kim's sketch is a favourite layout of mine that I often come back to) but for today's card I was completely faithful to it. I stamped my wave using my Stamparatus to build up my layers of ink colour and cropped it for fit the centre of my card. I matted it with a thin border in Night of Navy and added a birthday sentiment from the same set that I trimmed to fit:


A stamp, inks and paper; just 6 items - nothing else required! Clean and uncluttered - just my thing!

Here is the visual summary of the key products used on today's project for you to pin for easy reference:


You can see all of my 'How To' summaries on my 'How To - Tips and Techniques' Pinterest board in case you've missed any. 

Enjoy your day and I'll be back tomorrow with another project for our new challenge over at the Paper Players where I am the hostess. Until then, happy stampin'!


Stampin' Up! Supplies Used:

Table built using Product Table Builder by The Crafty Owl - Independent Stampin' Up! Demonstrator.

Foamy Waves of Inspiration AYSI 273

by Joanne James22. April 2022 12:00

Today I'm sharing my design team card for our new challenge over at As you See It where it's time for a shades of blue colour challenge chosen by the lovely LeAnne:
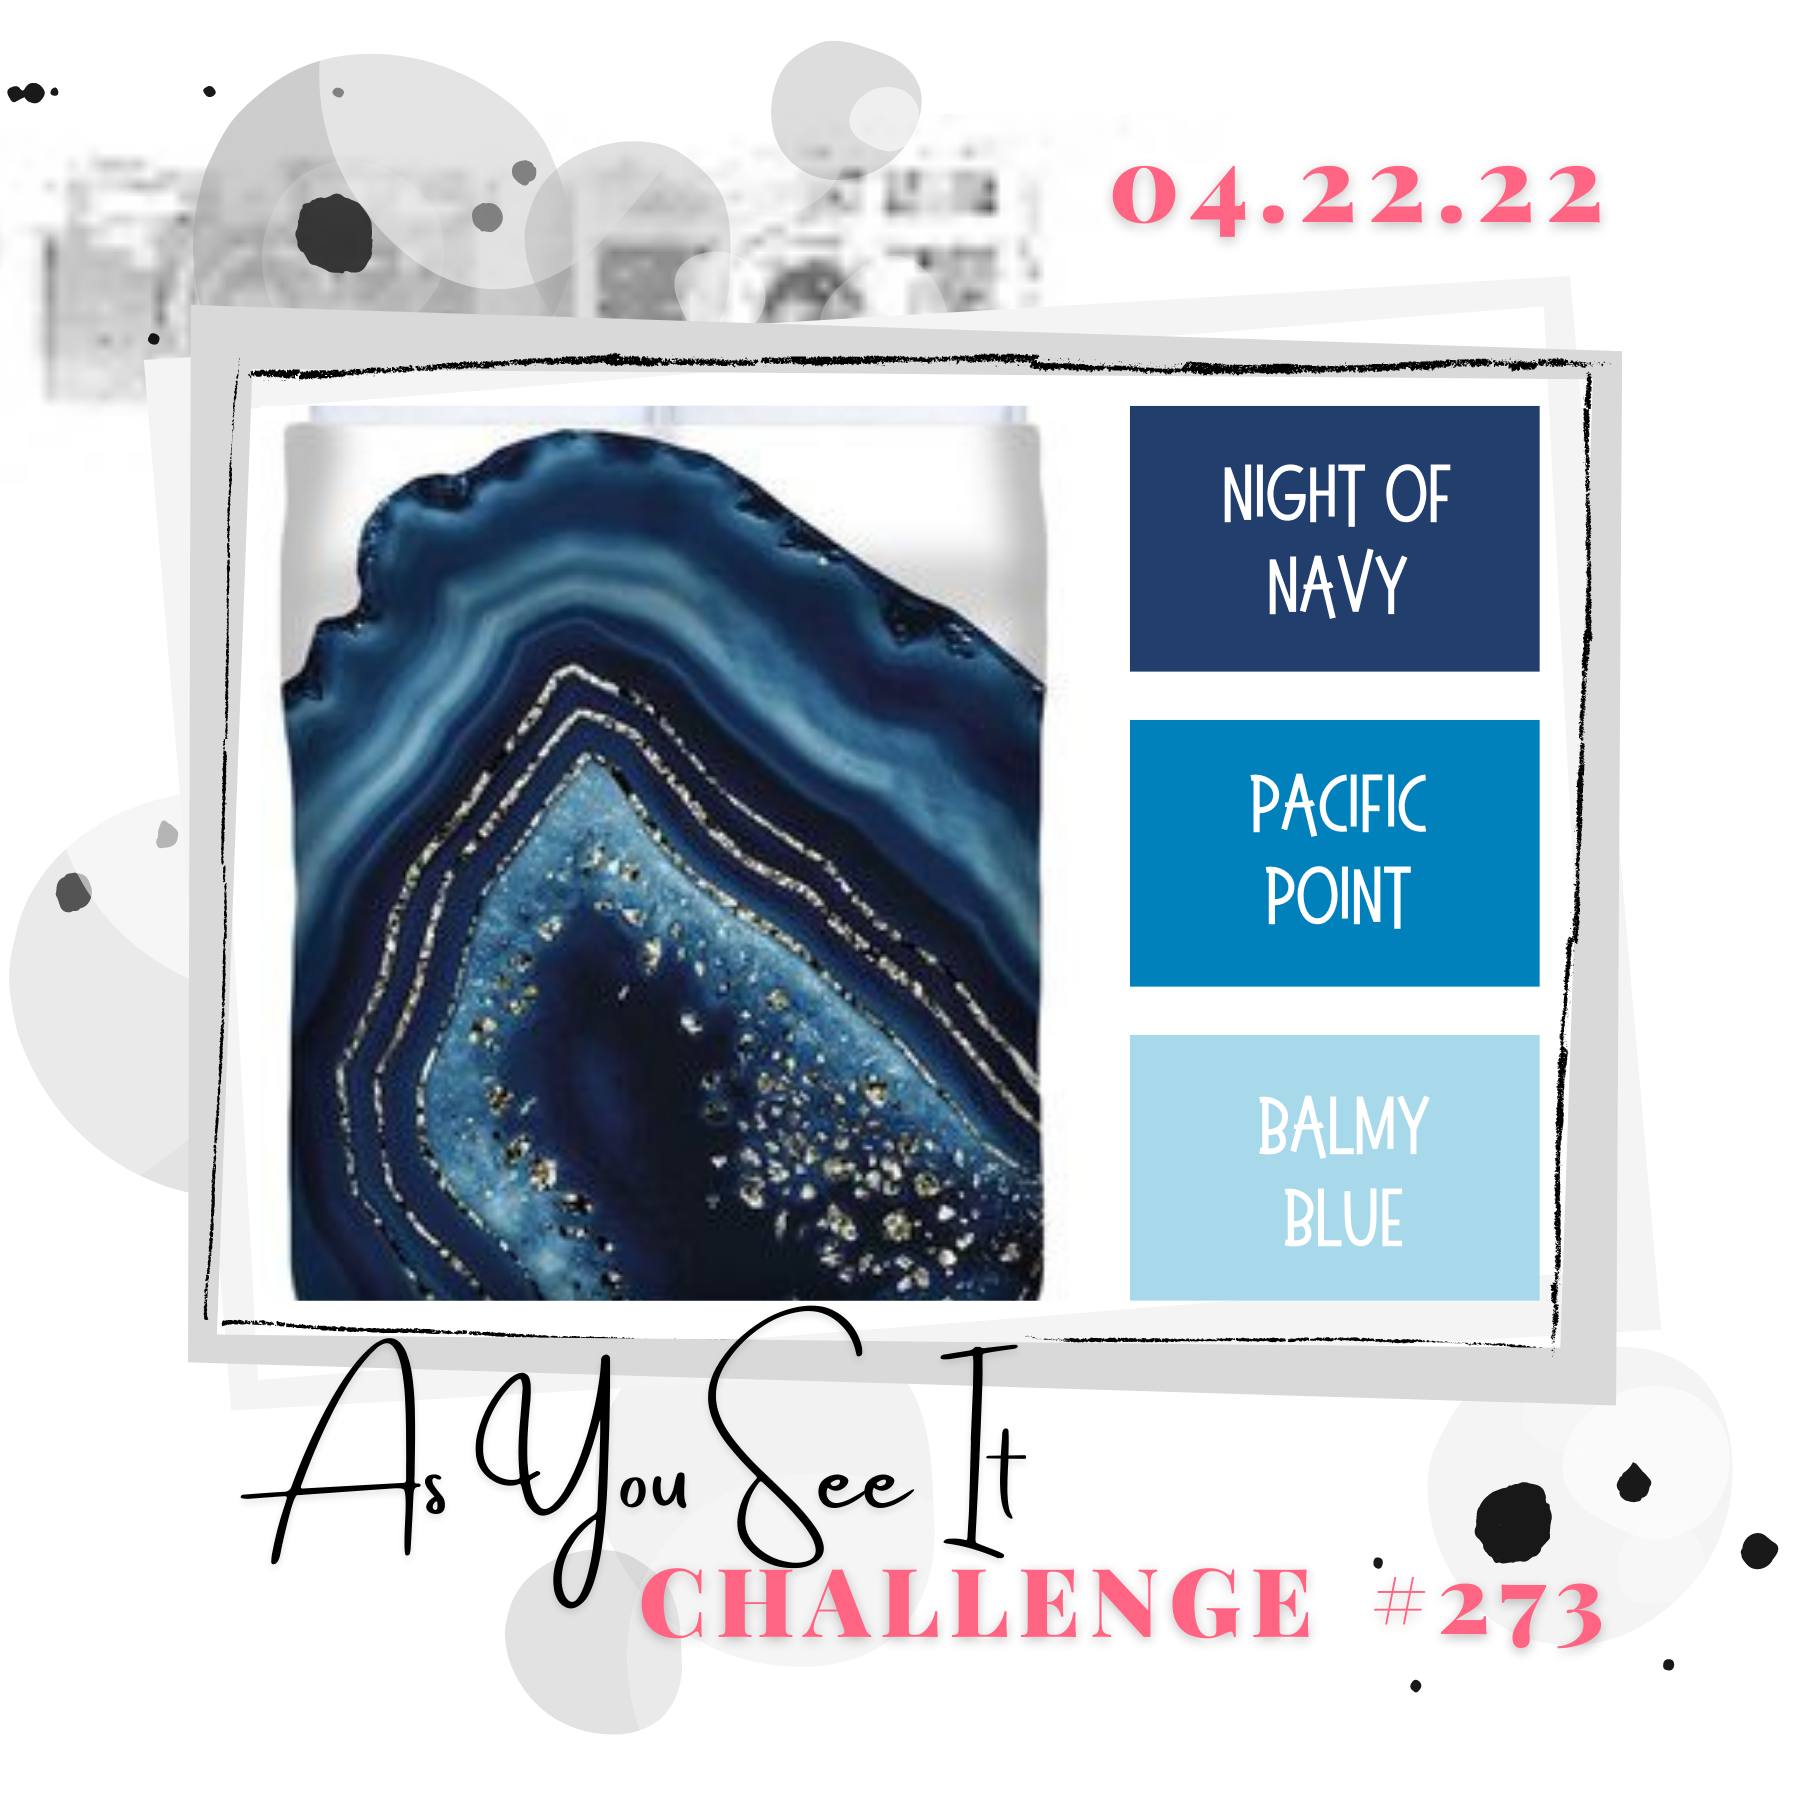
 

I have been busy preparing for my upcoming 'Waves of The Ocean' card class and this trio of blues is just perfect for waves, so I thought I'd share a variation of a card that I'll be making with my ladies next week, including a fun technique - take a look at my card:
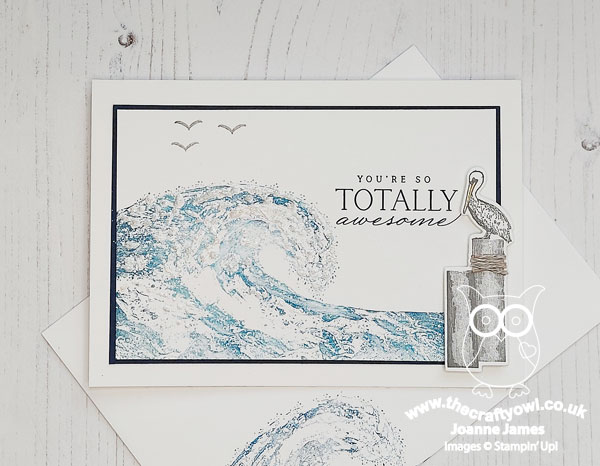
 

Here's the low-down on today's card:

Waves of Inspiration - This fabulous tidal wave is the real scene-stealer in the 'Waves of Inspiration' stamp set and can make a card all by itself (more on that later!) For this card, I used my Stamparatus to ink the whole wave in Balmy Blue, then I inked a second time, adding Pacific Point and Night of Navy to select areas of the stamp using a sponge dauber, to give me the variegated colour. The Stamparatus is most definitely your friend when using this stamp - it allows you to align the image and add layers of colour with ease. 

Foamy Waves - I decided I wanted to add some dimension and texture to my wave to give it a truly foamy feel; you can see it on the card above but I thought you would appreciate a closer look below:
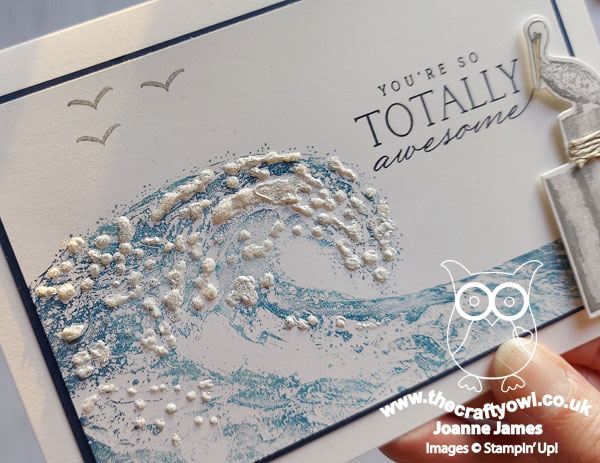
 

In real life this texture looks so good! 

Want To Know More? - Creating the textured foam really is easier than it perhaps looks: all you need is some liquid glue, white embossing powder and a heat gun to make the magic happen. Here's a link to a short video I made some years ago where I used the same technique to create puffy clouds and snow that demonstrates it better than I can explain it:

In addition to the basic technique, to add a little extra sparkle to today's card I went back over some of the raised areas with my liquid glue and added some fine loose glitter, but you could forgo this step if glitter isn't your thing. 

In designing my classes I always try to use all of the stamps in a set, but also to introduce new ideas or ways of using stamps that my ladies perhaps haven't thought of or that I haven't seen used elsewhere in the creative blogosphere. I hope my ladies like this one!

Here is the visual summary of the key products used on today's project for you to pin for easy reference:
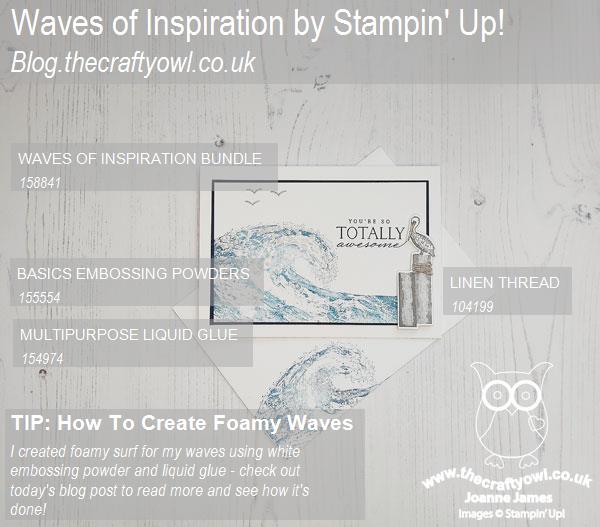
 

You can see all of my 'How To' summaries on my 'How To - Tips and Techniques' Pinterest board in case you've missed any. 

Here's a summary of our challenge rules:

  • Create any card, scrapbooking page, 3D project or packaging project that fits the challenge.
  • Please include the challenge graphic and link back to the challenge in your blog post. Turn off word verification so we can leave you lots of lovely comments. Make sure you link the post not the whole blog to the Linky. Use #AYSIXXX when uploading to a public gallery.
  • If you’re unsure about ‘the rules’, check the details under the Challenge Guidelines tab on the As You See It Challenge homepage.
  • In a colour challenge, black or other neutral can be used in outlines and sentiments but no other colours should be included. Stampin’ Up colours are used for reference but colours that are a close match are welcome.
We look forward to seeing your creations in the AYSI gallery.

Enjoy your day; we are taking it easy following a very late night in London yesterday. It was so worth it though - the ALW production of 'Cinderella' was AMAZING!  I'll be back tomorrow with another project and I have several more 'Waves of Inspiration' cards to share too, so stay tuned. Until then, happy stampin'!


Stampin' Up! Supplies Used:

Table built using Product Table Builder by The Crafty Owl - Independent Stampin' Up! Demonstrator.

Scrapbooking

Stampin' Up! has introduced a new range of 12x12" scrapbooking product and kit - the full range is now available to purchase online. To download a copy of the new digital Scrapbooking Catalogue click here.

Mini Catalogue

BROWSE THE CATALOGUE

'Tis The Season - the new Stampin' Up! Mini Catalogue is here! For more details and to download your copy click here

Shop Online

Access my online shop 24 x 7, 365 days of the year:

Current September hostess code:

JQEHTZGK

Shop Online

2024-25 Annual Catalogue

BROWSE THE CATALOGUE

Click on the image to download your copy of the 2024-25 annual catalogue. For a full list of current SU! supplies, go to my online store. If you would like any help or advice, please drop me a line at joanne@thecraftyowl.co.uk or give me a call on 07773 421446 - I'd be happy to help.

Join My Team

It's always a great time to join Stampin’ Up! New team members can get £130 worth of products for only £99 + free business supplies + free shipping + all the fun being a part of Stampin’ Up! Stampin' Up! has something for everyone: join my growing team and benefit from my support to enjoy Stampin' Up! however you choose.

If you're interested, call me for a chat to understand how I can help you realise your goals. Alternatively, if you have already decided to sign up and you just can't wait, please click here for the link to the online form where you can sign up and order your starter kit right away! 

Latest Kits!

Stampin Cut and Emboss

The Christmas Ornaments Kit and Card Keeper Kit are the latest kits that will be arriving in the online store later this month - get yours here!

New Online Exclusives

There are new products available exclusively in the online store from 3 July - check them out here.

About Me

Hi I'm Joanne and live in Northampton and when I'm not looking after my husband and two beautiful children, am an avid crafter with a passion for all things Stampin' Up!

I must confess that I have never been a big rubber stamper - until I discovered Stampin' Up! that is. I love the fact that I can get such great results with co-ordinating stamps, inks, papers and punches - the possibilities are endless! Join me on my stamping journey as I share the things I love and be inspired to create amazing things yourself!

Follow Me

Monthly Newsletter

Box Builder

Click the button above to use Box Buster to create your custom box design using the Envelope Punch Board!

Kits Collection Now Available!

Stampin Cut and Emboss

The new Kits Collection from Stampin' Up! is now available!

Click here to see the current kits available and order yours online today.

I Design For


Stampin' Up Stuff

This is my personal blog and is not endorsed by Stampin’ Up! I hope you find it a plentiful source of ideas and personal inspiration but please don't copy my designs for contest submission or use for classes, publication or sale without express permission.