Peaceful Moments Poppy Birthday Card and Hanging Ornament

by Joanne James1. May 2020 17:00


Today I'm sharing a couple of projects from one of last month's classes that featured the Peaceful Moments bundle, part of the Painted Poppies Suite. First up a birthday card:


I used the designer series paper from the Peaceful Poppies Suite beneath a diecut layer and embellished with two layered diecut poppies and a banner sentiment. We also made a co-ordinating hanging ornament using the same diecut poppies and a sentiment stamped directly onto a wooden circle:


We don't often make 3D items in our technique class, so this was a change for us. It was a great way to make use of the dies which we were featuring and it's fair to say the ladies loved it too.

Here's a photo of both items together:


Here is the visual summary of the key products used on today's project for you to pin for easy reference:


You can see all of my 'How To' summaries on my 'How To - Tips and Techniques' Pinterest board in case you've missed any. 

I've had one of those days when I've been seriously fighting technology today with nothing going right and the internet is clearly not appreciating all of the at-home Jameses running multiple devices at once! I feel exhausted by the whole thing and like I need to step away - so I'm off to finish my online groceries shopping and then am taking the night off!! 

I'll be back tomorrow with another project. Until then, happy stampin'!


Stampin' Up! Supplies Used: 

Table built using Product Table Builder by The Crafty Owl - Independent Stampin' Up! Demonstrator.

Always Remember Peaceful Moments Poppies Sympathy Card

by Joanne James28. April 2020 08:00

Today I'm sharing my second card using the sketch over at Fusion, this time fully embracing the inspiration photo too:


You can see my previous post here that featured primarily the sketch; I loved that inspiration photo too, which the team chose to commemorate Anzac Day in Australia and New Zealand, which was last week on 25th April. I wanted to create a sympathy card using reds and yellows and the silhouette idea  - this is what I came up with:


Here's the low-down on today's card:

Poppy Moments - Just as with the previous card I made for this challenge, I used a diecut poppy, this time a couple of them, as the focal point for my card. I just love those Poppy Moments Dies - they make such fabulous bold statements on projects. I stuck with the remembrance theme and this time used a combination of sentiments for my sympathy card, with a simple 'always remember' on the front and then finished the inside like this:


A Background Cheat - I loved the idea of the sun behind the poppies in the inspiration photo and wanted to retain these colours and the silhouette idea on my card. I considered brayering and pigment sprinkles, but as you know I have something of a love-hate relationship with these (mostly the latter!) but then it dawned on me - a cheat! I could create an easy artsy background with the Sprinkles effect by using some of the See A Silhouette designer series paper - so much more me! And I love the finished effect - and no mess either, win-win! 

Poppy Silhouettes - I don't have a soldier image, but decided with my bold red accent poppies and my colourful background, I could use one of my Painted Poppies stamps to create some silhouetted poppies. I simply stamped them directly onto my DSP and coloured the poppy petals in with my dark Basic Black Stampin' Blends marker. They look a little grey in the photo, but do look a little darker in real life.  

Here is the visual summary of the key products used on today's project for you to pin for easy reference:


You can see all of my 'How To' summaries on my 'How To - Tips and Techniques' Pinterest board in case you've missed any. 

I really like the way this card came together and it seems quite fitting to share it today, given that here in the UK we are observing a  minute silence at 11am in remembrance of the keyworker staff who have lost their lives during the Corona Virus pandemic. So for the doctors, nurses, bus drivers and many more - this is for you. #minutesilence

As forecast, it's wet with a constant drizzle here today, so indoor jobs it is! I am finishing up some class prep today for next week's online 'Beautiful Friendship' class (full details here if you would like to join) getting on with some cleaning and ironing, trying to not disturb the Juniors as they plough diligently on with distance learning. Enjoy your day and I'll be back later with another card for you. Until then, happy stampin'!


Stampin' Up! Supplies Used:

Table built using Product Table Builder by The Crafty Owl - Independent Stampin' Up! Demonstrator.

Peaceful Moments Poppy Birthday Card

by Joanne James26. April 2020 19:00

I have another quick post for you today with an extra card that I made yesterday for a couple of challenges using the colours over at InspireCreate and the sketch over at Fusion:


I used the designer series paper from the Peaceful Poppies Suite that features all of the challenge colours and stamped a sentiment on the cross strip from the Peaceful Moments stamp set and used a diecut poppy as my accent:


I added a little decoration to the inside and the envelope to finish things off:

This is a great colour combo - I have a couple of other projects that use it too from one of last month's classes that it occurs to me I haven't shared with you - hopefully I will get to these later this week.  

Here is the visual summary of the key products used on today's project for you to pin for easy reference:


You can see all of my 'How To' summaries on my 'How To - Tips and Techniques' Pinterest board in case you've missed any. 

I'll be back tomorrow with another project. Until then, happy stampin'!


Stampin' Up! Supplies Used: 

Table built using Product Table Builder by The Crafty Owl - Independent Stampin' Up! Demonstrator.

Peaceful Poppies in Red, White and Grey CTD578

by Joanne James3. February 2020 19:00

I'm here with my second card of the day - and on a class day too, go me! And it's only Monday - let's hope that this is a sign of a productive week! This card is one of the ones that we made in my technique class this morning featuring the Painted Poppies bundle and I used this week's colours over The Color Throwdown as my inspiration:

This is the card I came up with: 


Here's the low-down on today's card:

Painted Poppies and Peaceful Moments - All of our class cards featured the Peaceful Poppies stamps and co-ordinating Painted Labels Dies. Here the poppies were simply coloured using Real Red ink and the watercolour 'splodge' stamp in the set, with a little detailing added with a marker and then diecut. The leaves were stamped in black and some tiny splodges added in Smoky Slate before fussy cutting by hand. We paired it with a sentiment of our choice from the 'Peaceful Moments' set - I chose this one, but everyone in my class used the 'With Deepest Sympathy as they thought this card wold work well as a sympathy card.  

Sweetly Stitched - I used the largest of the Stitched So Sweetly rectangular dies as the mat on my card; these are on page 20 of the Spring-Summer mini catalogue and worth a look if you've passed over them as they are easy to miss, especially if the co-ordinating stamp set is one that doesn't appeal. You're welcome ;-) 

A Pattern Party - I sponged some darker Basic Grey onto my scalloped rectangle piece using one of the Pattern Party masks, graduating the colour outwards from the corner, to add interest and tie in with my flowers. I added some clear sequins and some black pearls (regular ones coloured with a black marker) to the centre of my flowers to finish.

Here is the visual summary of the key products used on today's project for you to pin for easy reference:


You can see all of my 'How To' summaries on my 'How To - Tips and Techniques' Pinterest board in case you've missed any. 

This was the middle card from my class today and it's fair to say the ladies loved it. I'll share the others another time; in the meantime, if you live in or around Northampton and would like to attend a class, do get in touch - we would love you to join us! The next one features the 'Peaceful Moments' bundle and will be held on Monday 9th March - the day after my residential weekend craft retreat!

Enjoy your evening; I have to go and start on my ironing pile now - I can't put it off any longer! I'll be back tomorrow with another project. Until then, happy stampin'!


Stampin' Up! Supplies Used:

Table built using Product Table Builder by The Crafty Owl - Independent Stampin' Up! Demonstrator.

Congratulations Peaceful Poppies for PP473

by Joanne James12. January 2020 10:00

Today it's Sunday and time for this week's new challenge over at The Paper Players! It's the turn of the fabulous Anne Marie to host this week and she has what I'm sure will be a popular colour challenge for you to work with:
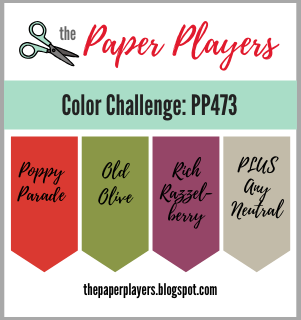
    

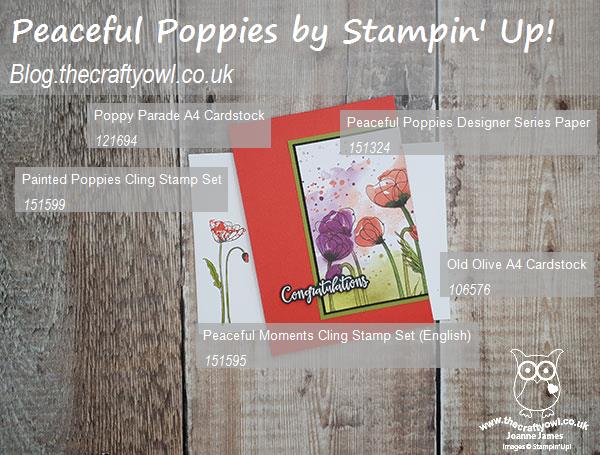
The reason I think Anne Marie's colour palette will be popular this week is that all of her key colours feature in the new Peaceful Poppies designer series paper from Stampin' Up! and try as I might to go in a different direction, I couldn't help but cut into my pack for today's card. With the help of Judy's great sketch over at Freshly Made Sketches this week, I was able to let the paper do all the talking - take a look:
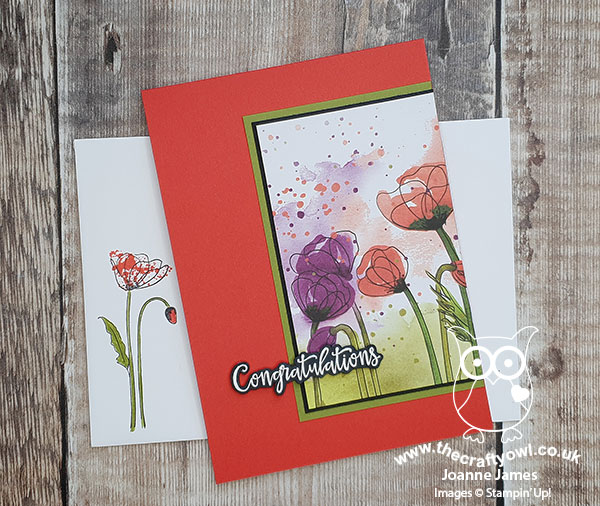
 

Here's the low-down on today's card:

Peaceful Poppies - Peaceful Poppies is one of the headline suites of the new Stampin' Up! Spring Mini Catalogue and it appears on the front cover. Beautiful line-art images accented by watercolour effects, all inspired by a field of poppies, the suite contains not one, but two bundles along with a range of co-ordinating accessories. My regular readers will know that I am a lover of designer series paper and I think the Peaceful Poppies paper is some of the most beautiful I've ever seen. One of the designs looks just like a painting and is perfect for card fronts and I cut a piece of this, featuring both Poppy Parade and Rich Razzleberry coloured poppies.

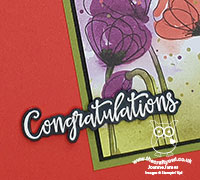
Neutral Black - My paper choice was so pretty, I couldn't bring myself to add much more to the front of my card. I used a Poppy Parade card base and added a double mount to frame my patterned paper, in Old Olive and Basic Black. I also decided to heat emboss my sentiment in white on black, as opposed to stamping the other way around - using black to 'frame' my picture and sentiment ties in to the black line-drawn design of the paper, so whilst used sparingly my neutral choice plays an important role.

Beautiful Inside And Out - Having done very little stamping on the front of my card, I decided a little interior decoration along with my split/masked sentiment was needed to redress the balance:
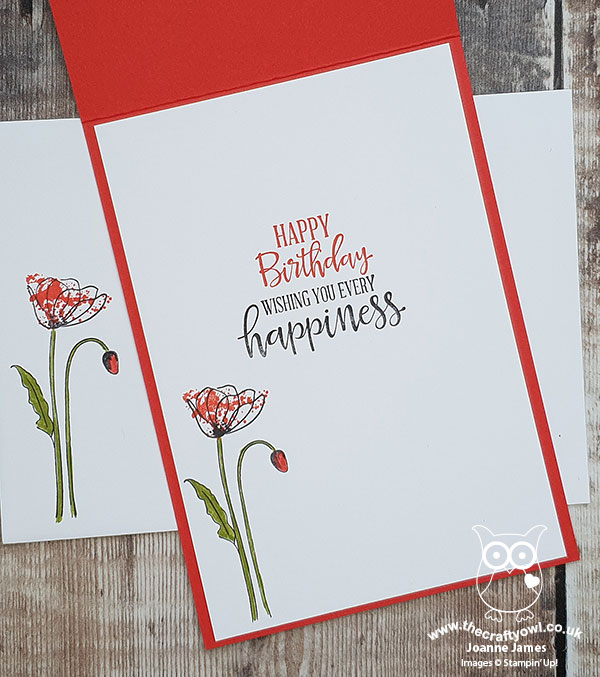
I added a poppy to the front of my envelope too - no naked envelopes here this week!

Here is the visual summary of the key products used on today's project for you to pin for easy reference:
 

You can see all of my Product and 'How To' summaries on my 'How To - Tips and Techniques' Pinterest board in case you've missed any. 

Before you reach for your ink and papers, check out what our amazing team has created to inspire you this week:

Here's a quick recap of our challenge rules:
 
1.  Create a new paper project
2.  Upload your creation to your blog with a link back to us and provide a direct link to the post featuring your challenge submission.
3.  Please link your card to no more than four challenges, TOTAL.
4.  Have FUN!

You can see all of my 'How To' summaries on my 'How To - Tips and Techniques' Pinterest board in case you've missed any. 

Enjoy your day; we had a day of sport yesterday so today should be a quieter one. I spent yesterday making final preparations for my class tomorrow, however if I'm lucky I might squeeze in a little extra crafting today - here's hoping! I'll be back tomorrow with another project. Until then, happy stampin'!


Stampin' Up! Supplies Used: 

Table built using Product Table Builder by The Crafty Owl - Independent Stampin' Up! Demonstrator.

Mini Catalogue

BROWSE THE CATALOGUE

The mini catalogue is now live! Read and download your copy here.

Shop Online

Access my online shop 24 x 7, 365 days of the year:

Current April hostess code:

VDKNV7BH

Shop Online

Join My Team

It's always a great time to join Stampin’ Up! New team members can get £130 worth of products for only £99 + free business supplies + free shipping + all the fun being a part of Stampin’ Up! Stampin' Up! has something for everyone: join my growing team and benefit from my support to enjoy Stampin' Up! however you choose.

If you're interested, call me for a chat to understand how I can help you realise your goals. Alternatively, if you have already decided to sign up and you just can't wait, please click here for the link to the online form where you can sign up and order your starter kit right away! 

Latest Kit!

Stampin Cut and Emboss

The Rock Legend Kit has all you need to make 8 cards with coordinating envelopes. Along with the new Panda Friends Kit, both are available from January 4th for just £14 each - get yours here!

2023-24 Annual Catalogue

BROWSE THE CATALOGUE

Click on the catalogue for a full list of current SU! supplies - if you would like to order any of the items featured, please drop me a line at [email protected] or give me a call on 07773 421446 - I'd be happy to help.

New Online Exclusives

There are new products available exclusively in the online store from 5 March - check them out here.

About Me

Hi I'm Joanne and live in Northampton and when I'm not looking after my husband and two beautiful children, am an avid crafter with a passion for all things Stampin' Up!

I must confess that I have never been a big rubber stamper - until I discovered Stampin' Up! that is. I love the fact that I can get such great results with co-ordinating stamps, inks, papers and punches - the possibilities are endless! Join me on my stamping journey as I share the things I love and be inspired to create amazing things yourself!

Follow Me

Monthly Newsletter

Box Builder

Click the button above to use Box Buster to create your custom box design using the Envelope Punch Board!

Kits Collection Now Available!

Stampin Cut and Emboss

The new Kits Collection from Stampin' Up! is now available!

Click here to see the current kits available and order yours online today.

I Design For


Stampin' Up Stuff

This is my personal blog and is not endorsed by Stampin’ Up! I hope you find it a plentiful source of ideas and personal inspiration but please don't copy my designs for contest submission or use for classes, publication or sale without express permission.