Hand-Penned Petals Feel Better Friend Card

by Joanne James18. February 2023 13:28


Today I'm sharing a card that I made using this week's colour palette over at Global Design Project #GDP381:


I love purples, but wasn't sure I could balance this colour combination. I decided I needed to balance it with a lot of white. I had also been considering which of the cards on page 5 of the Sale-A-Bration catalogue I was going to CASE for the current SUO Challenges challenge, and then I had an idea as to how I could bring the two together! I still had my Hand-Penned Petals bundle out on my desk from Thursday's card, so grabbed it and this is what I came up with:


Here's the low-down on today's card:

CASE Copy And Share Everything - Despite the rather literal definition, as a rule of thumb you should aim to alter the least three things on your card so that whilst the similarities to the original card are clear, you create something that is unique to you. So can you see from the photo below which card I CASE'd? 


Yes, it's the one with the bird's nest, coloured strips and spring sentiment. The layout is instantly recognisable - but the colours, stamp set, dies and sentiment are all different.

Make Your Own Background - The Hand-Penned Petal stamp set is a two-step set and has lots of Small stamps that can be used as infills for the flower and leaf outlines. Do you ever look at these stamps and consider how they could be used differently? Today's card is a good example. I used a different stamp for each of my coloured strips to create a unique tone-on-tone pattern. You can see each pattern more closely on the photo below:


What stamps do you have in your collection that could be used in this way?  

White on White - With those blocks of colour as my base, I wanted my diecut focal point to be white. I layered the large posy from the Penned Petal Dies, along with a few additional flowers and leaves, with just a single gem of colour. A trio of loose flower embellishments in Fresh Freesia and my get well soon sentiment complete my card.

Here is the visual summary of the key products used on today's project for you to pin for easy reference:


You can see all of my 'How To' summaries on my 'How To - Tips and Techniques' Pinterest board in case you've missed any. 

I've done double duty at the hockey pitch today covering home and away matches, so I am going to enjoy an evening with my feet up in front of the TV.  Enjoy your evening and I'll be back tomorrow with another project. Until then, happy stampin'! 


Stampin' Up! Supplies Used:

Table built using Product Table Builder by The Crafty Owl - Independent Stampin' Up! Demonstrator.

Penned Flowers Thank You in Pretty Peacock and Gold

by Joanne James16. February 2023 14:00

Today I'm sharing a card I made to squeak in an entry for this week's Just Us Girls Challenge using the colour combo over at AAA Cards and the Paper Craft Crew layout:


So the best thing to add sparkle to a card? Glimmer paper, of course! No shed, no mess - it's the best! I chose some gold glimmer paper (sadly now retired again, but every time it comes back I grab some to keep me going!) and paired it with some (retired) Pretty Peacock ink and cardstock for a clean an simple card using a bundle I haven't used in ages - take a look:


Here's the low-down on today's card:

I stamped the posy image from the 'Hand Penned Petals' stamp set directly onto my cardfront for a tone-on-tone effect, then added a strip of (retired) designer paper that I sponged in ink to dull the white pattern and trimmed this with a border cut from distressed gold paper. I then diecut the same posy image from gold glimmer paper and popped it on dimensionals, slightly offset from the stamped image:

I heat embossed my sentiment in gold and added a trio of gold enamel dots for a final touch of sparkle.

Were you a fan of Pretty Peacock when it was an in-colour a few years ago? If so, I have some news for you! This colour, along with one other previous retired in-colour, Lost Lagoon, are returning with the launch of some Online Exclusives on 1st March - this will be a rolling collection of products that will only be available online. I'll have more on that at the start of March - if you can't wait that long, do get in touch; for those who join Stampin' Up! before the end of this month, there is the opportunity to order these items that are currently on pre-order as part of your starter kit - another reason to join Stampin' Up! sooner rather than later!

Here is the visual summary of the key products used on today's project for you to pin for easy reference:


You can see all of my 'How To' summaries on my 'How To - Tips and Techniques' Pinterest board in case you've missed any. 

Enjoy your day and I'll be back tomorrow with another project. Until then, happy stampin'!


Stampin' Up! Supplies Used:

Table built using Product Table Builder by The Crafty Owl - Independent Stampin' Up! Demonstrator.

Painted Christmas Country Wreaths TTT188

by Joanne James17. November 2022 15:00

It's Thursday and time for a new challenge over at TicTacToe! It's the turn of Team X to host this week and the lovely Felicita is our featured designer this week. This is the fun board that we are playing along with: 


I have been having a lot of fun with my Cottage Wreaths bundle so decided to take the right hand column and use any shape die, wreath and gold foil/glitter for my card today - take a look:


Here's the low-down on today's card:

I love the sketch over at TGIF Challenges this week and decided that it would be perfect for a little of 'something old, something new' - I layered a stamped and diecut wreath from the Cottage Wreaths bundle over a panel of Soft Sea Foam. embossed with the retired but gorgeous Seasonal Wreath embossing folder. This has so much detail and dimension yet makes a pretty, subtle background. I also added some stamped and diecut holly leaves, red rhinestones and an antique gold foiled bow to my Christmassy Cottage Wreath, along with a fussy cut sentiment:

All of this was against a background of the returning favourite, painted Christmas Designer Series Paper, with a couple of red glimmer borders thrown in. The prettiness doesn't stop there though - I also decorated both the inside of my card, and the envelope - no naked envelopes here:

I'll be sharing this with the lovely ladies over at Just Us Girls where it's trend week and this is the trend Lisa has chosen. I love to decorate an envelope and the inside of my card to co-ordinate with the card front; I think it's a great way to add a finishing detail and I like to think that a patterned envelope makes the recipient smile before they've even opened it. 

Here is the visual summary of the key products used on today's project for you to pin for easy reference:


You can see all of my Product and 'How To' summaries on my 'How To - Tips and Techniques' Pinterest board in case you've missed any. 

A tictactoe board offers so many creative possibilities - how does this week's board inspire you? Why not have a go? We would love to see you in the gallery and who knows - you might be selected for Designer's Choice and be eligible to be a guest designer on a future challenge. 

Enjoy your day; I am heading out to Sixth Form Options Evening with the youngest of the James Juniors at school this evening; this does at least mean dinner out, due to the logistics of trying to get everywhere on time - what a treat! I'll be back tomorrow with another project. Until then, happy stampin'!


Stampin' Up! Supplies Used: 

Table built using Product Table Builder by The Crafty Owl - Independent Stampin' Up! Demonstrator.

Abigail Rose Thank You Card PP601

by Joanne James24. July 2022 08:00

Today it's Sunday and time for this week's new challenge over at The Paper Players! It's the turn of the fabulous LeAnne to host this week and she has my favourite, a sketch challenge for us to work with:


I wasn't sure how to tackle today's sketch initially, but I thought the focal point 'any shape' might lend itself to some fussy cutting, so I decided to reach for some of my designer papers and see where the mood took me! I settled on the lovely browns and neutrals of the Abigail Rose Suite and ended up creating a 'kitchen sink' of a focal point - take a look:


Here's the low-down on today's card:

I decided to use this bold pattern of white florals on a brown scripted background for my base, then fussy cut more of the flowers and used those as the basis for the decoration for my focal point. I used a stitched circle for my base, blending some inks to create an ombre effect and then layering a selection of leafy diecuts in shades of browns, along with some (retired) wooden leaves and sprigs and my trio of fussy cut flowers for decoration. I added a touch more colour to my fussy cut flowers using my Stampin' Blends, to give them a little more definition and added some Elegant Faceted Gems for a touch of sparkle:

I just kept layering and adding in bits and pieces until I felt happy with the way the decoration framed my sentiment (taken from the 'Hand Penned' stamp set) - hence my 'kitchen sink' reference! I decided to make my vertical banner element from vellum, so that it didn't obscure too much of the pattern beneath it. I also added some layered ribbon for detail and texture and to pick up the colour scheme (the Crumb Cake ribbon I used is retired but I've included a link below to a suitable current alternative). 

Very little stamping on today's card and just like my last one another card with lots of bits and pieces, but actually easy to recreate - the paper definitely does the 'heavy lifting' and I love the way the fussy cut flowers tie in with the base below. I'm also linking my card up with the ladies over at TGIF Challenges who are crafting with their favourite things this week - anyone who knows me well can attest to my love of designer series paper - I love it all, any pattern, any size and this card is definitely a showcase of that!

Here is the visual summary of the key products used on today's project for you to pin for easy reference:


You can see all of my Product and 'How To' summaries on my 'How To - Tips and Techniques' Pinterest board in case you've missed any. 

Before you reach for your ink and papers, check out what our amazing team has created to inspire you this week:

Here's a quick recap of our challenge rules:
 
1.  Create a new paper project
2.  Upload your creation to your blog with a link back to us and provide a direct link to the post featuring your challenge submission.
3.  Please link your card to no more than four challenges, TOTAL.
4.  Have FUN!

Enjoy your day; not much going on here 'chez James' this weekend - just enjoying a relaxing weekend in the garden, hopefully with a little crafty time thrown in now things have cooled down a little. I'll be back tomorrow with another project. Until then, happy stampin'!


Stampin' Up! Supplies Used: 

Table built using Product Table Builder by The Crafty Owl - Independent Stampin' Up! Demonstrator.

Pierced Blooms And A Hippo Birthday PP586

by Joanne James10. April 2022 08:00

Today it's Sunday and time for this week's new challenge over at The Paper Players! It's the turn of the fabulous Anne Marie to host this week and she has a bright colour challenge for us to work with:
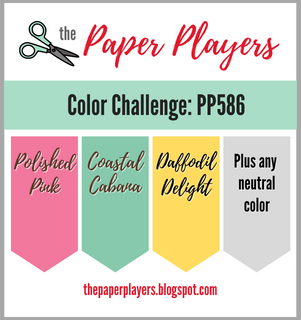
    

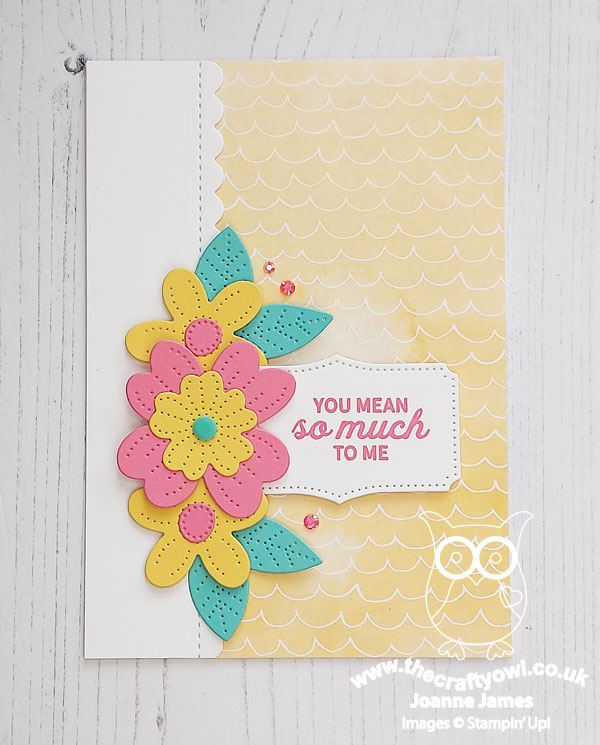
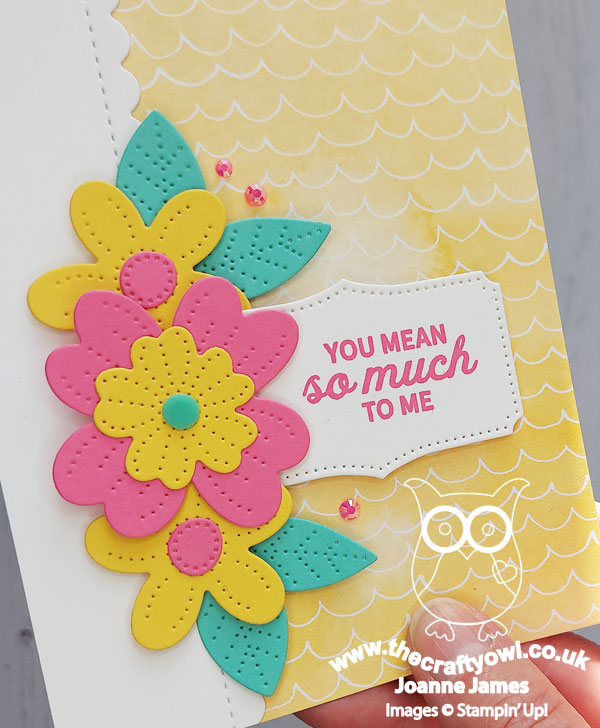
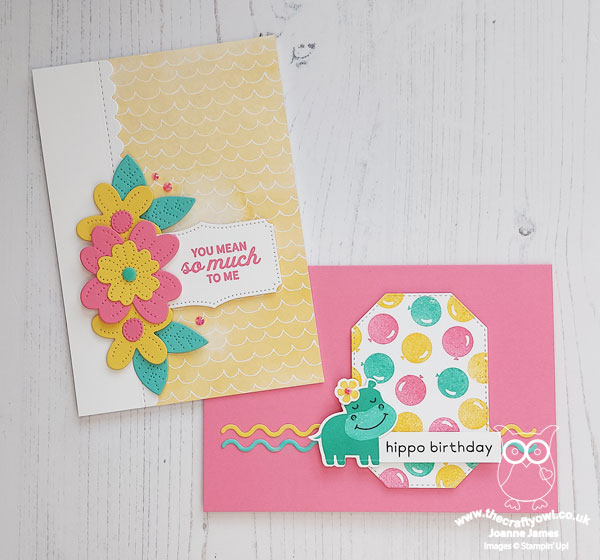
I love Anne Marie's bright and sunny colours this week and ended up making a couple of cards. First up I used this week's layout over at Hand Stamped Sentiments and went with some florals, care of my Pierced Blooms Dies - take a look:


Here's the low-down on today's card:

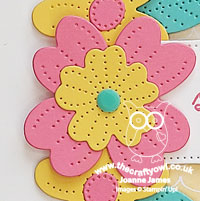
I diecut a trio of layered flowers and leaves and paired them with a piece of Daffodil Delight coloured Hand Penned designer series paper and used white as my neutral. A few polished pink gems add a touch of sparkle to the front of my card:


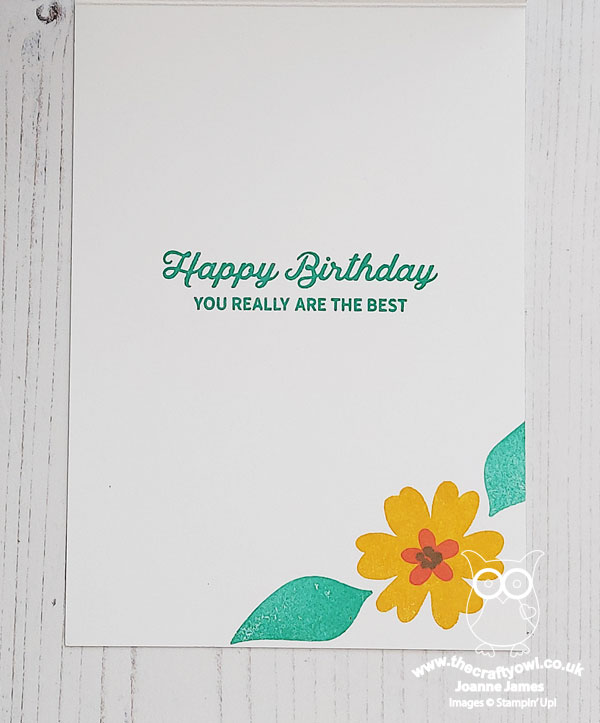
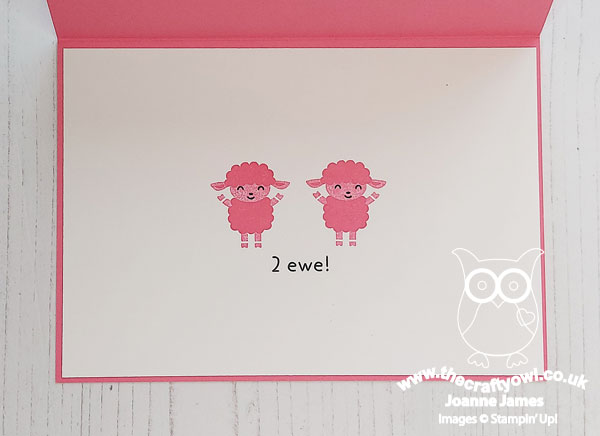
And a little extra stamping inside completes my card:


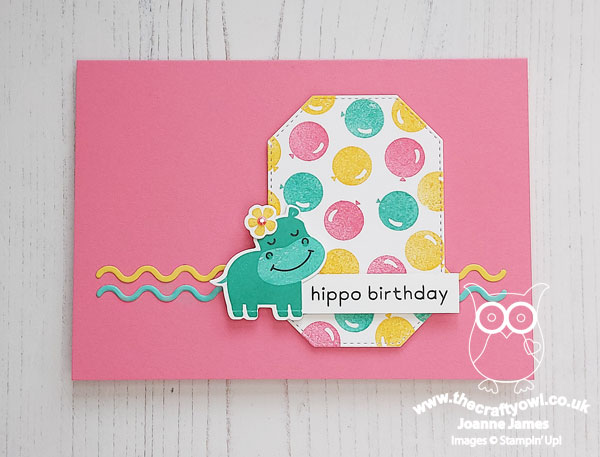
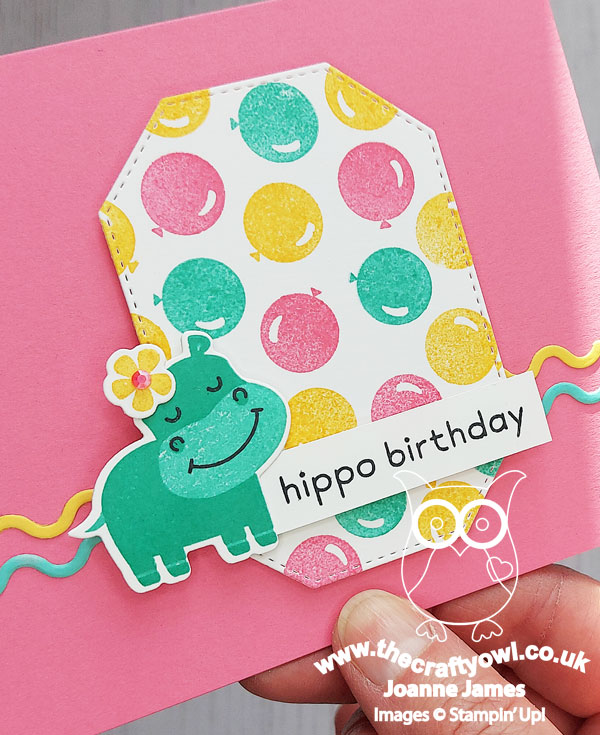
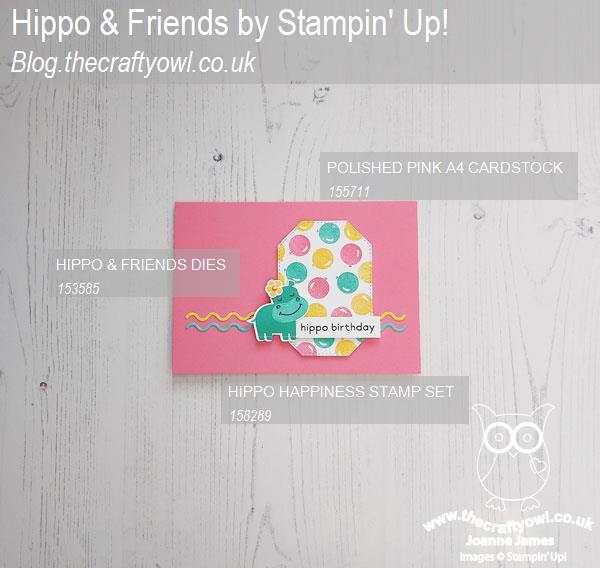
I wanted to try and use these colours on something other than flowers, so made a second card using the retiring 'Hippo Happiness' stamp set and co-ordinating Hippo & Friends Dies:


Some simple stamping and diecutting is all there is to it. The best part about this card is definitely the punny sentiment though - Hippo birthday...


... 2 ewe! Isn't that just so sweet?!


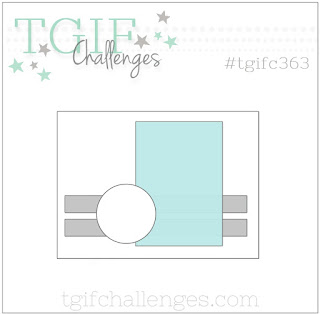
I used the sketch over at TGIF Challenges this week for the layout for this card and I am also linking up over at SUO Challenges where they are all about 'animals and critters' for their current challenge.

Two very different cards but I think both work with these colours. Which one do you prefer? Do leave me a comment below - I'd love to hear your thoughts.

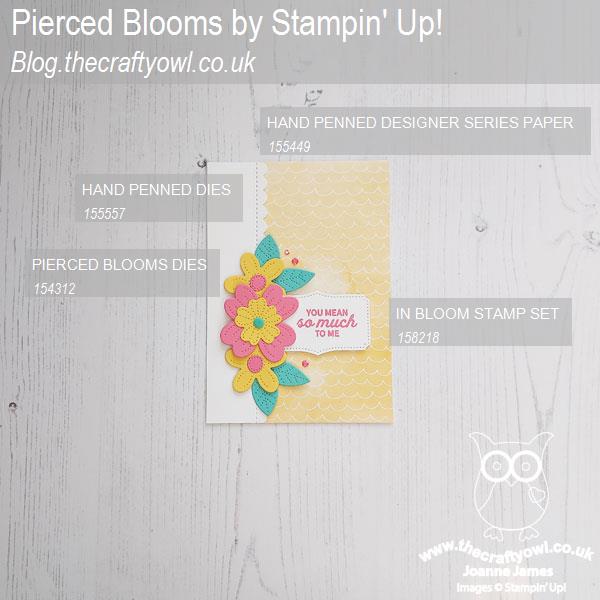
Here is the visual summary of the key products used on today's projects for you to pin for easy reference:


You can see all of my Product and 'How To' summaries on my 'How To - Tips and Techniques' Pinterest board in case you've missed any. 

Before you reach for your ink and papers, check out what our amazing team has created to inspire you this week:

Here's a quick recap of our challenge rules:
 
1.  Create a new paper project
2.  Upload your creation to your blog with a link back to us and provide a direct link to the post featuring your challenge submission.
3.  Please link your card to no more than four challenges, TOTAL.
4.  Have FUN!

Enjoy your day; we have some chores to take care of and we are out to lunch - should be a good day! I'll be back tomorrow with another project. Until then, happy stampin'!


Stampin' Up! Supplies Used (where still available): 

Table built using Product Table Builder by The Crafty Owl - Independent Stampin' Up! Demonstrator.


Relax In The Moment

by Joanne James16. March 2022 11:30

Today I'm sharing a card that I made using the current sketch over at TGIF Challenges:

Today's card features the 'In The Moment' stamp set and is also a sneak peek of things to come for the ladies attending my class next week that centres around this set. So many creative possibilities with this one in addition to straightforward colouring and this card showcases just one of them - take a look:


Here's the low-down on today's card:

I stretched the sketch as I needed my panel to be horizontal rather than vertical, to accommodate my stamped image and tag element and stamped my image onto a scalloped rectangle. I added a strip of Hand-Penned designer series paper to the left hand side, and having stamped and coloured my image using Stampin' Blends, I stamped the image a second time onto a piece of Hand-Penned paper and fussy cut both the blanket and pillows and paper-pieced them onto my coloured image to bring in some extra pattern. You can see the detail more closely on the image below:


I think this is quite a fun way to add extra interest to a coloured image. Some co-ordinating twine and a sentiment on a coloured tag completes my card.

I used one of the 2020-22 In Colors, Misty Moonlight, for the base of my card today and this is a good time to remind you that Misty Moonlight, along with the other 2020-22 In Colors Cinnamon Cider, Just Jade, Bumblebee and Magenta Madness, will all be retiring soon when the current annual catalogue retires. The retiring lists for the Annual Catalogue will be announced next week on Wednesday 23rd March and that is usually the point at which in-color products sell out, so if you need to stock up on ink, cardstock, reinkers or accessories, now is the time to get your order in!

Here is the visual summary of the key products used on today's project for you to pin for easy reference:


You can see all of my 'How To' summaries on my 'How To - Tips and Techniques' Pinterest board in case you've missed any. 

I'm looking forward to making a version of this card along with a couple of others at my card class next week. As a reminder, all of my classes are delivered online via Zoomm these days so if you're reading this and think you would like to join us do get in touch - you would be most welcome!

Enjoy your day; following yesterday's sunshine today it's pouring with rain, grey and freezing cold - clearly spring has not quite yet sprung!! I'll be keeping warm in my craft room and will be back tomorrow with another project. Until then, happy stampin'!


Stampin' Up! Supplies Used:

Table built using Product Table Builder by The Crafty Owl - Independent Stampin' Up! Demonstrator.

All Squared Away Floral Squares Birthday Card PP573

by Joanne James9. January 2022 09:00

Today it's Sunday and time for this week's new challenge over at The Paper Players! It's the turn of the fabulous Anne Marie to host this week and she has a fresh colour challenge for us to work with:


Anne Marie's colours feel like a breath of spring this week! I used Amy's fabulous layout over at Freshly Made Sketches, grabbed my dies and some patterned papers and set to work. This is what I came up with:


Here's the low-down on today's card:

Floral Squares - I decided to feature the Floral Squares Dies on my card today, which dictated the size of my shapes in relation to Amy's sketch (I used a horizontal as opposed to vertical layout for this reason). I used two of the four floral designs in the set, and cut each one out three times - once in Just Jade, once in Calypso Coral and once in white, also cutting the flower heads separately in Calypso Coral. I carefully snipped various elements out of each one and layered them to achieve my finished frames, with the flower heads applied last to slightly overlap my white frames.

A Trio of Patterns - I used three different patterned paper designs in the challenge colours for the squares/rectangles across the centre of my card - can you guess which packs each comes from? The first is from Hand Penned, the second from the new Abstract Beauty papers and the final one from the You're A Peach paper pack. Each has a spotted design; this unifies the patterns/colours and avoids the panels appearing too 'busy'. 


Finishing Touches - I used white as a neutral to unify the various elements of my design and as a finishing touch also added an in-colour gem and a neutral linen thread bow to my single flower frame:


I love Calypso Coral and I am really pleased with how today's card turned out - what a great colour combo this week Anne Marie!

Here is the visual summary of the key products used on today's project for you to pin for easy reference:


You can see all of my Product and 'How To' summaries on my 'How To - Tips and Techniques' Pinterest board in case you've missed any. 

I'm also linking today's card up over at The Paper Craft Crew where the theme this week is 'anything goes'. 

Before you reach for your ink and papers, check out what our amazing team has created to inspire you this week:

Here's a quick recap of our challenge rules:
 
1.  Create a new paper project
2.  Upload your creation to your blog with a link back to us and provide a direct link to the post featuring your challenge submission.
3.  Please link your card to no more than four challenges, TOTAL.
4.  Have FUN!

Enjoy your day; I am looking forward to a quiet family day - nothing special planned. I'll be back tomorrow with another project. Until then, happy stampin'!


Stampin' Up! Supplies Used: 

Table built using Product Table Builder by The Crafty Owl - Independent Stampin' Up! Demonstrator.

Hand Penned Create With Friends PP547

by Joanne James27. June 2021 08:00

Today it's Sunday and time for this week's new challenge over at The Paper Players! It's the turn of the fabulous Laurie to host this week and she has my favourite, a sketch challenge for you to work with:


I decided that the central rectangle was perfect to showcase a piece of designer paper so I grabbed a pretty pattern from the Hand Penned DSP pack and set to work. This is what I came up with:


Here's the low-down on today's card:

Hand Penned - I chose a beautiful pattern of soft blues, pinks and yellow from the Hand Penned paper pack and used one of the Hand Penned Memories and More Cards for my base for additional subtle colour and pattern. These watercolour effect papers are so pretty!

Penned Flowers - I added one of the detailed diecuts from the co-ordinating Penned Flowers Dies in white, having backed it with vellum cut with the larger outline die. This enabled the diecut to standout from the patterned paper a little more, whilst still giving a hint of colour and pattern behind. I added some loop fronds of stripped Pool Party sheen ribbon behind my diecut and added a sprinkling of pink and white Elegant Faceted Gems to decorate.


Amazing You - I finished my card with a fussy-cut sentiment from the 'Create With Friends' set. This is a set that allows you to create an endless combination of words to make a wide range of phrases and sentiments.

Here is the visual summary of the key products used on today's project for you to pin for easy reference:


You can see all of my Product and 'How To' summaries on my 'How To - Tips and Techniques' Pinterest board in case you've missed any. 

Before you reach for your ink and papers, check out what our amazing team has created to inspire you this week:

Here's a quick recap of our challenge rules:
 
1.  Create a new paper project
2.  Upload your creation to your blog with a link back to us and provide a direct link to the post featuring your challenge submission.
3.  Please link your card to no more than four challenges, TOTAL.
4.  Have FUN!

You can see all of my 'How To' summaries on my 'How To - Tips and Techniques' Pinterest board in case you've missed any. 

Enjoy your day; we had a busy day yesterday with the final school cricket match of the season (where did that term go?!) and a long bike ride around Grafham Water before finishing the day with my second Covid vaccination. Fortunately today should be a quiet one, so if I am feeling at all under the weather I will have the perfect excuse to craft or put my feet up and watch a movie! I'll be back tomorrow with another project. Until then, happy stampin'!

Stampin' Up! Supplies Used: 

Table built using Product Table Builder by The Crafty Owl - Independent Stampin' Up! Demonstrator.

Gather Happy Moments with Hand Penned Memories and More

by Joanne James22. June 2021 08:00

Today I'm sharing a card using the sketch layout over at Paper Craft Crew and the colours from the latest Color Dare Challenge


Purple is one of my favourite colours and I thought the sketch would be perfect to showcase a Memories and More card so my card came together pretty quickly - take a look:


Here's the low-down on today's card:

I took one of the floral Memories and More cards that features purple and yellow flowers (yellow and green are my additional colours to accompany my Highland Heather purple) and I trimmed down the card, adding the floral section to a stitched scalloped mat. I added a second panel of a co-ordinating Highland Heather pattern from the Hand Penned patterned paper pack. A tied bow of crinkle white ribbon and a trio of clear sequins along with the printed sentiment that was fussy-cut from the remainder of the Memories and More card finish my card:


Here is the visual summary of the key products used on today's project for you to pin for easy reference:


You can see all of my 'How To' summaries on my 'How To - Tips and Techniques' Pinterest board in case you've missed any. 

Enjoy your day and I'll be back later with this week's project for our new CAS Colours & Sketches challenge. Until then, happy stampin'!


Stampin' Up! Supplies Used:

Table built using Product Table Builder by The Crafty Owl - Independent Stampin' Up! Demonstrator.

Mini Catalogue

BROWSE THE CATALOGUE

The mini catalogue is now live! Read and download your copy here.

Shop Online

Access my online shop 24 x 7, 365 days of the year:

Current March hostess code:

S9F2XJJW

Shop Online

Join My Team

It's always a great time to join Stampin’ Up! New team members can get £130 worth of products for only £99 + free business supplies + free shipping + all the fun being a part of Stampin’ Up! Stampin' Up! has something for everyone: join my growing team and benefit from my support to enjoy Stampin' Up! however you choose.

If you're interested, call me for a chat to understand how I can help you realise your goals. Alternatively, if you have already decided to sign up and you just can't wait, please click here for the link to the online form where you can sign up and order your starter kit right away! 

Latest Kit!

Stampin Cut and Emboss

The Rock Legend Kit has all you need to make 8 cards with coordinating envelopes. Along with the new Panda Friends Kit, both are available from January 4th for just £14 each - get yours here!

2023-24 Annual Catalogue

BROWSE THE CATALOGUE

Click on the catalogue for a full list of current SU! supplies - if you would like to order any of the items featured, please drop me a line at [email protected] or give me a call on 07773 421446 - I'd be happy to help.

New Online Exclusives

There will be new products available exclusively in the online store from 5 March - check them out here.

About Me

Hi I'm Joanne and live in Northampton and when I'm not looking after my husband and two beautiful children, am an avid crafter with a passion for all things Stampin' Up!

I must confess that I have never been a big rubber stamper - until I discovered Stampin' Up! that is. I love the fact that I can get such great results with co-ordinating stamps, inks, papers and punches - the possibilities are endless! Join me on my stamping journey as I share the things I love and be inspired to create amazing things yourself!

Follow Me

Monthly Newsletter

Box Builder

Click the button above to use Box Buster to create your custom box design using the Envelope Punch Board!

Kits Collection Now Available!

Stampin Cut and Emboss

The new Kits Collection from Stampin' Up! is now available!

Click here to see the current kits available and order yours online today.

I Design For


Stampin' Up Stuff

This is my personal blog and is not endorsed by Stampin’ Up! I hope you find it a plentiful source of ideas and personal inspiration but please don't copy my designs for contest submission or use for classes, publication or sale without express permission.