New Wednesday Weekly Deals Are Here!

by Joanne James27. January 2016 09:00

It's Wednesday and you know what that means: a new collection of Wednesday Weekly Deals! These offers are valid for one week only. As always, a new collection of deals will be announced next Wednesday.

If you want to take advantage of any of the deals on offer, you can support my business by placing your order online by clicking here or using the link to my store on the right hand side of my blog page where it says 'Shop Online' or with me in person. Don't forget to add the new Hostess Code for January W2ZHBH2D if your order is under £150 and be sure to make sure that you don't check the 'no contact' box if you'd like to be kept updated with the progress of you order and receive a little thank you in the post from me. 

Here's a summary of this week's one-week only Wednesday deals - click on each item to go to the online store to purchase:

Table built using Product Table Builder by The Crafty Owl - Independent Stampin' Up! Demonstrator.

A little bit of everything this week! 

Back later with today's creative project; until then, happy shopping!

Serene Silhouettes Turquoise Ombre Card

by Joanne James26. January 2016 20:32

I've spent a lovely day today teaching a group of ladies how to brayer in a Brayer Technique Masterclass and witnessed lots of lovely sunsets and beautiful colour schemes as they learned the 'do's and don'ts' of perfecting the technique. Today's card is one of the ones we made, practising creating a monochromatic ombre:

We used a small 3/4" circle of post-it note to mask out a moon, then having brayered in the blue sky, I stamped the tree image partially off the panel in Black Archival ink and mounted this onto a mat of Basic Black. I then stamped the tree again on the Tempting Turquoise card base, using my stamp-a-ma-jig to line up with the partial stamped image. I added my sentiment from the 'Wetlands' stamp set to complete my card. 

I'm linking my card up again with the lovely ladies over at Less Is More whose challenge this week is to use a silhouette on your card. I like the way the partial stamping adds interest to the silhouette on this otherwise monochromatic card and this card was a great way to start today's class. Here's a shot of my ladies hard at work and having fun:


Very messy, but well worth it! 

If you would like to join one of my classes, please do get in touch for details of upcoming classes or check out the listings on my web page here

I'll be back tomorrow with another project; until then, happy stampin'!


Stampin' Up! Supplies Used:

Table built using Product Table Builder by The Crafty Owl - Independent Stampin' Up! Demonstrator.


You Are Tea-riffic Teapot Card

by Joanne James24. January 2016 09:00

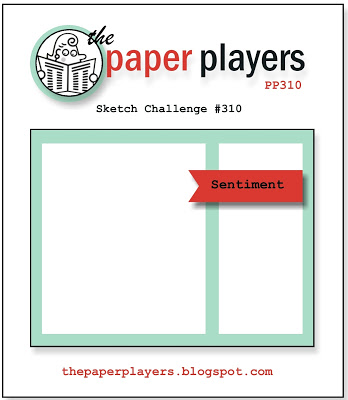
It's Sunday and time for a new challenge over at The Paper PlayersThis week it is the turn of the lovely Nance to host and she has my favourite type of challenge, a sketch, for you to play along with:

For my card this week I was inspired to use my Cups and Kettle Framelits Dies and co-ordinating 'Have A Cuppa' Designer Series Paper Stack for a fun card:


My colour scheme was taken directly from the paper stack and my card is otherwise really quite self explanatory. I added a White Perfect Accent to my teapot lid and some clear Wink of Stella to the steam heart above the spout for added shimmer. I love the bright colours in these papers and the many little elements in the framelit set - endless creative possibilities! 

Before you reach for your ink and papers, check out what our amazing team has created to inspire you this week:

The Paper Players Design Team
 
 
Here's a quick recap of our challenge rules:
 
1.  Create a new paper project
2.  Upload your creation to your blog with a link back to us and provide a direct link to the post featuring your challenge submission.
3.  Please link your card to no more than four challenges, TOTAL.
4.  Have FUN! 


I look forward to seeing what you create with this week's theme. We have a an important day of sport today: Ben is playing basketball this morning and no hockey this week as Rebecca has an afternoon of swimming with County trials today - wish us luck!

Back tomorrow with another project; until then, happy stampin'!


Stampin' Up! Supplies Used: 

Table built using Product Table Builder by The Crafty Owl - Independent Stampin' Up! Demonstrator.


Love Is In The Air Balloon Valentine Card

by Joanne James23. January 2016 21:51

I've had a busy day today with housework and homework, but fortunately a little crafting time too! I made a clean and simple Valentine's card for the following challenges:


Global Design Project, TGIF Challenges and SUO Challenges all have a Love-Valentine's theme and this week's sketch over at CAS(E) This Sketch provided me with the perfect layout for what I had in mind:

Using a Pool Party base, I took a piece of Shimmery White cardstock and washed it lightly from top to bottom with my Aquapainter and some Pool Party ink. then stamped a cluster of heart-shaped balloons in Blushing Bride and Watermelon Wonder, with Smoky Slate strings, using the 'Balloon Builders' stamp set. I heat embossed my sentiment in White on a popped up banner of Watermelon Wonder. This card has a wonderful lustre and sparkle in real life as a result of the shimmery white cardstock that is difficult to see in the photo and I just love the soft, almost watercoloured stamp effect of the balloons. One stamp set, one card - what's not to love?!

That's my card for today; come back tomorrow for a new challenge over at The Paper Players when I will be sharing another new set for the first time with you. Until then, happy stampin'!


Stampin' Up! Supplies Used:

Table built using Product Table Builder by The Crafty Owl - Independent Stampin' Up! Demonstrator.


Tags: , , , , , ,

Cards | Shop Online | Stamping

Silhouettes & Script Sunny Day Card

by Joanne James21. January 2016 08:05

Today it's time for a new challenge over at Create With Connie and Mary and this week we have an interesting colour combination for you:


I struggled a little with this colour combo - having seen Lisa Martz, one of the other Design Team members, adorable chick card I couldn't see how to use these colours for anything else (does that ever happen to you when you see something that was in your mind's eye all along?!) Finally this week's sketch over at Retrosketches helped me out and I came up with this:


I used Lost Lagoon for my card base then covered this with a piece of the raindrop patterned paper from the Sale-A-Bration 'Wildflower Fields' designer series paper pack and a top layer of Whisper White, stamped with my 'hello' greeting in Memento Black. I added a bright red frame cut with my Big Shot and square framelits and a Hello Honey sun, also from the Silhouettes and Script' hostess stamp set, which I fussy cut and popped up on dimensionals. I added an epoxy heart, adhered to Real Red cardstock, as a little embellishment.

A super clean and simple card that brings these colours together in a slightly unconventional way; it might not be that chick, but I like it!

Do visit the other Design Team members to see what they did with this week's colours; there's lots of inspiration over on their blogs too!

Enjoy your day and I'll be back tomorrow with another project; until then, happy stampin'!


Stampin' Up! Supplies Used:

  • Silhouettes & Script Clear-Mount Stamp Set
  • Wildflower Fields Designer Series Paper
  • Squares Collection Framelits Dies
  • Big Shot
  • Whisper White A4 Cardstock
  • Tuxedo Black Memento Ink Pad
  • Lost Lagoon A4 Cardstock
  • Hello Honey Classic Stampin' Pad
  • Real Red A4 Cardstock
  • Itty Bitty Accents Epoxy Stickers

Just For You Botanical Blooms Card

by Joanne James20. January 2016 09:00

It's Wednesday - hurrah! Today I have a card for this week's challenge over at CAS Colours and Sketches where they have the following sketch to work with:

I turned the sketch through 90 degrees for my card today and used the large sentiment from the 'Botanicals For You' Sale-A-Bration set, paired with some Botanical Gardens Designer Series Paper and yes, another of those flowers made using the Botanical Builder Framelits Dies - I just can't get enough of them! Here's my card:

I just love the different flower combinations you can make with these framelit dies! Whilst I do have something different to share with you tomorrow, rest assured you haven't seen the last of these yet!

That's all from me today; I'll be spending the day in my office - I'm hoping for a productive one! I'll be back tomorrow with a card for this week's new challenge over at Create With Connie and Mary. Until then, happy stampin'!


Stampin' Up! Supplies Used:

Table built using Product Table Builder by The Crafty Owl - Independent Stampin' Up! Demonstrator.


New Wednesday Weekly Deals Are Here!

by Joanne James20. January 2016 08:55

It's Wednesday and you know what that means: a new collection of Wednesday Weekly Deals! These offers are valid for one week only. As always, a new collection of deals will be announced next Wednesday.

If you want to take advantage of any of the deals on offer, you can support my business by placing your order online by clicking here or using the link to my store on the right hand side of my blog page where it says 'Shop Online' or with me in person. Don't forget to add the new Hostess Code for January W2ZHBH2D if your order is under £150 and be sure to make sure that you don't check the 'no contact' box if you'd like to be kept updated with the progress of you order and receive a little thank you in the post from me. 

Here's a summary of this week's one-week only Wednesday deals - click on each item to go to the online store to purchase:

Table built using Product Table Builder by The Crafty Owl - Independent Stampin' Up! Demonstrator.


Back later with today's creative project; until then, happy shopping!

Enjoy The Little Things

by Joanne James19. January 2016 07:00

Good morning lovely readers! Today I am sharing a card for this week's challenge over at Pals Paper Arts:

PPA-283-Jan14

I'm not usually one to gravitate towards colour challenges (I'm more of a sketch gal as you well know!) but I thought this was a great colour combo chosen by the equally great Brian King and so that, combined with the fact that he finds my English spelling of the word 'colour' in and of itself rather quirky, I just had to play along! Here's my card:

I decided to make a bold statement using blocks of colour, with Basic Black as my base and each of the other colours cut with both the positive and negative pieces of the intricate leaf framelit from the Botanical Builder Framelits Dies and pieced together for my base. I stamped my sentiment in Versamark and heat embossed it in white on an oval of Basic Black, which I then popped up on dimensionals in the centre of my card. What to use to tie the whole thing together though? I decide to have a go at making a loopy flower out of the new thick baker's twine that comes in the challenge colours; I made a few but decided one was enough to ground my sentiment and bring the whole thing together. If you've never made one of these before, they are really not that tricky when you know how. With that in mind, I made another short technique tutorial to show you how it's done - I haven't yet had time to edit it though, so will share with you later in the week. 

That's all from me today; I have a private class this morning with a wonderful group of seniors at a local residential care home and then a few jobs this afternoon before taking the James Juniors for their music lessons. Another busy day!

Back tomorrow with another project; until then, happy stampin'!


Stampin' Up! Supplies Used:

Table built using Product Table Builder by The Crafty Owl - Independent Stampin' Up! Demonstrator.


Another Sale-A-Bration Hello!

by Joanne James18. January 2016 07:00

Hello to you from James Towers this morning! It's cold outside but we haven't had any more snow, much to the disappointment of my James juniors who were so hoping for a snow day today! 

Today's card is for the current 2 year anniversary challenge over at Fusion where they have this wonderful summery photo inspiration and optional sketch to play along with:

I used the photo and the sketch for my card today, albeit I used the sketch in a landscape rather than portrait orientation as it suited my embellishments a little better. Here is my card:

I used a base of extra thick Whisper White cardstock and covered the lower part with a piece of chevron designer series paper from last year's Brights dsp stack. I added a strip of Melon Mambo cardstock and also used it to frame my 'Hello' sentiment, from the Sale-A-Bration stamp set of the same name. I added a trio of layered flowers in pinks and yellow, for my embellishment. I cut each of them using the Botanical Builder Framelits Dies, adding some sponging for added depth. These framelits make gorgeous flowers with so much layering and interest and if you run them through your Big Shot with the Precision Base Plate and use the new Big Shot Die Brush to remove the cuts from the dies, they are incredibly easy to make.

I just love the breath of summer that the colours and flowers of today's card evoke - makes me forget the freezing temperatures outside, even if just for a little while! That's all from me today; I have a busy day with a piano lesson, some final preparation for a private class tomorrow and I'm off to watch Rebecca's first netball match of the season this afternoon - thankfully, indoors! Back tomorrow with another project; until then, happy stampin'!


Stampin' Up! Supplies Used:

Table built using Product Table Builder by The Crafty Owl - Independent Stampin' Up! Demonstrator.


Tags: , , , , ,

Cards | Shop Online | Stamping

You Send Me Soaring Valentine's Card and Technique Video Tutorial

by Joanne James17. January 2016 09:00

It's Sunday and time for a new challenge over at The Paper PlayersThis week it is the turn of the lovely Sandy to host and she has a timely clean and simple theme for you to play along with:

For my card this week I was inspired to use the Sale-A-Bration set ''Sky is The Limit' to create my clean and simple Valentine's card - I was so keen to make a card with a red bi-plane! Here it is:


I used a base of Soft Sky and a piece  of diagonal striped black and white paper from the neutrals paper stack for a mat, then took a piece of watercolour paper that I washed with my aqua painter and some Soft Sky and Pool Party inks for a hint of colour. Once my sky panel was thoroughly dry, I stamped the clouds and smoke trail in Versamark and heat embossed them in white, the stamped the sentiment and heat embossed that in black. I then went back to my clouds and smoke trail and used the effect I shared with you previously on this card here, where I filled in the space with Tombo, covered in White embossing powder and then heat embossed until the powder set and the glue bubbled. This effect not only works for snow as on my previous card but for clouds and smoke trails too!

I also added a touch of Melon Mambo within the heart to make it stand out a little. Finally, I stamped my bi-plane in Real Red onto a piece of Whisper White cardstock and fussy cut it out, adding a small piece of window sheet cut using my flower builder punch (the stamen) and a silver mini-brad to accentuate the propeller, before popping it on a couple of dimensionals and adding to my card - here's a close up:


Isn't that fun? I hope you like today's card - this is a set with so many uses, not just Valentines. It's a limited time Sale-A-Bration offer and is only available until 15th February. Plenty of time to get it in order to make a love-themed card for a special person though, so don't forget to add it to your next £45 order for free!

I've edited today's post to include a little video tutorial that I filmed this afternoon that shows exactly how I created the effect I described above:


I hope you enjoyed that - I haven't made a video in ages but there have to be some advantages to waking up to snow on the ground - more time to craft!

Before you reach for your ink and papers, check out what our amazing team has created to inspire you this week:

The Paper Players Design Team
 
 
Here's a quick recap of our challenge rules:
 
1.  Create a new paper project
2.  Upload your creation to your blog with a link back to us and provide a direct link to the post featuring your challenge submission.
3.  Please link your card to no more than four challenges, TOTAL.
4.  Have FUN! 


I look forward to seeing what you create with this week's theme. We have no hockey due to the freezing weather here in the UK and a frozen pitch; in fact, snow on the ground meant that snowball fights even won out over basketball today. As for me - the results of my endeavours are included above!!

Back tomorrow with another project; until then, happy stampin'!


Stampin' Up! Supplies Used: 

Table built using Product Table Builder by The Crafty Owl - Independent Stampin' Up! Demonstrator.

New Online Exclusives

There are new products available exclusively in the online store from 5 November - check them out here.

Latest Kits!

Stampin Cut and Emboss

The Layered Landscapes Kit and Nature's Paintings Kit are the latest kits in the online store - get yours here!

Shop Online

Access my online shop 24 x 7, 365 days of the year:

Current November hostess code:

9NKXDTTR

Shop Online

Mini Catalogue

BROWSE THE CATALOGUE

'Tis The Season - the new Stampin' Up! Mini Catalogue is here! For more details and to download your copy click here

Scrapbooking

Stampin' Up! has introduced a new range of 12x12" scrapbooking product and kit - the full range is now available to purchase online. To download a copy of the new digital Scrapbooking Catalogue click here.

2024-25 Annual Catalogue

BROWSE THE CATALOGUE

Click on the image to download your copy of the 2024-25 annual catalogue. For a full list of current SU! supplies, go to my online store. If you would like any help or advice, please drop me a line at joanne@thecraftyowl.co.uk or give me a call on 07773 421446 - I'd be happy to help.

Join My Team

It's always a great time to join Stampin’ Up! New team members can get £130 worth of products for only £99 + free business supplies + free shipping + all the fun being a part of Stampin’ Up! Stampin' Up! has something for everyone: join my growing team and benefit from my support to enjoy Stampin' Up! however you choose.

If you're interested, call me for a chat to understand how I can help you realise your goals. Alternatively, if you have already decided to sign up and you just can't wait, please click here for the link to the online form where you can sign up and order your starter kit right away! 

About Me

Hi I'm Joanne and live in Northampton and when I'm not looking after my husband and two beautiful children, am an avid crafter with a passion for all things Stampin' Up!

I must confess that I have never been a big rubber stamper - until I discovered Stampin' Up! that is. I love the fact that I can get such great results with co-ordinating stamps, inks, papers and punches - the possibilities are endless! Join me on my stamping journey as I share the things I love and be inspired to create amazing things yourself!

Follow Me

Monthly Newsletter

Box Builder

Click the button above to use Box Buster to create your custom box design using the Envelope Punch Board!

Kits Collection Now Available!

Stampin Cut and Emboss

The new Kits Collection from Stampin' Up! is now available!

Click here to see the current kits available and order yours online today.

I Design For


Stampin' Up Stuff

This is my personal blog and is not endorsed by Stampin’ Up! I hope you find it a plentiful source of ideas and personal inspiration but please don't copy my designs for contest submission or use for classes, publication or sale without express permission.