Wishing You Well Thanksgiving Wreath PP417

by Joanne James4. November 2018 09:00

Today it's Sunday and time for this week's new challenge over at The Paper Players - yay! It's the turn of my wonderful friend Claire to host this week and she has a timely theme challenge for you to work with that I know she would love you to play along with:


I know that Claire loves Thanksgiving and whilst it isn't something we celebrate here in the UK, the underlying theme of being grateful and thankfulness is one we should all celebrate. I used both the sketch layout and photo inspiration over at Fusion and CASual Fridays as starting points for today's card: warm autumn leaves and wood textures feature heavily on my card this week - take a look:


Here's the low-down on today's card:

Textured Layers -  I wanted to create texture on my card and did something quite unusual for me: used not one, but two embossing folders on my background panels. To recreate the grey weatherboard effect, I used my Simple Stripes embossing folder on a panel of Smoky Slate. For my feature panel, I used a piece of Wood Textures Designer Series Paper and added further texture by running this through my Pinewood Planks embossing folder. I love the effect this gives - it adds so much interest and detail.

A Wreath of Twigs and Leaves - I stamped the wreath from the Wishing You Well stamp set in Early Espresso onto a stitched circle of Very Vanilla and punched out the middle using my 1 1/4"  circle punch, so that more of the textured wood panel could be seen. I coloured a selection of pearls in various sizes with my Pumpkin Pie, Daffodil Delight and Cajun Craze Blends markers to suggest leaves and then added a trio of actual leaves cut with my Seasonal Layers Thinlits to frame my sentiment (I sponged the edges of the leaves to add depth).

Something For The Thanksgiving Table - When I started my card, I wanted to create a wreath like the one in the Fusion inspiration photo. I made a wreath in autumnal colours using my sprig punch that I really loved, but when it came to adding it to my card, it was a little too bulky so I went back to the drawing board. I didn't want my punched wreath to go to waste though, so instead I attached it to a band of Very Vanilla stamped with my Buffalo Check stamp in Crushed Curry, added a banner sentiment and a braided linen twine bow and made a napkin ring - perfect for the Thanksgiving table. Here's a photo of my finished napkin ring:


I'm linking my napkin ring up with the ladies over at SUO Challenges where they are looking for home decor items for the Thanksgiving table. This was so easy to make yet really effective - you could make a while bunch of these to decorate the Thanksgiving table in a relatively short space of time. 

Here is the visual summary of the key products used on today's project for you to pin for easy reference:


You can see all of my Product and 'How To' summaries on my 'How To - Tips and Techniques' Pinterest board in case you've missed any. 

Before you reach for your ink and papers, check out what our amazing team has created to inspire you this week:

Here's a quick recap of our challenge rules:
 
1.  Create a new paper project
2.  Upload your creation to your blog with a link back to us and provide a direct link to the post featuring your challenge submission.
3.  Please link your card to no more than four challenges, TOTAL.
4.  Have FUN!

You can see all of my 'How To' summaries on my 'How To - Tips and Techniques' Pinterest board in case you've missed any. 

Enjoy your day; it is the last day of the James Juniors' half term and there is hockey to be played along with a little down time before the return to school tomorrow. I'll be back here tomorrow with another project. Until then, happy stampin'!


Stampin' Up! Supplies Used - For the card: 

Table built using Product Table Builder by The Crafty Owl - Independent Stampin' Up! Demonstrator.
 

Stampin' Up! Supplies Used - For the napkin ring: 

Table built using Product Table Builder by The Crafty Owl - Independent Stampin' Up! Demonstrator.

Snowflake Showcase Pillow Box Creative Retreat Gifts

by Joanne James2. November 2018 19:00

As promised in my earlier post today (you can read that here if you missed it), today I'm sharing something a little different that I gave a sneak peek of on my Facebook page the week before last - a 3D project! Today is the perfect day to share it since it coincides with the launch of the Snowflake Showcase product suite yesterday - you can read all about that here.

The weekend before last I held my second residential craft retreat this year. I love these weekends: they are a great opportunity for me to spend quality time with my customers, some of whom I see at my regular classes but for many who follow my blog and shop with me online and for whom this is an opportunity to get away from it all for some quality crafting time amongst friends. I am grateful that they choose to spend a weekend with me crafting and as such in addition to their goody bags, they receive lots of little pillow gifts and table favours throughout their stay as a token of my appreciation. When they leave at the end of the weekend, I like to gift them a key ring that is unique to that retreat as a reminder of the fun time that they've had. It has to showcase some fabulous Stampin' Up! product too, both on the keyring and the packaging so for this one I just had to feature the limited edition, exclusive Snowflake Showcase products that went live on sale yesterday. So first up here is the packaging for my gift:


I dressed up one of the kraft pillow boxes available in the annual catalogue with some silver-trimmed ribbon and added a sentiment banner stamped tone-on-tone with the border stamp and then heat-embossed my sentiment in silver over the top. I then added the fabulous string of snowflakes diecut to the front of the box for a real 'wow'.

It didn't end there; I continued the snowflake theme inside with a keyring, that had a snowflake tree, a teeny-tiny sentiment and one of my craft retreat logos all stamped onto shrink plastic and reduced in size, along with one of the gorgeous snowflake trinkets that are also part of this suite. I made them in two colourways, Pool Party and Balmy Blue:


Here's a picture of them both together - gift and packaging. What do you think - cute enough to hang your keys from? 

I received such lovely comments from the ladies who attended my retreat, who all said they felt truly spoiled all weekend. Here's one of the pictures I shared over on my Facebook page of us at dinner on the Saturday evening, with some of them sharing another of their table gifts:


Christmas crackers, what else?! I will have more projects using the fabulous Snowflake Showcase in the coming weeks so look out for those and meanwhile do get in touch with me directly or via my online store to order yours whilst supplies last.

Equally, if you would like to be similarly spoiled and enjoy a fabulous crafty weekend away from it all, there are still spaces available on my March 2019 retreat which will be held in the West Midlands on 2-3 March - you can read more about it here and I would love it if you could join me! The dates for next October will be released soon and I already have a waiting list for this event, so if you would like to be one of the first to receive the details as they are published then do get in touch with me via joanne@thecraftyowl.co.uk to register your interest as spaces are likely to be snapped up quickly!

Enjoy your evening and I'll be back tomorrow with another project. Until then, happy stampin'!


Stampin' Up! Supplies Used:

Table built using Product Table Builder by The Crafty Owl - Independent Stampin' Up! Demonstrator.

Copper and Merry Merlot Swirly Snowflakes Christmas Card and Triangular Gift Box

by Joanne James23. September 2018 09:00


Today it's Sunday and time for this week's new challenge over at The Paper Players! It's the turn of the fabulously creative Jaydee to host this week and she has my favourite, a sketch challenge, for you to work with:


I decided to continue getting a headstart on my Christmas card making preparations (so my projects are perfect for the challenge over at TGIF Challenges too this week) and spent a few hours making a more involved boxed Christmas card with a matching gift box too. First things first - here's my card:


Here's the low-down on today's card:

Diagonal Swirly Snowflake Border - Whilst I love a good sketch, I often struggle with the concept of a diagonal. I decided to alter the dimensions of Jaydee's sketch and create a horizontal fold out card as I wanted to use my Swirly Snowflakes Thinlits Dies to create a layered diagonal edge and I needed the extra width to balance my card and fit the entire border in (I'm sure she will allow me this liberty ;-) ). I snipped away the straight edge of my copper foil snowflakes and added a sentiment embossed in white, before adding my embellishment (more on that below). My card opens from the right to reveal a complete panel of my favourite copper-embossed Joyous Noel Specialty Designer Series Paper, then the left hand side lifts to reveal the sentiment inside, embellished with a narrow strip of copper washi tape:

Christmas Copper Snowflakes - I created a layered embellishment on the front of my card, using one of the copper snowflake wire elements as the centrepiece. I layered this with a Shimmery White diecut from the Eastern Medallions Thinlits set, with a centre of a clear epoxy droplet on a copper sequin, all layered up on a fancy double bow in the gorgeous Merry Merlot and Copper Reversible Ribbon. This showy embellishment adds a lot of dimension to the front of my card, so much so that it wouldn't fit in a standard envelope. Instead, I made a box with a co-ordinating belly band closure:

A Gift Box To Match - This kind of card takes a little while to make and is destined for someone who I know will appreciate the effort and time taken to create it. Whilst I was fully 'in the zone', I decided to create a co-ordinating gift box with a magnetic closure. The box measures approx. 15cm x 6cm x 5cm, so not huge but large enough for a small gift to accompany my card. I created a triangular box with a decorative flap created using the Swirly Snowflakes Thinlits for the border detail, based on this one I'd seen on Pinterest. I decorated the front panel of my box with more of that gorgeous Joyous Noel DSP too: 

And here's one last photo of all three of my project elements together - I hope you will agree, a lovely Christmas set in rich, festive colours:


Here is the visual summary of the key products used on today's project for you to pin for easy reference:


You can see all of my Product and 'How To' summaries on my 'How To - Tips and Techniques' Pinterest board in case you've missed any. 

Before you reach for your ink and papers, check out what our amazing team has created to inspire you this week:

Here's a quick recap of our challenge rules:
 
1.  Create a new paper project
2.  Upload your creation to your blog with a link back to us and provide a direct link to the post featuring your challenge submission.
3.  Please link your card to no more than four challenges, TOTAL.
4.  Have FUN!

You can see all of my 'How To' summaries on my 'How To - Tips and Techniques' Pinterest board in case you've missed any. 

Thank you Jaydee for a great sketch - who would have thought that it would have resulted in 3 projects in one go!

Enjoy your day; the weather has been dreadful here the past couple of days so I'm hoping I get the longer straw and get to stay home and craft whilst hubby takes the James Juniors to hockey trials this afternoon. I'll be back tomorrow with another project. Until then, happy stampin'!


Stampin' Up! Supplies Used: 

Table built using Product Table Builder by The Crafty Owl - Independent Stampin' Up! Demonstrator.

Country Lane Thank You Card and Chocolate Slider Gift Packaging

by Joanne James3. September 2018 09:00


Today I'm sharing a card and co-ordinating chocolate slider gift package that I actually made for last week's challenge over at Just Add Ink  but didn't get to photograph in time to play along;luckily for me, it is perfect for this week's Just Add Ink challenge too - if you take a look at the challenge badges, you will see what I mean: 


I absolutely loved the JAI colour palette last week and I couldn't resist breaking out some of my new products to create a card and matching gift packaging - luckily there's plenty of texture in there too! Firstly, here's the card I created:


Here's the low-down on today's projects:

Country Home - From the Country Lane Suite in the new Autumn-Winter catalogue, the Country Home stamp set is all about country living, with some great thanks sentiments and it's perfect for colouring too. I used my Blends to add colour to my Fall florals and fussy cut them out ready to layer onto my card. I also stamped a border using the tiled stamp in the set for some 'faux texture' with some Bermuda Bay tone-on-tone stamping, tucked under my sentiment.

Tin Tile Metallics - The background panel of my card is a piece of silver foil cardstock that has been embossed with the new Tin Tile Dynamic Textured Impressions Embossing Folder and given a slightly aged/distressed look by sponging with some Soft Suede ink. I just love the embossed pattern of this folder; it's so pretty. I know I'm going to use it lots!

Thankful For ... Chocolate - I loved my card so much, I thought I would create a matching slider gift package using exactly the same layout and design to make a slider wrap for one of my favourite bars of chocolate, ready to gift to someone; it's always nice to be able to share a sweet treat, especially when beautifully packaged I think - I love going to the trouble to make something quite ordinary appear to be rather special: 


These wraps are very straightforward - and when you pull the ribbon bow and tag, the chocolate bar slides outwards:


Finally, here's a shot of both items together:


Here is the visual summary of the key products used on today's project for you to pin for easy reference:


You can see all of my 'How To' summaries on my 'How To - Tips and Techniques' Pinterest board in case you've missed any. 

I think this set will be heading for my local postmaster as a thank you for his help with my Autumn-Winter catalogue mailings this week (yes, if you're one of my customers the catalogues are in the post!) He is used to me appearing with bags full of catalogues to be mailed at this time of year and we have a great system going now, which makes the process efficient and keeps ongoing queues to a minimum! I like to give him a bar of chocolate as a thank you for his help and to keep him sweet :-) On the subject of Autumn-Winter catalogues: if you don't have a demonstrator and would like me to add you to my list, then do get in touch and I can pop one in the post to you too. The electronic version of the catalogue will be available here online tomorrow when it launches.

Enjoy your day and I'll be back tomorrow with another project. Until then, happy stampin'!


Stampin' Up! Supplies Used:

Table built using Product Table Builder by The Crafty Owl - Independent Stampin' Up! Demonstrator.

Treehouse Adventure Lunchbox Love Note Trio PP408

by Joanne James2. September 2018 09:00

Today it's Sunday and time for this week's new challenge over at The Paper Players - yay! It's my turn to host this week and I have a fun theme challenge for you to work with:


This week is back-to-school week here in the UK and so it's the time that I start thinking about little notes to put in the lunchboxes and pencil cases of my James Juniors to let them know I'm thinking of them during the school day, hence my chosen theme this week.

When I think about lunchbox love note cards, I like to create something that is slightly smaller than usual that can be slipped into a pocket or pencil case (or lunchbox!) and 'discovered' during the day. One of the sets I couldn't wait to get my hands on when the new annual catalogue went live was 'Treehouse Adventure' - so perfect for these types of cards! So I decided to create a little trio of cards using this set for the challenge this week - take a look:


Here's the low-down on today's cards:

Take A Simple Notecard - If I am making lunchbox notes, I generally like them to be quick and easy to create and tend to make them smaller than a standard card as they are easier to slip into a lunchbox, blazer pocket or pencil case. At 5 1/4" x 3", Stampin' Up!'s notecards and envelopes are just perfect for this. I took a trio of notecards and stamped three simple designs, mostly one layer apart from the smallest amount of fussy cutting (the signs, flags and tyre swing) and some punched sentiments. Easy peasy!

Here are each of my cards individually:


I just love this card - what a great sentiment! This next one is a perfect uplifting phrase for the start of a new school year: 


And this final one is perfect for the start of a new year and all the changes that this brings:


Treehouse Adventure Colour Combo - I chose a bright and cheery colour combo for my child-friendly notecards - here it is if you would like to save it to use on your projects:


A Little Treat Too - In addition to my notecard trio, I decided to make a quick and easy co-ordinating treat too. I wrapped a small chocolate bar in a piece of Brights DSP and stuck it top and bottom and added a simple ribbon and tag - you can see the wrapped and an unwrapped version below:


These cards will be for Ben and I often bring him a little treat on a Friday afternoon to celebrate the end of the school week and give him a little pick-me-up before his Friday evening swimming lesson. We often play a game of '10 questions', where he has 10 questions to try and guess what the treat inside the packaging is, by asking questions that can have only 'yes' or 'no' answers. If he guesses within the 10 questions, he gets his treat - I don't think he's never not managed it, but it has enabled him to develop some astute questioning skills, not to mention his knowledge of sweet treats, brands and packaging! It is one of the little games we play to make our car journey pass quickly - I can highly recommend it!

Here is the visual summary of the key products used on today's project for you to pin for easy reference:


You can see all of my Product and 'How To' summaries on my 'How To - Tips and Techniques' Pinterest board in case you've missed any. 

I am also linking today's notecards up with the challenge over at SUO Challenges where the theme is 'Babies and Kids' this week. And just in case you think my older James Junior is missing out, not so - I made some slightly more sophisticated notes for her which were inspired by a rather unlikely object which I will share with you later this week!

Before you reach for your ink and papers, check out what our amazing team has created to inspire you this week - the lovely Ann Schach is back with us too as a permanent design team member again following an extended break, so be sure to pop by her blog and say hi:

Here's a quick recap of our challenge rules:
 
1.  Create a new paper project
2.  Upload your creation to your blog with a link back to us and provide a direct link to the post featuring your challenge submission.
3.  Please link your card to no more than four challenges, TOTAL.
4.  Have FUN!

You can see all of my 'How To' summaries on my 'How To - Tips and Techniques' Pinterest board in case you've missed any. 

Enjoy your day and I'll be back tomorrow with another project. Until then, happy stampin'!


Stampin' Up! Supplies Used:  

Table built using Product Table Builder by The Crafty Owl - Independent Stampin' Up! Demonstrator.

Creative Escapes From The Crafty Owl - October Luxury Crafting Weekend Retreat Booking Offer!

by Joanne James25. August 2018 10:50

Happy Bank Holiday weekend to my UK readers and I hope the rest of you are finding fun (and maybe even crafty!) things to do this weekend. I have managed to squeeze in a little craft time this week so do have lots of new projects to share with you (especially using the items in my Autumn-Winter preorder box, I can't stop creating with them!) but firstly today I want to talk about creative escapes of a different kind!
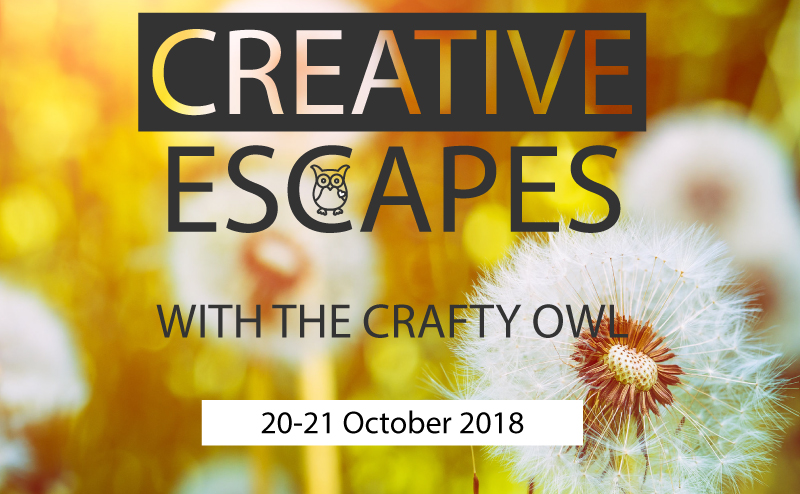
 

Further to the successful weekend retreat I held earlier this year with my friend and fellow demonstrator Louise Sims, I have another two sole ventures planned. The same venue, more great projects and most importantly a weekend away, full of crafting and good company. If getting away from everyone and everything and having some ME time appeals, then a luxury weekend of crafting and a Creative Escape with The Crafty Owl sounds just the thing for you.

Where is the retreat held?

The venue for the Craft Retreat is the gorgeous 4 star Macdonald Ansty Hall Hotel, conveniently located just off the M6/M69, near Coventry, Warwickshire.

Set in beautiful grounds it is the perfect destination for a getaway; gorgeous surroundings, good food and your own stylish bedroom for the night.

Its central Midlands location just off junction 2 of the M6 motorway means it has easy access from all parts of the country – making it a perfect destination break for you and your friends from afar.

What is included?

The Creative Escape package includes an overnight stay and all food for the weekend, lunches, snacks, evening meal and breakfast together with unlimited tea and coffee. You have 2 full days of crafting with your own table for the whole weekend – no need to tidy away! Bliss!

A goody bag of Stampin’ Up! crafting supplies is also part of the package and will be more than £100 in value. The supplies will enable you to complete the projects for the classes run throughout the weekend and you'll have lots left over to take home too!

The Classes

The classes offered during the weekend are optional. The weekend is yours, so you can choose to keep with class pace or do your own thing. There is no requirement to complete everything, you can do exactly what you want – chat, craft, chill … the choice is yours. Choose to craft at every possible moment, or take a break for a walk or a drink in the lounge – it’s all up to you. Classes are suitable for both beginner and experienced crafters alike - there really is something for everyone.

2018-19 Craft Retreat Dates

Booking is currently open for the following dates:

Saturday 20th October - Sunday 21st October 2018​   **LIMITED AVAILABILITY** LAST FEW SPACES REMAINING
Saturday 2nd March – Sunday 3rd March 2019

Fully inclusive price for 1 nights accommodation,  with lunch and a 3 course dinner on Saturday, followed by breakfast and buffet lunch on Sunday. It also includes unlimited tea, coffee or hot chocolate & snacks, 4 crafting classes and a goody bag worth more than £100 full of Stampin’ Up! products.

The price of a Creative Escape With The Crafty Owl is as follows:

Single occupancy is £325 per person or
Double occupancy is £305 per person

Early booking discounts for all Creative Escapes apply (£292 pp and £272 pp respectively).

Spaces are limited with booking brisk for next March and only a few spots remaining for this October. I am keen to fill the last few spaces for the October weekend so with this in mind I have a Bank Holiday weekend booking incentive for you: 

Bank Holiday Creative Escapes Booking Offer:


** Book and pay in full for your October Creative Escape before 31st August 2018 and you will receive both a free ink pad and early booking rates for next March too. **


Once you've done one, you won't want to miss the next one!

The October Creative Escape will have a distinctly Christmas theme so why not come along and give yourself a head start on your creative makes for the festive season? 


How do I book?

Sounds like your kind of fun? Email to joanne@thecraftyowl.co.uk and I will contact you to confirm payment details. If you would like to book a place on the March Creative Escape, you are still able to join my payment plan so you can split the cost into monthly payments. Full terms and conditions are available on the Creative Escape Crafting Retreats page on my website.

If you have any further questions or queries, please do get in touch - I would love you to join me!


I'll be back soon with my next creative project; until then, happy stampin'!


Nerf Party Ideas For The Stampin' Creative Blog Hop

by Joanne James30. June 2018 06:00

It's Saturday and today I have a special post for you since I, along with the talented Kayla Macaulay, am a guest with the lovely ladies over on the Stampin' Creative Design Team Blog Hop:

You may have just arrived from the colourful Pip Todman over at Queen Pip Cards or alternatively this may be your first stop. Either way, welcome and be sure to continue to the next stop along the hop by clicking on the next name in the list below for more creative ideas. This month the theme is 'party central' and there are lots of ideas and inspiration for parties for many different occasions throughout the hop. 

When I started thinking about what I was going to create today, I immediately jumped to my collection of new catalogue products wondering which new set to use. But in actual fact, I ended up using one of the most long-standing staple items in my crafting arsenal for the majority of my makes today: my Layering Circles Framelits. The next party that I need to plan will be that of the youngest of the James Juniors and whilst we've had lots of debate about what form it will take, one thing is for sure - no party that centres around 11 year old boys is complete without some form of Nerf battle these days, so I decided to get ahead and take the opportunity to start making with this in mind. 

First up is a birthday card that I actually made for a friend of his who is celebrating his birthday today: I used the currently popular 'impossible card' fancy fold and along with some partial diecutting to create a Nerf target for the popped-up section. These cards are really not at all tricky to make, despite their name! You simply score across the horizontal and then make a single cut at the centre of one panel at right angles to this (I made mine at 3"), followed by two cuts wherever you like on the facing panel (mine are at (1 5/8" in from each edge) and then fold each half in opposite directions, leaving a gap front and back and creating the central pop-up. I kept the colour scheme really simple, using the new in-colours Blueberry Bushel and Grapefruit Grove, both of which are a perfect match for Nerf guns and foam bullets, and having layered my diecut target circles added a sight and a bullet popped up on dimensionals for a fun touch. Some in-colour Blueberry Bushel patterned paper and a sentiment courtesy of the Perennial Birthday stamp set finish my card.

This 'impossible card' fold is a fun way to add dimension and interest to a card whilst still enabling it to be folded flat for mailing. My card is an irregular size, since the size of the base was determined by the diameter of the outer target circle. The card measures 5 1/4" x 6" when flat, so requires a bespoke envelope which I created using my trusty Envelope Punch Board with the help of my Envelope Expert tool. 


 The other targets you can see in the forefront of my card are some cake toppers I made. I am currently in the middle of a kitchen renovation and have only a microwave and the BBQ for cooking, so there was no opportunity to bake any cakes to put them in but I'm sure you get the idea!

I also created a fun party favour using Stampin' Up!'s Mini Pizza Boxes. I'm so glad these made it into the annual catalogue, they really are so useful for dressing up for all kinds of things. I brayed my box with Bluberry Bushel ink then created a belly band with another target on top and a thank you tag. Can you guess what is inside?


Yes, more foam Nerf bullets! The Mini Pizza Boxes are the perfect size to house 14 bullets and since the children seem to use hundreds of these when they are playing in their Nerf battles, I figured a few more each wouldn't go amiss!


 Lastly for today I also created a set of freestanding spinning Nerf targets, based on this one I saw over at Frugal Fun 4 Boys. If you click on the link you can follow the instructions to make your own - I simply used a collection of layered circles, adding in some Whisper White and Granny Apple Green for more colour variety. This is great for indoor or outdoor use, so I'm sure will be added to the toybox supplies. This is my tester in action, declaring it to be too easy - I think he needs to move further away so that it's more of a challenge!


I hope you liked my collection of fun party ideas, that in fact require very little in the way of supplies to make. I have another Nerf-themed birthday card to share, which is the one I have made for Ben's birthday, but will save that for another time!

Here is the visual summary of the key products used on today's project for you to pin for easy reference:


You can see all of my Product and 'How To' summaries on my 'How To - Tips and Techniques' Pinterest board in case you've missed any. 

For now, why not continue the blog hop for more creative party ideas? Do check out them rest of the Stampin’ Creative team to see what celebrations they have been preparing for. To carry on with the hop click on the names in the list below:


Enjoy the rest of your day. Mine will be a busy one, with a Family Fun Day, birthday party and sleepover (thankfully not at my house!) and the final performance of The Sound of Music for my eldest singing superstar - can't wait. I'll be back tomorrow with this week's post over at The Paper Players where the celebrations continue as we are celebrating our 400th birthday! We have a very special challenge for you as a result with lots of prizes to give away too so do pop back then - you are not going to want to miss it. Until then, happy stampin'!


Stampin' Up! Supplies Used: 

Table built using Product Table Builder by The Crafty Owl - Independent Stampin' Up! Demonstrator.

Stampin' Up! Colour Collection Lined Alphabet Framed Home Decor Sampler

by Joanne James31. May 2018 11:00

Today is the last day for lots of things - you can read all about those in my earlier post here - but for today's creative post I'm sharing a piece of framed home decor that I made recently for a recent event and my upcoming new catalogue launch to illustrate to my customers the new Stampin' Up! colour collections following the colour revamp, whilst also highlighting both current sets of in-colours. 

I wanted something that would serve as a conversation-starter for questions and enable comparison of the new colour families so decided to take the opportunity to highlight one of my favourite bundles from the new catalogue, the Lined Alphabet bundle, to create a colour-themed piece of home decor - take a look:


This is a rather large framed piece, measuring a whopping 17 1/2" x 17 1/2" square (or 45cm x 45cm), so I've photographed it quite tightly so that you can see the detail. You might recognise the quotation - it is attributed to the Russian artist Wassily Kandinsky, famed for painting the first works of modern abstract art in the 20th century. In defining life, painting and the psychological impact of colour, he is quoted as saying:

"Colour is a power which directly influences the soul. Colour is the keyboard, the eyes are the hammer, the soul is the strings. The artist is the hand that plays, touching one key or another, to cause vibrations in the soul" (V. The psychological working of Colour: Quoted in: Hajo Düchting (2000) Wassily Kandinsky, 1866-1944: A Revolution in Painting. p. 17). 

This seemed perfectly suitable for my interpretation of the Stampin' Up! colours. All 53 colours feature: the new 2018-20 In-colours feature first (I repeated the Lovely Lipstick and Grapefruit Grove colours as I needed 6 colours for this word and a seventh panel to give me the symmetry for my overall design, but otherwise all colours feature just once). You can see each of the families in sequence, highlighted below - a little messy to label to be fair, as two of the colour families span more than one horizontal line, but hopefully you can make them all out:


This is then complimented by the three basics of Whisper White, Very Vanilla and Basic Black to make up the background.

What do you think of the new Lined Alphabet and the co-ordinating Layering Alphabet Edgelit Dies? I love them! Rest assured, these are an investment item and I will be getting my money's worth out of them so you will see lots more projects using them in the coming months for sure. They are really easy to use - I actually cut the letters first then stamped afterwards, but you could do the other way around which is the more conventional approach I guess. I like the subtle line detail that stamping the diecut letter adds for just that little bit of extra definition and the marker lines on the dies make it easy to get the words lined up. This is just one of the ways that I will be sharing the new colours with my customers - along with colour swatches, guides and the new in-color bookmarks that I sent out with my catalogues too.

I will be having a couple of new catalogue drop-in sessions next week for anyone who is local to me and would like to have a look at my new product displays including this frame in more detail, pick up their new catalogue, shop my 'buy one, get one free' stash of retired stock and more. These drop-ins will be on Wednesday 6th June 10am-12 noon and then again on Thursday evening 7th June from 6-8pm - please get in touch and let me know if you would like to attend either via email or my Facebook page.

Enjoy your day and I'll be back tomorrow with news of the new catalogue. Until then, happy stampin'!


Stampin' Up! Supplies Used: 

Table built using Product Table Builder by The Crafty Owl - Independent Stampin' Up! Demonstrator.

Statement of My Heart Home Decor Frame

by Joanne James24. May 2018 12:30

Today a quick post from me to share something a little different - a 3D framed home decor piece featuring the Statement of My Heart single stamp that is available exclusively this month with the 'Gotta Have It All' Bundle that forms part of the early release of the Share What You Love Suite. 

You can find full details of the bundles that are on offer in my previous blog post here - I was inspired to create this piece, which features the Stampin' Up! Statement of the Heart for my office, using the stamp and some of the fabulous Share What You Love Specialty Designer Series Paper:


I went for something of a vintage theme, stamping my words and then after sponging the edges of my white cardstock with some Crumb Cake ink, framing the verse with the oval piece of Delightfully Detailed Laser-cut Specialty Paper. I backed this piece with a sheet of the Share What You Love Specialty DSP, and to finish, I added some of the lovely pearlescent embossed flowers that I fussy cut from the DSP, some pearls and a little Rich Razzleberry velvet ribbon, before framing in a rather elaborate frame.

A little different in style for me, but so pretty and a great way to immortalise these wonderful words. If you would like to create a home decor piece like this one, you only have until the end of the month to purchase the bundle and receive this exclusive stamp set for free, so hop on over to the online store before it's gone for good.

Enjoy your day and I'll be back tomorrow with another project. Until then, happy stampin'!


Stampin' Up! Supplies Used:

Table built using Product Table Builder by The Crafty Owl - Independent Stampin' Up! Demonstrator.

Picture Perfect Birthday Box In A Card

by Joanne James18. May 2018 08:00

Hello - I'm back! I know that some of you have missed me; I exhibited at Kirstie Allsop's Handmade Fair at Ragley Hall in Warwick last weekend and seem to have spent most of this week recovering and getting family life back on track. It was a great weekend and I met many wonderful people, however it did wipe me out! Hopefully I'm recovered enough to get back to blogging properly. Here goes!

I have a number of projects that I've made and not shared using retiring products and need to get them shared sooner rather than later so thought I'd share a fun 'box in a card' make that I made a couple of weeks ago featuring the Picture Perfect stamp set and Picture Perfect Paper - take a look:


These cards are easier to make than they look: you simply cut a 2" wide section out of a folded A6 card and make a 2" square box from a sheet of 6x6" paper with a lid and slot it into the space - perfect for a little treat:


A little stamping on my card and to finish I topped my box with a mini bow to tie in with the party theme. 

Here is the visual summary of the key products used on today's project for you to pin for easy reference:


You can see all of my 'How To' summaries on my 'How To - Tips and Techniques' Pinterest board in case you've missed any. 

I'll be back tomorrow with another project. Until then, happy stampin'!


Stampin' Up! Supplies Used:

Table built using Product Table Builder by The Crafty Owl - Independent Stampin' Up! Demonstrator.

Current Promotions

Stampin Cut and Emboss

Save up to 30% off on all your favourite kits from 1 to 31 October! 

Click here to see the current kits available and order yours online today.

Join My Team

It's always a great time to join Stampin’ Up! During October you can get even more in your starter kit! New team members can get £160 worth of products for only £99 + free business supplies + free shipping + all the fun being a part of Stampin’ Up! Stampin' Up! has something for everyone: join my growing team and benefit from my support to enjoy Stampin' Up! however you choose.

If you're interested, call me for a chat to understand how I can help you realise your goals. Alternatively, if you have already decided to sign up and you just can't wait, please click here for the link to the online form where you can sign up and order your starter kit right away! 

Shop Online

Access my online shop 24 x 7, 365 days of the year:

Current October hostess code:

4XPEYCB9

Shop Online

Scrapbooking

Stampin' Up! has introduced a new range of 12x12" scrapbooking product and kit - the full range is now available to purchase online. To download a copy of the new digital Scrapbooking Catalogue click here.

Mini Catalogue

BROWSE THE CATALOGUE

'Tis The Season - the new Stampin' Up! Mini Catalogue is here! For more details and to download your copy click here

2024-25 Annual Catalogue

BROWSE THE CATALOGUE

Click on the image to download your copy of the 2024-25 annual catalogue. For a full list of current SU! supplies, go to my online store. If you would like any help or advice, please drop me a line at joanne@thecraftyowl.co.uk or give me a call on 07773 421446 - I'd be happy to help.

Latest Kits!

Stampin Cut and Emboss

The Christmas Ornaments Kit and Card Keeper Kit are the latest kits in the online store - get yours here!

New Online Exclusives

There are new products available exclusively in the online store from 5 November - check them out here.

About Me

Hi I'm Joanne and live in Northampton and when I'm not looking after my husband and two beautiful children, am an avid crafter with a passion for all things Stampin' Up!

I must confess that I have never been a big rubber stamper - until I discovered Stampin' Up! that is. I love the fact that I can get such great results with co-ordinating stamps, inks, papers and punches - the possibilities are endless! Join me on my stamping journey as I share the things I love and be inspired to create amazing things yourself!

Follow Me

Monthly Newsletter

Box Builder

Click the button above to use Box Buster to create your custom box design using the Envelope Punch Board!

Kits Collection Now Available!

Stampin Cut and Emboss

The new Kits Collection from Stampin' Up! is now available!

Click here to see the current kits available and order yours online today.

I Design For


Stampin' Up Stuff

This is my personal blog and is not endorsed by Stampin’ Up! I hope you find it a plentiful source of ideas and personal inspiration but please don't copy my designs for contest submission or use for classes, publication or sale without express permission.