Statement of My Heart Home Decor Frame

by Joanne James24. May 2018 12:30

Today a quick post from me to share something a little different - a 3D framed home decor piece featuring the Statement of My Heart single stamp that is available exclusively this month with the 'Gotta Have It All' Bundle that forms part of the early release of the Share What You Love Suite. 

You can find full details of the bundles that are on offer in my previous blog post here - I was inspired to create this piece, which features the Stampin' Up! Statement of the Heart for my office, using the stamp and some of the fabulous Share What You Love Specialty Designer Series Paper:


I went for something of a vintage theme, stamping my words and then after sponging the edges of my white cardstock with some Crumb Cake ink, framing the verse with the oval piece of Delightfully Detailed Laser-cut Specialty Paper. I backed this piece with a sheet of the Share What You Love Specialty DSP, and to finish, I added some of the lovely pearlescent embossed flowers that I fussy cut from the DSP, some pearls and a little Rich Razzleberry velvet ribbon, before framing in a rather elaborate frame.

A little different in style for me, but so pretty and a great way to immortalise these wonderful words. If you would like to create a home decor piece like this one, you only have until the end of the month to purchase the bundle and receive this exclusive stamp set for free, so hop on over to the online store before it's gone for good.

Enjoy your day and I'll be back tomorrow with another project. Until then, happy stampin'!


Stampin' Up! Supplies Used:

Table built using Product Table Builder by The Crafty Owl - Independent Stampin' Up! Demonstrator.

Picture Perfect Birthday Box In A Card

by Joanne James18. May 2018 08:00

Hello - I'm back! I know that some of you have missed me; I exhibited at Kirstie Allsop's Handmade Fair at Ragley Hall in Warwick last weekend and seem to have spent most of this week recovering and getting family life back on track. It was a great weekend and I met many wonderful people, however it did wipe me out! Hopefully I'm recovered enough to get back to blogging properly. Here goes!

I have a number of projects that I've made and not shared using retiring products and need to get them shared sooner rather than later so thought I'd share a fun 'box in a card' make that I made a couple of weeks ago featuring the Picture Perfect stamp set and Picture Perfect Paper - take a look:


These cards are easier to make than they look: you simply cut a 2" wide section out of a folded A6 card and make a 2" square box from a sheet of 6x6" paper with a lid and slot it into the space - perfect for a little treat:


A little stamping on my card and to finish I topped my box with a mini bow to tie in with the party theme. 

Here is the visual summary of the key products used on today's project for you to pin for easy reference:


You can see all of my 'How To' summaries on my 'How To - Tips and Techniques' Pinterest board in case you've missed any. 

I'll be back tomorrow with another project. Until then, happy stampin'!


Stampin' Up! Supplies Used:

Table built using Product Table Builder by The Crafty Owl - Independent Stampin' Up! Demonstrator.

Just Add Color Card and Tea Bag Holder For The Paper Players PP392

by Joanne James6. May 2018 09:00

It's Sunday and time for this week's new challenge over at The Paper Players! It's the turn of our fearsome leader, the fabulous Nance, to host this week and she has a rather pretty theme challenge for you to work with:
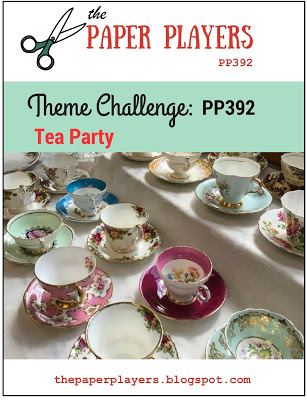
    

This challenge was made for me as I am a dedicated tea drinker! Coffee not so much, but I can drink as many as 10 cups of tea a day on average - definitely my drink of choice! I don't have much current product with a tea theme though, so wondered how I was going to tackle Nance's challenge this week, when I remembered the colouring paper in the current catalogue and voila - both my card and an accompanying little tea-related gift were created! First up, my card:
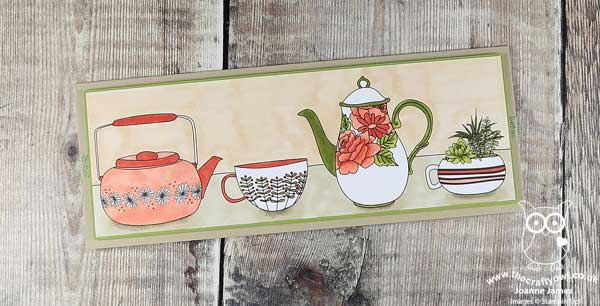
 

Here's the low-down on today's card:

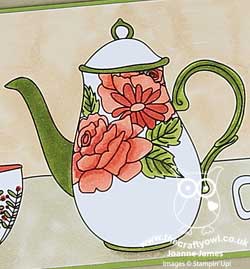
Just Add Color - One of the patterns in the Just Add Color Specialty Designer Series Paper pack is a sheet covered in all kinds of tea cups and teapots, so I cut a strip from the top of a sheet of paper, grabbed my Stampin' Blends and got to work. I went for a longer, thinner card this week and allowed the DSP pattern to dictate the dimensions for my card base.

Get Blending - Given that some of the teacups contain succulents rather than tea, this week's colour palette over at The Color Throwdown was perfect for my project. I used my Calypso Coral, Old Olive and Crumb Cake Blends, with the top portion coloured in Ivory. This paper is both very thick and matt, so alcohol markers do not blend quite as well as they do on Whisper White. This is particularly noticable on the larger areas such as the table and wall behind the teaset, however I quite like the effect - it gives an almost chalk effect, like rough plaster, so certainly works on my card.

Anyone For Tea? - Having completed my card, I was left with an offcut of DSP with a teapot and teacup. Rather than put this in my scrap box never to be seen again, I decided to use it up so coloured it and made a little tea bag holder containing a few wrapped tea bags that I could gift with my card. I also added a sentiment from the retired set 'Have A Cuppa', mounted on a punched scallop circle - here it is:
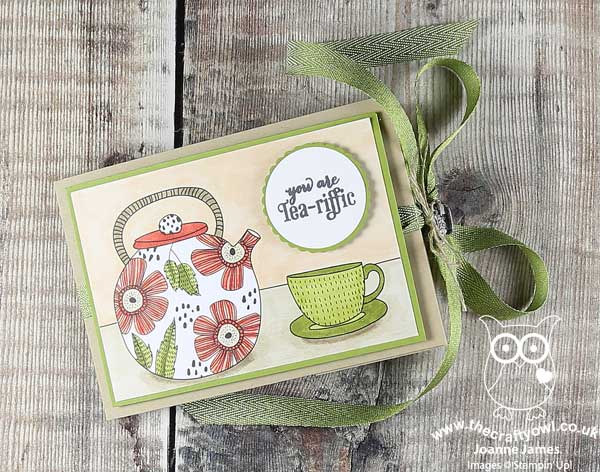
 

I cut my tea bag holder larger than was actually needed to accommodate the tea bags, as I didn't want to cut down the DSP; I just made my wrap and tea bag envelope holders, made with the Envelope Punch Board, slightly larger too. This is what it looks like on the inside - I used some Whole Lot of Lovely designer series paper for my little tea bag envelope pockets:
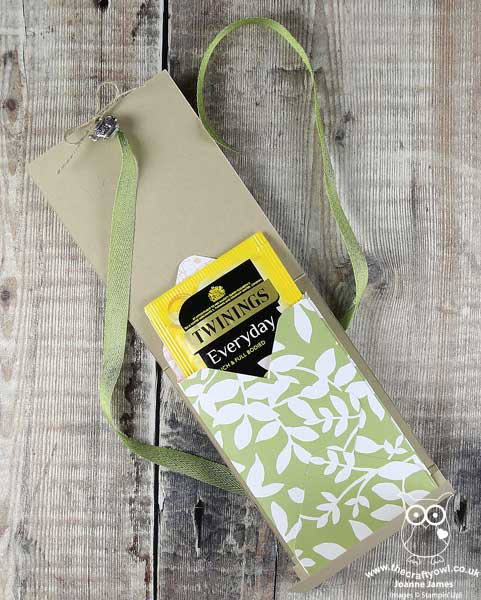
 

Did you spot the little tea pot trinket embellishment too? This is retired but it's at times like this I'm so glad I hoard these bits and pieces, as it finished off my package a treat :-) I love this fun set - I think I might send it to my Mum, as she is a keen tea drinker too.

Here is the visual summary of the key products used on today's project for you to pin for easy reference:
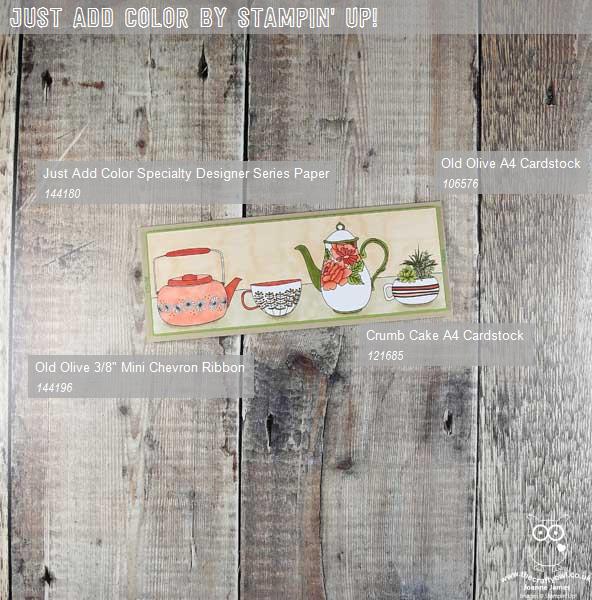
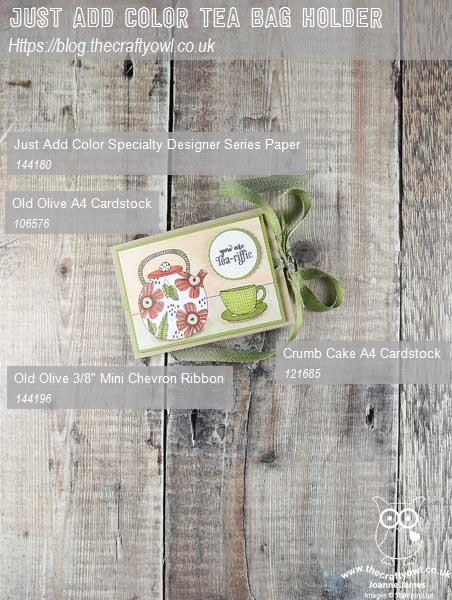


You can see all of my Product and 'How To' summaries on my 'How To - Tips and Techniques' Pinterest board in case you've missed any. 

Before you reach for your ink and papers, check out what our amazing team has created to inspire you this week:

Here's a quick recap of our challenge rules:
 
1.  Create a new paper project
2.  Upload your creation to your blog with a link back to us and provide a direct link to the post featuring your challenge submission.
3.  Please link your card to no more than four challenges, TOTAL.
4.  Have FUN!

I can't wait to see how you interpret this week's theme and look forward to visiting your blogs this week! Enjoy the rest of your weekend - we have a 3 day weekend here in the UK as it's a national Bank Holiday on Monday and for once the weather is glorious, so I will definitely be outside making the most of it. I'll be back tomorrow with another project; until then, happy stampin'!


Stampin' Up! Supplies Used: 

Table built using Product Table Builder by The Crafty Owl - Independent Stampin' Up! Demonstrator.

Picnic With You Basket of Flowers Exploding Box Card

by Joanne James1. April 2018 18:00

No, it's no April Fools - it's another two-post day today! I have spent a relaxing day being treated to Sunday lunch, along with my fair share of chocolate eggs following this morning's obligatory Easter egg hunt and I wanted to share an exploding box card that I made recently that is just perfect for this week's challenge over at Stamps Ink Paper before it closes this evening:

My card looks rather inconspicuous from the outside, just like a simple lidded box. Yet when the lid is removed, my unassuming card 'explodes' and opens up to reveal a 3 dimensional basket of flowers - take a look at this top-down view, showing all of the flaps and pockets - you can also see the layering within my basket:


And here you can see properly what the flower basket centrepiece looks like:

A sweet basket of flowers, complete with butterfly, on a base edged with grass. Isn't that fun?! Here's the low-down on today's card:

Picnic With You - I used the stamps and framelits from the Picnic With You bundle to create my basket, cutting four basket pieces scoring and glueing at the corners to create a 3 dimensional basket to hold my flowers. I love the embossed basket weave detail that is added with the speciality piece in the Picnic Basket Builder Framelit set - it adds great detail and interest.  

In-Colour Colour Combo - My card features Berry Burst flowers and makes a real feature of the In Color designer series paper in Tranquil Tide. Whilst my main box is made out of Whisper White, the lid is made from Tranquil Tide DSP and I've carried this through for the pockets and mats for the inside of my card. I added a little Pool Party butterfly for an unexpected pop of contrasting colour. I love this deep, yet fresh colour combo - feel free to save it if you would like to use it for your future project inspiration:


Pockets and Tabs - I added a generic message from the Picnic With you stamp set on one of the inner flaps of my card, and another on the right hand side after I took this photo that displayed a 'Happy Mother's Day' message (this card was for my Mother-In-Law for Mother's Day - I knew she would appreciate something a little different and it I could deliver by hand, another bonus!) In addition, the pockets contained two simple slide out cards, with simple tabs courtesy of the Circle Tab Punch (such a useful punch!) - we wrote messages on ours but they would also be a great place to add some photos or even some Memories & More cards perhaps.

Here's another photo showing the centre of my card in detail: 

Here is the visual summary of the key products used on today's project for you to pin for easy reference:


You can see all of my 'How To' summaries on my 'How To - Tips and Techniques' Pinterest board in case you've missed any. 

I hope you have all enjoyed your day and I'll be back on Tuesday with another project. Until then, happy stampin'!


Stampin' Up! Supplies Used:

Table built using Product Table Builder by The Crafty Owl - Independent Stampin' Up! Demonstrator.

Bubble Over Large Letters Party Banner Decoration

by Joanne James31. March 2018 08:00


Today it's the last day to snap up a Sale-A-Bration freebie, whether that's free stamps with your starter kit when you join my team, extra hostess rewards when you place an order of £200 or more or a free gift with a purchase of £45 or more. You only have until 10.50pm this evening though, so don't leave it too late!


I'm sharing the last of my Sale-A-Bration makes with you today, a party banner featuring the Bubble Over stamp set and Bottles & Bubbles Framelits Dies, and the FREE Bubbles & Fizz Designer Series Paper - take a look:


My banner letters are courtesy of the Letters For You stamp set and co-ordinating Large Letters framelits, on some layered circles before adding to the pennants featuring all of the designer paper designs. Here's a picture of it hanging properly at last November's Onstage event:


This is a great set for making part banners for a birthday or summer BBQ celebration (if it stops raining for long enough here in the UK to light one, of course!) and the Bubbles and Fizz designer papers add great colour and pattern with a fun party vibe.

Here is the visual summary of the key products used on today's project for you to pin for easy reference:


You can see all of my 'How To' summaries on my 'How To - Tips and Techniques' Pinterest board in case you've missed any. 

I'll be back tomorrow with this week's project for our new challenge over at The Paper Players. Until then, happy stampin'!


Stampin' Up! Supplies Used:

Table built using Product Table Builder by The Crafty Owl - Independent Stampin' Up! Demonstrator.

Memories And More Sweet Soiree Mini Album

by Joanne James30. March 2018 19:00

I hope you are all enjoying the start of a long bank holiday weekend. We have already enjoyed a morning of fresh air, followed by an afternoon of chocolate and a movie to avoid the return of the rain here in the UK. I am so done with winter now!

Today I thought I would share with you the first of the projects that I made with the ladies that attended my recent luxury craft weekend earlier this month. I won't be sharing any instructions on how they were made - these are reserved for those that attended - however I am sharing lots of photos of the projects that I designed as it is a great way for my readers to get a flavour of what a residential crafting retreat with me is like and the kinds of projects included. With 4 classes spread over 2 days, it's a great opportunity to tackle a variety of projects and also some that are a little more time-consuming than can be completed in a class that is of a shorter duration.

Today I'm sharing one of my favourite projects: a mini album I made featuring the Sweet Soiree Memories and More cards that are one of the current Sale-A-Bration gifts that can be yours free with a purchase of £45 or more, for just over another 24 hours:


Berry Burst cardstock forms the base of this expandable album and in addition to the Sweet Soiree Memories and More card pack, the Sweet Soiree Embellishment Kit has been used to decorate the cover and inside. 

This is what album looks when you first open it:


Fully extended, the album is four panels wide:


Each side then expands further to include additional flaps and pockets on both sides:


The album includes lots of areas to add photographs and capture memories, including this neat waterfall feature:


This album was certainly the most challenging of the projects we tackled during the retreat and was not for the fainthearted! The feedback was really positive though and everyone was so pleased with their creations; some ladies reported feeling truly amazed and thrilled to have tackled something like this, which they would not have ever contemplated on their own. I was personally thrilled with how positively this was received, as I've never led a class quite like this before. I'm already taking the learns from this project to create another version that is equally 'wow' yet a little easier to recreate.

If you would like to make projects like this one at a future retreat, please sign up to my newsletter by clicking on the icon in the right-hand column to ensure you receive the information for future retreats as soon as it is released or click here for more information - details for my next retreat will be announced in the coming weeks!

Here is the visual summary of the key products used on today's project for you to pin for easy reference:


You can see all of my 'How To' summaries on my 'How To - Tips and Techniques' Pinterest board in case you've missed any. 

Enjoy your evening and I'll be back tomorrow with one last project featuring Sale-A-Bration item. Until then, happy stampin'!


Stampin' Up! Supplies Used:

Table built using Product Table Builder by The Crafty Owl - Independent Stampin' Up! Demonstrator.

Envelope Punch Board Daisy Easter Basket

by Joanne James28. March 2018 17:30

It's the week before Easter already and so today I'm sharing a couple of really simple 3D projects that I made with a group of wonderful ladies last month that are perfect for holding Easter treats and also fit with the challenge over at Global Design Project this week:

The first one is an super easy Easter basket made with one of my most favourite tools EVER, the Envelope Punch Board  - take a look:


I love the Envelope Punch Board - my Envelope Expert and Box Buster tools are testament to that! - but it's great for lots more fun projects besides. Here I made my basket out of one of the Delightful Daisy DSP papers, decorated with some stamped and punched daisies and some faceted gems - a rather grown-up Easter basket, if you will, given the absence of bunnies! These little baskets are so easy to make and will hold a small full size egg or a collection of smaller ones. Here are the instructions in case you would like to make one too: 

  • Take a sheet of paper measuring 6” x 6”
  • Punch and score using your Envelope Punch Board at 1 ½” on all four sides
  • Turn over the sheet and repeat the step above on the reverse
  • Cut the flaps on each side to the first score line
  • Fold flaps either inside or outside to create your side panel and decorate with daisies or your chosen embellishment
  • Trim centre ends if desired (as I've done here) or adhere to the outside of the basket
  • Cut handle 15cm x 1.5cm and attach to sides

You can see more of these baskets in lots of other colours over on my Facebook page here, including some pictures of the ladies crafting 'in action'.

We also made some of the smaller egg carrier baskets, again using a piece of 6" x 6" paper and the Envelope Punch Board, this time using some of the Petal Garden DSP and some of the lovely free Sale-A-Bration Calypso Coral Shimmer Ribbon (only 4 more days to get your hands on this!) and a sweet Easter tag:


Instructions for this basket are as follows:

  • Take a sheet of paper measuring 6” x 6”
  • Punch and score using your Envelope Punch Board at 1¾” and 4” on the first side then use the score lines and guide to punch and score the remaining sides
  • Use a 3/4" circle punch to create the handles on the inner pieces and bring these up on the inside, adhering your flaps on the outside of these 

I'm mindful the instructions are not the easiest to follow without a video - watch this space and I'll see if I can make a quick one later! 

I had such a fun evening with my hostess Jane and her family and friends making these projects, and, having placed their orders, enabling Jane to earn rewards and free product, further boosted by the current Sale-A-Bration promotion. Whilst Sale-A-Bration is coming to an end in 4 days time, I am still taking party bookings into April, May and beyond, so if you would like a fun evening in with friends, crafting fun projects and earning some free Stampin' Up! product into the bargain, do get in touch.

Here are the visual summaries of the key products used on today's projects for you to pin for easy reference:

You can see all of my 'How To' summaries on my 'How To - Tips and Techniques' Pinterest board in case you've missed any. 

Enjoy the rest of your day and I'll be back tomorrow with another project. Until then, happy stampin'!


Stampin' Up! Supplies Used:

Table built using Product Table Builder by The Crafty Owl - Independent Stampin' Up! Demonstrator.
 
 
Table built using Product Table Builder by The Crafty Owl - Independent Stampin' Up! Demonstrator.

Tags: , , , , , , ,

3D Projects | Boxes | Envelope Punch Board

Bubbles And Fizz Clock - No Stamping Required #GDP127

by Joanne James2. March 2018 22:00

Today I'm sharing a 3D project with you that is the ultimate showcase of the Sale-A-Bration Bubbles & Fizz papers, so is perfect for this week's Global Design Project challenge:

Why is it the ultimate DSP showcase? Well there's not a single bit of stamping on today's project - take a look:


A multi-coloured and fully functional working clock - how fun is that?! Here's the low-down on today's project:

No Stamping Required - This is another of the projects that I showcased at Onstage back in November and is a real favourite of mine. You know how much I love those Bubbles and Fizz papers and this project showcases 3 of the designs (4 if you count the decorated pizza box I used to gift wrap it!): the multi-coloured bubble background, the bottle tops indicating where the numbers are and the bottles that form the clock hands. All three papers work really well together and leave no need for any stamping on this project.  

Bottles and Tops - Well, Bottles and Bubbles actually - well framelits that is, that fit the Bottles and Fizz paper perfectly. On each of these sheet designs every bottle and top can be cut out perfectly with the co-ordinating framelits, so there is no wastage. 

A Touch of Gloss - I added a layer of fine tip glue to my bottles and tops before attaching the to my clock face, to give a layer of shine and protection. That's all there is to it!

This project uses a simple clock kit that you can buy at any craft store and is great if you have customers who like home decor projects but are not big stampers (I have a group of those!) The clock is also fun - great for decorating the bedroom of a discerning teenager or maybe a student away from home. It really doesn't use much in the way of supplies and whilst you only need the framelits for this project, you are definitely going to want to buy the bundle to benefit from the stampset too and explore further creative opportunities.

Here is the visual summary of the key products used on today's project for you to pin for easy reference:


You can see all of my 'How To' summaries on my 'How To - Tips and Techniques' Pinterest board in case you've missed any. 

Enjoy your weekend; I will be hosting my first two day residential Stampin' Sanctuary luxury craft retreat so will not be blogging tomorrow. I'll be back on Sunday with another project for this week's new challenge over at The Paper Players though so be sure to tune in then. Until then, happy stampin'!


Stampin' Up! Supplies Used:

Table built using Product Table Builder by The Crafty Owl - Independent Stampin' Up! Demonstrator.

Tags & Trimmings Festive Christmas Stocking Gift Box For The Paper Players PP374

by Joanne James10. December 2017 09:00

It's Sunday and time for this week's new challenge over at The Paper Players- what's more, it's the last one of 2017! It's the turn of my good friend, the lovely and talented Claire, to host this week and she has a bright colour challenge for us to end the year with:


This is a palette with lots of options - you could still craft for Christmas, or use these colours for a non-festive project, it's up to you. Our design team this week has done a little of both, so there's lots of inspiration for you. I took the opportunity to squeeze in another Christmas project, but went with a 3D gift box rather than a card today. In fact, a Christmas stocking - take a look:


Here's the low-down on today's project:

Trim Your Stocking - These colours were perfect for a pink and girly Christmas stocking, complete with spotty heel, toe and cuff trim then finished off with a sprig of festive greenery. I've used the Trim Your Stocking Thinlits on this card previously but whatever your project, this set has an abundance of useful dies that are perfect for all kinds of embellishments. 

It's What's Inside That Counts - I love this sentiment! Whether it's a little chocolate - the content of choice of Rebecca - or money (most definitely the content of choice for my teenage niece!), the pillow box on the reverse of this stocking is just big enough for either. I haven't yet decided who this stocking will be heading for and for me how it looks on the outside is the most important thing, but one thing is for sure, for the recipient it's definitely what's inside that counts!

A Little Added Sparkle - I couldn't resist adding in a little sparkle to my festive stocking, with a silver foil bell, some mini sequin trim and a liberal dose of clear Wink of Stella on the lime green pieces - I'm hoping Claire considers silver (almost) a neutral such that I can get away with it - I just couldn't resist, those jingle bell dies are my favourite! 

Here is the visual summary of the key products used on today's project for you to pin for easy reference:


You can see all of my Product and 'How To' summaries on my 'How To - Tips and Techniques' Pinterest board in case you've missed any. 

Before you reach for your ink and papers, check out what our amazing team has created to inspire you this week:

The Paper Players Design Team
 
 
Here's a quick recap of our challenge rules:
 
1.  Create a new paper project
2.  Upload your creation to your blog with a link back to us and provide a direct link to the post featuring your challenge submission.
3.  Please link your card to no more than four challenges, TOTAL.
4.  Have FUN! 


I look forward to seeing what you create with this week's colour palette. As I mentioned above, this is our last challenge for 2017; we will be taking a two week break before returning with a fresh new set of challenges for 2018 starting on Sunday 7th January 2018. Thanks to everyone who plays along each week, to this year's guest designers, Crystal and Valentyna, Deanne, Jan and Annie, and everyone of you who visits our blogs and leaves us encouraging comments each week - it's great to know that you enjoy our creations! We will be announcing our new guest designers for the first half of 2018 this coming Wednesday, in my mid-week reminder post, so be sure to check back then to see who will be joining us to kick off the Paper Players fun at the start of 2018!

Enjoy the rest of your weekend as it will be over all too quickly; we are hoping to put our Christmas tree up and decorate the house tomorrow - then it really will feel like Christmas! I'll be back soon with another project; until then, happy stampin'!


Stampin' Up! Supplies Used: 

Table built using Product Table Builder by The Crafty Owl - Independent Stampin' Up! Demonstrator.

Layered Gingerbread In A Jar - The Perfect Homemade Christmas Gift PP373

by Joanne James3. December 2017 09:00

It's Sunday and time for this week's new challenge over at The Paper Players! The lovely Laurie is the hostess this week and she has a rather delicious seasonal theme for us to work with:


I'm also linking up with the team over at Stamp Ink Paper this week who are looking at Christmas wrapping and packaging solutions. I love to make gingerbread at this time of year but it's still a little early for me to have baked and wrapped creatively, so instead I decided to share with you a little something that I've been preparing for Ben's school Christmas Fayre the week after next that fits Laurie's theme perfectly. They are having a 'Jam Jar Tombola' stall, so I've been busy making up jars of all kinds for the children to win, including some jars of dry ingredients that they can use for their own festive baking. Here's one of my jars for gingerbread cookies - take a look:


These really are so easy to make: you simply layer the dry ingredients into a kilner jar, then decorate and add a tag with the details of any ingredients you need to add and the method. 

I used the 'December Deliciousness' stamp from the 'My Little Things' stamp set to decorate my jar, using my markers to selectively colour each of the elements in and adding a heat-embossed sentiment banner across the middle to create a decorated top to my jar. I paired it with some retired paper that fits perfectly with my theme for a folded tag that includes the ingredients and recipe, some ribbon and a wooden spoon that I will be tying to the side of the jar too ready for stirring - you could also add a gingerbread cutter if you have one.

I'm a big fan of homemade gifts at Christmas and there is no limit to the things you can put in a jar; with a little decoration this kind of thing can make a thoughtful, presentable gift.

If you would like to make a jar like mine, I've included the details from the inside of my folded tag below:

Easy Gingerbread Biscuits

This jar contains:

  • 100g soft light brown sugar
  • 1 tsp ginger, ¼ tsp allspice
  • ¼ tsp cinnamon, 225g plain flour
  • ½ tsp baking powder
  • ½ tsp bicarbonate of soda


You will need to add:

  • 150g melted butter
  • 1 tbsp golden syrup
  • 1 egg yolk


Method:

  • Mix 150g melted butter with 1 tbsp golden syrup and 1 egg yolk.
  • Add to the dry ingredients, mix well, then knead to a dough.
  • Chill for 15 mins then roll out.
  • Cut into biscuits and bake at 200C/180C fan/gas 6 for 8-10 mins. Cool on a wire rack.


Here is the visual summary of the key products used on today's project for you to pin for easy reference:


You can see all of my Product and 'How To' summaries on my 'How To - Tips and Techniques' Pinterest board in case you've missed any. 

Before you reach for your ink and papers, check out what our amazing team has created to inspire you this week:

The Paper Players Design Team
 
 
Here's a quick recap of our challenge rules:
 
1.  Create a new paper project
2.  Upload your creation to your blog with a link back to us and provide a direct link to the post featuring your challenge submission.
3.  Please link your card to no more than four challenges, TOTAL.
4.  Have FUN! 


I look forward to seeing what you create with this week's theme. Enjoy the rest of your weekend as it will be over all too quickly; my Christmas festivities have truly started in earnest this week and I am busier than ever! I am off to run a pre-Christmas Stampin' Up! party for a customer and her friends this afternoon, then will be returning home to put the finishing touches to my class preparations for my Delightful Daises Technique Class tomorrow and complete my 100 card challenge for the Ronald McDonald Christmas Cheer campaign that is happening in the UK this weekend.

I'll be back as soon as time allows with more projects; until then, happy stampin'!


Stampin' Up! Supplies Used: 

Table built using Product Table Builder by The Crafty Owl - Independent Stampin' Up! Demonstrator.

New Online Exclusives

There are new products available exclusively in the online store from 5 November - check them out here.

Latest Kits!

Stampin Cut and Emboss

The Layered Landscapes Kit and Nature's Paintings Kit are the latest kits in the online store - get yours here!

Shop Online

Access my online shop 24 x 7, 365 days of the year:

Current November hostess code:

9NKXDTTR

Shop Online

Mini Catalogue

BROWSE THE CATALOGUE

'Tis The Season - the new Stampin' Up! Mini Catalogue is here! For more details and to download your copy click here

Scrapbooking

Stampin' Up! has introduced a new range of 12x12" scrapbooking product and kit - the full range is now available to purchase online. To download a copy of the new digital Scrapbooking Catalogue click here.

2024-25 Annual Catalogue

BROWSE THE CATALOGUE

Click on the image to download your copy of the 2024-25 annual catalogue. For a full list of current SU! supplies, go to my online store. If you would like any help or advice, please drop me a line at joanne@thecraftyowl.co.uk or give me a call on 07773 421446 - I'd be happy to help.

Join My Team

It's always a great time to join Stampin’ Up! New team members can get £130 worth of products for only £99 + free business supplies + free shipping + all the fun being a part of Stampin’ Up! Stampin' Up! has something for everyone: join my growing team and benefit from my support to enjoy Stampin' Up! however you choose.

If you're interested, call me for a chat to understand how I can help you realise your goals. Alternatively, if you have already decided to sign up and you just can't wait, please click here for the link to the online form where you can sign up and order your starter kit right away! 

About Me

Hi I'm Joanne and live in Northampton and when I'm not looking after my husband and two beautiful children, am an avid crafter with a passion for all things Stampin' Up!

I must confess that I have never been a big rubber stamper - until I discovered Stampin' Up! that is. I love the fact that I can get such great results with co-ordinating stamps, inks, papers and punches - the possibilities are endless! Join me on my stamping journey as I share the things I love and be inspired to create amazing things yourself!

Follow Me

Monthly Newsletter

Box Builder

Click the button above to use Box Buster to create your custom box design using the Envelope Punch Board!

Kits Collection Now Available!

Stampin Cut and Emboss

The new Kits Collection from Stampin' Up! is now available!

Click here to see the current kits available and order yours online today.

I Design For


Stampin' Up Stuff

This is my personal blog and is not endorsed by Stampin’ Up! I hope you find it a plentiful source of ideas and personal inspiration but please don't copy my designs for contest submission or use for classes, publication or sale without express permission.