Copper Embossed You're My Anchor Masculine Card

by Joanne James5. June 2016 09:00

It's Sunday and time for a new challenge over at The Paper Players! It's the turn of the super-talented Claire to host our challenge this week and she has a timely theme for you to play along with:


With only a couple of weeks to go until Father's Day, today's challenge is a great opportunity for you to get your cards made (and posted if necessary!) in a timely manner. For my card this week I debated with myself what stamps to use: old or new! In the end I ended up making not one but 3 cards, each using a different set. I will be sharing them all over the next three days so if you're in need of masculine inspiration be sure to check back for three very different cards, each of which would work for both Father's Day or a male/Dad's birthday.

For today's card I used this week's sketch over at the Global Design Project and decided to go with one of my favourite existing masculine sets, Guy Greetings, along with some new product - copper embossing powder. Take a look:


Here's the low-down on today's card:

Add Shine With Copper - Heat embossing adds a 'wow' to any project and the new copper embossing powder is no exception. I stamped my anchors from the 'Guy Greetings' stamp set in Versamark onto a panel of Whisper White and heat embossed them in copper. Check out the lovely sheen that you get when the light bounces off it on my card above! I chose Bermuda Bay for the base and top split layer above my recessed anchor panel; it looks great with the copper and reminds me of the sea, so seemed appropriate for today's card. 

A Multi-Purpose Guy Greeting - I saved my 'Happy Father's Day' sentiment for the inside of my card and chose the anchor one for the front. It ties in with my visuals of course, but would also make this card a multi-purpose masculine card that could be used for other occasions too.

A Layered Label And Embellished Anchor - I used a layered label from the Tags & Labels Framelits set for my sentiment, modifying the mat as I wanted it to have a thinner border than the standard framelit size. This was easy to do: I just cut a standard sized one, then cut it again to remove a slice off two of the four sides. To finish I embossed another anchor in copper, then fussy cut it by hand, removing the rope pieces. I then took some thick Bermuda Bay baker's twine and wrapped it around the anchor where the embossed rope would have been and secured it in place with glue dots. You can see it in more detail in the thumbnail at the top of today's post.

Here is the visual summary of the key products used on today's project for you to pin for easy reference:
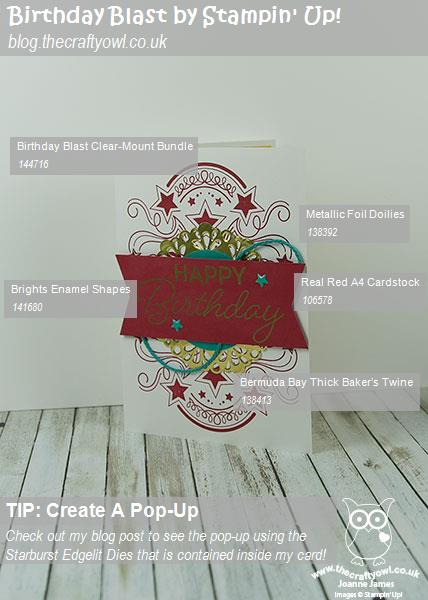
 

You can see all of my 'How To' summaries on my 'How To - Tips and Techniques' Pinterest board in case you've missed any. 

Before you reach for your ink and papers, check out what our amazing team has created to inspire you this week:

The Paper Players Design Team
 
 
Here's a quick recap of our challenge rules:
 
1.  Create a new paper project
2.  Upload your creation to your blog with a link back to us and provide a direct link to the post featuring your challenge submission.
3.  Please link your card to no more than four challenges, TOTAL.
4.  Have FUN! 


I look forward to seeing your masculine creations in our gallery this week. The weather hasn't been great here this week, however yesterday was a little warmer and today is forecast the same, so I'm looking forward to a BBQ lunch in the garden - doesn't food always taste better if eaten in the open air? I think so! Then I'm hoping to spend some time in the afternoon preparing for my Annual Catalogue Open House on Friday later this week. I hope you enjoy your Sunday too.

I'll be back tomorrow with another masculine project; until then, happy stampin'!


Stampin' Up! Supplies Used: 

Table built using Product Table Builder by The Crafty Owl - Independent Stampin' Up! Demonstrator.

Bear Hugs - Love You Paper Bear

by Joanne James29. May 2016 09:00

It's Sunday and time for a new challenge over at The Paper Players! It's my turn to host our challenge this week and I have my very own tic-tac-toe board for you to play along with:

    PPA-302-May26

Tic Tac Toe - hmmm, so many possibilities! For my card this week I decided to go with the diagonal - yellow, die-cut, paper clip - and using this week's Pals Paper Arts sketch for my layout, this is what I came up with:


My card is a card from a special little girl to her precious Daddy - here's the low-down:

Bear Hugs - The front of my card features the baby bear from the Bear Hugs stamp set, cut out with the co-ordinating Bear Hugs framelits. I also fussy cut his nose and added a couple of pearls coloured black with my Sharpie for eyes. These little bears are so cute - I'm glad that these are being carried over to the new catalogue. I also carried this little sweetie over to the inside, where I paired her with her Daddy and finished the final part of the sentiment:


Bow Paper Clip - I added my oversize bow paper clip with a little white seam binding ribbon tied around the middle to the ear of my little bear for an obvious feminine touch. 

A Daffodil Delight - I added a piece of Daffodil Delight flower-patterned designer series paper from the Brights DSP Stack for the main panel of my card. I wanted my card to feel girly, even though the recipient was the world's best Dad - I think he'll appreciate it! I think the yellow really compliments the Soft Suede too; here's my colour combo should you wish to save it:


I'm also linking up with the team over at Just Add Ink where the challenge this week is to 'Just Add B' which in my case, is B for Bear.

Here is the visual summary of the key products used on today's project for you to pin for easy reference:


You can see all of my 'How To' summaries on my 'How To - Tips and Techniques' Pinterest board in case you've missed any. 

Whilst I love the bright yellow and cute bear, I must confess the execution of today's card is lacking a little something. I played around with it lots and couldn't work out exactly what it was that wasn't working, so in the end time constraints meant I had to just go with it. Don't you just hate it when that happens?!

Before you reach for your ink and papers, check out what our amazing team has created to inspire you this week:

The Paper Players Design Team
 
 
Here's a quick recap of our challenge rules:
 
1.  Create a new paper project
2.  Upload your creation to your blog with a link back to us and provide a direct link to the post featuring your challenge submission.
3.  Please link your card to no more than four challenges, TOTAL.
4.  Have FUN! 


I look forward to seeing how many different combinations you make with my board this week. We are off to basketball today and are having a little James family get-together later, which should be fun. Otherwise the day will be spent clearing up the mess that was yesterday's flooded kitchen. We had such a busy day, that included shopping for Rebecca's new bike, a trip to the garden centre and a mow of the lawns, that when a pipe burst in the kitchen as we were cooking dinner we spent the rest of the evening filling bowls, waiting for emergency plumbers and mopping up. Hence no blog post yesterday - just too exhausted! Today I'm hoping will be the start of the restful Bank Holiday I was hoping for...

Back tomorrow with another project; until then, happy stampin'!


Stampin' Up! Supplies Used:

Table built using Product Table Builder by The Crafty Owl - Independent Stampin' Up! Demonstrator.

Tags: , , , , , , ,

Cards | Shop Online | Stamping

Swirly Scribbles Bird's Nest Baby Card

by Joanne James22. May 2016 09:00


It's Sunday and time for a new challenge over at The Paper Players! It's the turn of the queen of diecuts, the lovely Laurie, to host our challenge this week and she has a fun sketch for you to play along with:


As you know, I love a good sketch and for my card this week I had so many ideas! I will be using this sketch for my card tomorrow too; today I decided to feature a die from one of my favourite sets from the new catalogue called the Swirly Scribbles Thinlits and make not one, but two, new baby cards featuring two of the new in-colours. 

Here is the first one, a baby boy card featuring the new blue, Dapper Denim:


Here is the second baby card, featuring the new pink, Flirty Flamingo: 


Now I know I'm biased, but aren't they just the cutest?! Here is the low-down on today's card:

Swirly Scribbles Thinlits - There are some great swirl, flower and leaf dies in this set - the one that I used here makes the cutest bird's nest backdrop for the cute birdie ready to welcome her babies to the world.

Swirly Bird Masking and Kissing - I did some masking and kissing of the stamps to create my little bird in her nest: first, I stamped the nest twice in Soft Suede, and cut one of them out and used it as a mask so that I could stamp my bird and eggs in the nest. I also created some light speckling on my eggs by inking the 'grunge' stamp in the set in Soft Suede, inking the eggs in Sahara Sand, then 'kissing' the two together before stamping them into the nest. You can get a closer look at this on these close up images below:


Perfectly Wrapped Border - I used a mat of each of the new in-colours that I featured on my cards to accentuate the colour and decided to add an additional border detail as per the stitched detail on the sketch. I used one of the border stamps from the 'Perfectly Wrapped' stamp set; this set is photopolymer which makes lining up a breeze. 

Hello Baby Bear - I couldn't finish today's write-up without a nod to the sentiment on today's card. This is one from an adorable set called 'Baby Bear' that also features in the new catalogue and is finished on the inside of the card with '...welcome to the world!'. Perfect for today's card.

I love these dies and the co-ordinating stamp set; you can be sure you'll be seeing lots more projects with them. 

Here is the visual summary of the key products used on today's project for you to pin for easy reference:

Baby Boy Dapper Denim card, with a masking tip:

Flirty Flamingo baby girl card, with a kissing technique tip:


You can see all of my 'How To' summaries on my 'How To - Tips and Techniques' Pinterest board in case you've missed any. 

We do rather have birds on the brain in our house at the moment; the baby blue tits in our nesting box hatched about 10 days ago and we are watching the bird cam with interest on a daily basis. There are seven healthy babies and the mum and dad spend many hours each day flying in and out with caterpillars and bugs to feed the young chicks. Here is a photo of them waiting to be fed:


Apologies for the poor photo - the quality isn't great - but I can honestly say watching these little chicks grow is the best tv drama ever, they are so entertaining! Hopefully I'll be able to get some photos of them as they leave the nest when they are grown and share those at a later date.

Before you reach for your ink and papers, check out what our amazing team has created to inspire you this week:

The Paper Players Design Team
 
 
Here's a quick recap of our challenge rules:
 
1.  Create a new paper project
2.  Upload your creation to your blog with a link back to us and provide a direct link to the post featuring your challenge submission.
3.  Please link your card to no more than four challenges, TOTAL.
4.  Have FUN! 


I look forward to seeing how you interpret this week's sketch. We are off to basketball today and are then looking forward to a restful afternoon, with either some time in the garden weather-permitting or indoors watching a movie and the antics of our own baby bird family!

Back tomorrow with another card that also uses this sketch, but is quite different in terms of execution; until then, happy stampin'!


From Land To Sea Turtle One Layer Card

by Joanne James15. May 2016 09:00

It's Sunday and time for a new challenge over at The Paper Players! It's the turn of my good friend LeAnne to host our challenge this week and she has a fun clean-and-simple theme for you to play along with:


For my card this week I wanted to use my 'From Land To Sea' stamp set. I bought this set for the turtle - I love turtles! - but to date have only used the lighthouse stamp, so this week's challenge gave me the opportunity to change that. The ladies over at Less is More have a one layer challenge with the theme 'At Sea' so I'm linking my card with them too, along with the challenge over at Just Add Ink where the theme is 'masking'. I've a new product 'sneak peek' for you today as well! Without further ado, here is my card:


This isn't the first card I made for this week's challenge: I remembered 'wild animal' but forgot 'clean and simple' on my original card, so I will share that one with you later. As far as this card goes though, I just love it! Here's the low-down on how I created my card:

Sea-faring Turtle - Turtles are the one species of sea creature that has always captivated me. I have spent many hours BC (before children!) scuba diving in the warm waters of the Caribbean and nothing ever thrilled me more than to come across a turtle in its natural habitat. They really are so graceful and fascinating to observe. I stamped my turtle in Archival Black ink, once directly onto my extra-thick Whisper White card base, and again onto a post-it note. I cut the second one out and used it as a mask to cover the one on my card base, whilst I sponged in the sea behind. 

Swirly Scribbles Stencil - Secondly, the 'sneak peek'! I made a stencil with the wavy die in the new Swirly Scribbles Thinlits set from the forthcoming new annual catalogue by cutting one and then placing across a masked rectangle behind my turtle. With my turtle masked, I sponged through the stencil with Pool Party, Bermuda Bay and Island Indigo inks to create the seascape and then removed both the stencil and turtle mask and coloured my turtle with inks and a blender pen.

A Teeny Tiny Sentiment - To finish my card, I added a sentiment from the Teeny Tiny Sentiments set. This stamp set has a great variety of sentiments for each and every occasion that are suitably small and work perfectly with this layout. I chose my sentiment with the recipient of my card in mind; we haven't had a diving holiday with our good friends Cathy and Andy in such a long time, so this card is perfect to send to them to remind them that one day we will all dive together again!

Here is the visual summary of the key products used on today's project for you to pin for easy reference:


You can see all of my 'How To' summaries on my 'How To - Tips and Techniques' Pinterest board in case you've missed any. 

Before you reach for your ink and papers, check out what our amazing team has created to inspire you this week:

The Paper Players Design Team
 
 
Here's a quick recap of our challenge rules:
 
1.  Create a new paper project
2.  Upload your creation to your blog with a link back to us and provide a direct link to the post featuring your challenge submission.
3.  Please link your card to no more than four challenges, TOTAL.
4.  Have FUN! 


I look forward to seeing your wild animal CAS creations this week. We have double basketball today: training this morning them both James Juniors are playing at a tournament this afternoon - on opposing teams! One is playing for school and the other for club, so that should be interesting!!

Back tomorrow with another project; until then, happy stampin'!


Stampin' Up! Supplies Used:

Table built using Product Table Builder by The Crafty Owl - Independent Stampin' Up! Demonstrator.

You're Sublime In Subtles!

by Joanne James8. May 2016 09:00

Apologies for a lack of blog posts these last couple of days. I've plenty of projects made, I've just been away for a couple of days and then had my Crafternoon Tea Home Decor class yesterday at Bell of Northampton in Kingsthorpe. Along with everything else that makes up day-to-day life I've just not managed to find the time to write!

Anyway, today it's Sunday and time for a new challenge over at The Paper Players so I'm back to it! It's the turn of the lovely Jaydee to host our challenge this week and she has a four colour combination for you to play along with:


For my card this week I was inspired to use the flower-filled wheelbarrow from the 'You're Sublime' stamp set as the focal point (hence my rather compliment-filled blog post title today!), incorporating lots of layers as per the current sketch over at The Challenge:

Here's the low-down on today's card:

A Barrow of Flowers - This sweet little wheelbarrow stamp is one of the images in the 'You're Sublime' set that I haven't yet used and I these Spring pastels were perfect to fill my grey barrow. I coloured them using my Stampin' Write markers and added a liberal dose of clear Wink of Stella to my blooms, which adds a lovely sparkle in real life although is, alas, difficult to see in the photo. I then punched out my circle with my 2 1/2" circle punch - I'll miss this one when it retires!

A Subtle Collection of Pastels - I don't use Subtles that often, less so exclusively on a card, unless it's a baby card. These lovely ice-cream colours (there's an idea in itself!) work really well together and this card proves when mixed with a liberal dose of Whisper White they work for flowers too.

Uniformity In Layers - I focused on one each of the challenge colours per layer and kept the pattern the same on each of the DSP layers to create a uniformity to my design. Using a borderless circle for my focal image, white matting and a white seam binding ribbon and bow trim, each element ties together without overwhelming the others.

Here is the visual summary of the key products used on today's project for you to pin for easy reference:


You can see all of my 'How To' summaries on my 'How To - Tips and Techniques' Pinterest board in case you've missed any. 

Before you reach for your ink and papers, check out what our amazing team has created to inspire you this week:

The Paper Players Design Team
 
 
Here's a quick recap of our challenge rules:
 
1.  Create a new paper project
2.  Upload your creation to your blog with a link back to us and provide a direct link to the post featuring your challenge submission.
3.  Please link your card to no more than four challenges, TOTAL.
4.  Have FUN! 


I look forward to seeing what you create with this week's colours. We are off to basketball today and then hoping for a little more of the lovely sunshine we've been having here in the UK these past few days and an afternoon in the garden.

Back tomorrow with another project; until then, happy stampin'!


Stampin' Up! Supplies Used:

Table built using Product Table Builder by The Crafty Owl - Independent Stampin' Up! Demonstrator.

Let's Get Away Project Life Bicycle Card

by Joanne James1. May 2016 09:00

It's Sunday and time for a new challenge over at The Paper Players! It's the turn of our fearless leader Nance to host our challenge this week and she has a fun theme challenge for you to play along with:

   PPA-298-Apr28

For my card this week I decided to do something a little different and make a card featuring a couple of my Project Life cards. As a family we do a lot of cycling and it often features in my memory keeping, so it was a tough decision to actually part with this one and use it on a card! When I saw Ginger's sketch layout over at Pals Paper Arts this week it was perfect for showcasing an alternative use for my Project Life cards so I 'bit the bullet' and this is what I came up with:


My card is A5, so slightly larger than usual, in order to accommodate my pair of Project Life cards, yet it really was quite straightforward to put together as the Project Life cards do so much of the creative work. That said, there are a few things worth highlighting:

Let's Get Away - The Project Life cards featured on today's card are from the 'Let's Get Away' box set. This set is perfect for documenting your travels, near and far and contains lots of transport, including cars, aeroplanes and bicycles. What's more, this set is retiring so now is the perfect time to pick it up at a bargain price. The card I chose is perfect for today's challenge, with illustration and sentiment all in one. Here's a closer look at it in all its glory:

I mounted it onto a mat of Bermuda Bay for added definition and rounded the corners using my Project Life corner rounder punch. The second large polka dot card is one of the filler cards from the same set.

Bicycle Wheel Background - The stamp that I've used for my background is from the 'Balloon Celebration' set in the seasonal catalogue. I'm not exactly sure what this stamp is intended to be, but to me has always felt like a bicycle wheel - although I've no idea what that has to do with balloons! The open design works well to create interest in the background and incorporate my base and mat colours, which ties it in with my feature cards. 

Balloon Trio - As an added detail, I punched out a trio of coloured balloons using the mini balloon punch in the Party Punch Pack (you are so going to snap this up before it retires at the end of this month!) and adhered them over the top of the original ones that decorated the Project Life card, popping the pink one on a dimensional. They are slightly larger than the printed ones, so create a nice overhang and cover completely the printed balloons without any further work being required.

Here is the visual summary of the key products used on today's project for you to pin for easy reference:


You can see all of my 'How To' summaries on my 'How To - Tips and Techniques' Pinterest board in case you've missed any. 

Before you reach for your ink and papers, check out what our amazing team has created to inspire you this week:

The Paper Players Design Team
 
 
Here's a quick recap of our challenge rules:
 
1.  Create a new paper project
2.  Upload your creation to your blog with a link back to us and provide a direct link to the post featuring your challenge submission.
3.  Please link your card to no more than four challenges, TOTAL.
4.  Have FUN! 


I look forward to seeing what you make of our theme this week. We are off to basketball this morning but no hockey today as the season has officially ended. If the weather forecast is correct and we are in for an afternoon of rain, we will be snuggling up on the sofa for a family movie afternoon watching the classic 'The Wizard of Oz'. Rebecca has an audition for a role in a school production of this musical this week, so is keen to 'gen up' on all aspects. Her practising of 'Somewhere Over the Rainbow' is coming along nicely - Judy Garland, eat your heart out!

Back tomorrow with another project; until then, happy stampin'!


Stampin' Up! Supplies Used:

Table built using Product Table Builder by The Crafty Owl - Independent Stampin' Up! Demonstrator.

Pretty Petals Punched Butterflies Card

by Joanne James17. April 2016 09:00

It's Sunday and time for a new challenge over at The Paper Players! It's the lovely Sandy's turn to host our challenge this week and she has a great clean and simple challenge for you to play along with:


I was a little pressed for time this week in getting ready for Stampin' Up! Onstage at Telford (also the reason for a lack of blog posts over the last two days) so a clean and simple challenge couldn't have come as a better time! I used this week's sketch over at Mojo Monday for my layout and decided to go with punched rather than stamped butterflies for both impact and speed:

As you can see, today's card really is clean and simple. Here's the low down:

Pretty Petals - I reached for this paper pack to use as the starting point for my card and settled on this rather bold pattern, as I knew I needed only a small amount so wanted it to be impactful. My Pretty Petals paper set the colour combination for my card and provided the perfect backdrop to my sentiment from 'Tin of Cards'.

Can You Keep A Secret? - The DSP has a small amount of Calypso Coral around the flower heads, which I substituted with Watermelon Wonder as I wanted to use the wide satin ribbon in this colour for my banner. Sssh, don't tell - although honestly I think it's impossible to see the difference even up close. Here is the colour palette I used on my card:


A Trio of Punched Butterflies - I used a trio of solid colour butterflies to complete my card, punched using the Bitty Butterfly and Elegant Butterfly punches. I layered one of them and finished them all with pearls as a simple embellishment.

Here is the visual summary of the key products used on today's project for you to pin for easy reference:


You can see all of my 'How To' summaries on my 'How To - Tips and Techniques' Pinterest board in case you've missed any. 

So as you can see, a clean and simple card for this week's butterfly challenge. I'm also linking up with the lovely team over at the Global Design Project where their theme this week is 'nature' and a butterfly definitely qualifies for that!

Before you reach for your ink and papers, check out what our amazing team has created to inspire you this week:

The Paper Players Design Team
 
 
Here's a quick recap of our challenge rules:
 
1.  Create a new paper project
2.  Upload your creation to your blog with a link back to us and provide a direct link to the post featuring your challenge submission.
3.  Please link your card to no more than four challenges, TOTAL.
4.  Have FUN! 


I look forward to seeing your clean and simple cards this week. We are off to basketball today and back to hockey today ...

Back tomorrow with another project; until then, happy stampin'!


Stampin' Up! Supplies Used:

Table built using Product Table Builder by The Crafty Owl - Independent Stampin' Up! Demonstrator.

Botanical Builder Flowers And A Happy Hello From The Paper Players

by Joanne James10. April 2016 09:00

It's Sunday and time for a new challenge over at The Paper Players! It's my turn to host our challenge this week and I have an interesting colour combination for you to play along with:


I knew when I chose my colour palette some months ago that I would do something with flowers; for my card this week I was inspired to use the Botanical Builder Framelits Dies - I just love those flowers and I knew they would be great to create the tropical flowers I had in mind with my colour scheme. I also used this week's sketch over at Mojo Monday for the layout for my card:


Here's the low-down on today's card:

Lots of Layers - I love layers and this card has lots of them! I kept them either plain or with a unified pattern of polka dots so that they wouldn't overwhelm the sentiment and flowers that are the focal point of my card.

Subtles versus Brights - Balancing my colour choices today may be considered a challenge in itself. I used my Brights largely as accent colours, although the one thing I did differently on my card was stamp my sentiment if Soft Sky, the lightest colour. This is a real departure for me as normally I would stamp it in the strongest darkest colour for impact, yet sometimes it pays to take a more subtle approach - I hope you agree :-)

The Perfect Accent - Yes I used those White Perfect Accents for my flowers again - I love them, whether left 'naked' as here today or coloured up using my Sharpies. They make such a great flower centre.

Here is the visual summary of the key products used on today's project for you to pin for easy reference:


You can see all of my 'How To' summaries on my 'How To - Tips and Techniques' Pinterest board in case you've missed any. 

Before you reach for your ink and papers, check out what our amazing team has created to inspire you this week:

The Paper Players Design Team
 
 
Here's a quick recap of our challenge rules:
 
1.  Create a new paper project
2.  Upload your creation to your blog with a link back to us and provide a direct link to the post featuring your challenge submission.
3.  Please link your card to no more than four challenges, TOTAL.
4.  Have FUN! 


I look forward to seeing what you create with this week's colours. We are off to basketball today but no hockey - one more week off for Easter until we are back on the pitch! This means cycling if the sun is shining or board games if it rains - let's see where we end up!

Back tomorrow with another project; until then, happy stampin'!


Stampin' Up! Supplies Used:

Table built using Product Table Builder by The Crafty Owl - Independent Stampin' Up! Demonstrator.

Honeycomb Happiness Pop-Up Chick Card

by Joanne James27. March 2016 10:00

It's Sunday and time for a new challenge over at The Paper Players! It's the turn of the talented LeAnne to host our challenge this week and she has my favourite type of challenge, a sketch, for you to play along with:

    PPA-293-Mar24

As it's Easter Sunday today, for my card this week I decided to make one last Easter card to share with you, using this week's colours over at Pals Paper Arts. I'm also linking up with the Friday Mashup again as I've used the theme part of their challenge (Easter and chicks or bunnies - read on and all will become clear!) Here is the front of my card:


Simple enough: some polka dot panels, alongside an oversize flower made with 1 1/2 and 1 3/4 circle punches and the Flower Fair Framelits as a backdrop to my pair of Easter eggs. The eggs themselves are using a tip picked up from Cindy Schuster on the Stampin' Up! corporate blog (you can see her card here) where she used the balloon punch to create Easter Eggs (I stamped mine first using the outline in the 'Balloon Celebration' set and used the grunge stamp in 'Awesomely Artistic' for my mottled effect).

The best bit for me about today's card is the inside, take a look:

Having wrestled with myself every time I went to stick one of the Honeycomb embellishments to the front of my card, knowing that it would mean either a box needed to send it or risk the embellishment being crushed (I'm still suffering post-traumatic stress from having watched Shannon West uncerimoniously squash one on the front of a card whilst on stage at Onstage Live in Brussels last November!!) , I decided that there was a perfect way around it - use it on the inside! I stamped my chick from the 'Honeycomb Happiness' Sale-A-Bration stamp set on the inside of my card along the central score line, paper-pieced him with another stamped on So Saffron card, then added my honeycomb embellishment (I spritzed one of the white ones in So Saffron). I also stamped my Easter greeting from the 'Suite Sayings' stamp set on the inside of my card on the left-hand panel:


Isn't that just the cutest?! I am so happy with how this turned out! I can now use my Honeycomb Embellishments with a clear conscience!

Here is the visual summary of the key products used on today's project for you to pin for easy reference:

You can see all of my 'How To' summaries on my 'How To - Tips and Techniques' Pinterest board in case you've missed any.  

Before you reach for your ink and papers, check out what our amazing team has created to inspire you this week:

The Paper Players Design Team
 
 
Here's a quick recap of our challenge rules:
 
1.  Create a new paper project
2.  Upload your creation to your blog with a link back to us and provide a direct link to the post featuring your challenge submission.
3.  Please link your card to no more than four challenges, TOTAL.
4.  Have FUN! 


I look forward to seeing what you create with this week's sketch. We have a rare sport-free day today. We are looking forward to our Easter egg hunt (likely to be indoors if the weather forecast is correct!), a leisurely lunch and an afternoon eating too many chocolate eggs whilst watching a good movie!

Back tomorrow with another project (or two!); until then, happy stampin'!


Stampin' Up! Supplies Used:

Table built using Product Table Builder by The Crafty Owl - Independent Stampin' Up! Demonstrator.

Honeycomb Happiness Chick Amongst The Flowers

by Joanne James20. March 2016 09:00

It's Sunday and time for a new challenge over at The Paper Players! It's the turn of our very own Birthday Girl, the lovely Jaydee, to host our challenge this week and she has a fun clean and simple theme for you to play along with:


So along with Jaydee's birthday - happy birthday wishes to you Jaydee! - we are also celebrating the arrival of Spring! For my card this week I was inspired to use the cute little chick from the Sale-A-Bration Honeycomb Happiness stamp set, this time in conjunction with the floral spray in the 'Number of Years' stamp set. I used this week's layout over at Freshly Made Sketches for my card - take a look:


Key points to note about today's card:

More than a number - The 'Number of Years' stamp set is big on numbers, but it also has this lovely floral spray which can be used in conjunction with the other stamps in the set or for something totally different, as I've done here. The watercolour-effect stamp was the perfect pairing for my no-line watercoloured chick today. I stamped it twice, masking my chick once so that some of the stems appeared behind for depth of field, then went over the top with my aquapainter to further enhance to watercoloured effect. 

No-line watercolouring - I've used this technique with this same little chick previously (you can see that card here). Today I wanted to use soft pastels and delicate colouring to have him peeking out of the spring flowers, so no-line watercolouring was the perfect solution. I stamped him in Sahara Sand and coloured him in So Saffron and Daffodil Delight with my aquapainter to give him a realistic finish.

Sketches are open to interpretation - Kim's sketch is great but I needed my chick to be grounded and not floating in mid-air, so I rotated the sketch through 180 degrees (this is allowed!) I used the floral spray to give the circular shape within the sketch without adding another layer to my card and keep it looking 'clean and simple'.

A bold Hello - With such delicate watercoloured pastels, I decided to stamp my sentiment in Versamark on Basic Black and heat emboss in white to give my sentiment some prominence. I then punched this out with my Word Window Punch. A nice contrast I think to the softness of the rest of my card.

I'm also linking up my card today with the challenge over at Addicted to CAS, where the current theme is 'delicate' and SUO Challenges where the theme is 'welcome Spring'.

Here's today's visual summary of the key products used on today's card for easy reference:


Before you reach for your ink and papers, check out what our amazing team has created to inspire you this week:

The Paper Players Design Team
 
 
Here's a quick recap of our challenge rules:
 
1.  Create a new paper project
2.  Upload your creation to your blog with a link back to us and provide a direct link to the post featuring your challenge submission.
3.  Please link your card to no more than four challenges, TOTAL.
4.  Have FUN! 

I look forward to seeing what you create with this week's clean and simple theme. We have a jam-packed day of sport today: hockey and basketball training, followed by a hockey tournament, lunch and then both James Juniors are playing in a basketball match. I'm thinking we need to start the day with at least two Weetabix each to get us through to dinner!!

Back tomorrow with another project; until then, happy stampin'!


Stampin' Up! Supplies Used:

Table built using Product Table Builder by The Crafty Owl - Independent Stampin' Up! Demonstrator.

New Online Exclusives

There are new products available exclusively in the online store from 5 November - check them out here.

Latest Kits!

Stampin Cut and Emboss

The Layered Landscapes Kit and Nature's Paintings Kit are the latest kits in the online store - get yours here!

Shop Online

Access my online shop 24 x 7, 365 days of the year:

Current November hostess code:

9NKXDTTR

Shop Online

Mini Catalogue

BROWSE THE CATALOGUE

'Tis The Season - the new Stampin' Up! Mini Catalogue is here! For more details and to download your copy click here

Scrapbooking

Stampin' Up! has introduced a new range of 12x12" scrapbooking product and kit - the full range is now available to purchase online. To download a copy of the new digital Scrapbooking Catalogue click here.

2024-25 Annual Catalogue

BROWSE THE CATALOGUE

Click on the image to download your copy of the 2024-25 annual catalogue. For a full list of current SU! supplies, go to my online store. If you would like any help or advice, please drop me a line at joanne@thecraftyowl.co.uk or give me a call on 07773 421446 - I'd be happy to help.

Join My Team

It's always a great time to join Stampin’ Up! During October you can get even more in your starter kit! New team members can get £160 worth of products for only £99 + free business supplies + free shipping + all the fun being a part of Stampin’ Up! Stampin' Up! has something for everyone: join my growing team and benefit from my support to enjoy Stampin' Up! however you choose.

If you're interested, call me for a chat to understand how I can help you realise your goals. Alternatively, if you have already decided to sign up and you just can't wait, please click here for the link to the online form where you can sign up and order your starter kit right away! 

About Me

Hi I'm Joanne and live in Northampton and when I'm not looking after my husband and two beautiful children, am an avid crafter with a passion for all things Stampin' Up!

I must confess that I have never been a big rubber stamper - until I discovered Stampin' Up! that is. I love the fact that I can get such great results with co-ordinating stamps, inks, papers and punches - the possibilities are endless! Join me on my stamping journey as I share the things I love and be inspired to create amazing things yourself!

Follow Me

Monthly Newsletter

Box Builder

Click the button above to use Box Buster to create your custom box design using the Envelope Punch Board!

Kits Collection Now Available!

Stampin Cut and Emboss

The new Kits Collection from Stampin' Up! is now available!

Click here to see the current kits available and order yours online today.

I Design For


Stampin' Up Stuff

This is my personal blog and is not endorsed by Stampin’ Up! I hope you find it a plentiful source of ideas and personal inspiration but please don't copy my designs for contest submission or use for classes, publication or sale without express permission.