Today it's Sunday and time for this week's new challenge over at The Paper Players - yay! It's my turn to host this week and I have a clean and simple challenge for you to work with:
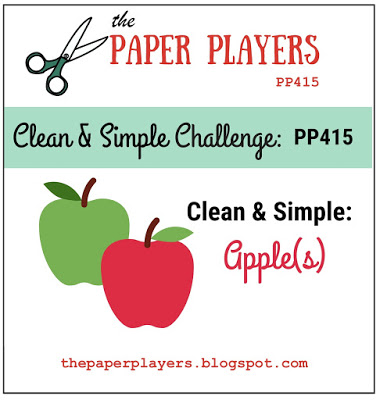
Remember in addition to including an apple on your card, this week is a Clean-and-Simple (CAS) challenge! What do we mean by CAS?
- Minimal layers and embellishments
- Plenty of open space, aka "white" space
- Simple and uncluttered
I decided that for my card this week I was going to pair a little of something old with something new and create a bunch of thank you cards - take a look:
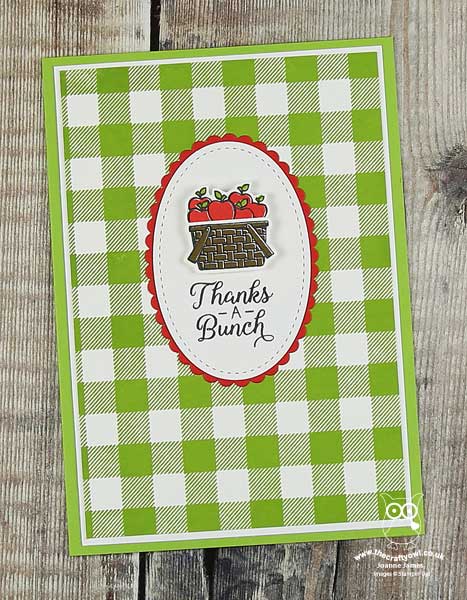
Here's the low-down on today's card:
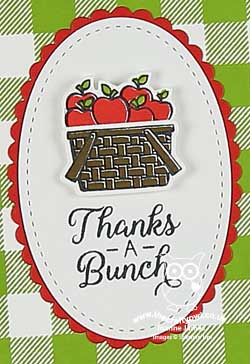
A Basket Of Apples - My little basket of apples comes from the Bike Ride set and is cut out with the Build A Bike framelits. This little image works in its own right - not a bike in sight on today's card! It is super quick and easy to stamp as the leaves and apples and basket all have solid images to be stamped to fill in the colour quickly and easily - great for clean and simple cards.
Thanks A Bunch - I layered my basket on a set of layered ovals, with a sentiment from the Beautiful Bouquet stamp set. Ok, so this stamp was designed to work with flowers, but I think it works for apples too!
Buffalo Check Background Made Easy - I know I'm using it again this week, but can you tell I'm loving the new Buffalo Check background stamp? I went with a straightforward single colour stamped image in Granny Apple Green to contrast with the apples - it reminds me of a picnic table cloth!
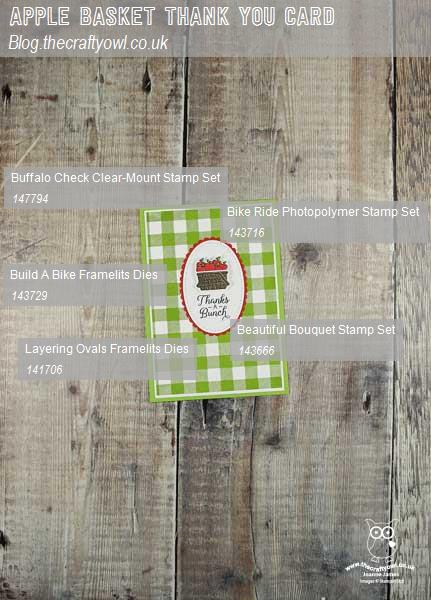
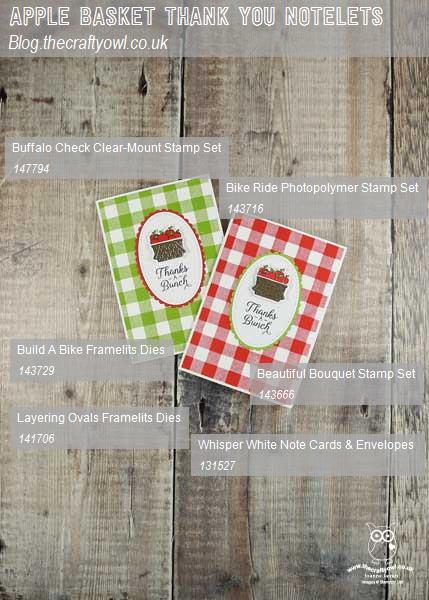
Here is the visual summary of the key products used on today's project for you to pin for easy reference:
Having completed my full-size card for today, I decided to run off a whole bunch of these using the same design, in both a red and green colourway, to use as my customer thank you cards this month - here are two of my finished cards:
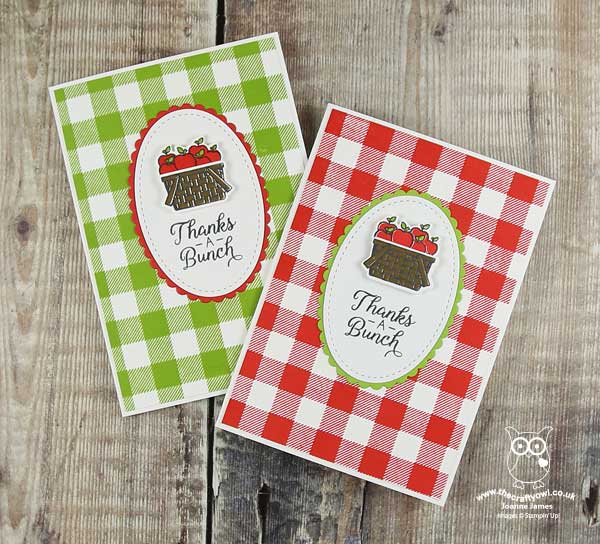
I actually think I prefer the balance of the size/shape of the oval on the lightly smaller card - what do you think? Either way, I like this design so much I think I'll run off a set of co-ordinating bag tags too!
Here is the visual summary of the key products used on today's project for you to pin for easy reference:
You can see all of my Product and 'How To' summaries on my 'How To - Tips and Techniques' Pinterest board in case you've missed any.
Before you reach for your ink and papers, check out what our amazing team has created to inspire you this week:
The Paper Players Design Team
Here's a quick recap of our challenge rules:
1. Create a new paper project
2. Upload your creation to your blog with a link back to us and provide a direct link to the post featuring your challenge submission.
3. Please link your card to no more than four challenges, TOTAL.
4. Have FUN!
You can see all of my 'How To' summaries on my 'How To - Tips and Techniques' Pinterest board in case you've missed any.
Enjoy your day; I will be spending mine with a lovely group of ladies on the second day of our weekend residential craft retreat - more about that in tomorrow's post! Until then, happy stampin'!
Stampin' Up! Supplies Used: