Today we have a public holiday here in the UK so we are enjoying an extra-long weekend - well, as much as you can when both James Juniors are revising for end-of-year exams and the weather outside is rather grey and chilly! We are at least enjoying the slower pace and I'm hoping I might even sneak in a little crafting later too. First up I'm sharing a card for this week's challenge over at Just Add Ink where the team are making sympathy cards:

These are sometimes difficult cards to make and it's sometimes good to have a few of these on hand that you can simply reach for when needed rather than need to make from scratch. There is a gorgeous set in the Spring-Summer catalogue that will sadly be retiring next month but is perfect for this type of card - take a look:
Here's the low-down on today's card:
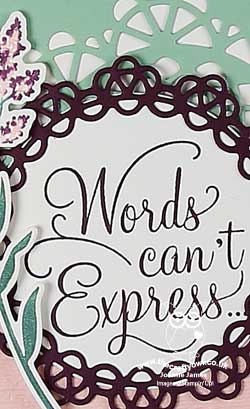
Dear Doily - So when I first saw the Dear Doily set in the seasonal catalogue, it wasn't at the top of my wish list, however my dear crafty friend Jan Clothier had this set and created so many fabulous samples with it (check them out on her blog here) that I eventually decided I 'needed' it and now I'm sad that this set is going away! The Doily Builder Thinlits are already sold out in the UK and have been for some time, however the stamp set is still available. It has some beautiful images but it's really the words in this set that get me; the gorgeous swirly font for the main words I used on the front of today's card that can then be paired with a number of alternatives depending on whether your card is to show thanks, friendship or sympathy. I used the latter on the inside of my card:

For a sympathy card, it is often difficult to find the right words and I think this set really hits the mark as far as that is concerned.
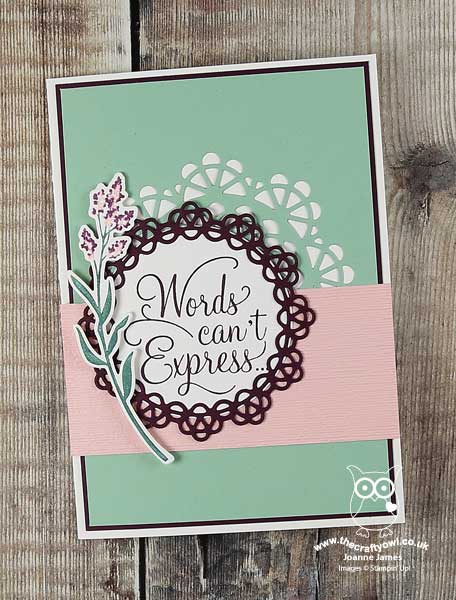
Make Your Mark With Markers - I kept my card fairly simple, using the Doily Builder Thinlits to create both some inset diecutting on the back panel and a frame for my sentiment which I really wanted to be the focal point of my card, but I did choose to add a single stem of lavender using one of the other stamps in this set. I coloured it with my Stampin' Write markers, colouring the stem in Tranquil Tide and the buds in Powder Pink with a little edging in Blackberry Bliss to create a variation in colour. Using your markers is a great way to add variagated colour to a single stamp; just ink them up and 'huff' on your stamp, and it will stamp a beautiful multi-coloured image.
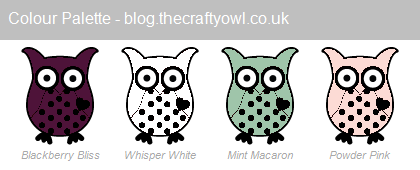
A Fresh Colour Combination - I kept my colour palette subtle for today's card, with the exception of Blackberry Bliss which acts as a strong accent colour for my focal point. if this is a colour combination that appeals to you, please feel free to save it for future inspiration:
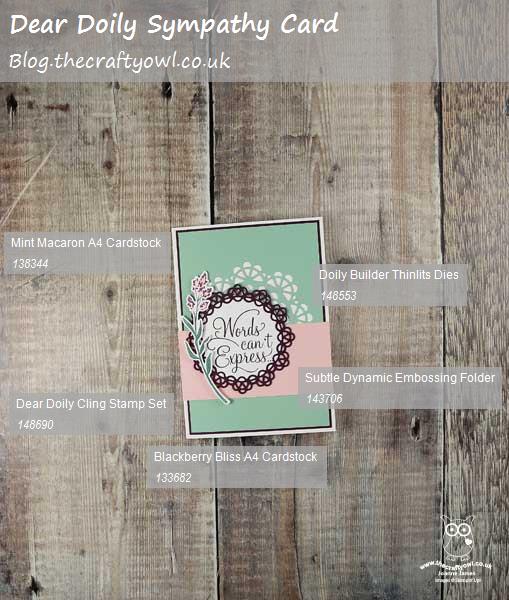
Here is the visual summary of the key products used on today's project for you to pin for easy reference:
You can see all of my 'How To' summaries on my 'How To - Tips and Techniques' Pinterest board in case you've missed any.
There is some great inspiration from the team and in the gallery over on the Just Add Ink page so you should definitely click on the link and check them out if this is something you often struggle with. Meanwhile, enjoy your day and I'll be back tomorrow with another project. Until then, happy stampin'!
Stampin' Up! Supplies Used: