Perfectly Paired Decoupage Welcome New Baby Card

by Joanne James3. May 2019 08:00

Today I'm sharing a card for the current baby theme challenge over at Inspire.Create:

 There are a couple of cute baby sets in the Spring-Summer catalogue and both are set to retire at the end of the month. I used my favourite, Perfectly Paired, to create a colourful and fun baby card - take a look:


Here's the low-down on today's card:

I've created a whole host of cards with the Perfectly Paired stamp set (check out this post here if you missed it) but they have all involved using the stamp in a single colour. This is such a fabulous stamp set to colour though and I spent a pleasant couple of hours with my Blends markers creating this card. I haven't listed them all out in the table below as I pretty much used all of them in one way or another! I stamped the image twice and coloured a few of the animals and fussy cut them and popped them up on dimensionals to create a fun decoupage detail. you can see that in this close up here:

I added a border using my favourite gingham paper and a stitched diecut edge using the Be Mine Stitched Framelits to finish my card.

Here is the visual summary of the key products used on today's project for you to pin for easy reference:


You can see all of my 'How To' summaries on my 'How To - Tips and Techniques' Pinterest board in case you've missed any. 

Enjoy your day and I'll be back tomorrow with another project. Until then, happy stampin'!


Stampin' Up! Supplies Used:

Table built using Product Table Builder by The Crafty Owl - Independent Stampin' Up! Demonstrator.

Fable Friends Stitched Frame Friendship Card PP437

by Joanne James14. April 2019 09:00

Today it's Sunday and time for this week's new challenge over at The Paper Players! It's the turn of the fabulous Ann to host this week and she has a fresh colour challenge for you to work with:


What a pretty trio of spring colours Ann has for us this week! I knew exactly how I was going to use these colours. As I have been busy at Stampin' Up!'s Onstage event these last few days I needed a straightforward layout and the sketch over at Fab Friday was perfect for what I had in mind (I rotated it through 180 degrees) - take a look:


Here's the low-down on today's card:

Fable Friends - Having resisted it for many months, I eventually caved and purchased the adorable collection of farmyard animals that is the 'Fable Friends' stamp set. I have seen one too many examples of loveliness as far as this set is concerned and decided I 'needed' to add it to my stamp collection. The mama duck and her trio of ducklings seemed just perfect for a spot of colouring with this week's colours.

A Trio of Blends - I used the combo packs of Balmy Blue, Calypso Coral and Daffodil Delight to colour my little duckiest, along with a little Ivory for feather detail and light Smoky Slate to ground them. So super-cute is the little trio of ducklings, I had to repeat them on the inside of my card too. I added a close-up here so that you could see how I had coloured them and to show that you don't have to be a colouring expert to get a good result:


Frame It - I used a simple frame made from two Rectangle Stitched Framelits and a piece of Daffodil Delight cardstock to provide the border outline for my picture, along with some Gingham Gala check to add to the theme. My greeting is from the same set and I stamped it on Balmy Blue to make it stand out from the white space surrounding my image.

I really love this fresh, spring-inspired card - now I just need to decide who to send it to!

Here is the visual summary of the key products used on today's project for you to pin for easy reference:


You can see all of my Product and 'How To' summaries on my 'How To - Tips and Techniques' Pinterest board in case you've missed any. 

Before you reach for your ink and papers, check out what our amazing team has created to inspire you this week:

Here's a quick recap of our challenge rules:
 
1.  Create a new paper project
2.  Upload your creation to your blog with a link back to us and provide a direct link to the post featuring your challenge submission.
3.  Please link your card to no more than four challenges, TOTAL.
4.  Have FUN!

You can see all of my 'How To' summaries on my 'How To - Tips and Techniques' Pinterest board in case you've missed any. 

Enjoy your day; mine will be a quiet one as I feel I need to recover from the last 2 days of Onstage, which were long and hectic, whilst also fun and a great opportunity to catch up with friends. I'll be back tomorrow with another project. Until then, happy stampin'!


Stampin' Up! Supplies Used: 

Table built using Product Table Builder by The Crafty Owl - Independent Stampin' Up! Demonstrator.


First Steps New Baby Boy Welcome Card for AYSI197

by Joanne James9. April 2019 14:00

Today I'm sharing a card for the current challenge over at As You See It where the ladies have a great sketch to play with:

This is one of those versatile sketches that is a 'keeper' and can be used in so many ways. I still had my gingham papers out on my desk following Sunday's cards and decided it was perfect for a baby card - take a look:


Here's the low-down on today's card:

First Steps - My focal point sentiment comes from the 'First Steps' stamp set, an adorable collection of sweet baby images that are perfect for cards, invites, showers, samplers and more. I stamped my sentiment using my Stamparatus so that I could ink it several times and get a really solid image, then having stamped off first stamped the tiny footprints behind it in the same colour.  

Subtle Textures - I embossed my top panel with the Subtles embossing folder to add a little texture without detracting from the sentiment. I added a little more detail with the soft organdy ribbon and used my layers and scalloped border/mat detail to add a little more interest and to tie in my panel of Balmy Blue gingham check across the bottom. 

Monochromatic Blue - I kept my card simple with a monochromatic Balmy Blue and Whisper White colour combination however this design could be easily replicated in pink for a girl or any of the other colours in the Gingham Gala designer series paper stack for a more gender-neutral design.

Here is the visual summary of the key products used on today's project for you to pin for easy reference:


You can see all of my 'How To' summaries on my 'How To - Tips and Techniques' Pinterest board in case you've missed any. 

Enjoy your day and I'll be back tomorrow with another project. Until then, happy stampin'!


Stampin' Up! Supplies Used:

Table built using Product Table Builder by The Crafty Owl - Independent Stampin' Up! Demonstrator.

A Good Day Gingham Gala Card Trio

by Joanne James7. April 2019 09:00

Today it's Sunday and time for this week's new challenge over at The Paper Players! It's the turn of the fabulous LeAnne to host this week and she has a fun theme challenge for you to work with:
I decided to get making with my Gingham Gala designer series paper and made not one, not two but three cards for today's challenge - all of which use this week's Fusion sketch too (turned through 90 degrees):

I didn't get overly creative with my gingham panels as I wanted to use them as backgrounds in their own right and really let them shine.

So, to my cards! Each of them also coincidentally features a stamp from the stamp set, 'A Good Day', for my feature circles.  Here is the first one:
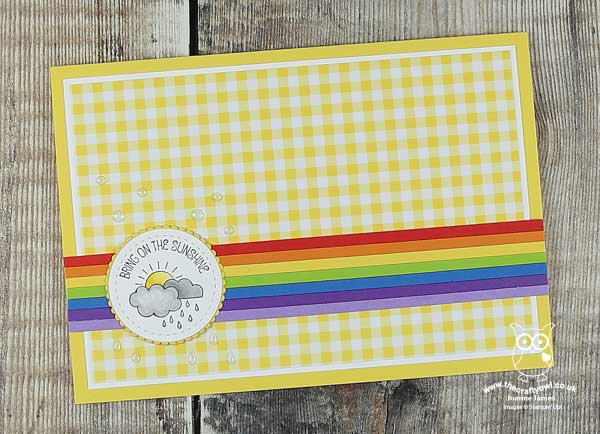
 

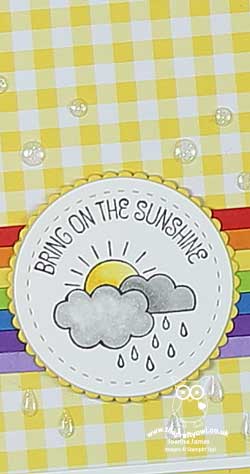
This card is my favourite from a creative point of view, as I love the sun/rain rainbow idea and the bright yellow check just makes this such a happy card!

For my second card I created one that uses not only the Fusion sketch but the theme too - no Easter eggs sure, but the cutest of Easter bunnies:
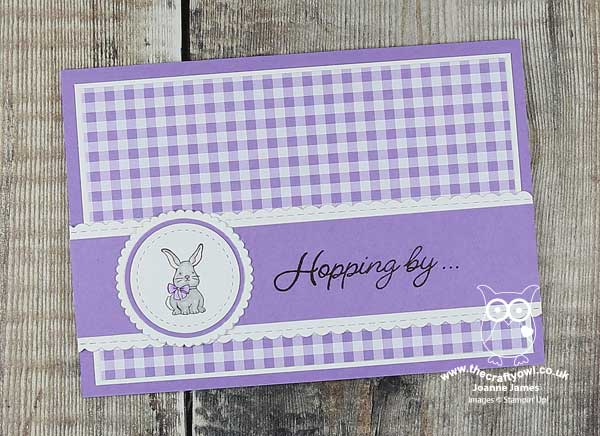
 

I stamped part of my sentiment on the banner. which I also bordered with one of the the edgelits in the Be Mine Stitched Framelits set and continued it on the inside of my card. I forgot to take a photo of my 'corrected' inside, but if you're interested and fancy a giggle you can pop over to my Facebook page to see the original one!

For my final card, I was inspired by this week's Global Design Project #GDP183 theme of 'A Day At The Park':

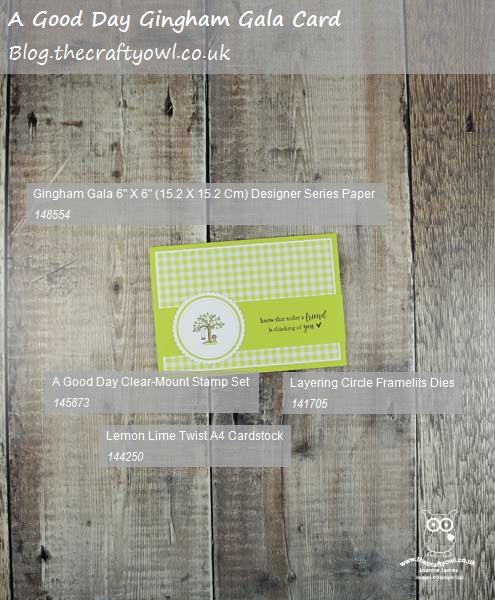
For me a day at the park is not complete without a ride on the swings, so this sweet little tree swing was perfect to fit this theme and paired with a sentiment from the Sale-A-Bration set 'Part of My Story' and the fresh green gingham makes for a sweet, uplifting card:
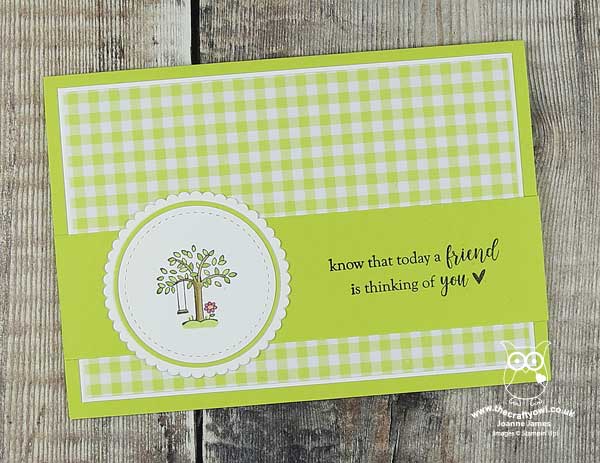
 

This is the card that I like most in terms of layout - whilst each of the images needs a different sized circular element, this is the one that I like the most in terms of overall proportion. 

Here are the visual summaries of the key products used on today's project for you to pin for easy reference:
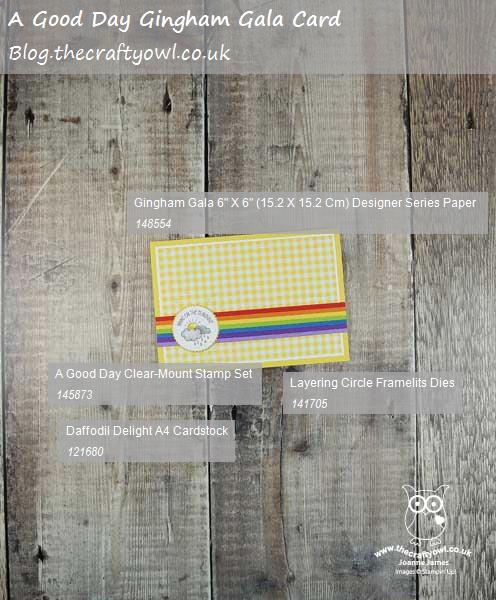
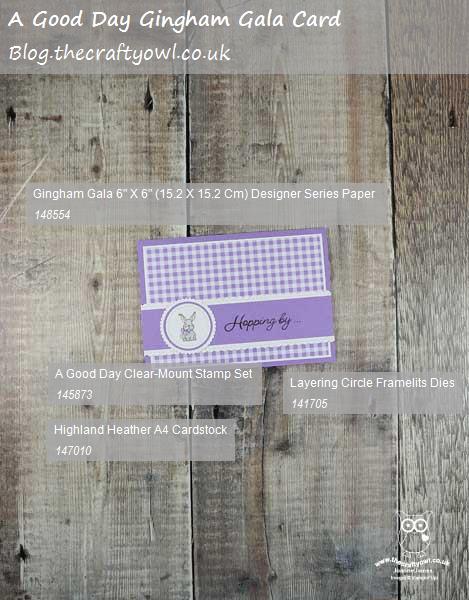


You can see all of my Product and 'How To' summaries on my 'How To - Tips and Techniques' Pinterest board in case you've missed any. 

I hope you like my gingham trio; I also created a 'bonus' card using plaid as the main feature of my design so do pop back later in the week to see another example using this week's theme.

Before you reach for your ink and papers, check out what our amazing team has created to inspire you this week:

Here's a quick recap of our challenge rules:
 
1.  Create a new paper project
2.  Upload your creation to your blog with a link back to us and provide a direct link to the post featuring your challenge submission.
3.  Please link your card to no more than four challenges, TOTAL.
4.  Have FUN!

You can see all of my 'How To' summaries on my 'How To - Tips and Techniques' Pinterest board in case you've missed any. 

Enjoy your day; we are having a restful one with a roast dinner with all the trimmings for lunch and then we'll be watching the Oxford-Cambridge boat race on TV in the afternoon - armchair sportsmen for once! I'll be back tomorrow with another super-fun project that you are not going to want to miss. Until then, happy stampin'!


Stampin' Up! Supplies Used: 

Table built using Product Table Builder by The Crafty Owl - Independent Stampin' Up! Demonstrator.

Gingham Easter Bunny Trio For Less Is More

by Joanne James16. March 2019 08:00

Today I'm sharing a card for the new challenge over at Less Is More where following my success in January over at LIM as their January winner, I have the honour of being guest designer this week.

For the challenge that runs for the next two weeks, the challenge is a recipe challenge and here is the badge:


Just Take Three - three images, three colours, three patterns. What fun! Here's my take on the theme:


Here's the low-down on today's card:

Take Three Bunnies - I so enjoyed making this clean and simple bunny card the other day, I decided that the only thing better than one bunny would be three - perfect for the Less Is More challenge theme! At the time of writing the Bunny Builder Punch is still available to order so if the Bunny Builder Punch is on your wish list, and you haven't yet ordered, don't delay and get your order in sooner rather than later. 

Gingham Gala Trio - I also used three different colours of Gingham Gala designer series paper on my card for my punched bunny silhouettes, this time adding white punched tails to keep a cleaner feel. 

Keeping It Simple - Keeping the paper pattern design the same and leaving plenty of white space around my bunnies, adding only a small sentiment to ground them, allows me to maintain a clean and simple feel. A super simple card with only five key material ingredients - a great card for beginners with very little stamping required.

Here is the visual summary of the key products used on today's project for you to pin for easy reference:
You can see all of my 'How To' summaries on my 'How To - Tips and Techniques' Pinterest board in case you've missed any. 

Enjoy your weekend; I am off to watch one of the James Juniors play hockey this afternoon and I'll be back tomorrow with this week's card for our new challenge over at The Paper Players. Until then, happy stampin'!


Stampin' Up! Supplies Used:

Table built using Product Table Builder by The Crafty Owl - Independent Stampin' Up! Demonstrator.

Bunny Builder Punch Approaching Not Orderable - Get Yours Before It's Too Late!

by Joanne James13. March 2019 20:00


Today I'm sharing a card for the current challenge over at Addicted to CAS where they have a great code word currently:

Clouds, puppy dogs, sheep - so many possibilities! For me though there was only one thing that sums up 'fluffy' and that's a bunny's tail - take a look:


Here's the low-down on today's card:

Get Your Bunny Builder Now Whilst You Still Can - I made this card to share with you today, before finding out late yesterday evening that the Bunny Builder Punch is in short supply and about to move to unorderable status at some point in the near future. Unlike two of the Sale-A-Bration Co-ordination items that went the same way within just a few days of ordering and with no notice - the Hop Around Framelits Dies and the Call Me Cupcake Thinlits Dies - we have at least been given a quick heads-up on this one, so if the Bunny Builder Punch is on your wish list, don't delay and get your order in now; it's unclear at this stage whether or not the punch will carry over to the new annual catalogue, so this may be your last chance to snap up this useful little tool, especially with Easter around the corner. 

Gingham Gala - Rather than stamp a bunny, I decided to punch a bunny silhouette out of the Gingham Gala designer series paper. In fresh colours, these papers are perfect for Easter and spring. For me 'fluffy' makes me think of bunny tails, but a punched paper one just wouldn't do - I removed a white pompom from some retired trim and added in to my bunny's bottom - adorable!

Keeping It Simple - A single colour, simple frame and bunny silhouette rather than stamped image keep my card design simple, clean and uncluttered. 

Here is the visual summary of the key products used on today's project for you to pin for easy reference:


You can see all of my 'How To' summaries on my 'How To - Tips and Techniques' Pinterest board in case you've missed any. 

Enjoy your evening and I'll be back tomorrow with another project. Until then, happy stampin'!


Stampin' Up! Supplies Used:

Table built using Product Table Builder by The Crafty Owl - Independent Stampin' Up! Demonstrator.

Best Bunny Spring Easter Card For The Paper Players PP431

by Joanne James3. March 2019 09:00

Today it's Sunday and time for this week's new challenge over at The Paper Players! It's the turn of the fabulous Anne-Marie to host this week and she has a fun theme challenge for you to work with:


I was in part inspired by yet another fabulous badge created by the lovely Nance for us this week to create a pretty Spring day background for my Easter bunny - take a look:


Here's the low-down on today's card:

Best Bunny - The Best Bunny stamp set is super cute and just perfect for my Easter bunny. I stamped my bunny onto Soft Suede cardstock and paper-pieced his features then layered him on some ovals. I also used the carrot decoration to add a little detail to the inside:


Spring Is in The Air - I created my spring background with a touch of brayering using a sponge brayer and Balmy Blue ink. Then I stamped some grass and added a couple of tiny butterflies from the 'Enjoy Life' stamp set. My zingy Lemon-Lime Twist Gingham Gala paper and orange accents add a fresh vibrancy to this fun Easter card.

Easter Wishes From More Than Words - My larger-than-life sentiment comes from the new 'More Than Words' stamp set that is available exclusively during March as part of the Sale-A-Bration co-ordination product launch. A great set with lost of sentiments, that also compliments greetings in a number of first stage Sale-A-Bration release stamp sets.

Here is the visual summary of the key products used on today's project for you to pin for easy reference:


You can see all of my Product and 'How To' summaries on my 'How To - Tips and Techniques' Pinterest board in case you've missed any. 

Before you reach for your ink and papers, check out what our amazing team has created to inspire you this week:

Here's a quick recap of our challenge rules:
 
1.  Create a new paper project
2.  Upload your creation to your blog with a link back to us and provide a direct link to the post featuring your challenge submission.
3.  Please link your card to no more than four challenges, TOTAL.
4.  Have FUN!

You can see all of my 'How To' summaries on my 'How To - Tips and Techniques' Pinterest board in case you've missed any. 

Enjoy your day; I am on day 2 of my weekend Creative Escapes Craft Retreat so mine will be a busy one. Day one was a lot of fun so I'm expecting day 2 to be much the same! I'll be back tomorrow with another project. Until then, happy stampin'!


Stampin' Up! Supplies Used: 

Table built using Product Table Builder by The Crafty Owl - Independent Stampin' Up! Demonstrator.

New Online Exclusives

There are new products available exclusively in the online store from 5 November - check them out here.

Latest Kits!

Stampin Cut and Emboss

The Perpetual Beauty Calendar Kit and Cherry Blossoms Treat Boxes Kit are the latest kits in the online store - get yours here!

Shop Online

Access my online shop 24 x 7, 365 days of the year:

Current December hostess code:

9NKXDTTR

Shop Online

Mini Catalogue

BROWSE THE CATALOGUE

'Tis The Season - the new Stampin' Up! Mini Catalogue is here! For more details and to download your copy click here

Scrapbooking

Stampin' Up! has introduced a new range of 12x12" scrapbooking product and kit - the full range is now available to purchase online. To download a copy of the new digital Scrapbooking Catalogue click here.

2024-25 Annual Catalogue

BROWSE THE CATALOGUE

Click on the image to download your copy of the 2024-25 annual catalogue. For a full list of current SU! supplies, go to my online store. If you would like any help or advice, please drop me a line at joanne@thecraftyowl.co.uk or give me a call on 07773 421446 - I'd be happy to help.

Join My Team

It's always a great time to join Stampin’ Up! New team members can get £130 worth of products for only £99 + free business supplies + free shipping + all the fun being a part of Stampin’ Up! Stampin' Up! has something for everyone: join my growing team and benefit from my support to enjoy Stampin' Up! however you choose.

If you're interested, call me for a chat to understand how I can help you realise your goals. Alternatively, if you have already decided to sign up and you just can't wait, please click here for the link to the online form where you can sign up and order your starter kit right away! 

About Me

Hi I'm Joanne and live in Northampton and when I'm not looking after my husband and two beautiful children, am an avid crafter with a passion for all things Stampin' Up!

I must confess that I have never been a big rubber stamper - until I discovered Stampin' Up! that is. I love the fact that I can get such great results with co-ordinating stamps, inks, papers and punches - the possibilities are endless! Join me on my stamping journey as I share the things I love and be inspired to create amazing things yourself!

Follow Me

Monthly Newsletter

Box Builder

Click the button above to use Box Buster to create your custom box design using the Envelope Punch Board!

Kits Collection Now Available!

Stampin Cut and Emboss

The new Kits Collection from Stampin' Up! is now available!

Click here to see the current kits available and order yours online today.

I Design For


Stampin' Up Stuff

This is my personal blog and is not endorsed by Stampin’ Up! I hope you find it a plentiful source of ideas and personal inspiration but please don't copy my designs for contest submission or use for classes, publication or sale without express permission.

DSP Special Release

Check out 3 popular designer series paper designs in fresh new colourways! Available exclusively in the online store from 3 December - check them out here

Last Chance Products

Last Chance Products will now be updated every other month - check them out here.